
Animals · Step-by-step guide
Winged Paper Dragon
Build a small dragon with a long neck, pointed wings and a folded tail. Follow the photo panels carefully through the layered folds.
What you’ll need
- One square of thin paper
Origami · Creasing, collapse folds & shaping
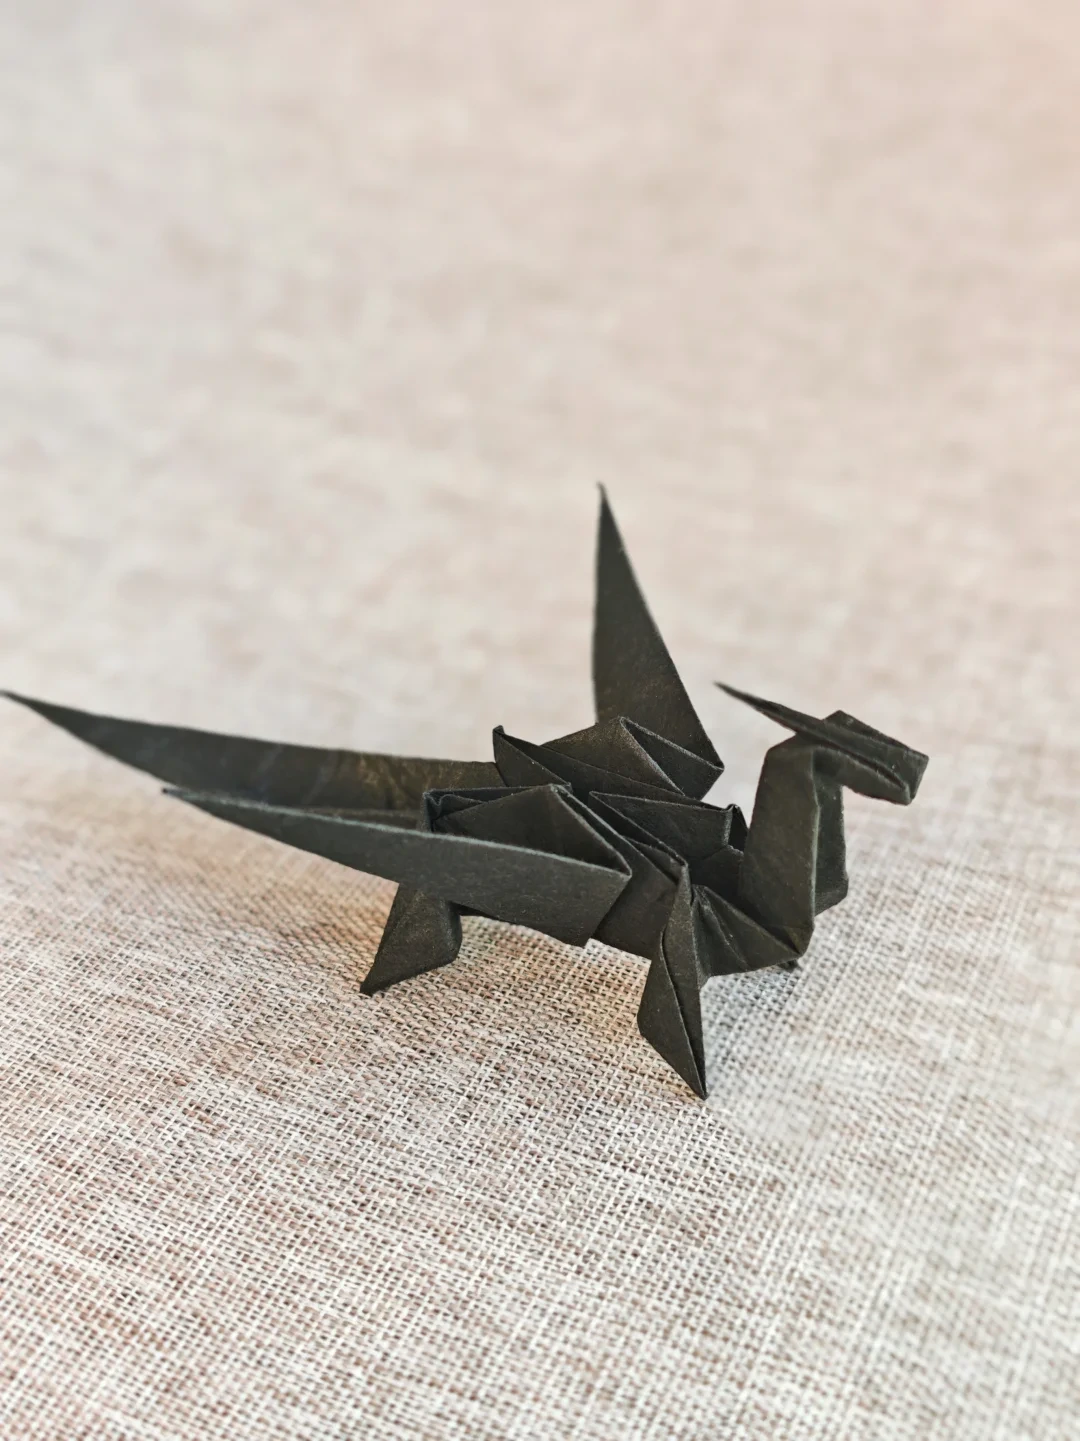
Make it, step by step.
12 steps · Original diagrams with English instructions
Prepare the sheet
 Open image at full size ↗
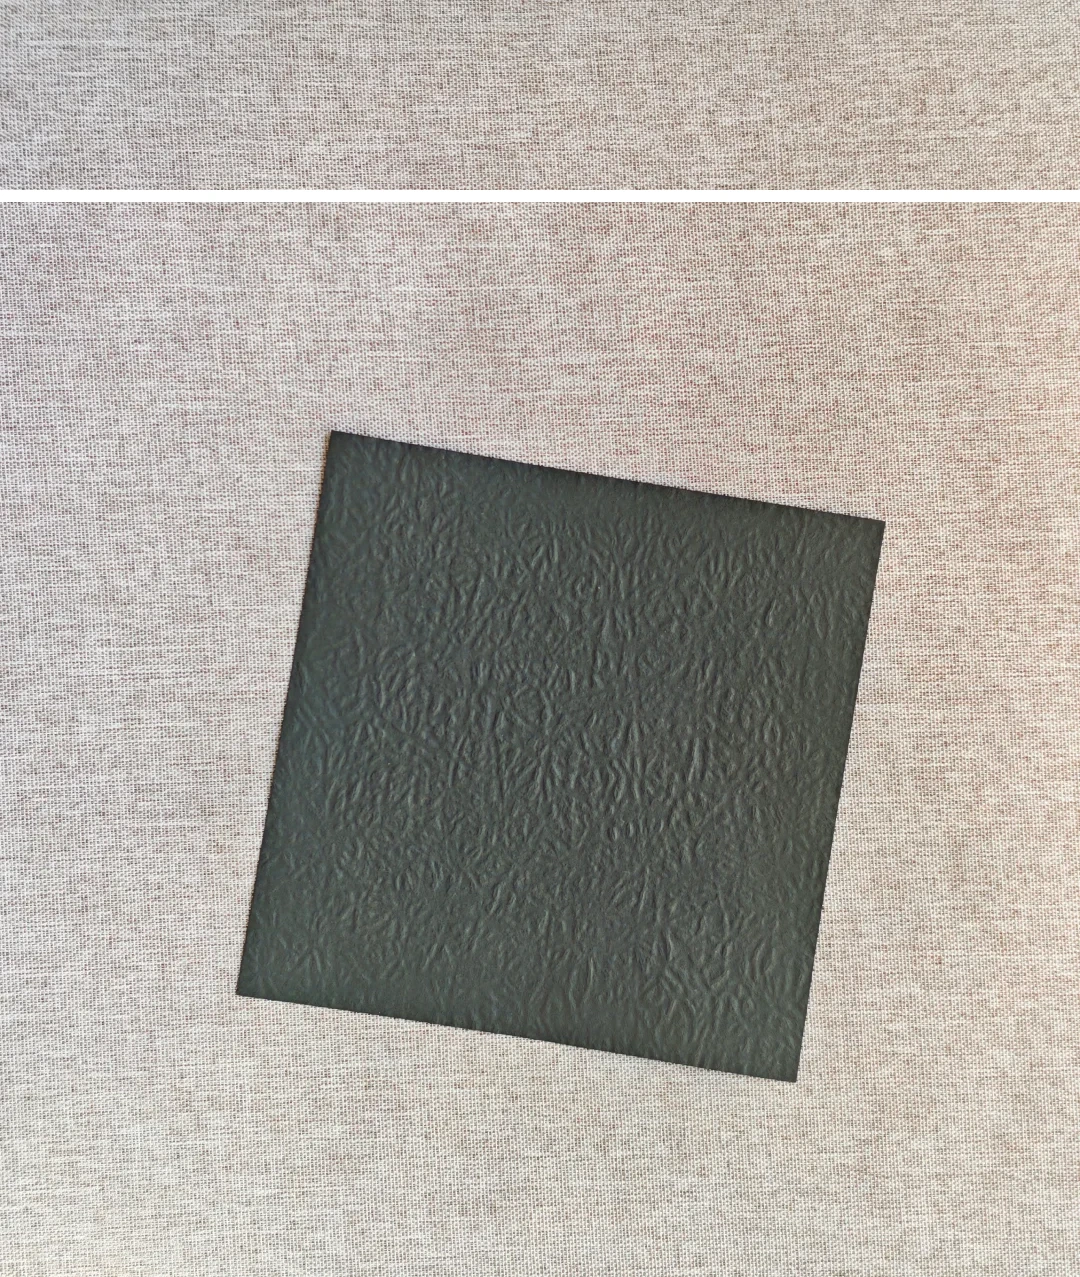
Use a thin square sheet; the neck and feet contain several layers.
Make the base
 Open image at full size ↗
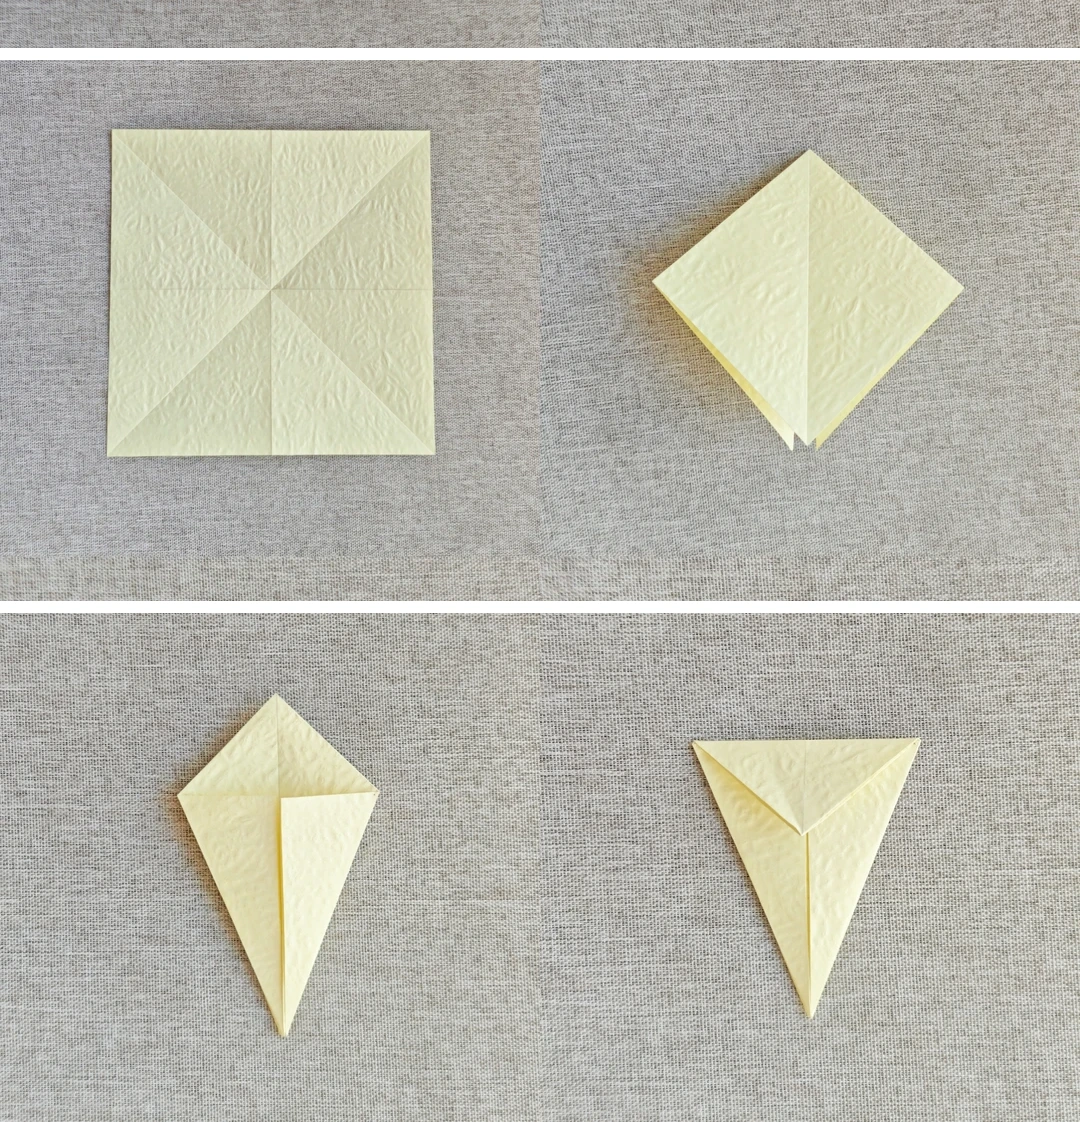
Crease both diagonals and midlines, then collapse into a square base with the opening down. Fold both side edges inward and crease the top triangle.
Sink the center
 Open image at full size ↗
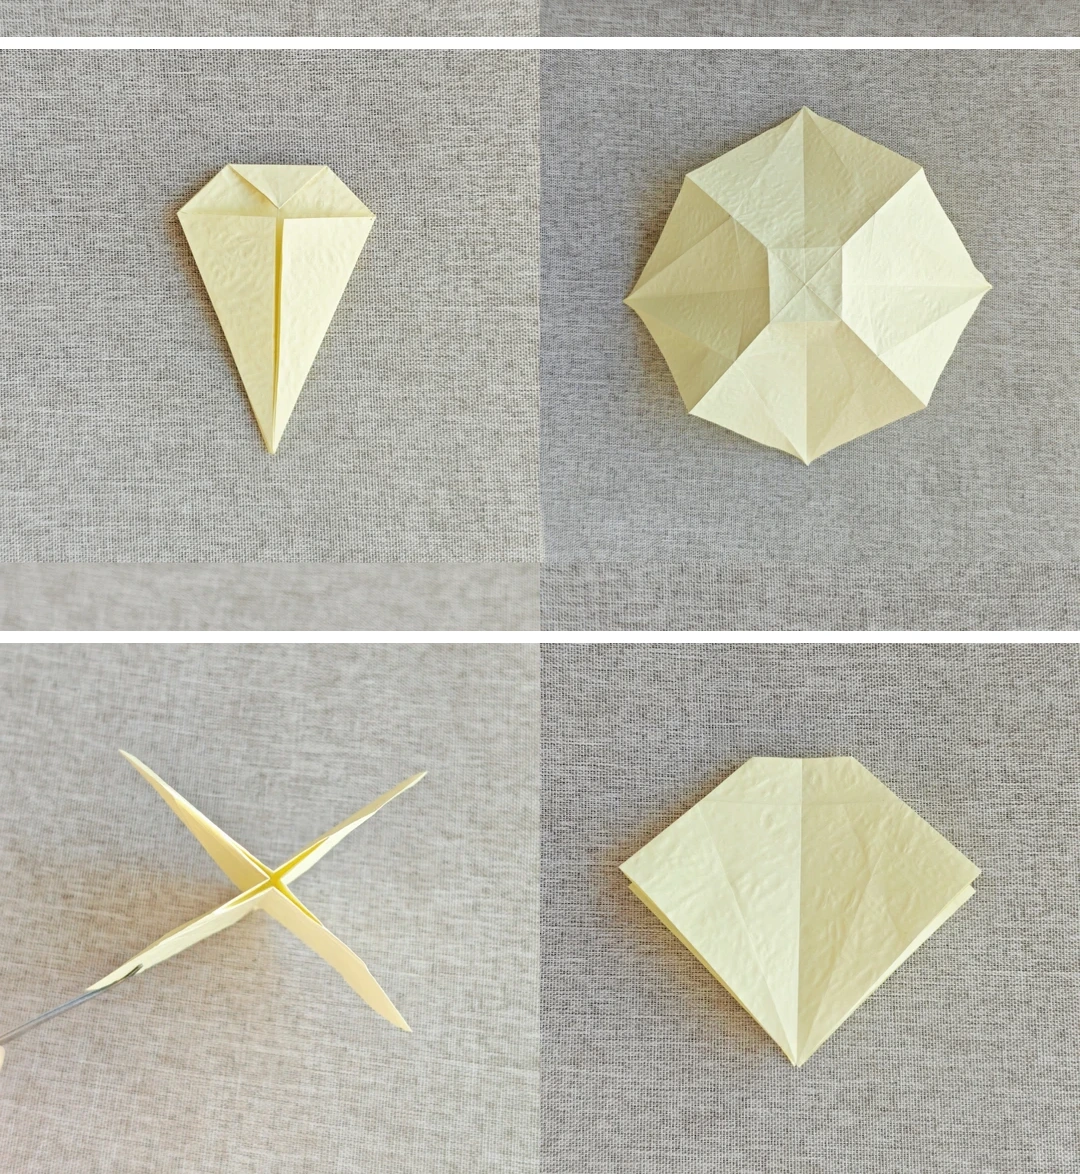
Open the folds, reinforce the central square and collapse that square inward, following the four panels.
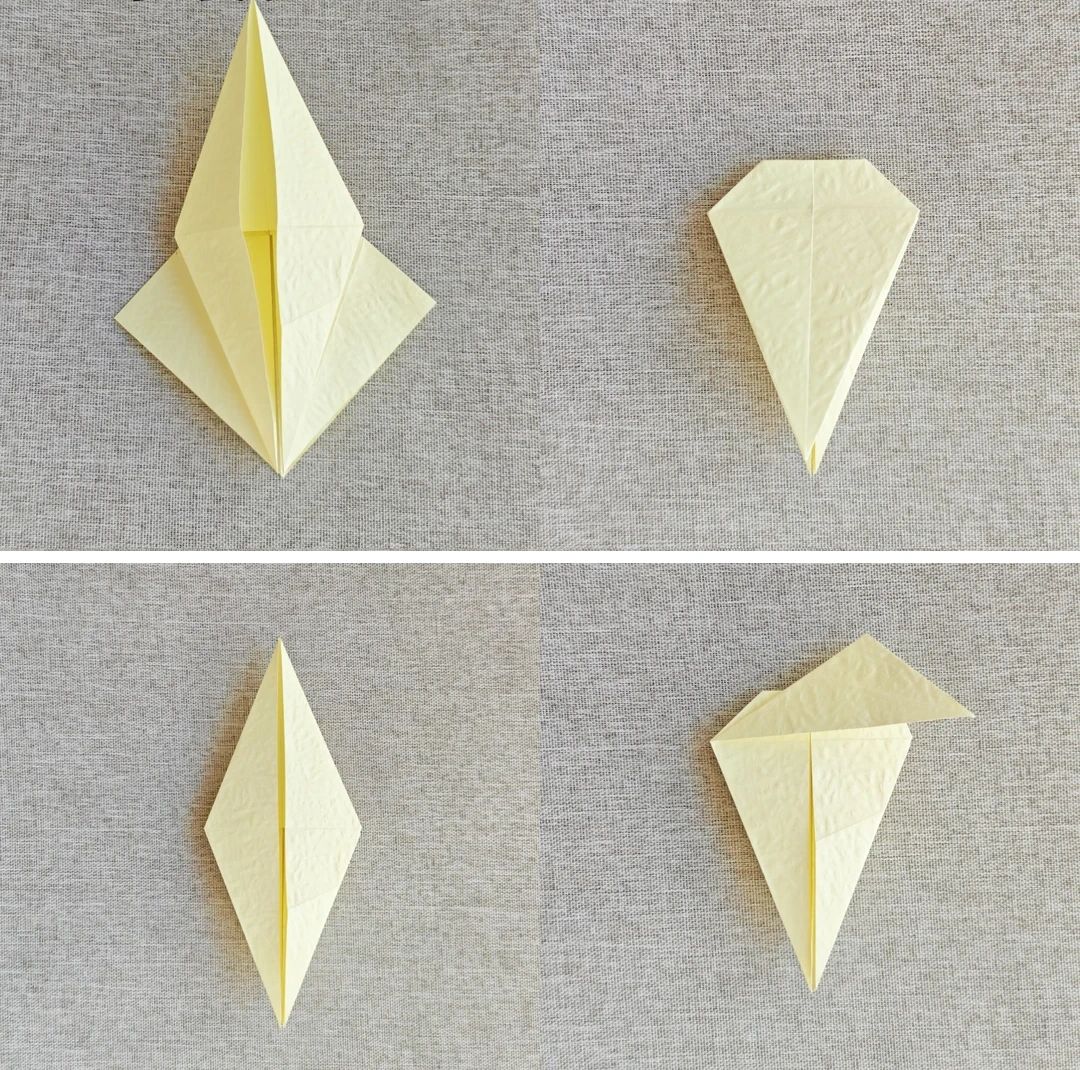
Fold the layered flaps
 Open image at full size ↗
Fold the upper section down, repeat on the remaining faces, then lift a flap upward. Make the indicated diagonal crease and reopen it.
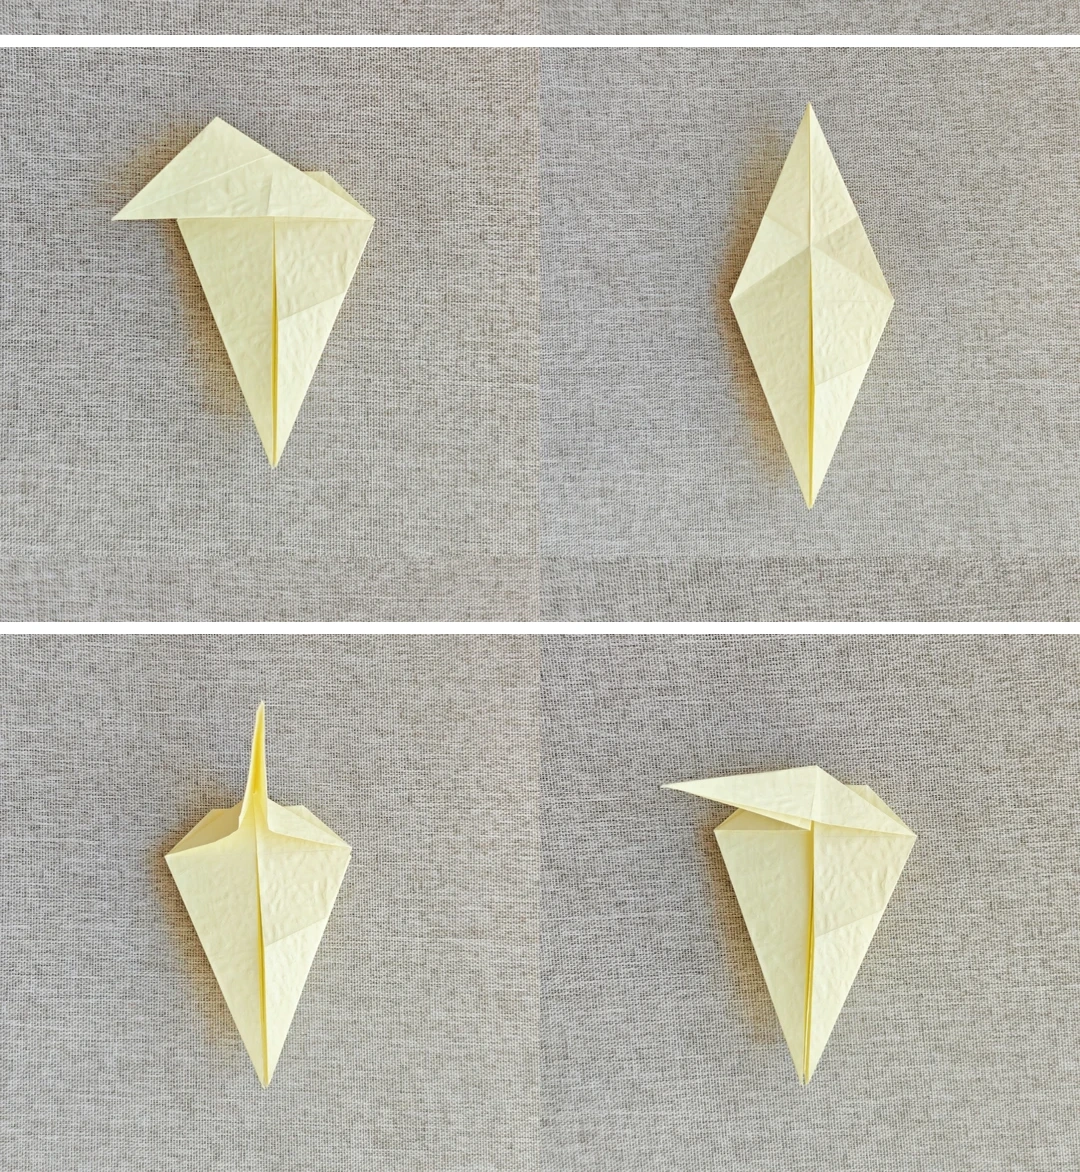
Pinch the creases
 Open image at full size ↗
Make and reopen the matching crease. Pinch the creases into a raised ridge and fold that ridge to one side.
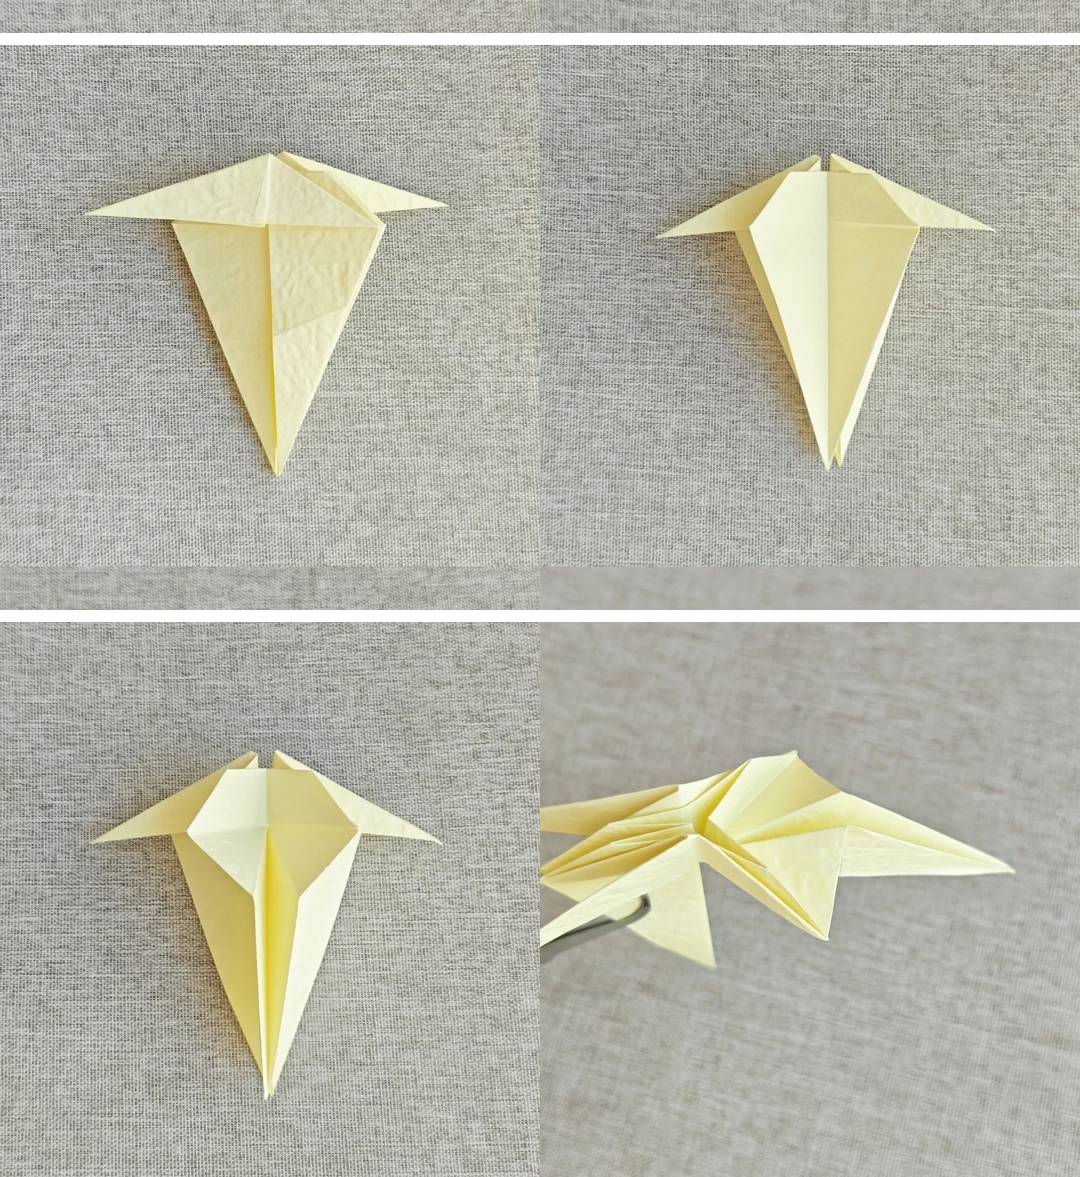
Rearrange the layers
 Open image at full size ↗
Repeat on the back. Turn the right front flap left and the left rear flap right; check the side view.
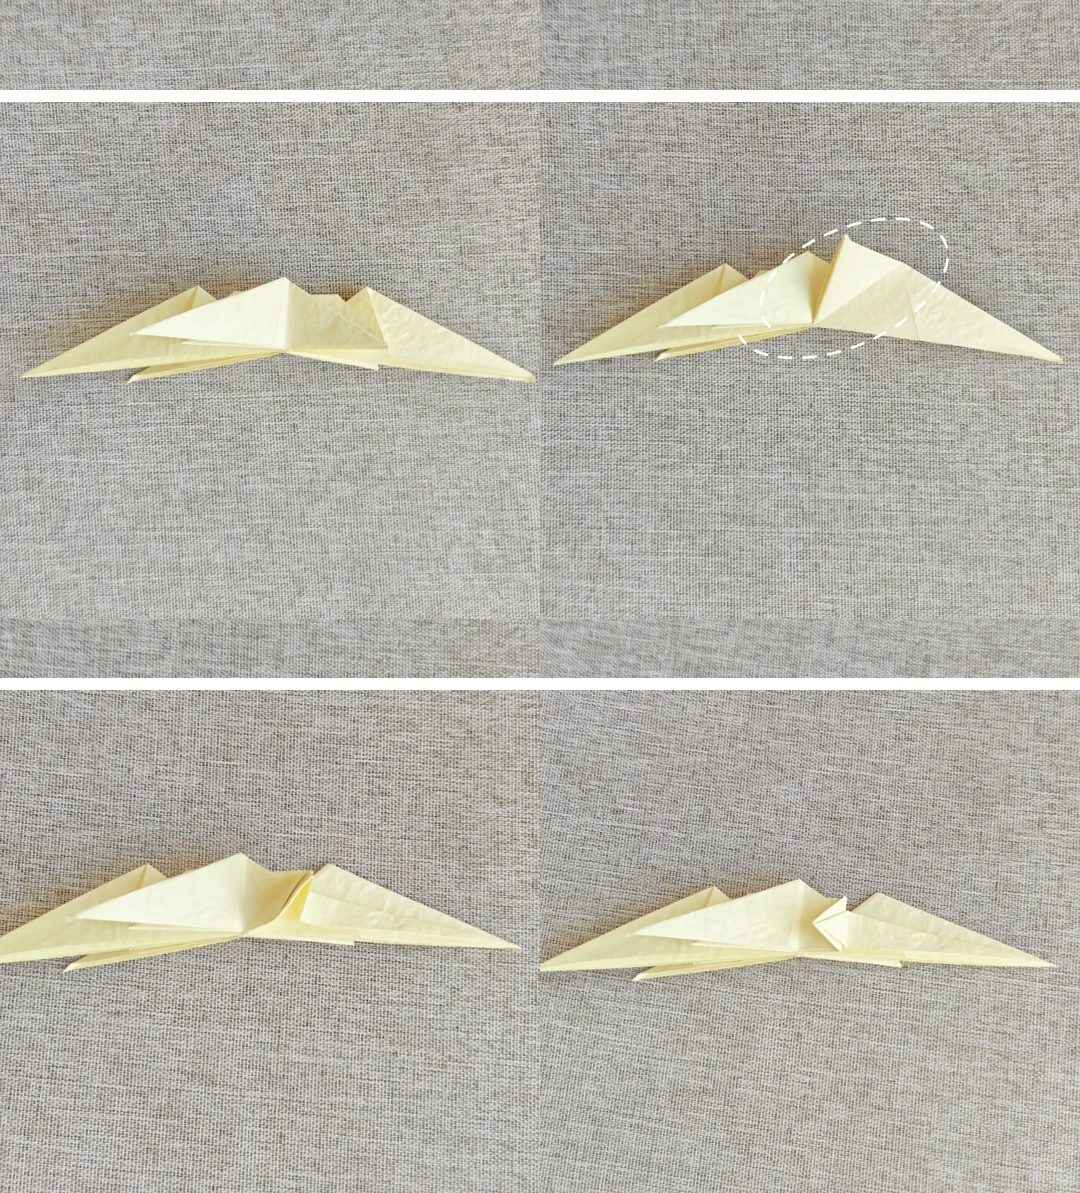
Shape the small points
 Open image at full size ↗
Open the little corner on each side. Align the indicated edges, then flatten the raised section to the left.
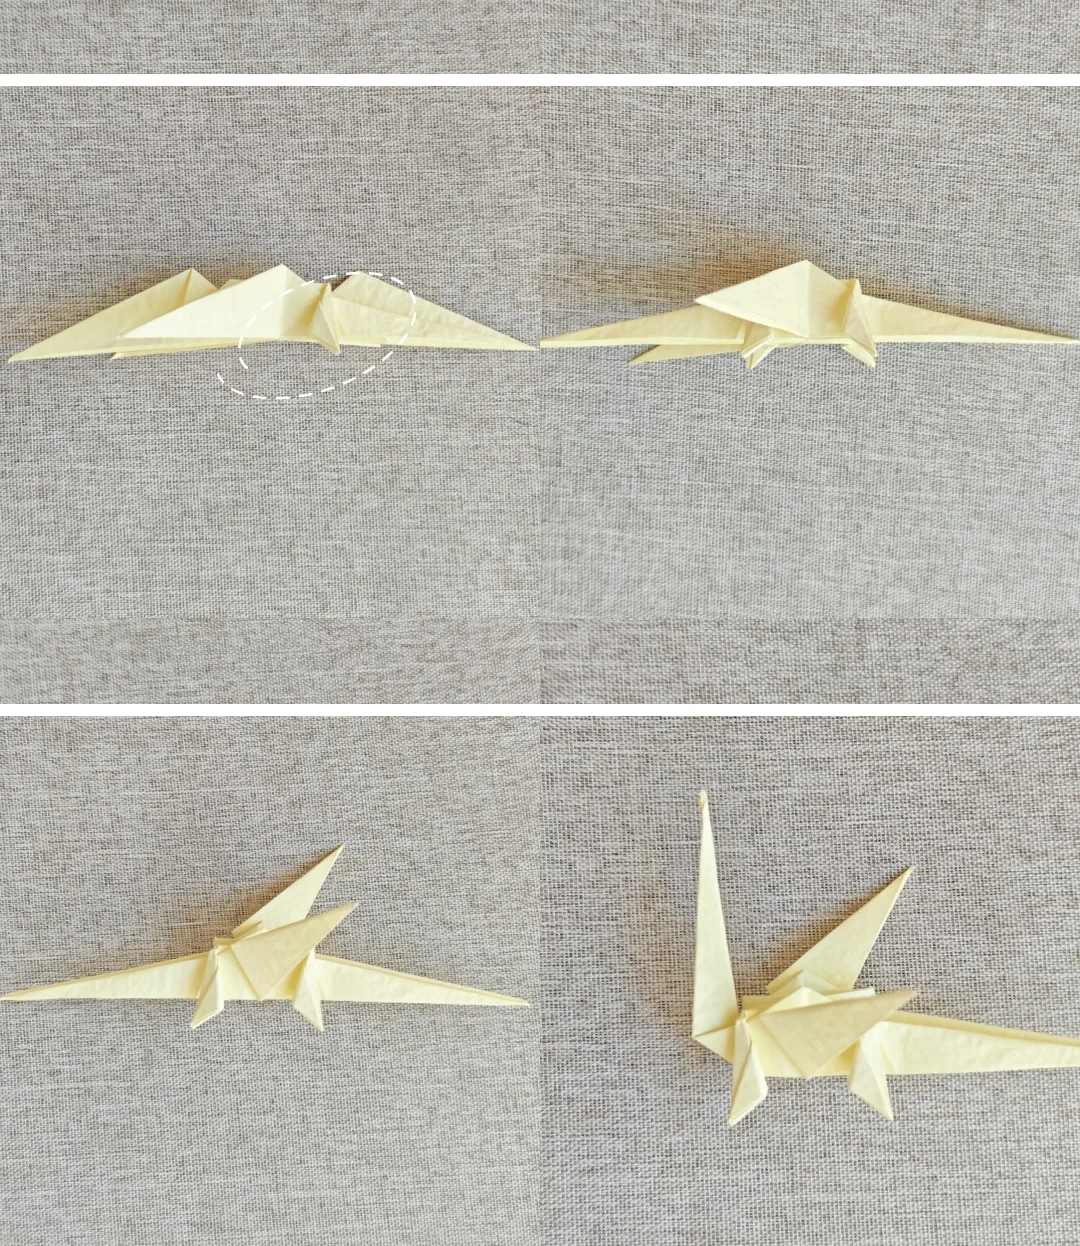
Separate wings and neck
 Open image at full size ↗
Repeat on all four small edges. Fold the broad flaps into wings and bend the narrow point into the neck.
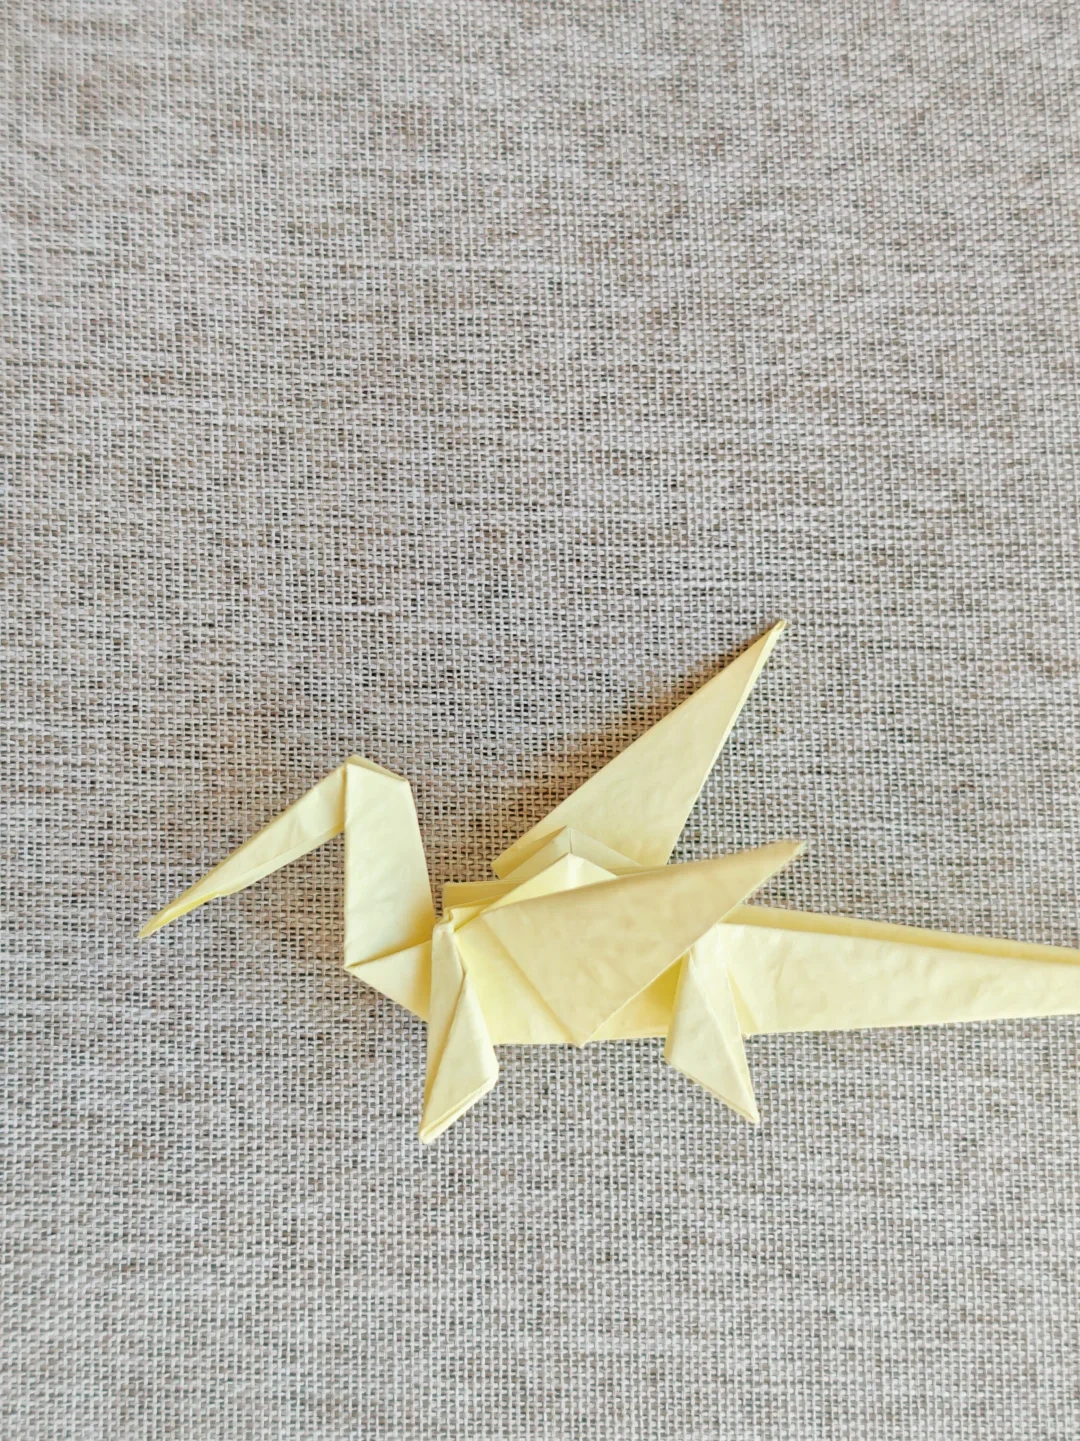
Bend the neck
 Open image at full size ↗
Use the close-up to reverse-fold the long point upward, supporting its base while you press the crease.
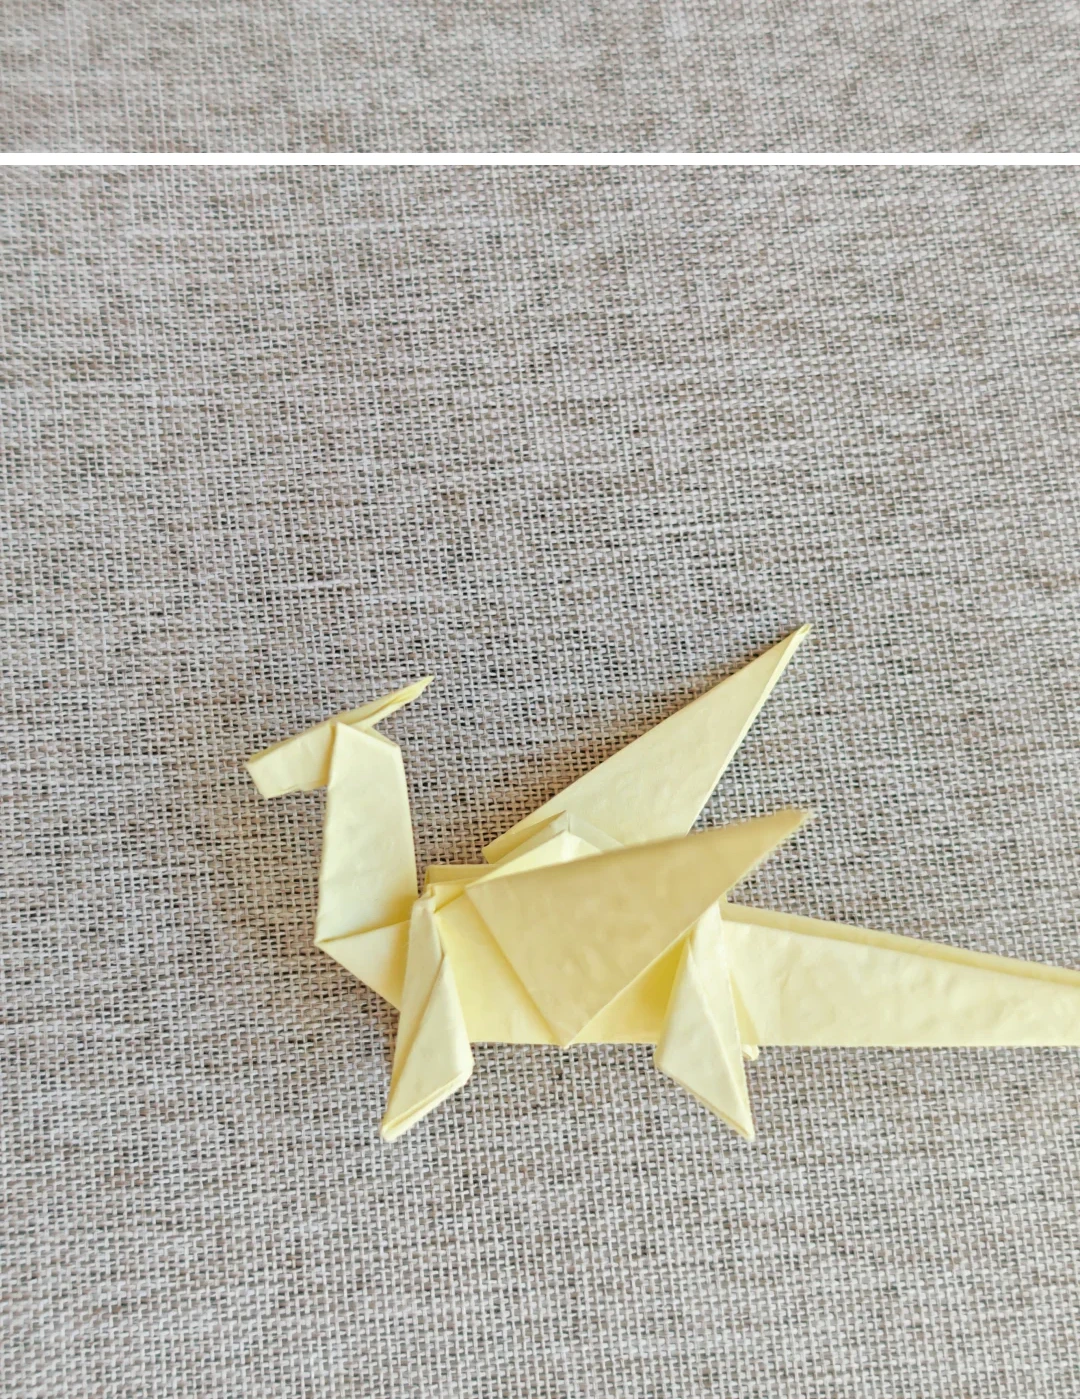
Shape the head
 Open image at full size ↗
Reverse-fold the tip to make the head and adjust its angle above the body.
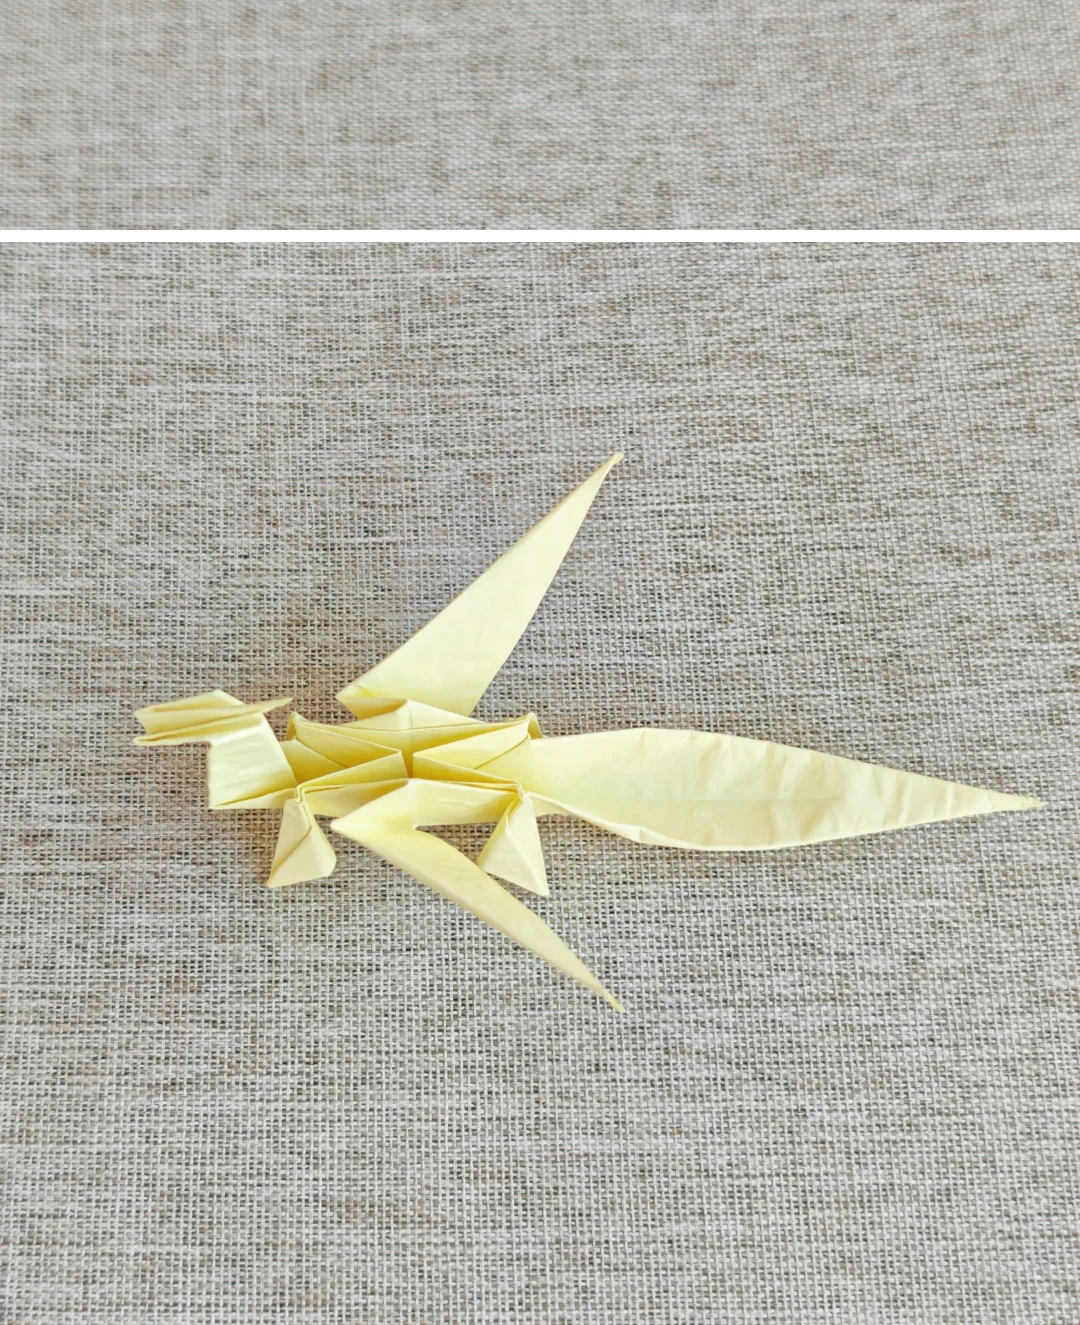
Flatten the tail
 Open image at full size ↗
Press the tail outward from its center and spread the wing folds.
Balance the dragon
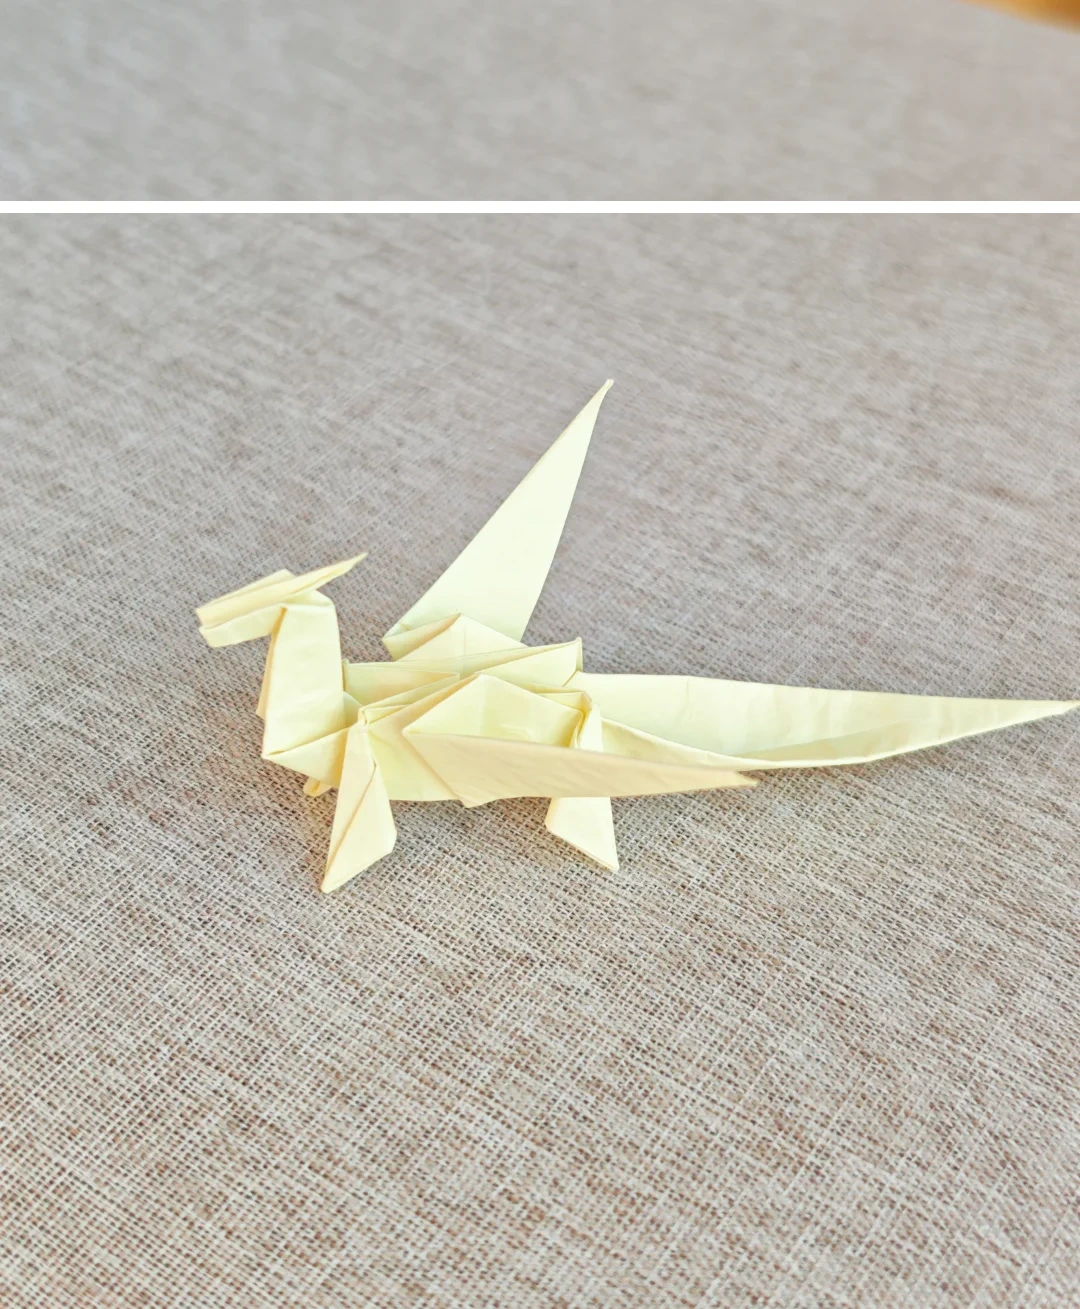 Open image at full size ↗
Adjust the feet, wings and tail until the dragon holds its shape.
Follow the diagrams alongside the step-by-step English instructions.
Choose your next project →