
Paper toys · Step-by-step guide
Two Paper Ninja Stars
Fold four matching modules and interlock them in two different arrangements.
What you’ll need
- Four square sheets per star, in two colors
- Glue, optional
Paper folding and shaping

Make it, step by step.
20 steps · Original diagrams with English instructions
Steps 1–4
 Open image at full size ↗
Prepare a square sheet.
Fold once along a diagonal.
Fold both sides toward the centerline.
Turn over and fold the triangle to the right.
Steps 5–8
 Open image at full size ↗
Fold both sides along the triangular edges.
Bring the folds inward along the creases.
Flatten into the illustrated module.
Repeat to make four modules.
Steps 9–12
 Open image at full size ↗
Insert the black module’s tip into the red module.
Press the joint flat.
Insert the red tip into another black module.
Continue interlocking the pieces as pictured.
Steps 13–16
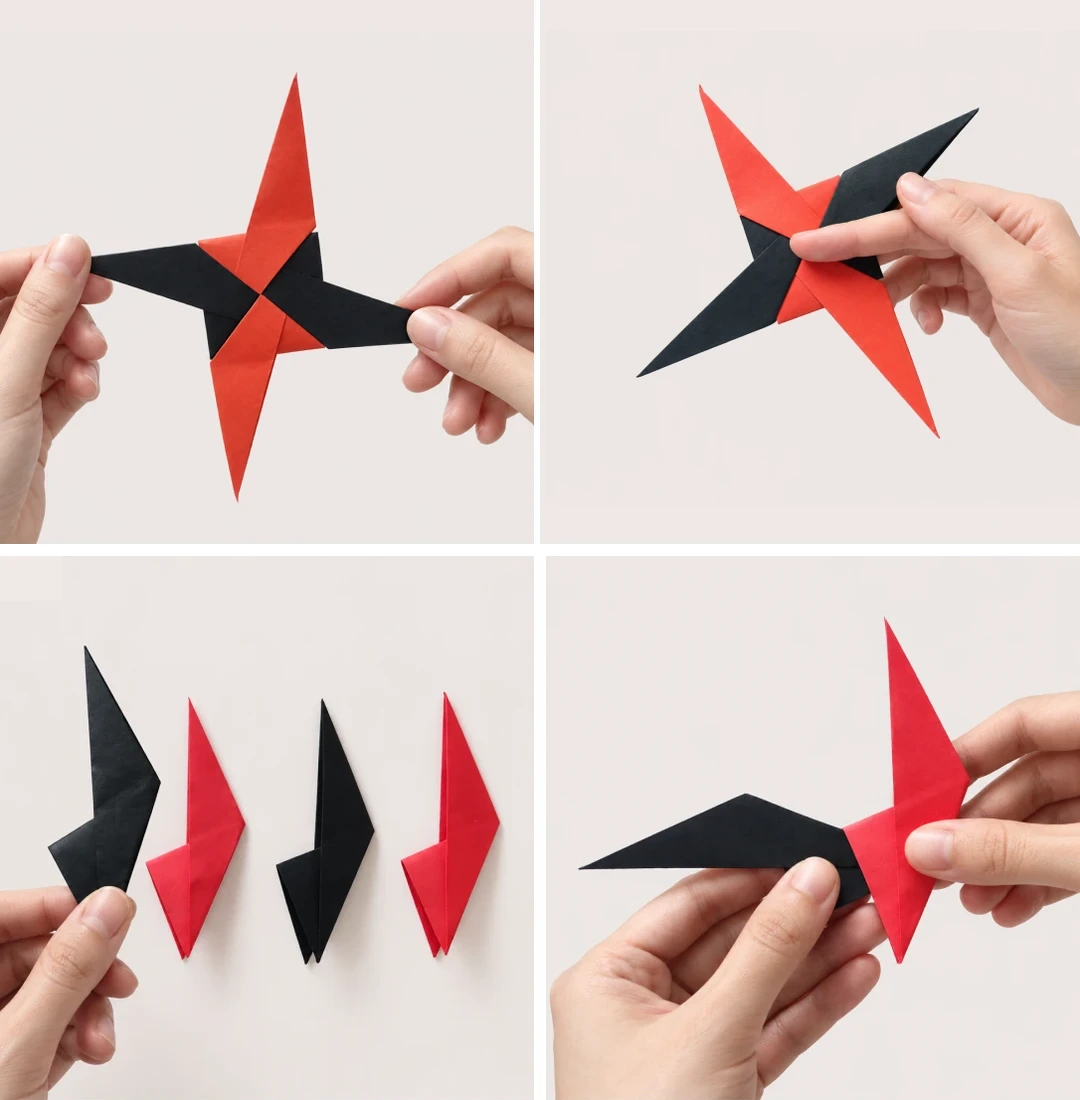 Open image at full size ↗
Press the completed first arrangement flat.
Add glue at the joints if desired.
Make another set of four modules for the second style.
Insert a black tip into a red module in the new orientation shown.
Steps 17–20
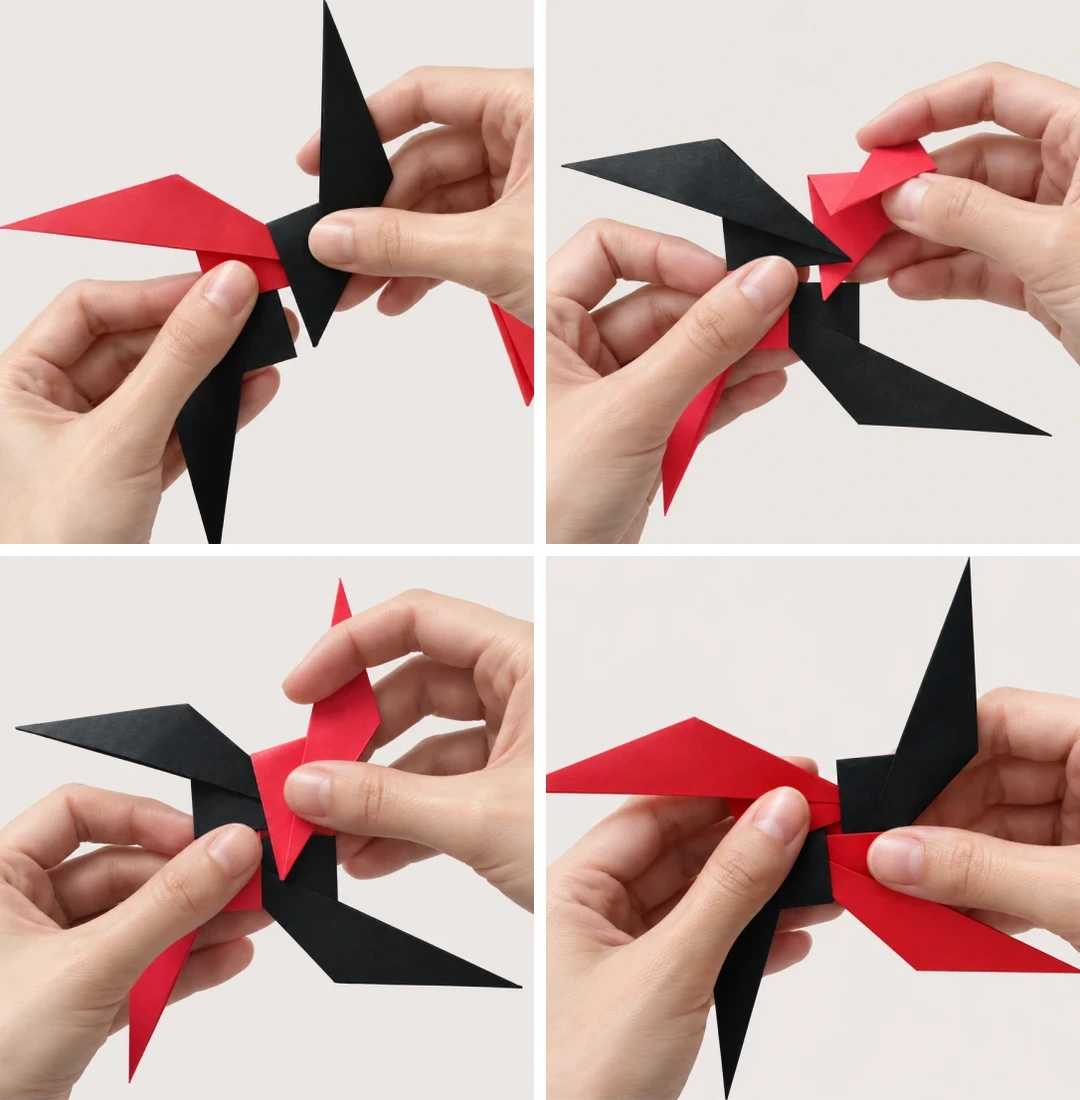 Open image at full size ↗
Add the next module following the pictured arrangement.
Tuck its flap into the neighboring pocket.
Continue joining the final module.
Interlock the remaining tips to close the second star.
The finished project
 Open image at full size ↗
Style A: the completed first arrangement of four interlocking modules.
The finished project
 Open image at full size ↗
Style B: the same folded modules joined in a different orientation.
Follow the diagrams alongside the step-by-step English instructions.
Choose your next project →