
Flowers & nature · Step-by-step guide
Tiny Flower and Pot
Pair a four-petal blossom with a folded green base for a miniature flower pot.
What you’ll need
- One paper square for the blossom
- One green paper rectangle for the base
- A small contrasting paper piece for the center
- Craft glue
Paper craft · Folding and assembly
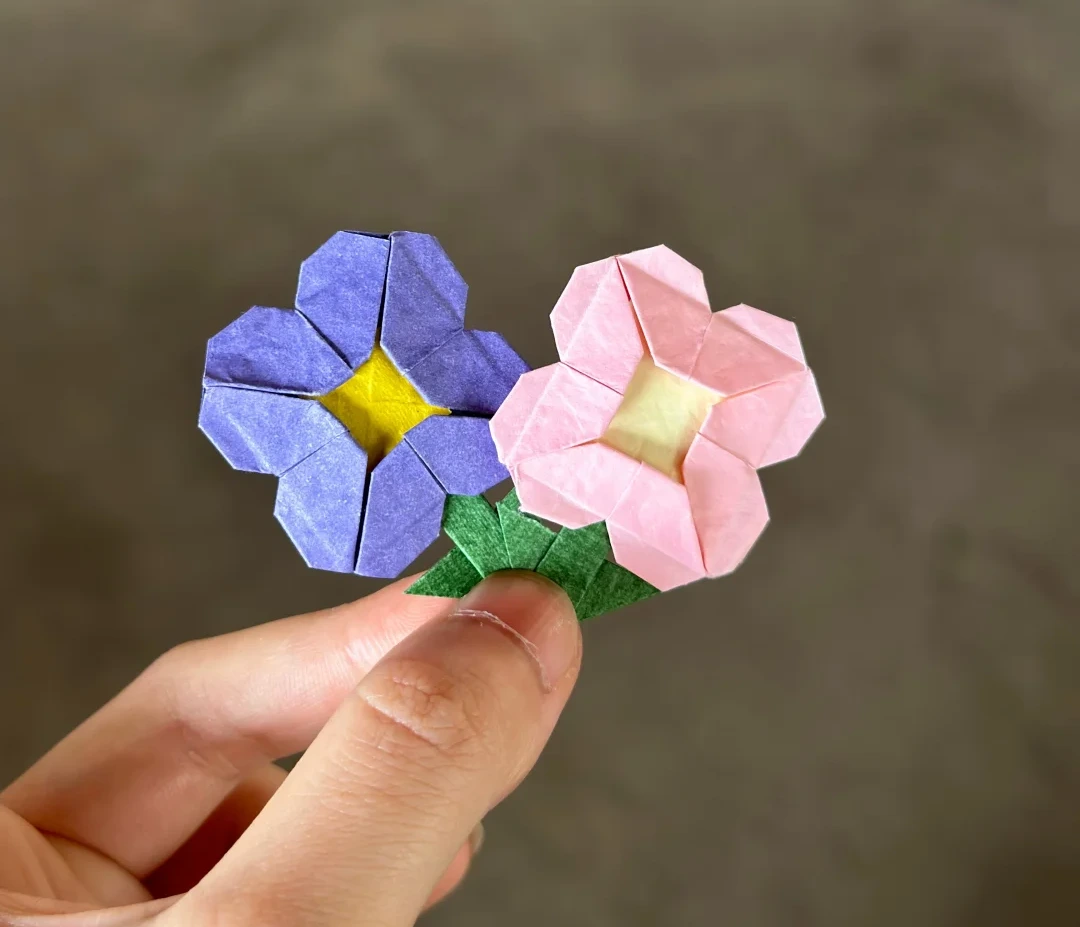
Make it, step by step.
12 steps · Original diagrams with English instructions
Read each picture from left to right, then top to bottom. The pictures do not specify exact sizes for the flower square or the green rectangle.
Finished model
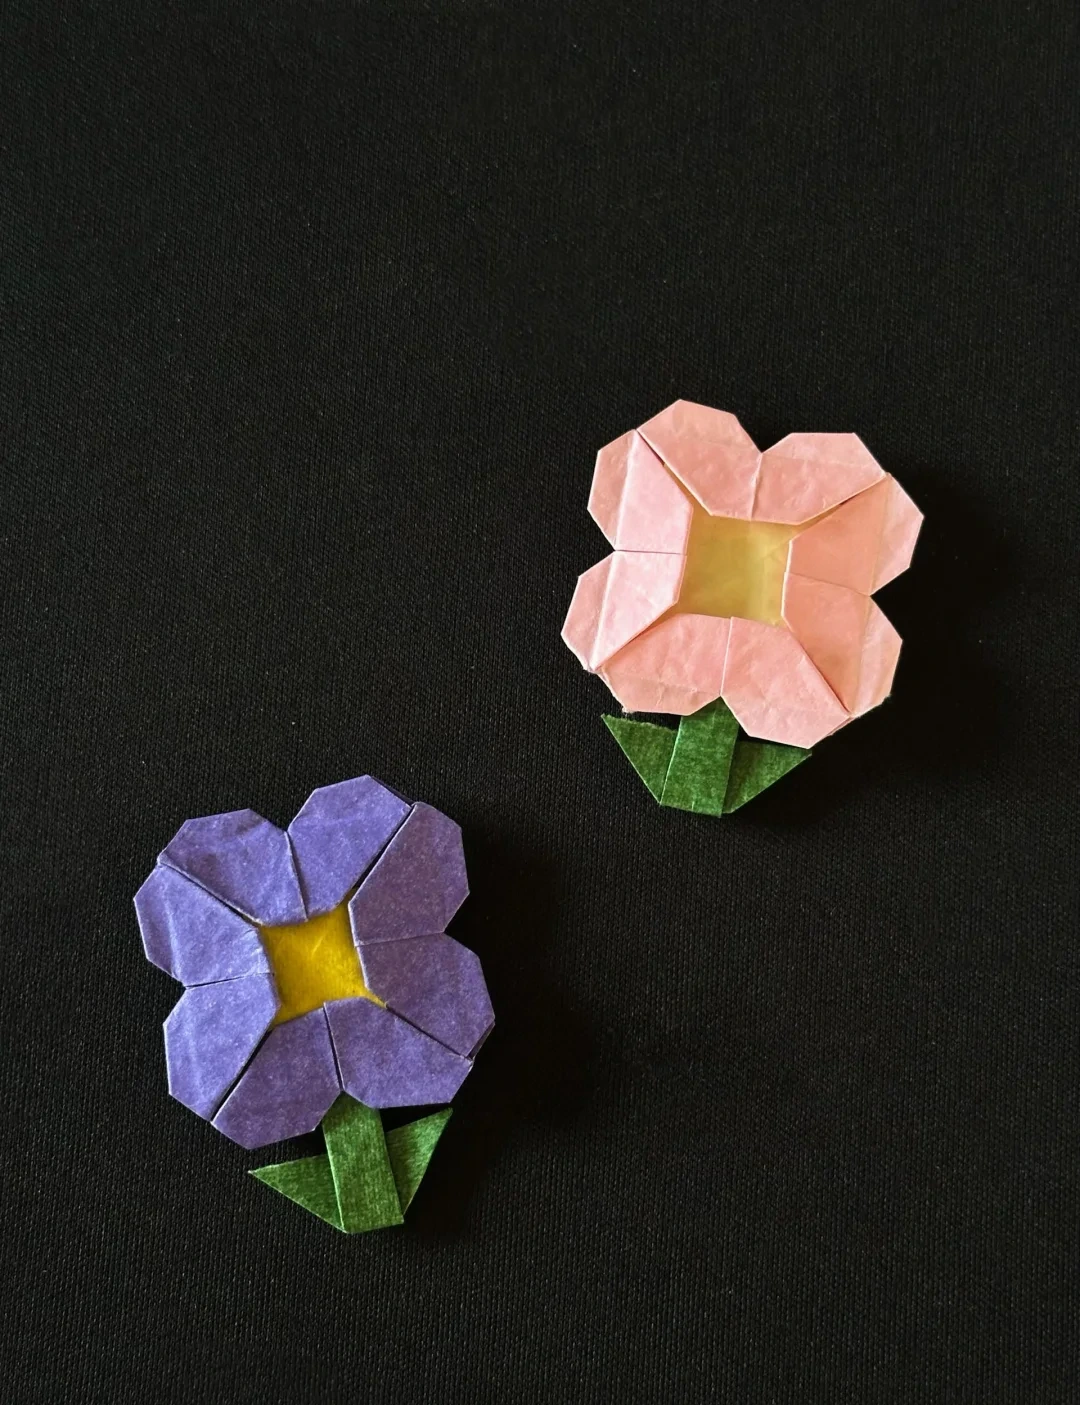 Open image at full size ↗
Use this finished example to compare the shape and proportions of your model.
Finished model
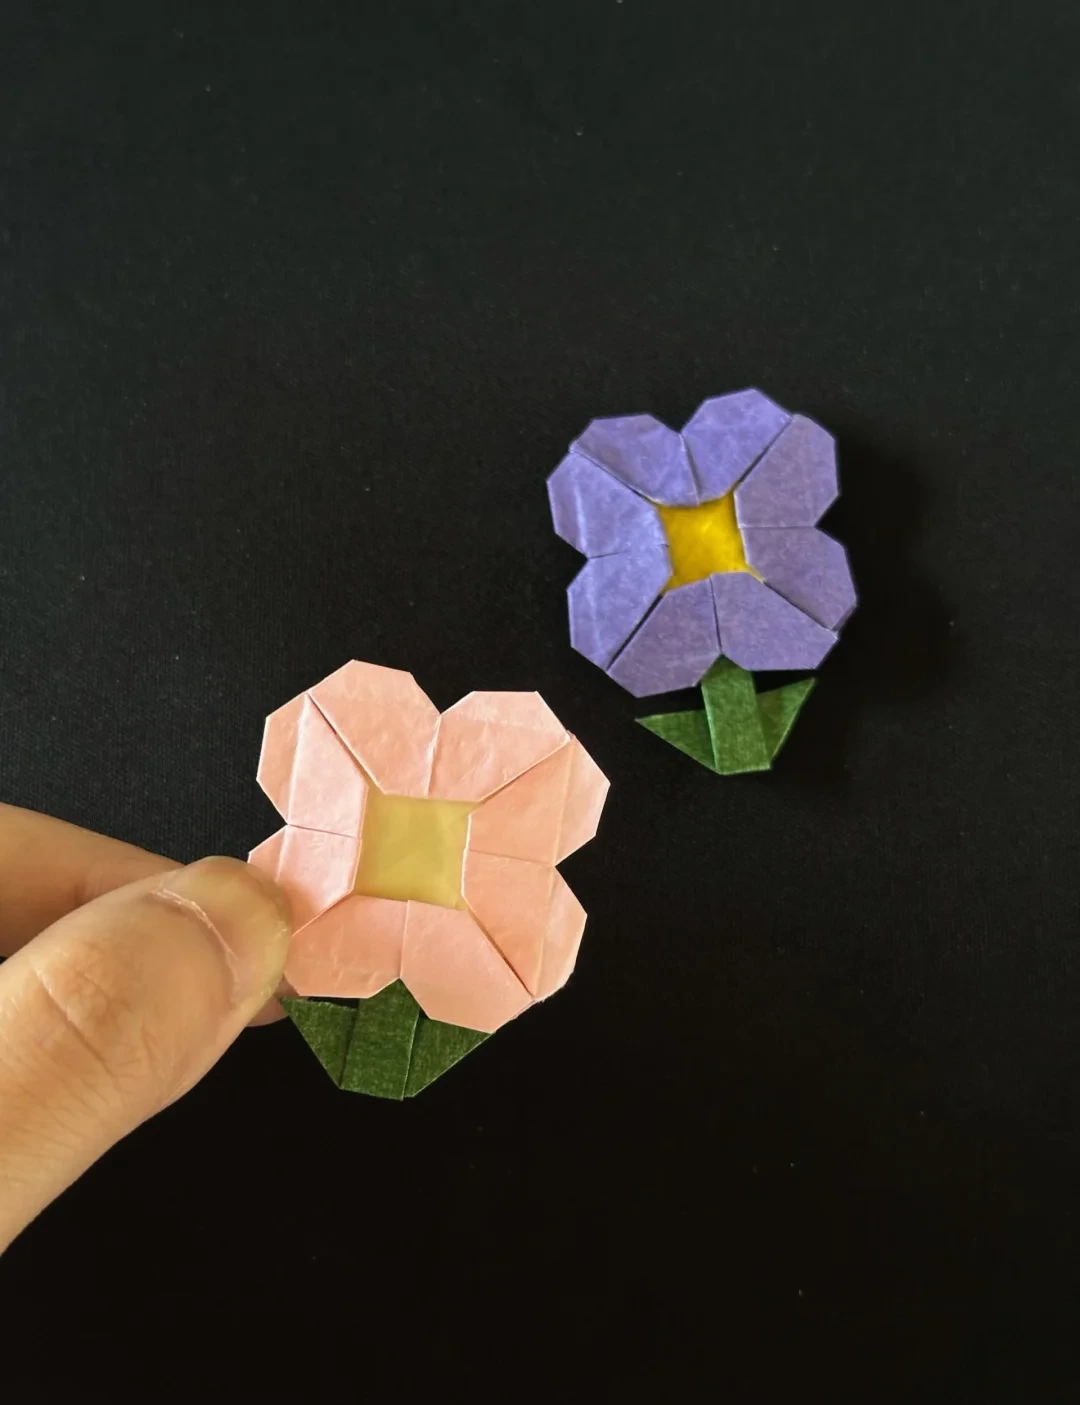 Open image at full size ↗
Use this finished example to compare the shape and proportions of your model.
Fold the flower base
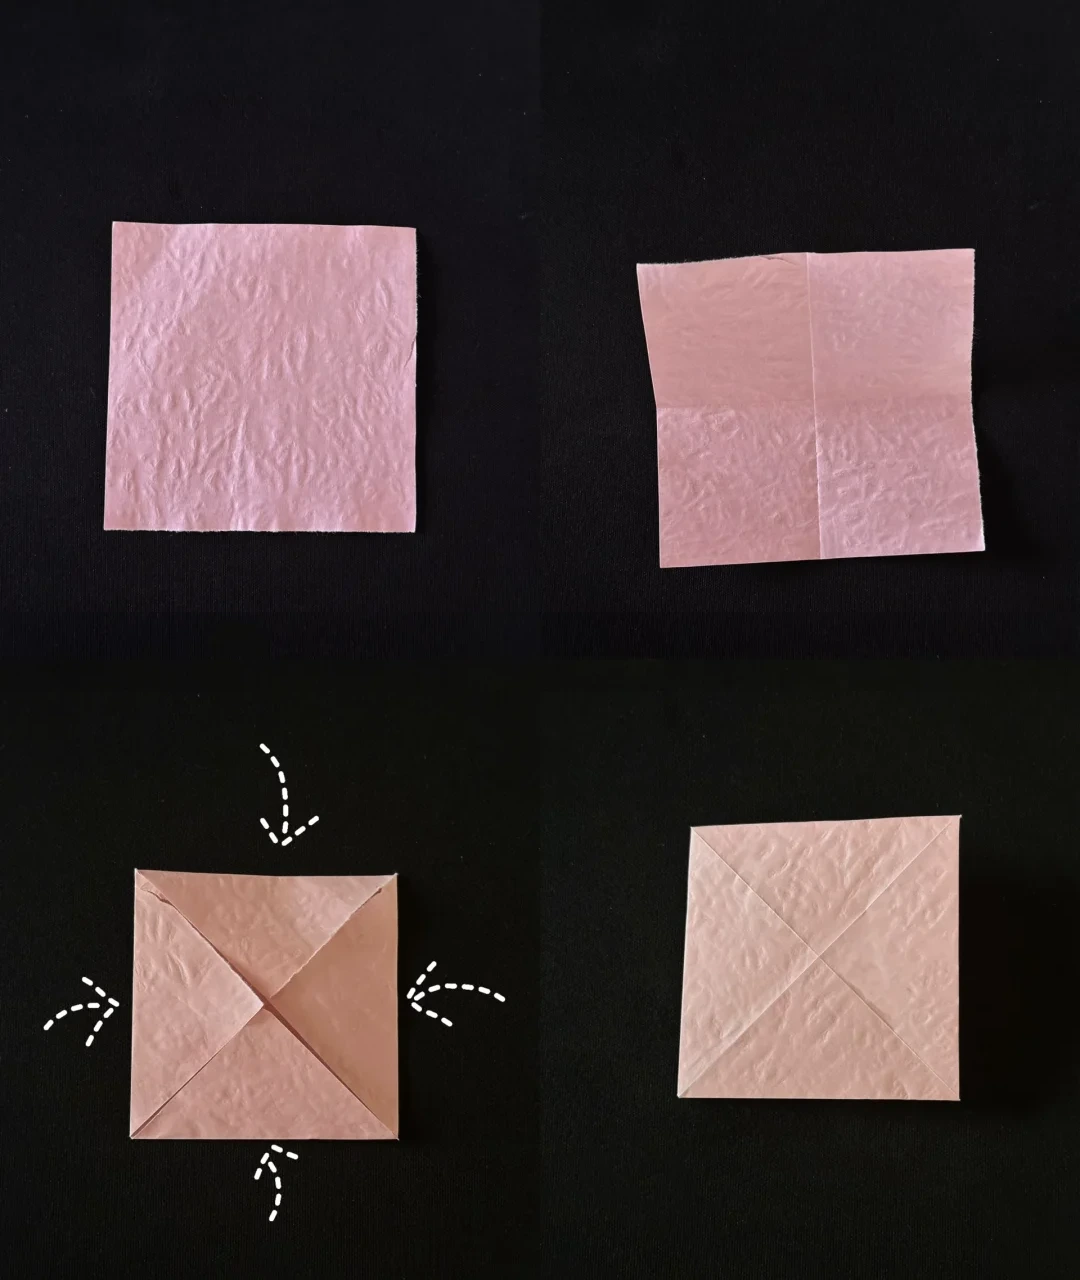 Open image at full size ↗
Crease the square horizontally and vertically. Bring all four corners to the center, then turn it over.
Fold successive layers
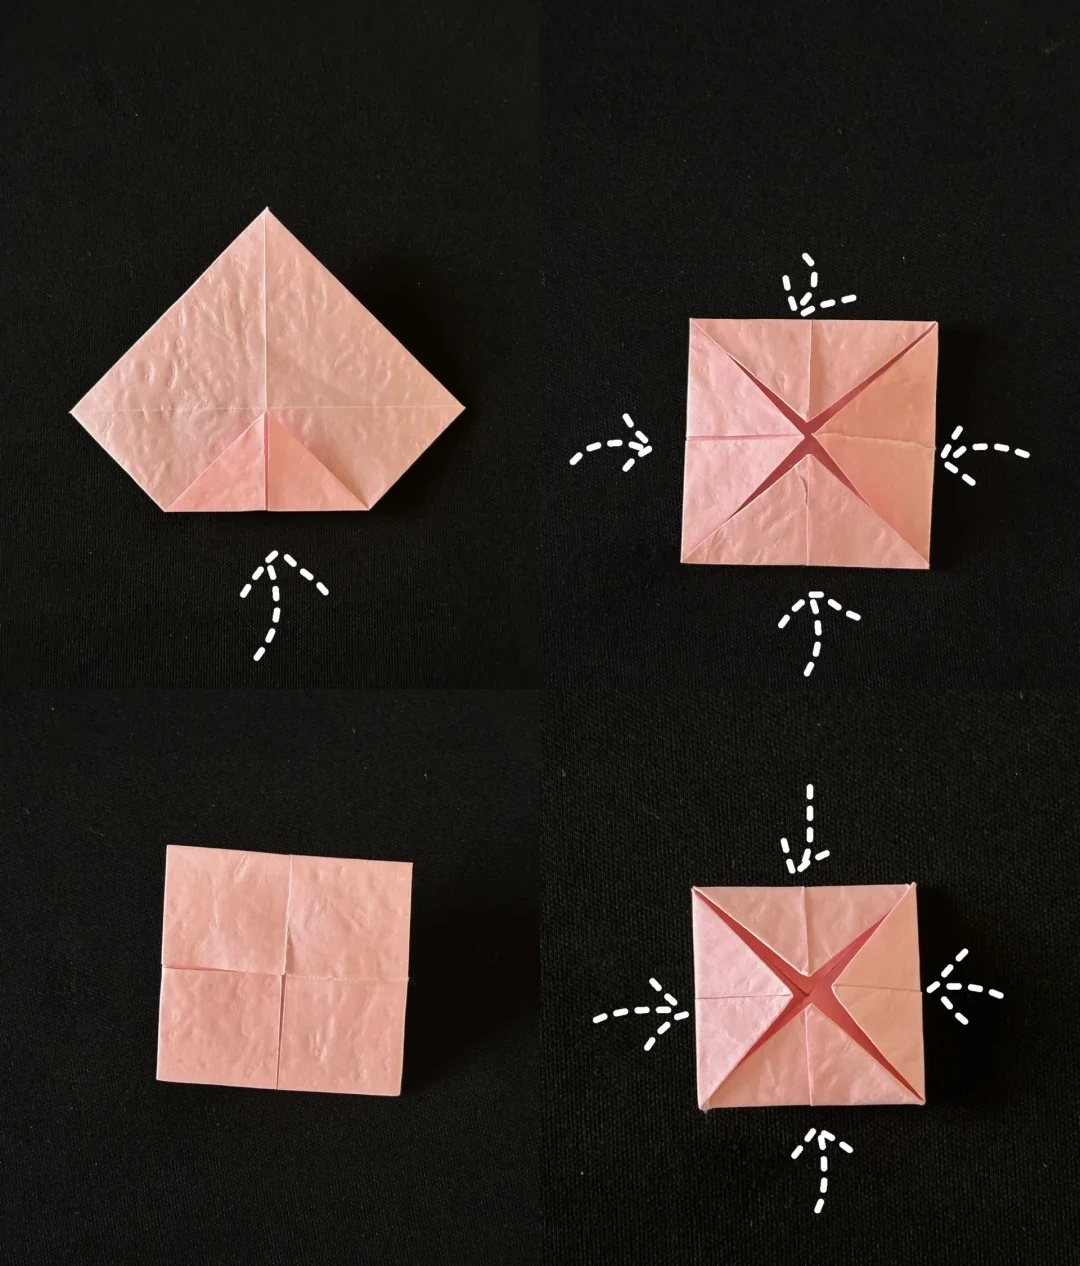 Open image at full size ↗
Bring all four corners to the center again. Turn the model over and repeat with the new corners.
Open four petals
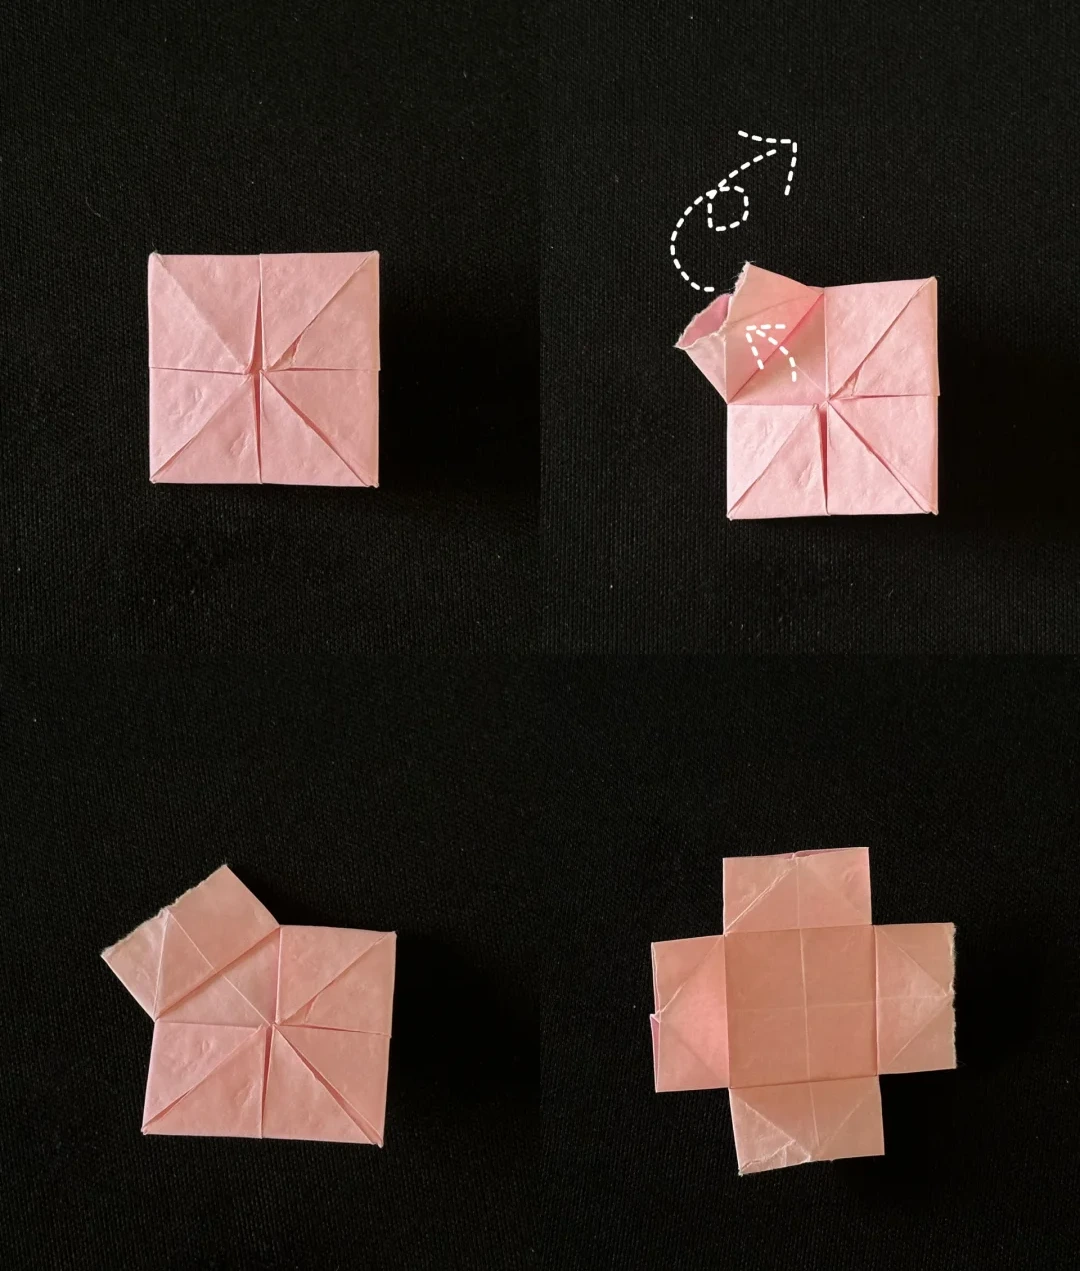 Open image at full size ↗
Turn the model over. Open one corner pocket outward and squash it flat. Repeat at the other three corners.
Soften the petals
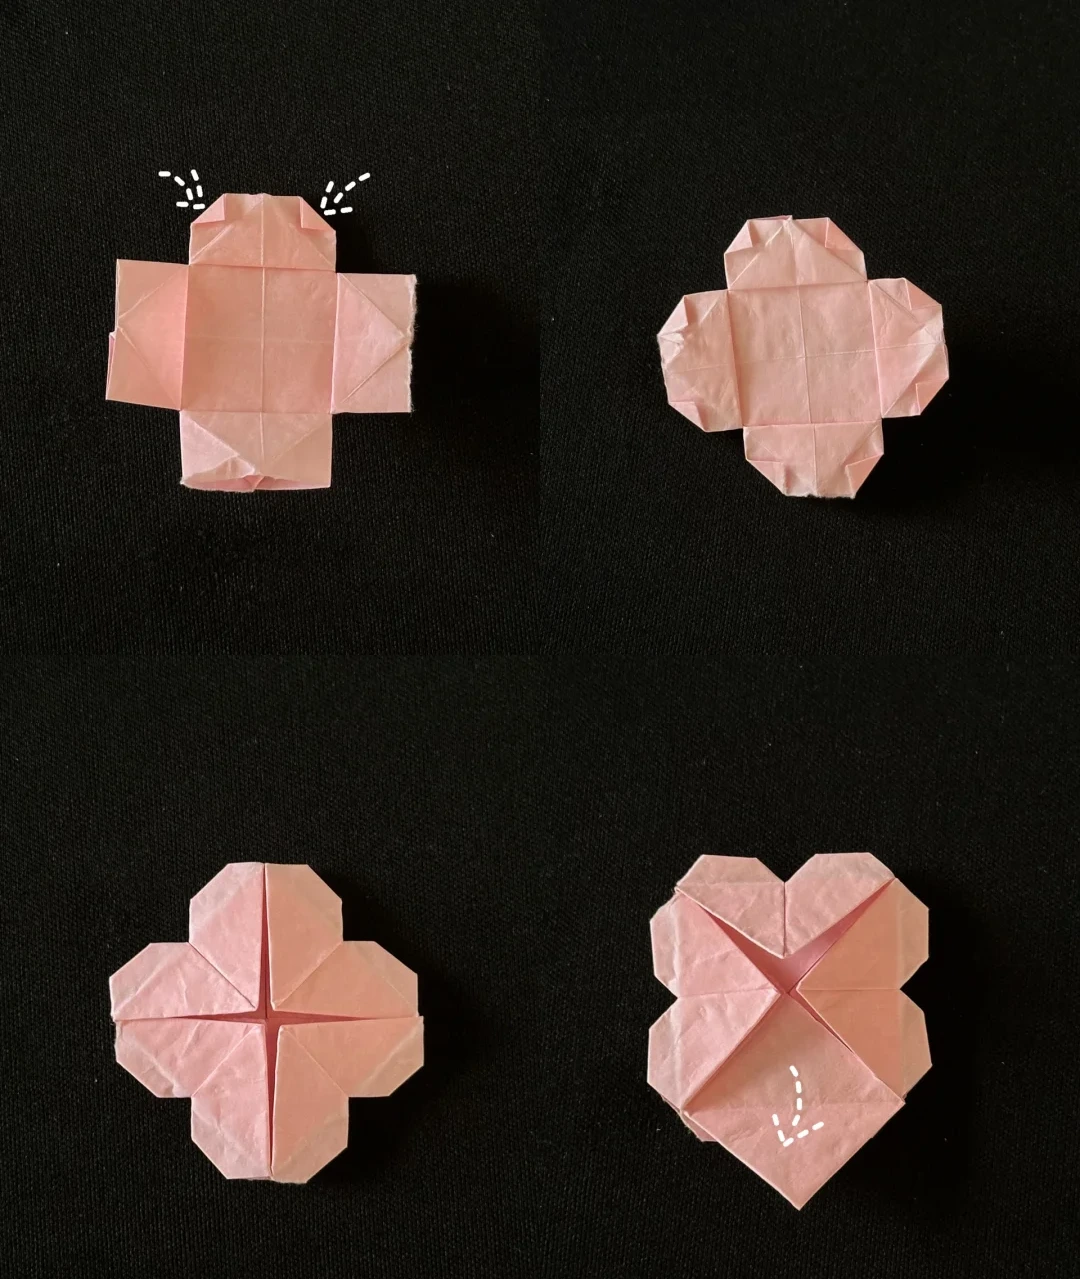 Open image at full size ↗
Fold the two outer corners of each petal slightly inward. Repeat on all four sides, then turn the flower over.
Lower the indicated triangular layer.
Open the flower center
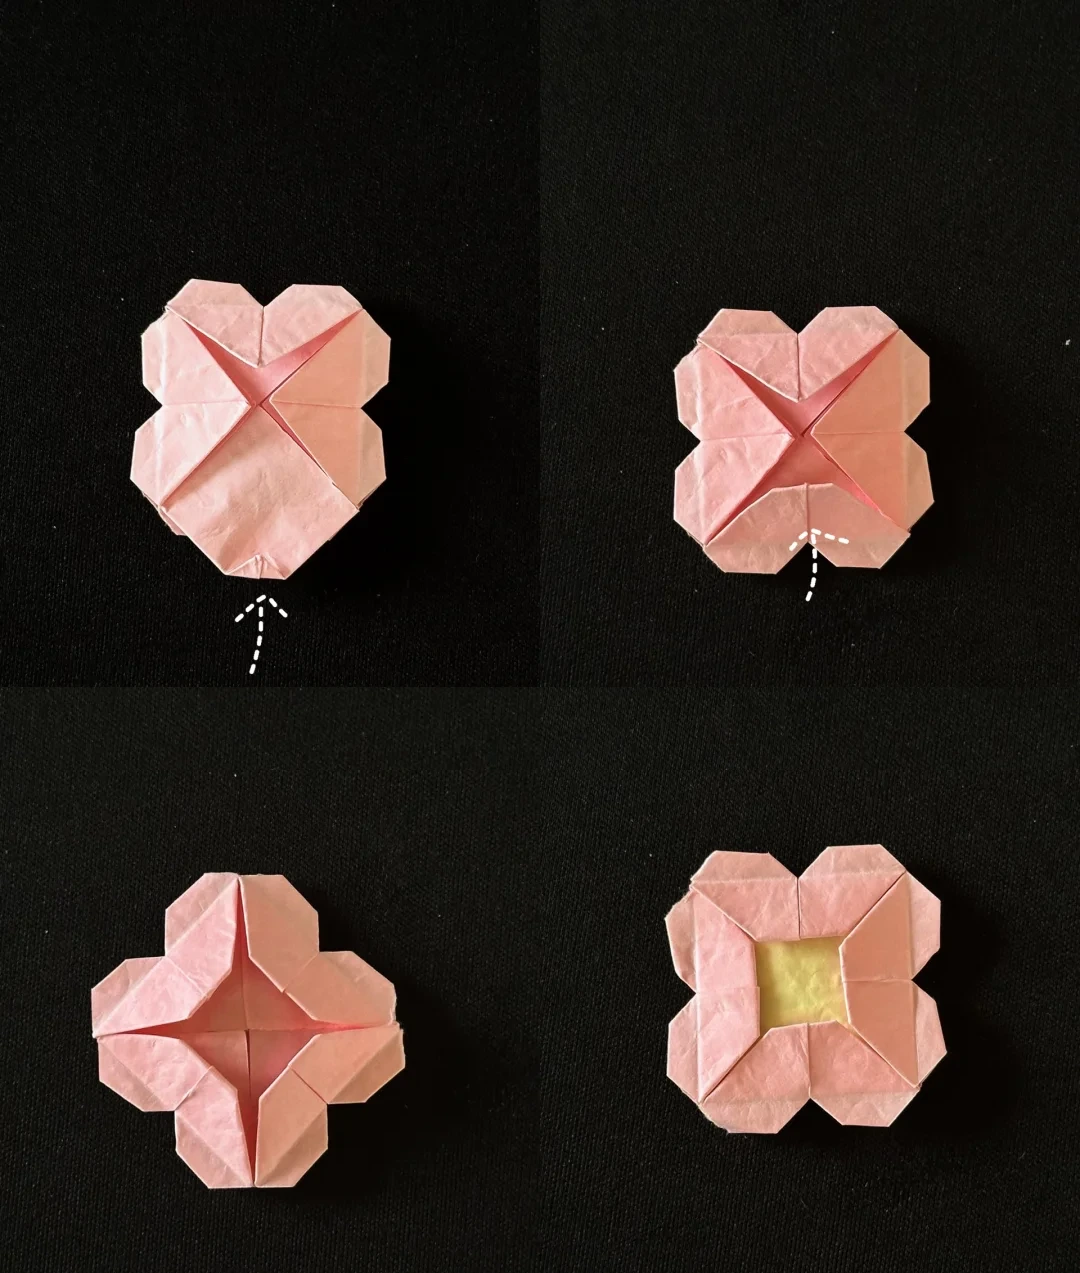 Open image at full size ↗
Fold its small tip upward, then fold the layer upward again. Repeat around all four sides. Add the small contrasting center piece.
Precrease the green base
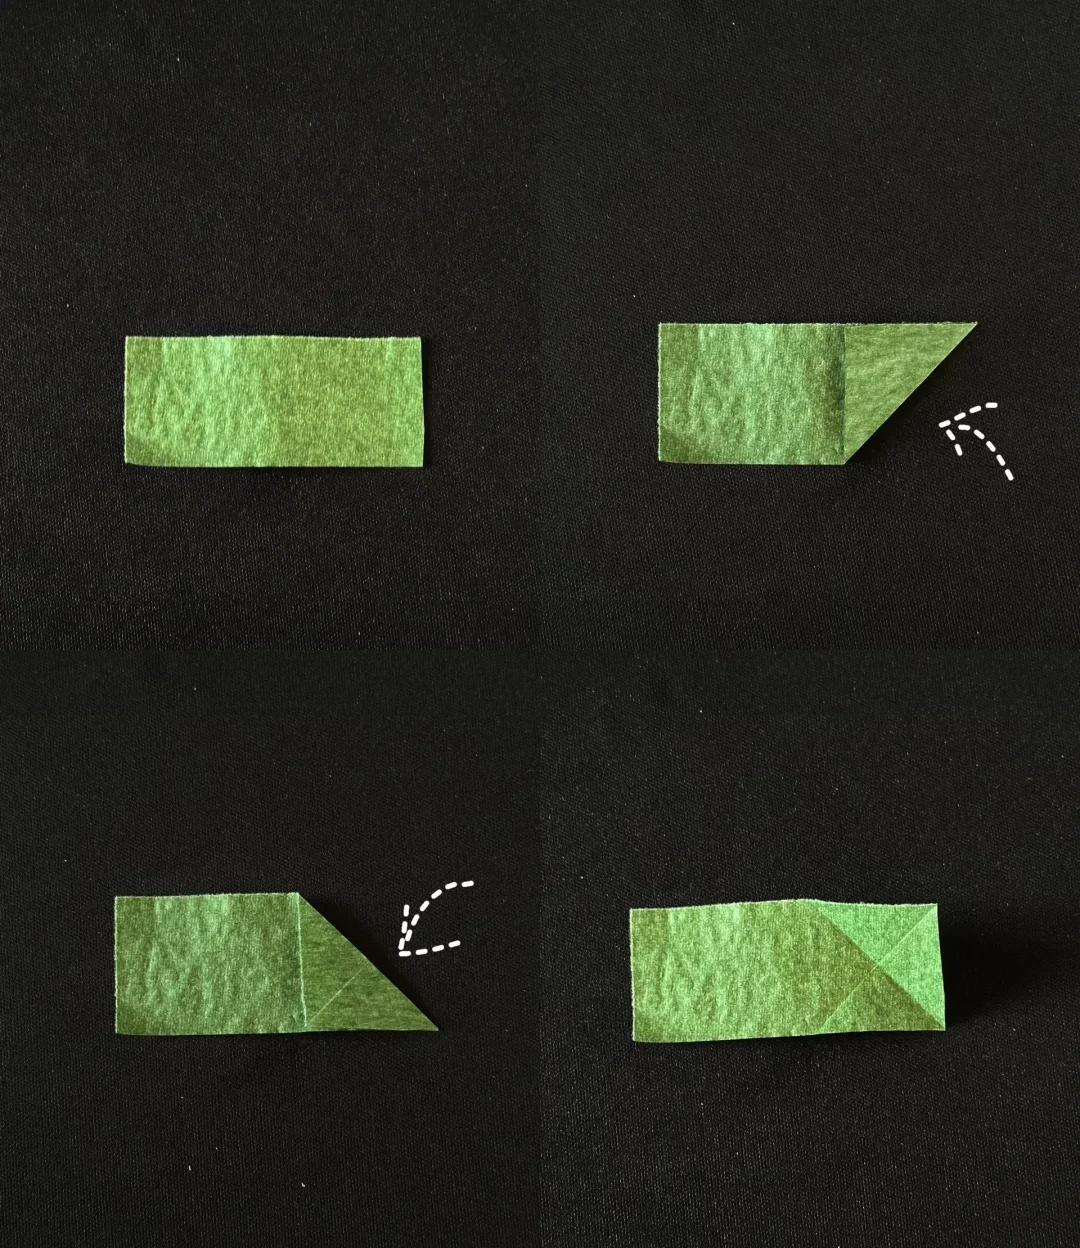 Open image at full size ↗
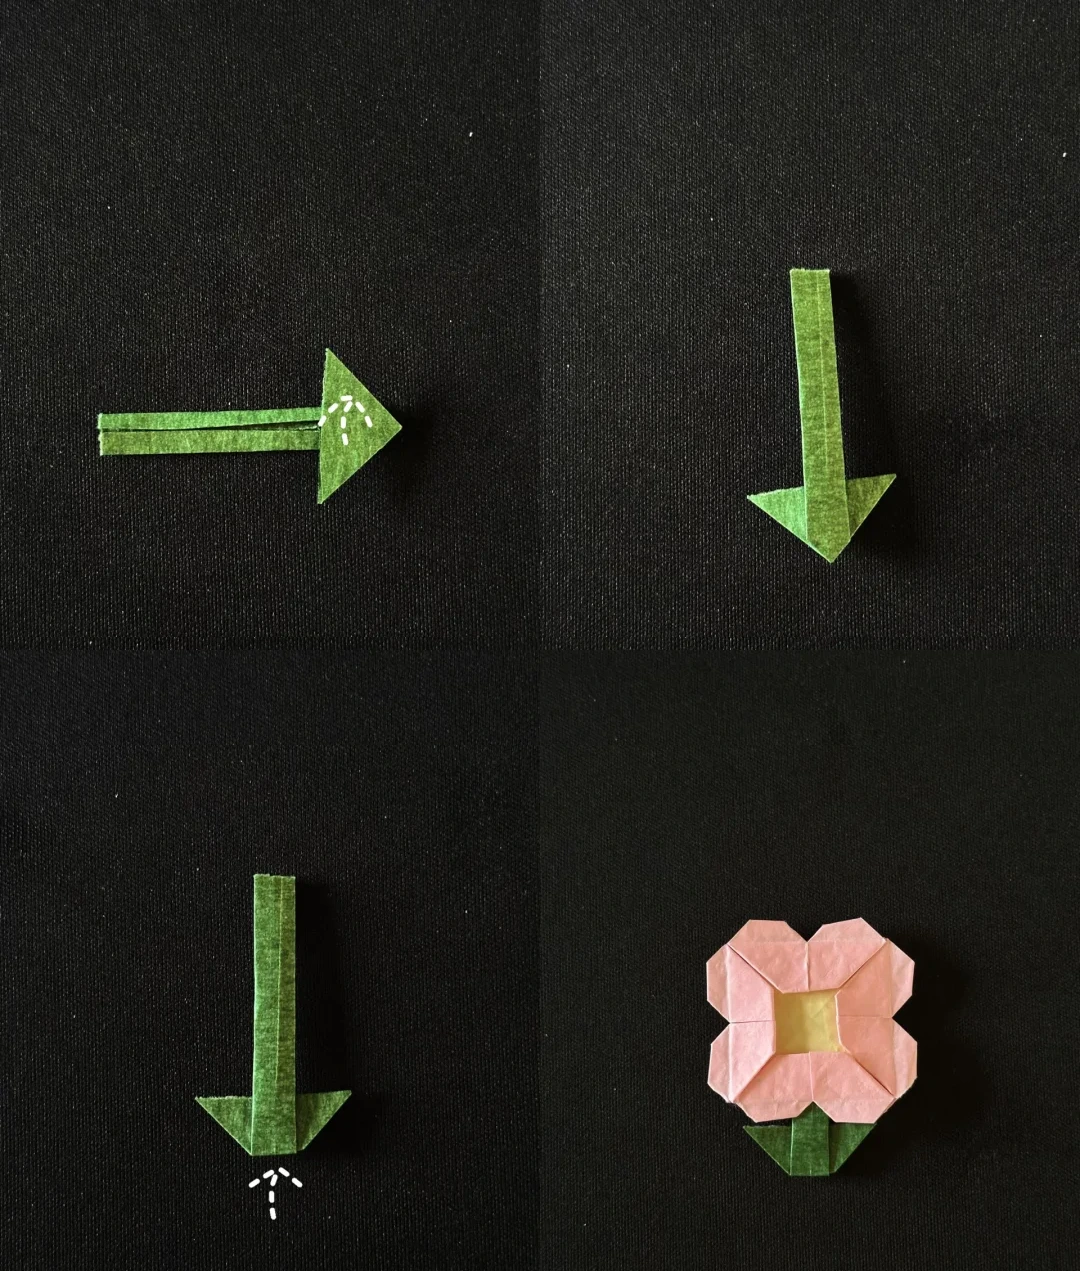
Place the rectangle horizontally. Fold its right end diagonally down to the left and then up to the left, opening each fold.
Collapse the end
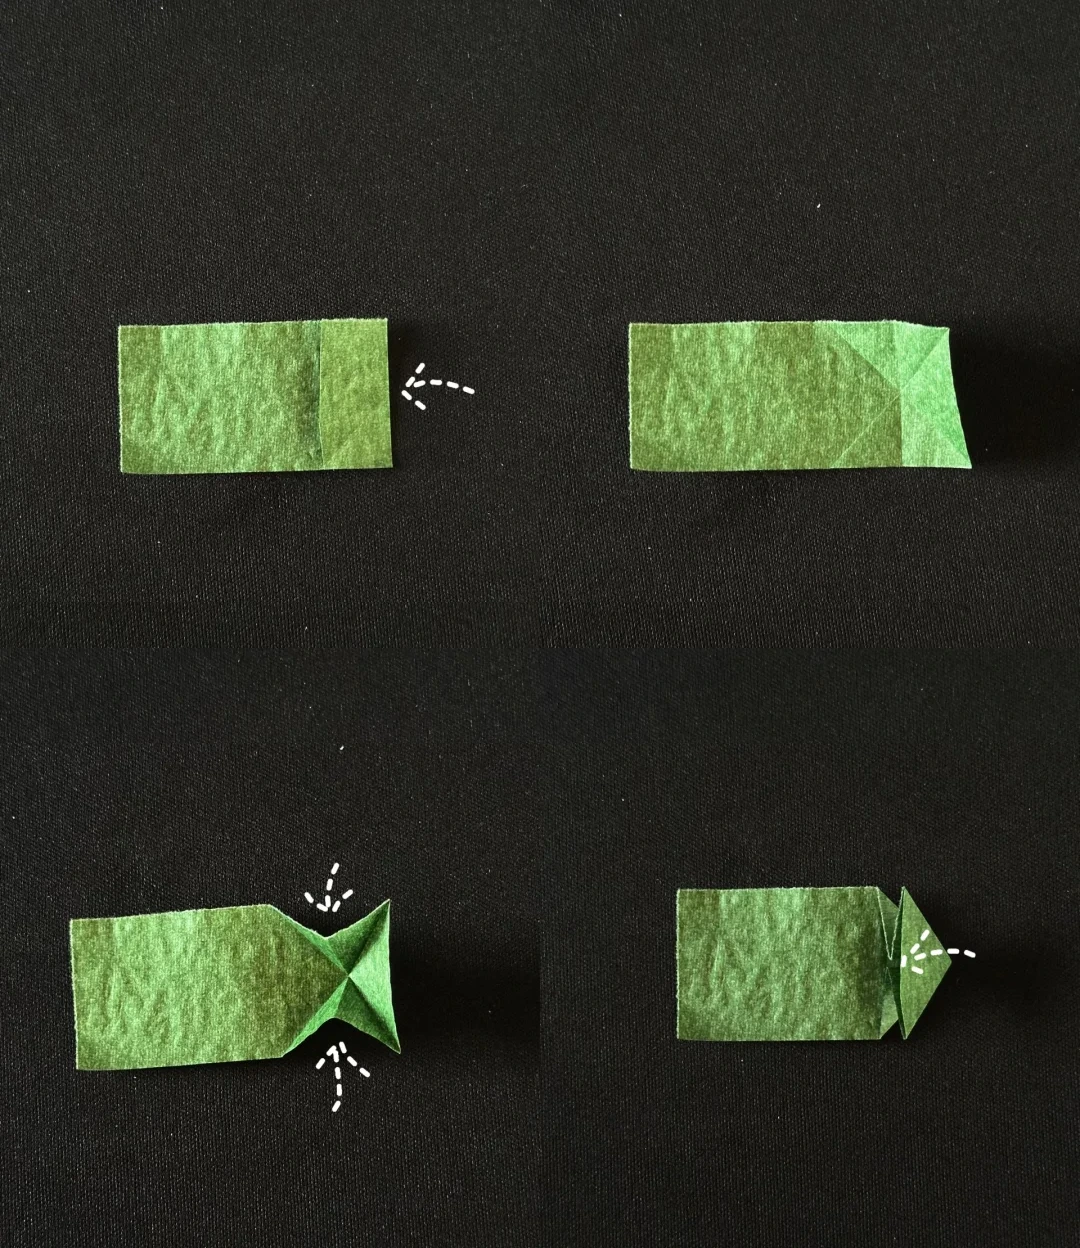 Open image at full size ↗
Fold the right end to the left to mark a vertical crease and unfold. Push the sides inward along the diagonal creases and flatten into a triangle.
Narrow the strip
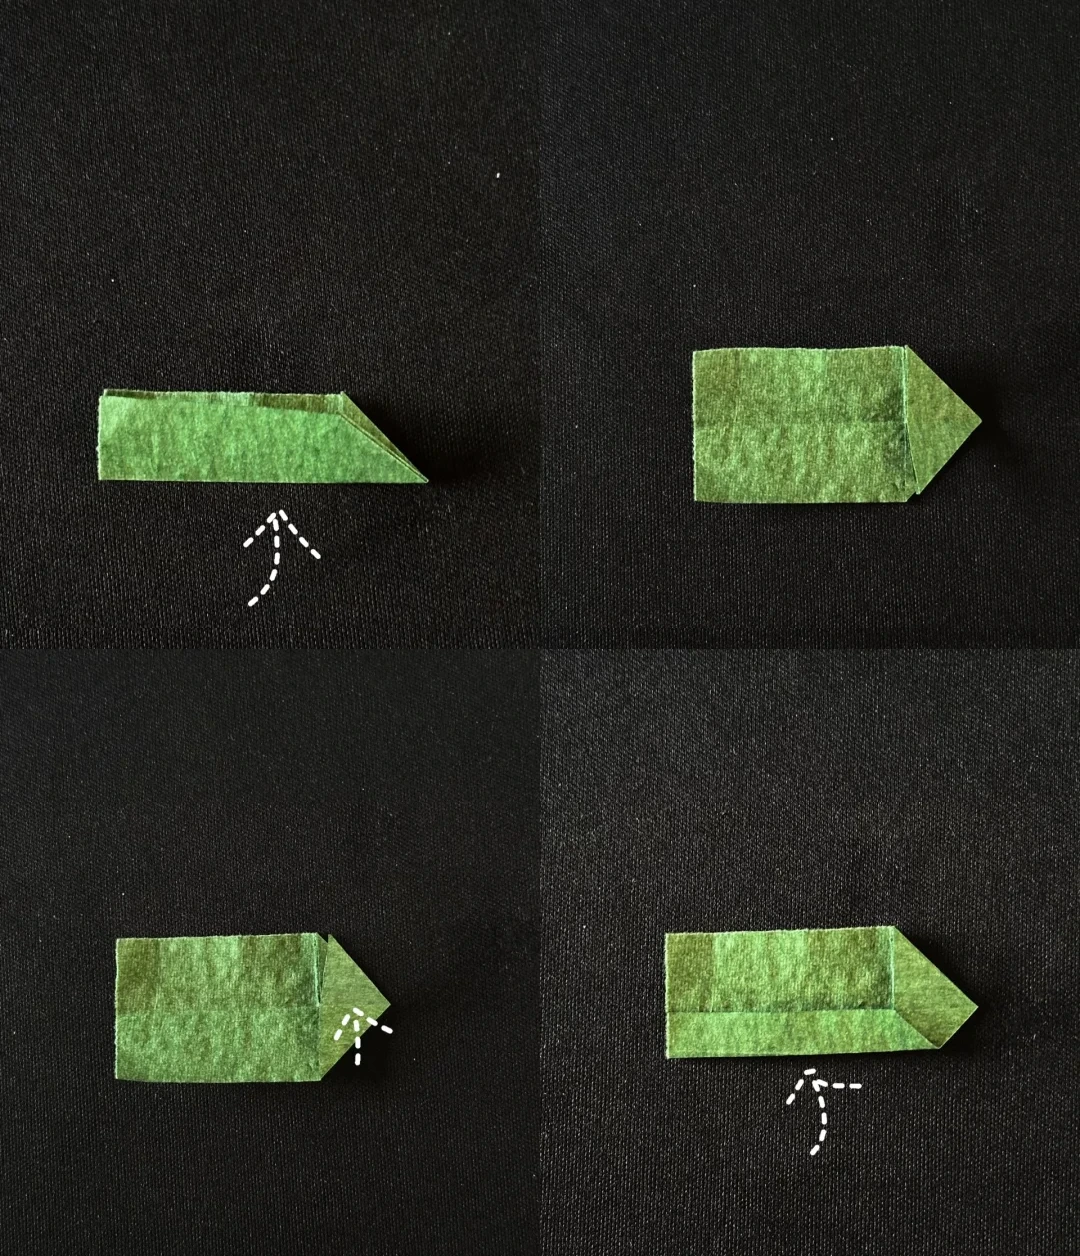 Open image at full size ↗
Fold the lower half upward, lift the small triangular flap, and open the long section again. Bring its lower edge to the middle.
Fold the handle strip
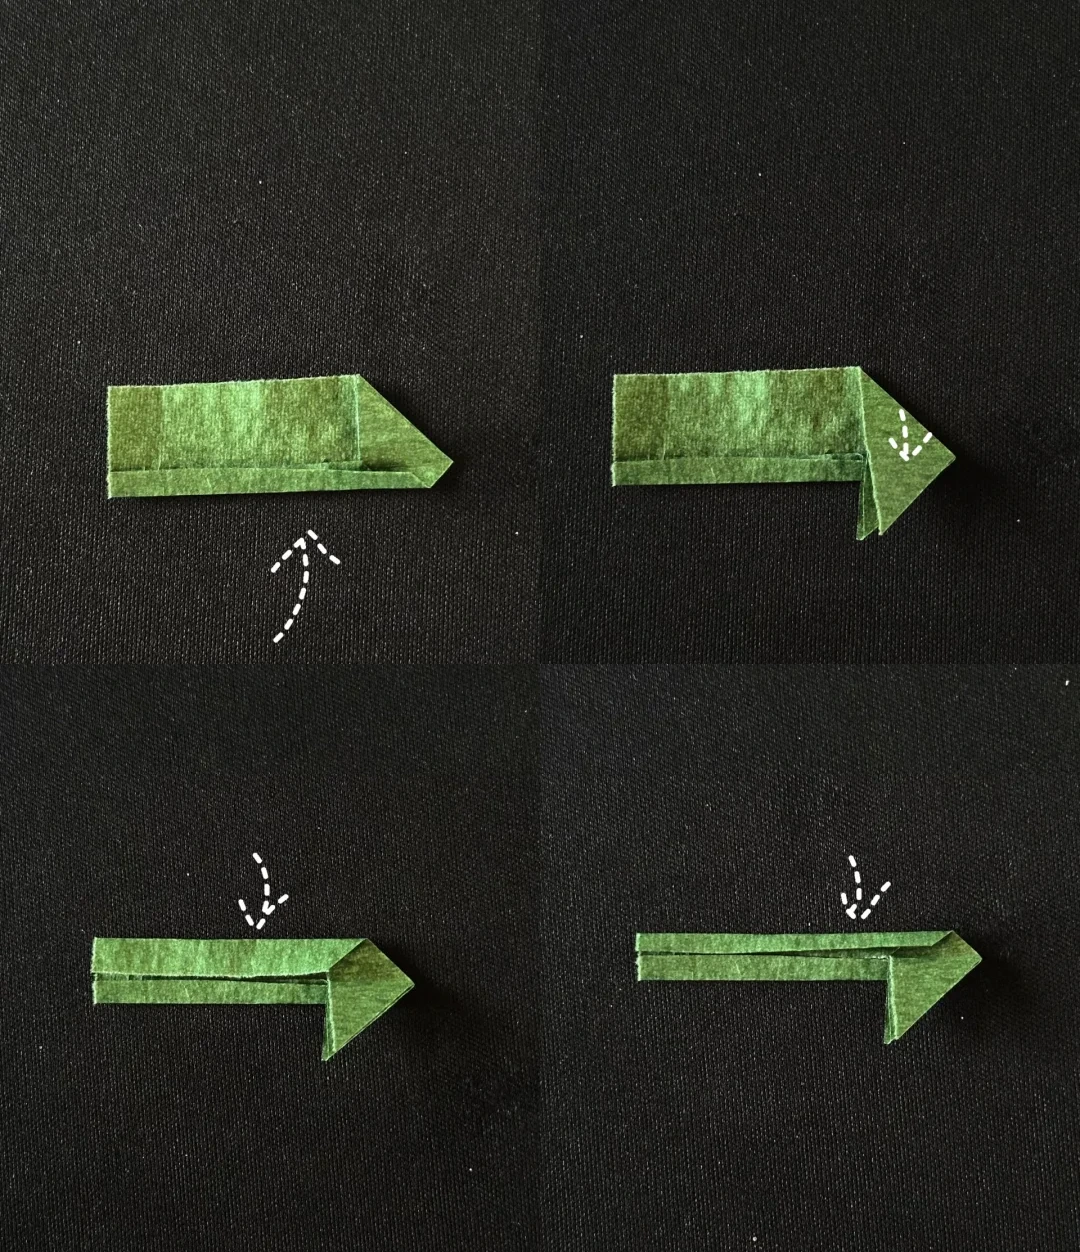 Open image at full size ↗
Fold that edge toward the middle again. Lower the small triangle. Repeat the narrowing folds on the opposite edge.
Join the two pieces
 Open image at full size ↗
Lift one triangular layer. Turn the base over and rotate it so the narrow strip points upward.
Fold the bottom point behind and attach the flower over the strip, leaving the green base visible below it.
Finished model
 Open image at full size ↗
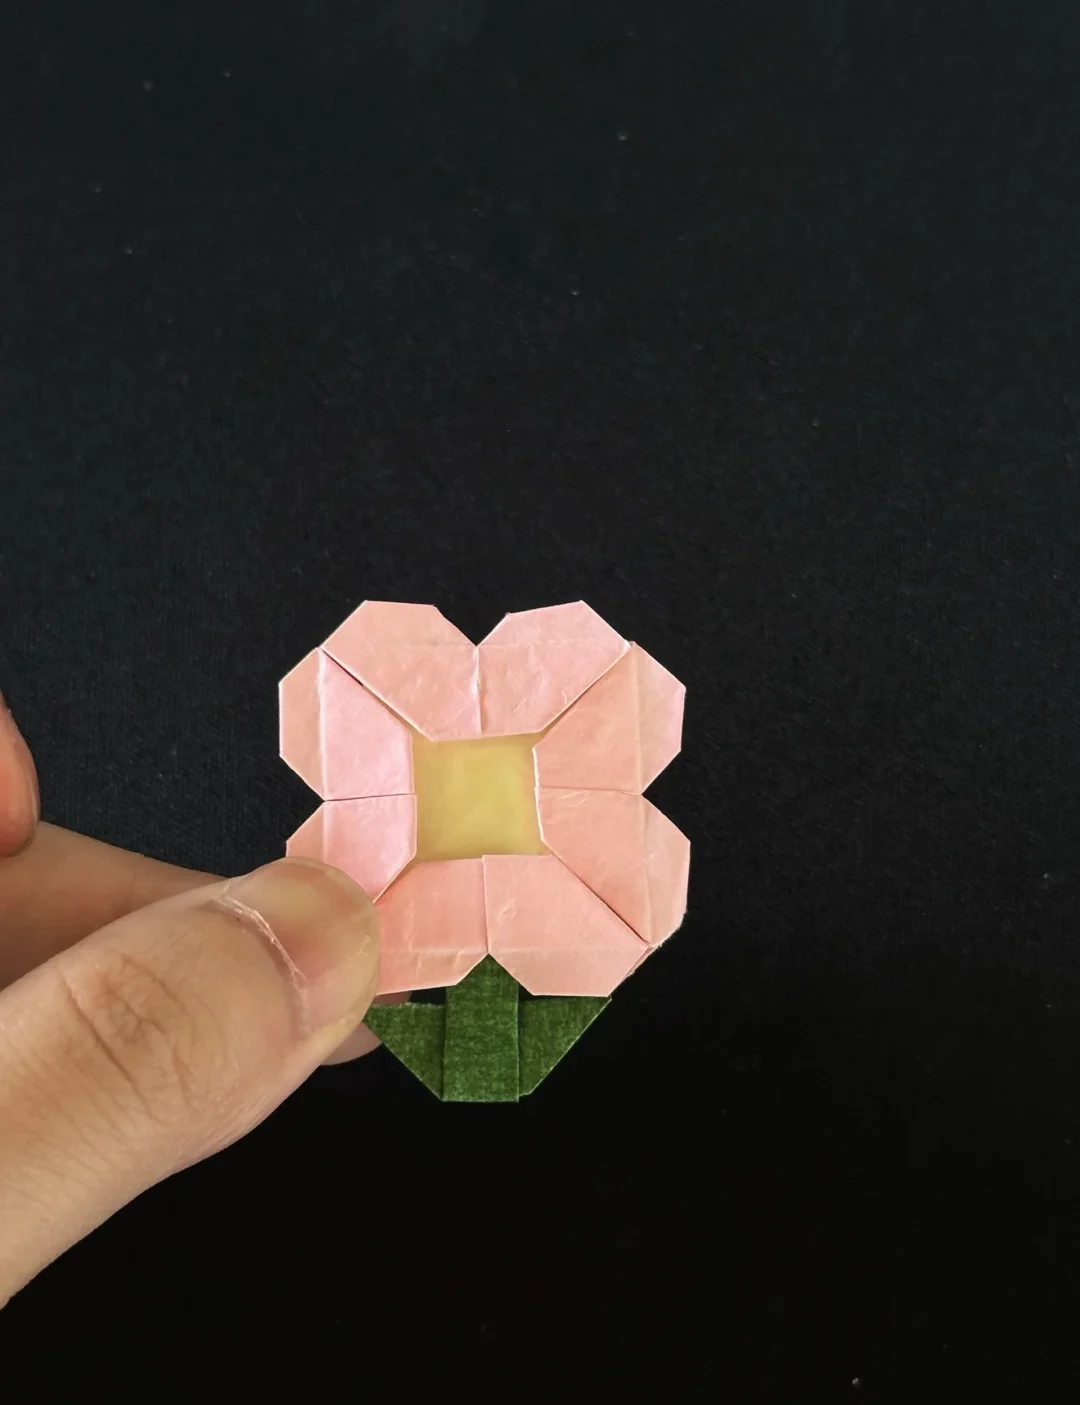
Use this finished example to compare the shape and proportions of your model.
Finished model
 Open image at full size ↗
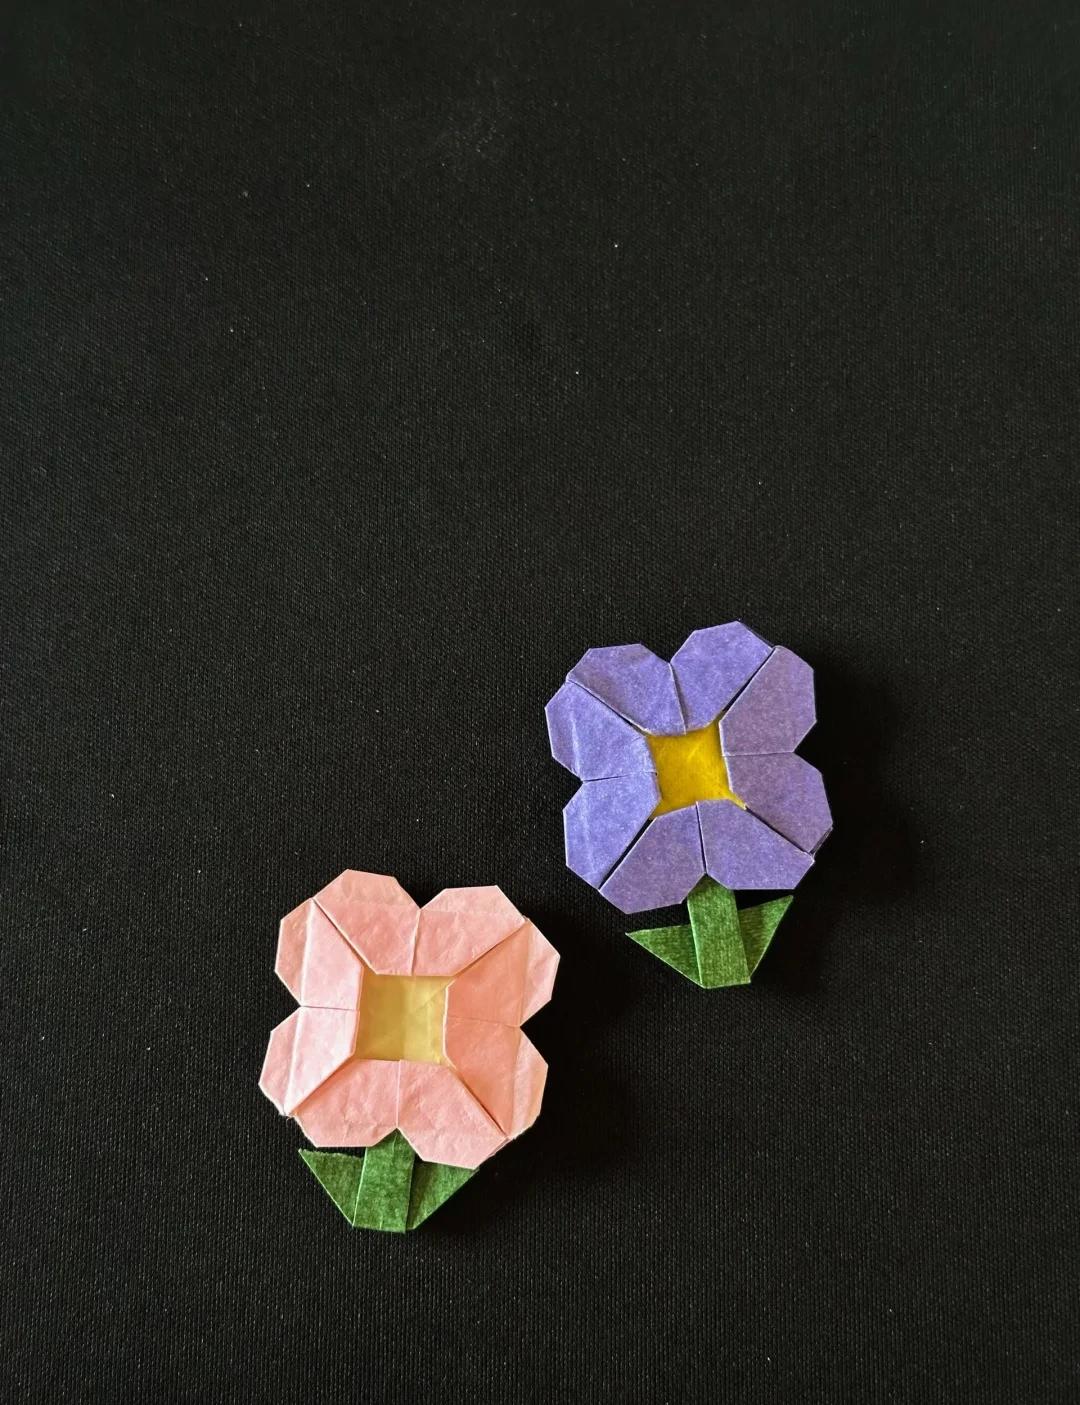
Use this finished example to compare the shape and proportions of your model.
Finished model
 Open image at full size ↗
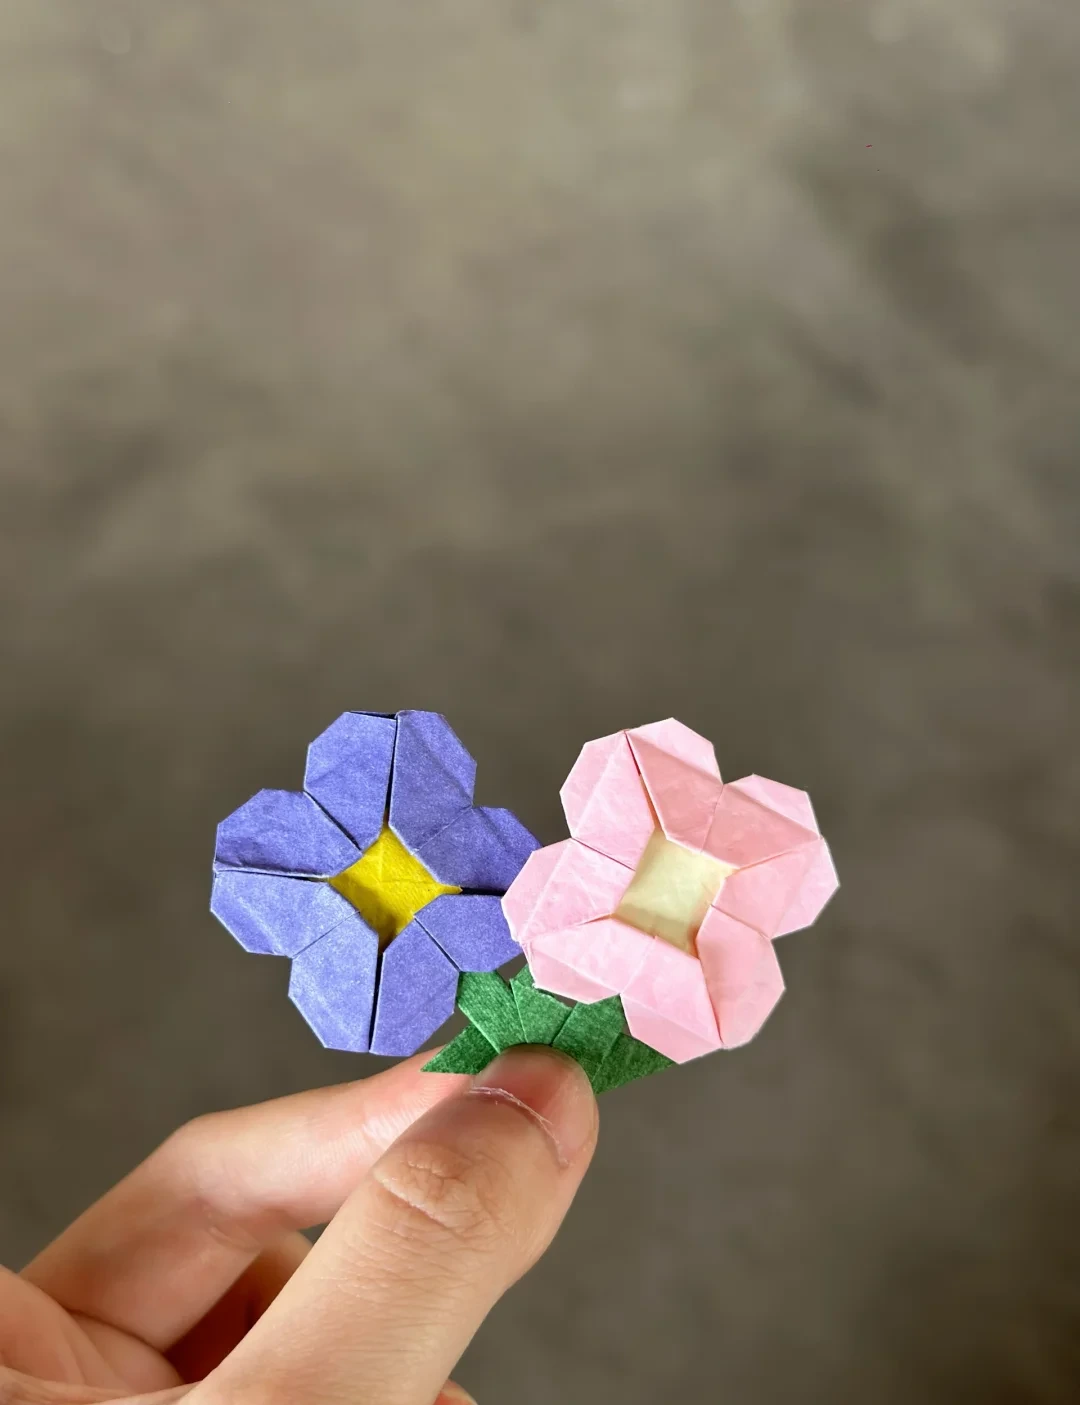
Use this finished example to compare the shape and proportions of your model.
Follow the diagrams alongside the step-by-step English instructions.
Choose your next project →