
Flowers & nature · Step-by-step guide
Tiny Osmanthus Flowers and Leaves
Fold miniature four-petal blossoms and accompanying leaves. The crescent in the display is a separate decoration; this sequence covers the flowers and leaves.
What you’ll need
- Small yellow or white paper squares
- Green paper squares for leaves
- Craft glue, optional
Origami · Creasing, collapse folds & shaping
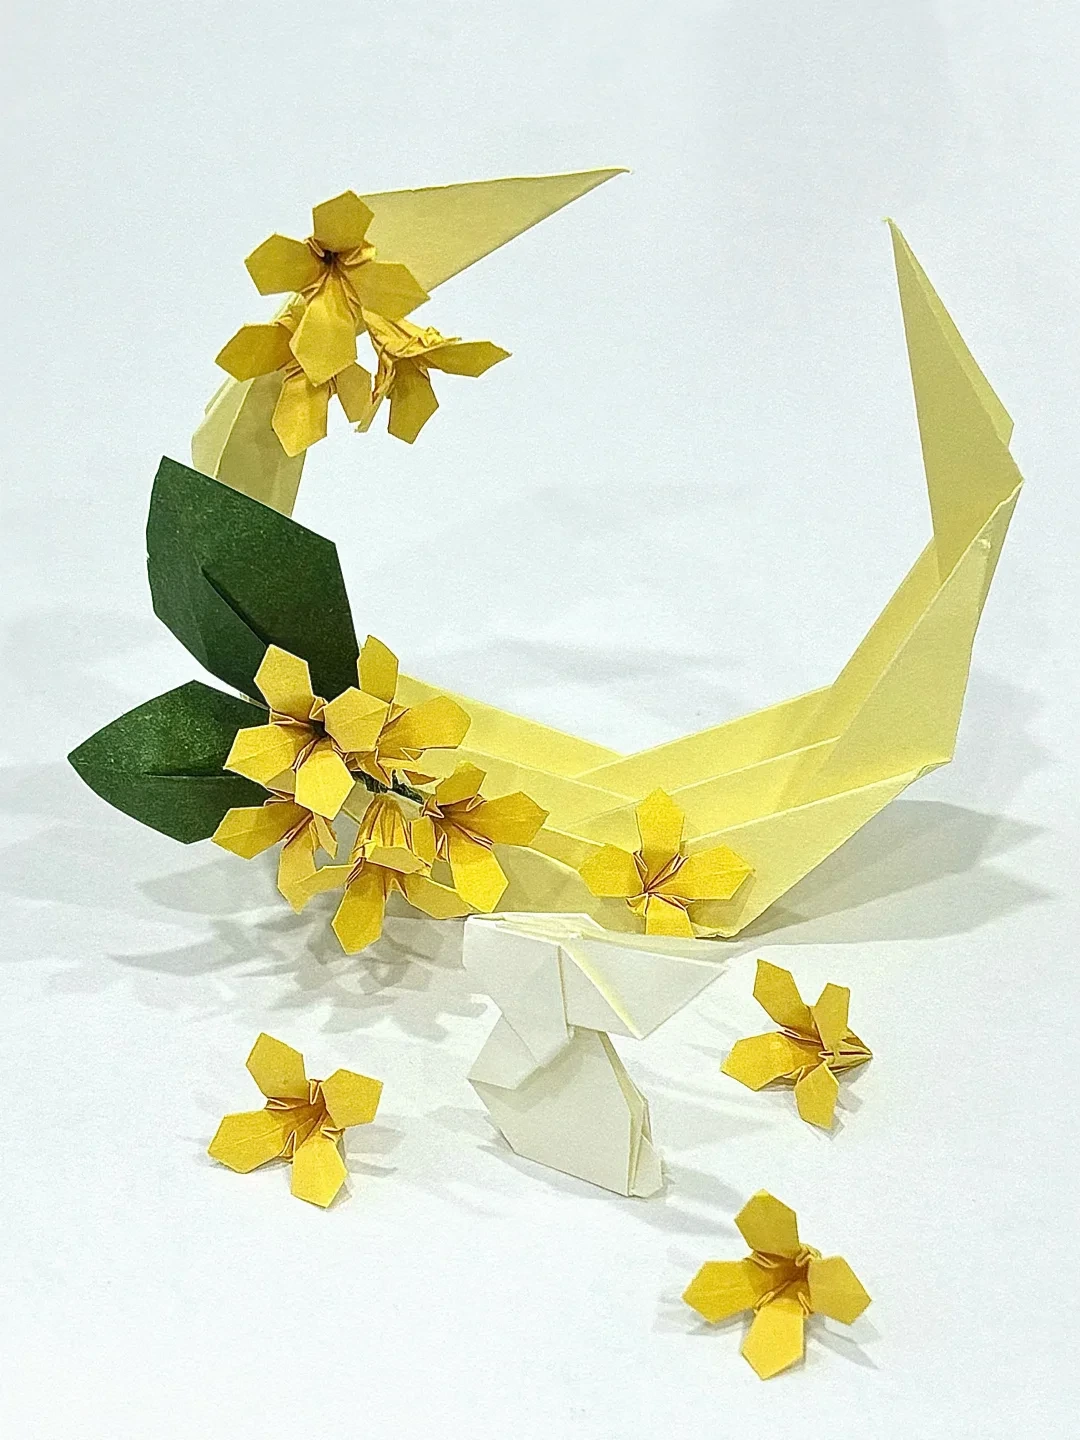
Make it, step by step.
16 steps · Original diagrams with English instructions
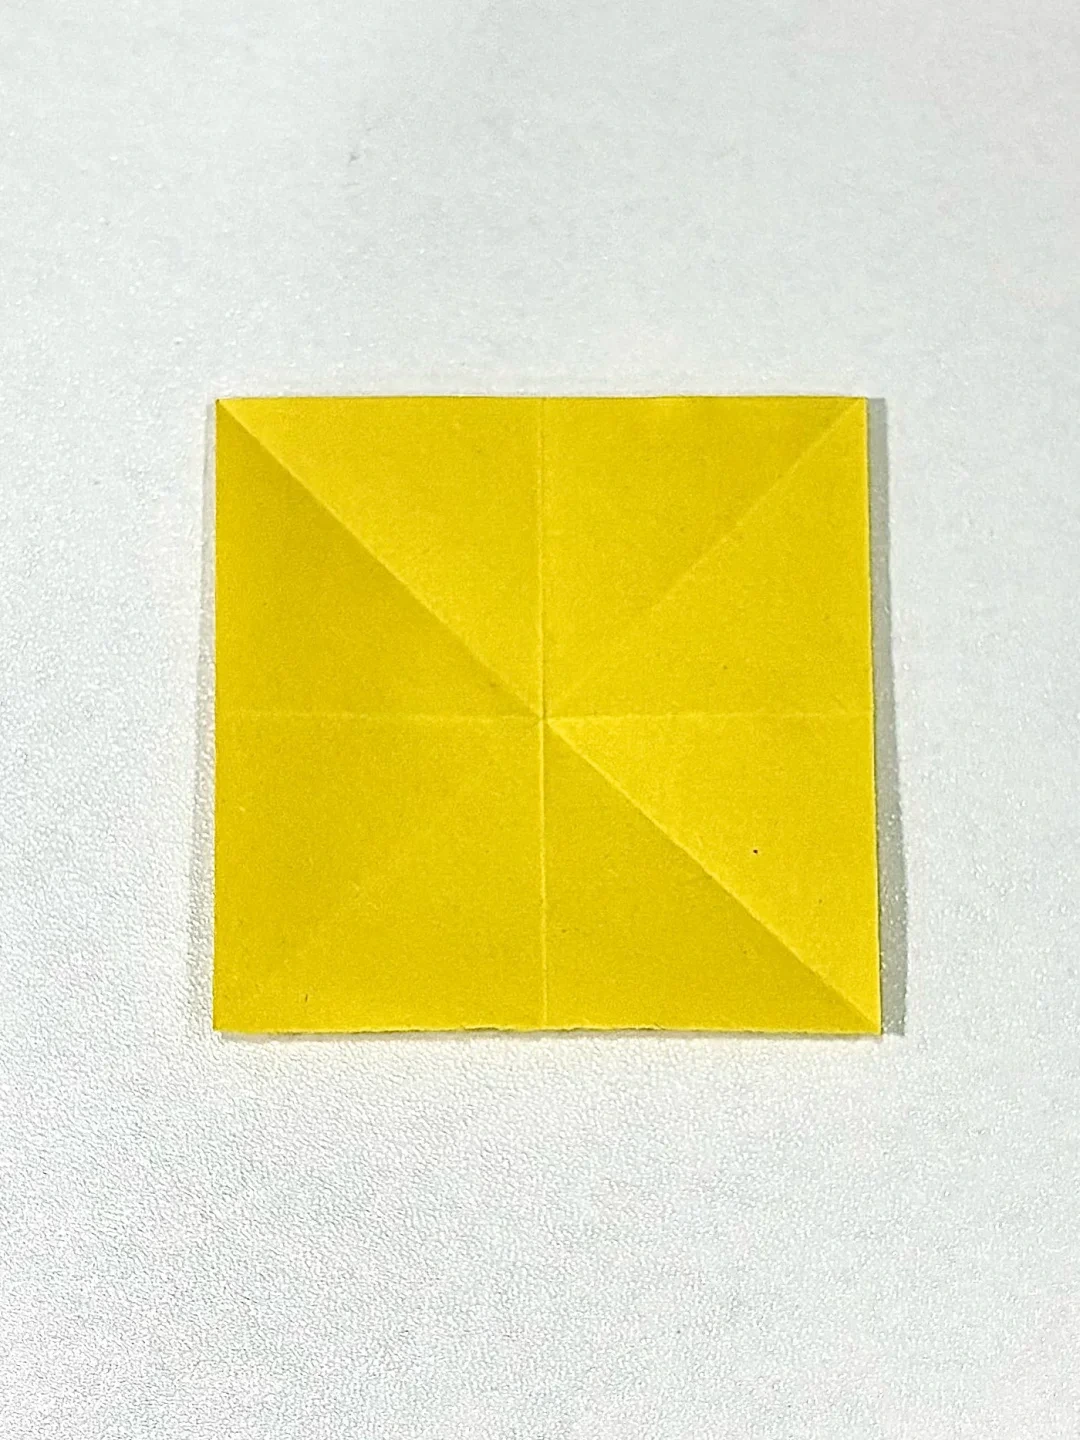
Precrease the flower paper
 Open image at full size ↗
Fold the square in half both ways and along both diagonals, then unfold it.
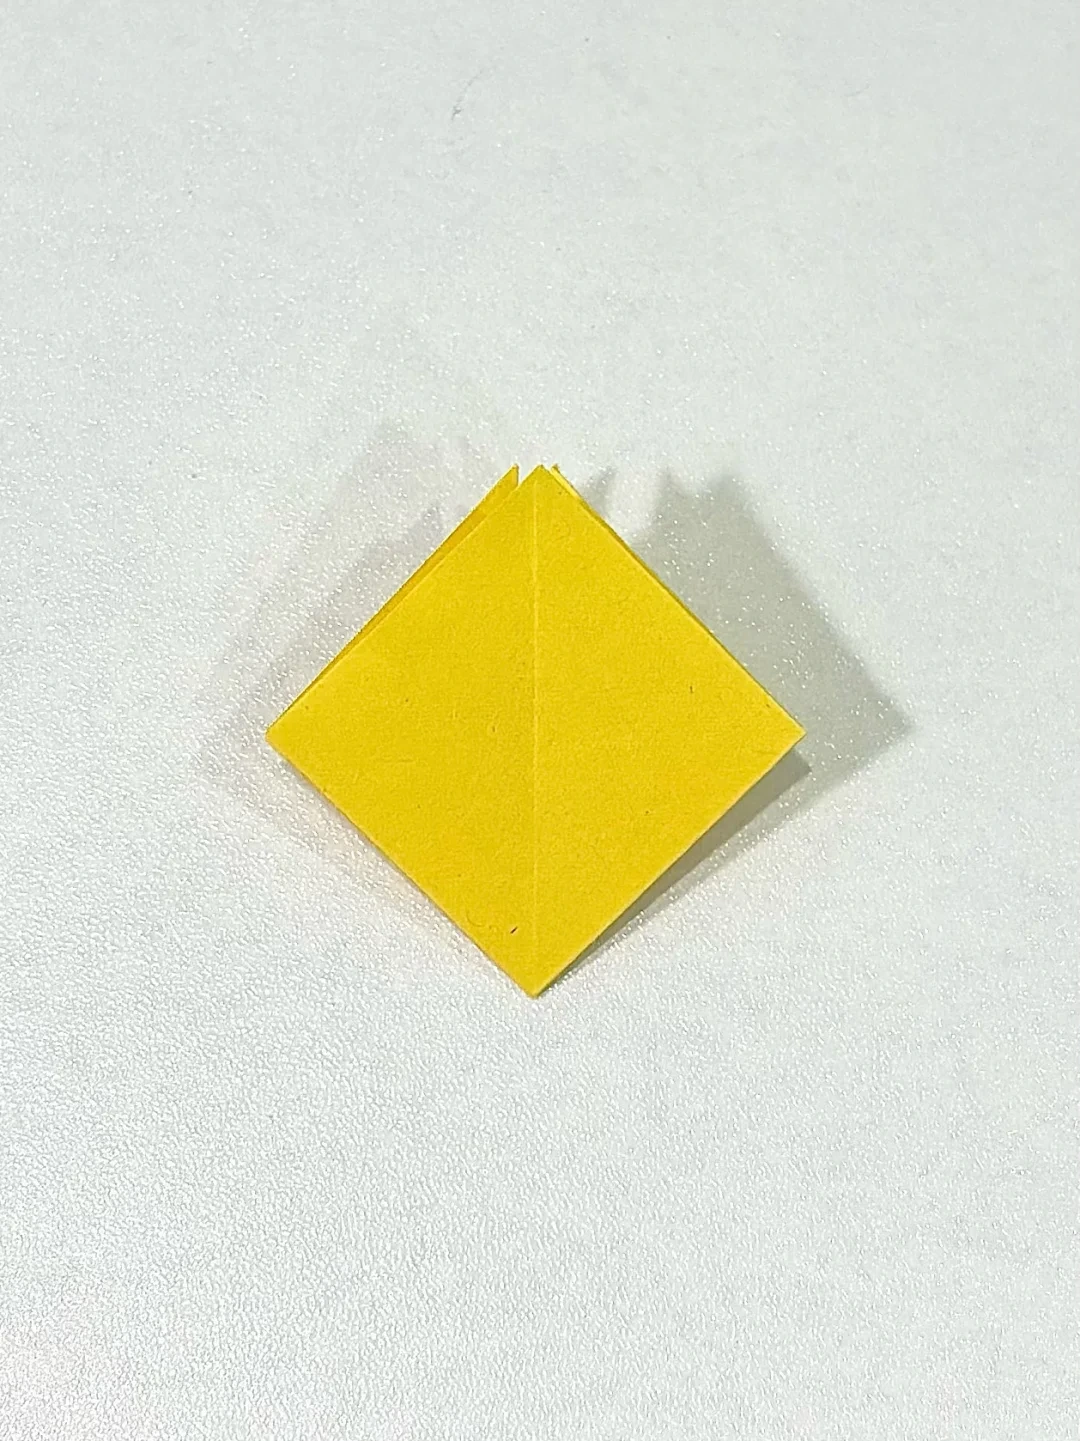
Collapse a square base
 Open image at full size ↗
Bring the straight creases inward and flatten the paper into a layered square with its open points facing down.
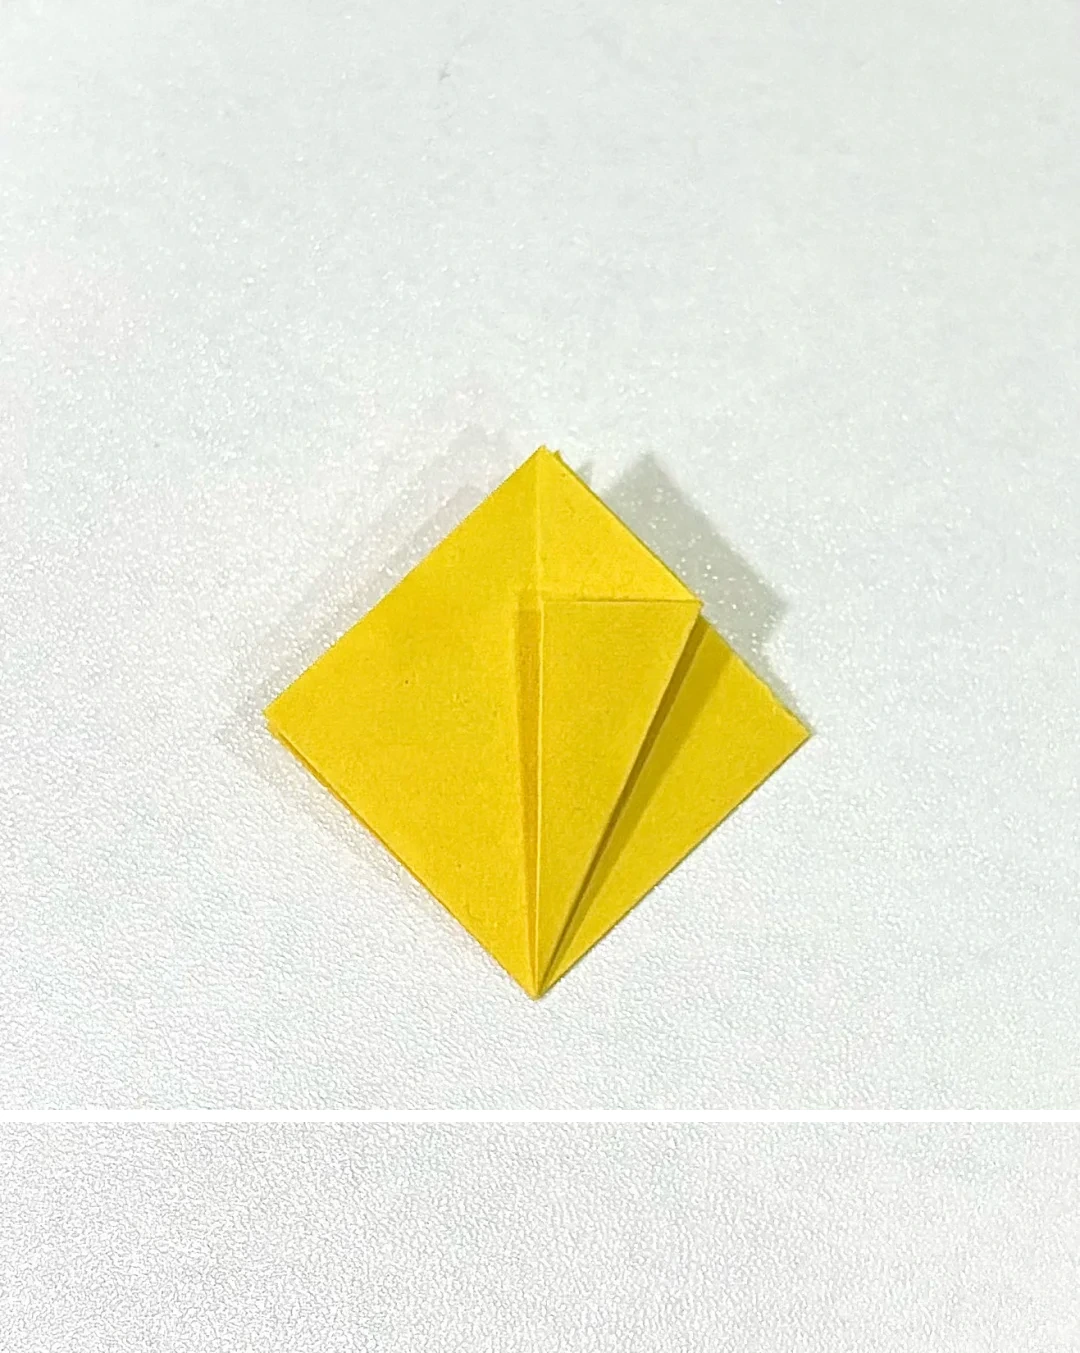
Mark a narrow flap
 Open image at full size ↗
Fold the two lower edges of the front layer toward the center line.
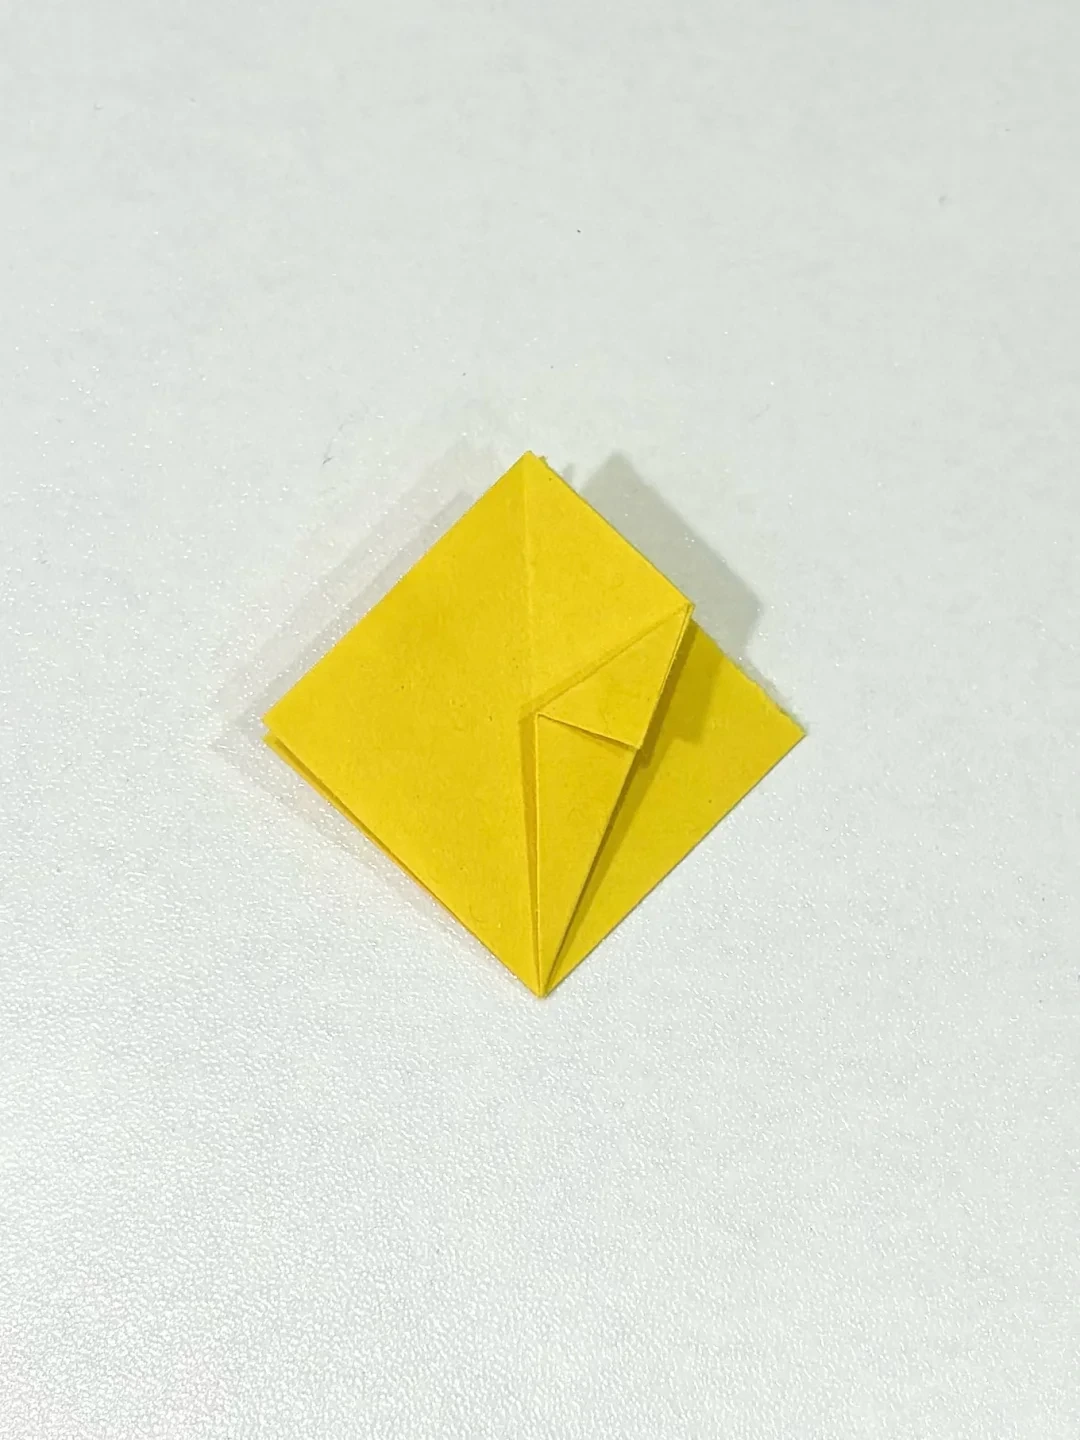
Repeat the creases
 Open image at full size ↗
Repeat the edge folds on the other faces of the layered base.
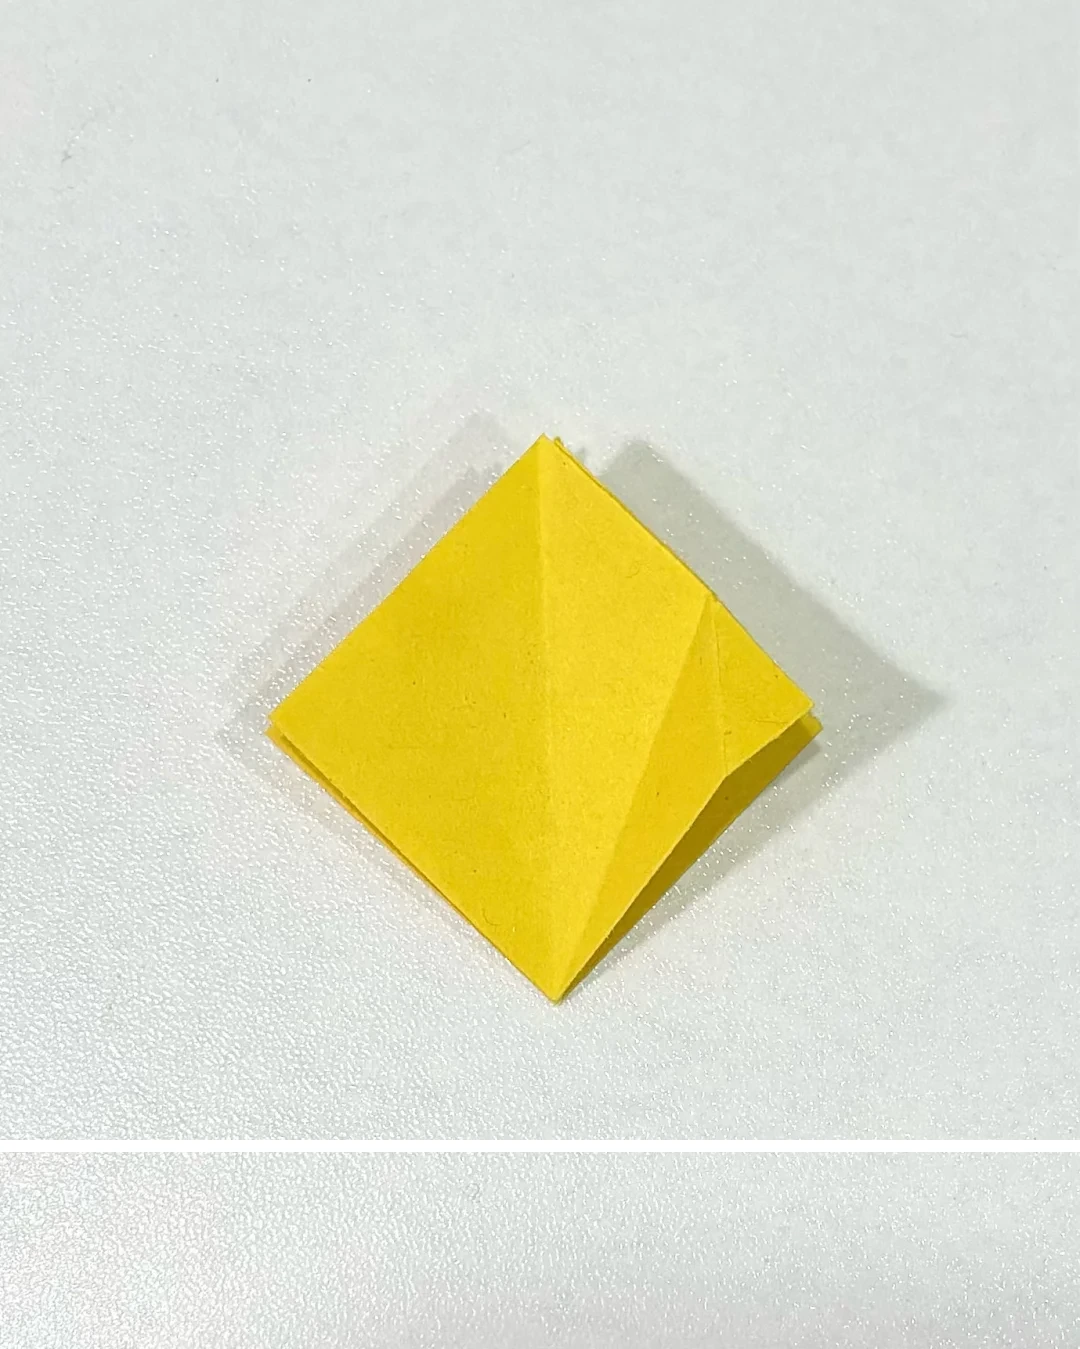
Unfold the flap
 Open image at full size ↗
Open the two edges you just folded, leaving their guide creases visible.
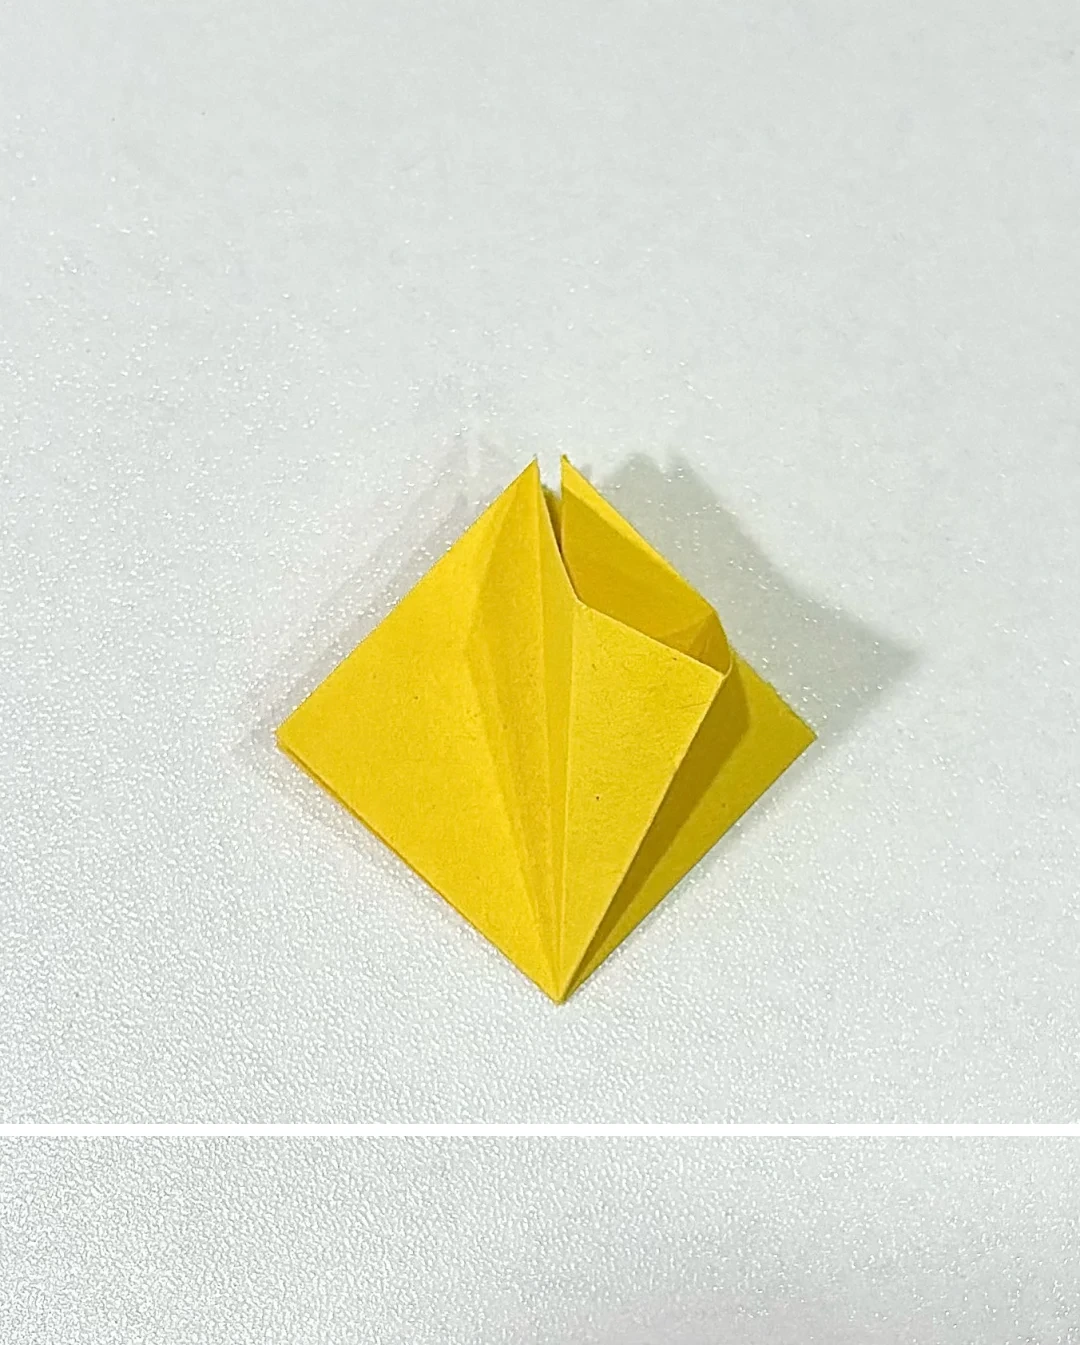
Open the pocket
 Open image at full size ↗
Lift the front layer and open its pocket along the creases.
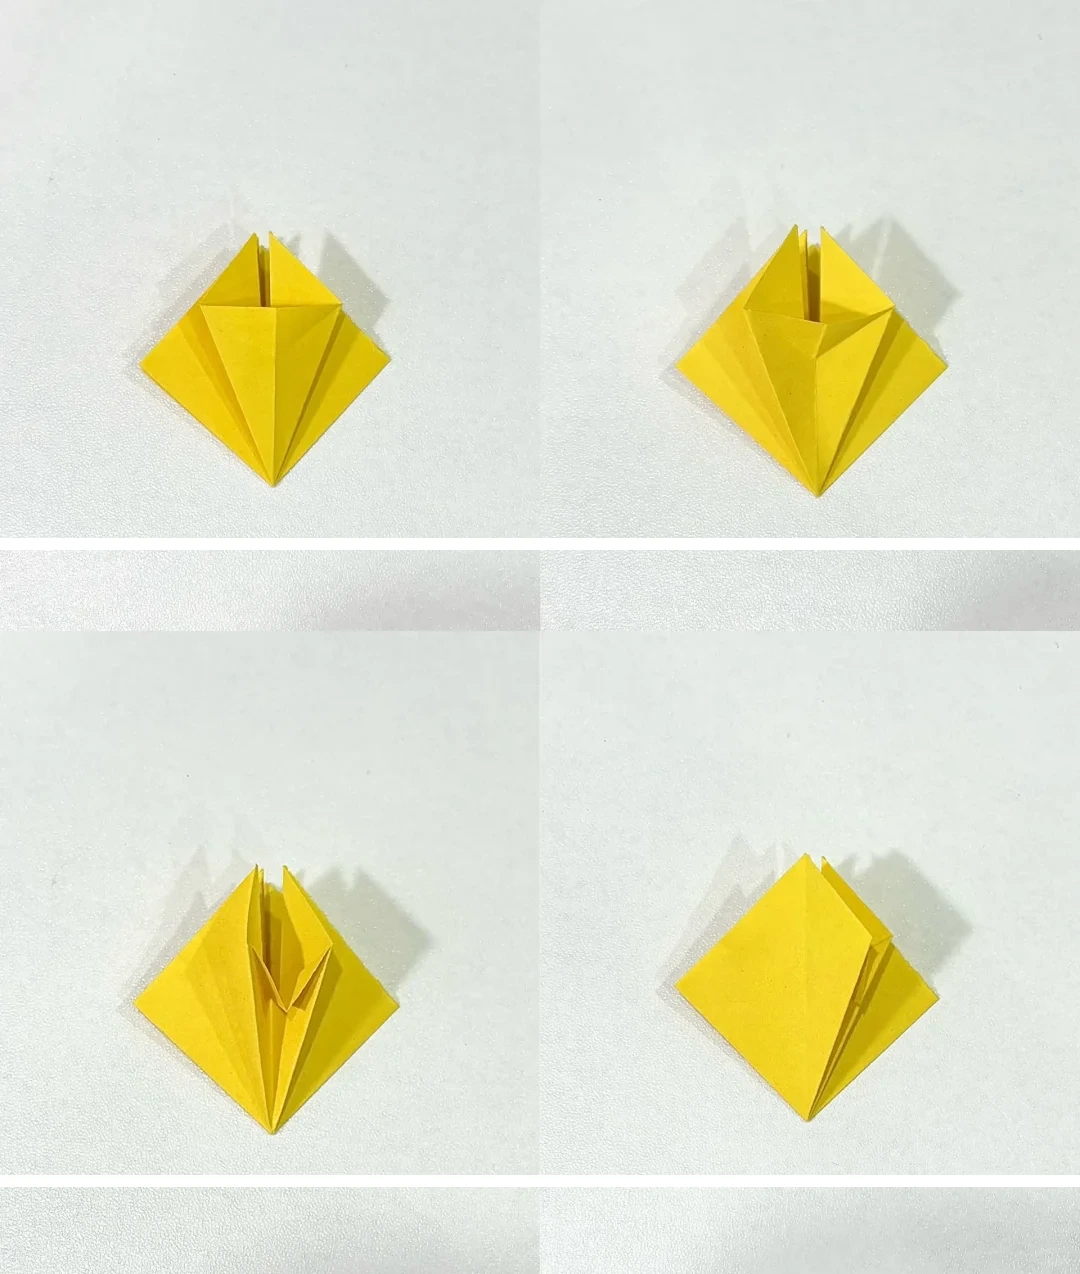
Shape each section
 Open image at full size ↗
Flatten the pocket along the guide creases. Pull out the small triangular section, then close the sides together. Repeat around the base.
Check the petal base
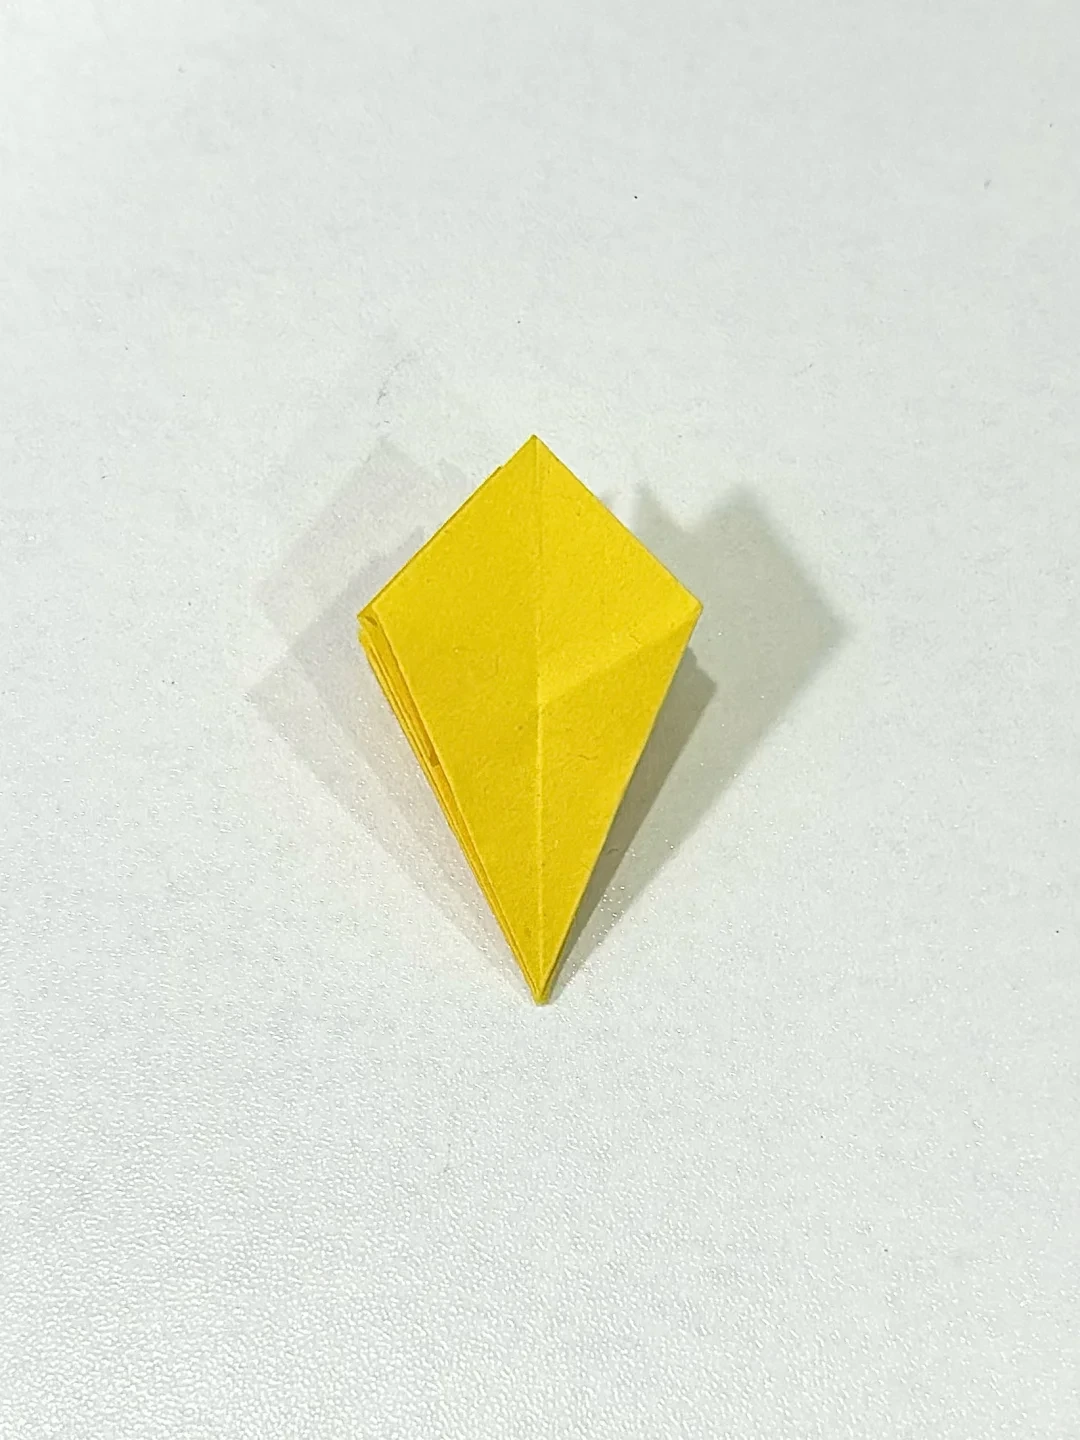 Open image at full size ↗
Arrange the layers into the narrow diamond shown, keeping the tips aligned.
Narrow the petals
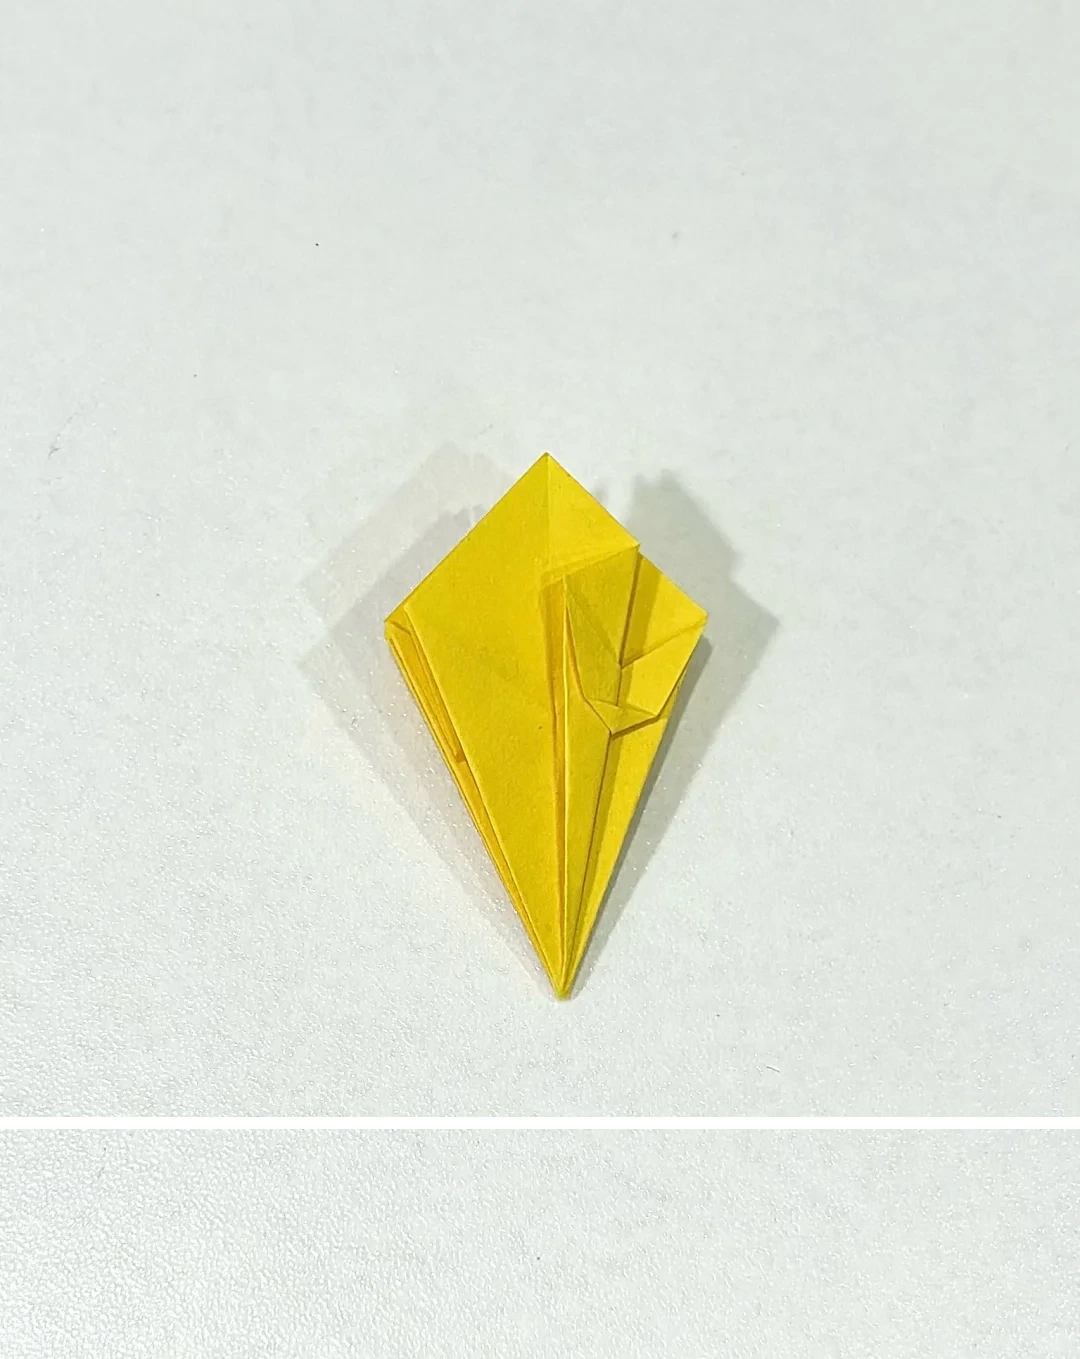 Open image at full size ↗
Fold the outer edges inward toward the center on each face.
Open the blossom
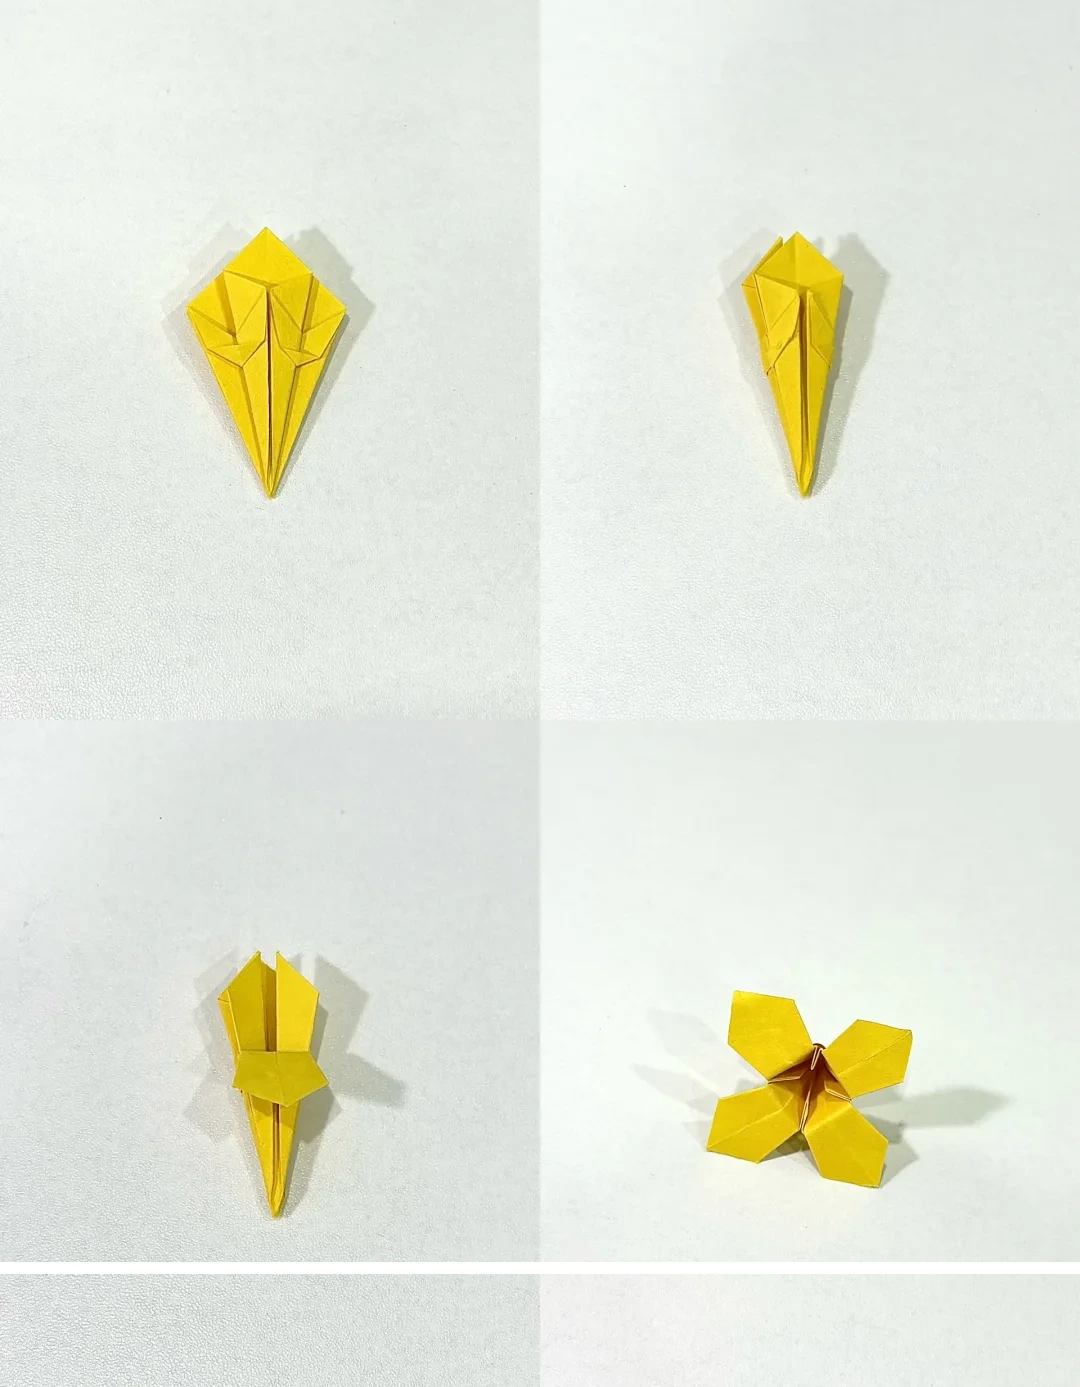 Open image at full size ↗
Fold the petal points down and gently spread all four petals into a small flower.
Start a leaf
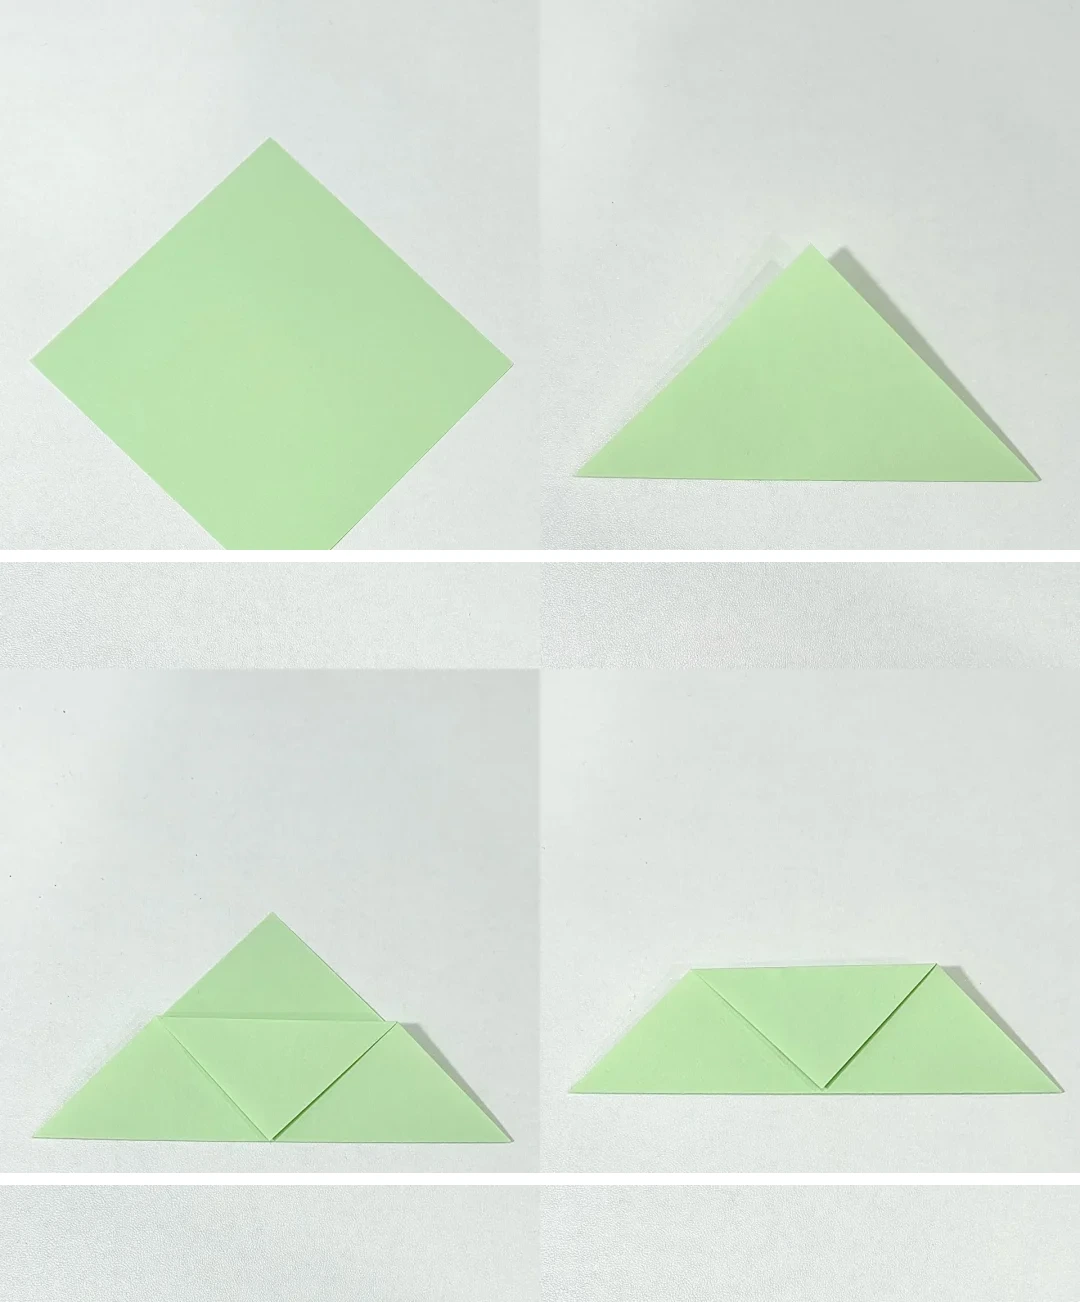 Open image at full size ↗
Fold a green square diagonally in half. Fold one layer downward, turn the piece over, and repeat on the other side.
Crease the leaf ends
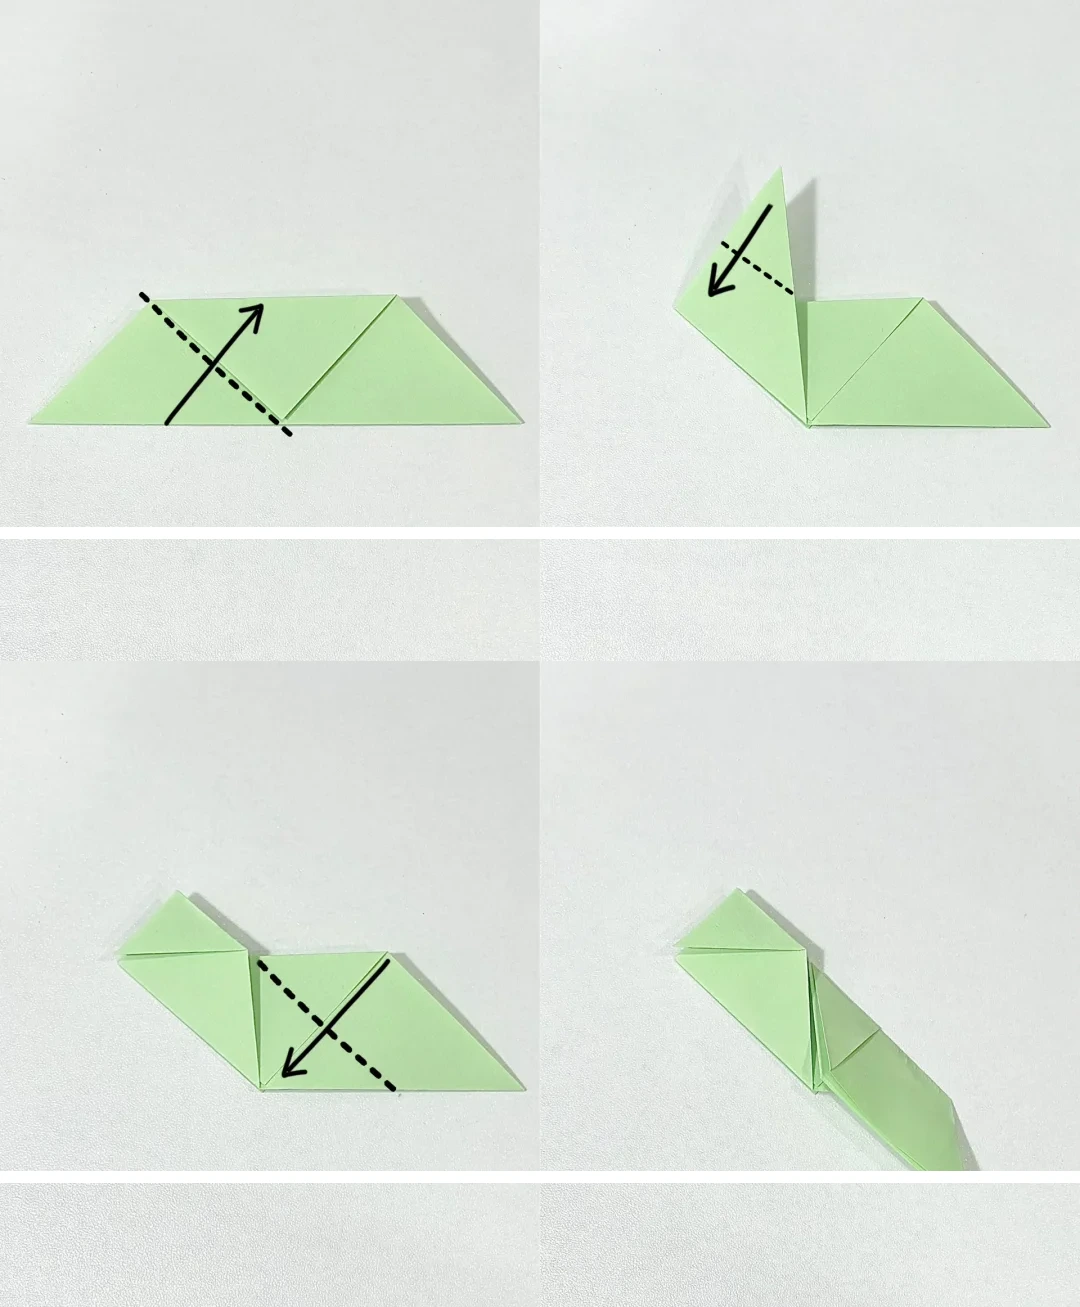 Open image at full size ↗
Follow the diagonal marks: fold the left section up, unfold it, and fold the corresponding section down on the other face.
Prepare the leaf pocket
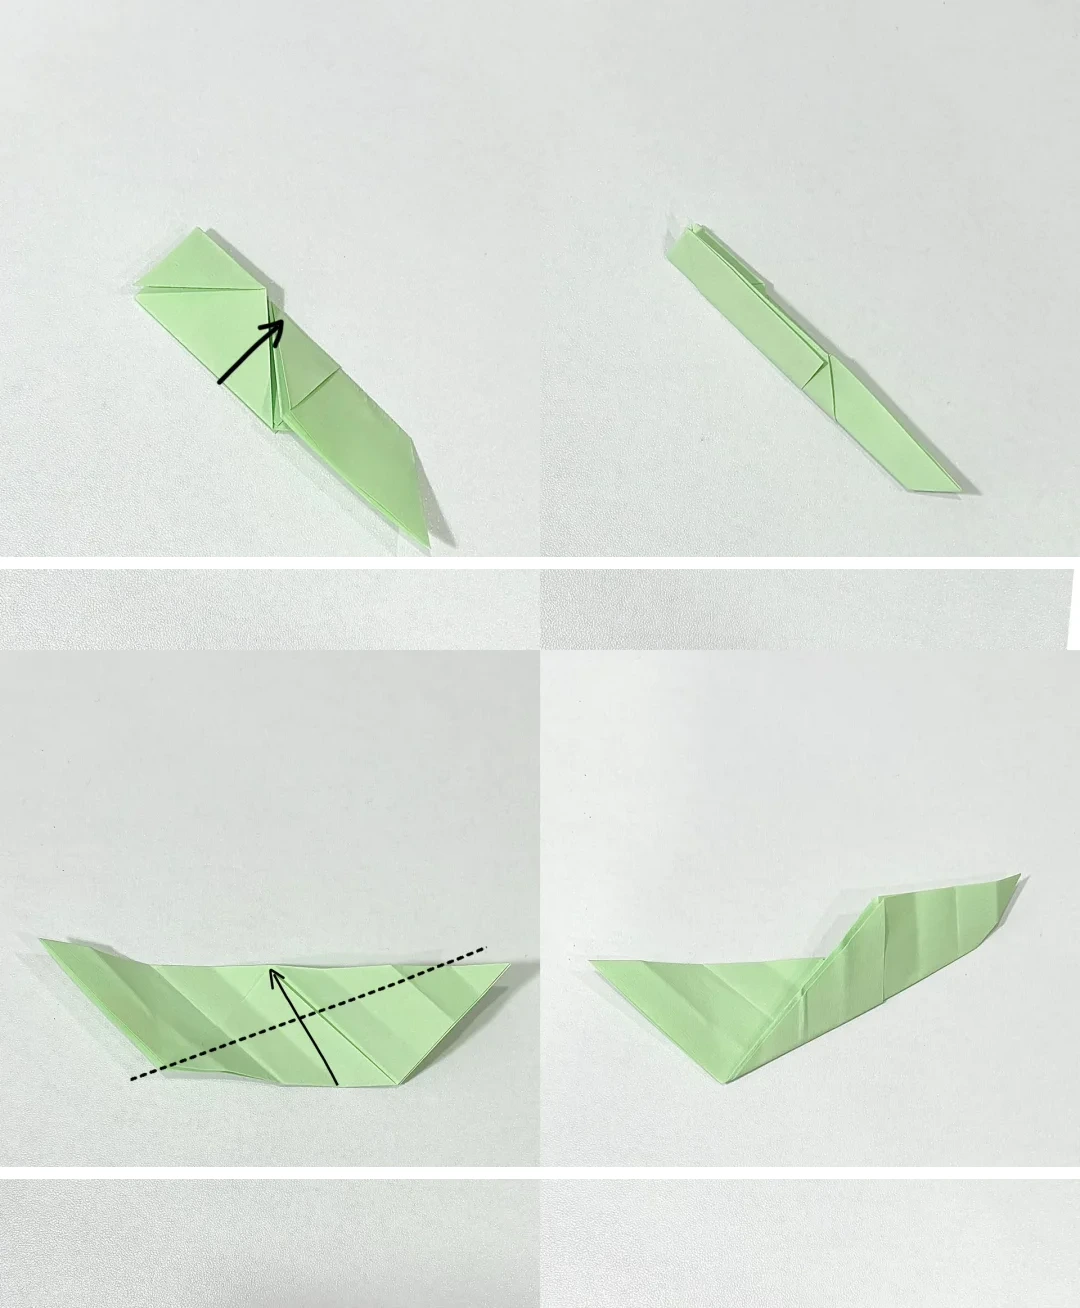 Open image at full size ↗
Fold the narrow piece in half, reopen it, and lift the long edge along the indicated crease.
Open and flatten
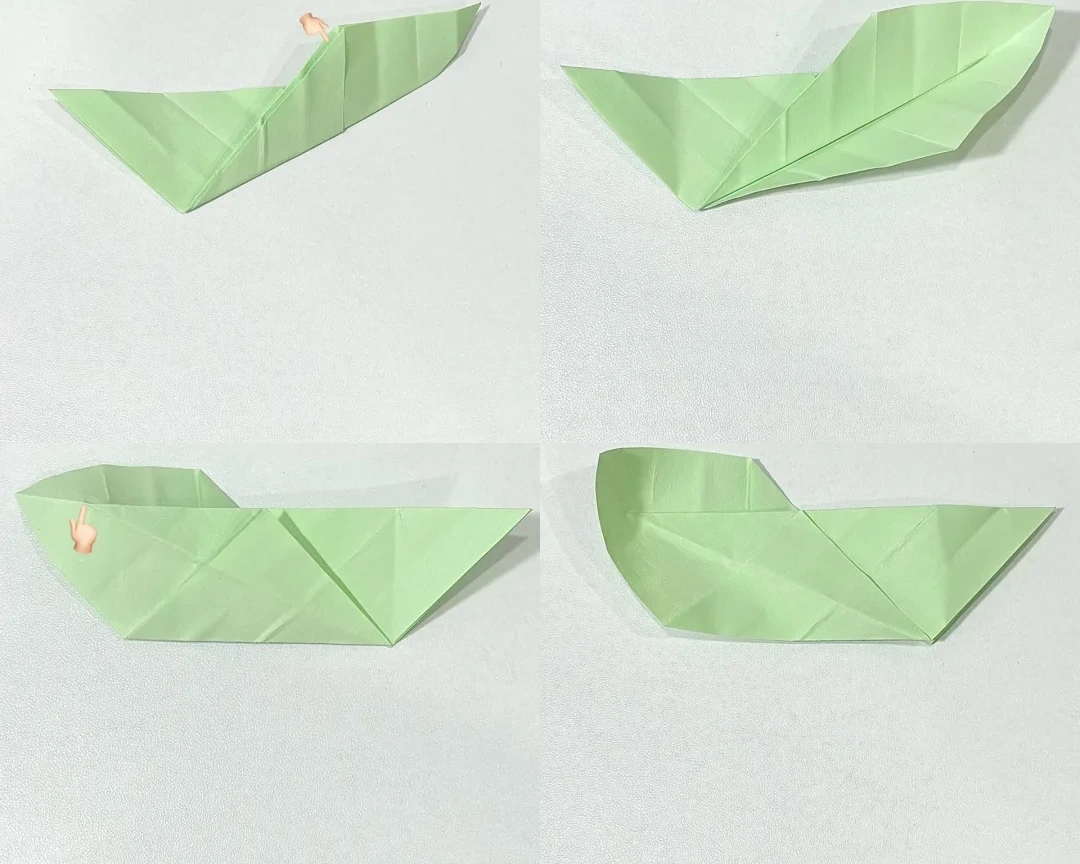 Open image at full size ↗
Open the pocket at the indicated point. Turn the leaf over and press the raised section down to flatten it.
Shape the leaf
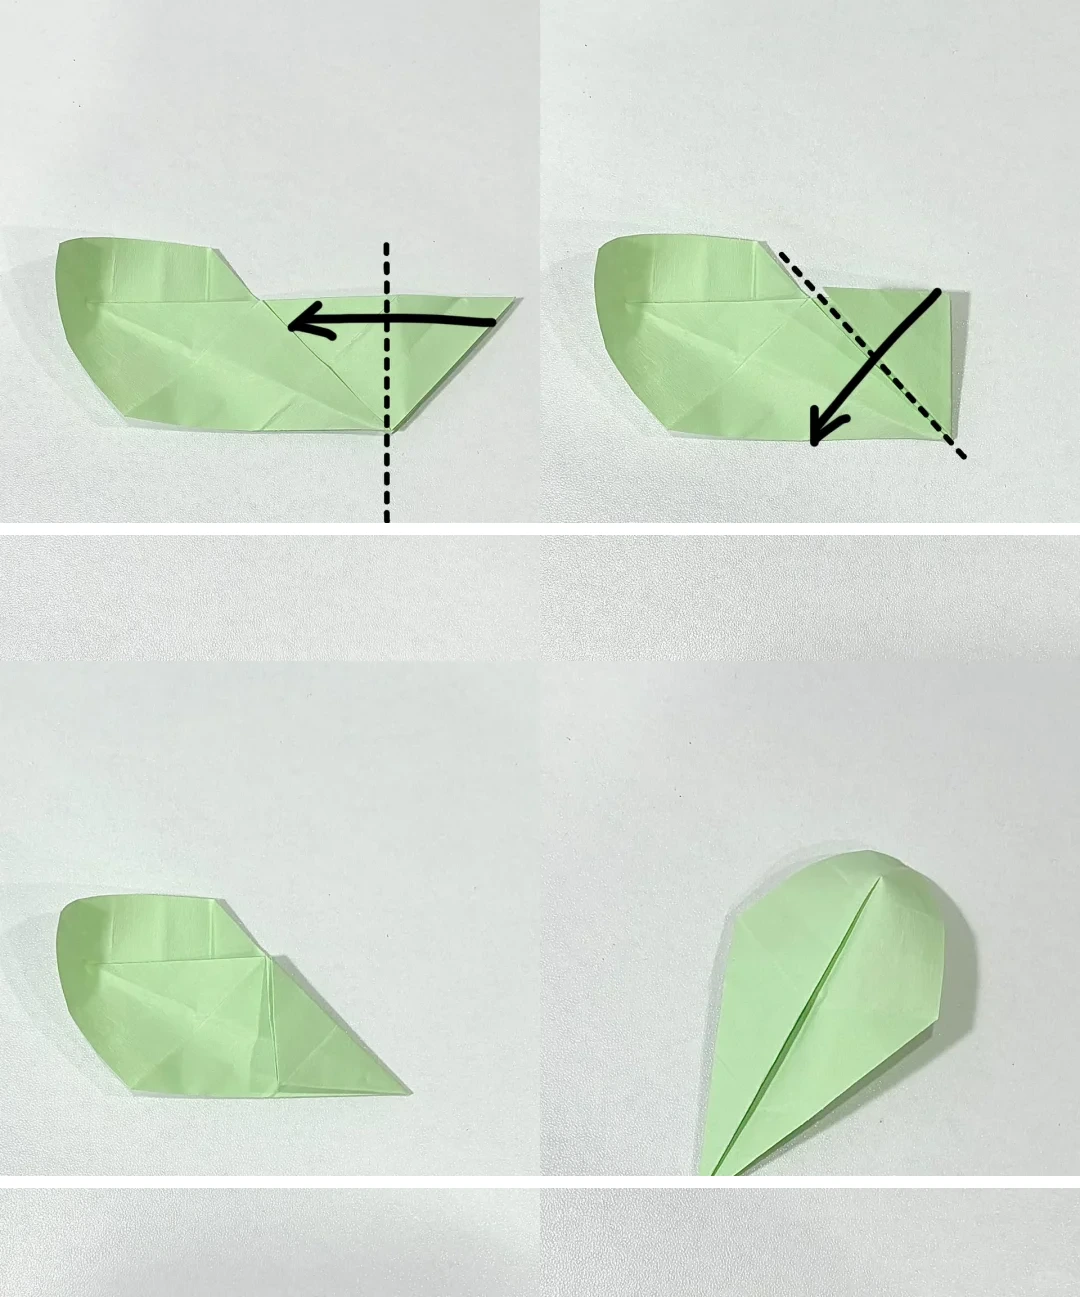 Open image at full size ↗
Fold the indicated section down, then fold the end inward along the diagonal. Turn over to reveal the finished leaf.
Arrange the flowers
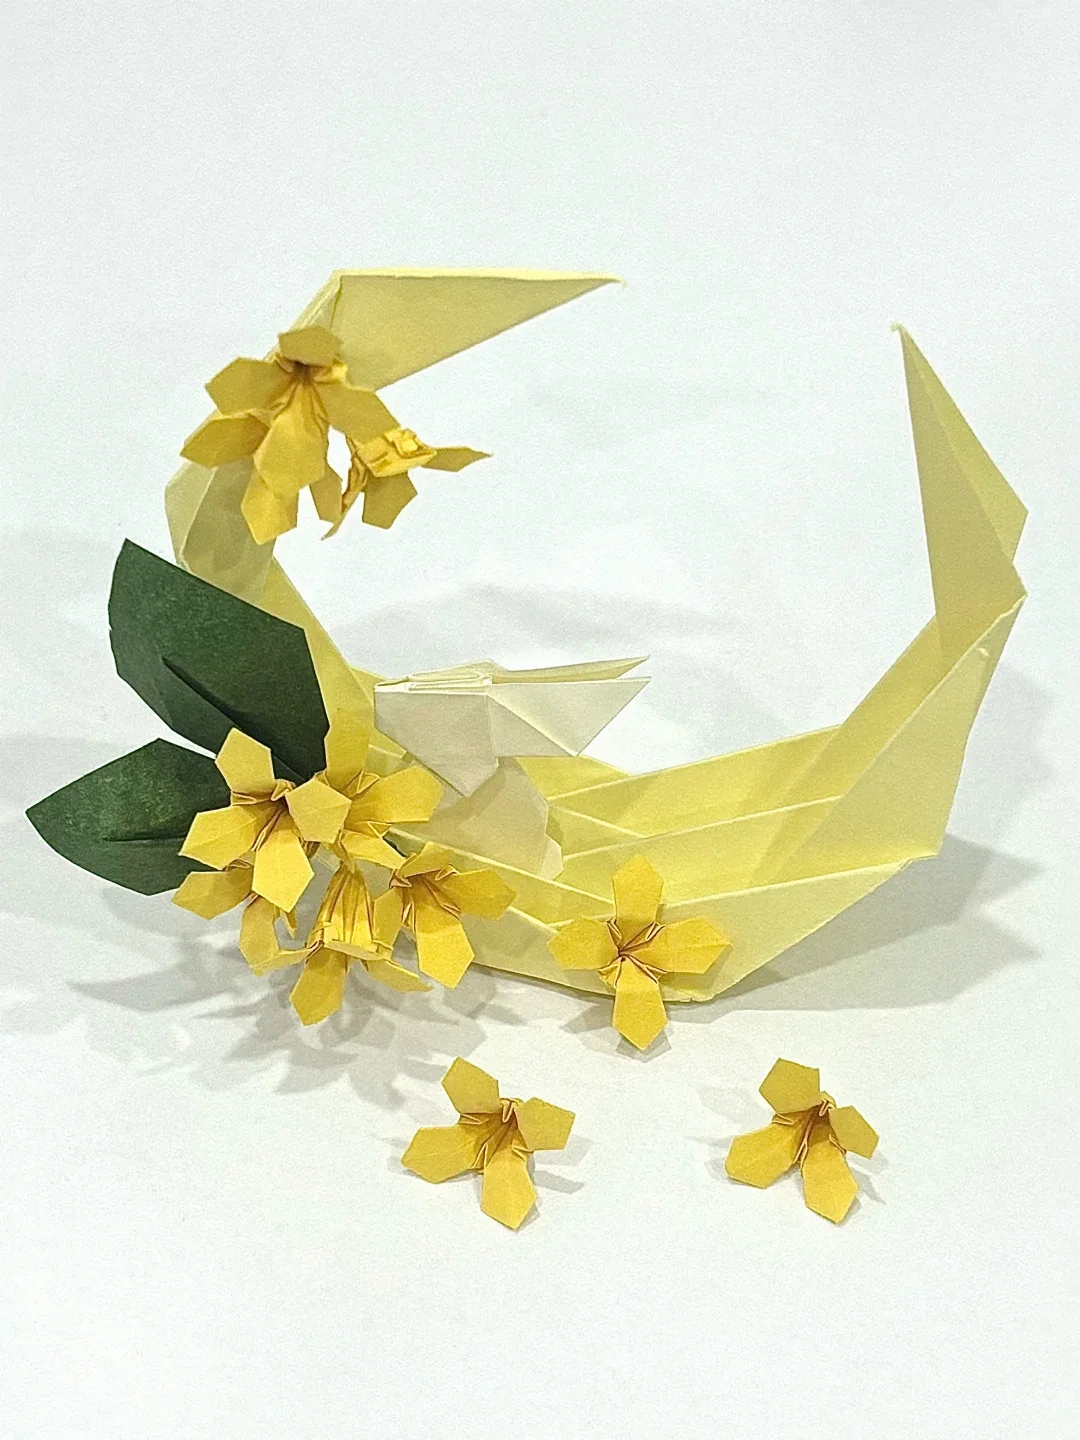 Open image at full size ↗
Repeat the blossom and leaf folds as needed. Group them on a card, wreath, or a separately made display base.
Follow the diagrams alongside the step-by-step English instructions.
Choose your next project →