
Paper toys · Step-by-step guide
Three-Piece Spinning Top
Combine three folded modules into a colorful spinning top.
What you’ll need
- Three square sheets in different colors
Paper folding and shaping

Make it, step by step.
36 steps · Original diagrams with English instructions
Steps 1–4
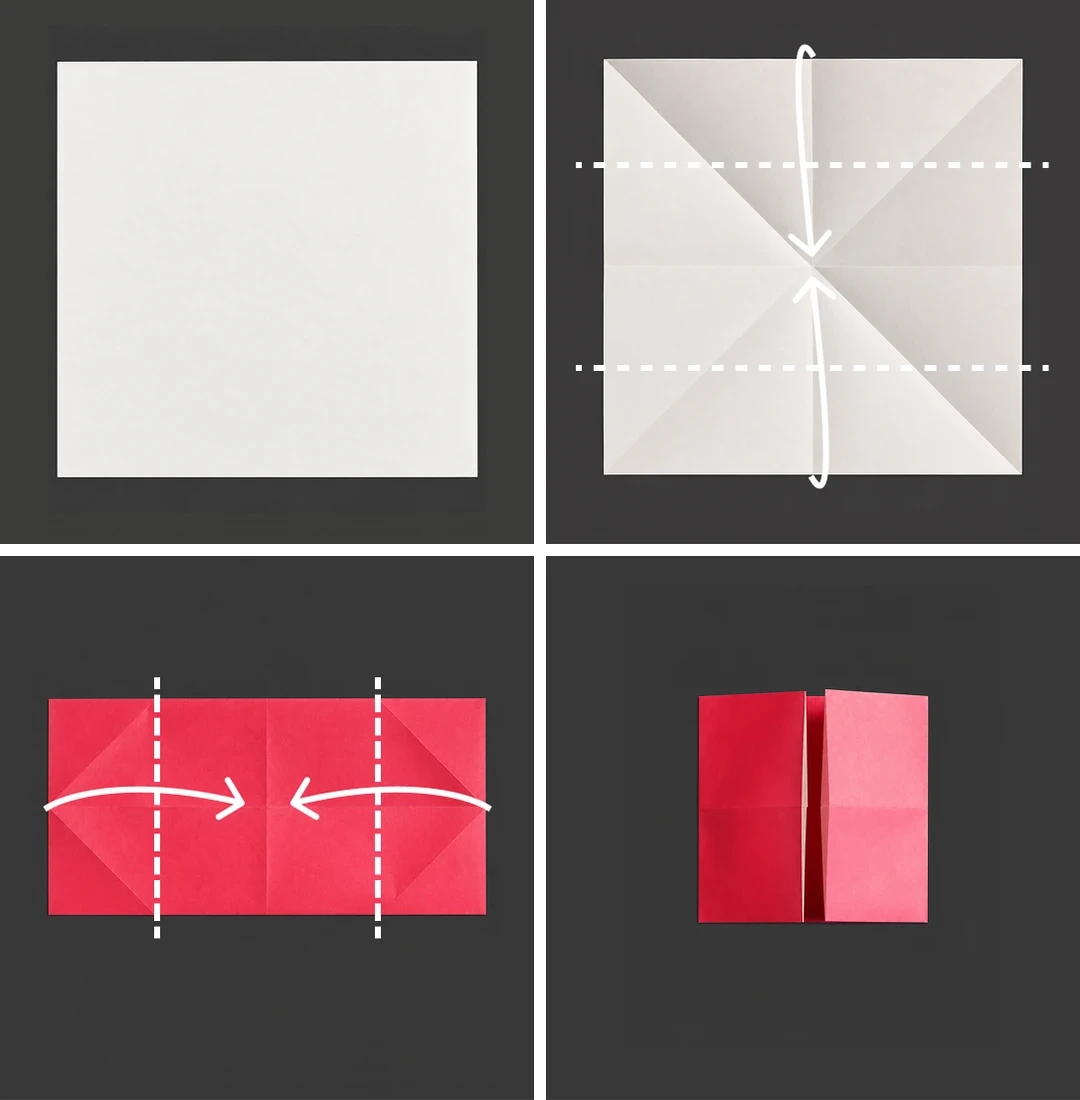 Open image at full size ↗
Prepare the first square sheet.
Crease both diagonals and midlines, then fold inward along the dotted lines.
Fold both sides toward the center.
Press the creases, then open.
Steps 5–8
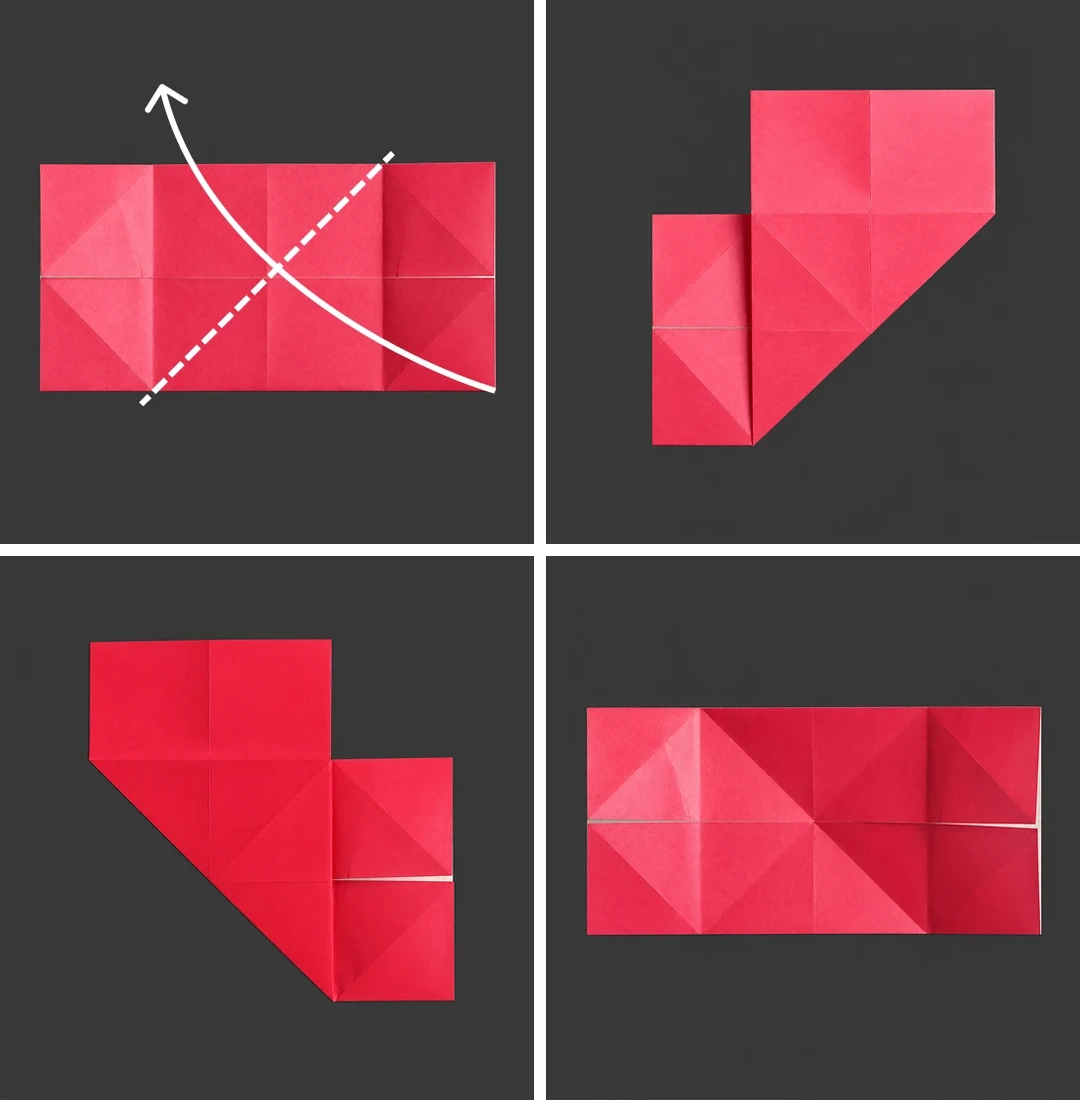 Open image at full size ↗
Fold the lower-right edge toward the left along the dotted line.
Crease firmly, then unfold.
Repeat on the left.
Open to reveal the crease pattern.
Steps 9–12
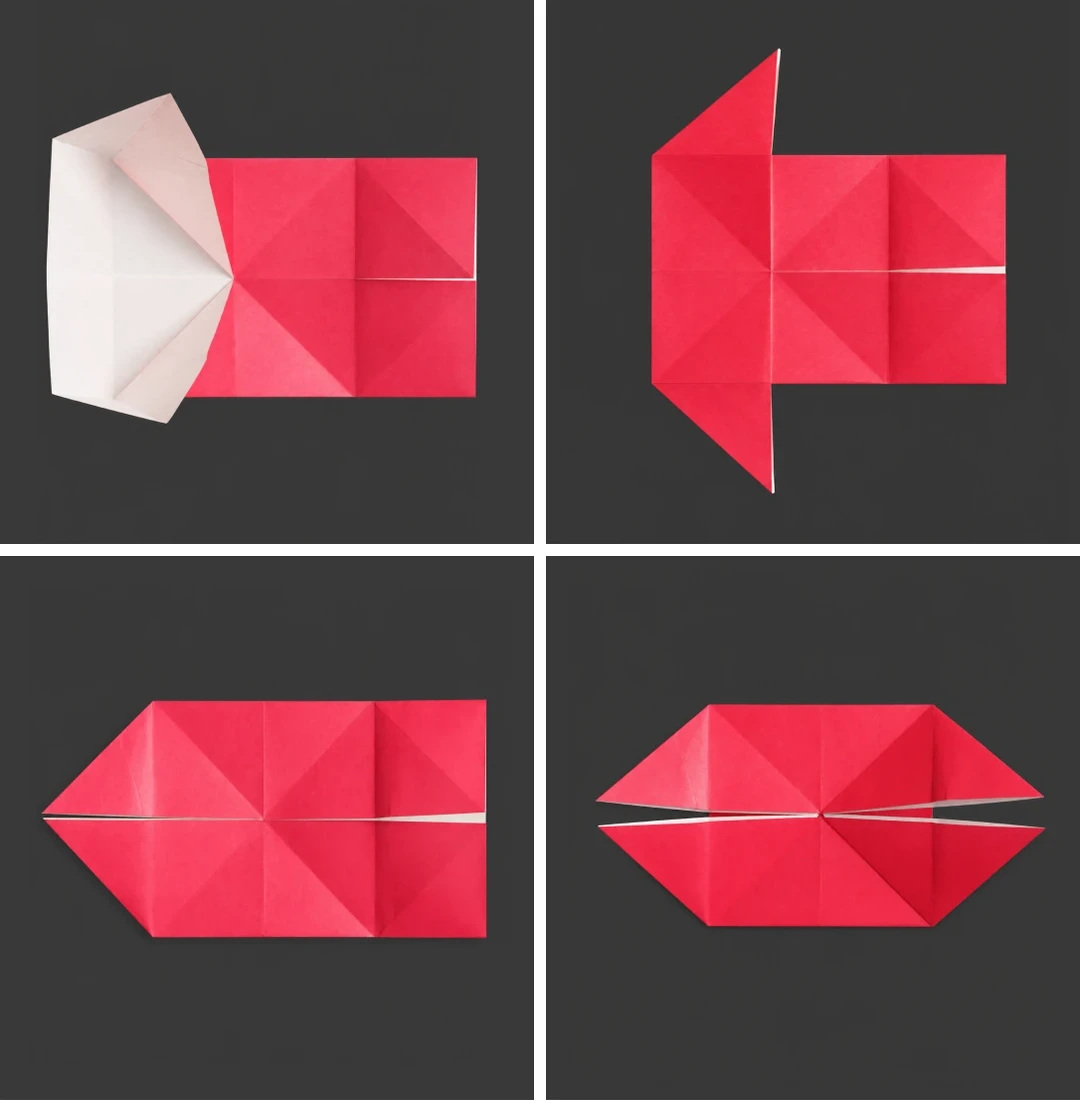 Open image at full size ↗
Open the pocket along the left diagonal crease.
Fold the upper and lower corners to the left.
Flatten into the illustrated shape.
Repeat steps 9–11 on the right.
Steps 13–16
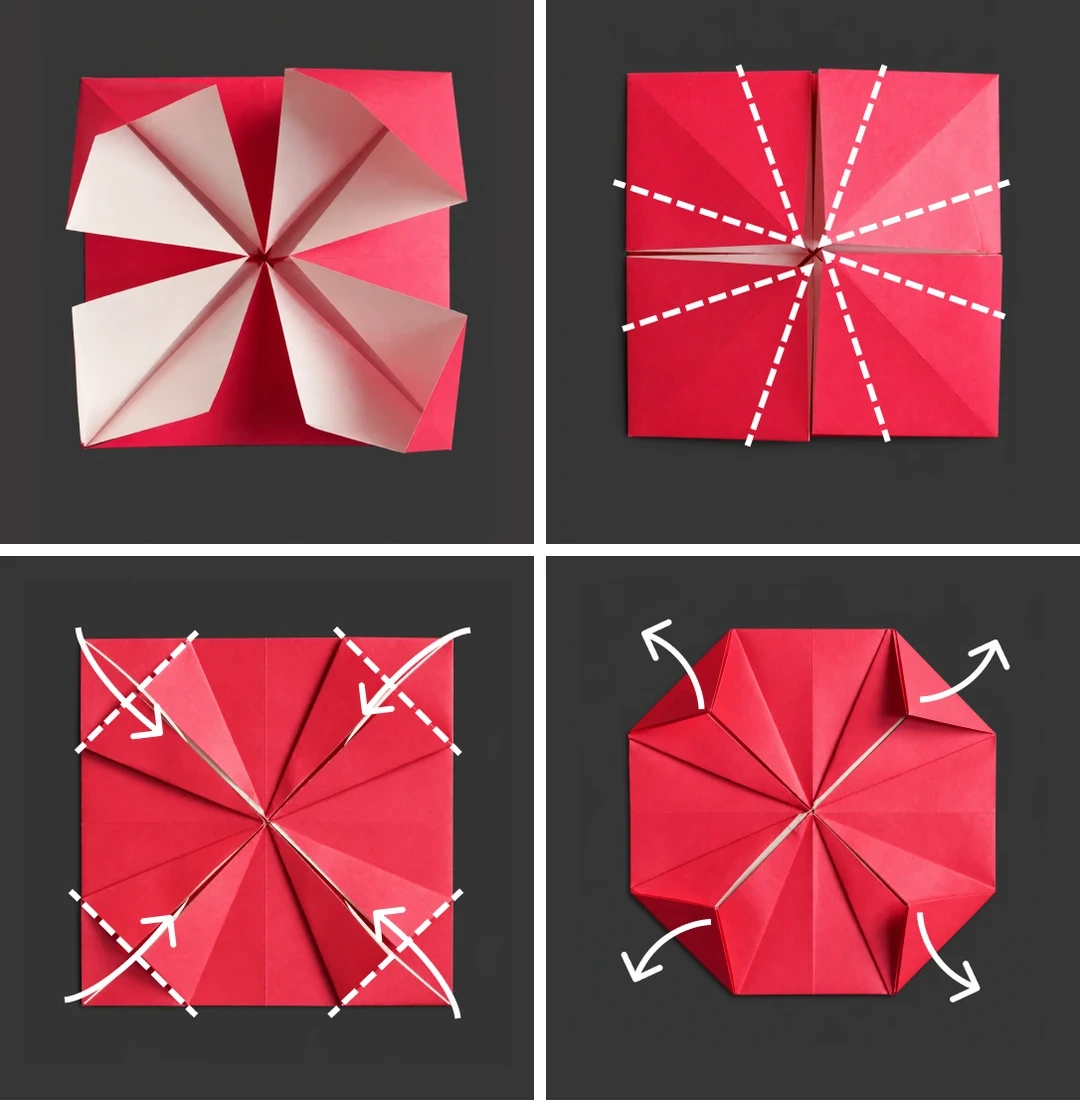 Open image at full size ↗
Open and squash each of the four small flaps.
Fold each small square inward along its two dotted lines.
Fold the triangles at the four corners inward.
Press the creases and reopen the corners.
Steps 17–20
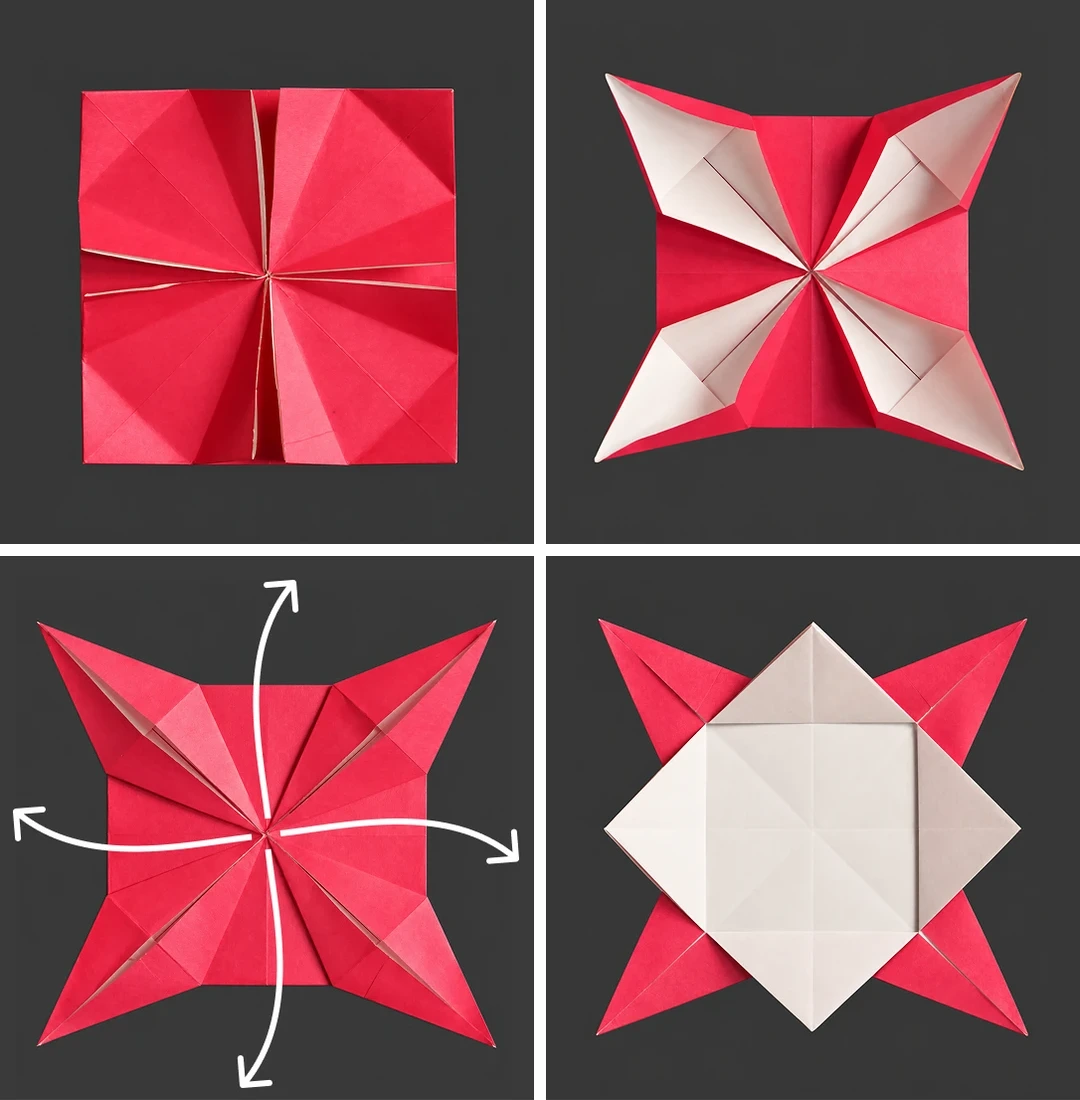 Open image at full size ↗
Check the shape against the picture.
Fold outward in each of the four directions along the creases.
Flatten the folds and fold the four central corners outward.
Fold the four red corners toward the center.
Steps 21–24
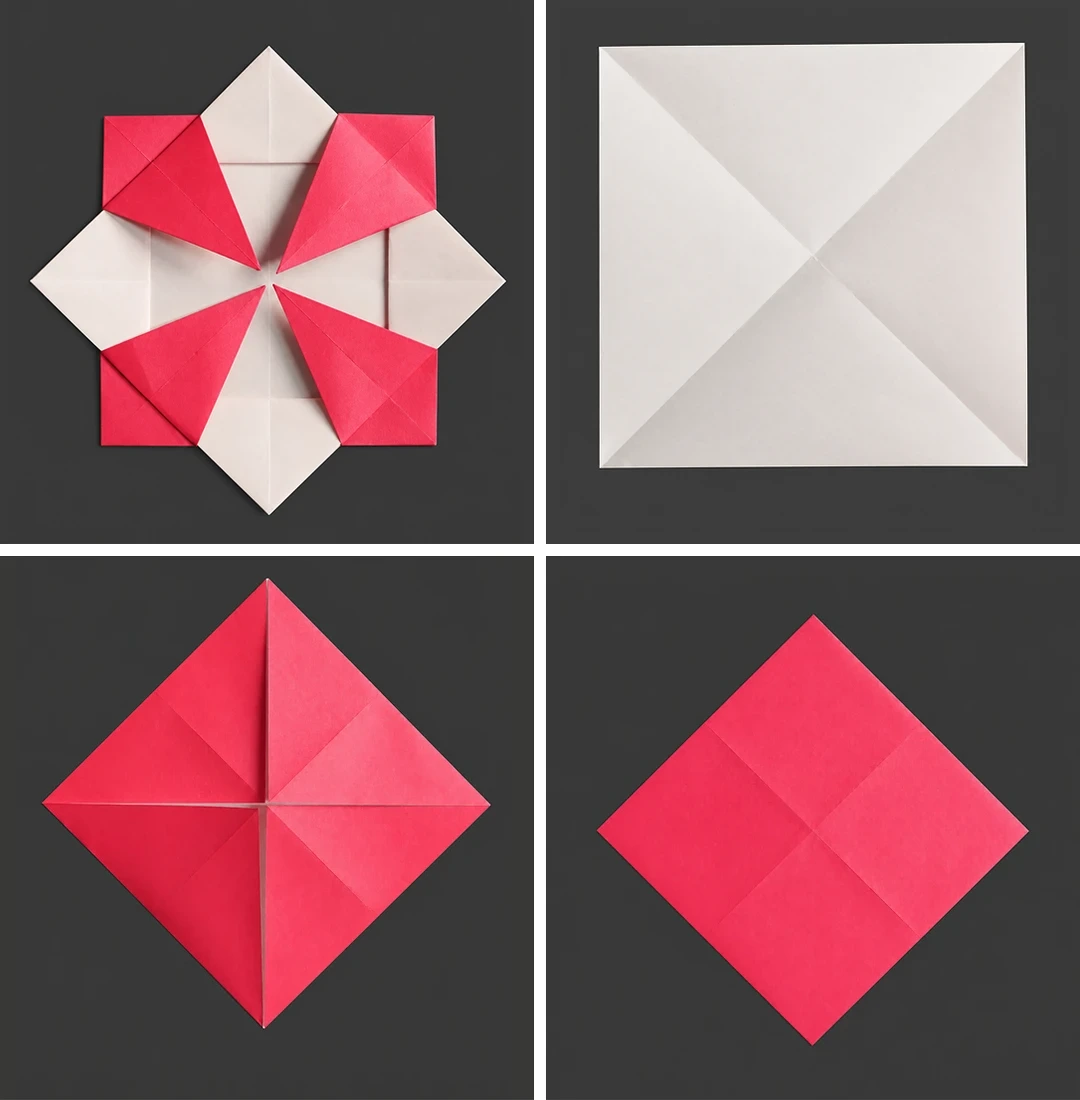 Open image at full size ↗
Check the completed first module.
Take a second square and crease both midlines.
Fold all four corners to the center.
Turn over and fold the corners to the center again.
Steps 25–28
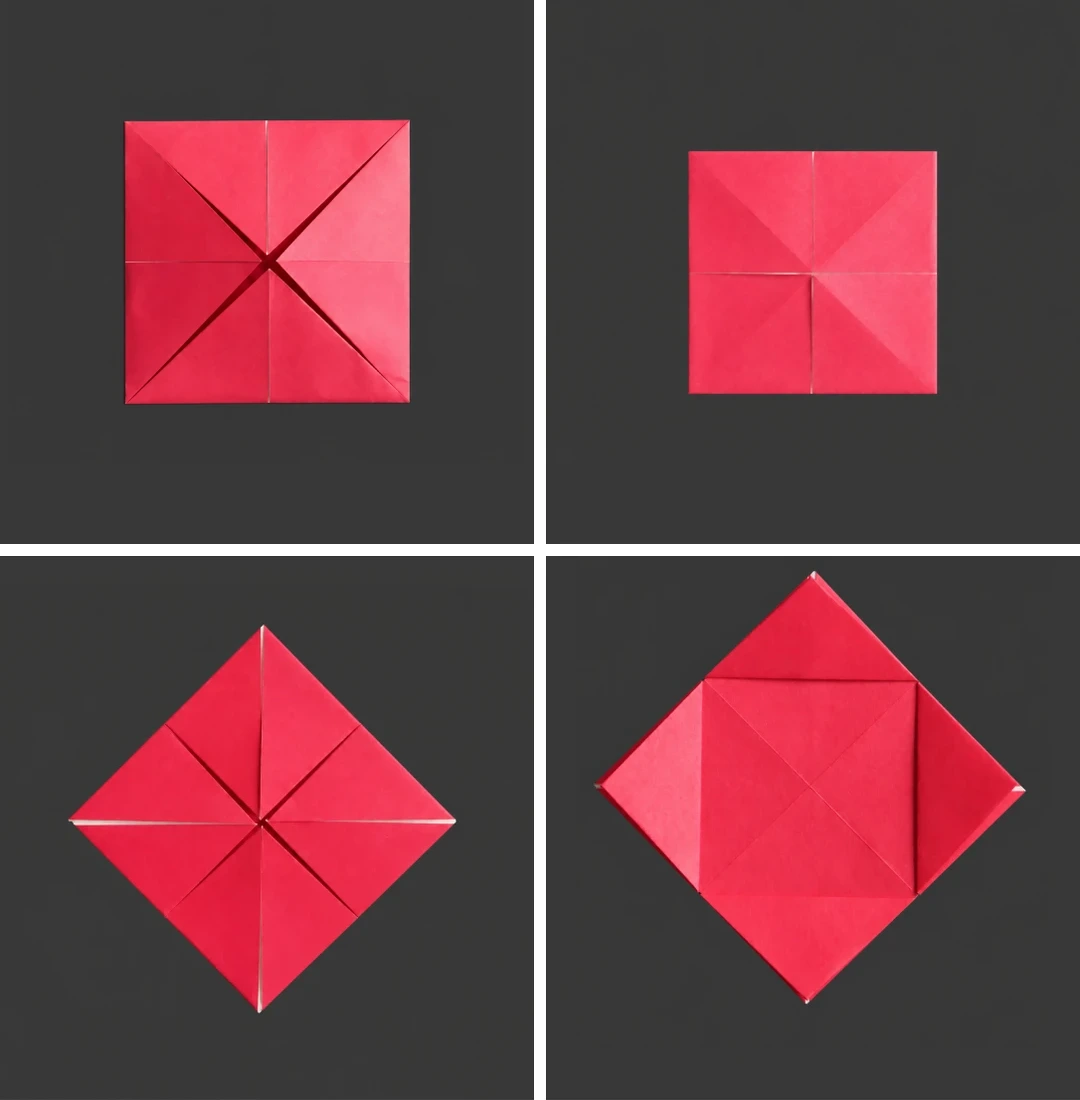 Open image at full size ↗
Repeat the previous corner-to-center folds once more.
Fold all four corners outward.
Turn the module over.
Check its shape against the picture.
Steps 29–32
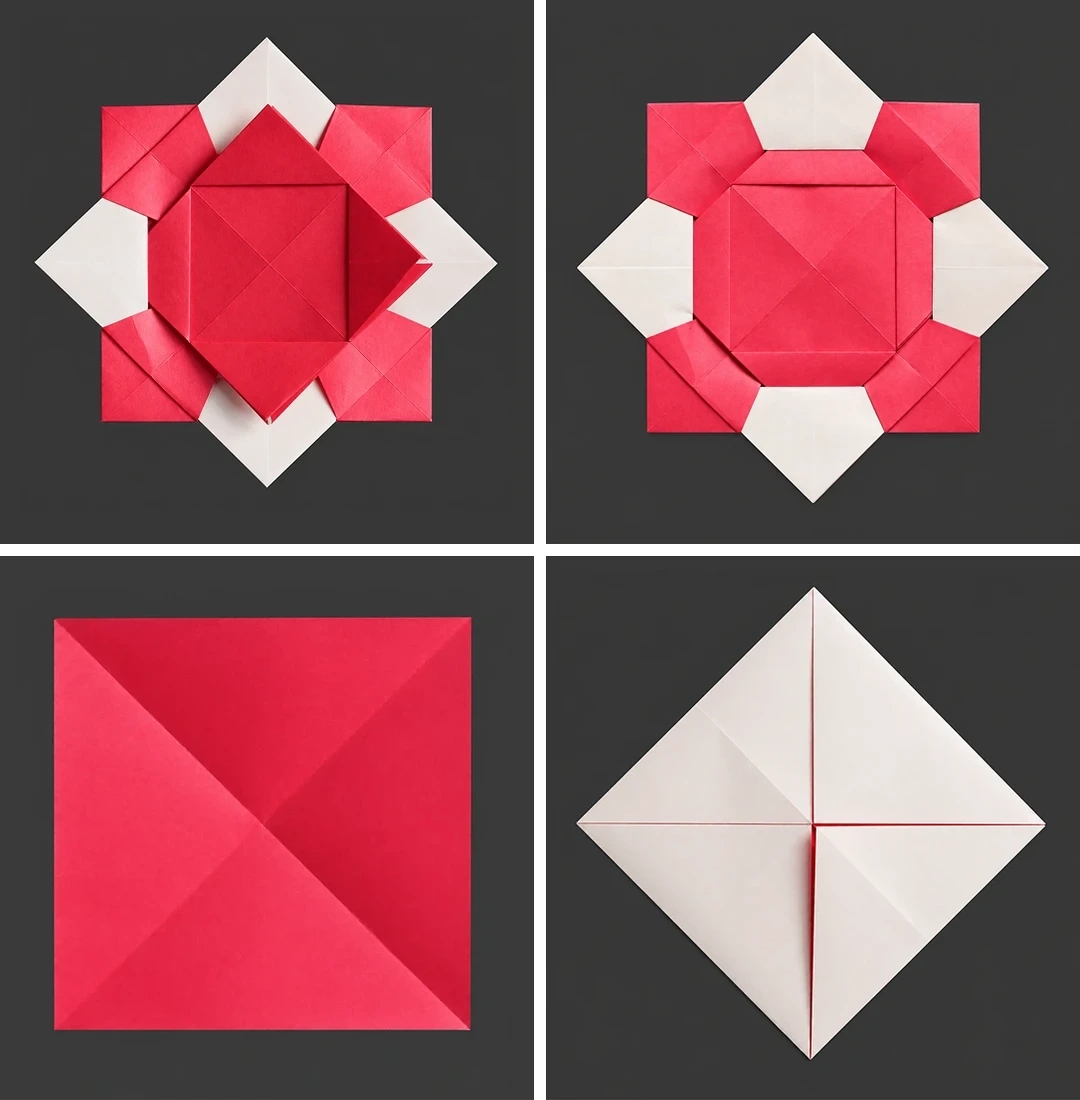 Open image at full size ↗
Join the modules by tucking the smaller module’s four corners into the larger module’s pockets.
Check the assembled layers.
Take the final square and crease both diagonals.
Fold its four corners to the center.
Steps 33–36
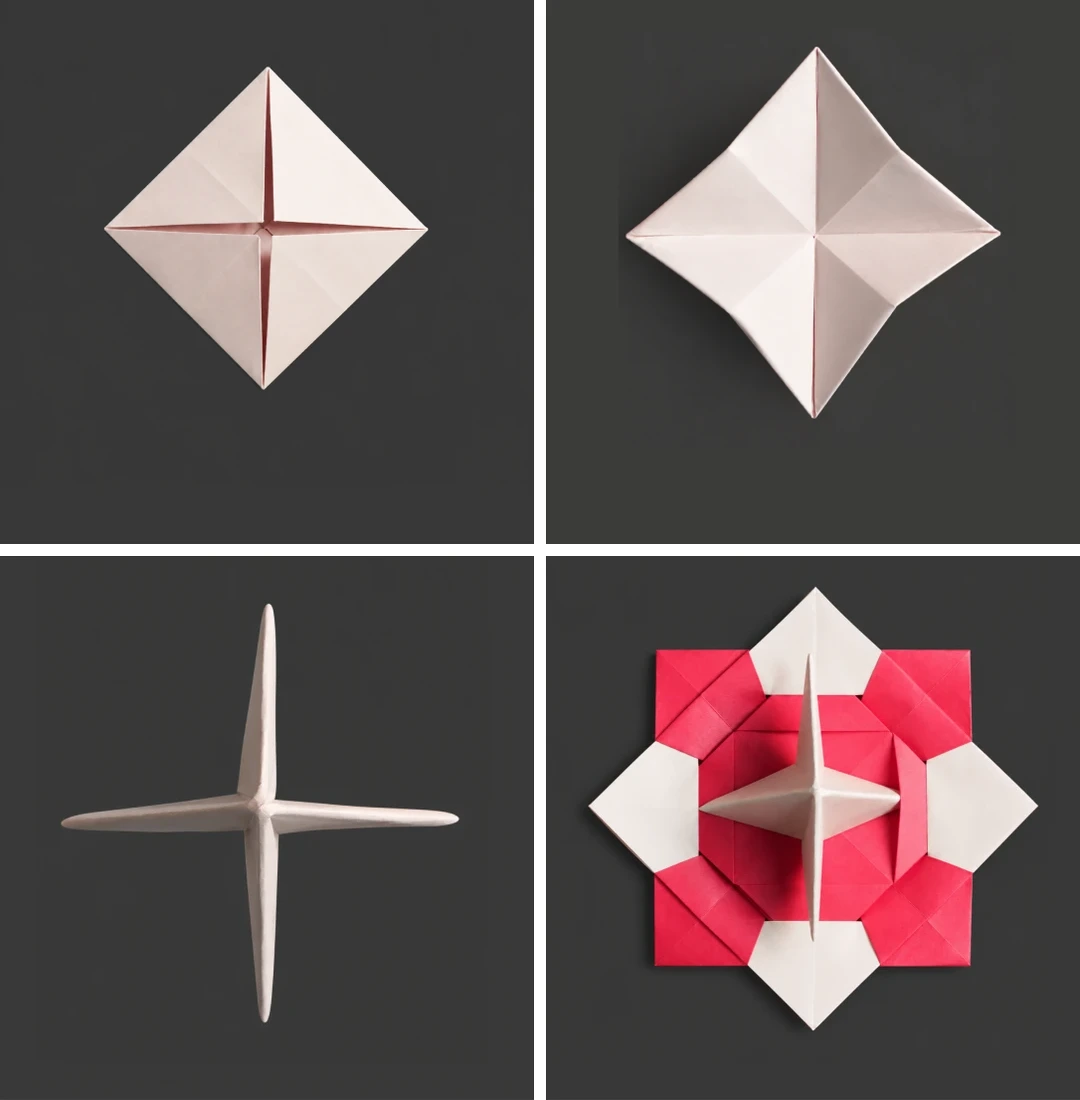 Open image at full size ↗
Repeat the corner-to-center folds.
Fold horizontally, then vertically, to mark the midlines.
Push each side toward the middle to form an X.
Turn it over and tuck the X-shaped piece into the four pockets of the assembled model.
Follow the diagrams alongside the step-by-step English instructions.
Choose your next project →