
Animals · Step-by-step guide
Talking Paper Fish
Fold a lively little fish with a wide mouth and an eye-catching tail.
What you’ll need
- Square paper
- Small paper or craft eye
- Glue
Paper folding and shaping
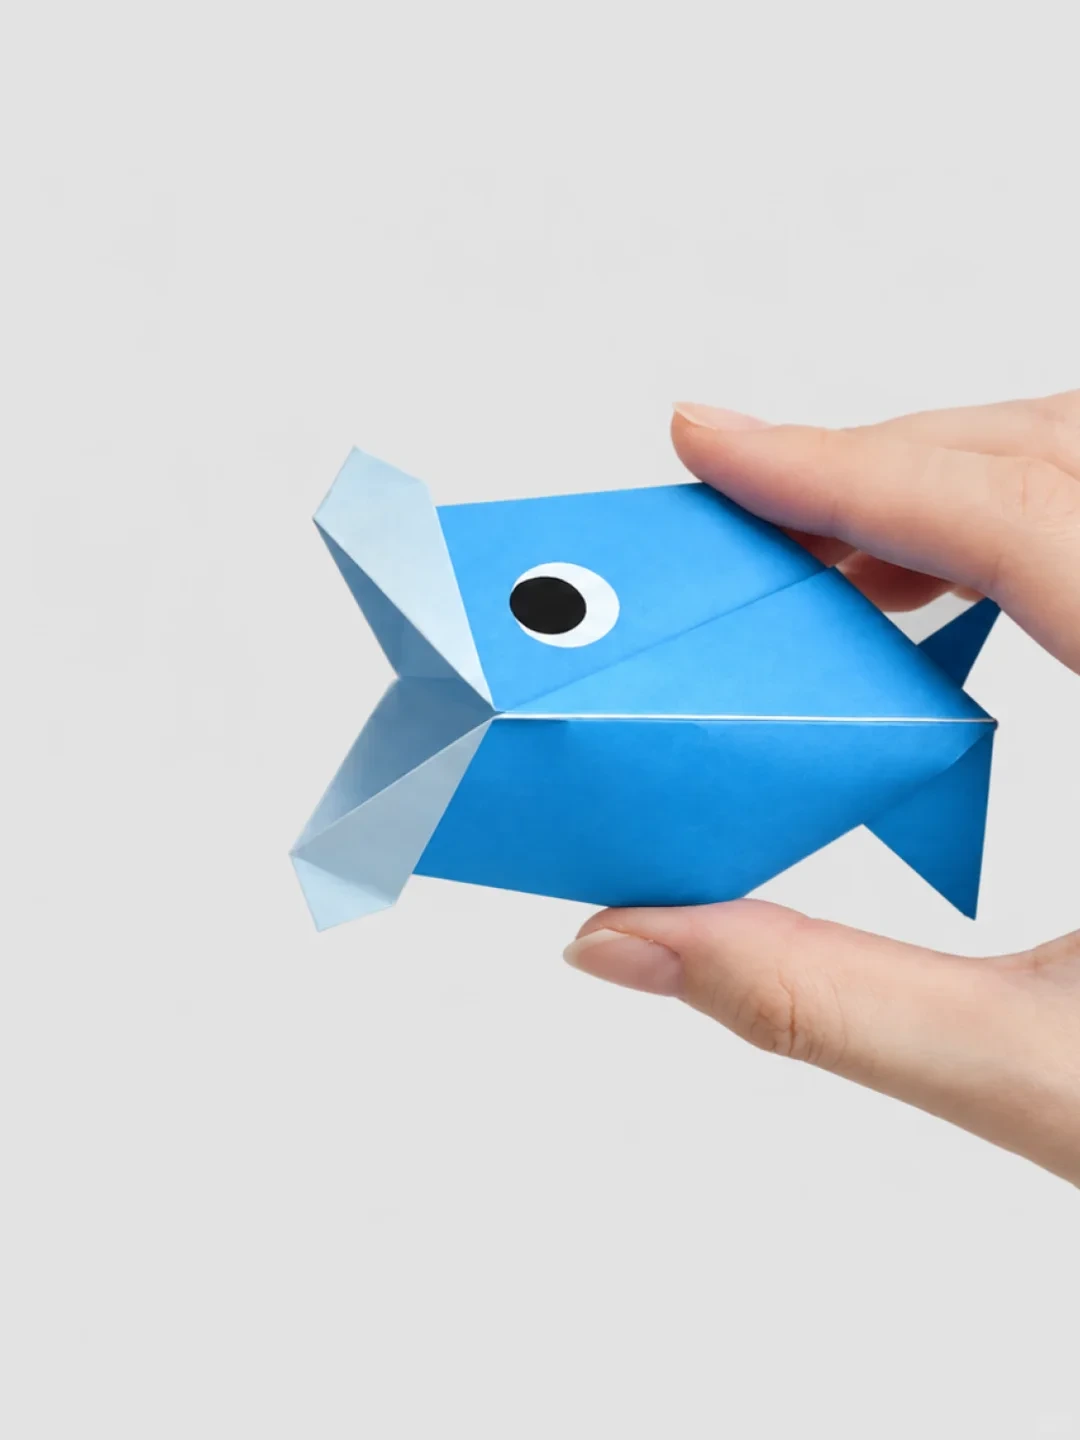
Make it, step by step.
24 steps · Original diagrams with English instructions
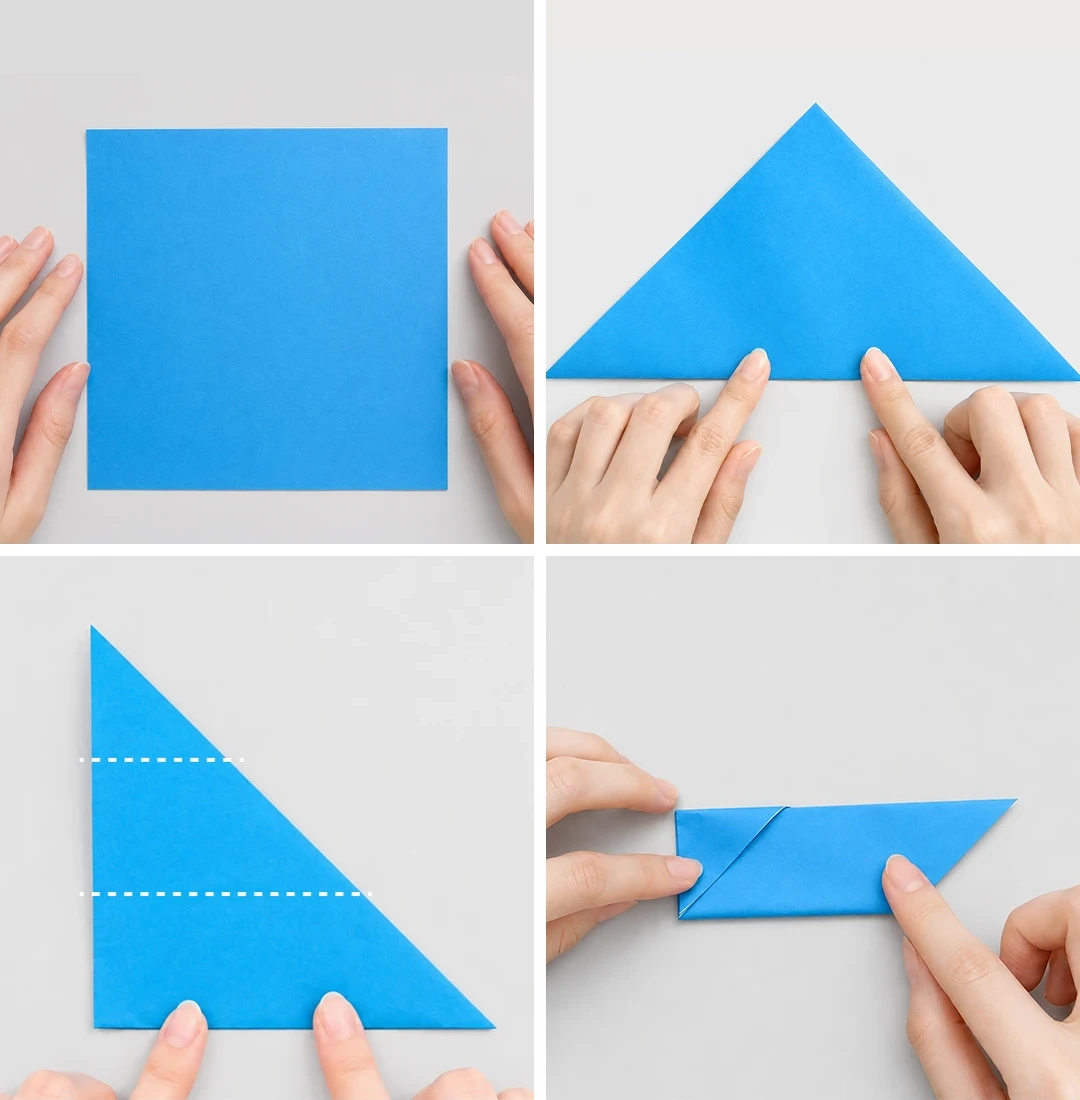
Steps 1–4
 Open image at full size ↗
Prepare a square sheet.
Fold along a diagonal.
Divide the folded triangle into thirds.
Fold the triangular flap up to the top.
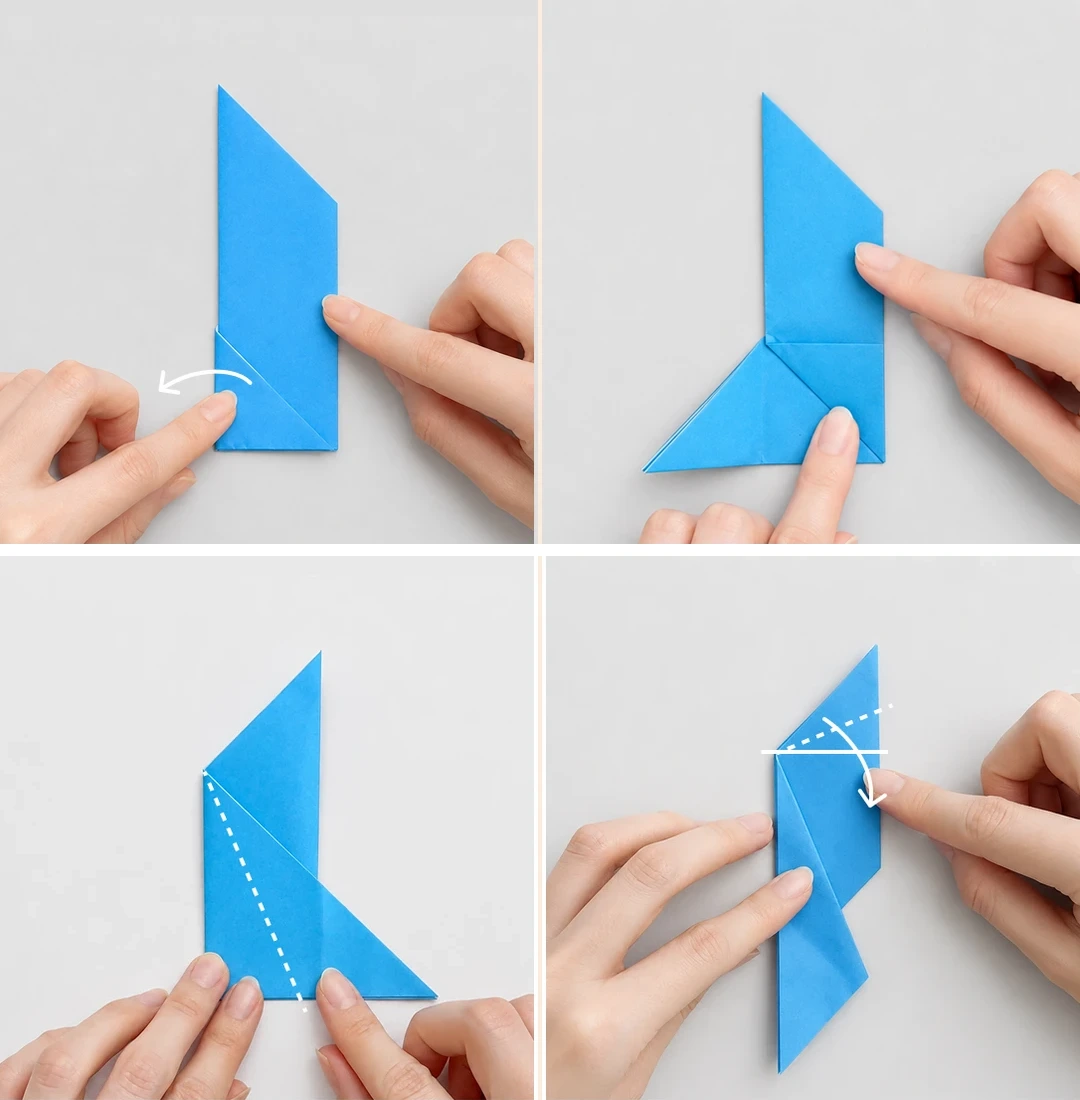
Steps 5–8
 Open image at full size ↗
Rotate the model and open the left triangle.
Fold the lower side to the right and press.
Turn over and fold leftward along the dotted line.
Fold the upper triangle downward.
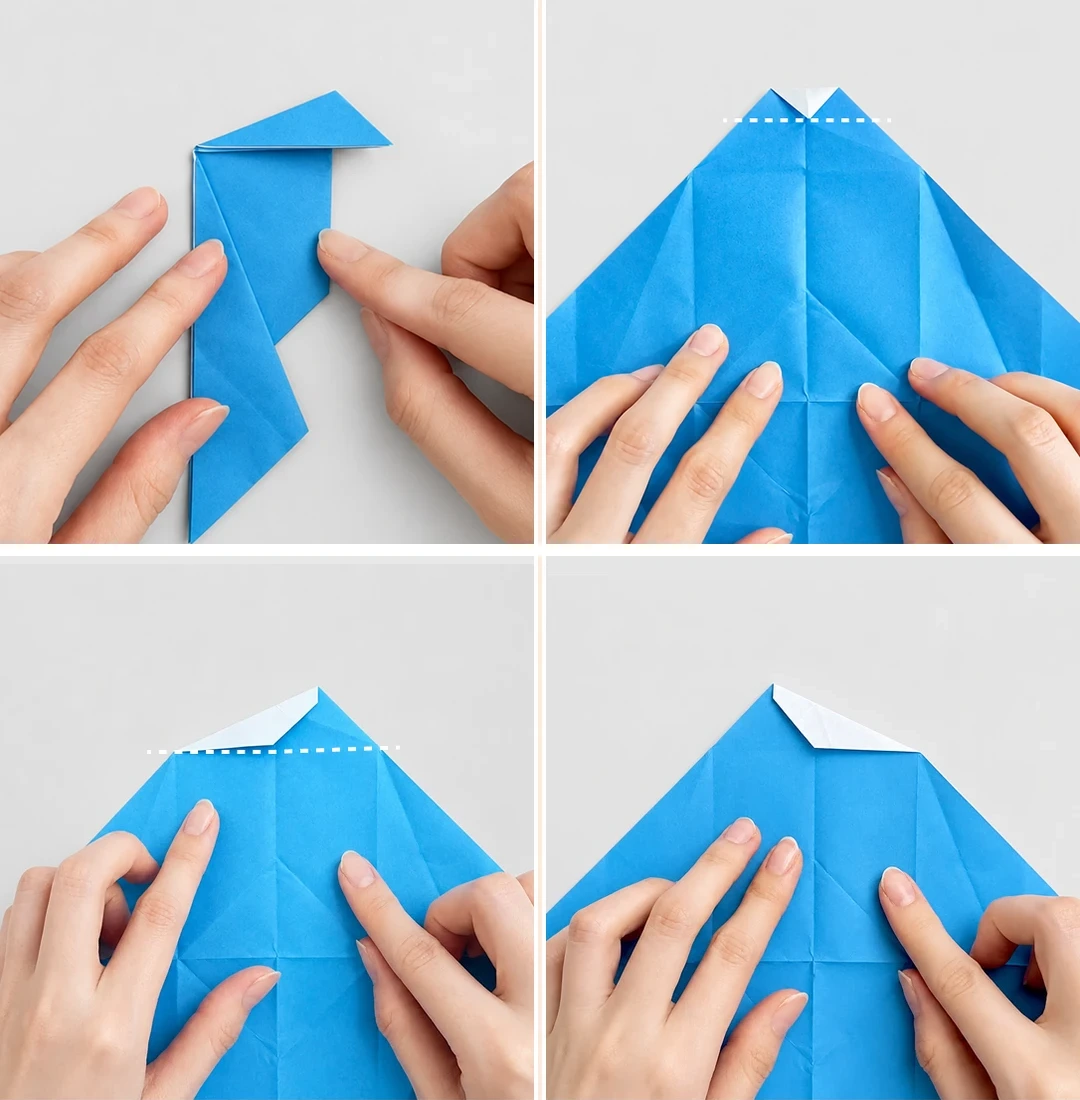
Steps 9–12
 Open image at full size ↗
Fold a small triangle down from the upper tip.
Open and fold that small upper triangle downward.
Fold a triangle to the right along the dotted line.
Repeat in the opposite direction.
Steps 13–16
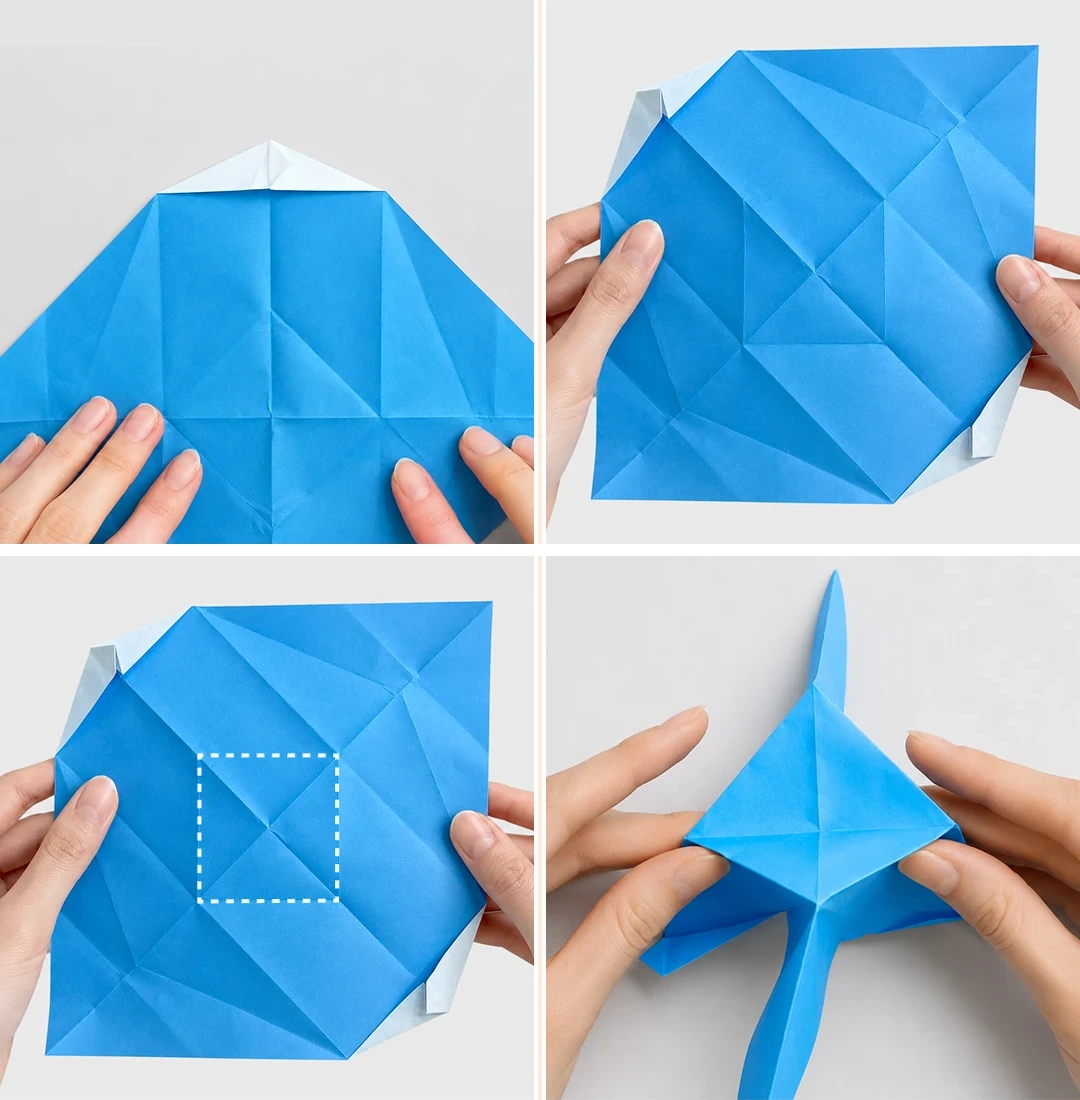 Open image at full size ↗
Fold downward along the creases and press.
Repeat on the diagonally opposite side.
Press the central square along its creases.
Bring the sides inward along the creases.
Steps 17–20
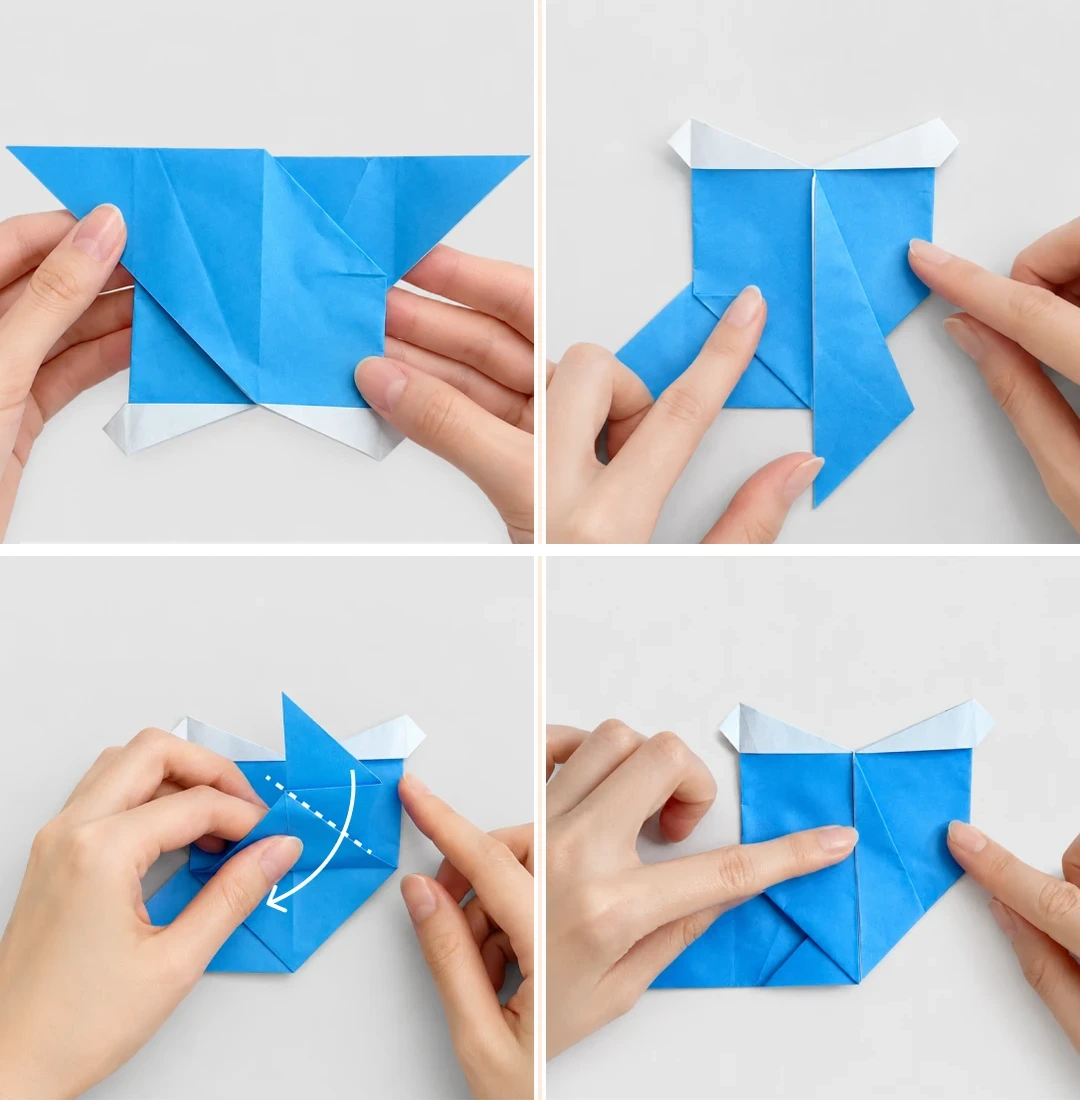 Open image at full size ↗
Flatten into the shape shown.
With the white side up, fold toward the center along the creases.
Lift the tail and fold inward.
Check the tucked-in shape.
Steps 21–24
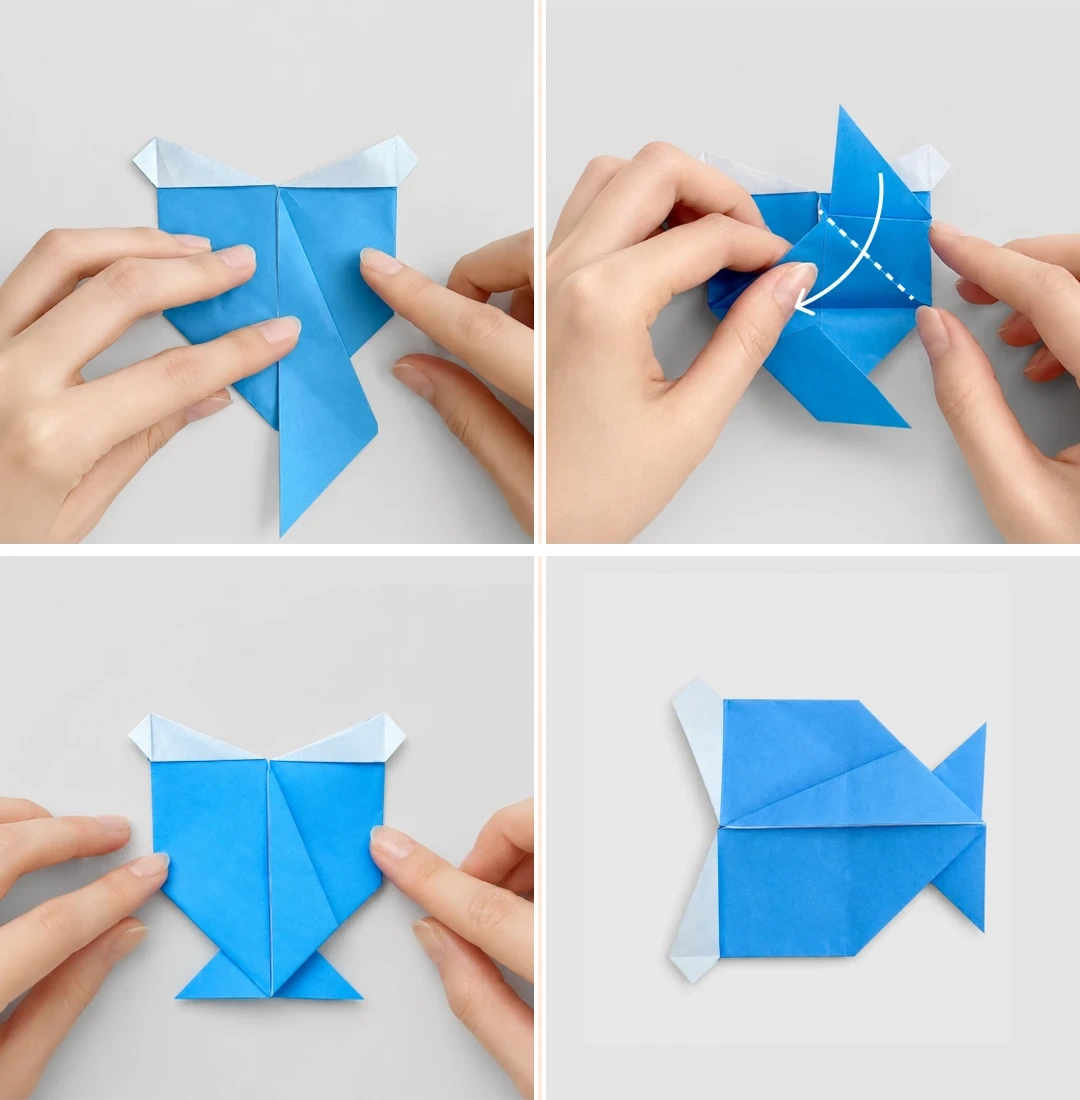 Open image at full size ↗
Repeat the same sequence on the other side.
Lift the tail and fold inward.
Adjust the shape.
Attach an eye to finish the fish.
The finished project
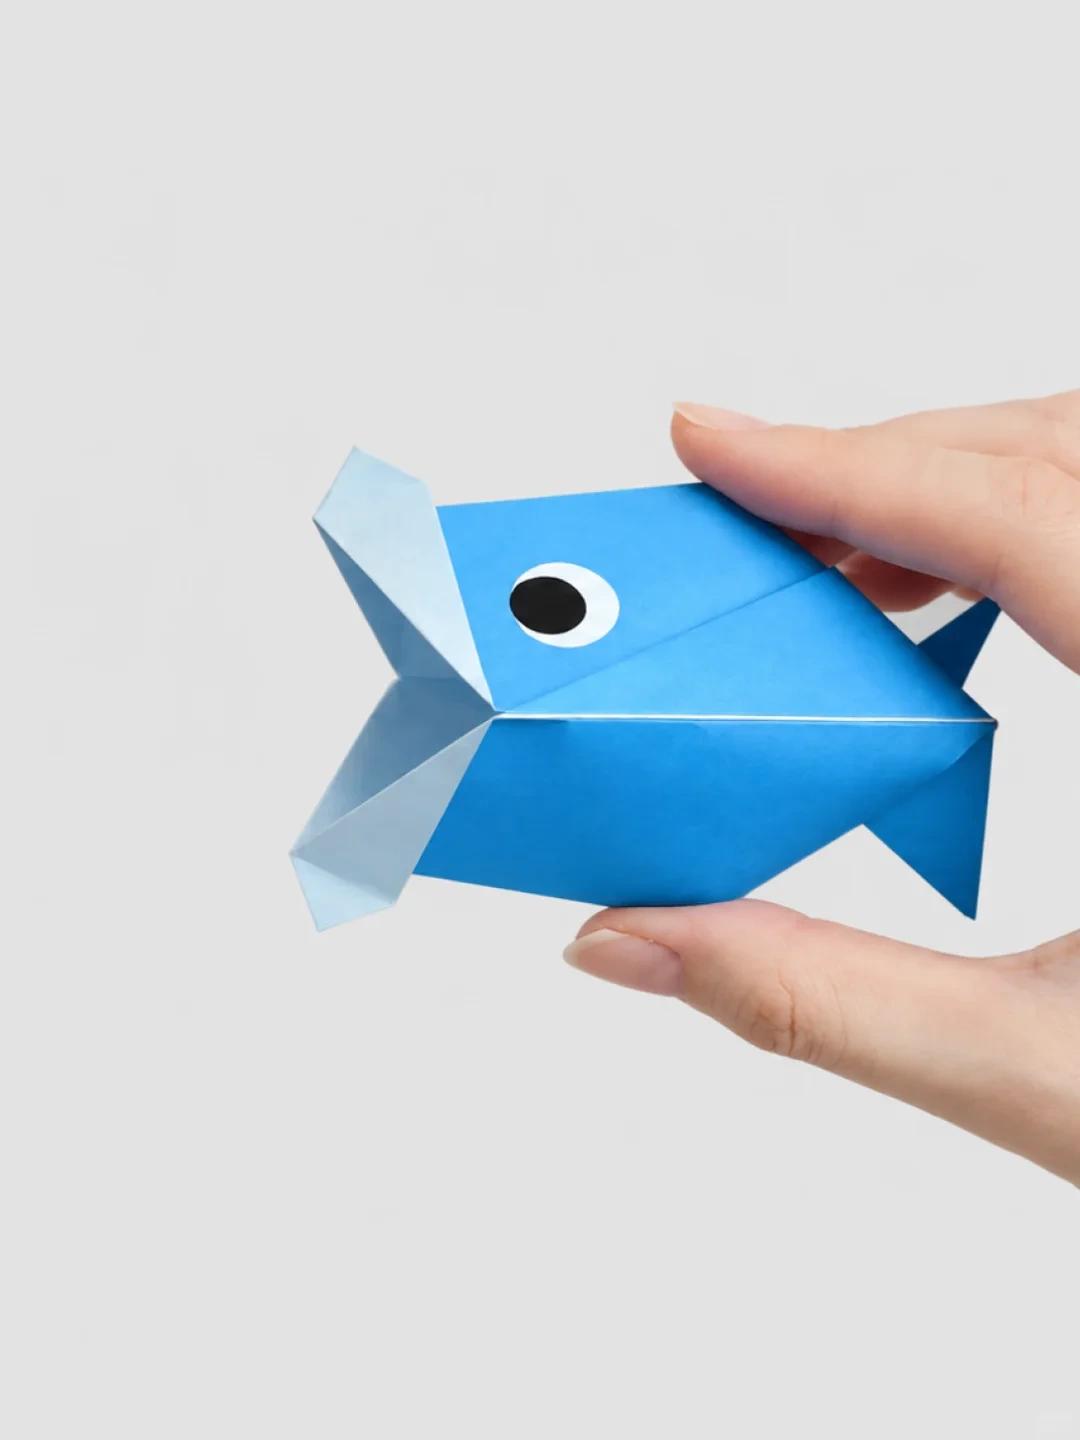 Open image at full size ↗
The completed fish. The final photograph shows the mouth and tail in their finished positions.
Follow the diagrams alongside the step-by-step English instructions.
Choose your next project →