
Animals · Step-by-step guide
Standing Paper Dinosaur
Fold a little standing dinosaur with a long tail, small arms and sturdy feet.
What you’ll need
- Square paper, 15 × 15 cm
Paper folding and shaping
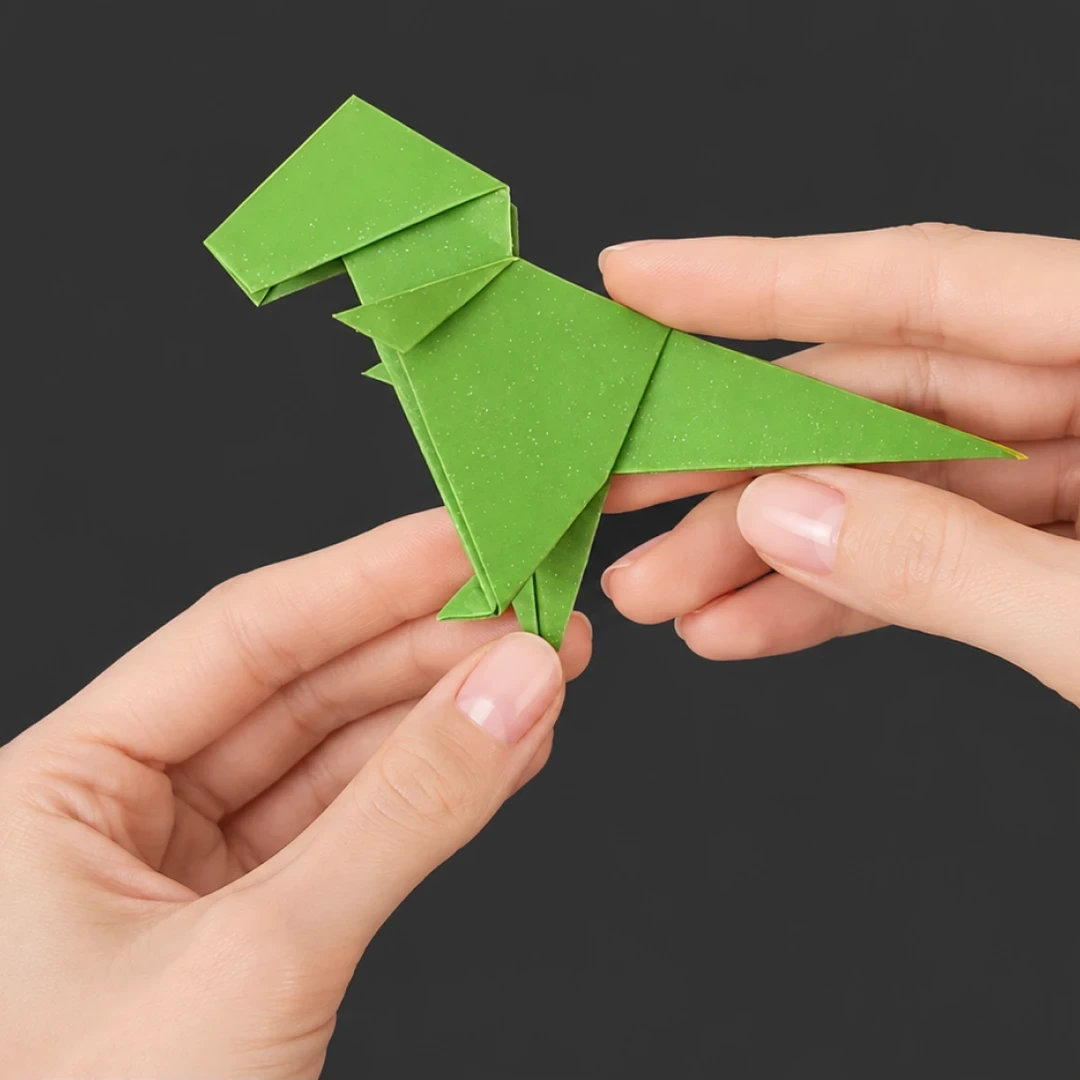
Make it, step by step.
17 steps · Original diagrams with English instructions
Step 1
 Open image at full size ↗
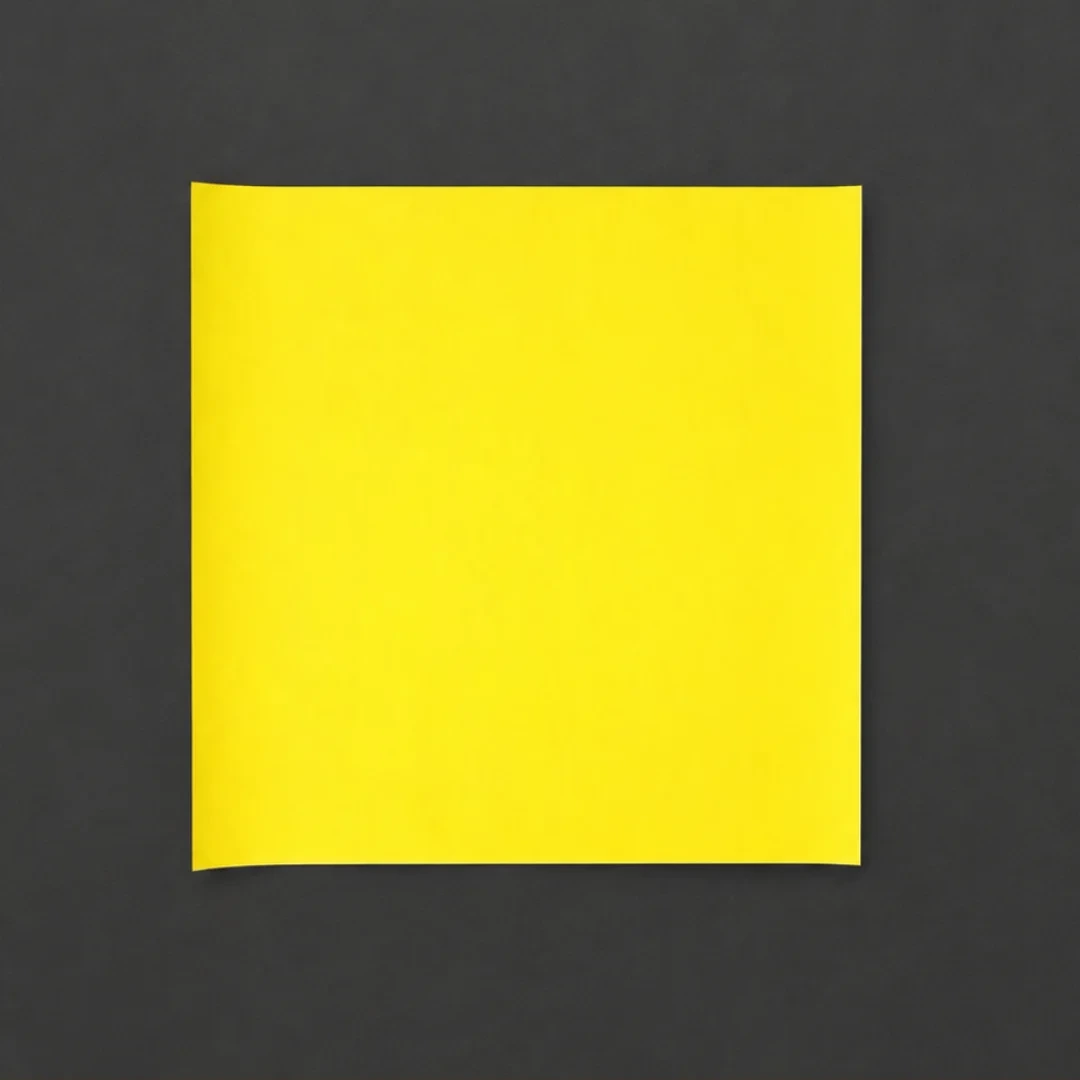
Prepare a 15 × 15 cm square.
Step 2
 Open image at full size ↗
Place a corner at the top and crease both diagonals.
Step 3
 Open image at full size ↗
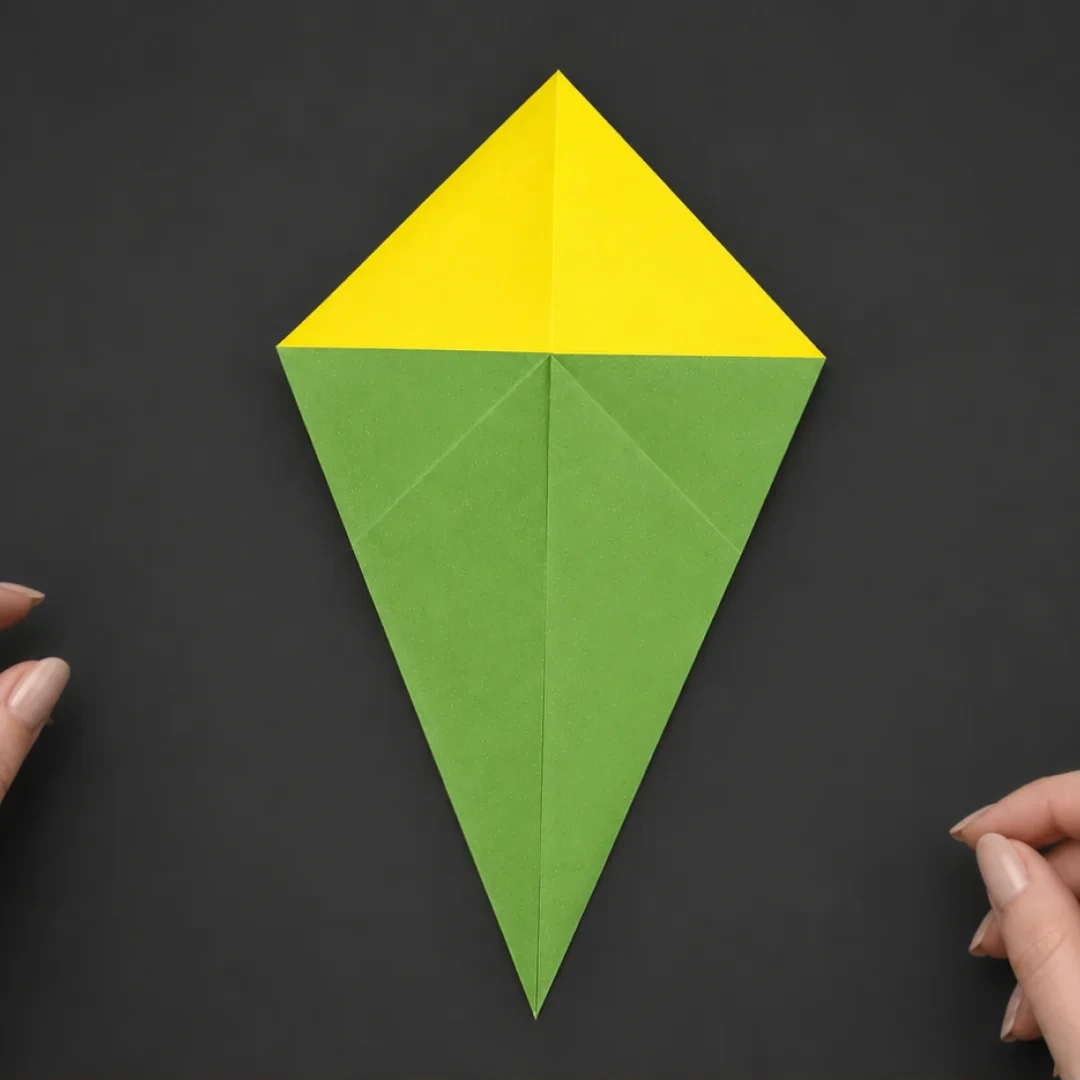
Fold the left and right edges toward the middle.
Step 4
 Open image at full size ↗
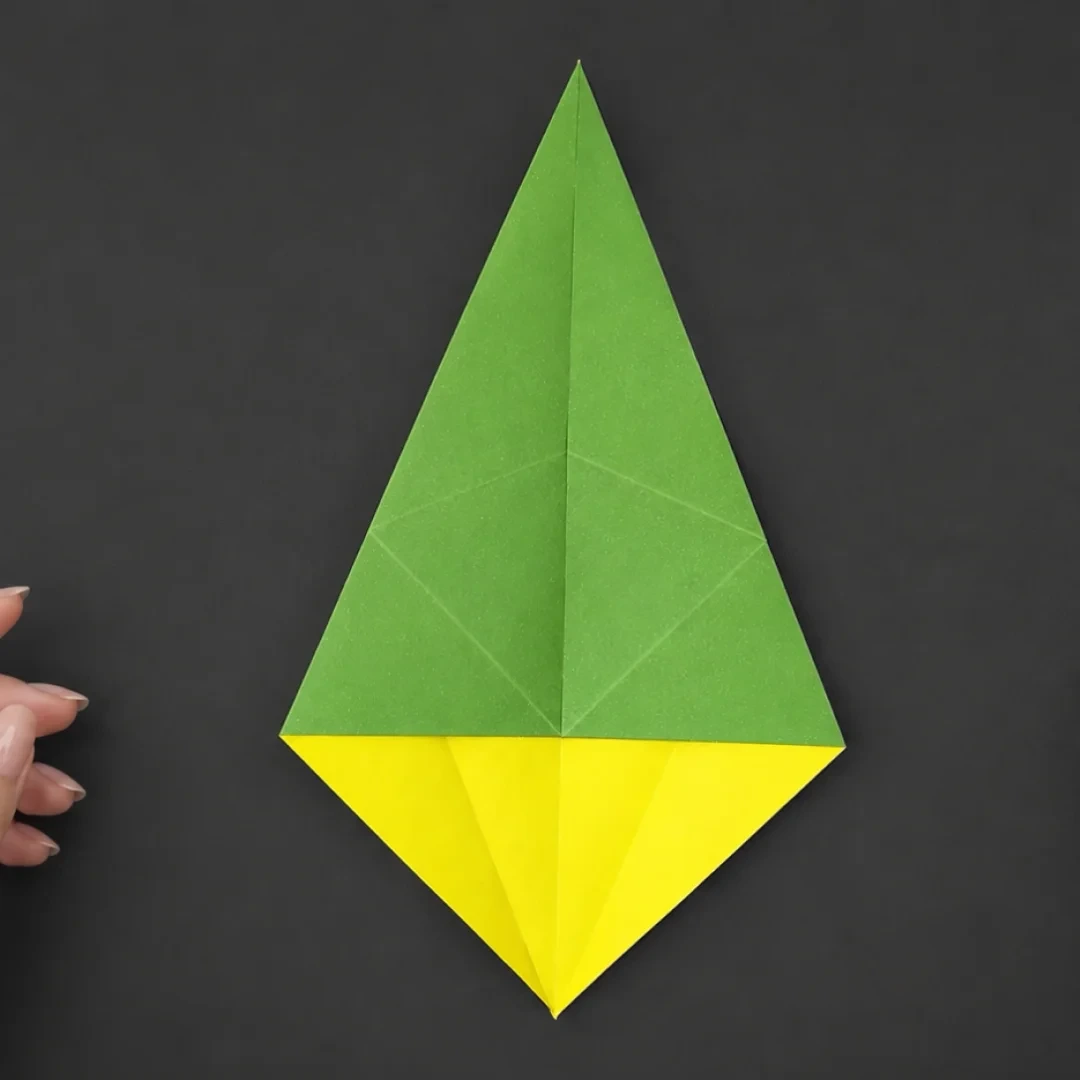
Fold the upper edges inward in the same way.
Step 5
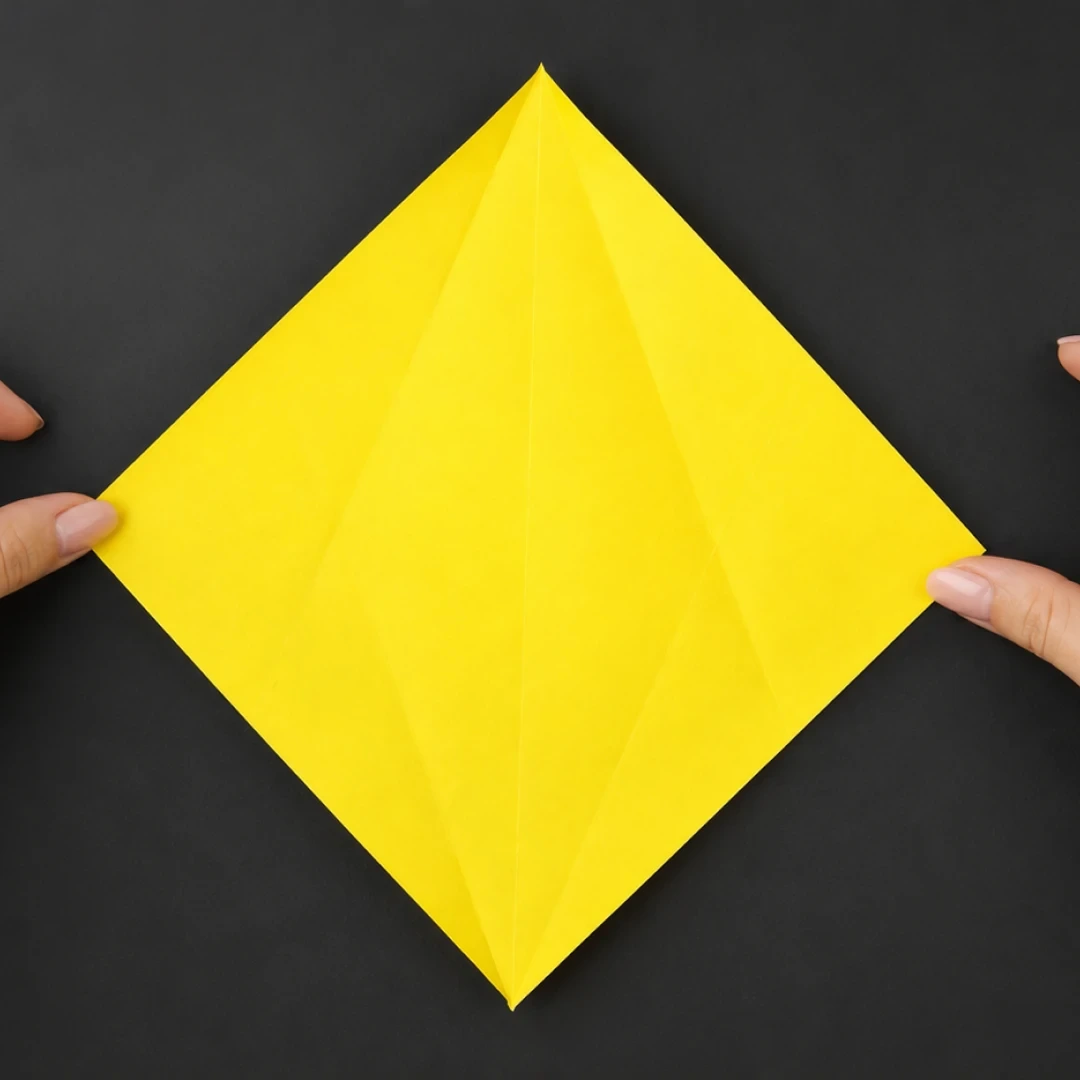 Open image at full size ↗
Open the paper and bring the sides inward toward the middle.
Step 6
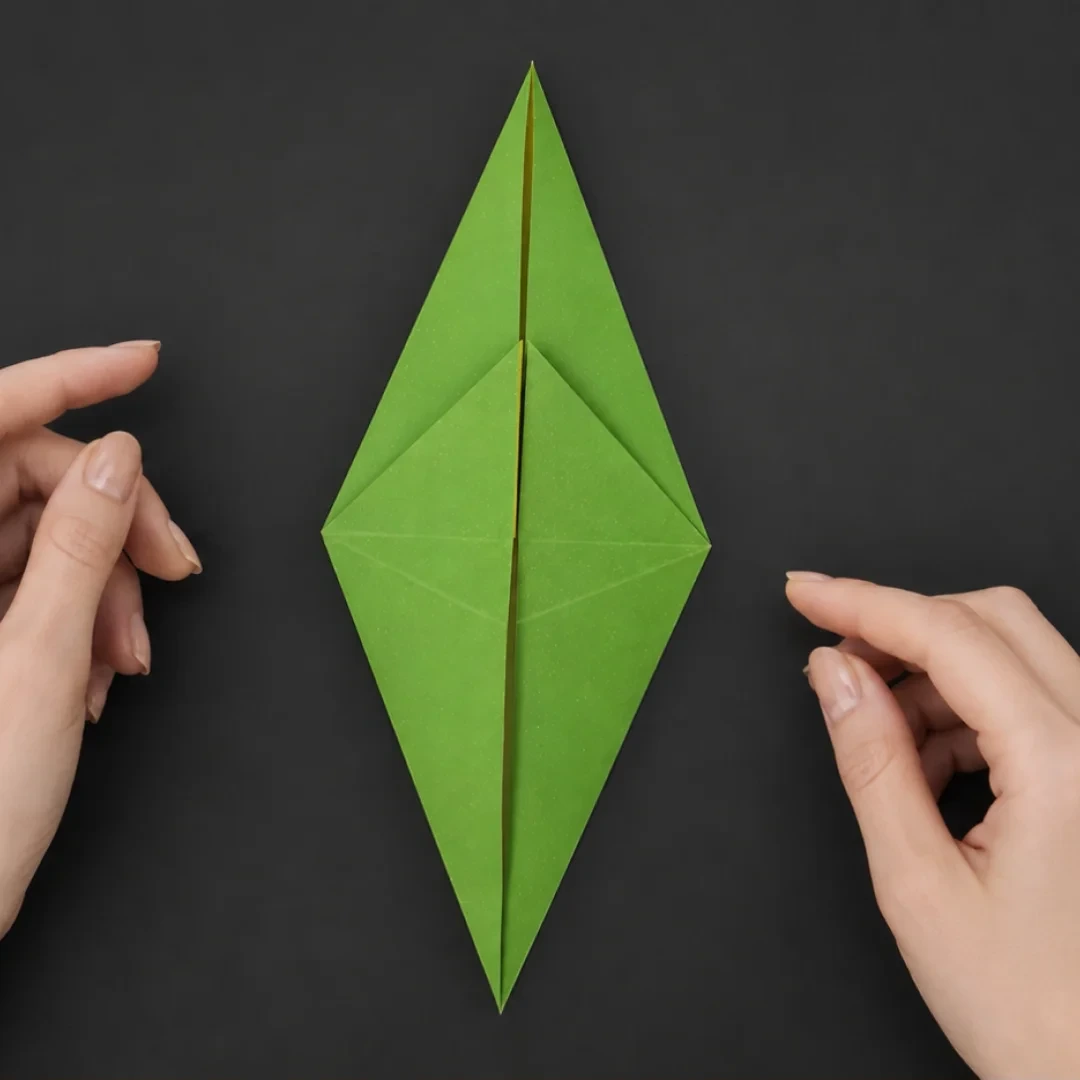 Open image at full size ↗
Move the new central triangular flap upward.
Step 7
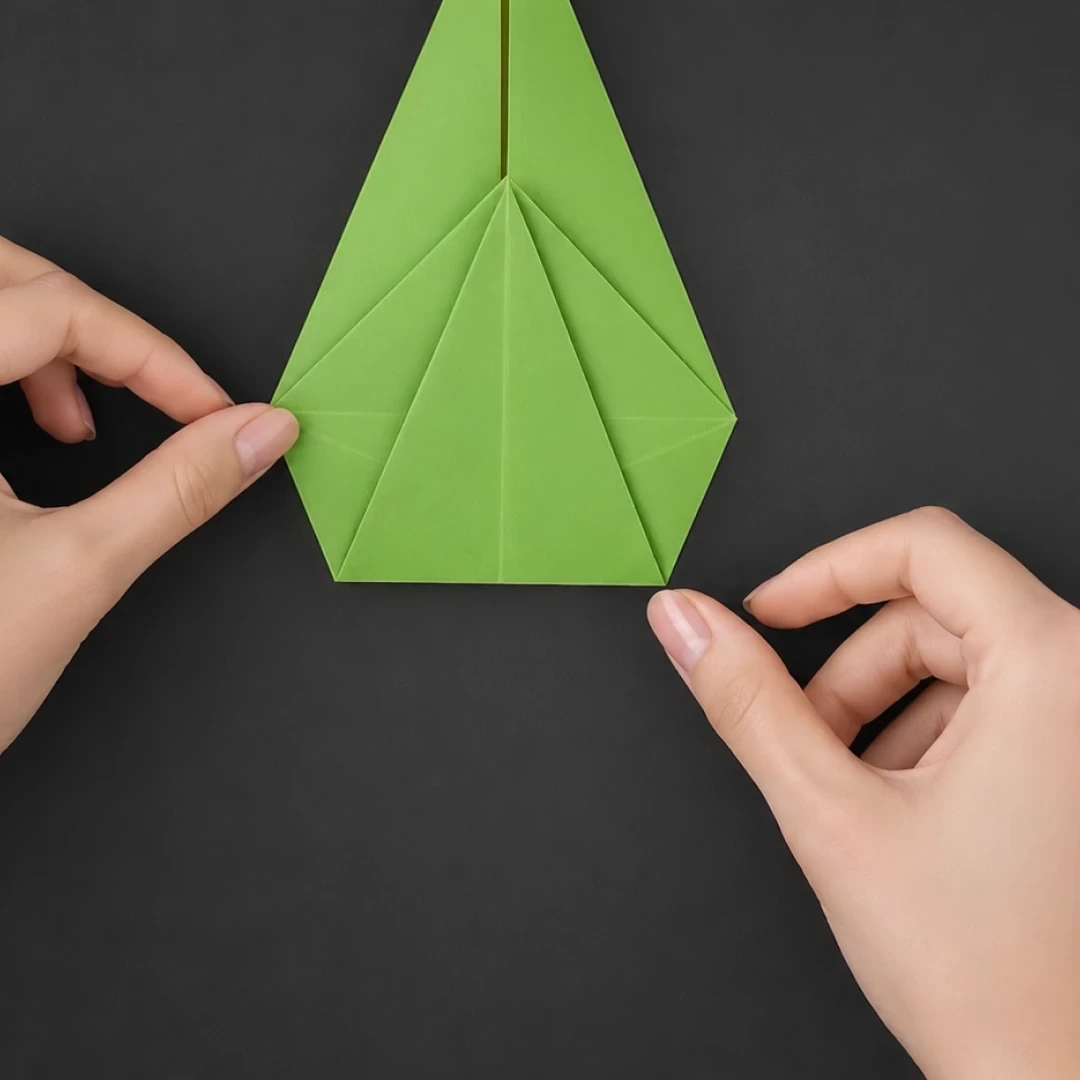 Open image at full size ↗
Lift the bottom corner to the middle triangle and fold it over that triangle.
Step 8
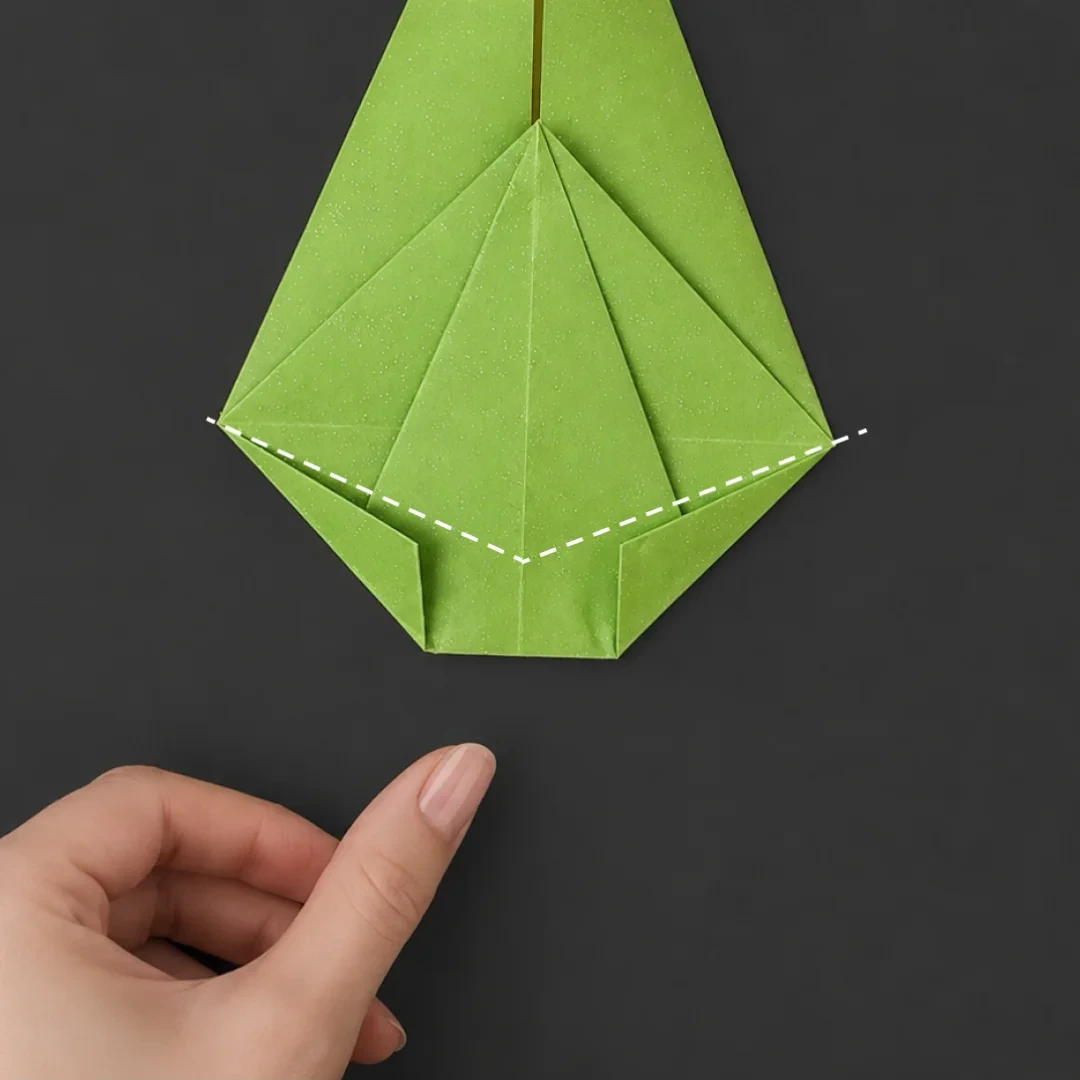 Open image at full size ↗
Fold the left and right corners along the dotted lines.
Step 9
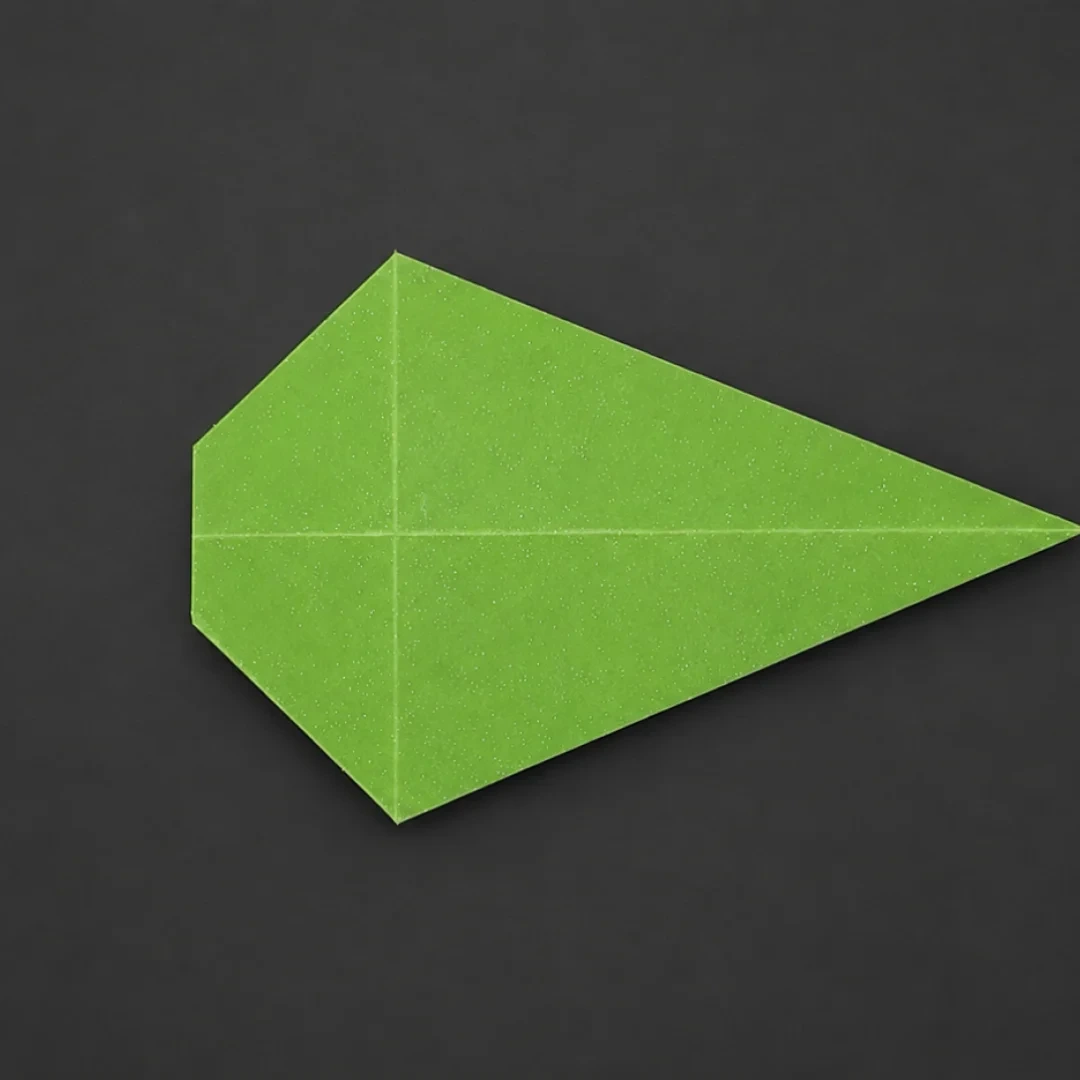 Open image at full size ↗
Turn over and move the extra flap from the right side to the left.
Step 10
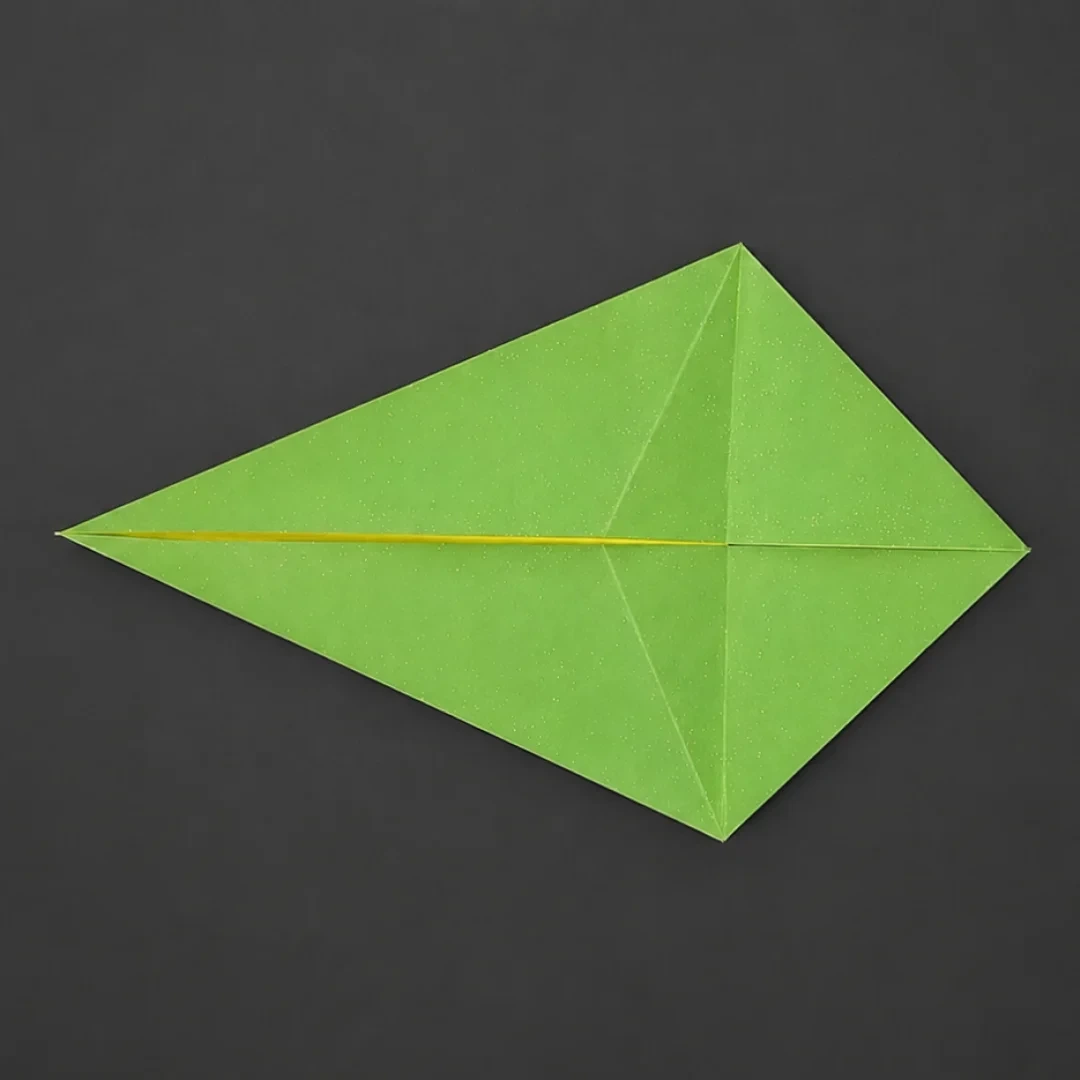 Open image at full size ↗
Flatten the layers into the shape shown.
Step 11
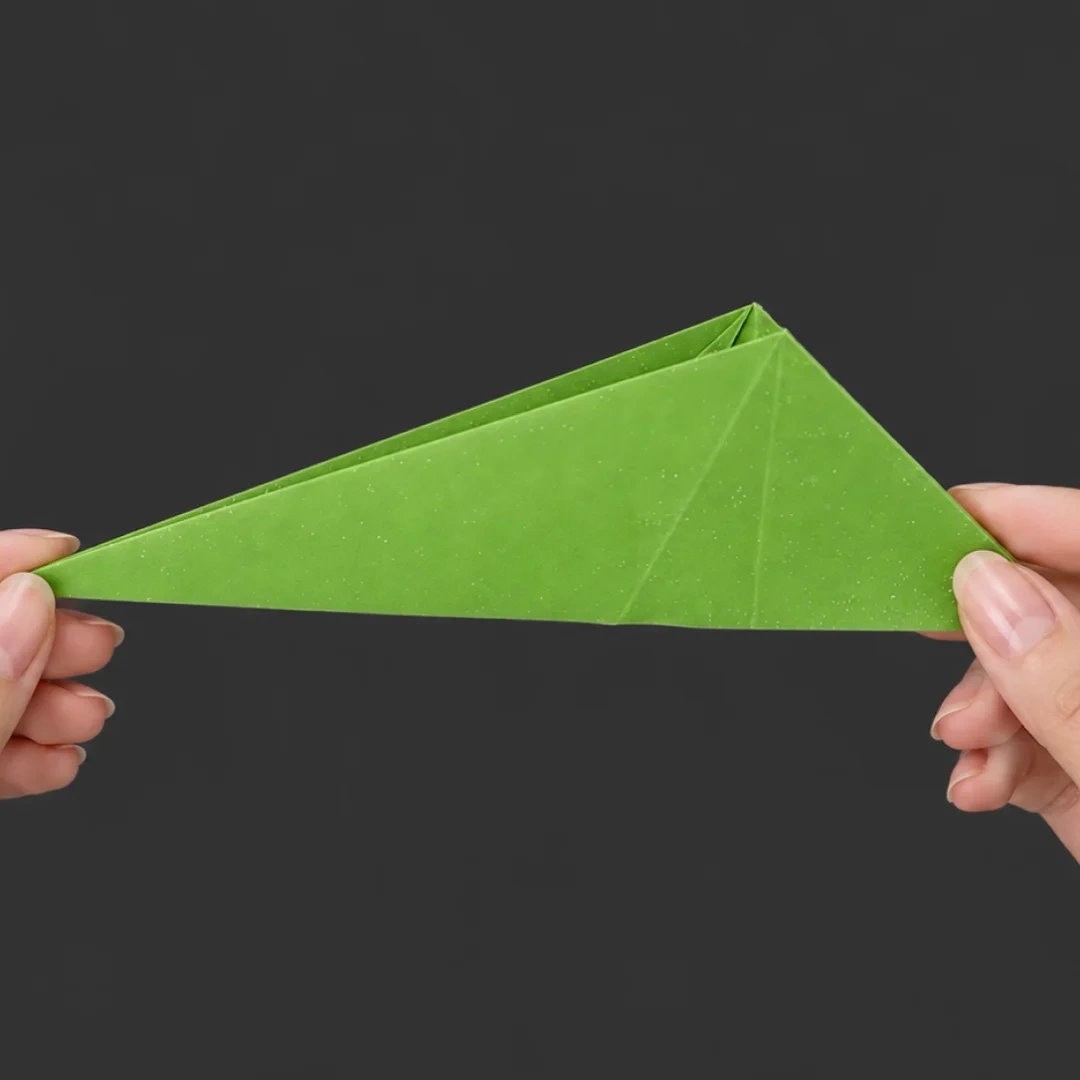 Open image at full size ↗
Turn over and fold the model in half.
Step 12
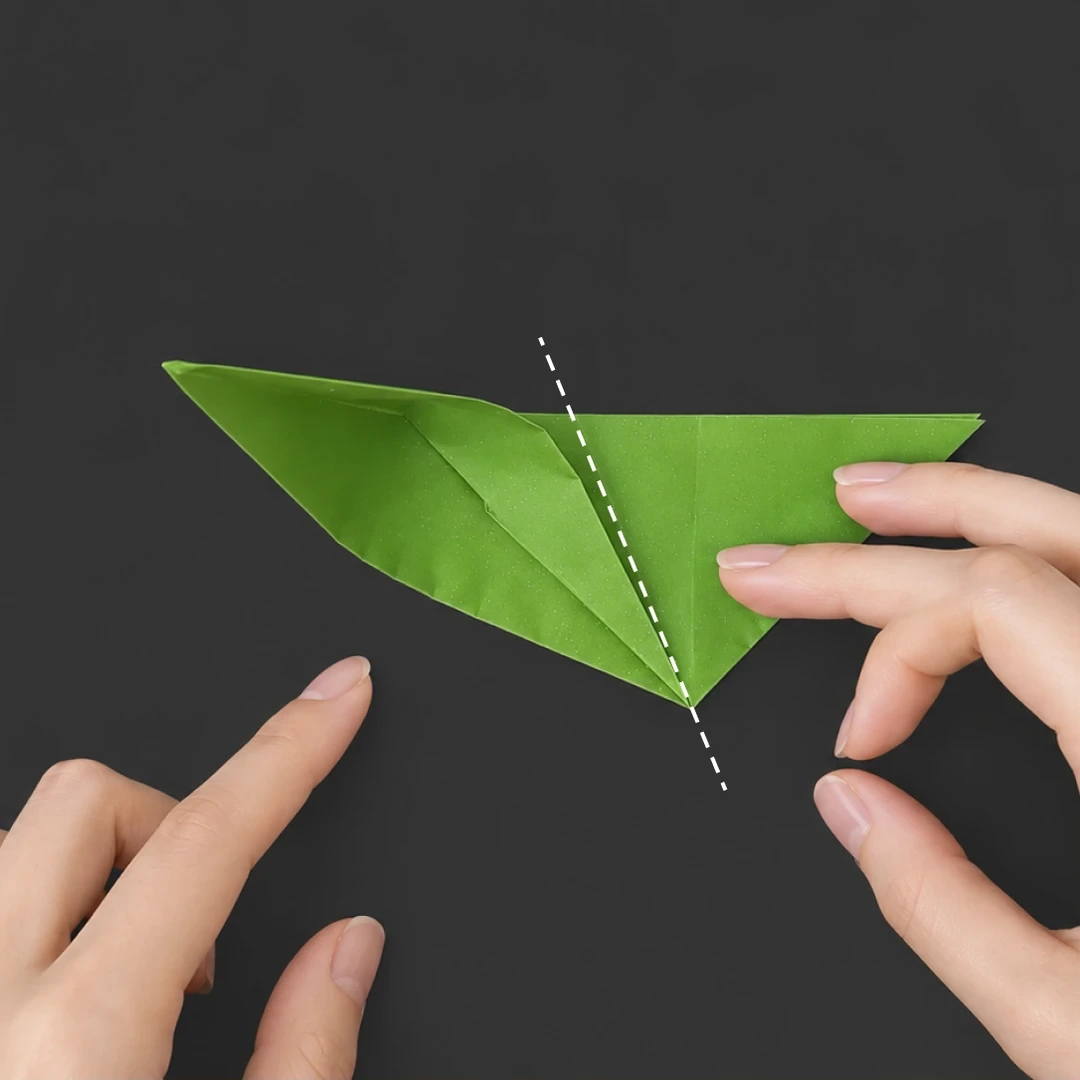 Open image at full size ↗
Align the inner edge with the dotted line and fold. Turn over and repeat.
Step 13
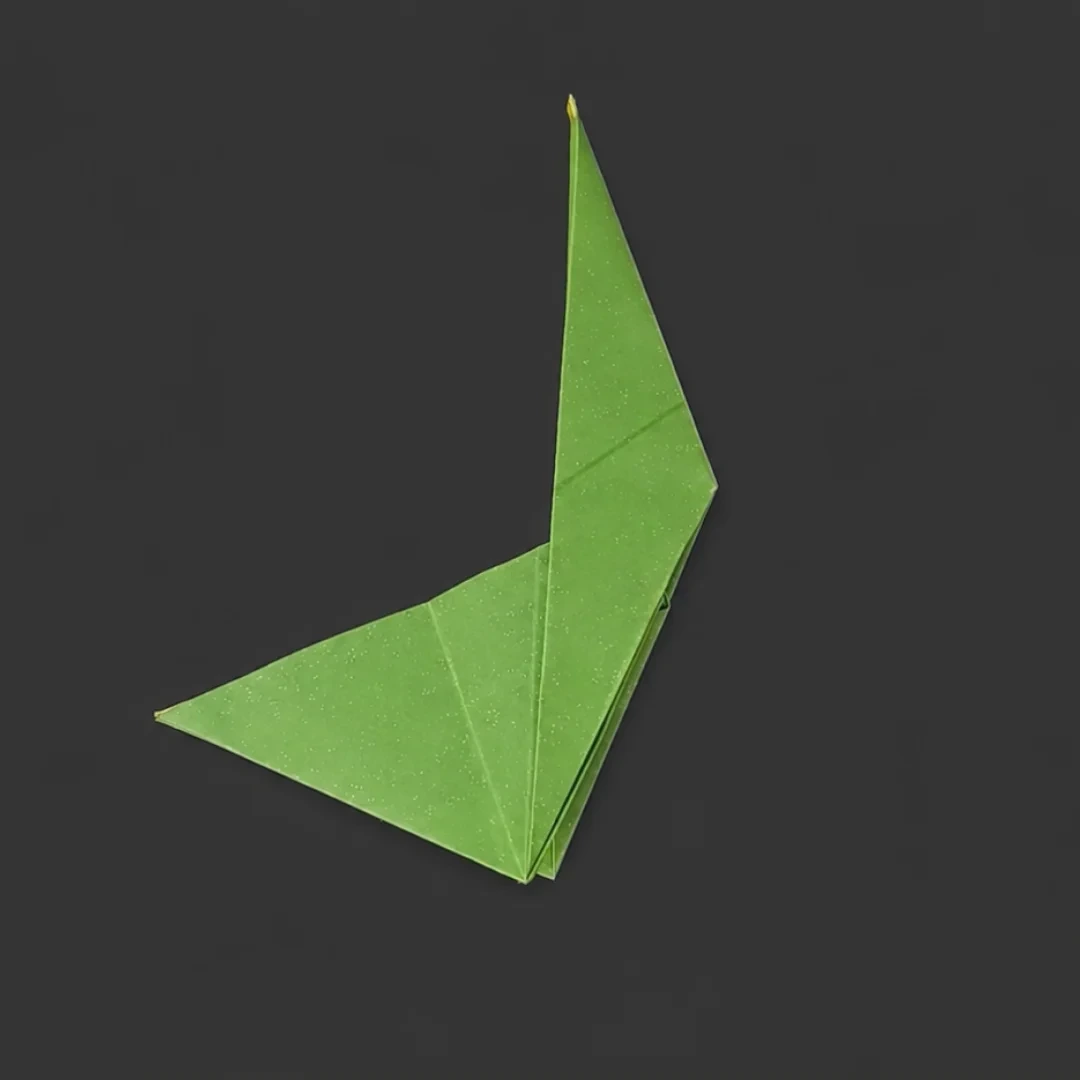 Open image at full size ↗
Open from the top and reverse the fold along the crease just made.
Step 14
 Open image at full size ↗
Fold the upper tip to shape the head.
Step 15
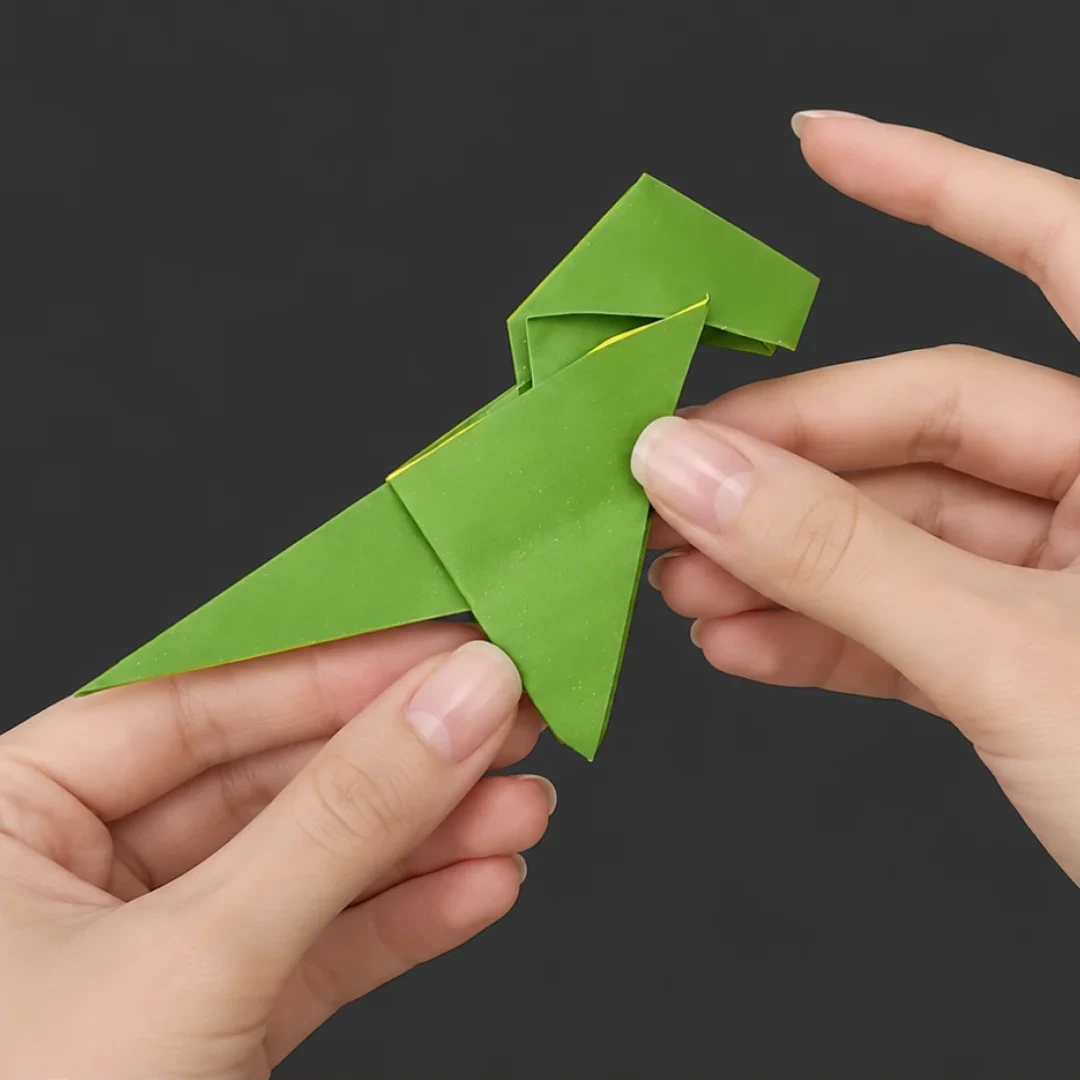 Open image at full size ↗
Bring the two back flaps toward the front.
Step 16
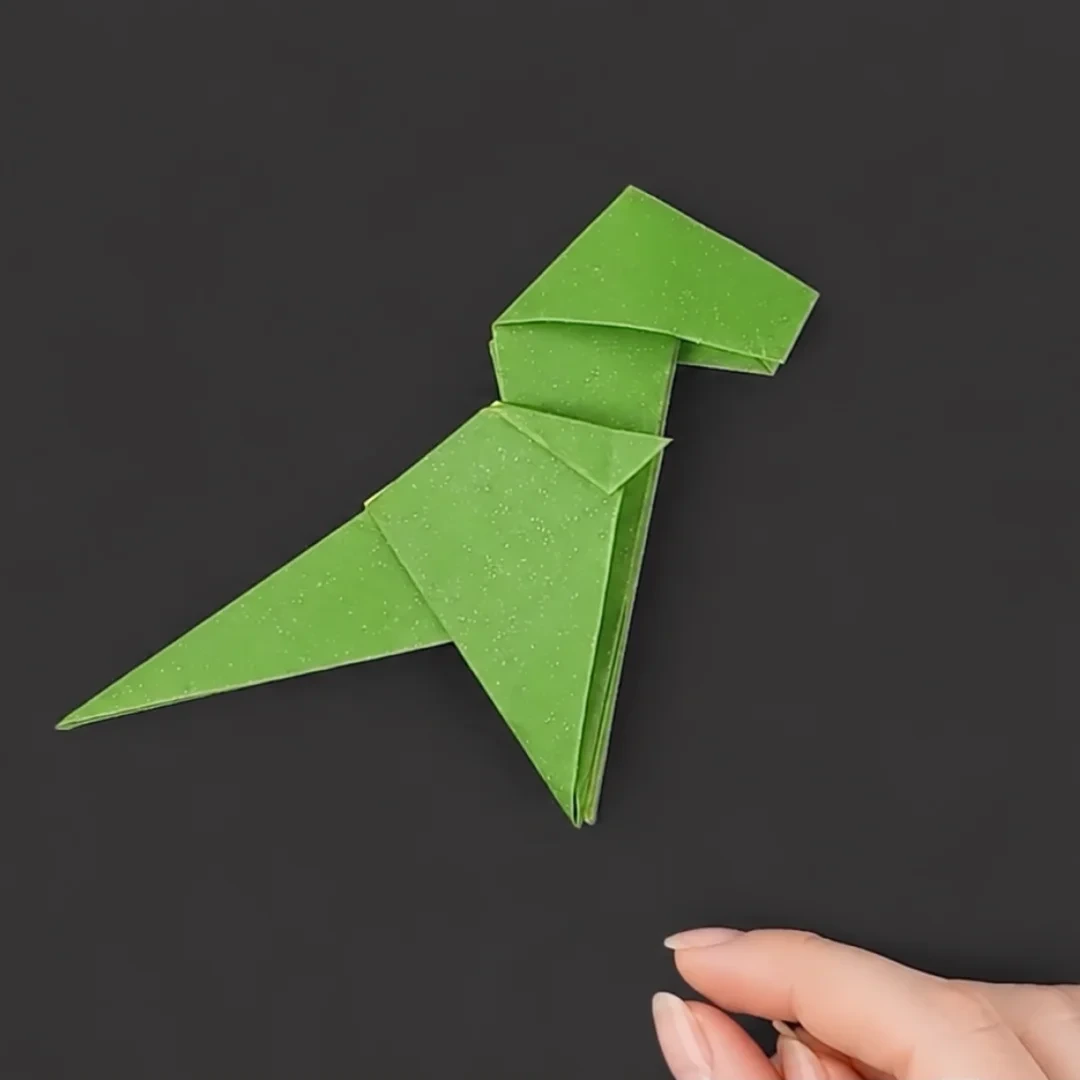 Open image at full size ↗
Fold a small arm, then turn over and repeat.
Step 17
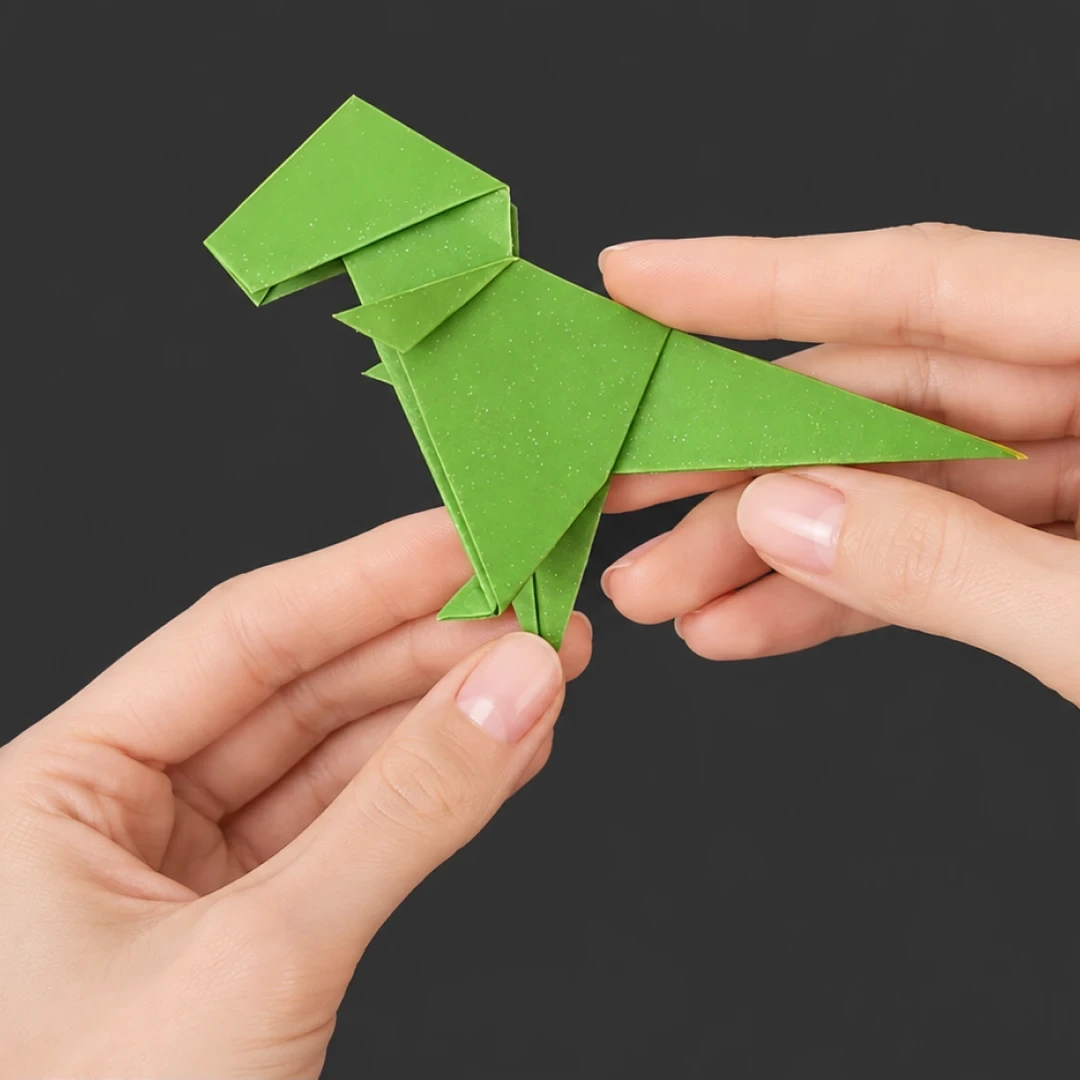 Open image at full size ↗
Open the lower section and reverse its angle to form a foot. Adjust the model so it stands.
Follow the diagrams alongside the step-by-step English instructions.
Choose your next project →