
Flowers & nature · Step-by-step guide
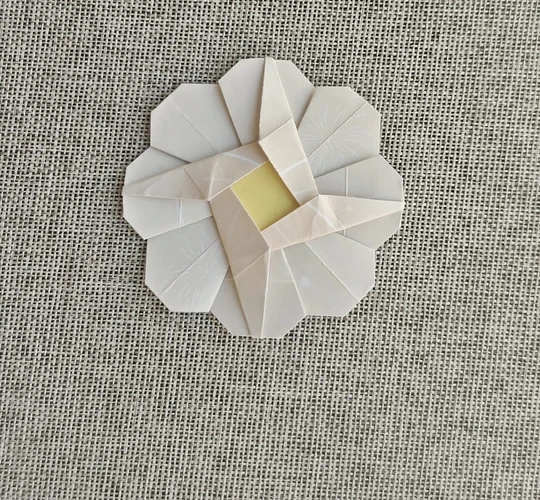
Square-Center Paper Daisy
Fold a flat daisy with eight rounded edges and a small square center.
What you’ll need
- One 7.6 × 7.6 cm square
- One 1.5 × 1.5 cm yellow square
- Glue
Origami · Creasing, collapse folds & shaping
Make it, step by step.
5 steps · Original diagrams with English instructions
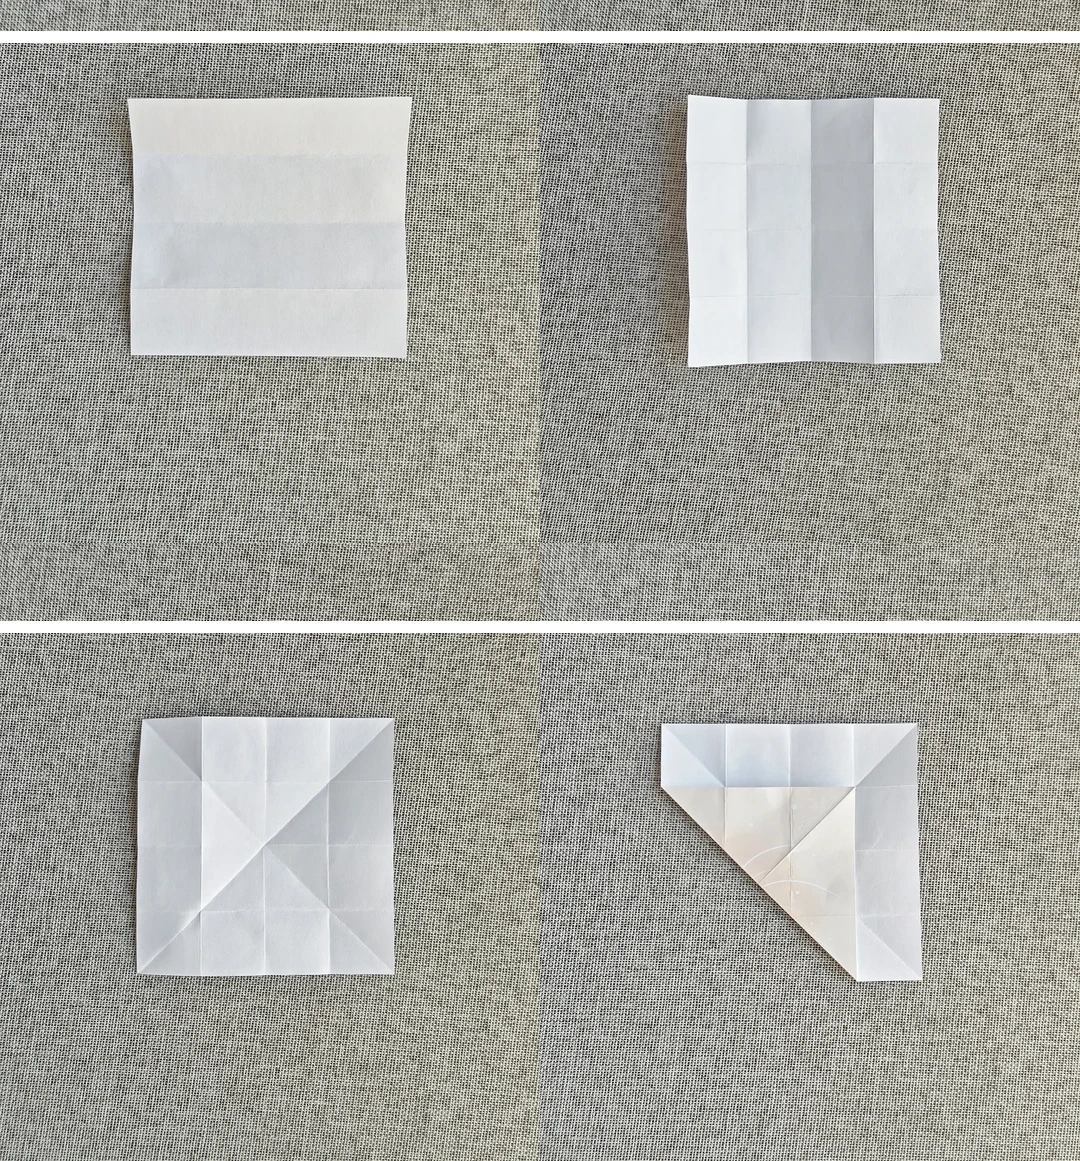
Make a crease grid
 Open image at full size ↗
Fold the square into quarters horizontally and vertically, reopening each time. Add both diagonals and the extra diagonal crease shown.
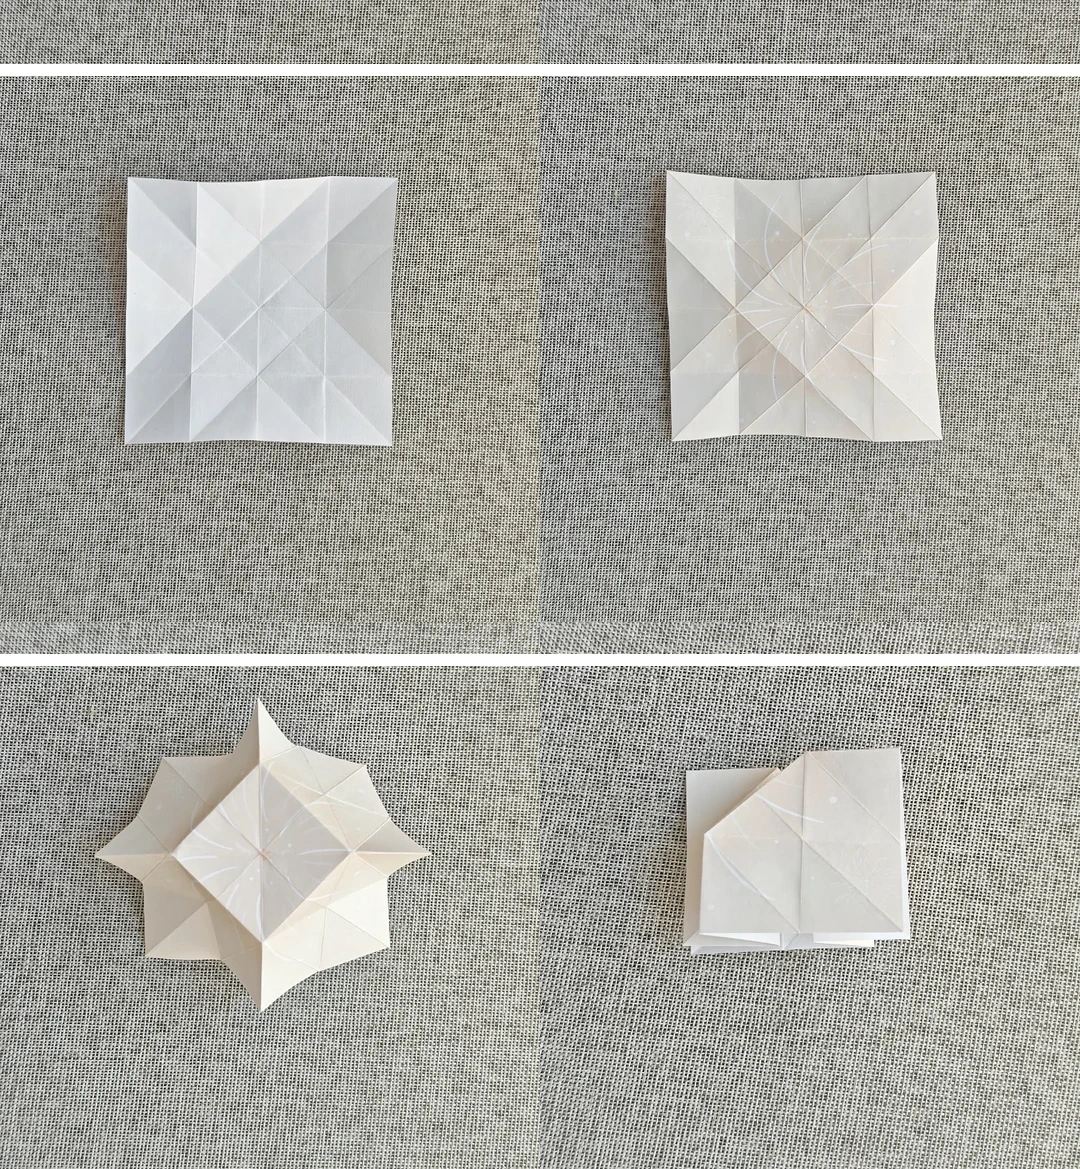
Collapse the grid
 Open image at full size ↗
Repeat the diagonal crease at the other corners and turn over. Bring the paper toward the center and flatten the side sections.
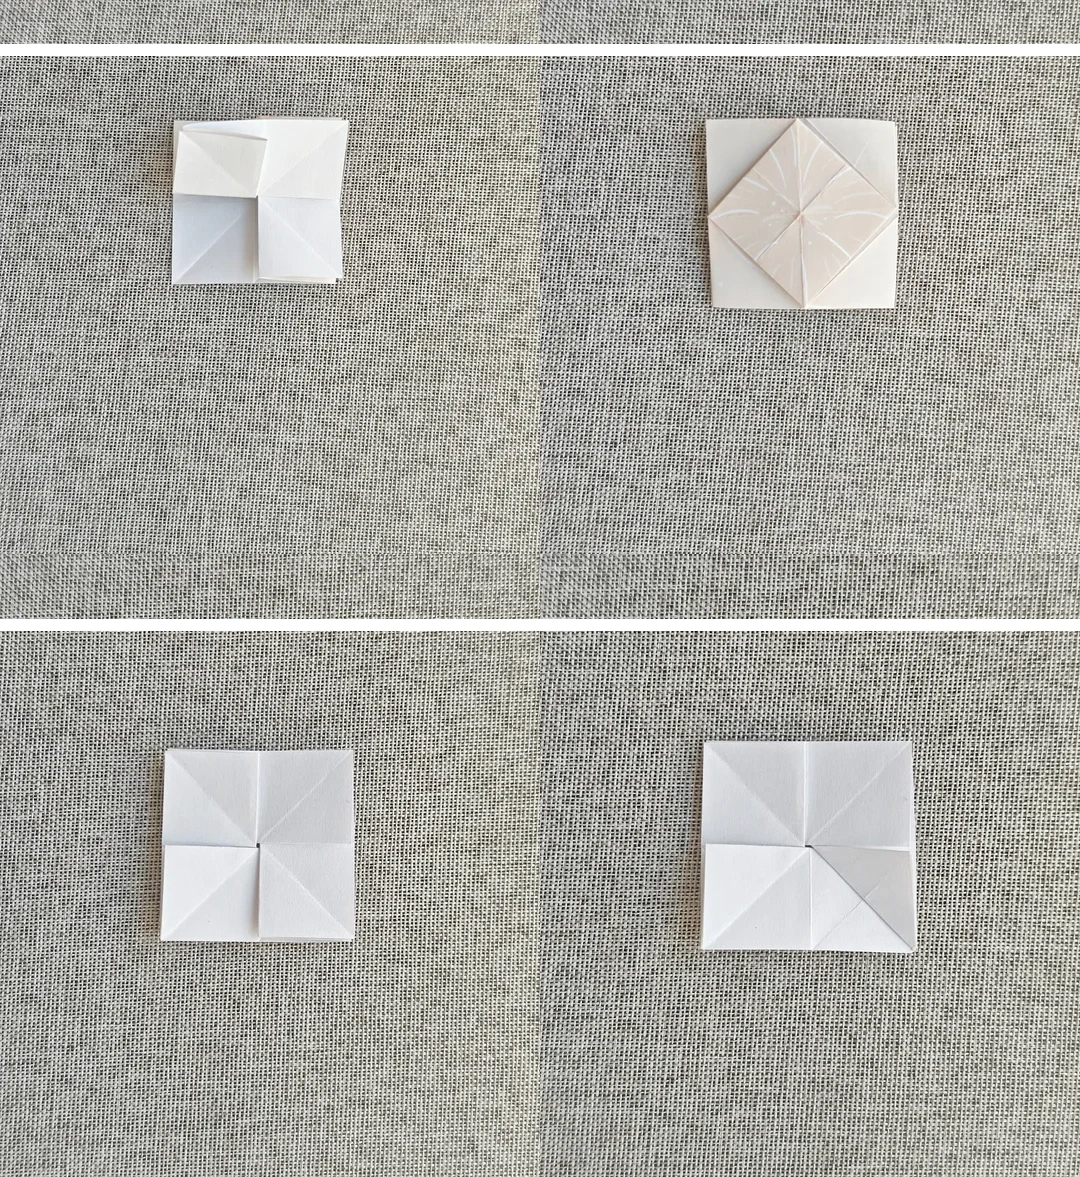
Rearrange the layers
 Open image at full size ↗
Fold the lower half upward, turn over, fold the upper half down and turn again. Fold the small corner across.
Open the petal points
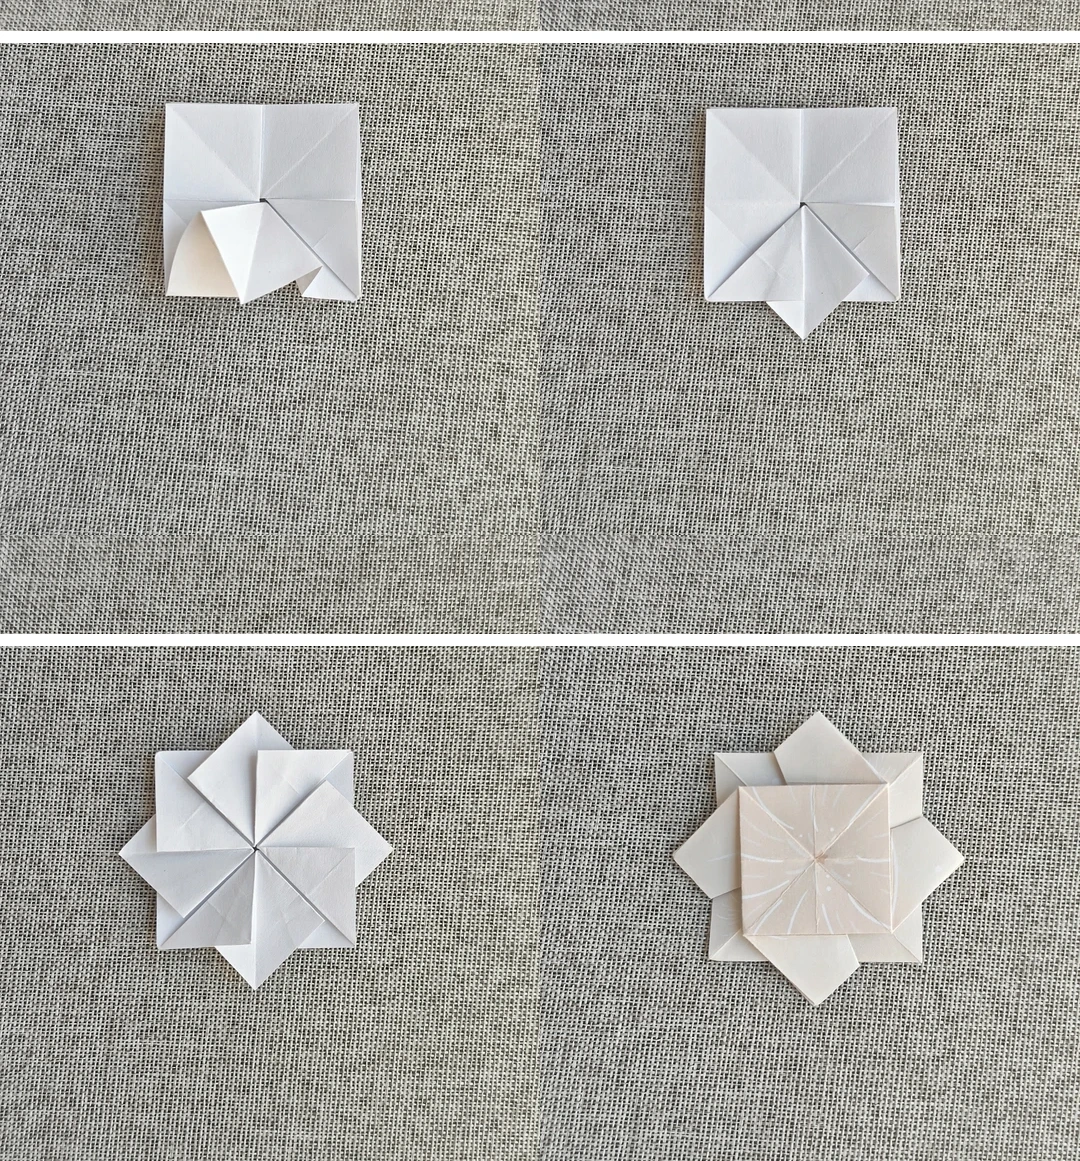 Open image at full size ↗
Fold the exposed edge toward the center. Repeat around the model to open the eight points, then turn over.
Round and finish
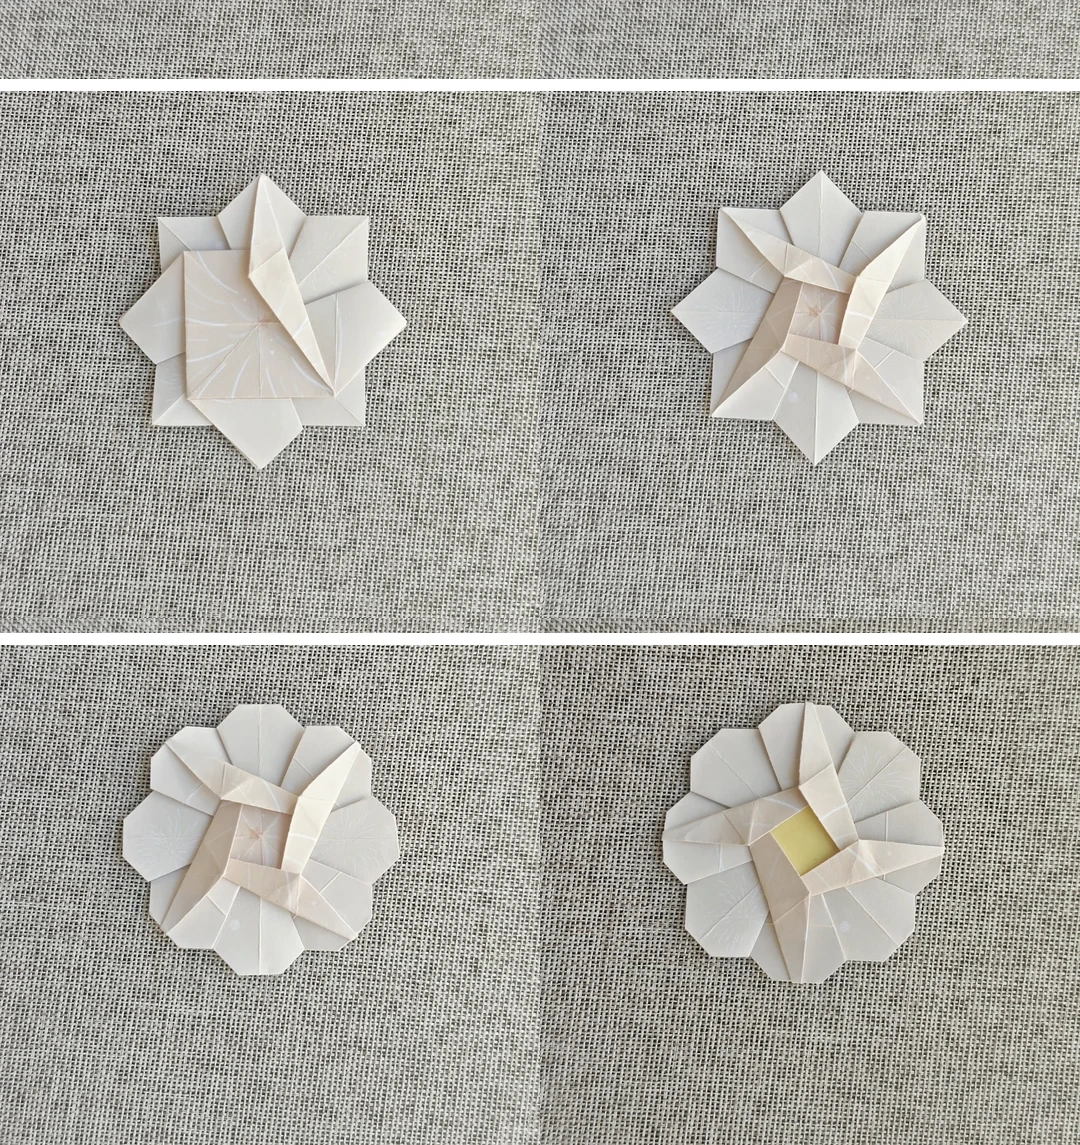 Open image at full size ↗
Fold each inner edge as pictured, tuck the outside sharp corners behind and glue the small yellow square into the center.
Follow the diagrams alongside the step-by-step English instructions.
Choose your next project →