
Animals · Step-by-step guide
Springy Paper Snake
Fold a little snake with an accordion body that springs up when you press it.
What you’ll need
- Square paper
- Pen
Paper folding and shaping
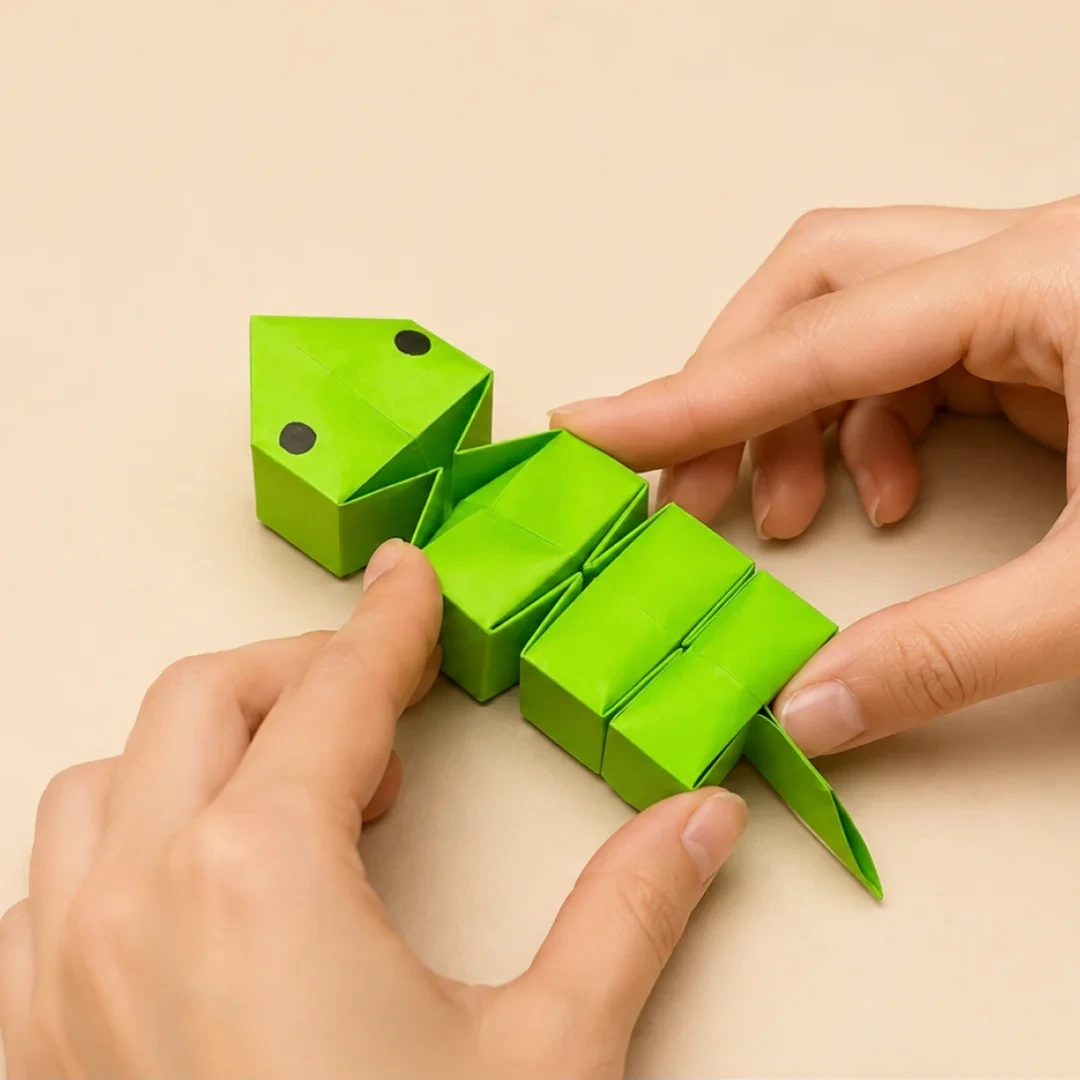
Make it, step by step.
14 steps · Original diagrams with English instructions
Step 1
 Open image at full size ↗
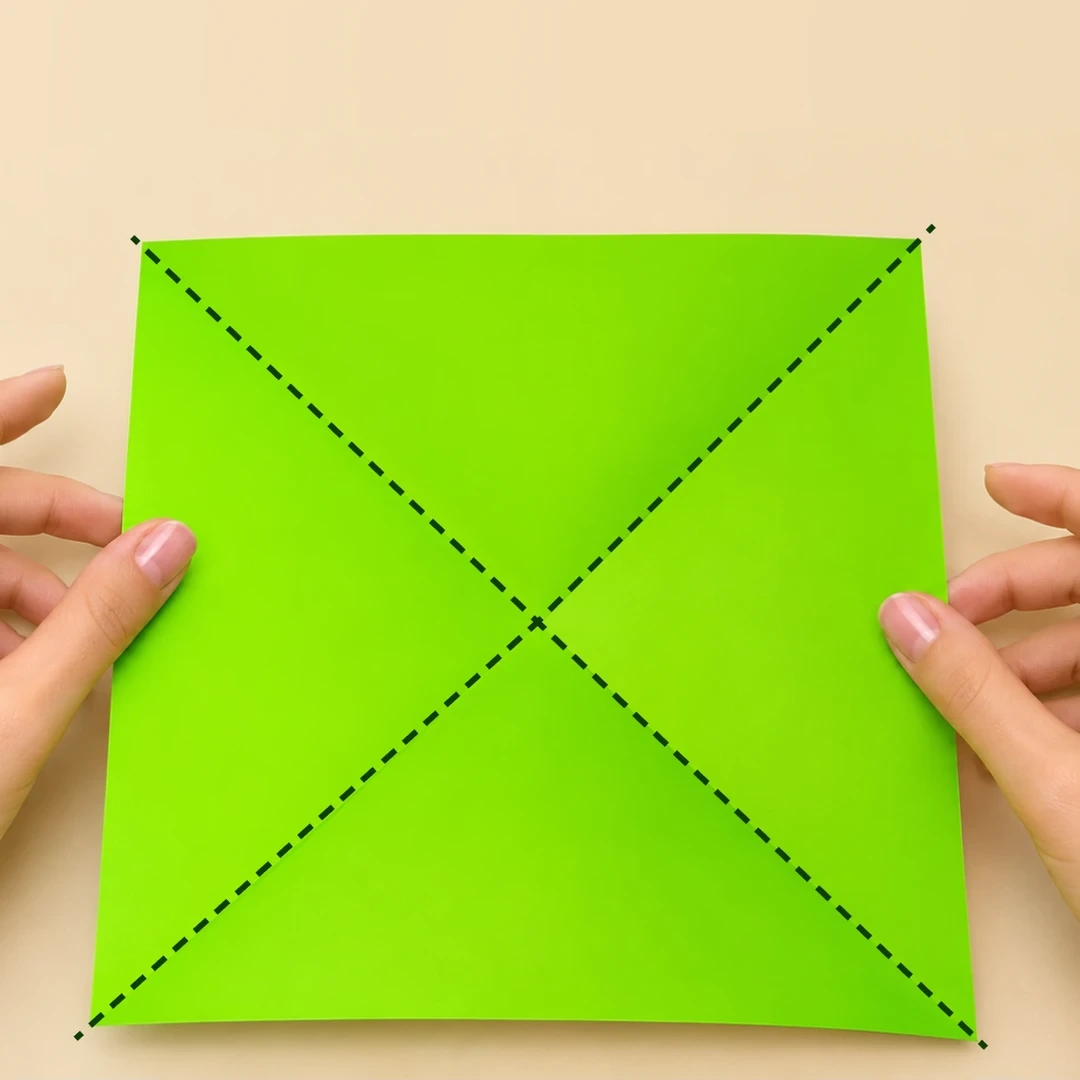
Prepare a square sheet. Fold it in half along the dotted line.
Step 2
 Open image at full size ↗
Fold the top and bottom corners toward the center.
Step 3
 Open image at full size ↗
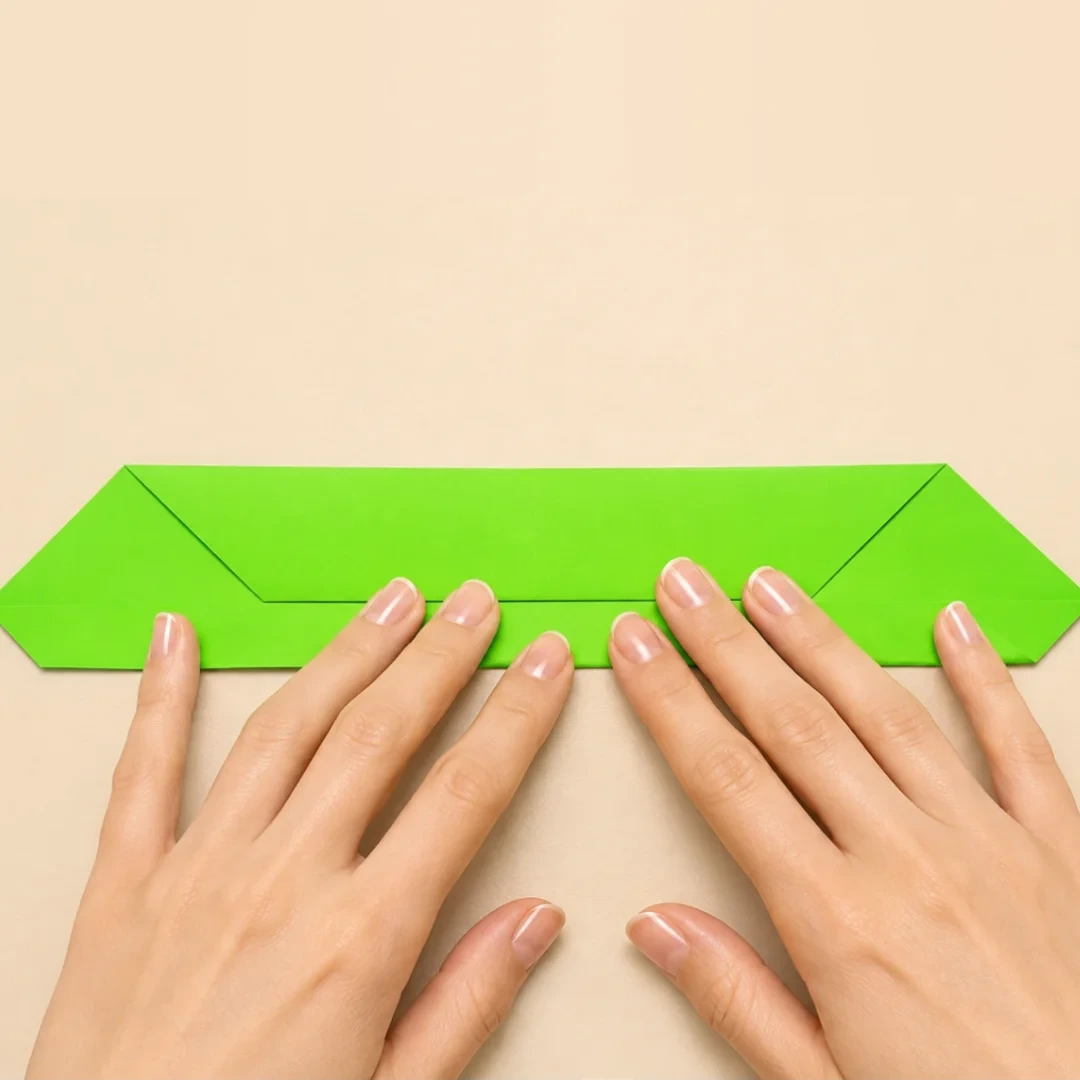
Fold each side toward the centerline twice more.
Step 4
 Open image at full size ↗
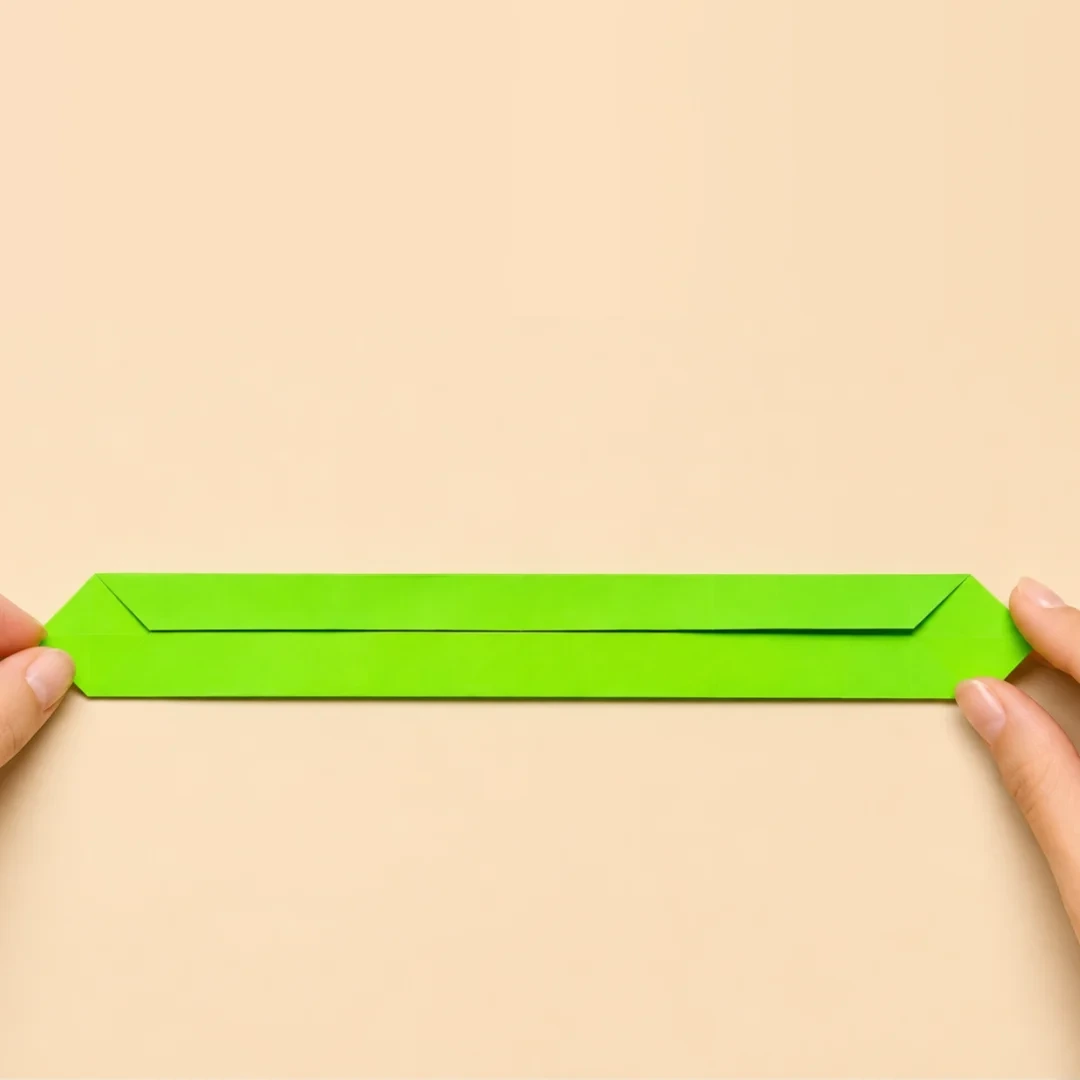
Repeat on the opposite corners, following the picture.
Step 5
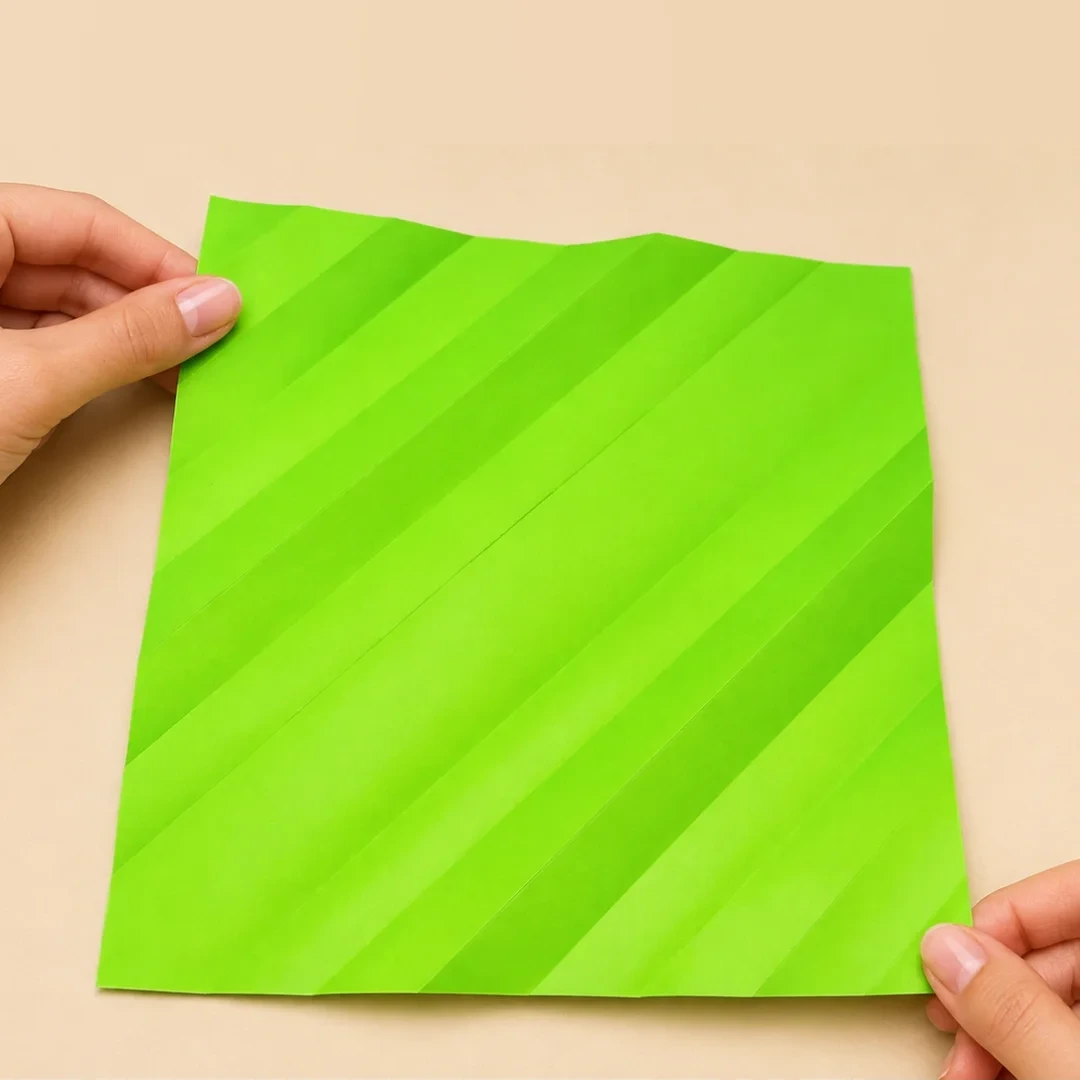 Open image at full size ↗
Open the paper and fold the other pair of corners.
Step 6
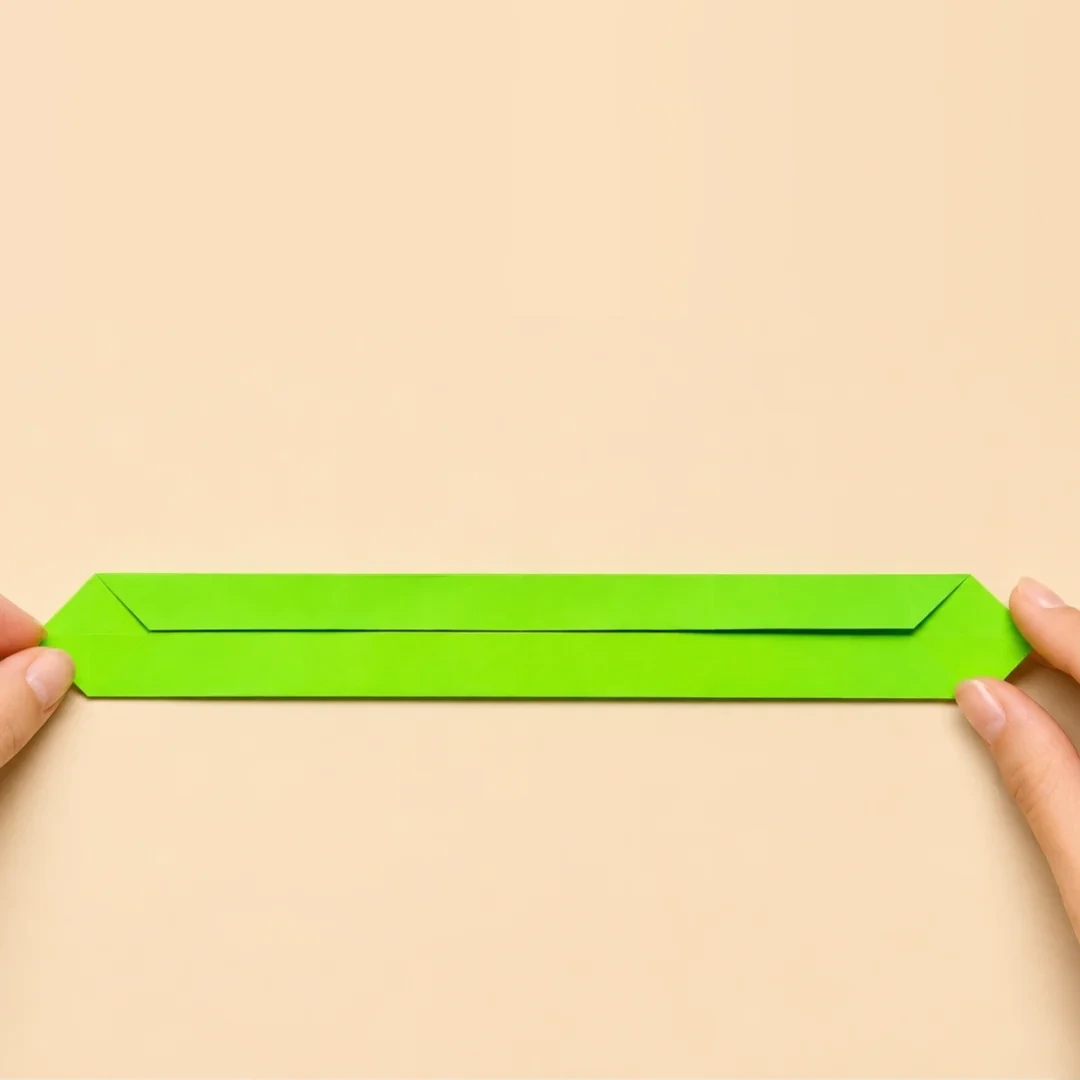 Open image at full size ↗
Repeat the folding sequence shown in the earlier pictures on this pair of corners.
Step 7
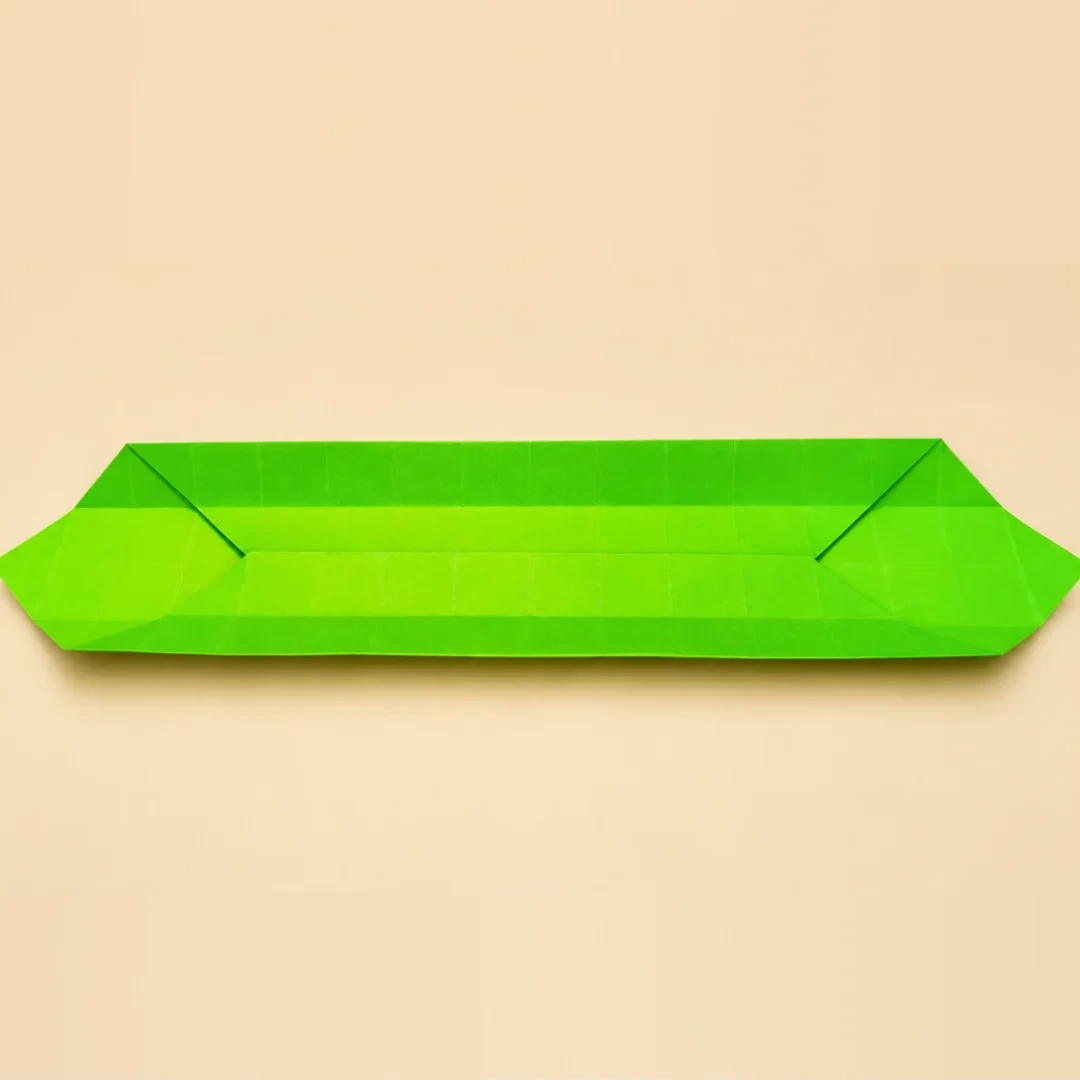 Open image at full size ↗
Open the first layer as shown.
Step 8
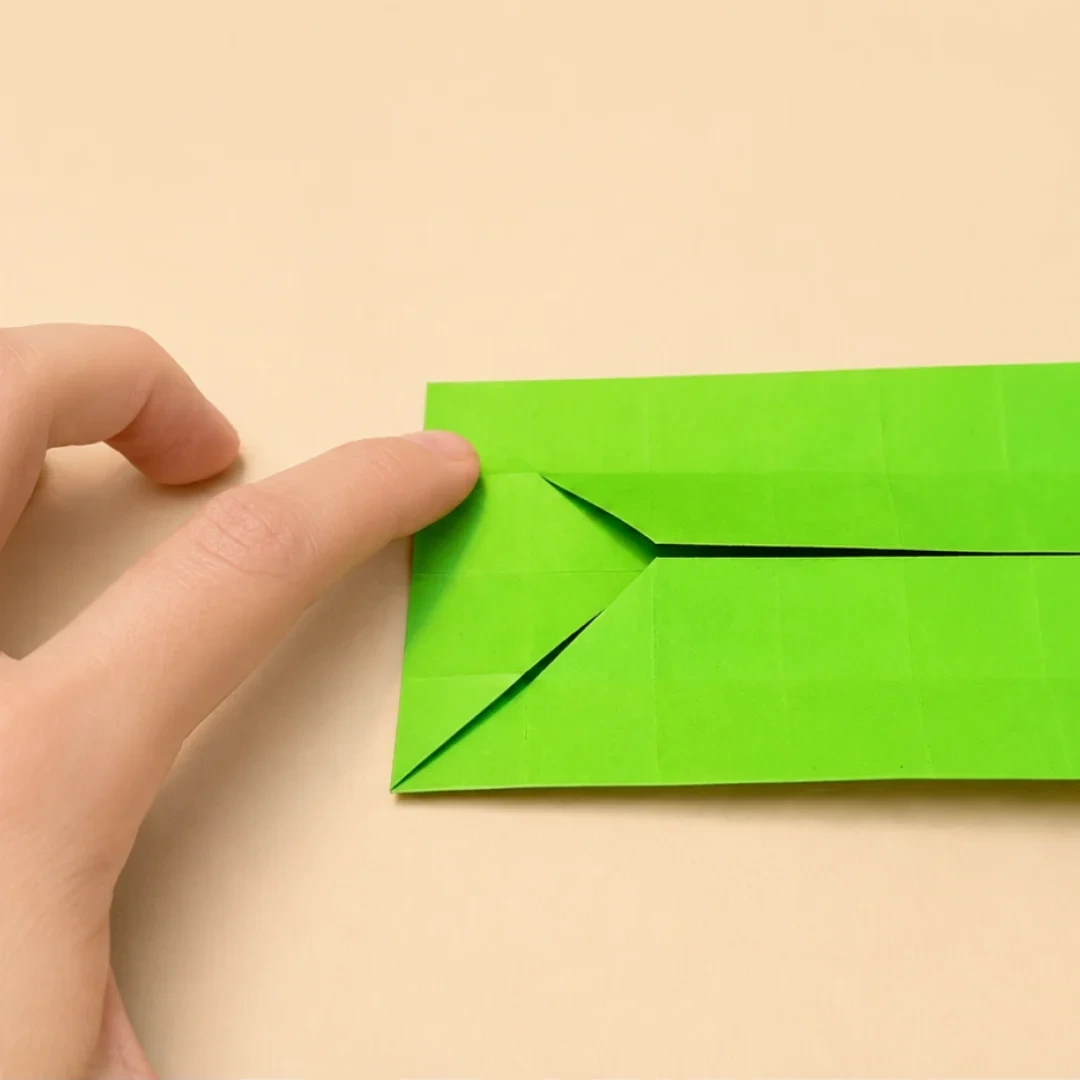 Open image at full size ↗
Fold the corner upward to form the snake’s head.
Step 9
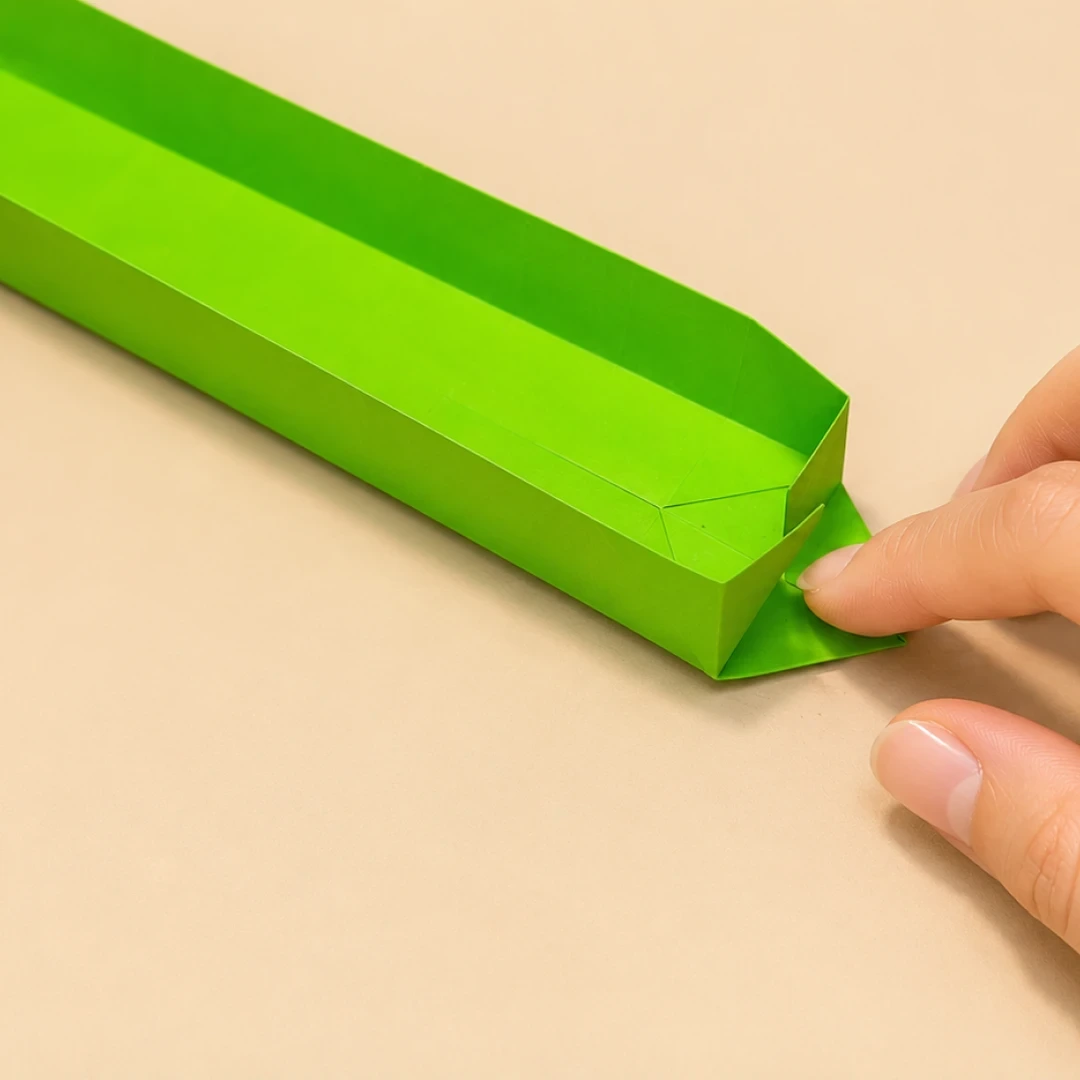 Open image at full size ↗
Fold both sides inward into triangles, then fold the paper in half into the shape shown.
Step 10
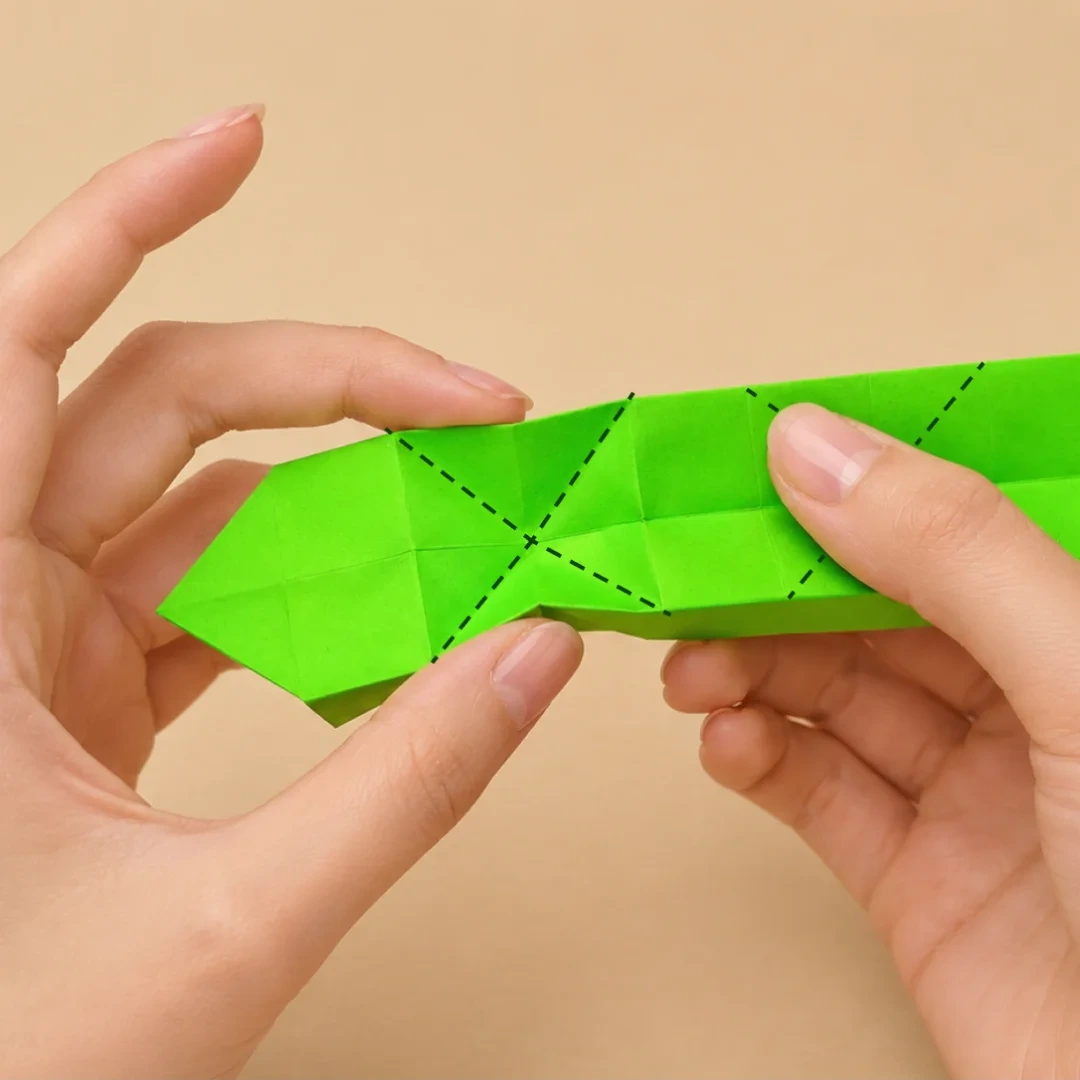 Open image at full size ↗
Crease the positions marked by the dotted lines.
Step 11
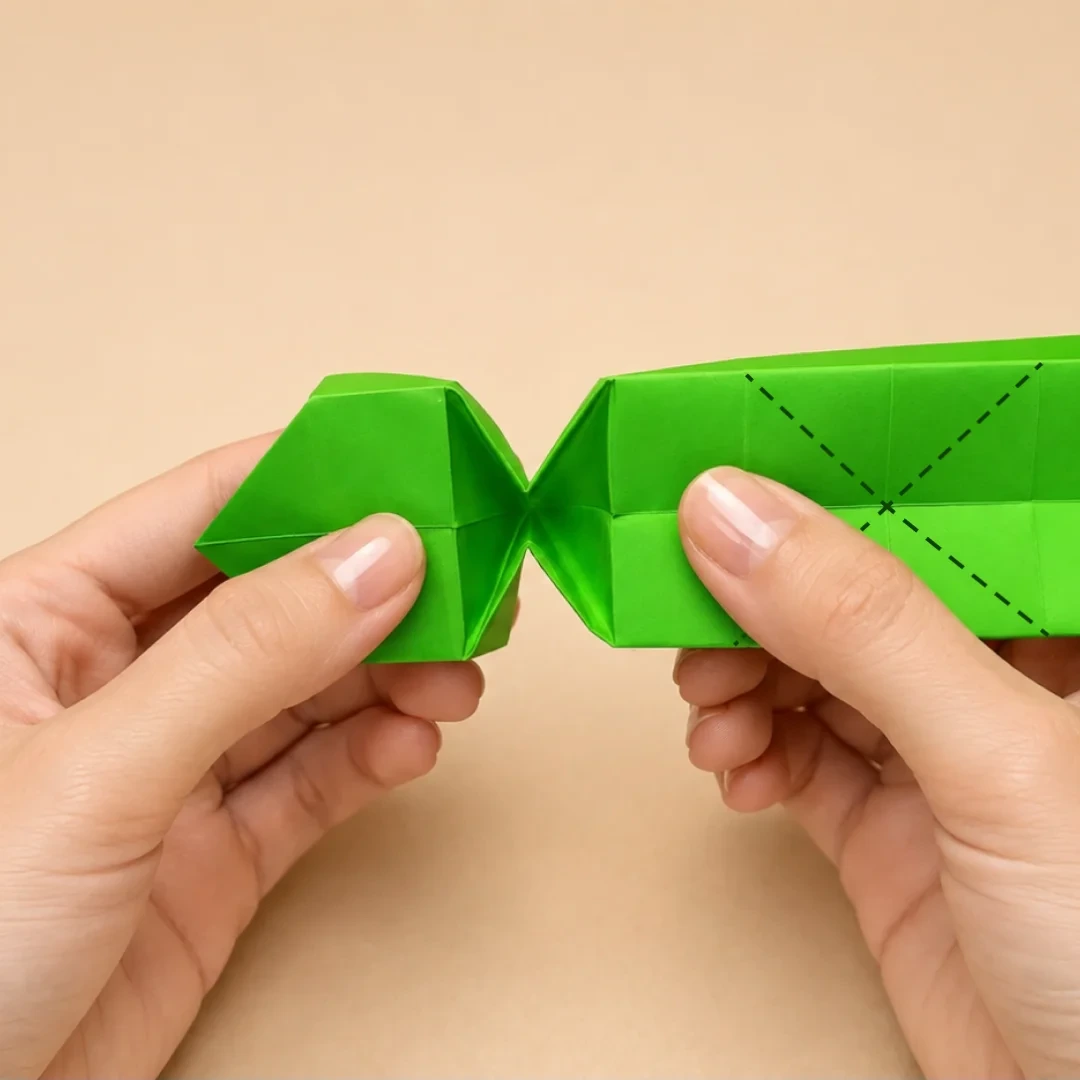 Open image at full size ↗
Squeeze the folds together into the shape shown.
Step 12
 Open image at full size ↗
Turn the model over and press the inner folds again.
Step 13
 Open image at full size ↗
Repeat these folds along the body as shown.
Step 14
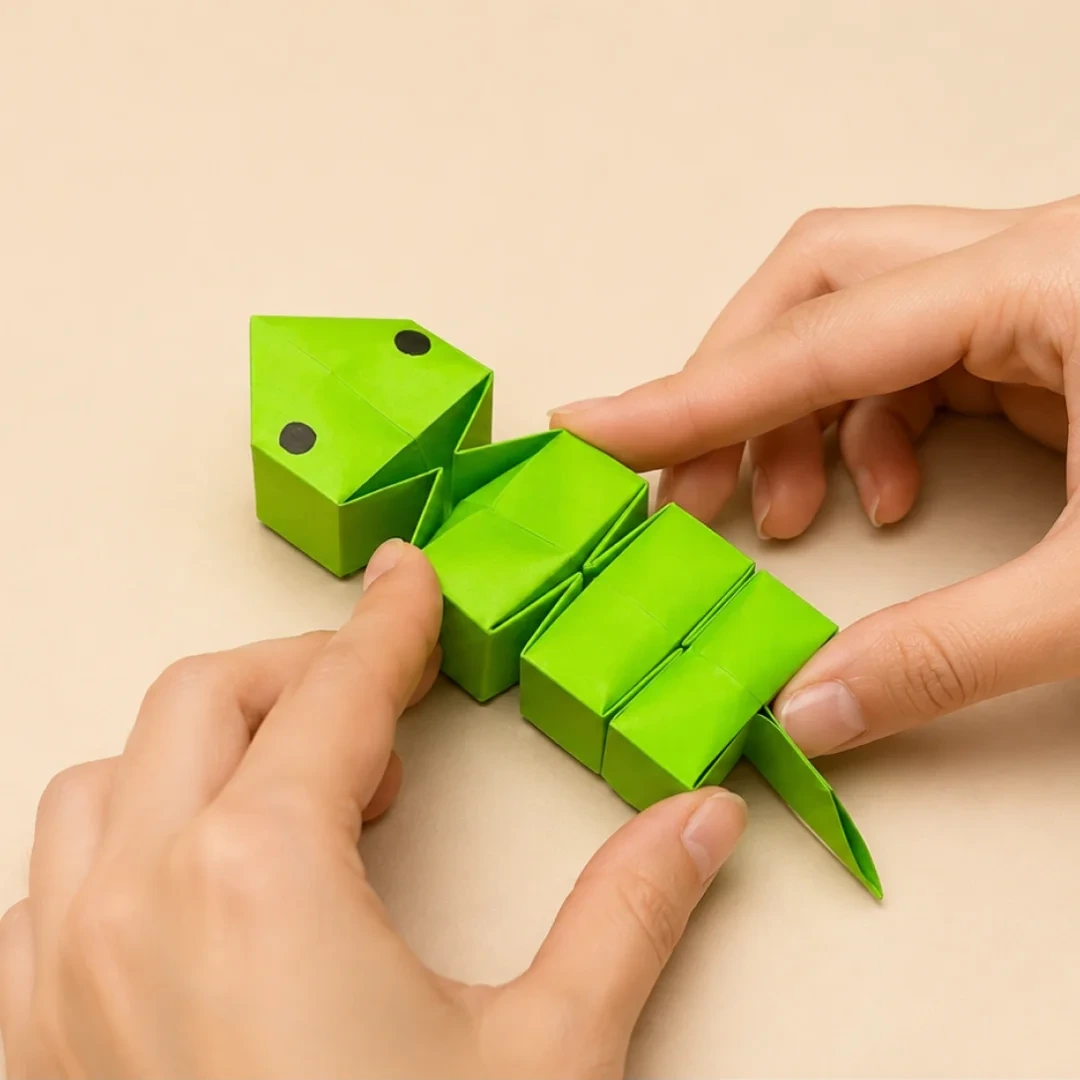 Open image at full size ↗
Draw the eyes. Your springy paper snake is ready.
Follow the diagrams alongside the step-by-step English instructions.
Choose your next project →