
Flowers & nature · Step-by-step guide
Seven-Unit Spider Lily
Combine seven curled blossoms into a dramatic red spider lily.
What you’ll need
- Seven 7.5 × 7.5 cm red paper squares
- Thin red paper strips for stamens
- Scissors
- Craft glue
- Tweezers or a slender curling tool
Paper craft · Folding and assembly
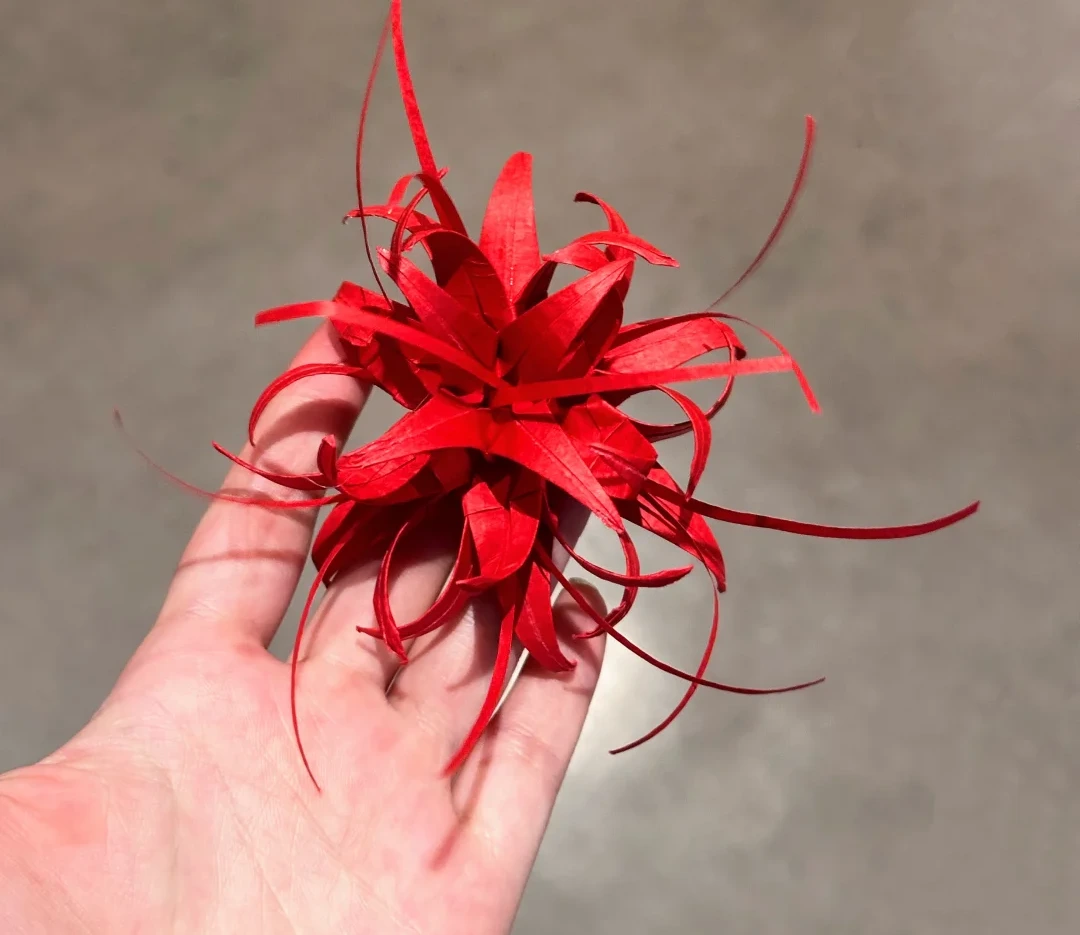
Make it, step by step.
11 steps · Original diagrams with English instructions
Read each picture from left to right, then top to bottom. The pictures show the arrangement of seven units, but do not illustrate a separate stem or a detailed fastening method.
Finished model
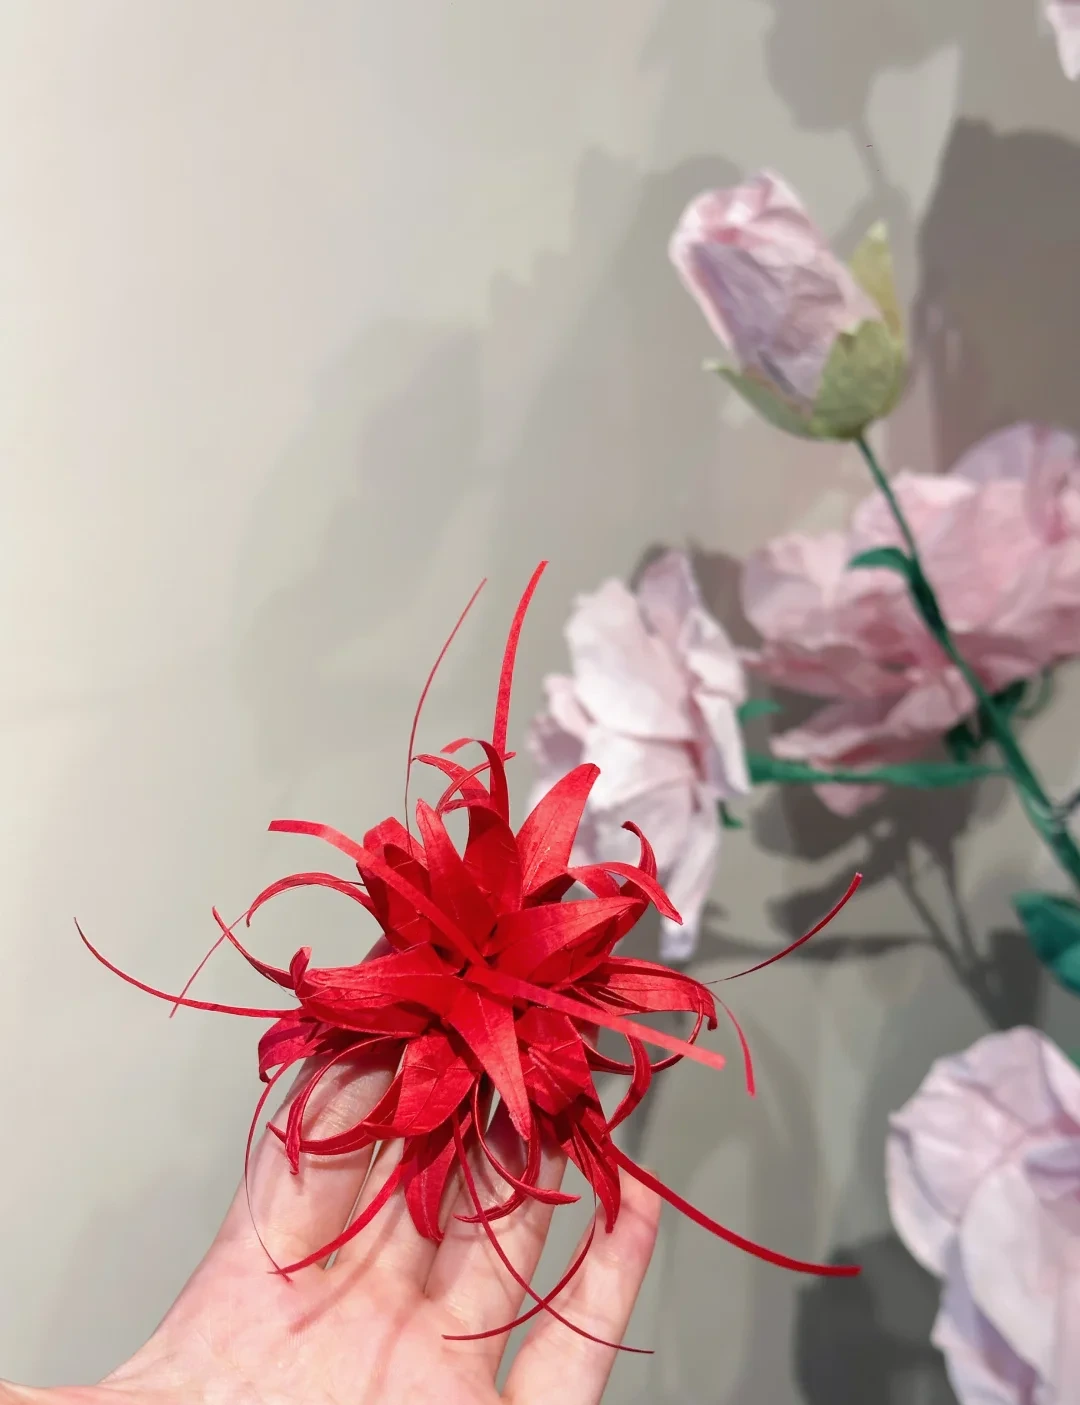 Open image at full size ↗
Use this finished example to compare the shape and proportions of your model.
Fold a square base
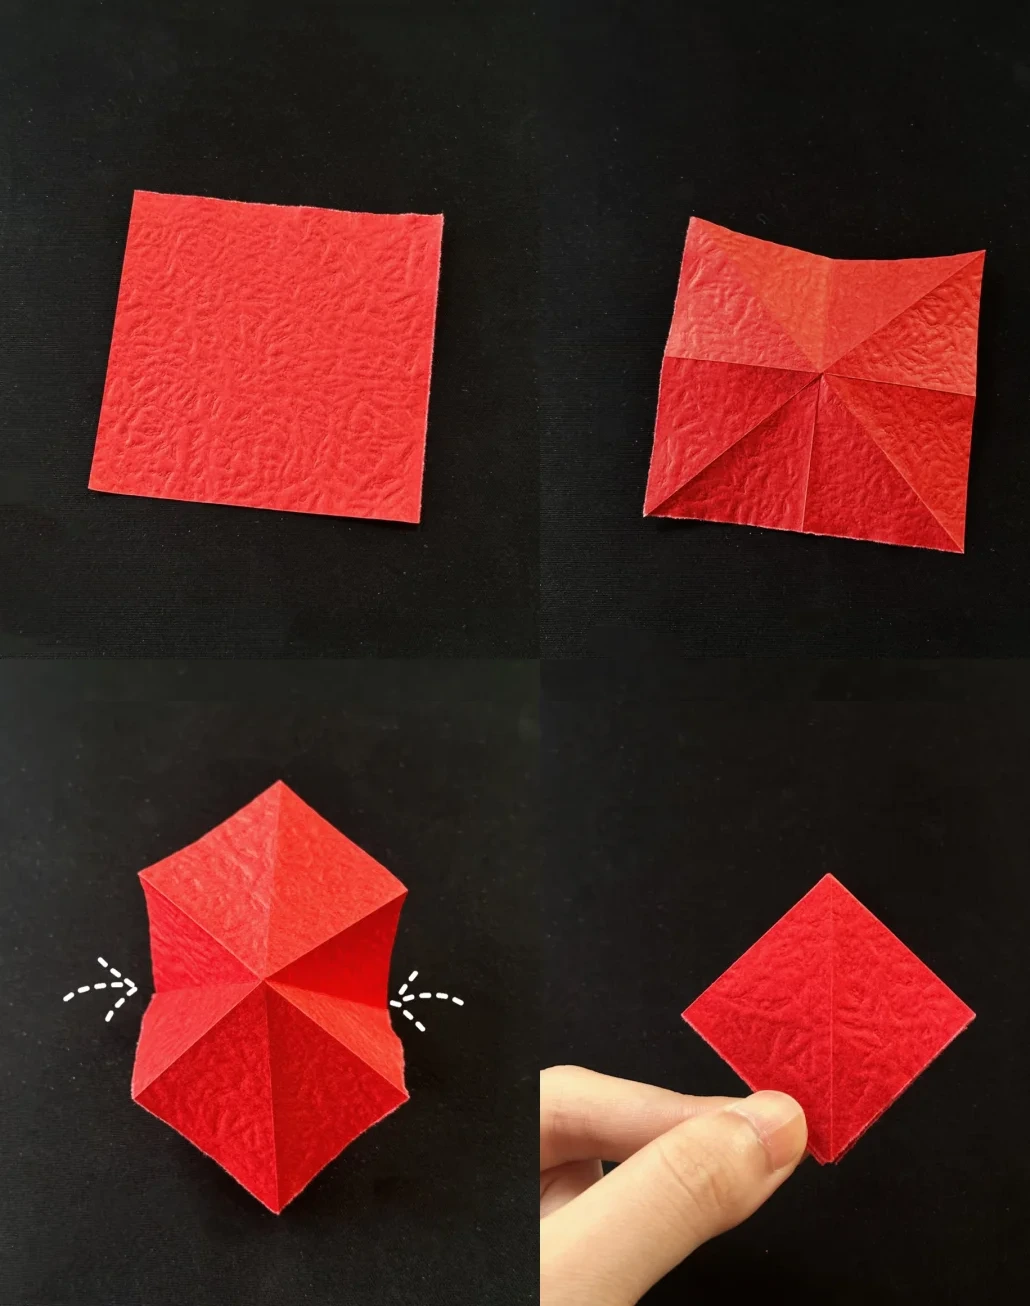 Open image at full size ↗
Crease both diagonals and both midlines. Push the two sides inward and flatten into a layered square.
Make a petal fold
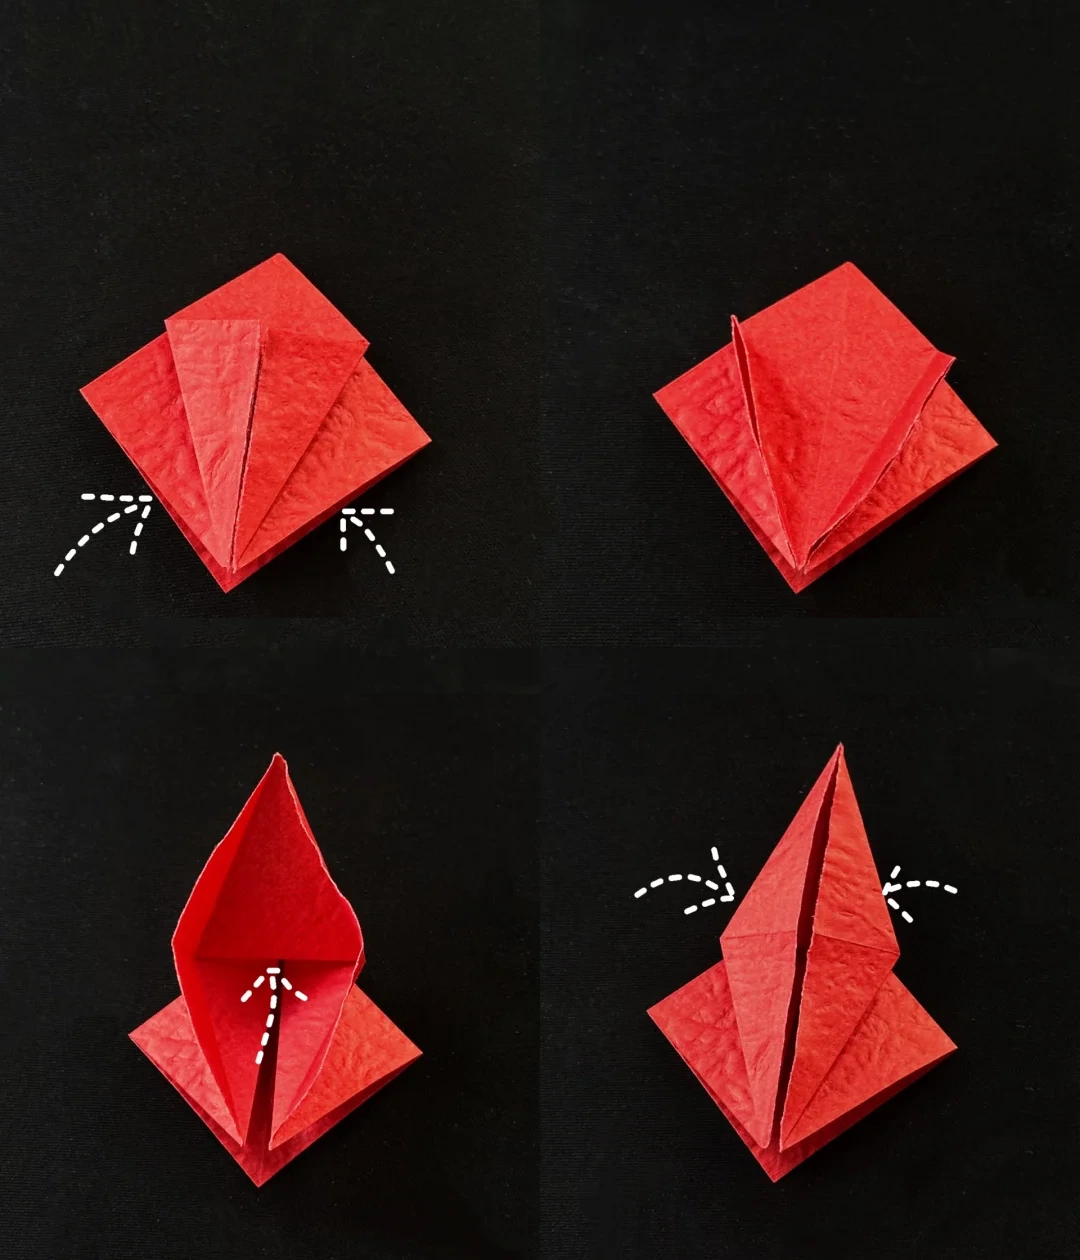 Open image at full size ↗
Fold the lower side edges to the center and unfold. Lift the lower front point upward.
Bring its edges inward along the creases and flatten the long flap.
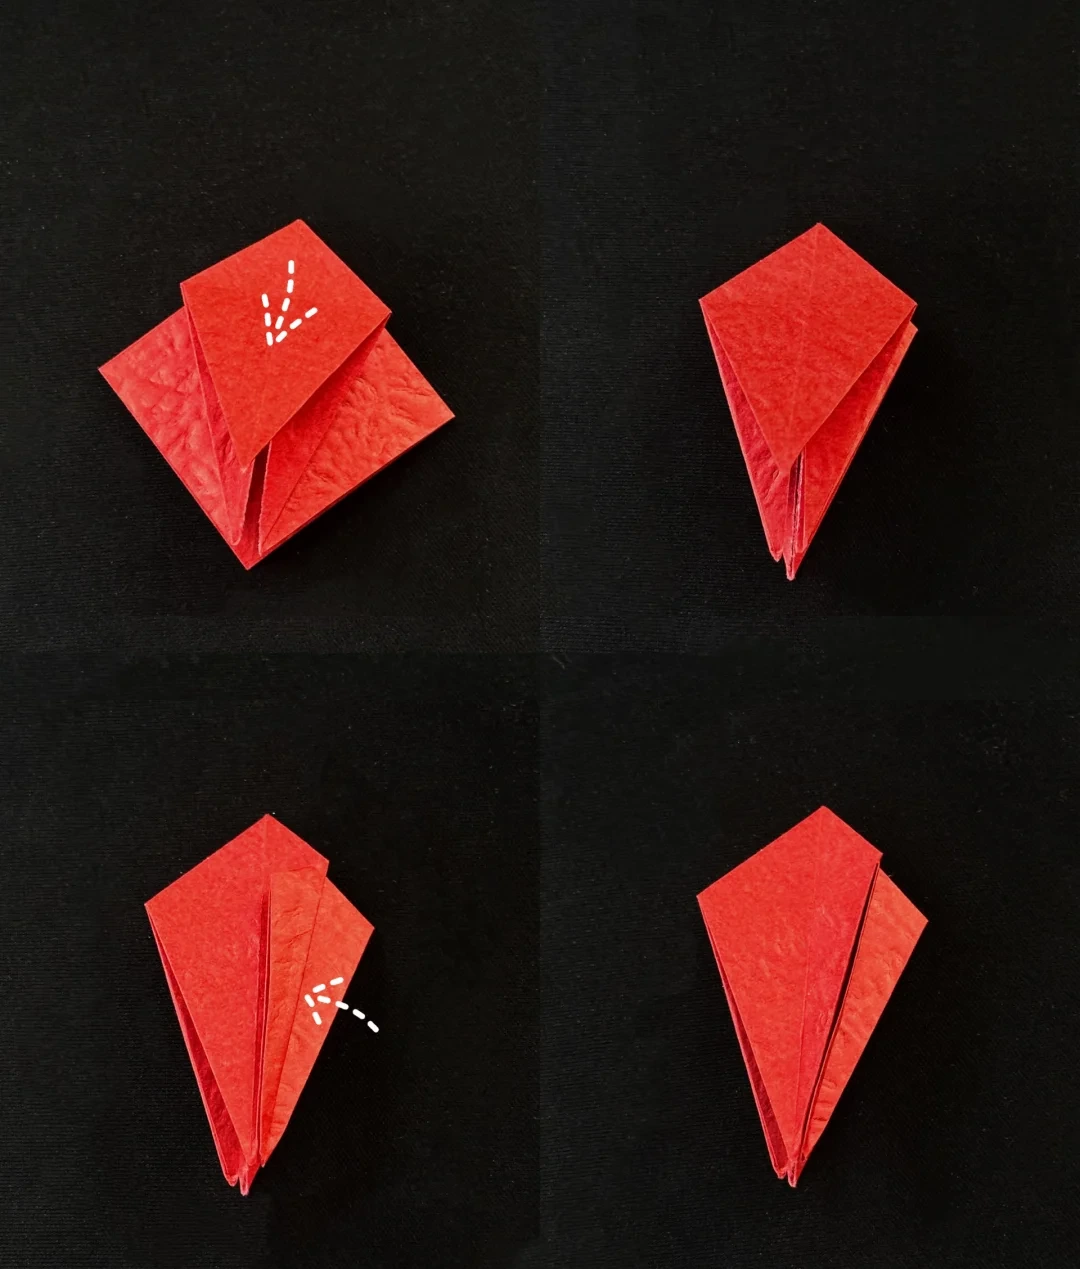
Narrow the base
 Open image at full size ↗
Lower the raised flap. Fold its side edges toward the center and repeat the same sequence on the back.
Lift the indicated folded flap to open the next pocket.
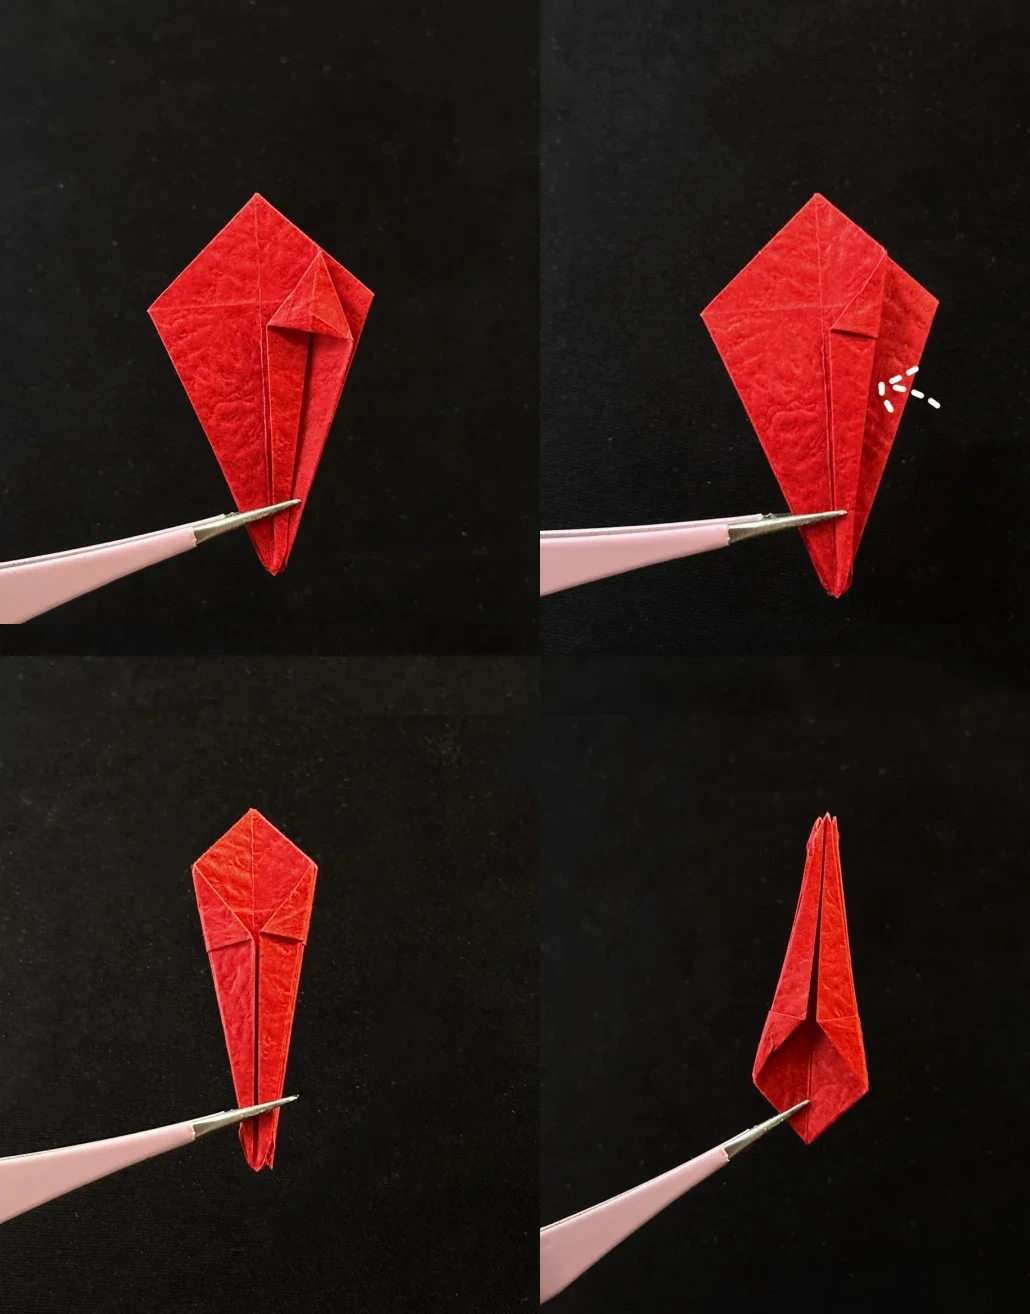
Open the petal layers
 Open image at full size ↗
Open and squash the pocket flat. Repeat on the other side.
Fold the corresponding half behind and rotate the model so the long points face upward.
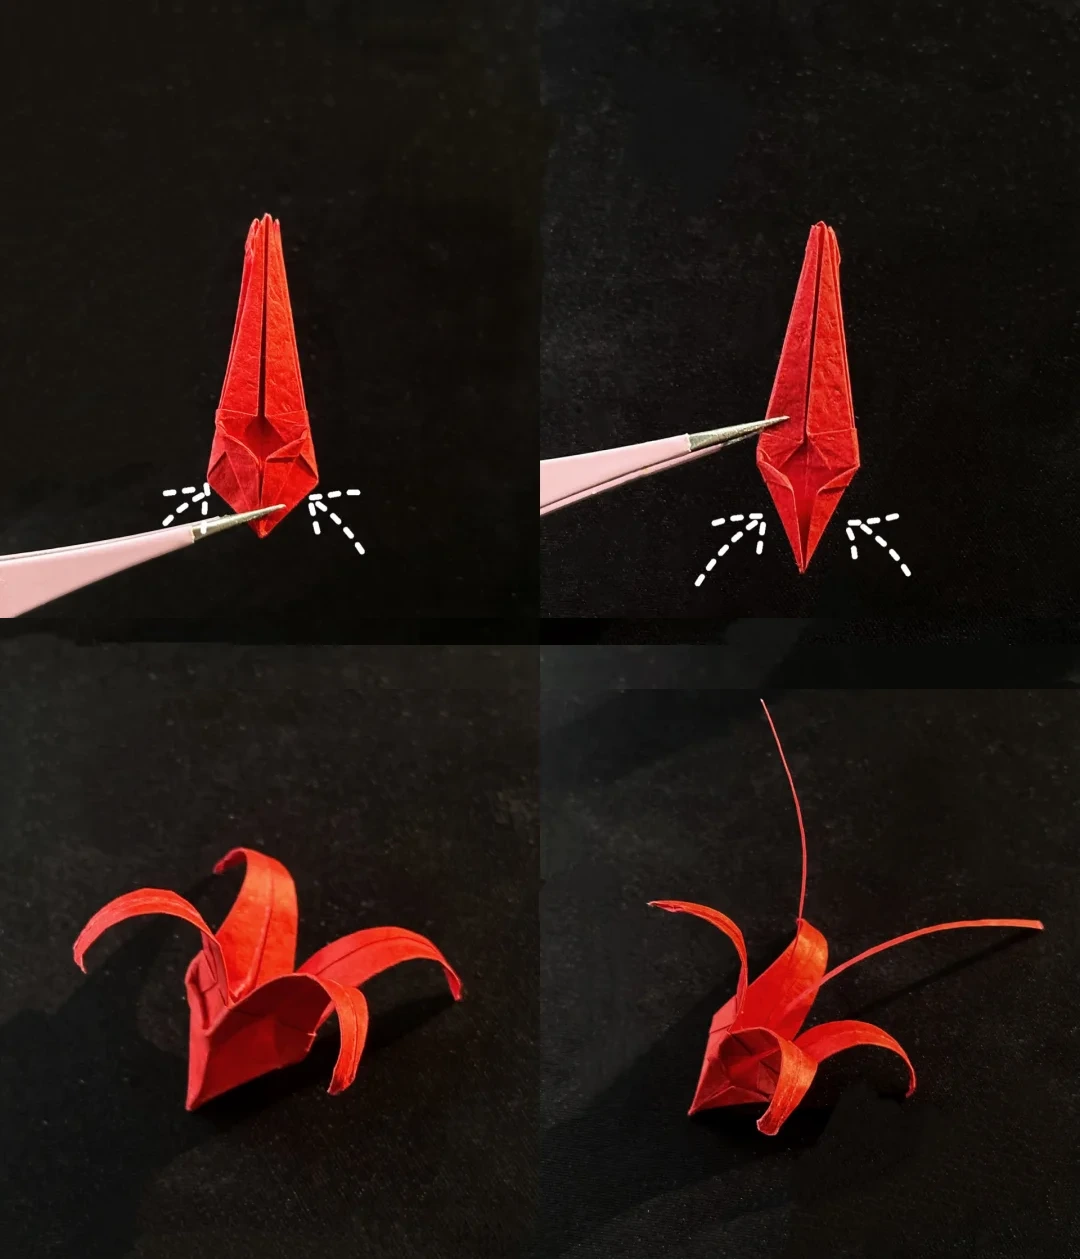
Curl the blossom
 Open image at full size ↗
Fold the lower side edges toward the center and repeat on the back.
Spread the petals and curl them outward. Add two slender paper stamens to the center of the unit.
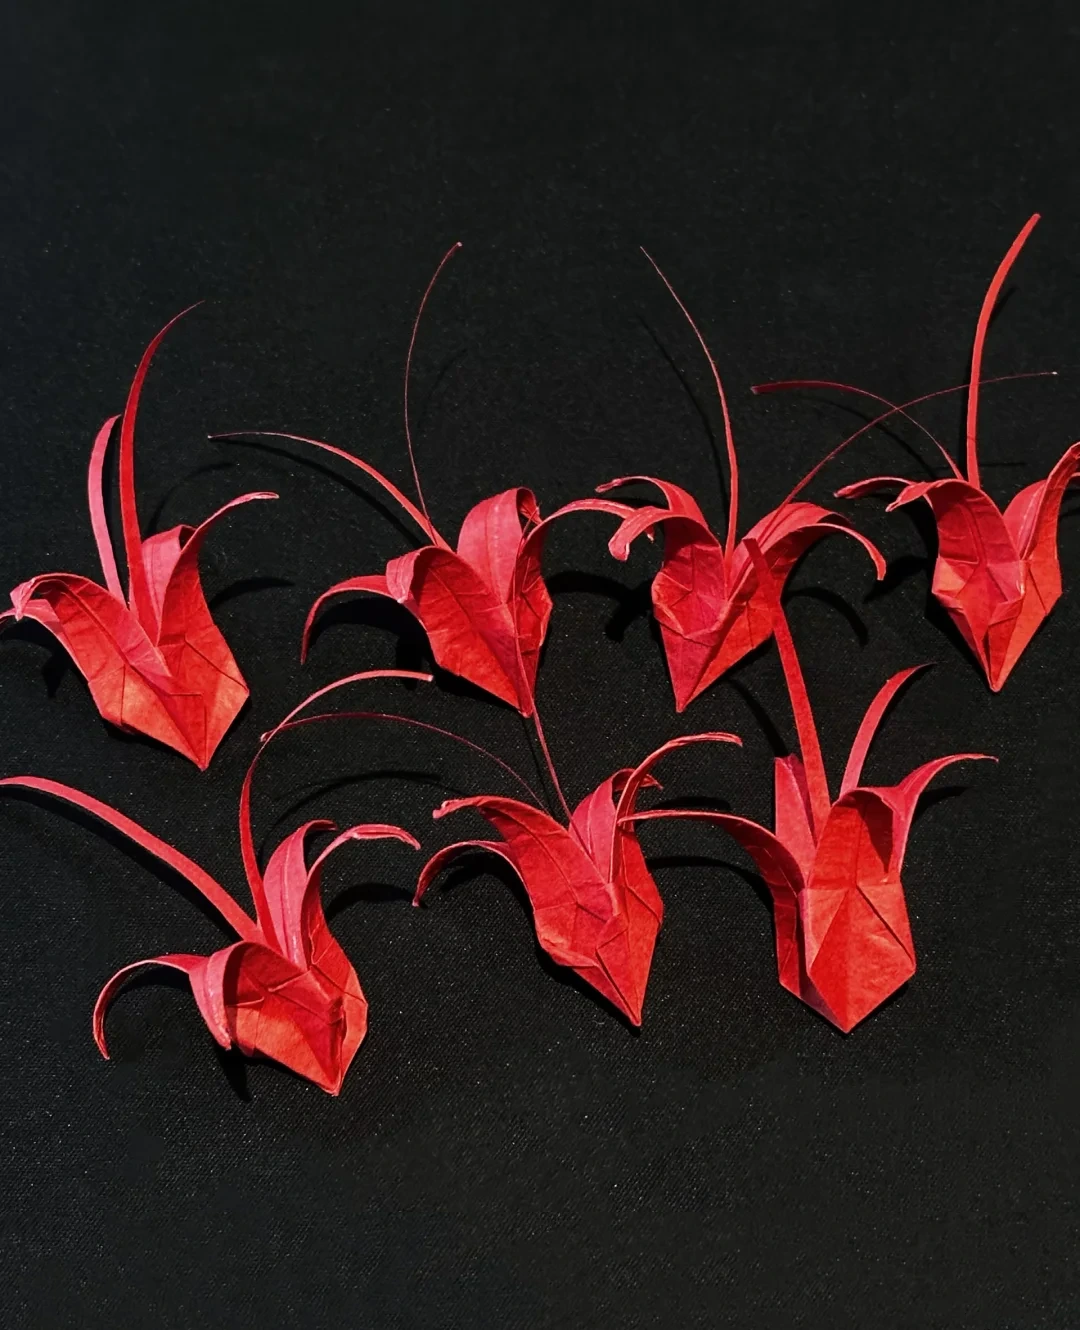
Make seven units
 Open image at full size ↗
Repeat the folding and curling sequence to make seven matching blossoms.
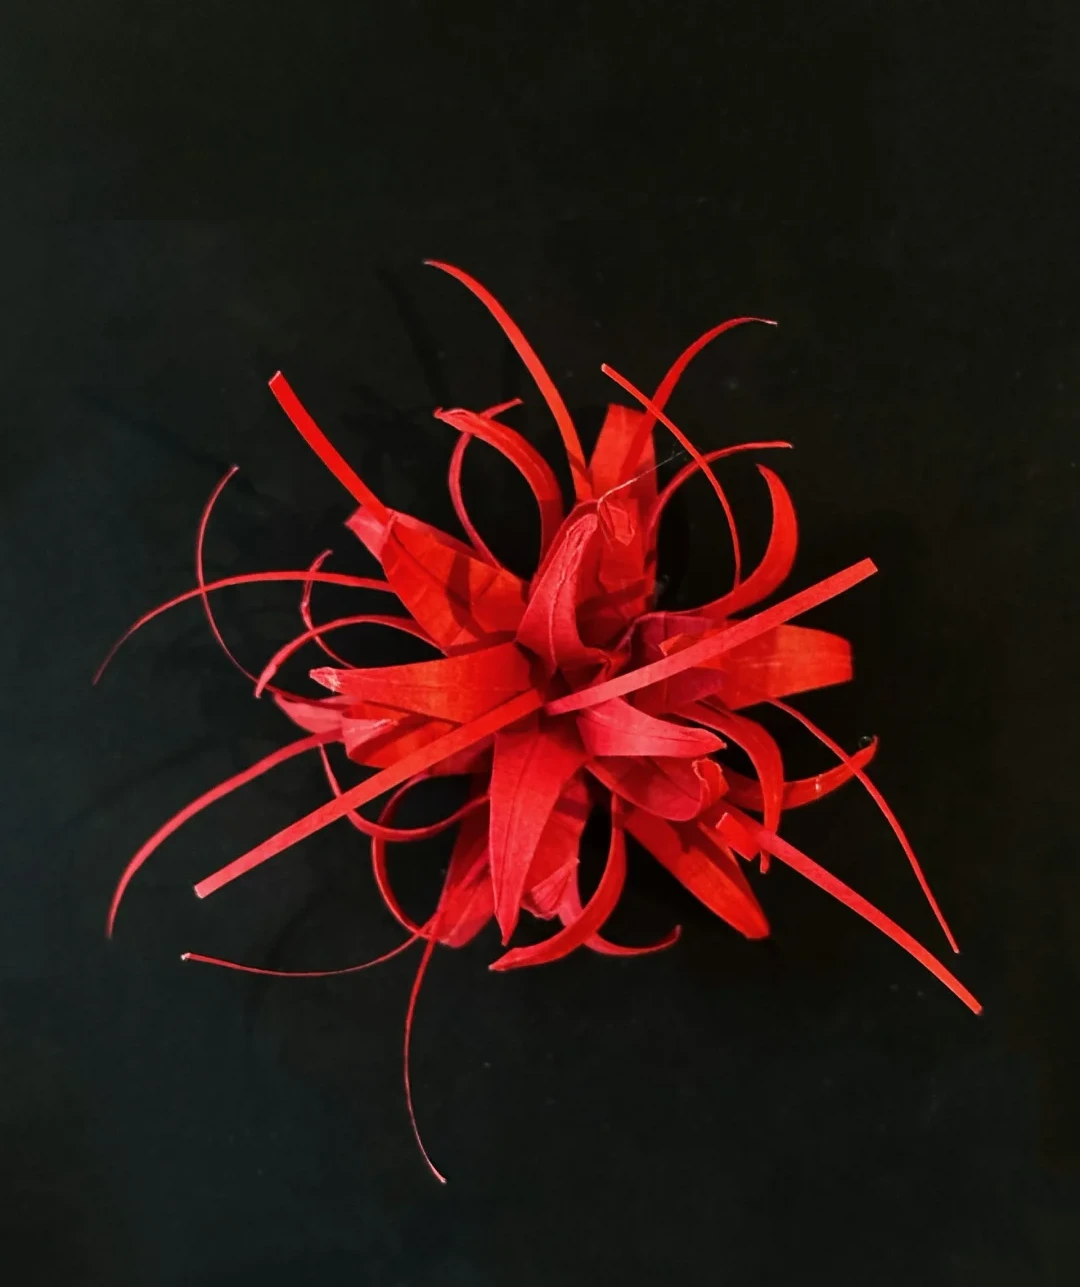
Assemble the flower head
 Open image at full size ↗
Arrange six blossoms around the lower part of the flower and place the seventh above them. Secure the bases with glue and spread the curled petals.
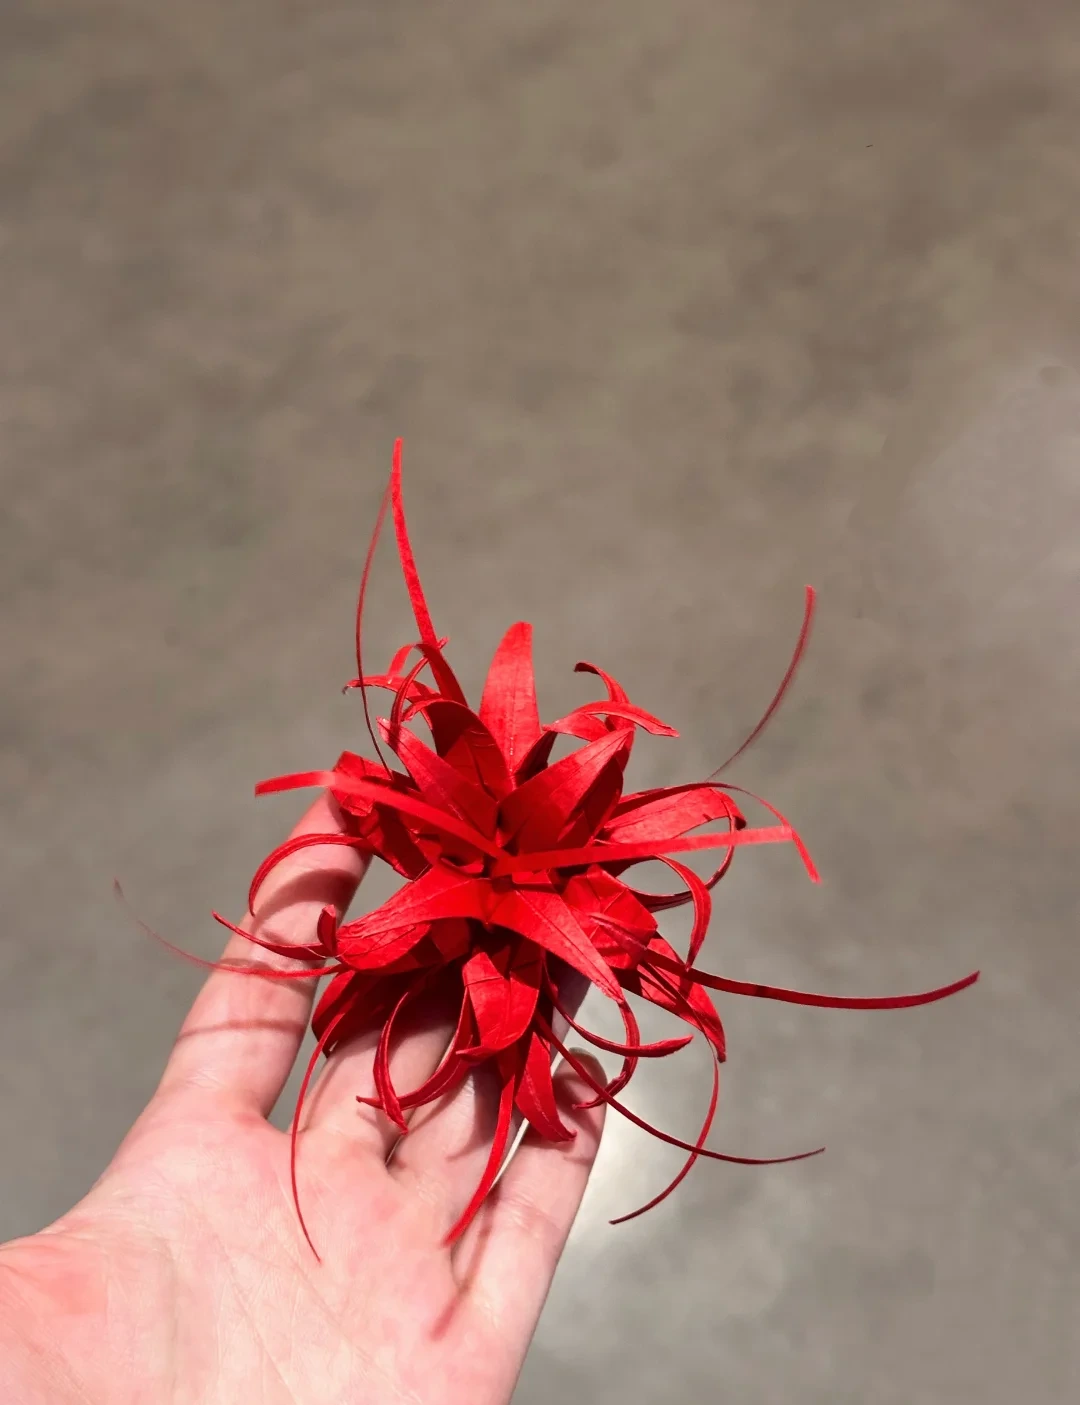
Finished model
 Open image at full size ↗
Use this finished example to compare the shape and proportions of your model.
Follow the diagrams alongside the step-by-step English instructions.
Choose your next project →