
Flowers & nature · Step-by-step guide
Seven Rounded-Petal Flower
Join seven simple folded petals into a soft rounded blossom.
What you’ll need
- Seven equal paper squares
- Craft glue
Paper craft · Folding and assembly
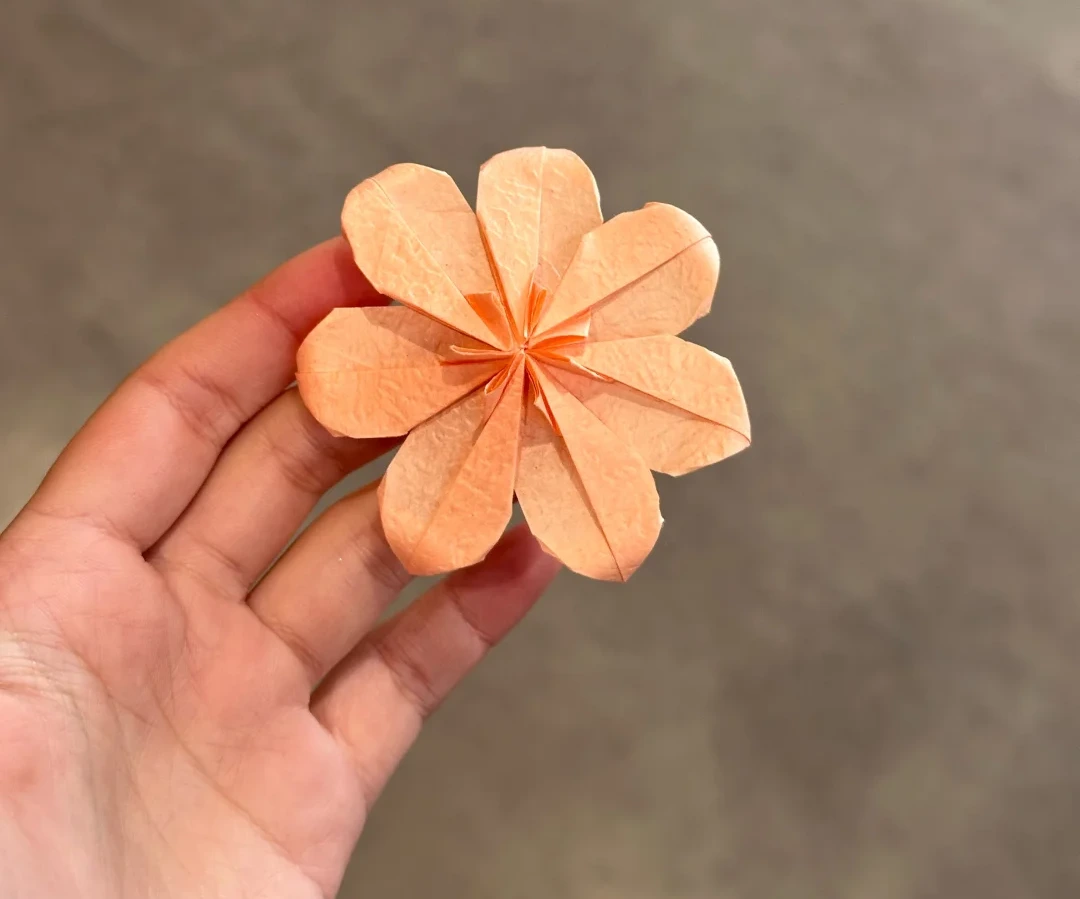
Make it, step by step.
8 steps · Original diagrams with English instructions
Read each picture from left to right, then top to bottom. No exact paper size is specified.
Make the first narrow folds
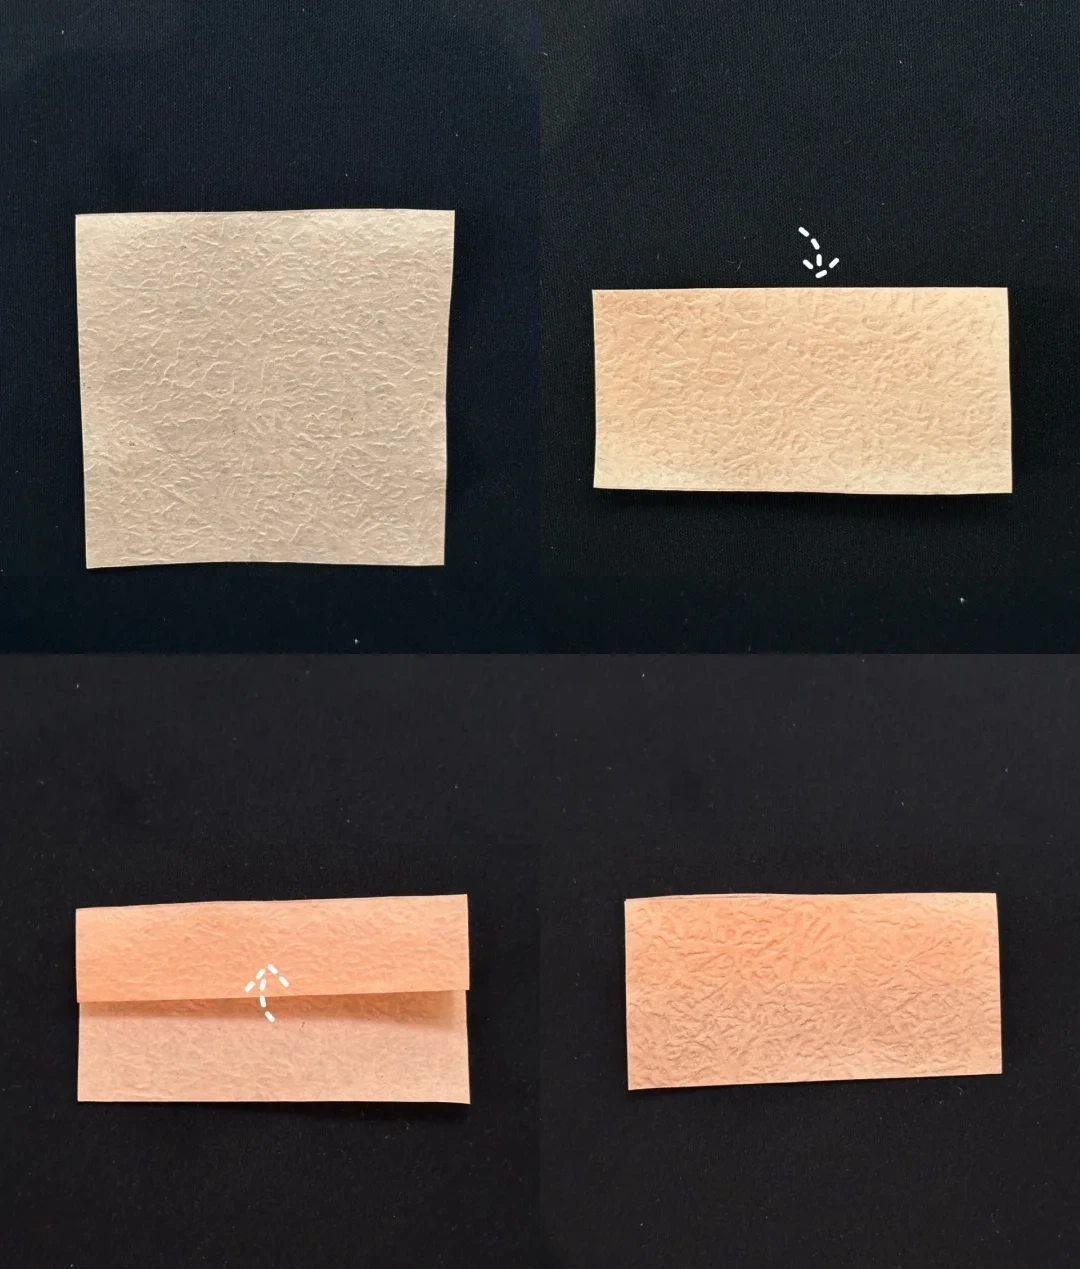 Open image at full size ↗
Fold a square downward in half. Fold the front lower edge upward in half, then turn the paper over.
Fold a pointed end
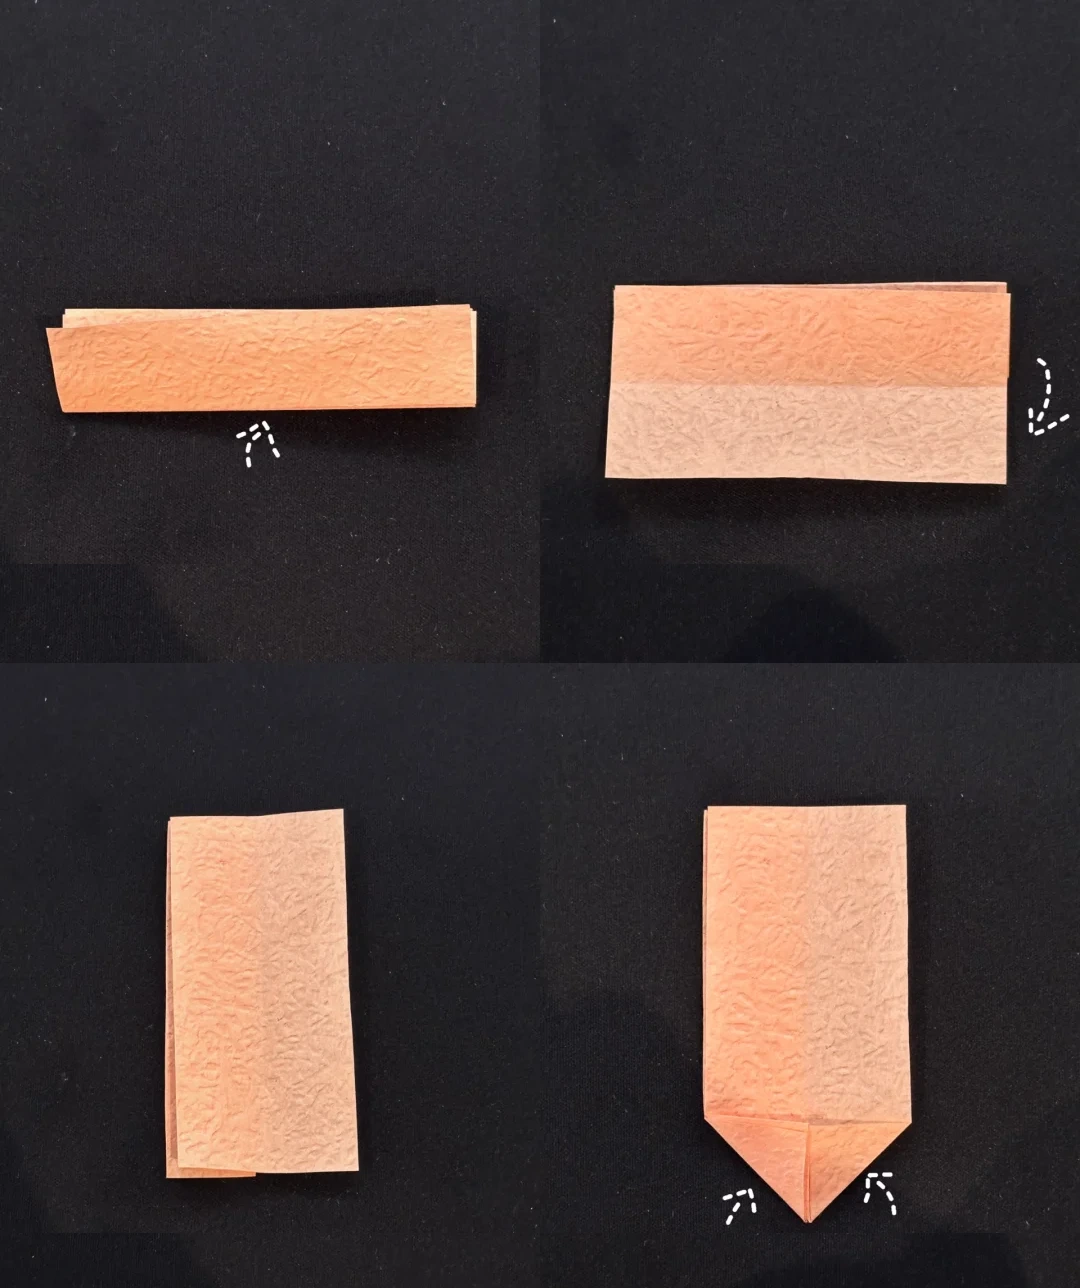 Open image at full size ↗
Fold the other lower edge upward and reopen that fold. Rotate the rectangle vertically. Bring the two lower corners toward the middle.
Precrease the petal base
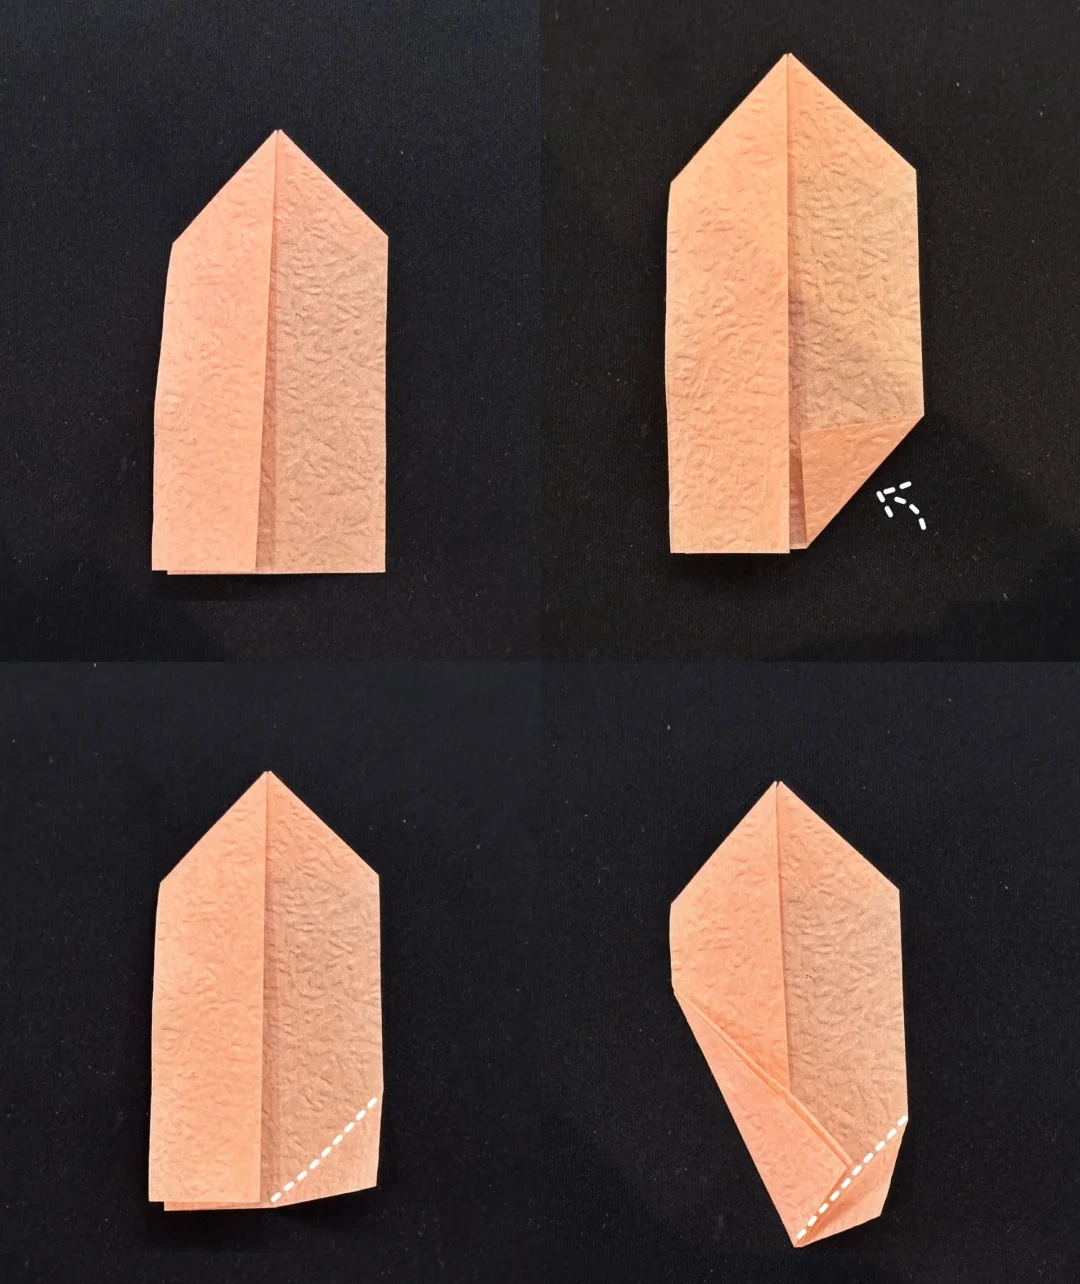 Open image at full size ↗
Turn the paper over and rotate it. Fold the right lower section toward the center and unfold.
Align the left lower section with the new diagonal crease and fold.
Tuck and round the petal
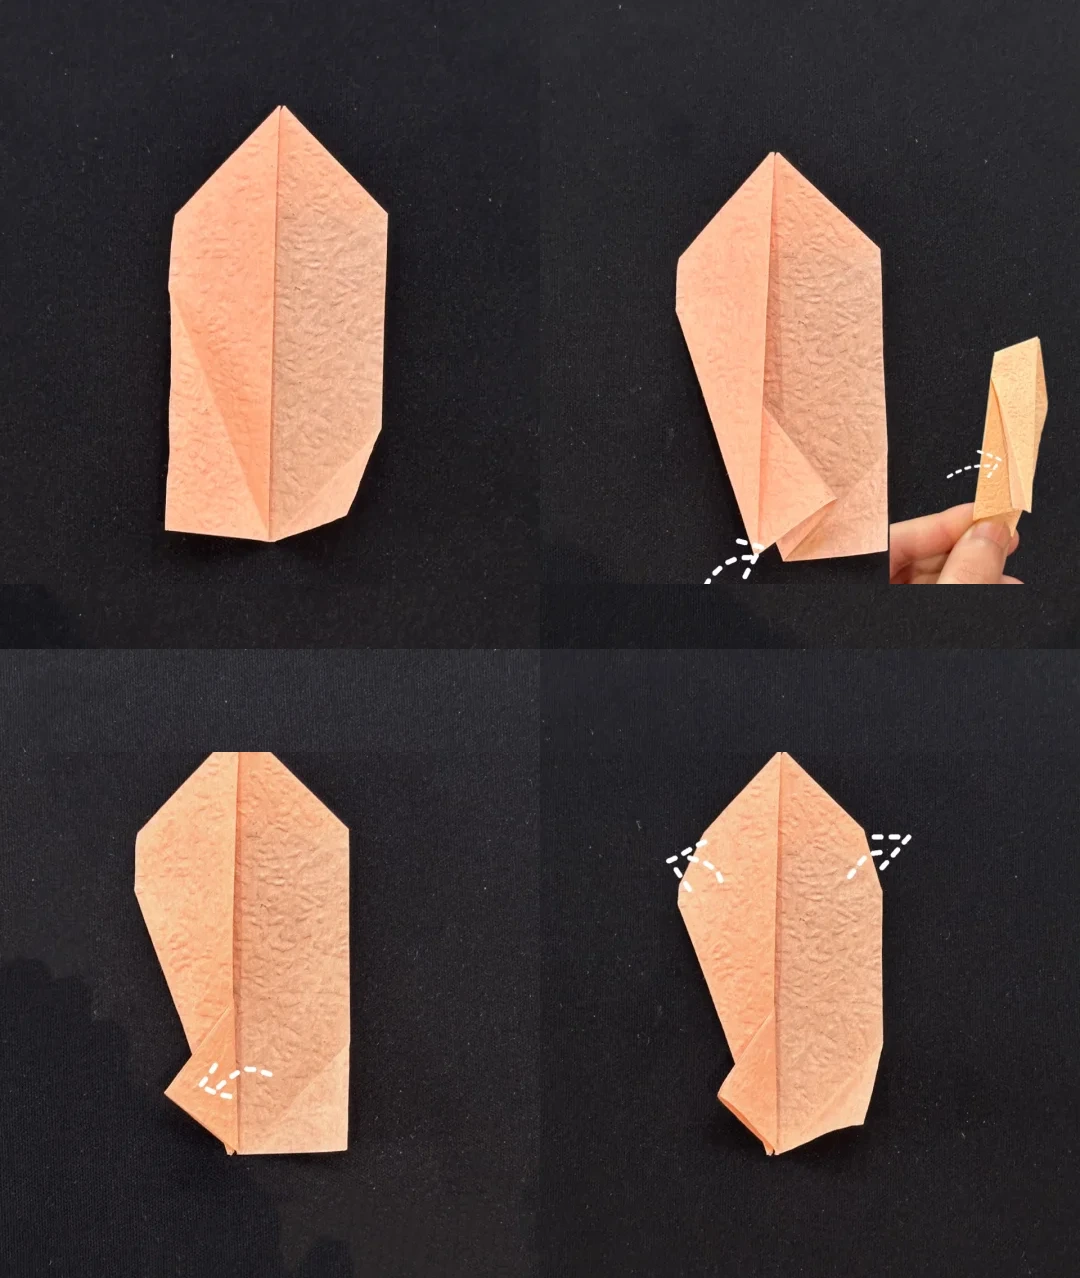 Open image at full size ↗
Open the last fold and tuck the lower section between the layers along the creases.
Fold the two small upper corners behind to round the tip.
Assemble seven petals
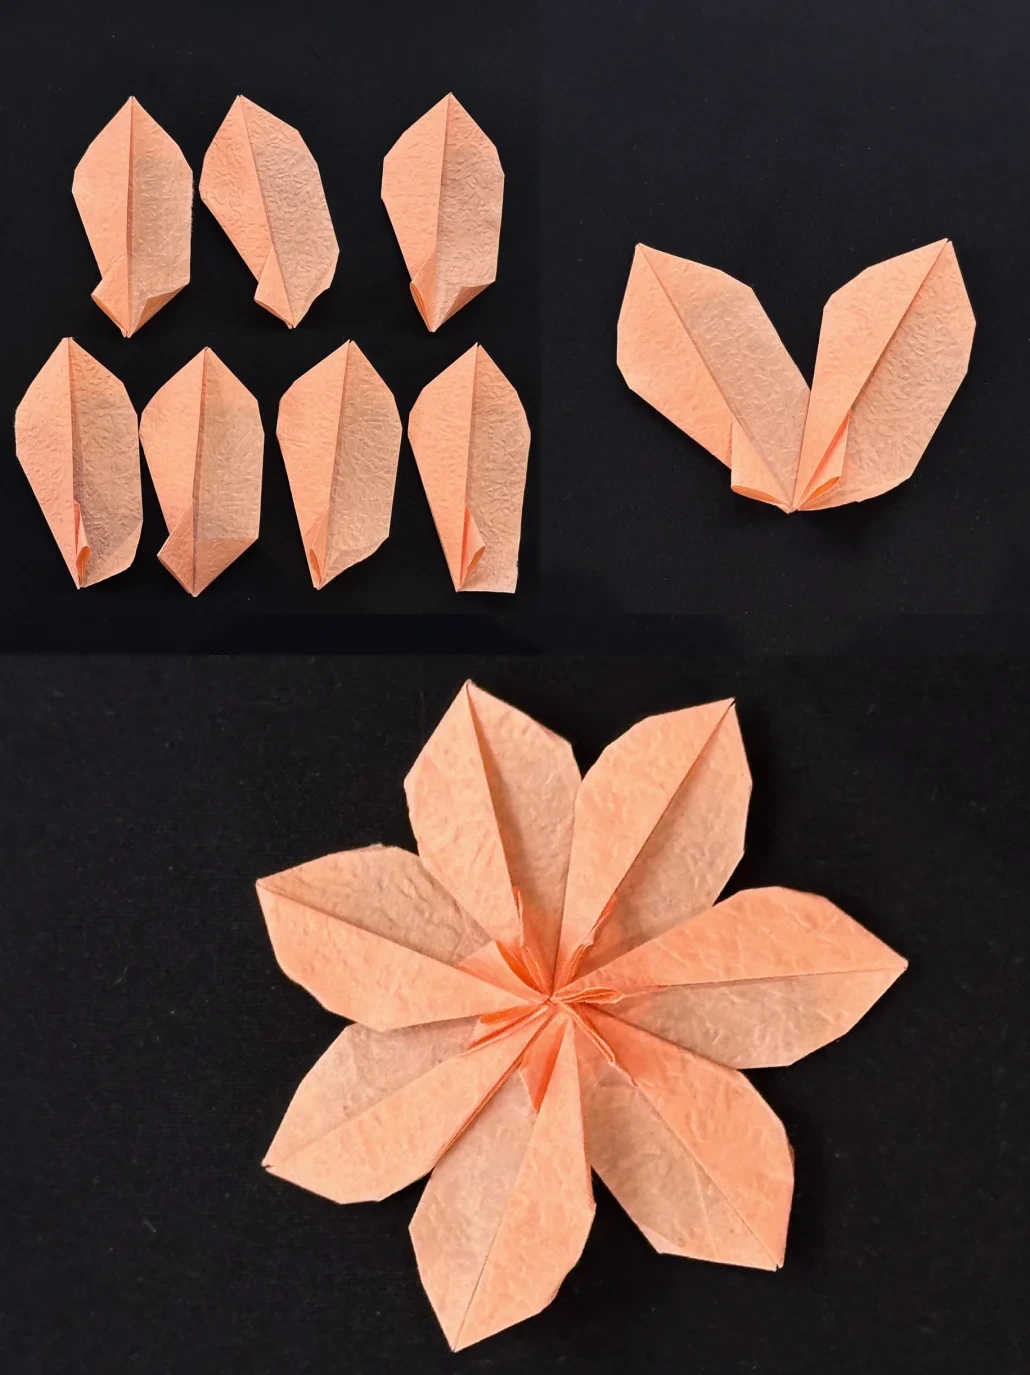 Open image at full size ↗
Make seven matching units. Glue neighboring lower edges together and continue around the center until the flower closes.
Curve the petals
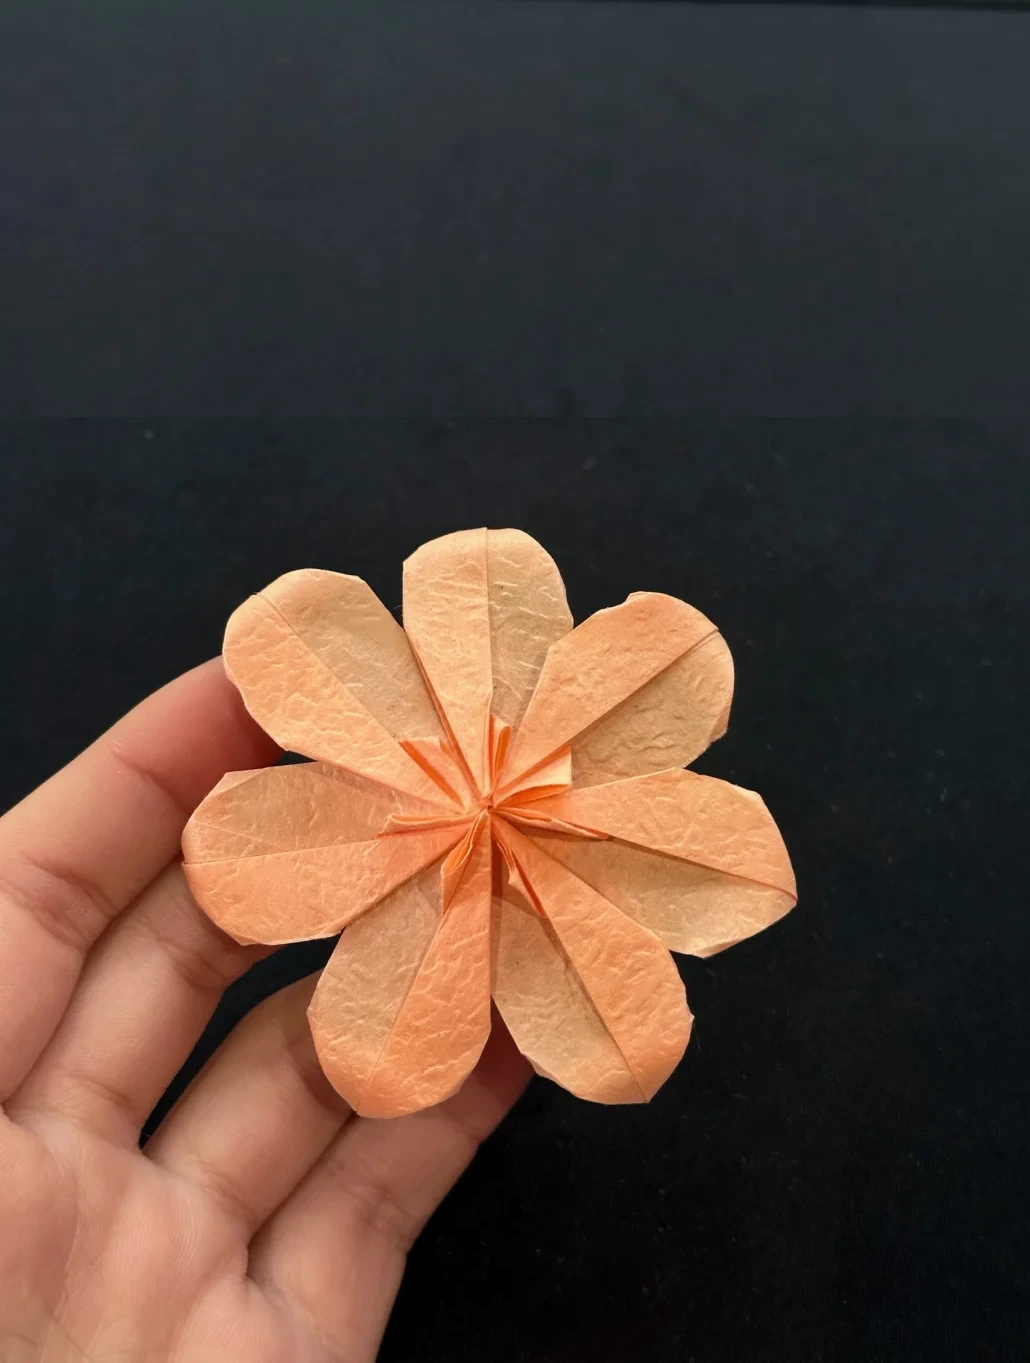 Open image at full size ↗
Gently curl the petal edges and spread them evenly around the center.
Finished model
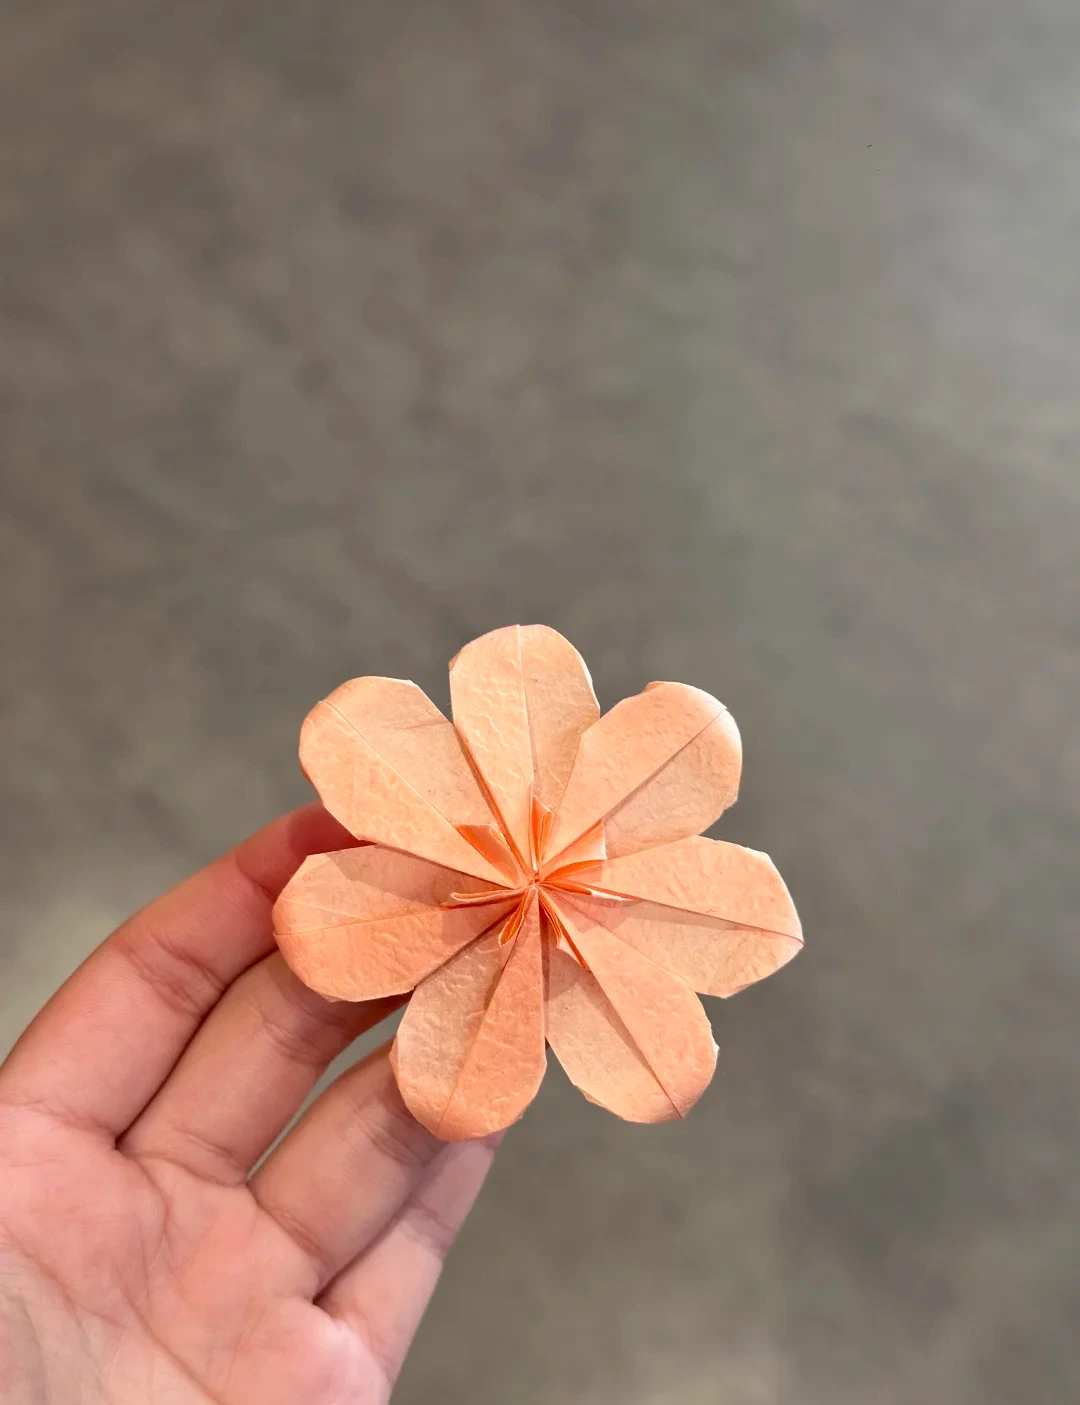 Open image at full size ↗
Use this finished example to compare the shape and proportions of your model.
Follow the diagrams alongside the step-by-step English instructions.
Choose your next project →