
Animals · Step-by-step guide
Seated Paper Bunny
Fold a seated bunny with long ears and a small tail. The other decorations in the cover photograph are separate models.
What you’ll need
- One square of paper
Origami · Creasing, collapse folds & shaping
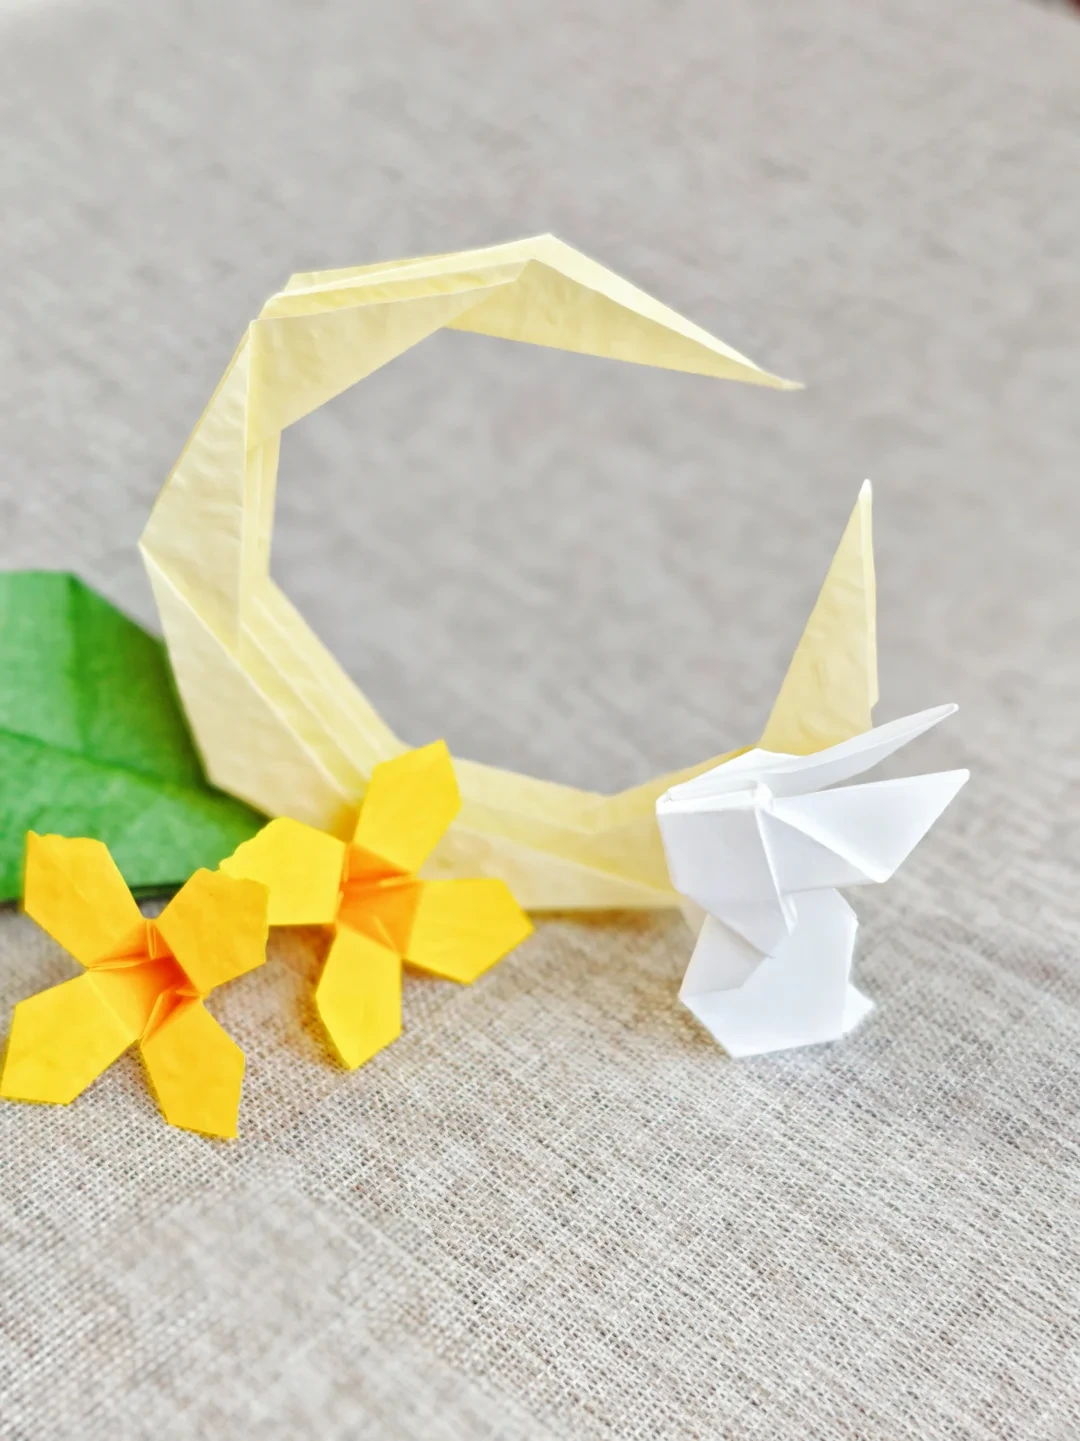
Make it, step by step.
9 steps · Original diagrams with English instructions
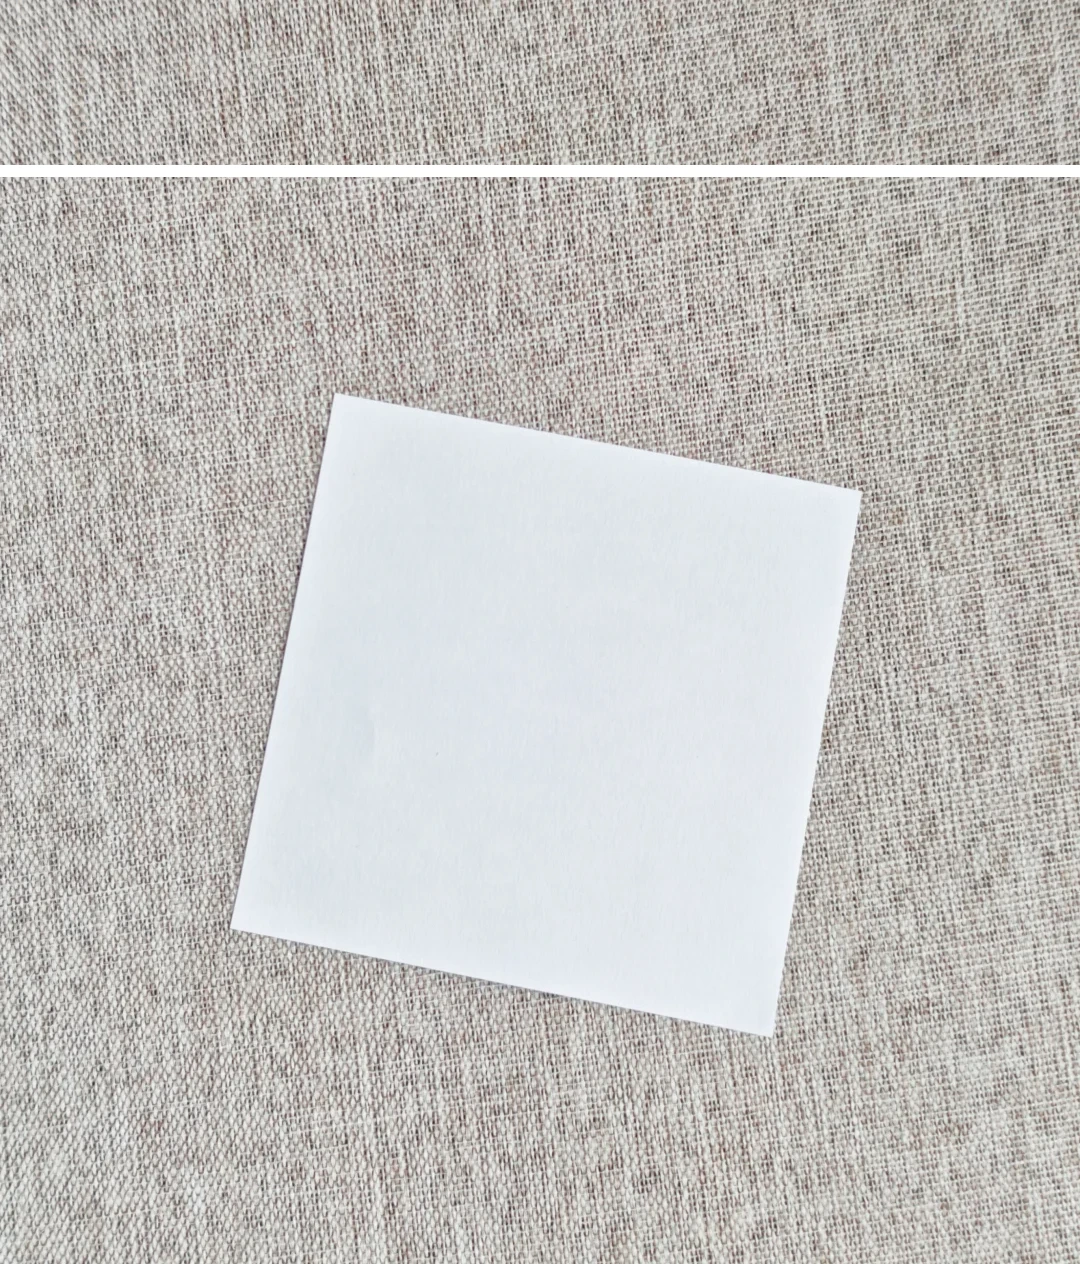
Prepare the square
 Open image at full size ↗
Use thin paper so the ears and body are easy to shape.
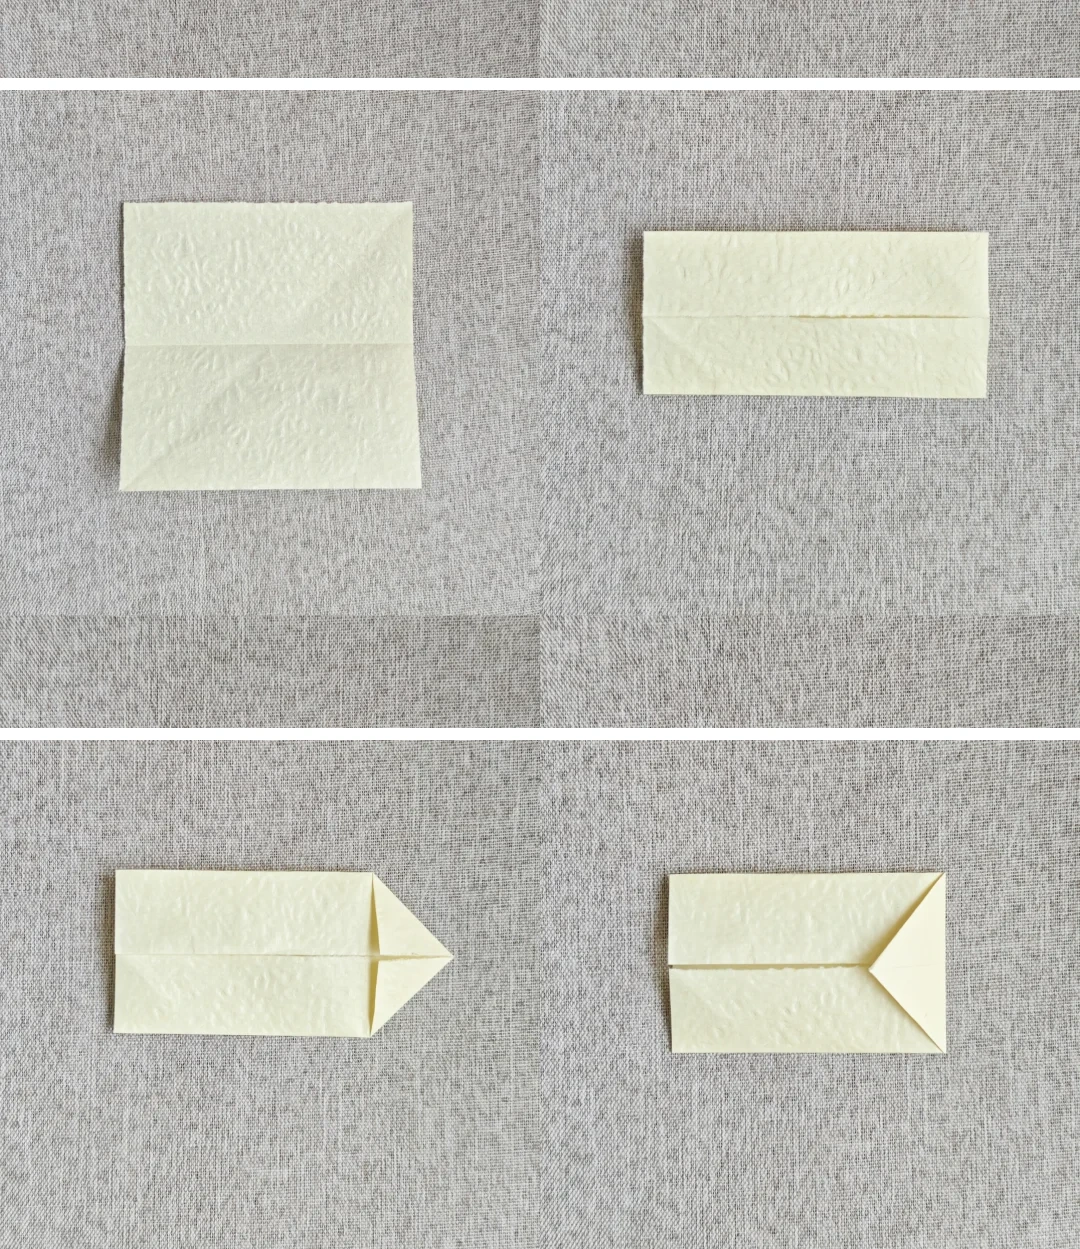
Make the reference folds
 Open image at full size ↗
Fold in half and unfold. Bring the upper and lower edges to the middle, then fold the triangular section left.
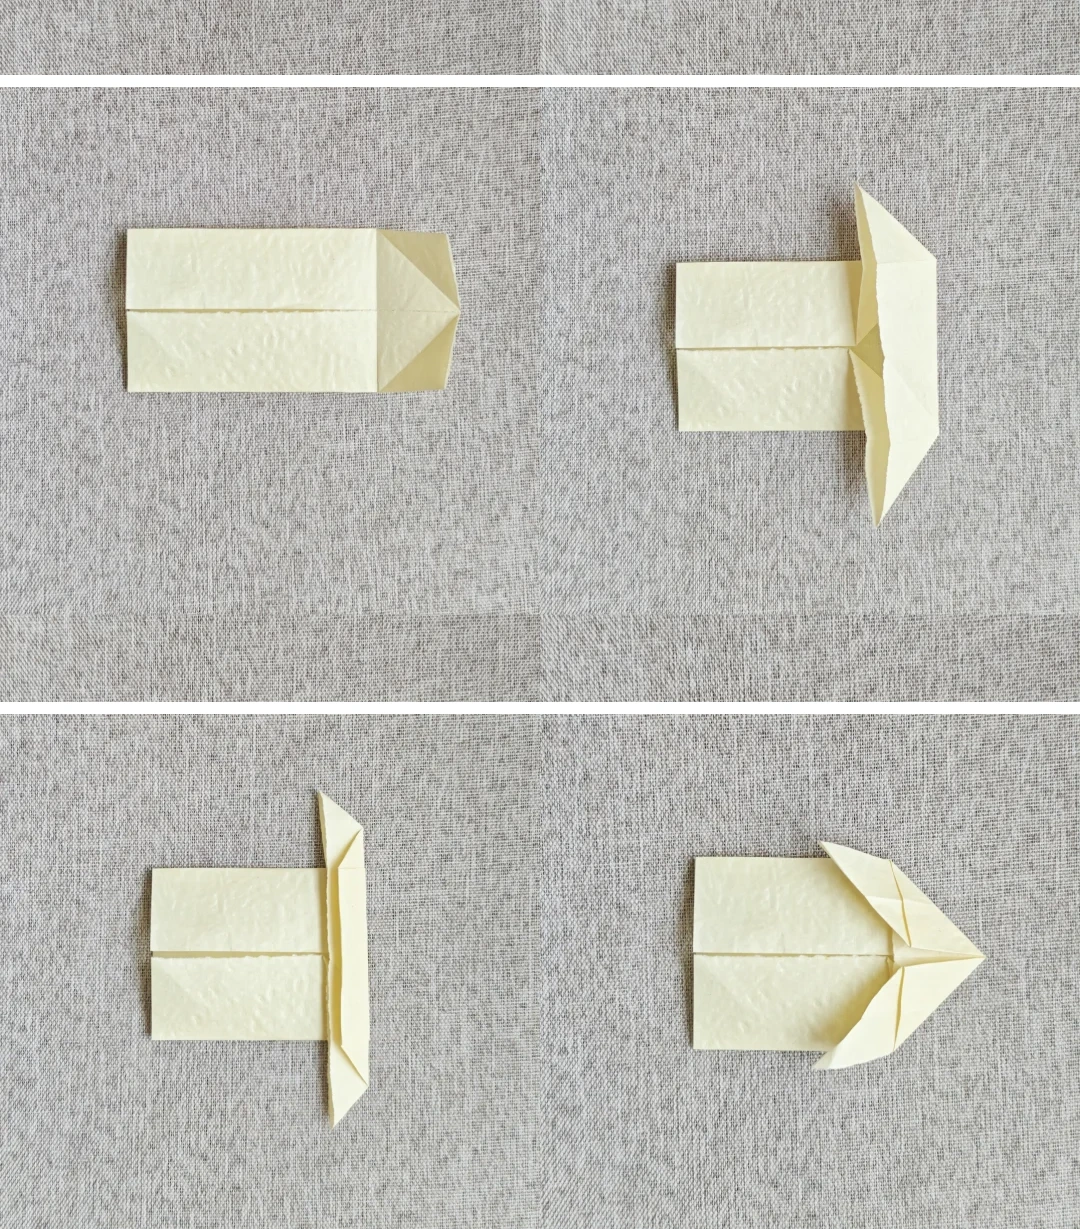
Open and refold
 Open image at full size ↗
Open the paper, make the pictured diagonal folds, then fold in half sideways and reopen.
Form the head section
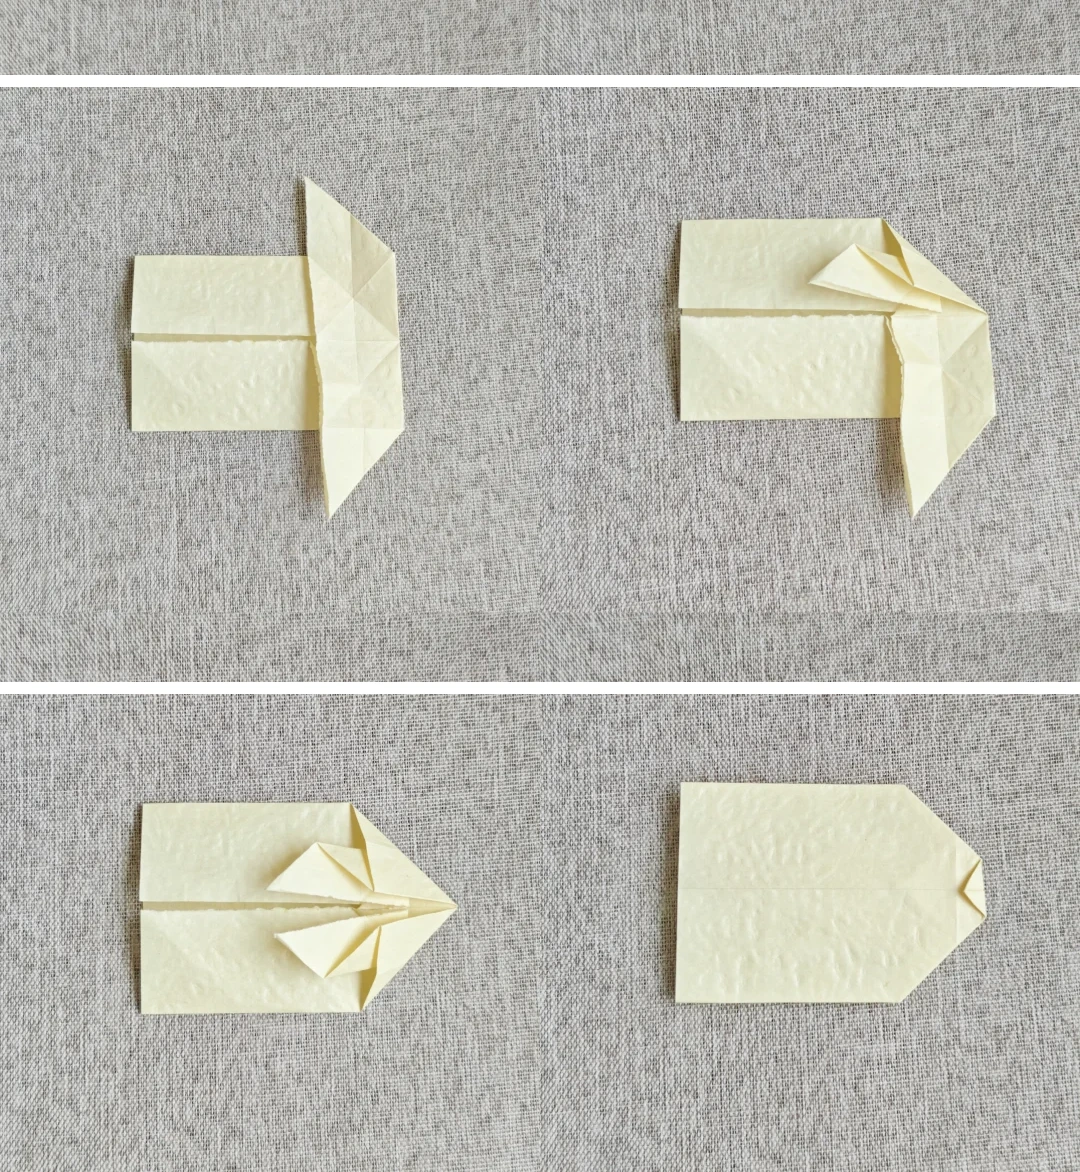 Open image at full size ↗
Fold both sides as pictured. Turn over and fold a small triangle upward.
Collapse the head
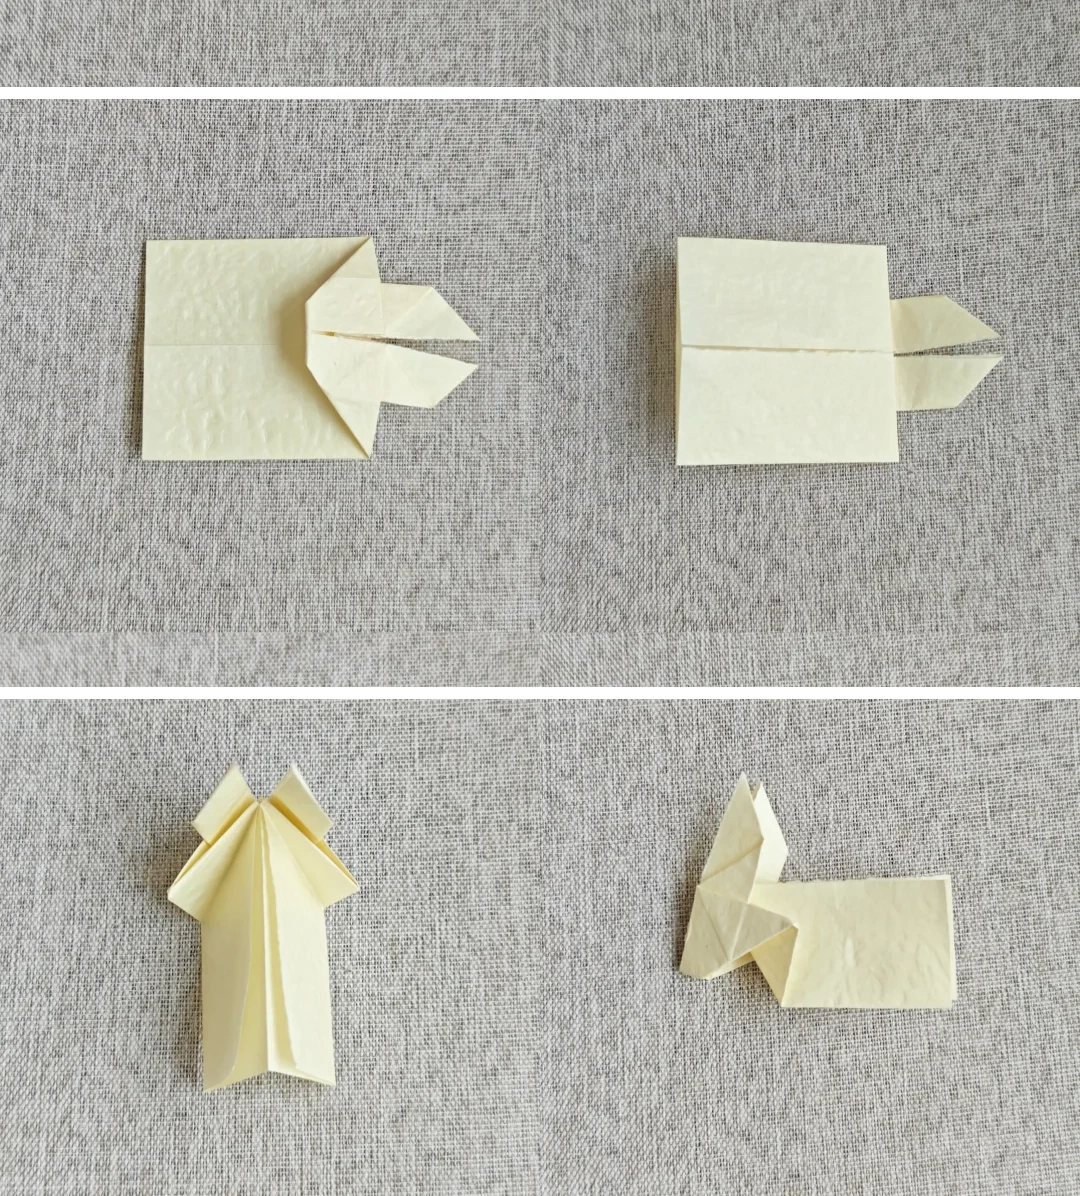 Open image at full size ↗
Lift the folded section, pinch the center crease and bring the two head edges together. Turn over to check the shape.
Shape the body
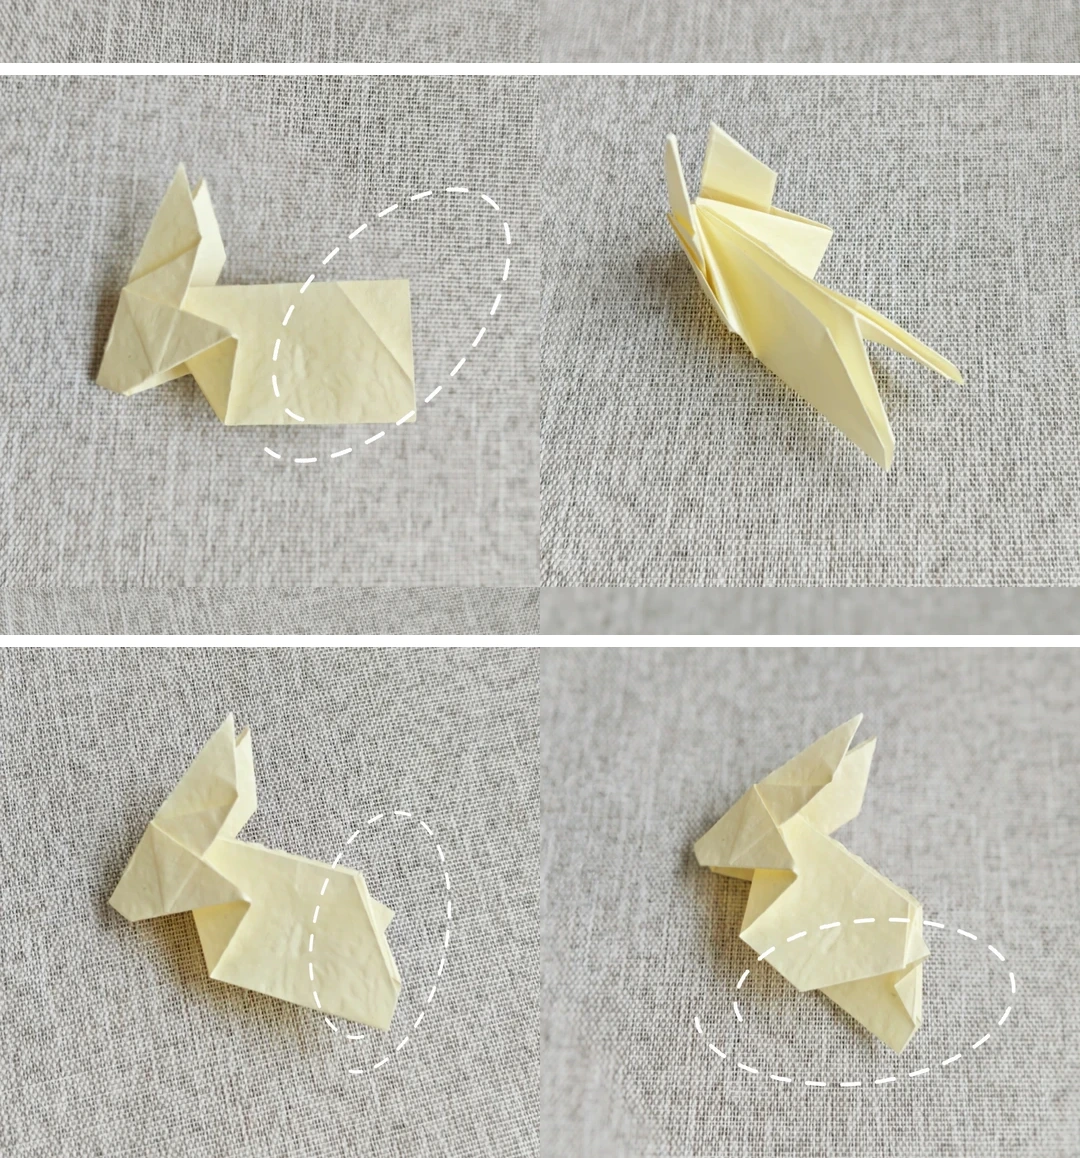 Open image at full size ↗
Fold the upper layer back slightly on both sides. Fold the middle inward, then outward again to form the small projecting section.
Match both sides
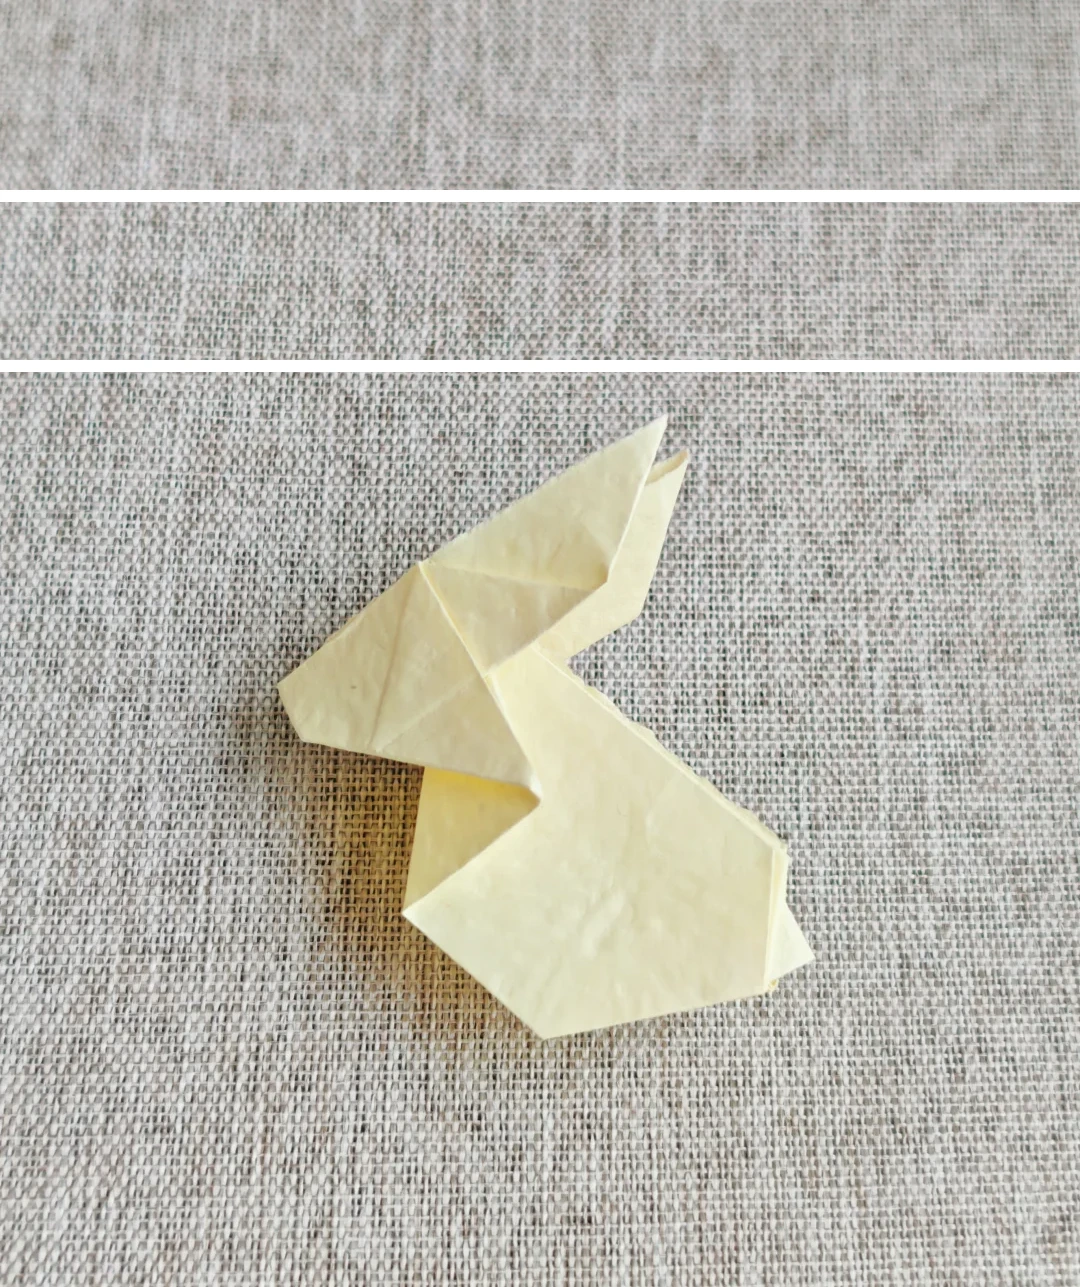 Open image at full size ↗
Repeat the body fold on the opposite side and pinch the creases together.
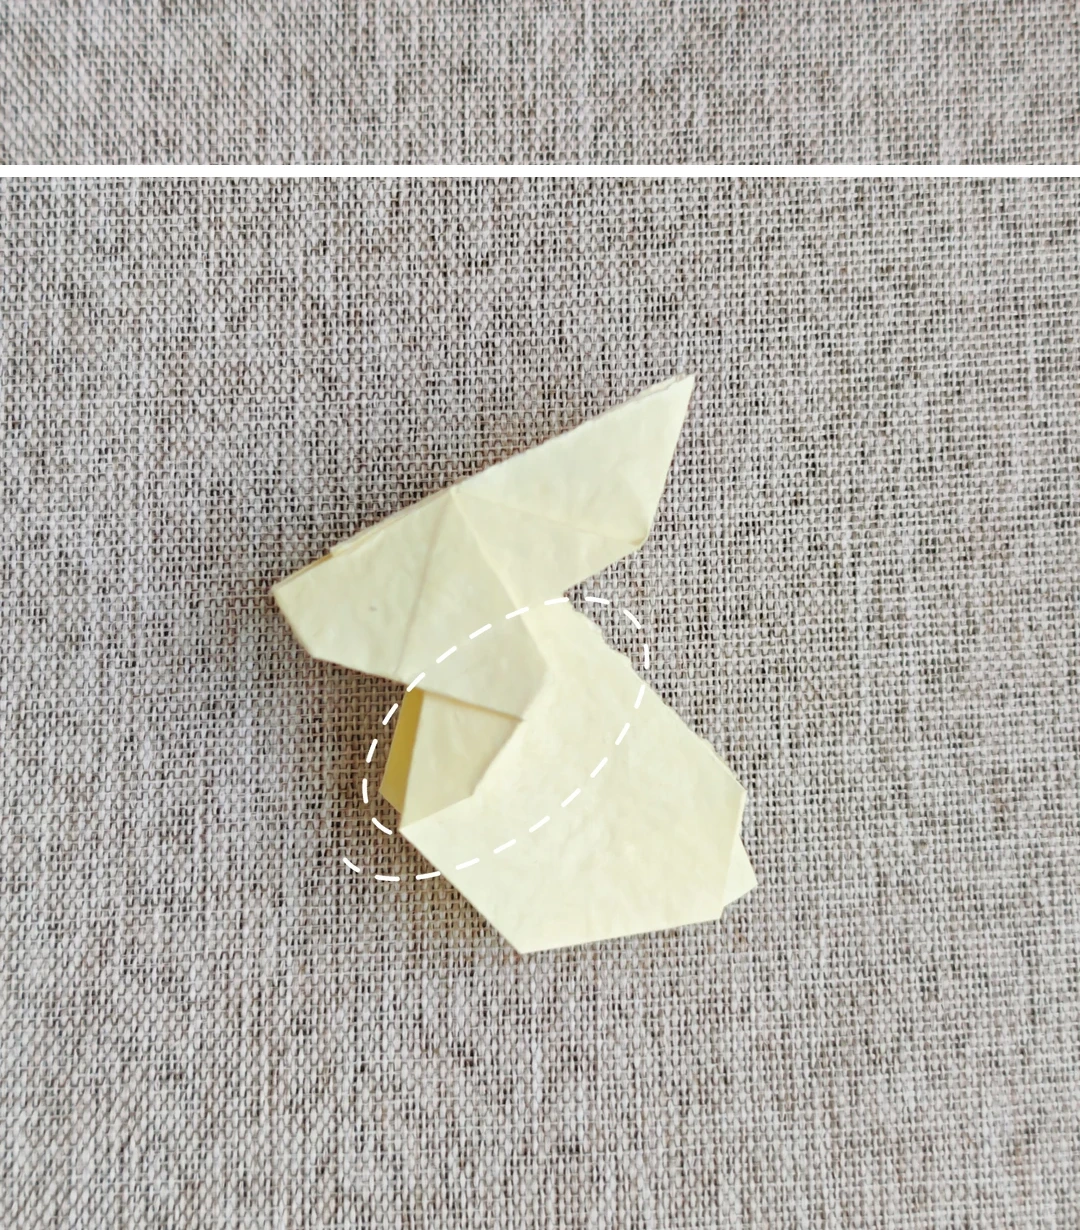
Tuck the lower corners
 Open image at full size ↗
Fold the circled corner inward. Repeat on the other side to shape the lower body.
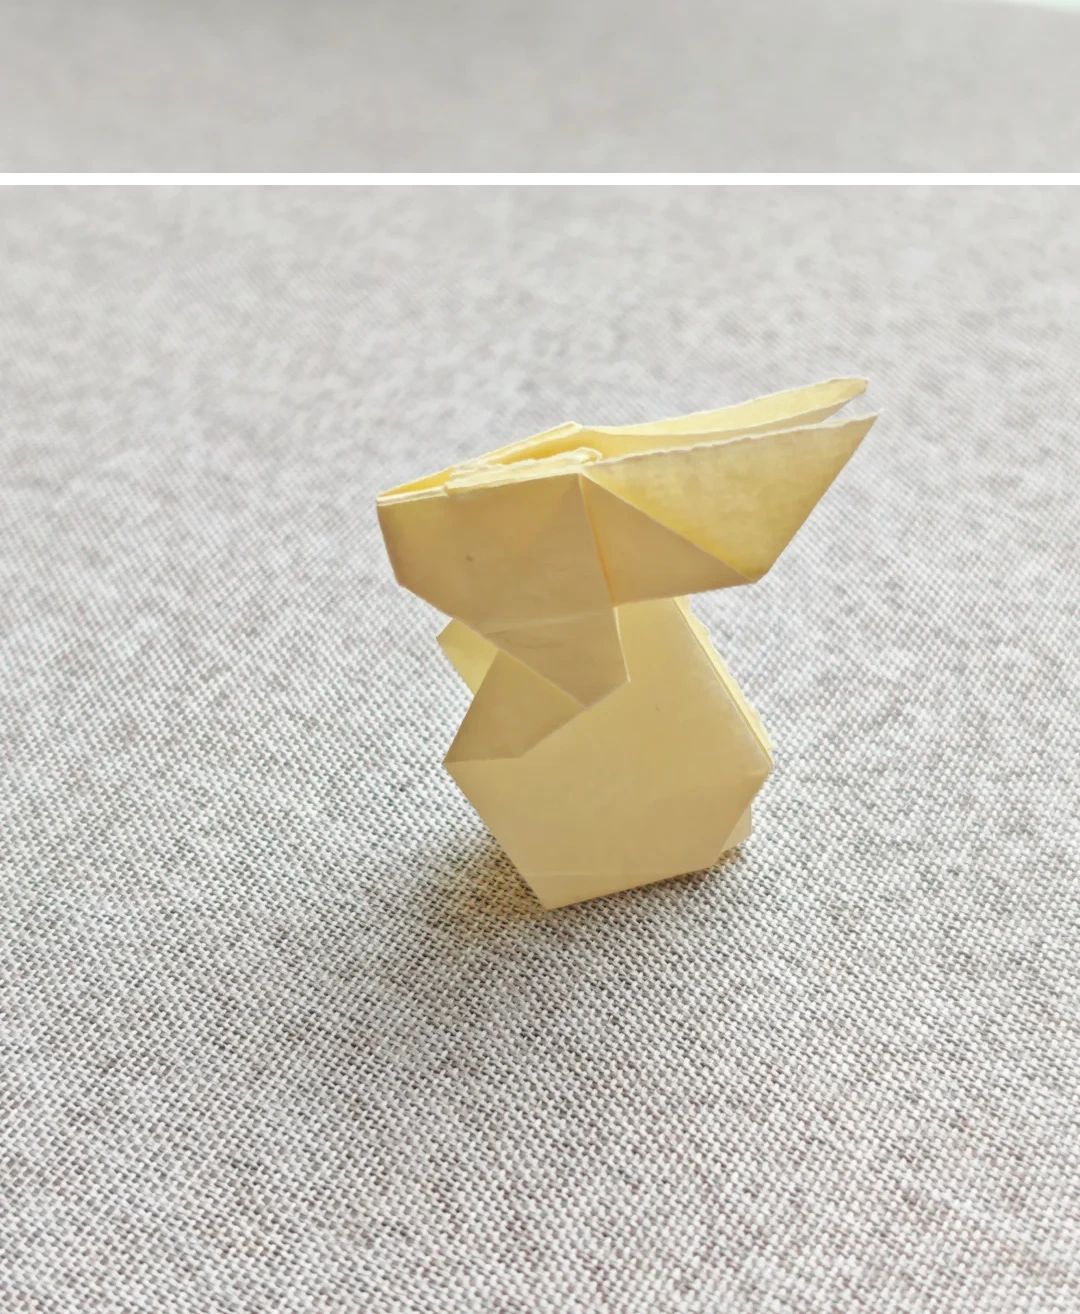
Open the ears
 Open image at full size ↗
Spread the ears gently and adjust the body until the bunny sits upright.
Follow the diagrams alongside the step-by-step English instructions.
Choose your next project →