
Airplanes · Step-by-step guide
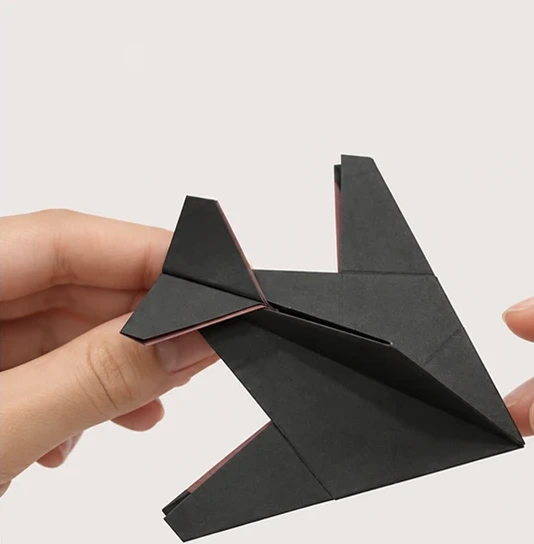
Sculpted Paper Fighter Jet
Fold a square into an angular paper jet with swept wings and upright tail fins. The original guide is a numbered photo sequence.
What you’ll need
- Square paper
Paper folding and shaping
Make it, step by step.
28 steps · Original diagrams with English instructions
The source provides numbered photos without written captions. These English descriptions explain the pictured actions.
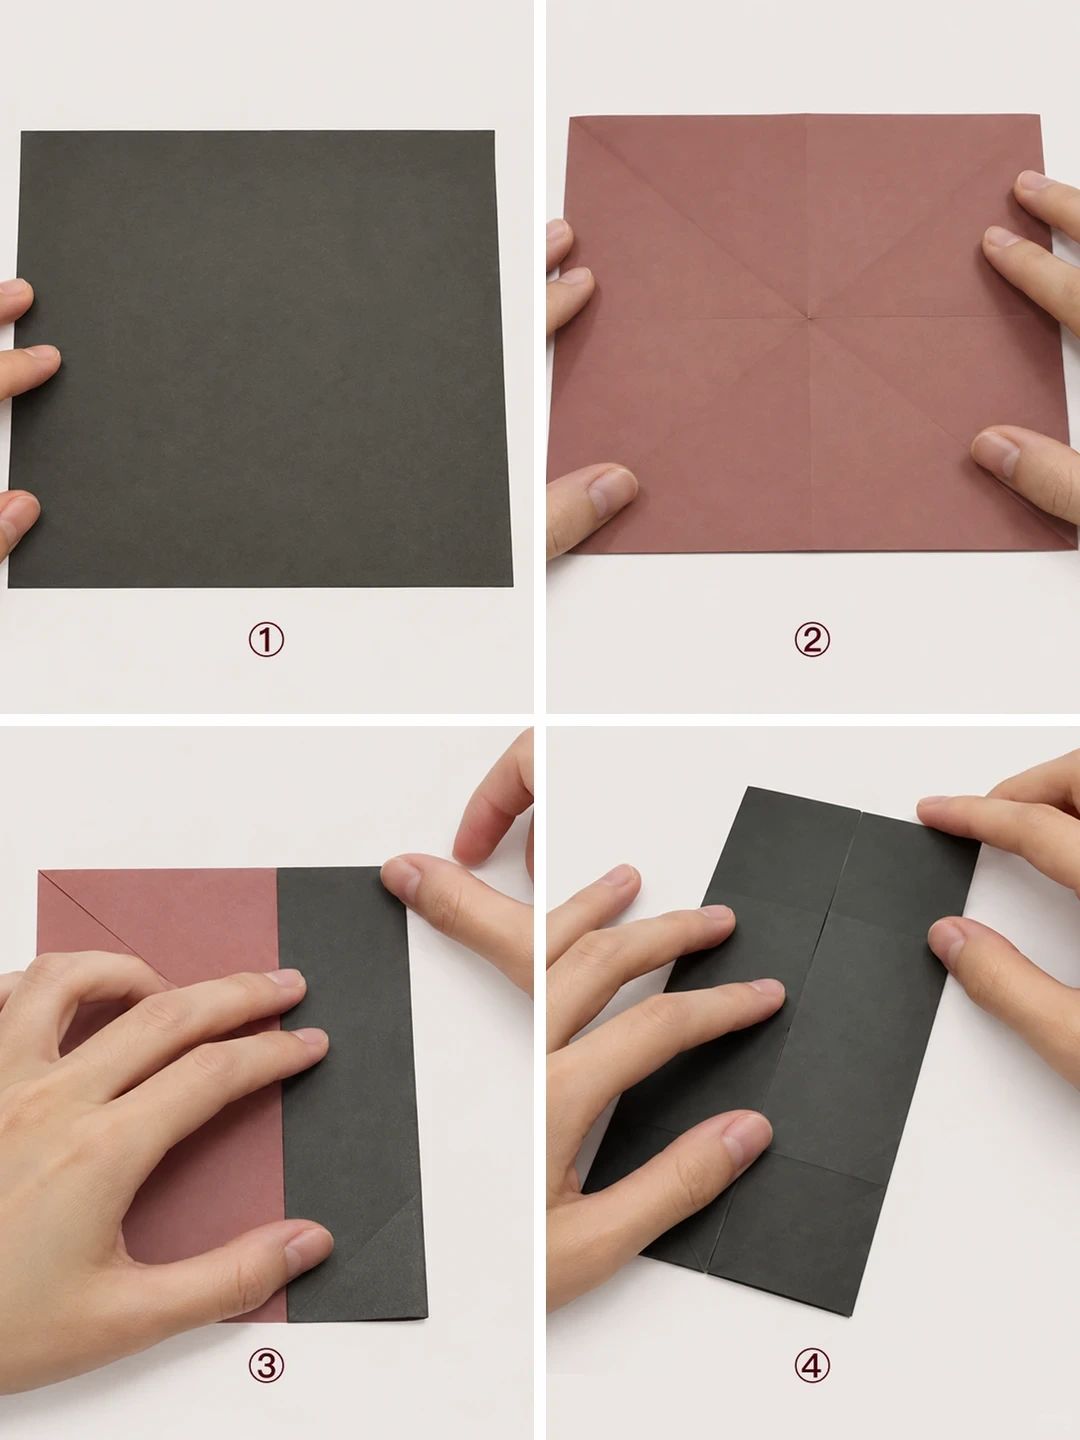
Steps 1–4
 Open image at full size ↗
Begin with a square sheet.
Turn it over and crease the two diagonals and midlines shown.
Fold the right edge inward to the center.
Fold the left edge inward to meet it.
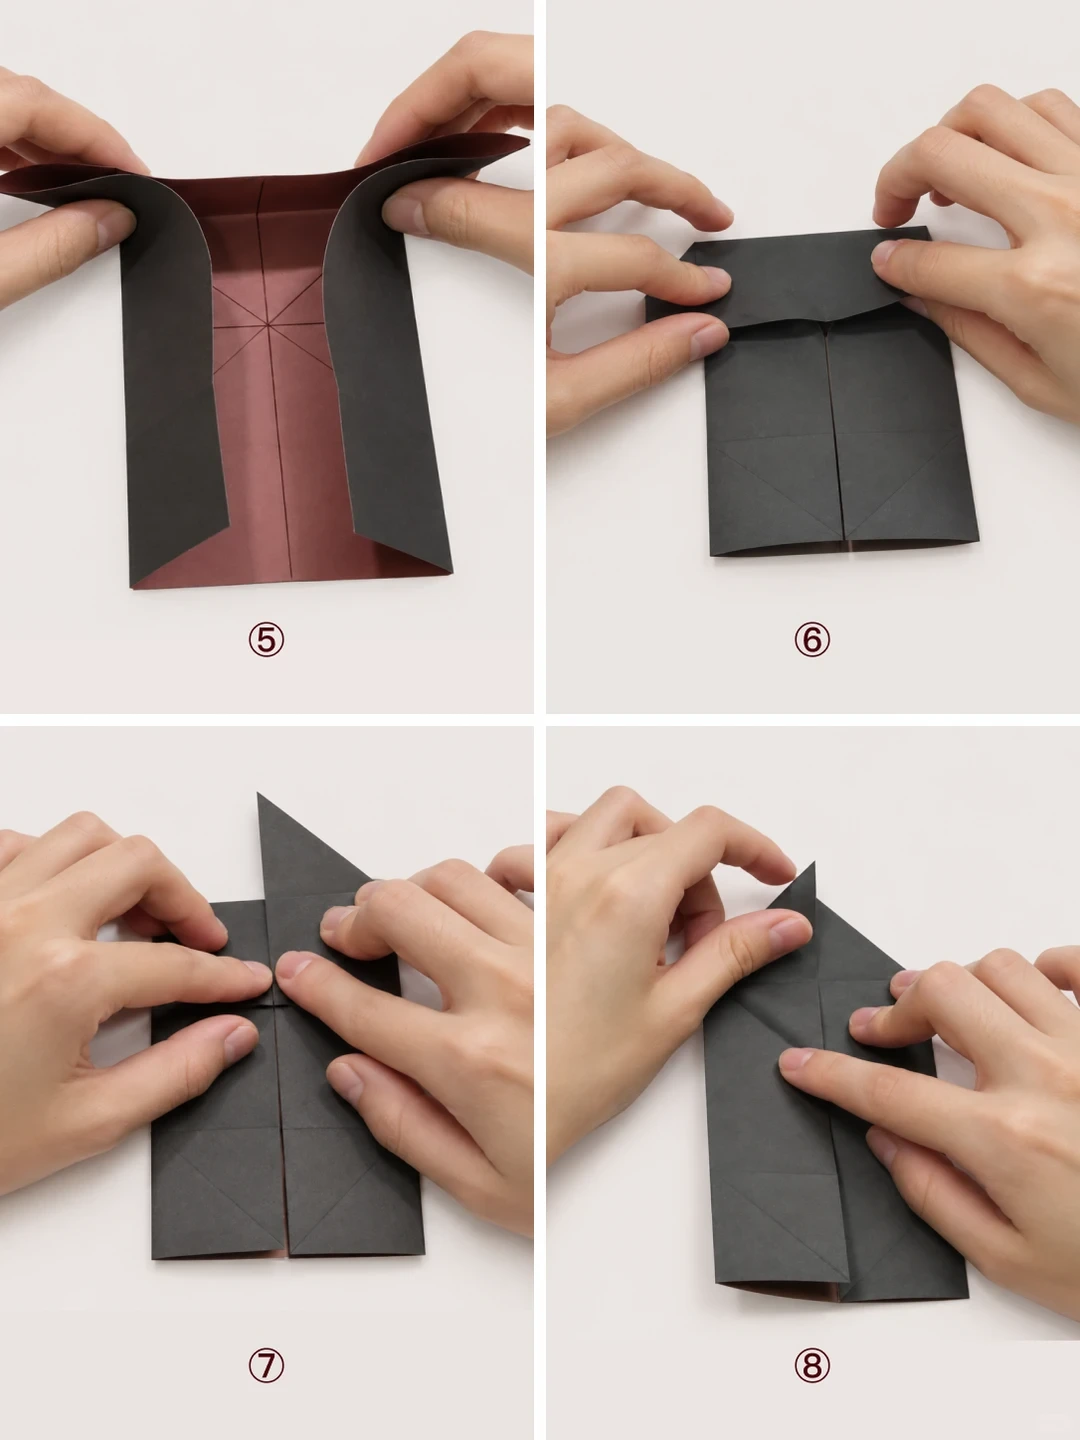
Steps 5–8
 Open image at full size ↗
Open the upper layers slightly along the existing creases.
Fold the top edge down into a horizontal flap.
Fold the lower edge of that flap upward along the illustrated crease.
Lift the right corner and flatten it diagonally.
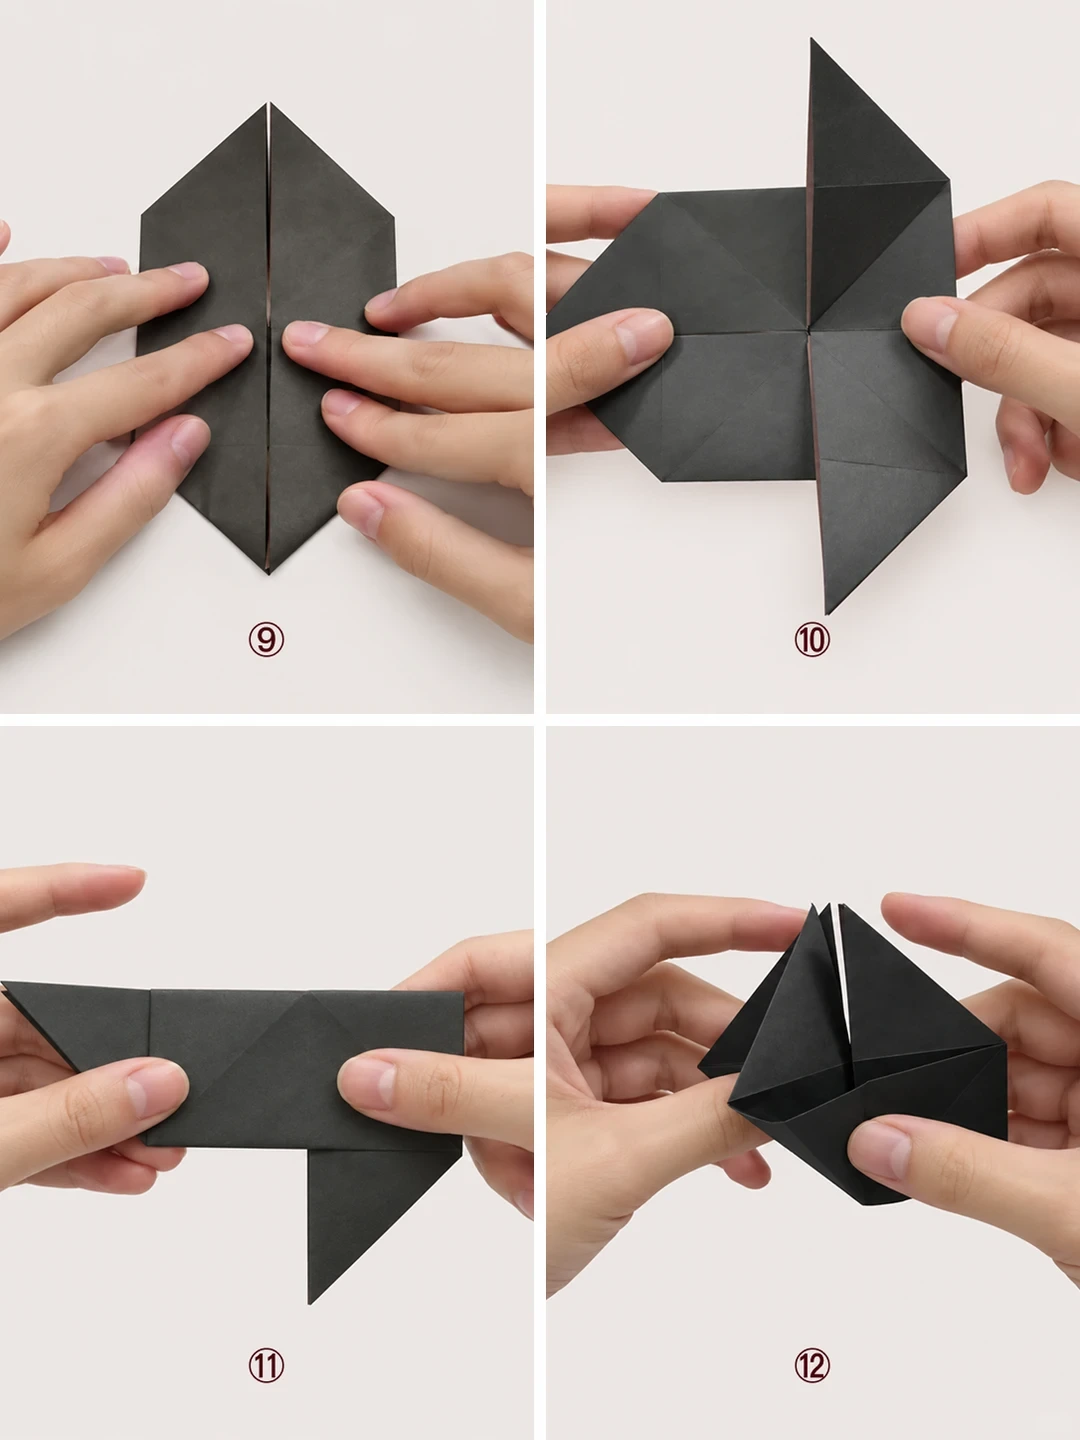
Steps 9–12
 Open image at full size ↗
Repeat on the left to form a pointed top.
Turn the model sideways and open the indicated side flap.
Press that flap flat into the horizontal strip shown.
Bring the pointed layers together into the three-dimensional arrangement pictured.
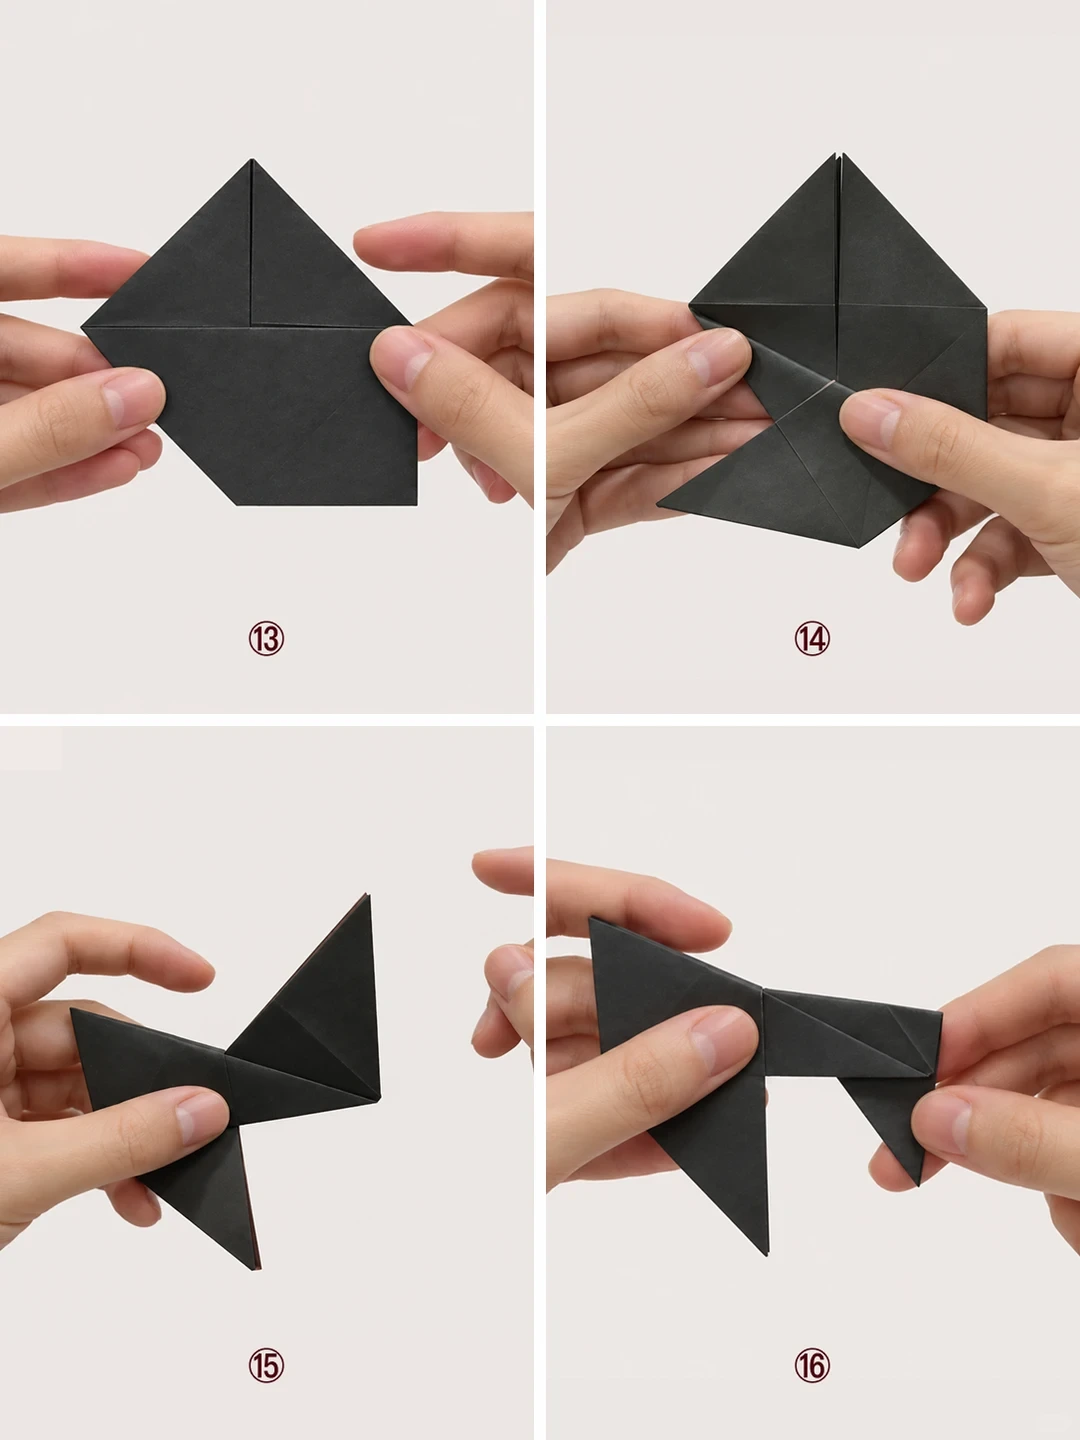
Steps 13–16
 Open image at full size ↗
Flatten the opened layers into the pointed shape shown.
Lift the lower triangular layer.
Fold and flatten it to one side along the existing crease.
Open the long right flap while keeping the left triangular layers together.
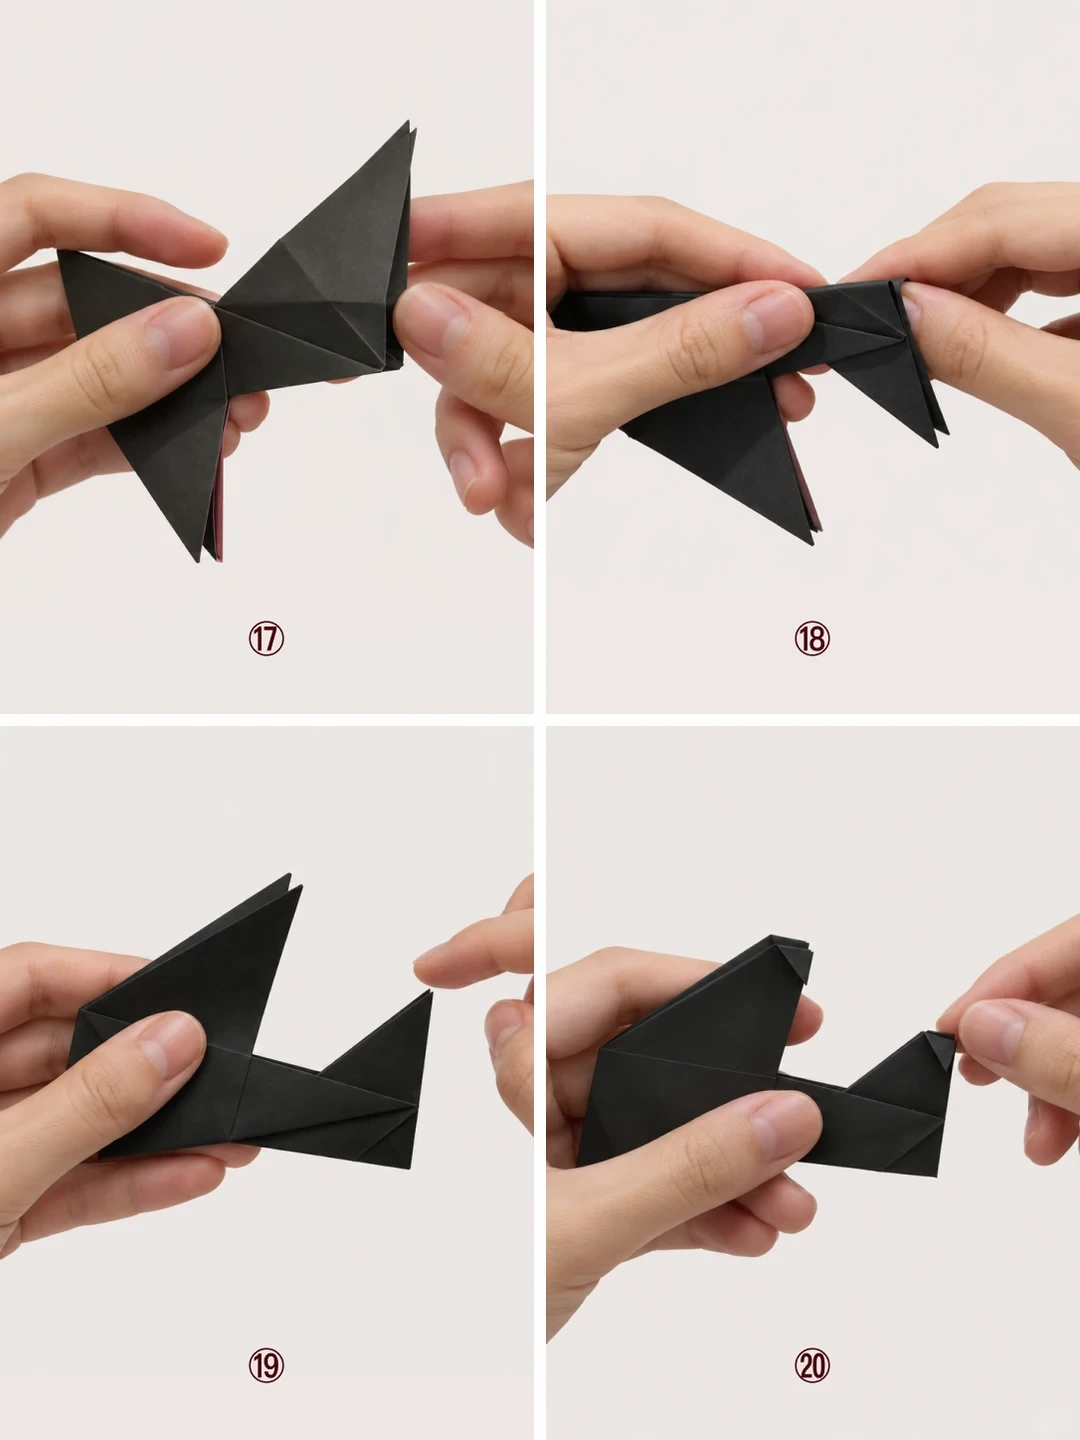
Steps 17–20
 Open image at full size ↗
Raise the right flap and crease its base.
Bring the long layers together and press the fold.
Open the two triangular sections into the profile shown.
Fold the small right-hand flap upward at its base.
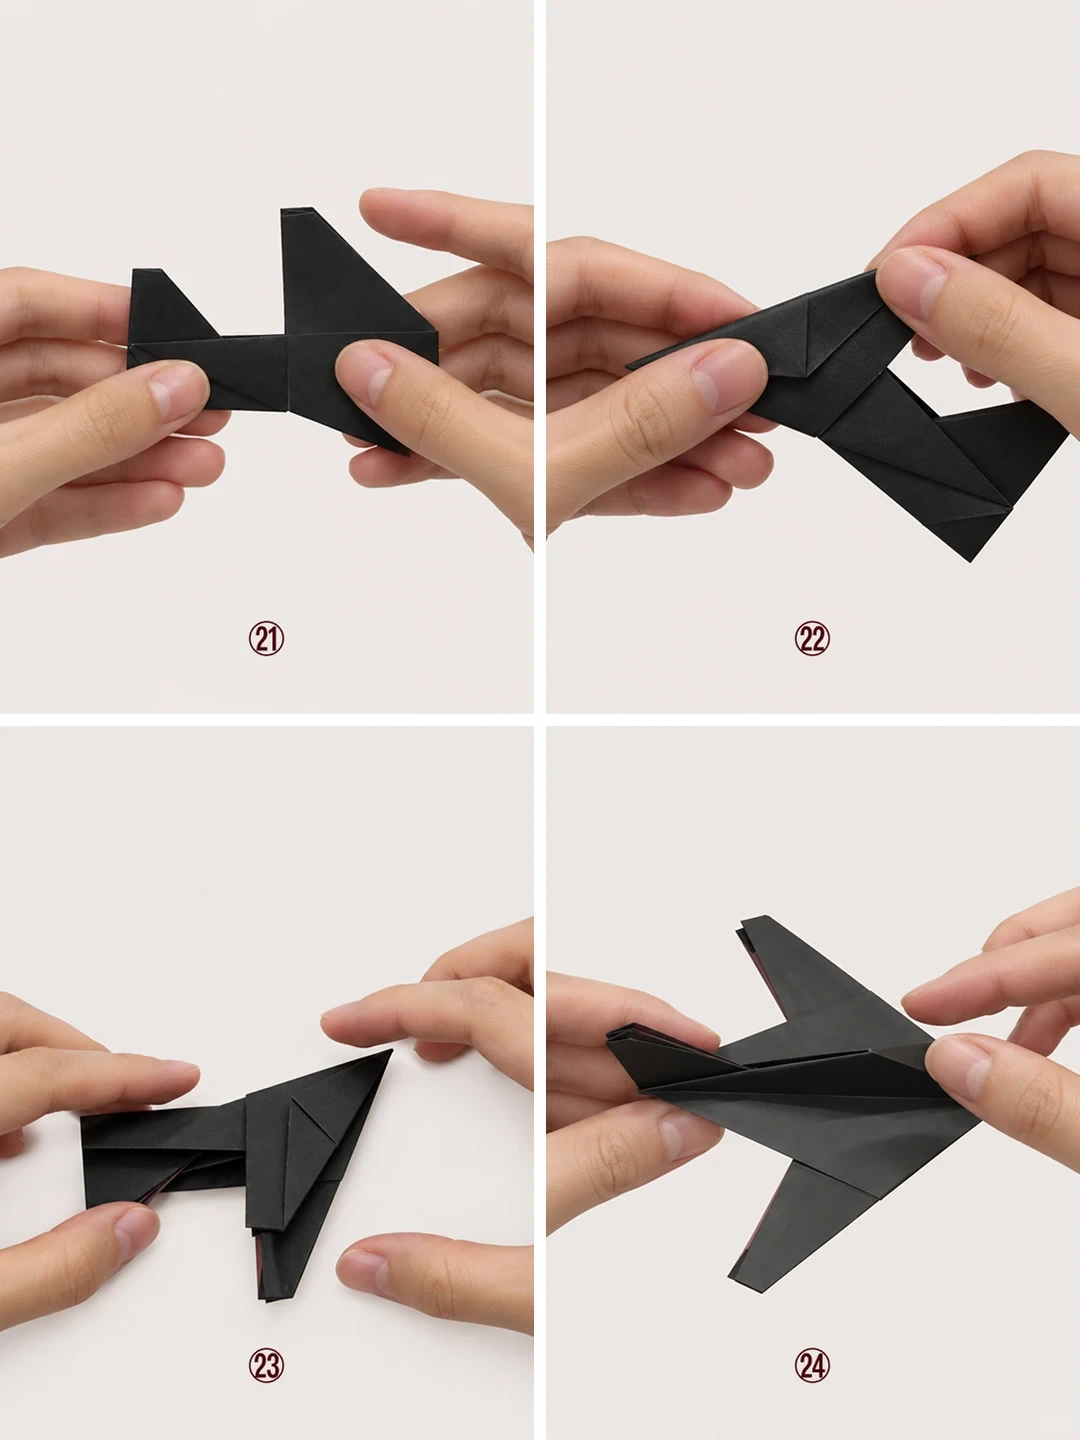
Steps 21–24
 Open image at full size ↗
Check that the two raised sections stand upright.
Open the underside layers gently.
Spread and flatten the side wing along its existing crease.
Open the opposite wing to match.
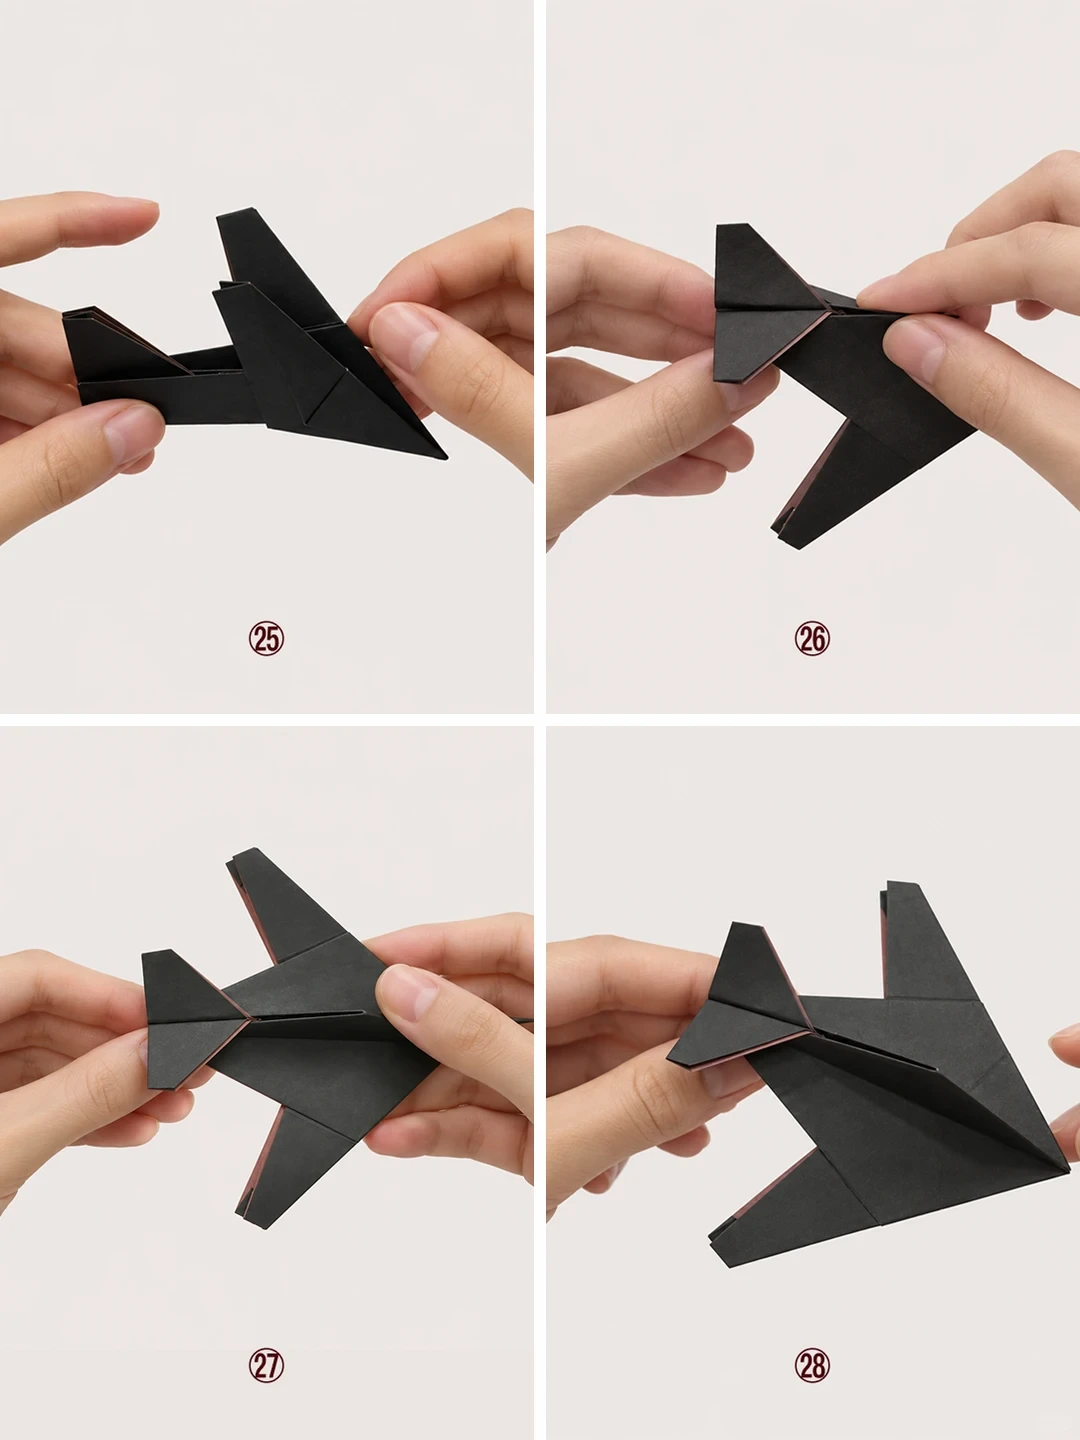
Steps 25–28
 Open image at full size ↗
Arrange the wings on both sides of the body.
Pinch the rear section along the illustrated centerline.
Flatten the tail layers into their final position.
Adjust both wings and upright fins to complete the model.
Follow the diagrams alongside the step-by-step English instructions.
Choose your next project →