
Animals · Step-by-step guide
Sculpted-Neck Paper Swan
Fold a swan with a textured body and a long curved neck.
What you’ll need
- One 15 × 15 cm paper square
- Tweezers or a folding tool, optional
Origami · Folding and shaping
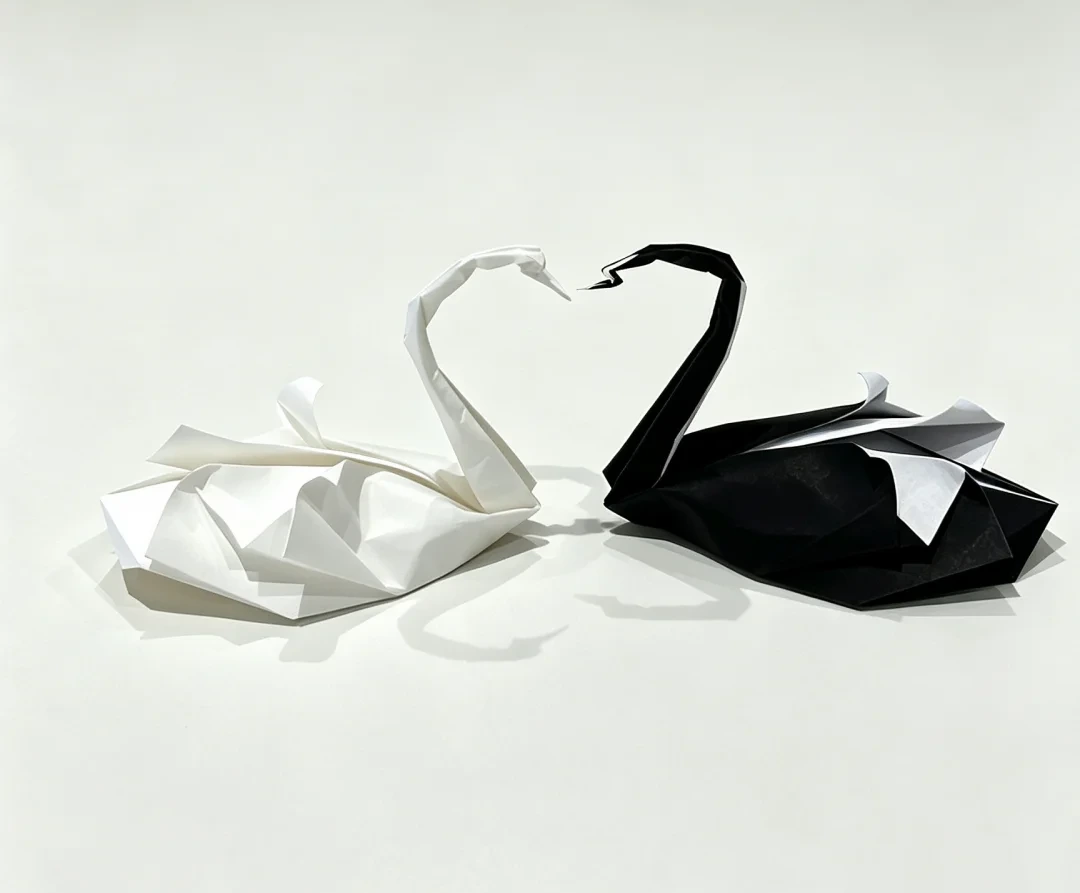
Make it, step by step.
18 steps · Original diagrams with English instructions
Read each picture from left to right, then top to bottom. The final neck is shown already curved; the pictures do not specify the placement of every small shaping fold.
Finished model
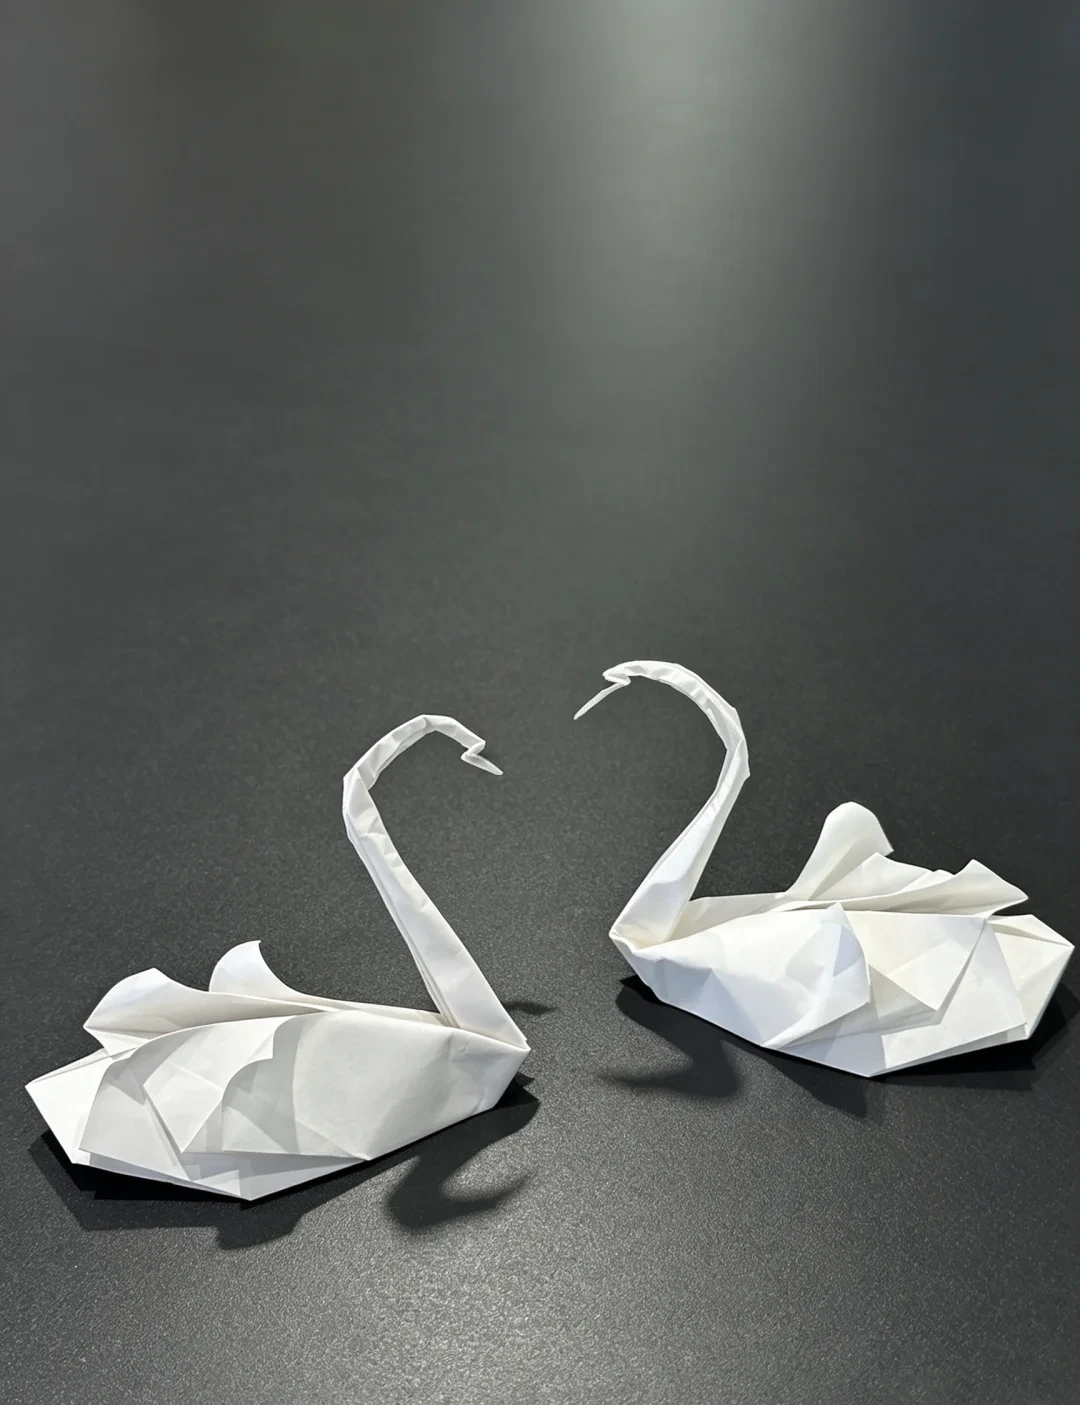 Open image at full size ↗
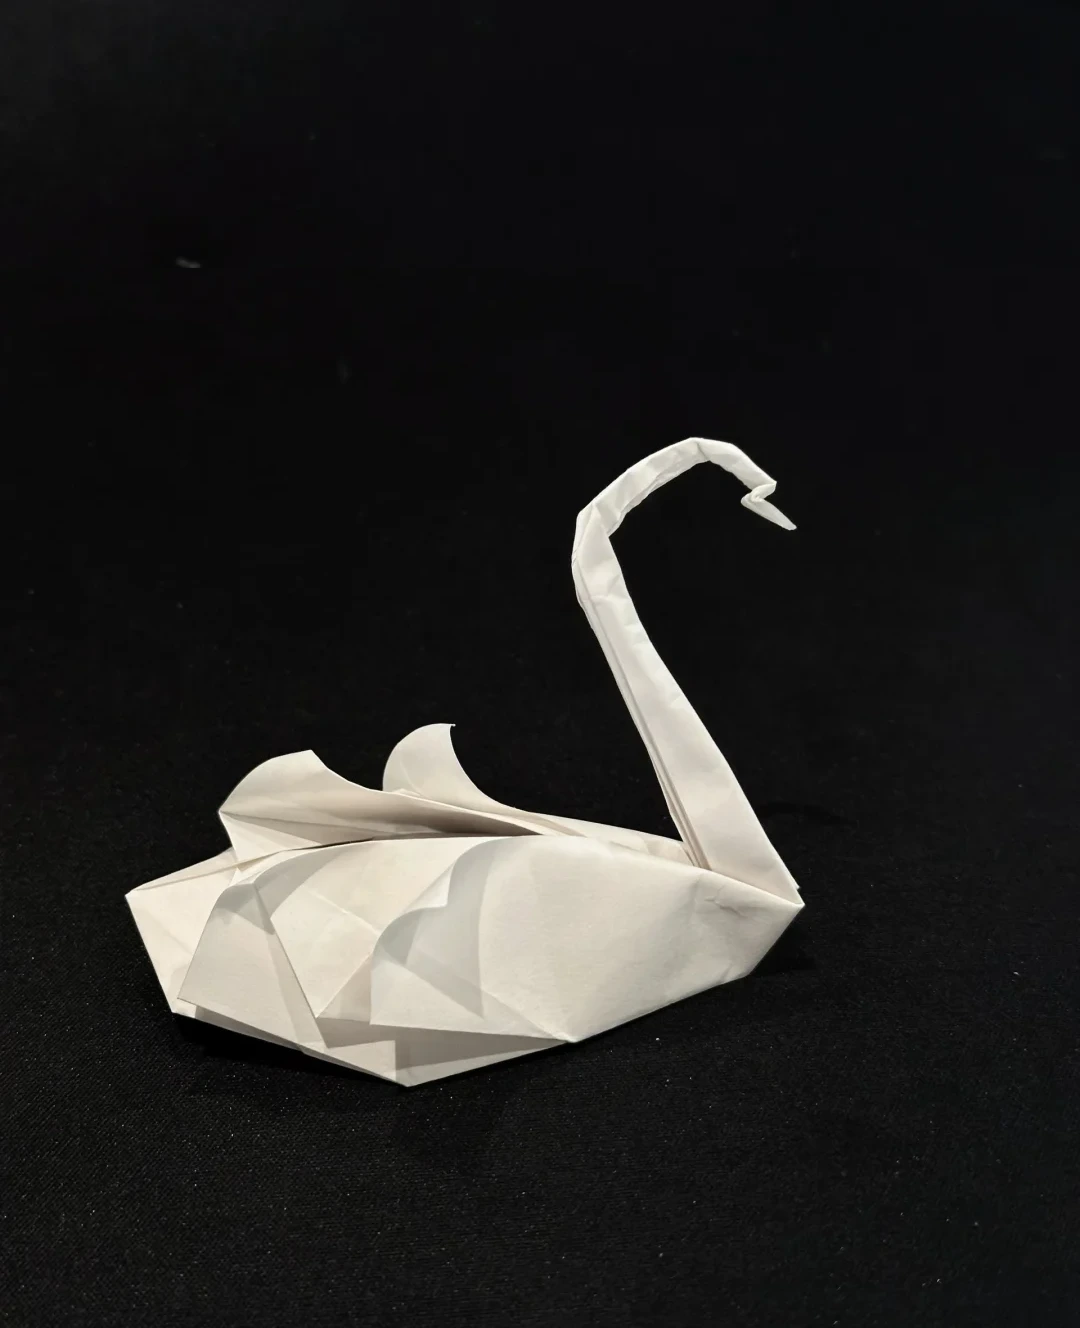
Use this finished example to compare the shape and proportions of your model.
Finished model
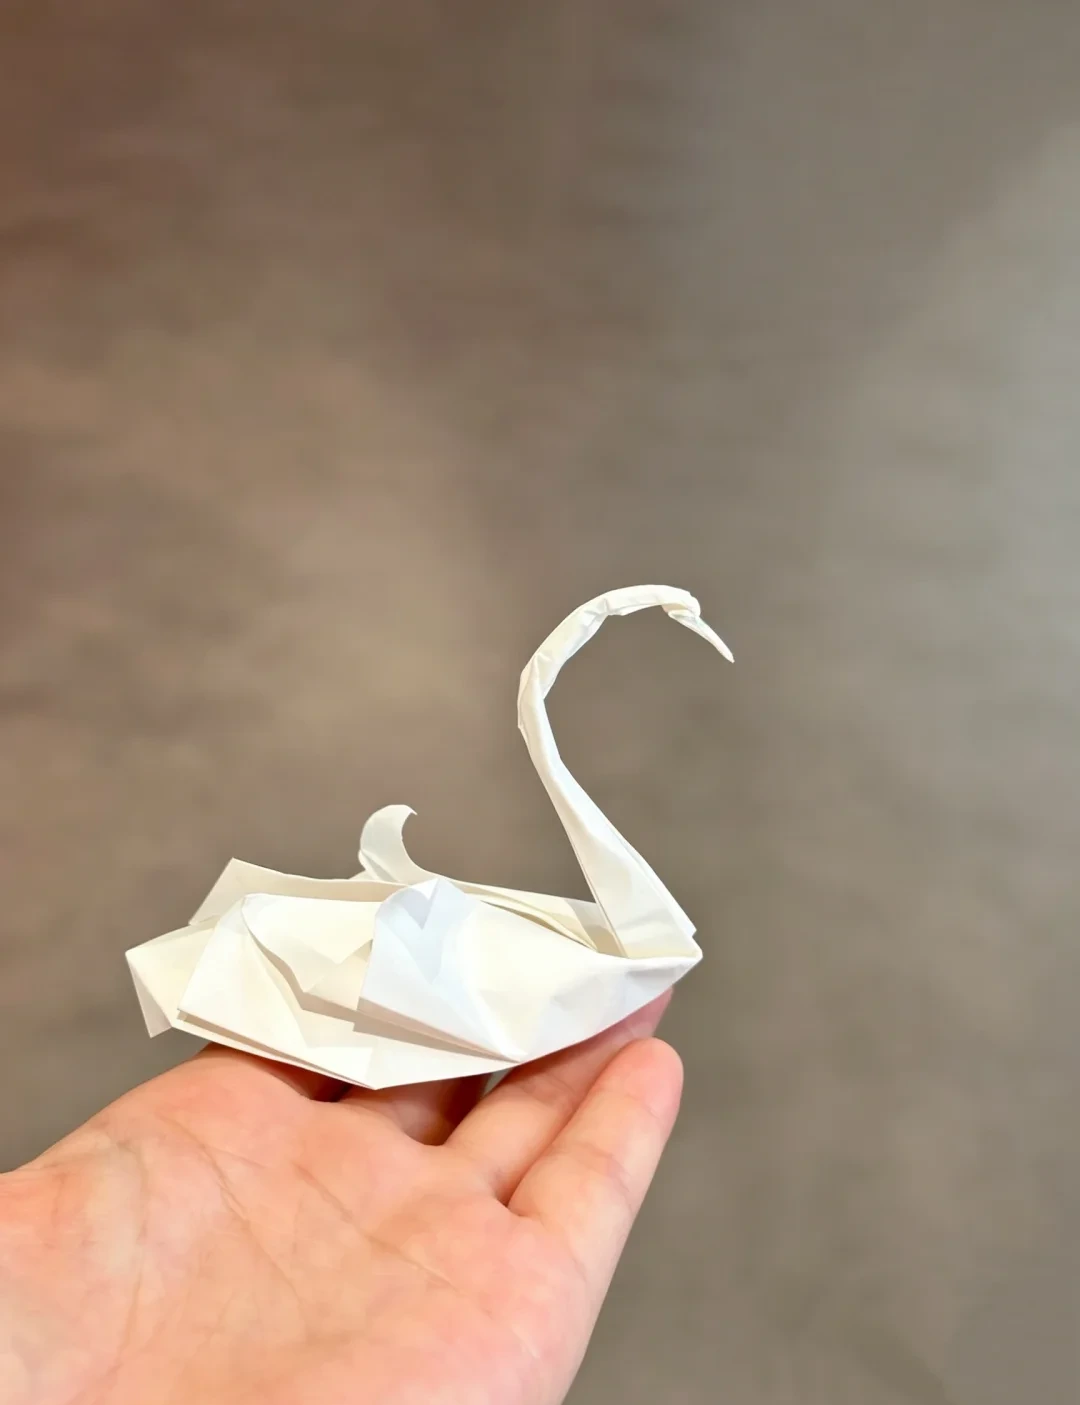 Open image at full size ↗
Use this finished example to compare the shape and proportions of your model.
Prepare a kite shape
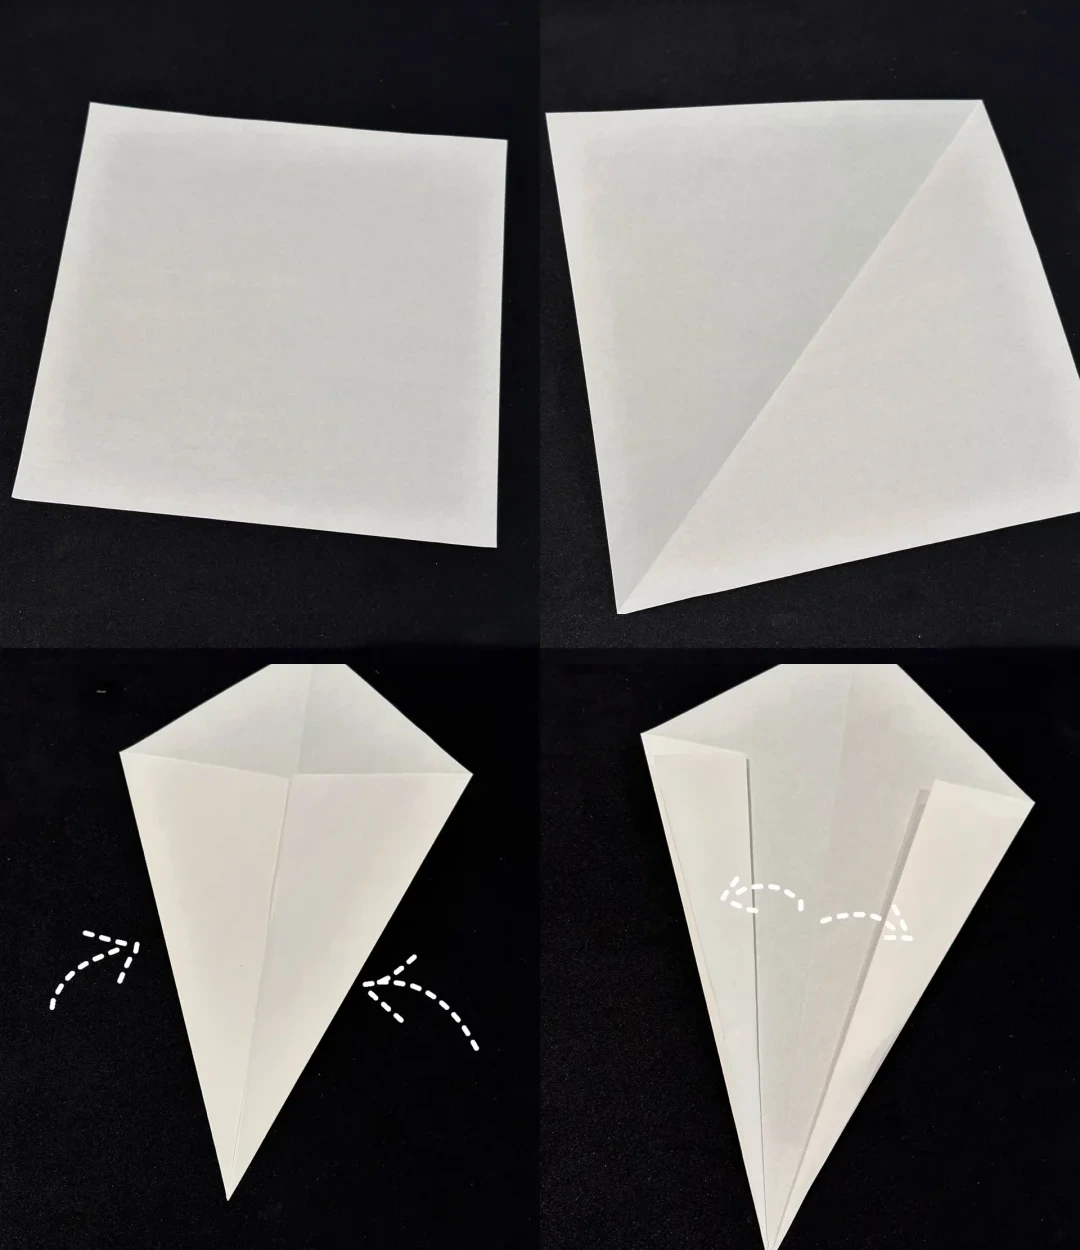 Open image at full size ↗
Crease one diagonal. Bring both side edges to the middle.
Fold the inner edges outward along the dotted guides.
Narrow the base
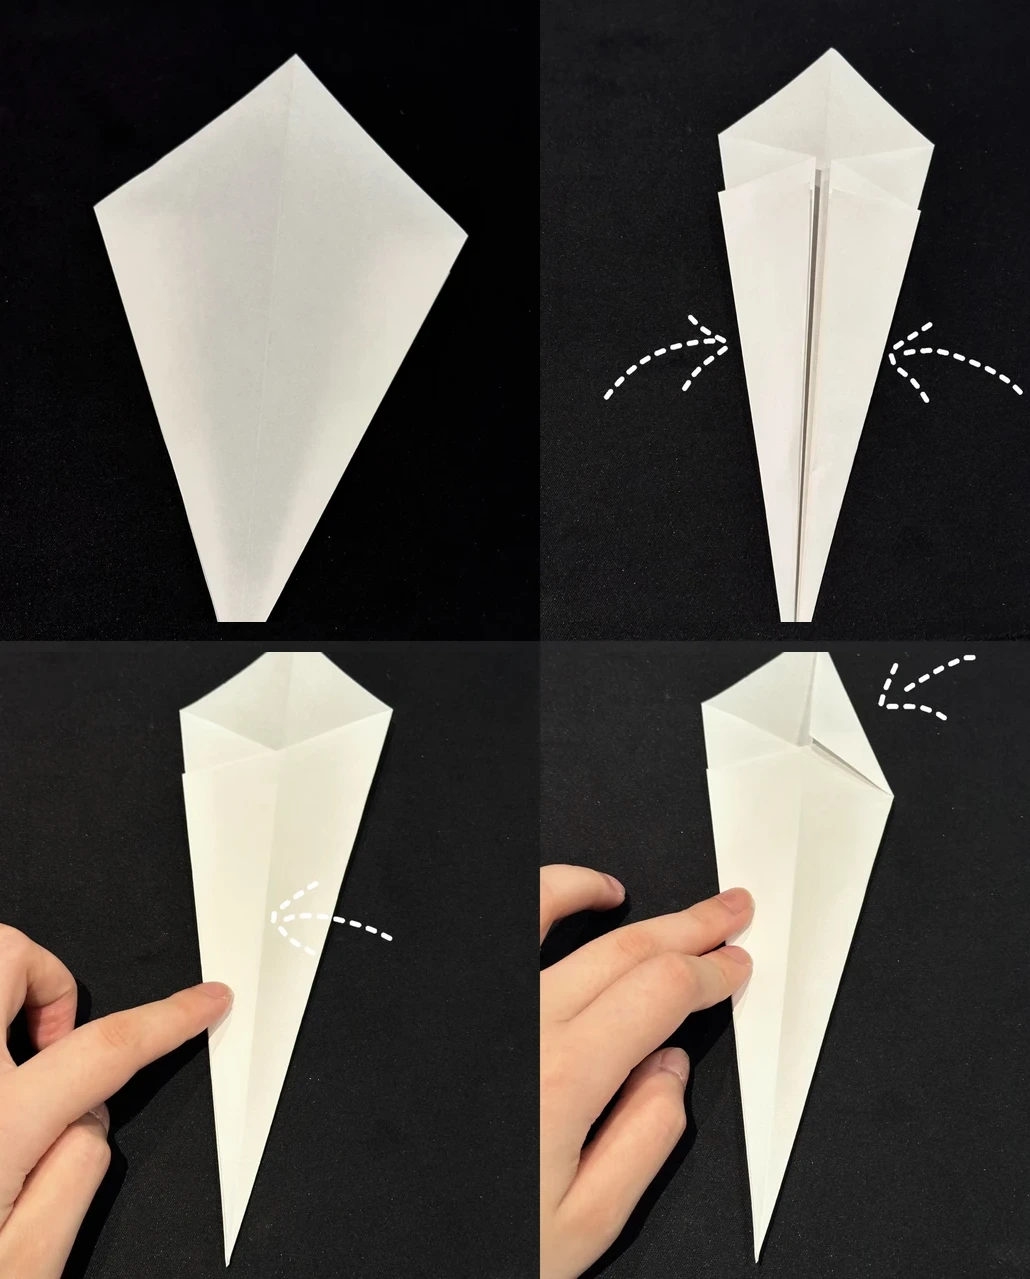 Open image at full size ↗
Turn the model over and bring both side edges to the center.
Fold the right half to the left. Bring the upper-right edge toward the middle to mark its crease.
Reverse the upper fold
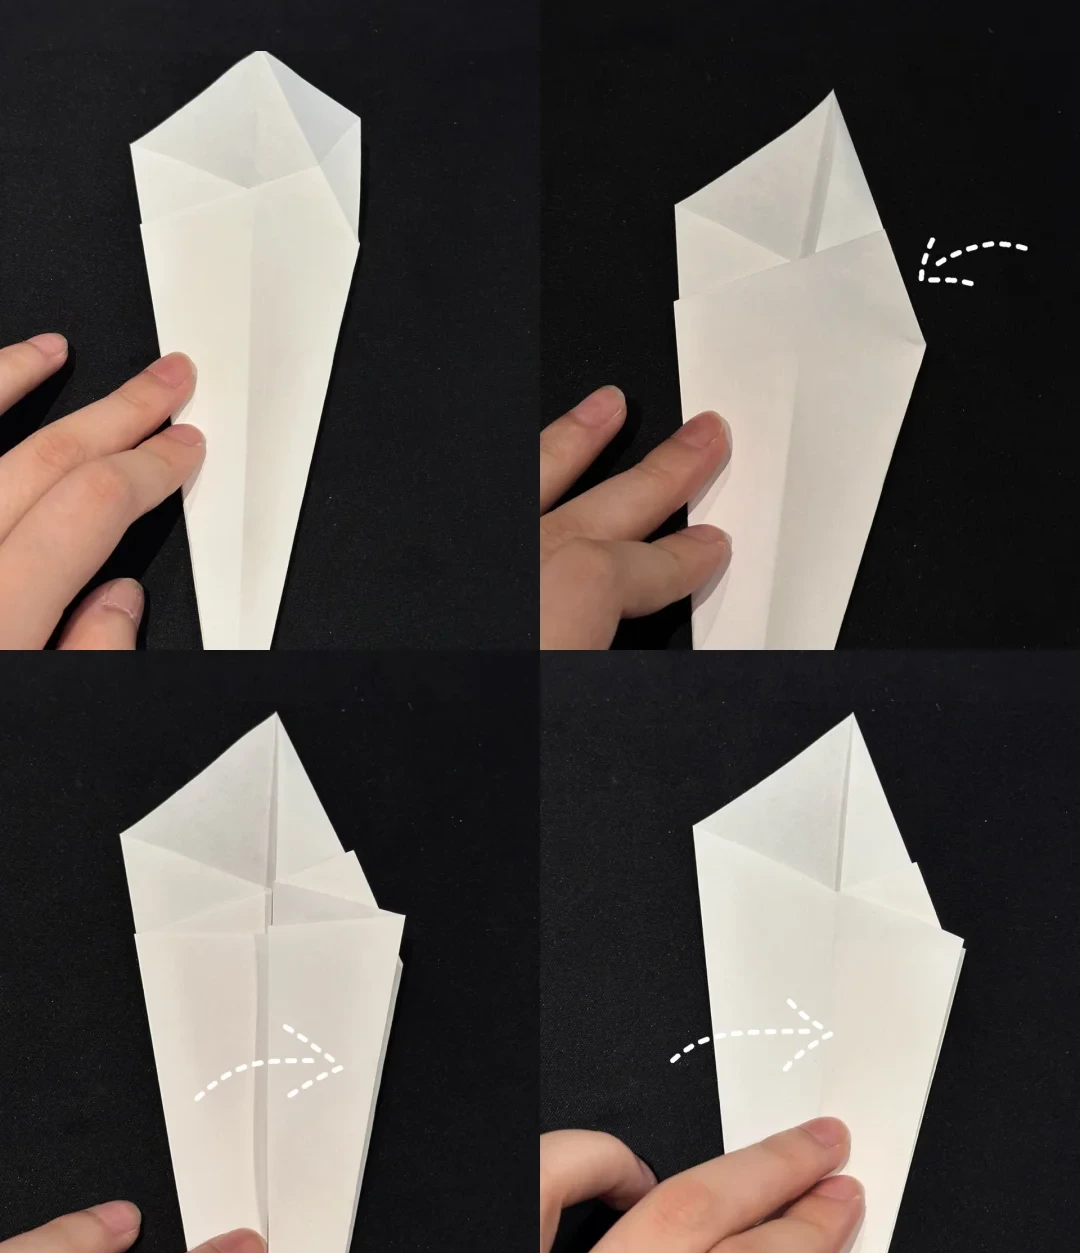 Open image at full size ↗
Open the last fold and tuck it inward along its crease.
Return the folded half to the right, then fold the left half over to the right.
Repeat on the opposite side
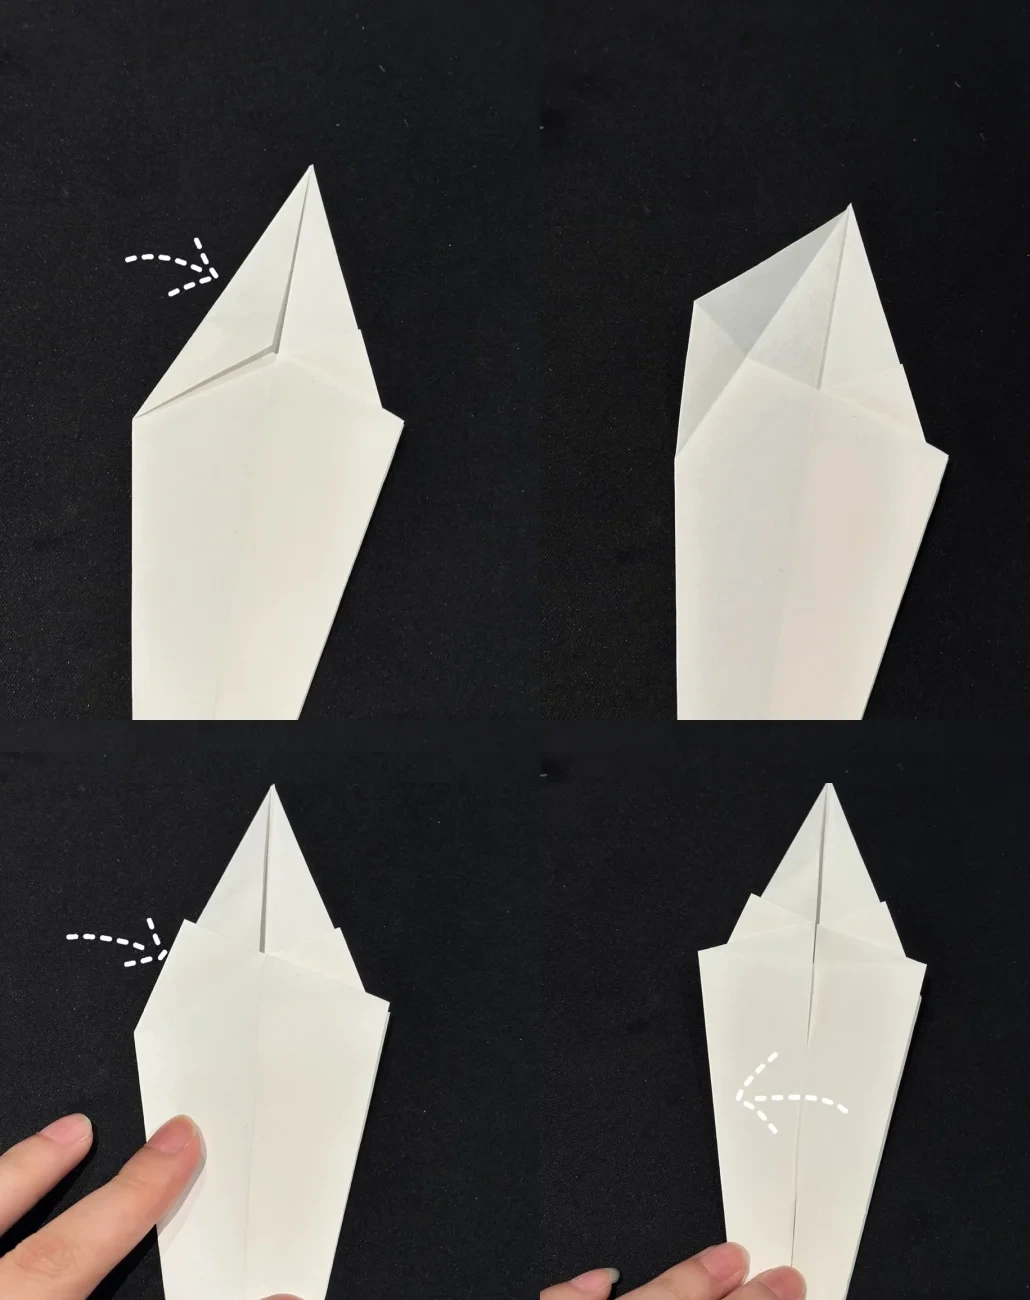 Open image at full size ↗
Bring the upper edge to the center and unfold. Reverse this fold inward.
Return the half to the left to restore the narrow, symmetrical shape.
Prepare the inner layers
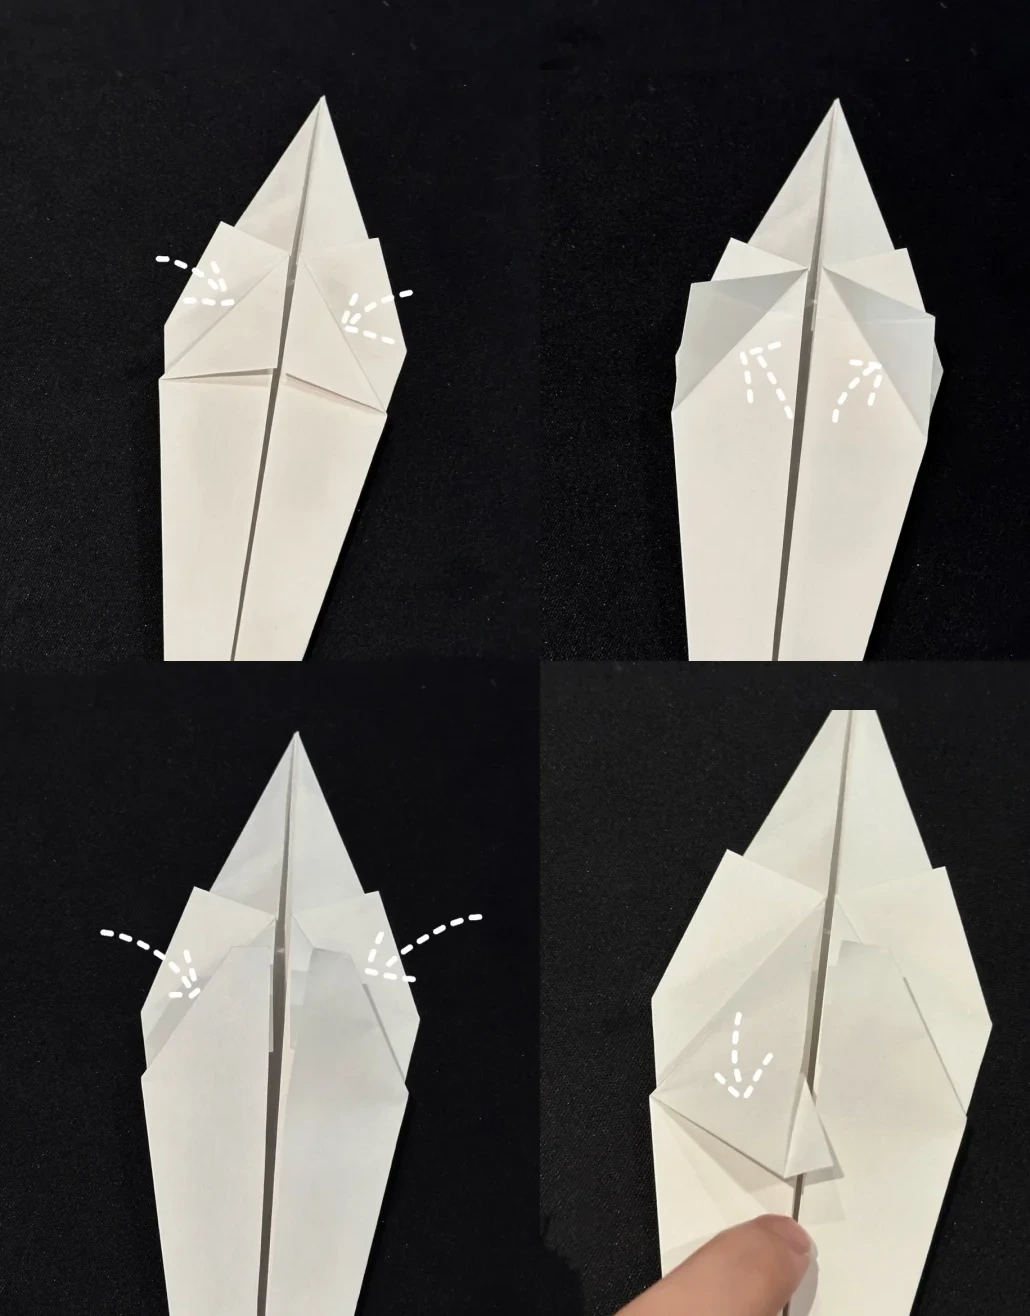 Open image at full size ↗
Fold both upper side edges to the middle and unfold.
Tuck them inward along the creases, then open the front layer downward.
Pleat the body surface
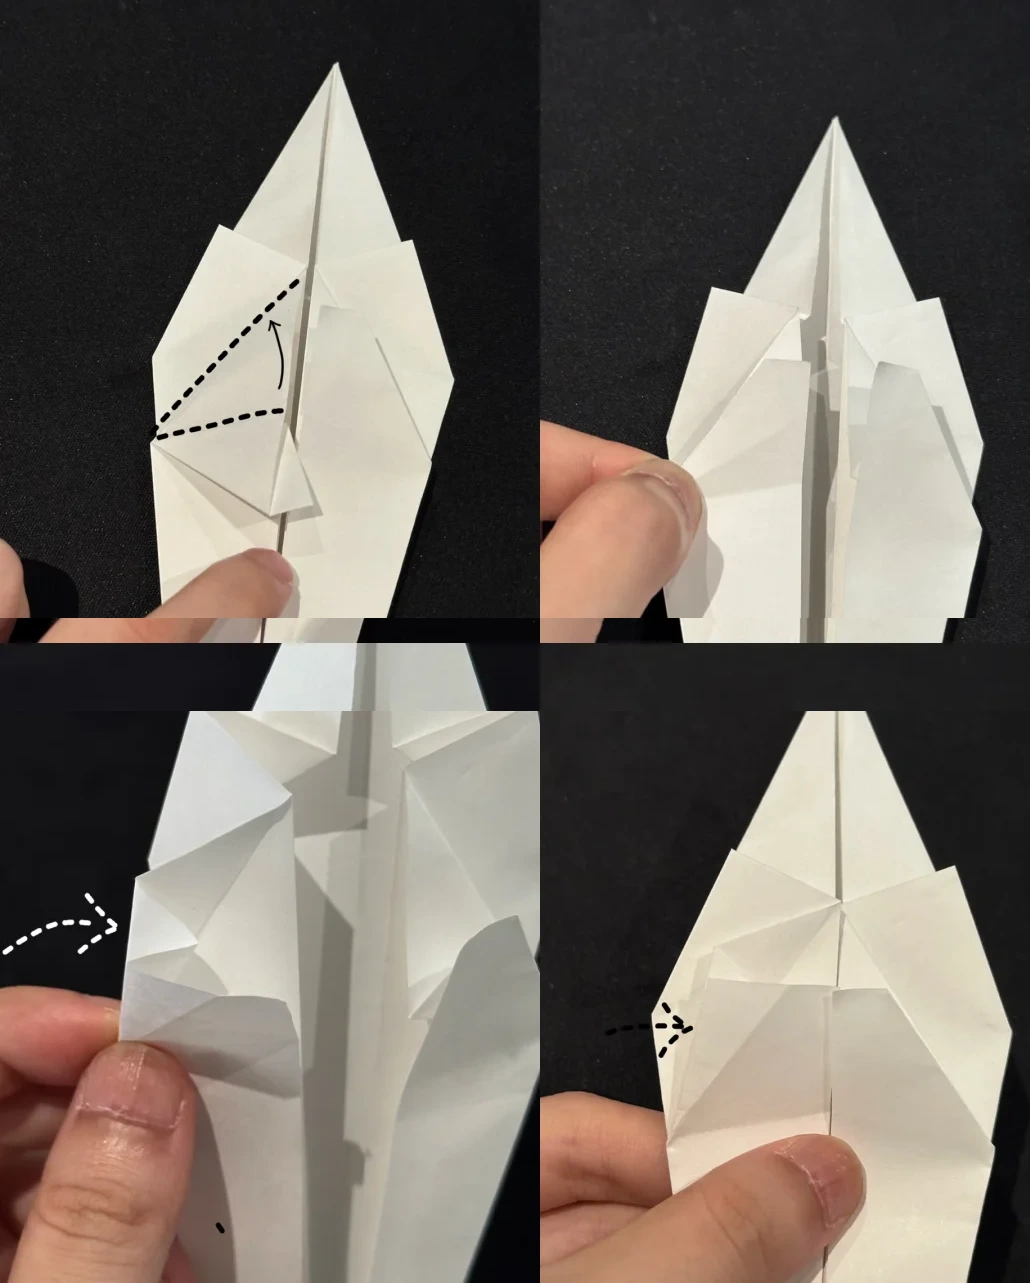 Open image at full size ↗
Bring the indicated crease lines together and flatten the opened side layer.
Push the newly formed crease inward and close the layers into the raised angular pattern shown.
Repeat and turn over
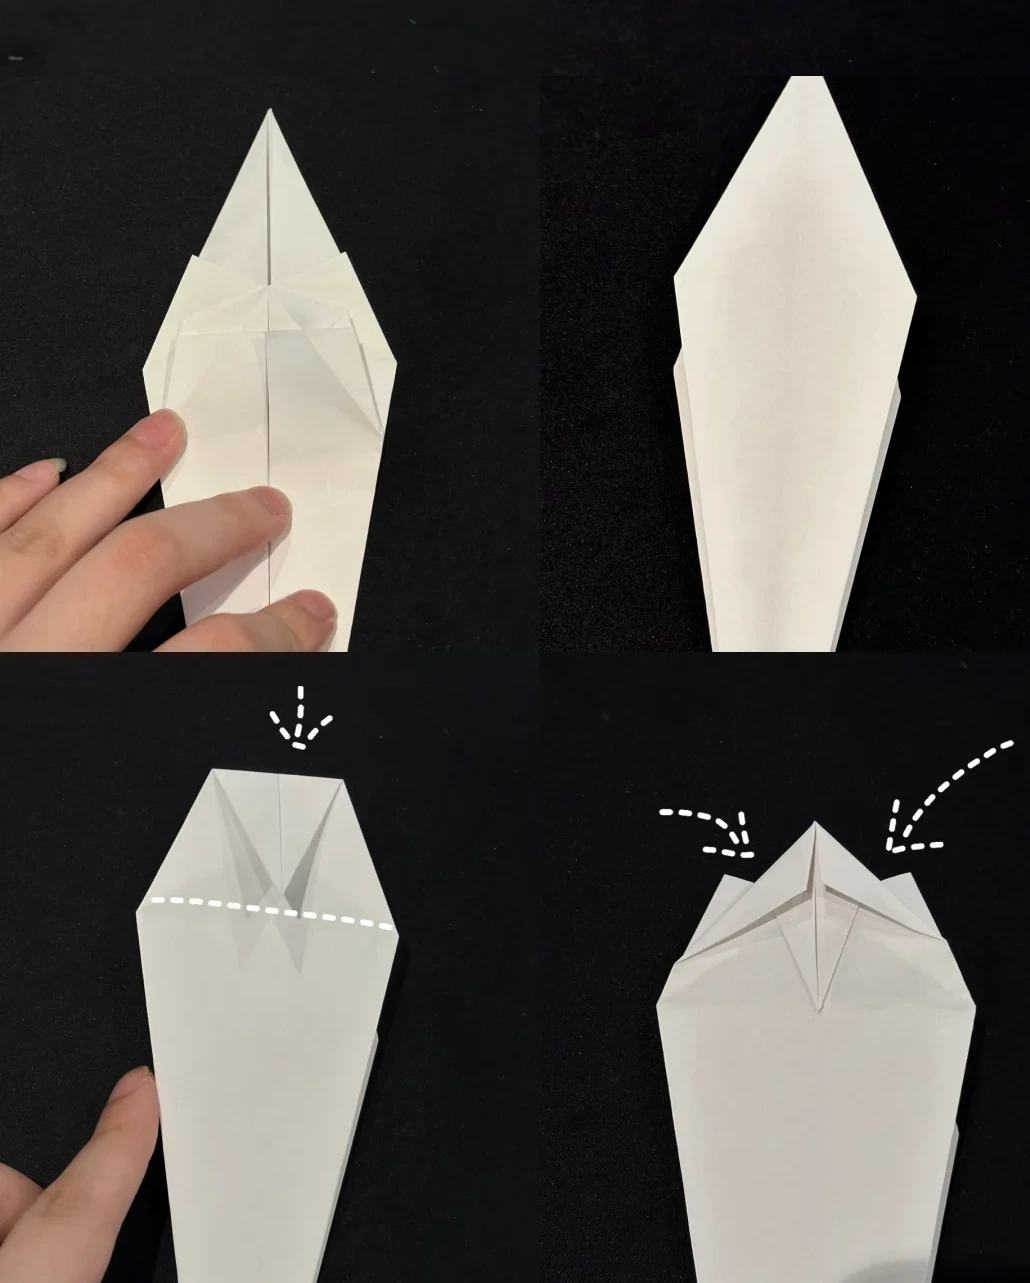 Open image at full size ↗
Repeat the body pleat on the other side and lower the opened flap. Turn the model over.
Fold the top point downward along the horizontal guide, then bring both upper side edges toward the middle.
Raise the neck
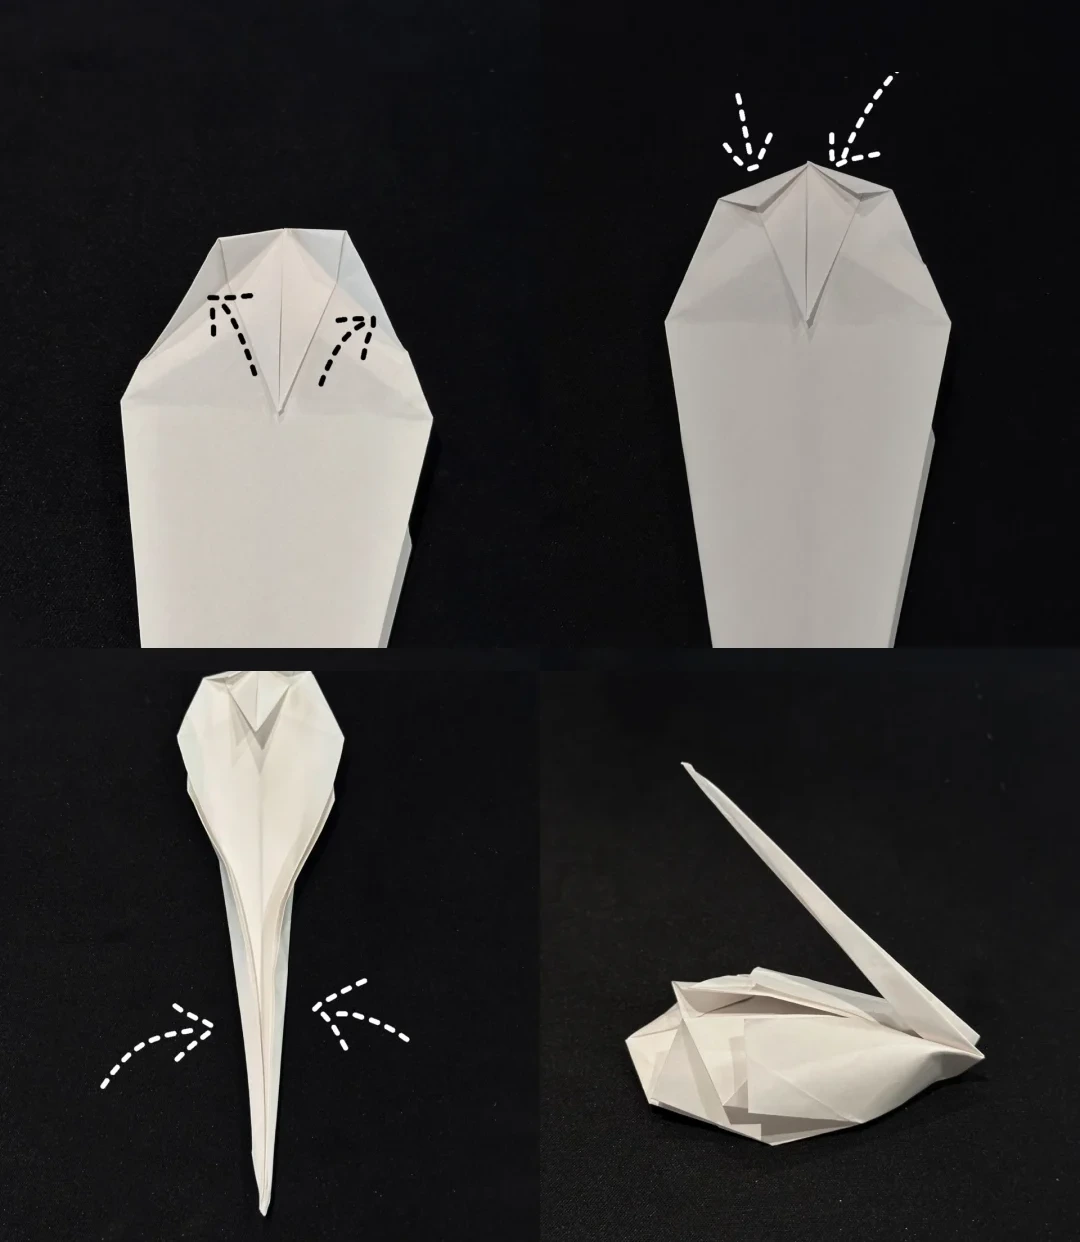 Open image at full size ↗
Open the side folds and refold them along the next guides. Fold the two sides together.
Fold the long narrow point backward and upward to raise the neck while opening the body.
Curve the head and neck
 Open image at full size ↗
Shape the long neck with several small bends. Fold the tip downward for the head and form a short beak.
Open and adjust the body so the swan rests evenly.
Finished model
 Open image at full size ↗
Use this finished example to compare the shape and proportions of your model.
Follow the diagrams alongside the step-by-step English instructions.
Choose your next project →