
Flowers & nature · Step-by-step guide
Sculpted Four-Leaf Clover
Fold a clover with four broad leaves and a small raised star at its center.
What you’ll need
- One 7.6 × 7.6 cm square
Origami · Creasing, collapse folds & shaping
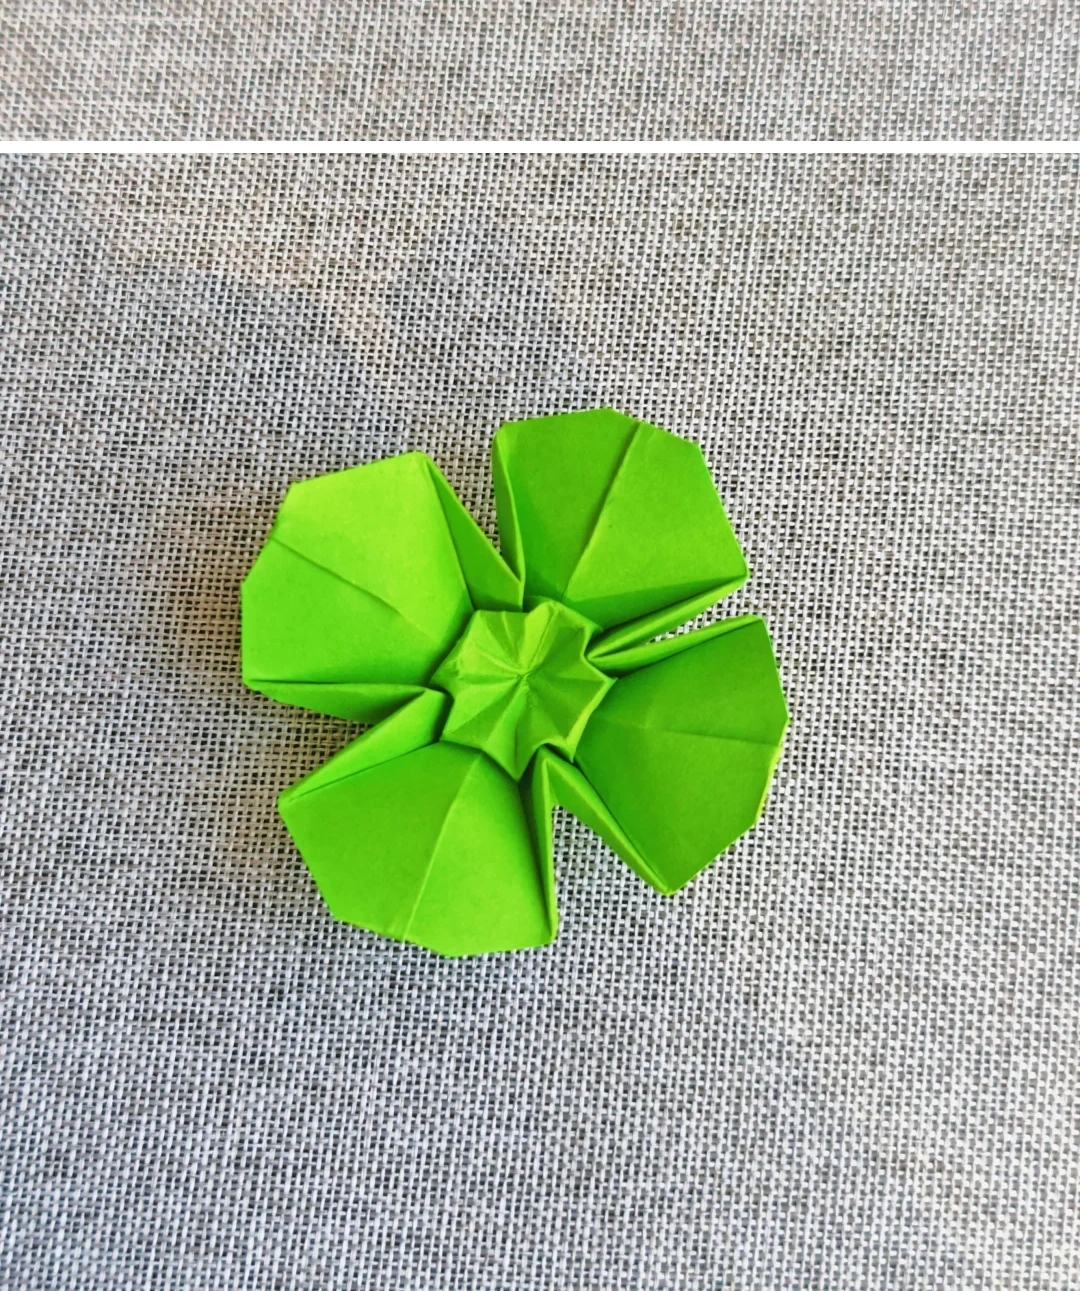
Make it, step by step.
7 steps · Original diagrams with English instructions
Make the base
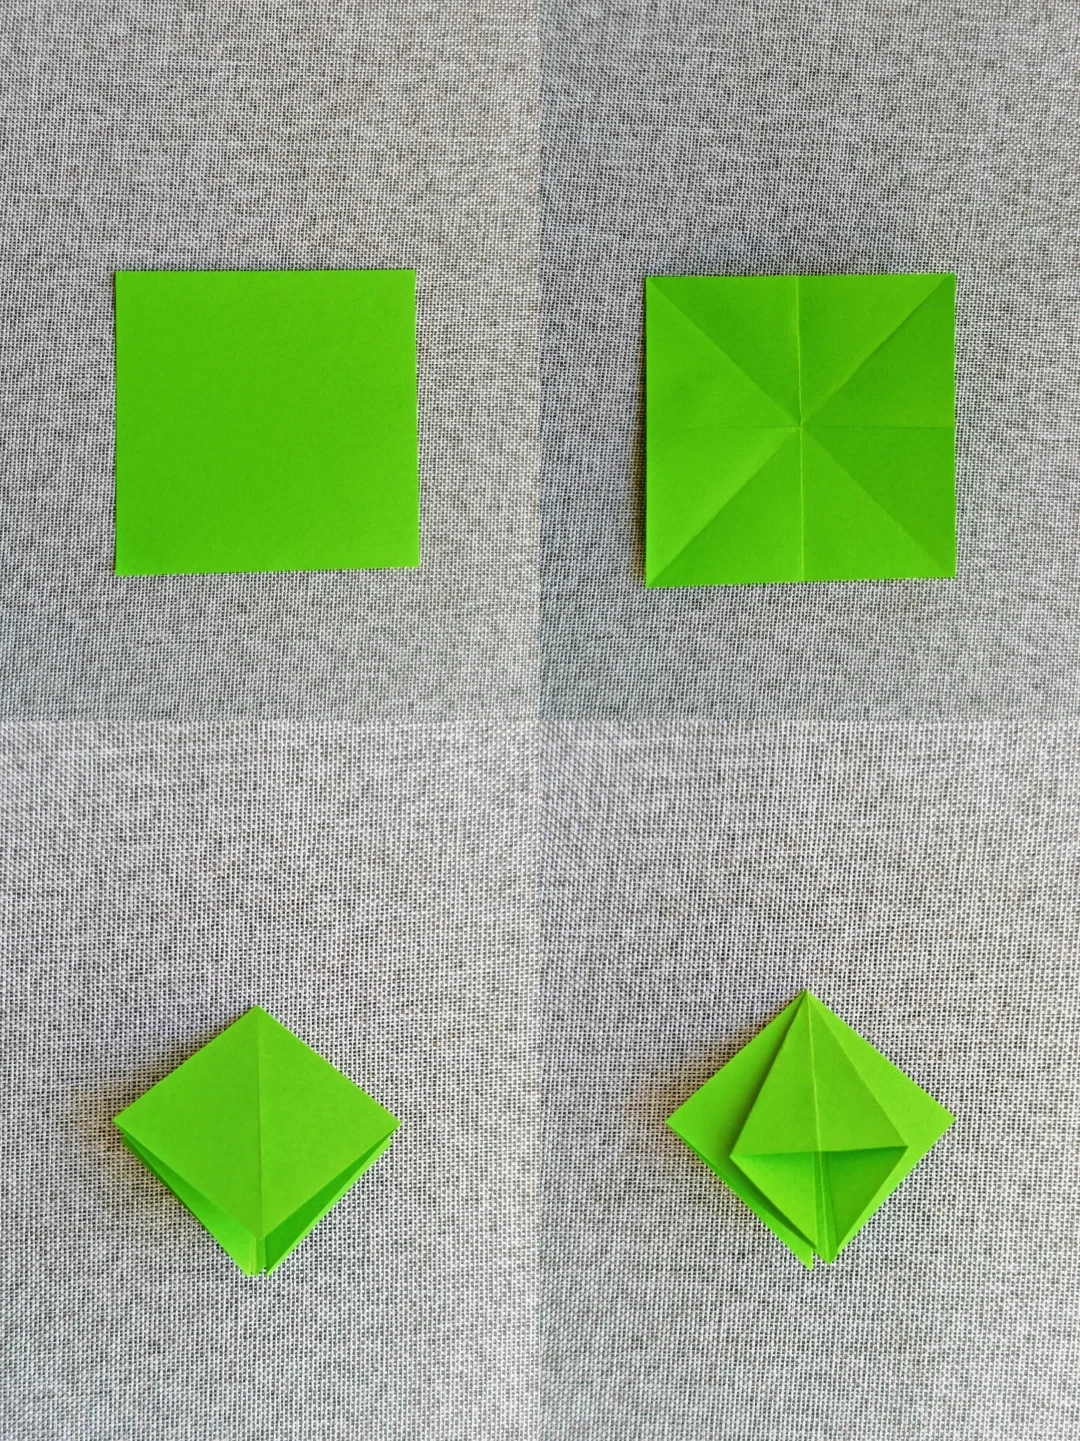 Open image at full size ↗
Crease both midlines and diagonals, collapse into a square base and fold the side edges inward.
Build the radial creases
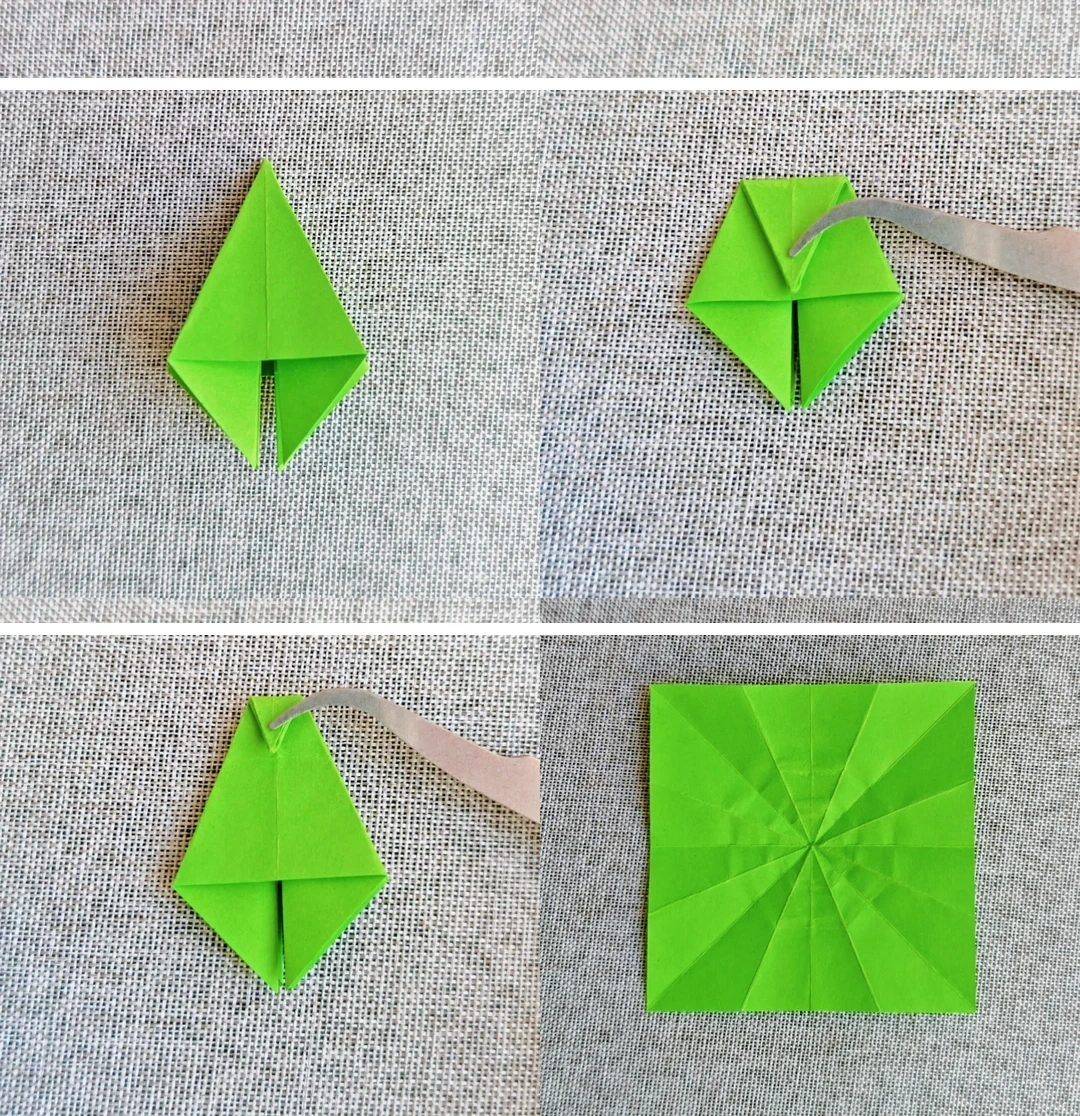 Open image at full size ↗
Fold each face as shown, bringing the tip to the previous reference crease. Unfold completely to reveal the pattern.
Set the crease directions
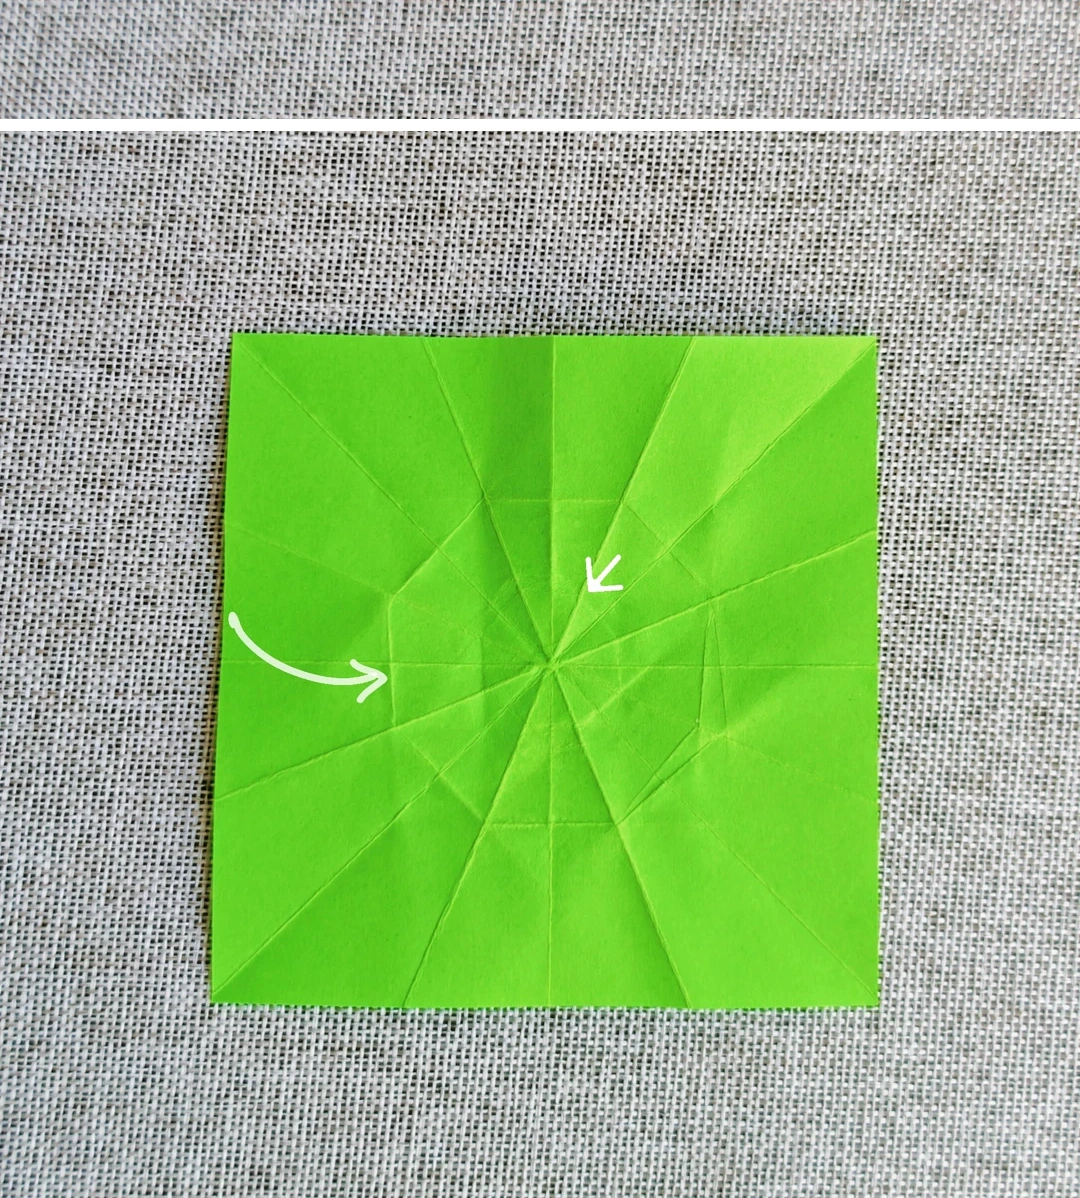 Open image at full size ↗
Fold the outer ring as mountain folds and the inner ring as valley folds, following the arrows.
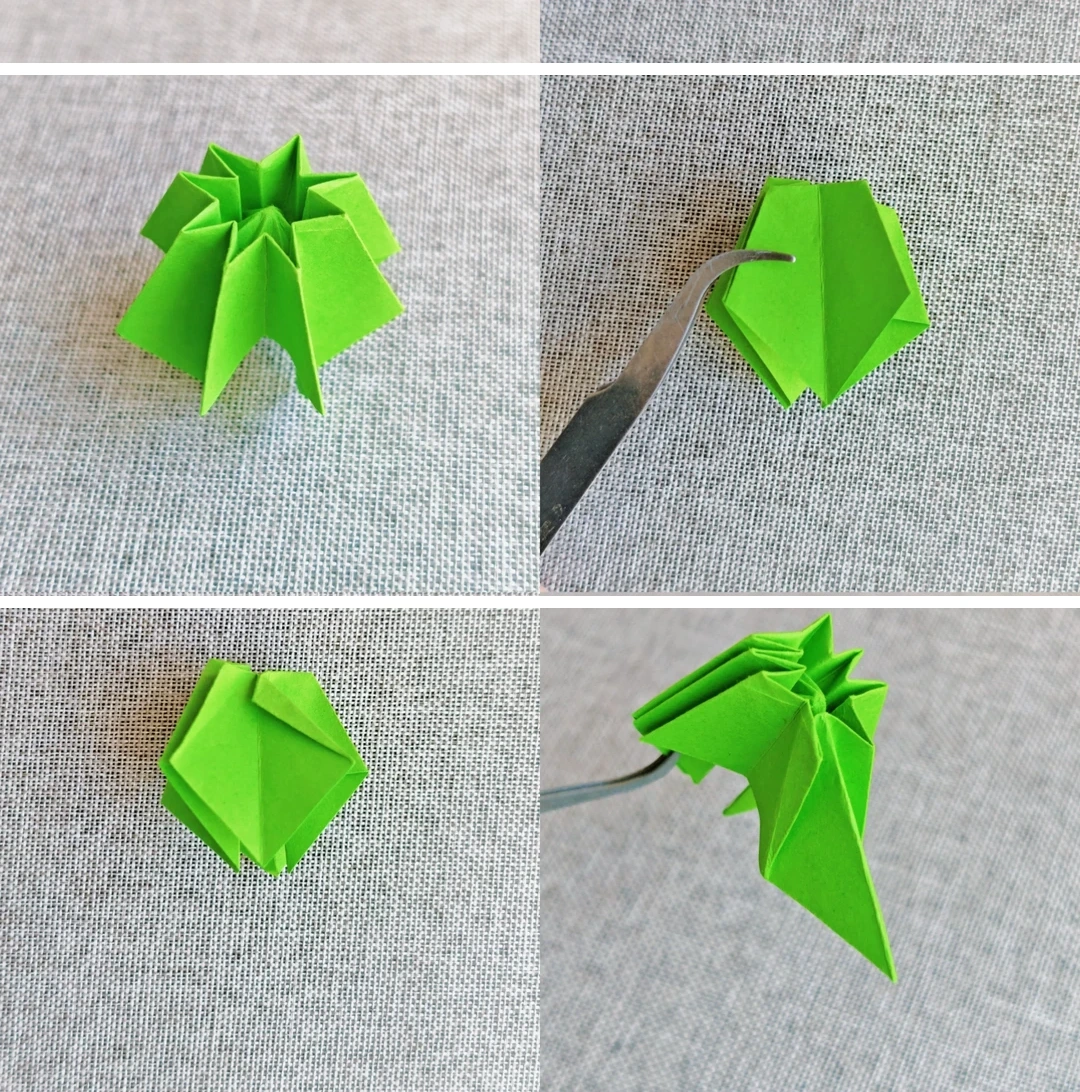
Collapse the center
 Open image at full size ↗
Gather the creases inward, flatten both sides, lift the middle section and fold the model together.
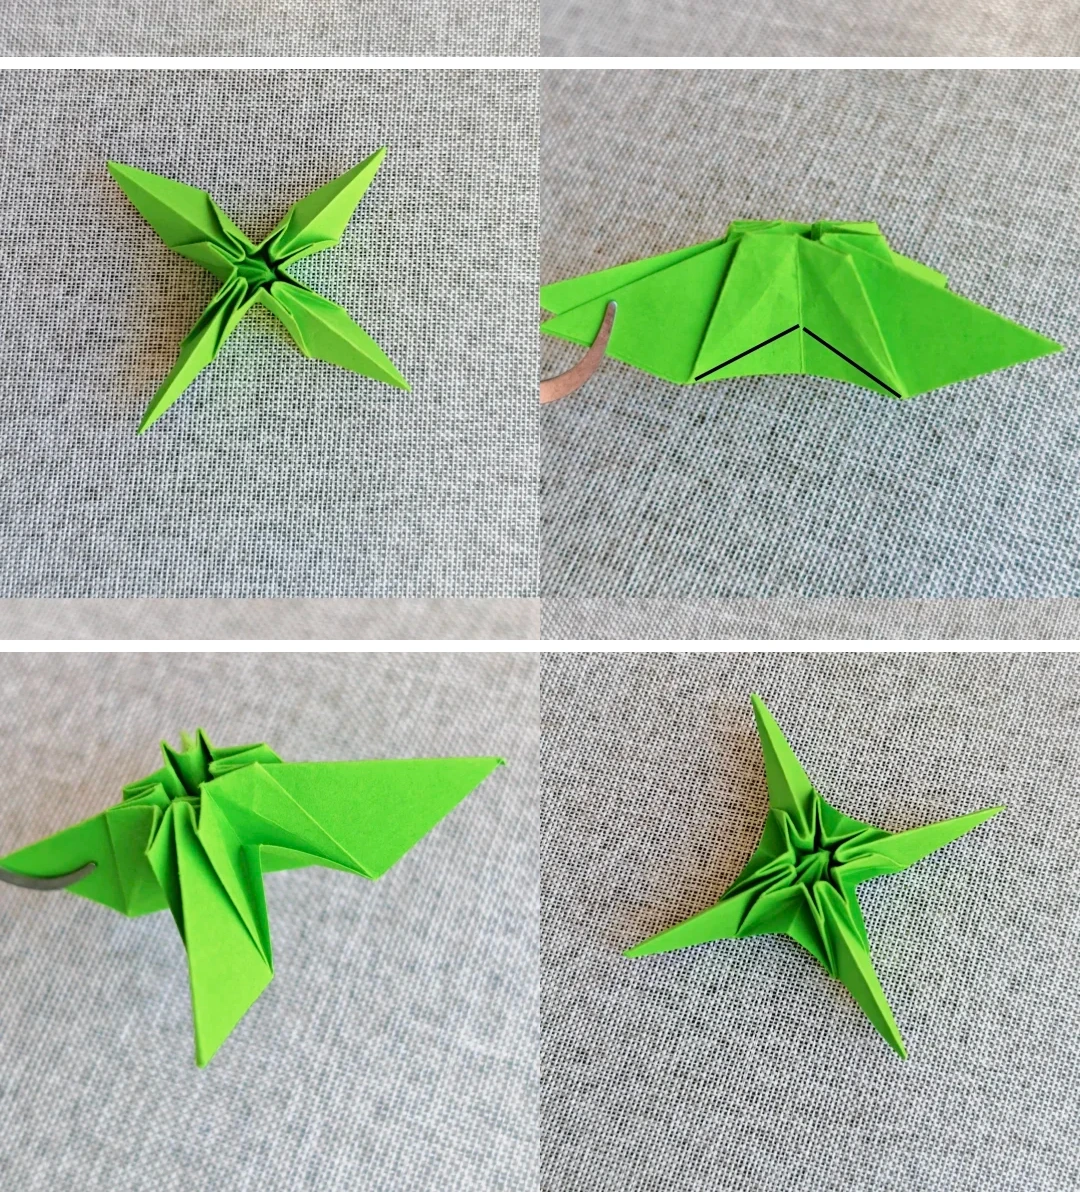
Lift the leaves
 Open image at full size ↗
Lift the first section along its creases. Repeat on the other three sides to open the four points.
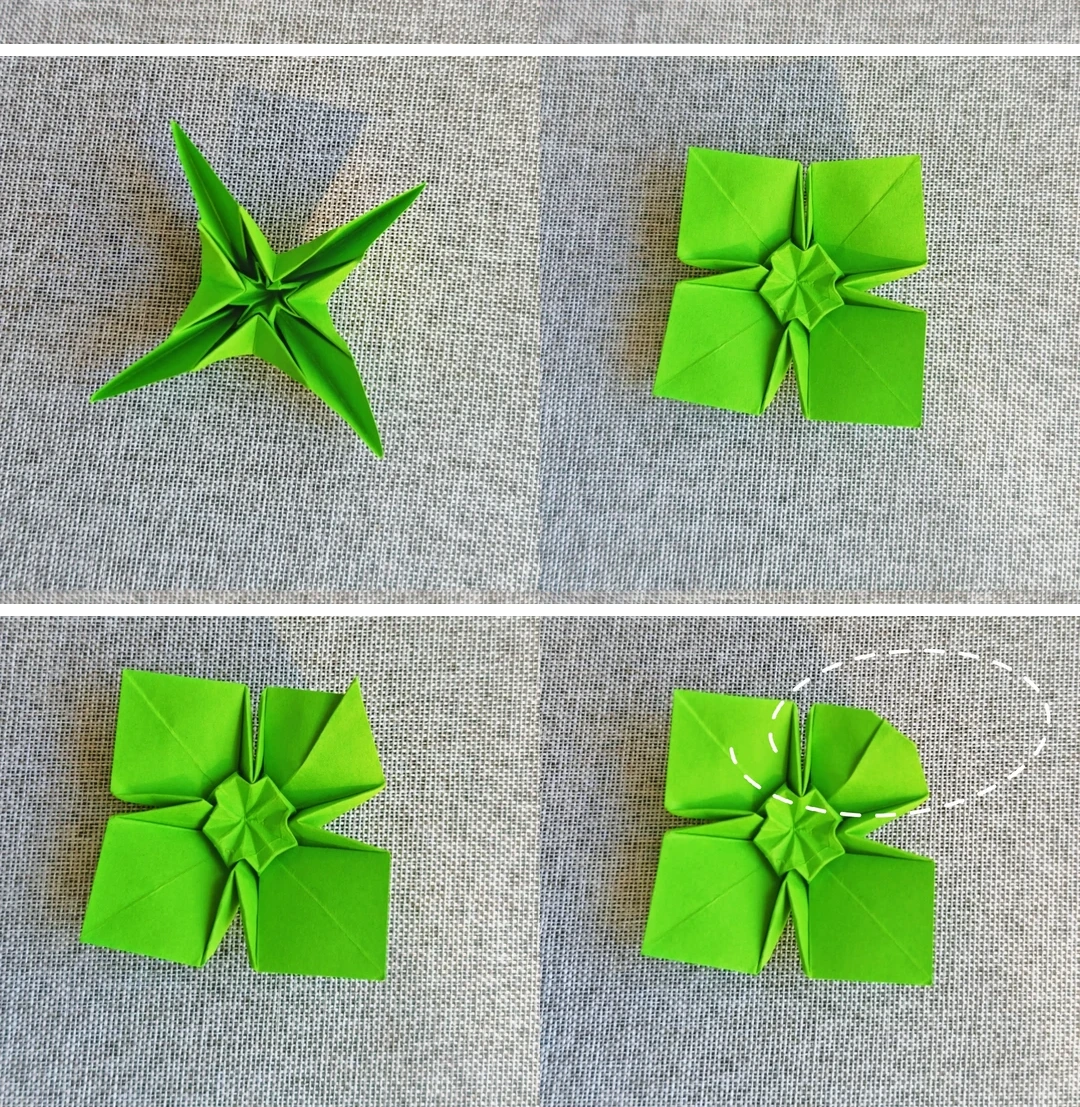
Shape a rounded leaf
 Open image at full size ↗
Turn over and open the four edges. Pinch the middle of a leaf, fold it sideways and tuck the protruding corner behind.
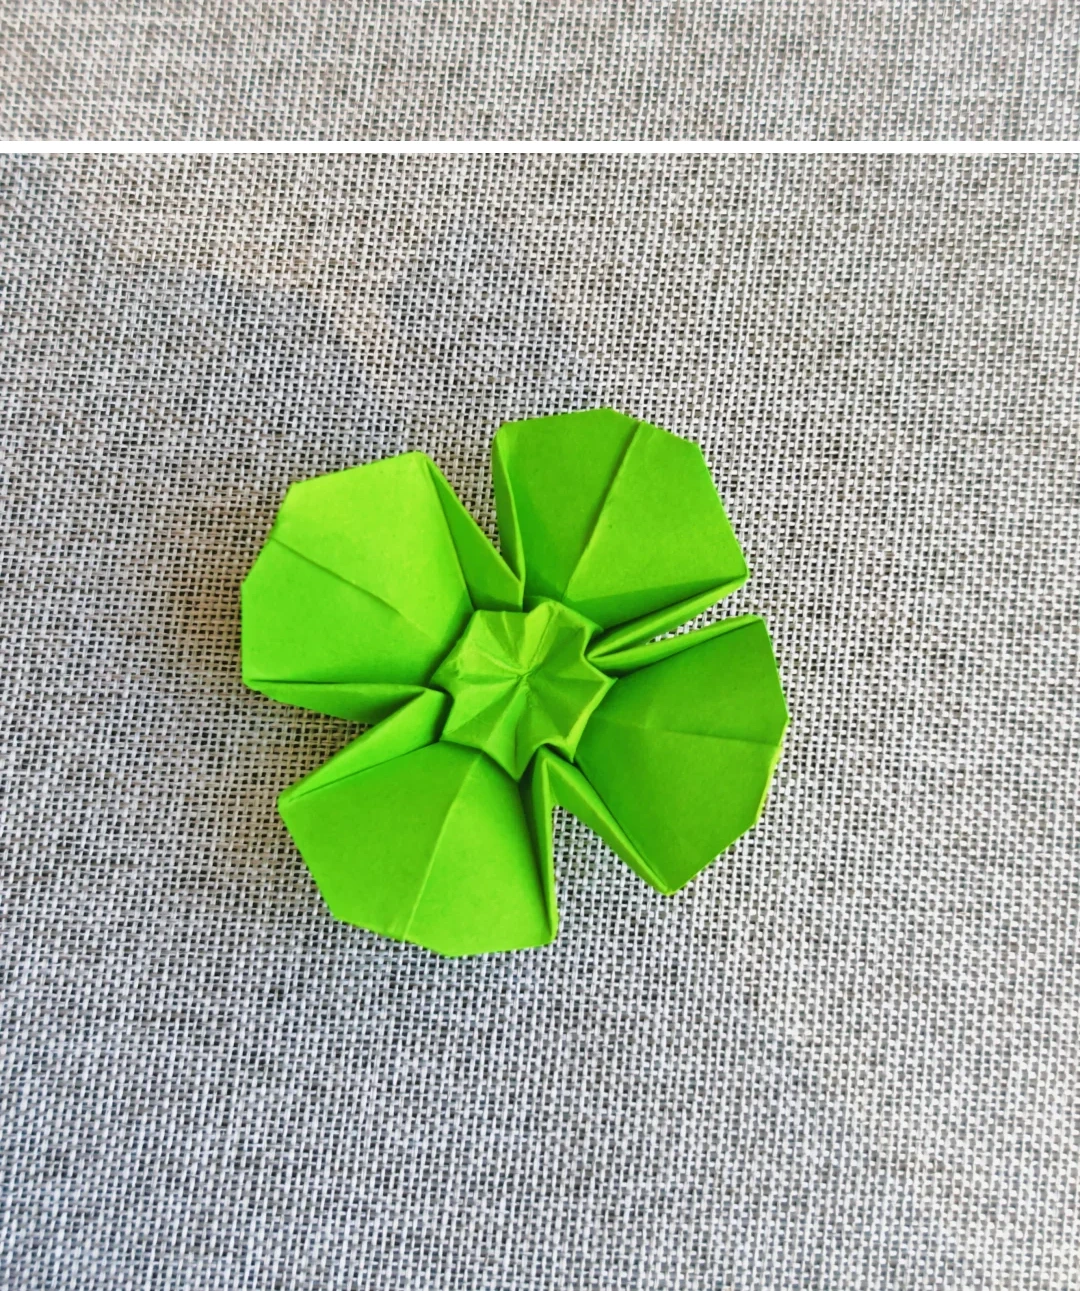
Repeat around the clover
 Open image at full size ↗
Shape the remaining three leaves and gently arrange the center folds.
Follow the diagrams alongside the step-by-step English instructions.
Choose your next project →