
Animals · Step-by-step guide
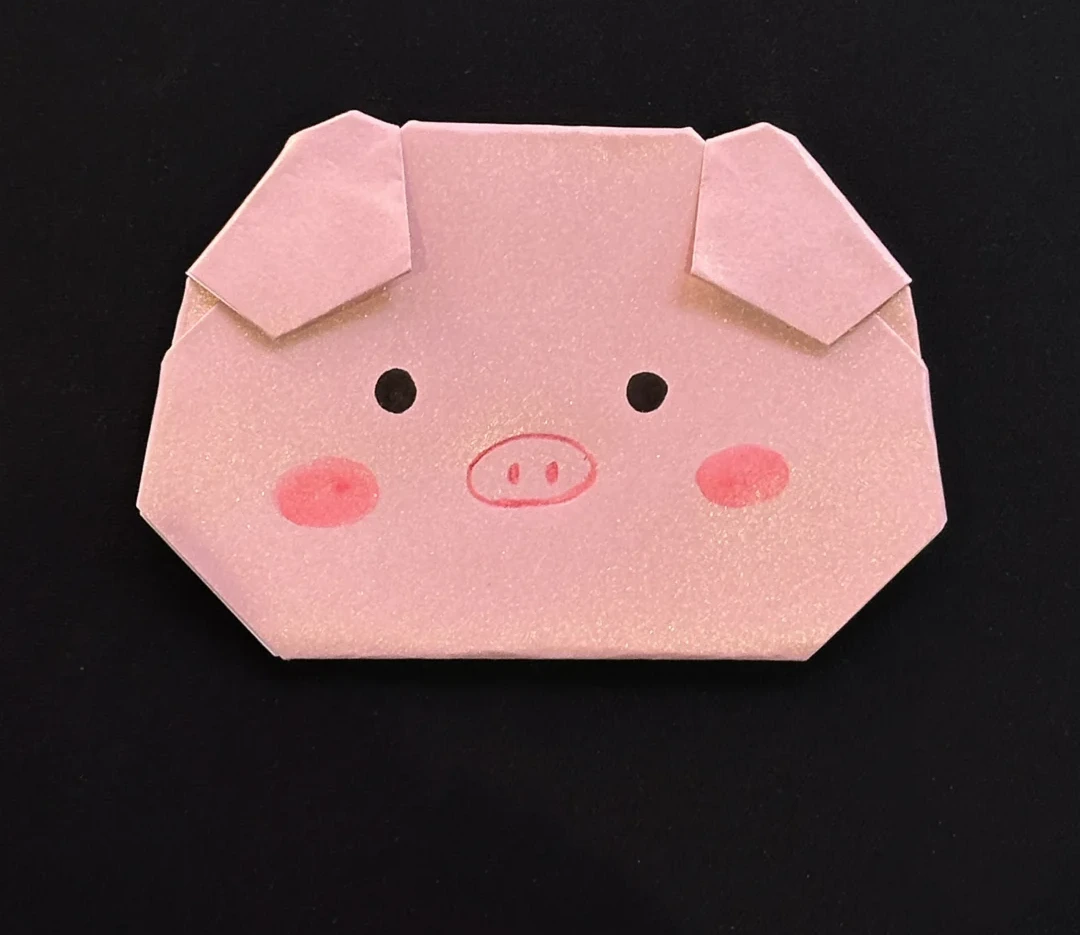
Round-Faced Paper Pig
Fold a broad pig face with floppy ears and add a cheerful drawn expression.
What you’ll need
- One pink paper square
- Black and pink markers
Origami · Folding and shaping
Make it, step by step.
8 steps · Original diagrams with English instructions
Read each picture from left to right, then top to bottom. Most panels use arrows without captions; these instructions describe the illustrated actions. No exact paper size is specified.
Fold the face base
 Open image at full size ↗
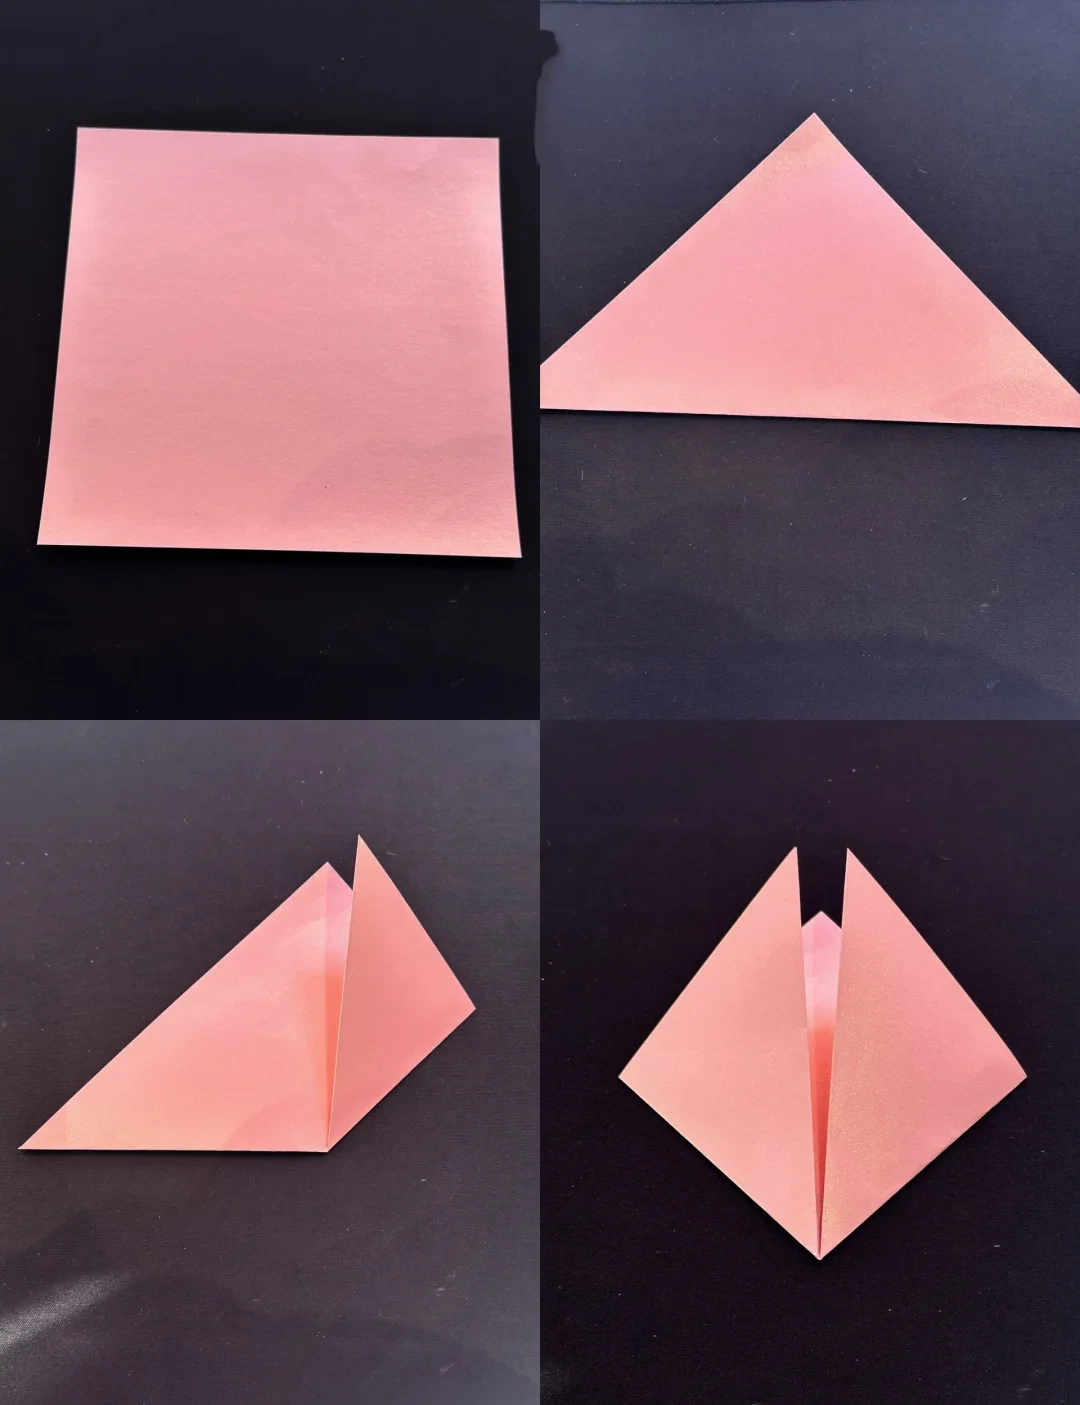
Fold the square diagonally into a triangle. Bring both lower corners upward toward the top point to form a diamond.
Raise the ears
 Open image at full size ↗
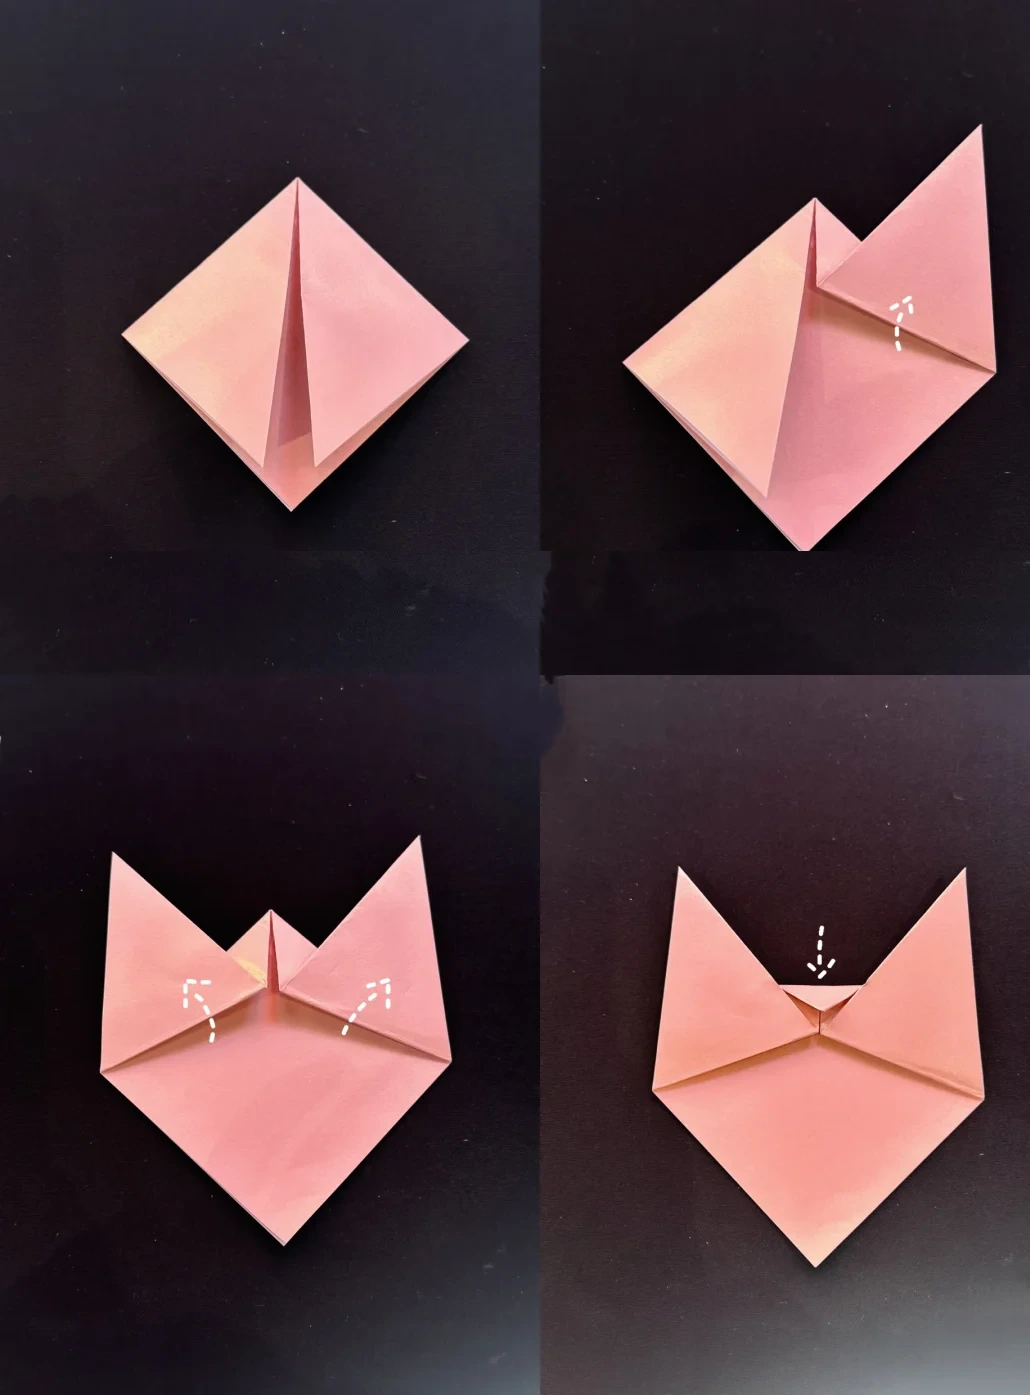
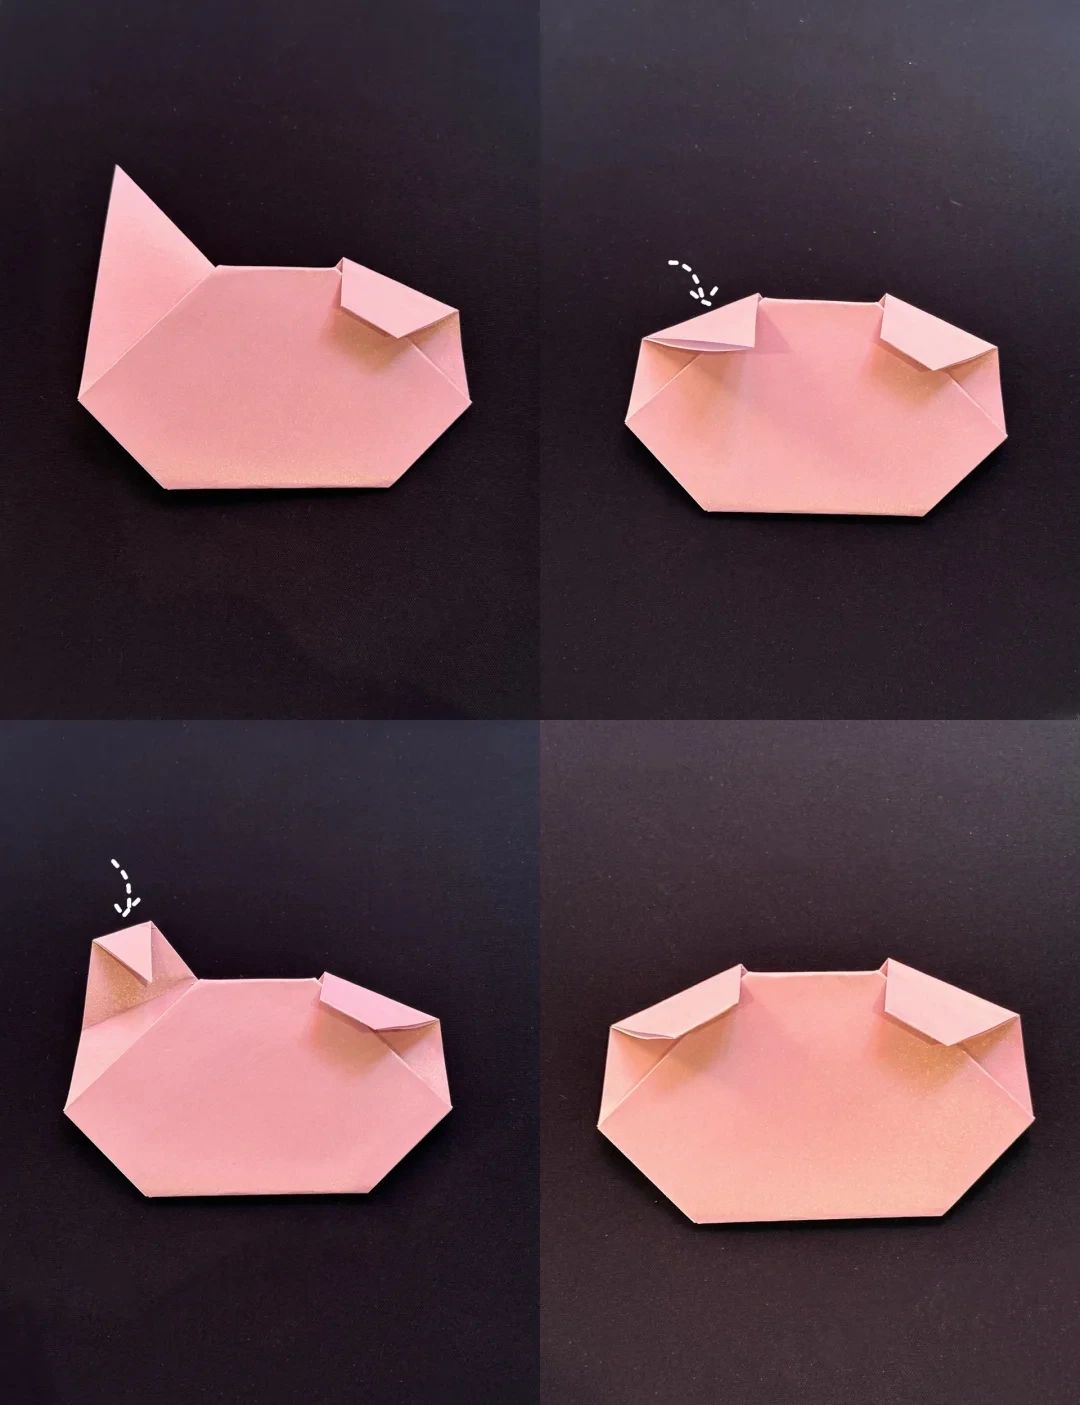
Rotate the diamond end for end. Fold one front flap diagonally upward and outward, then repeat on the other side.
Fold the small central upper tip downward.
Prepare the ear folds
 Open image at full size ↗
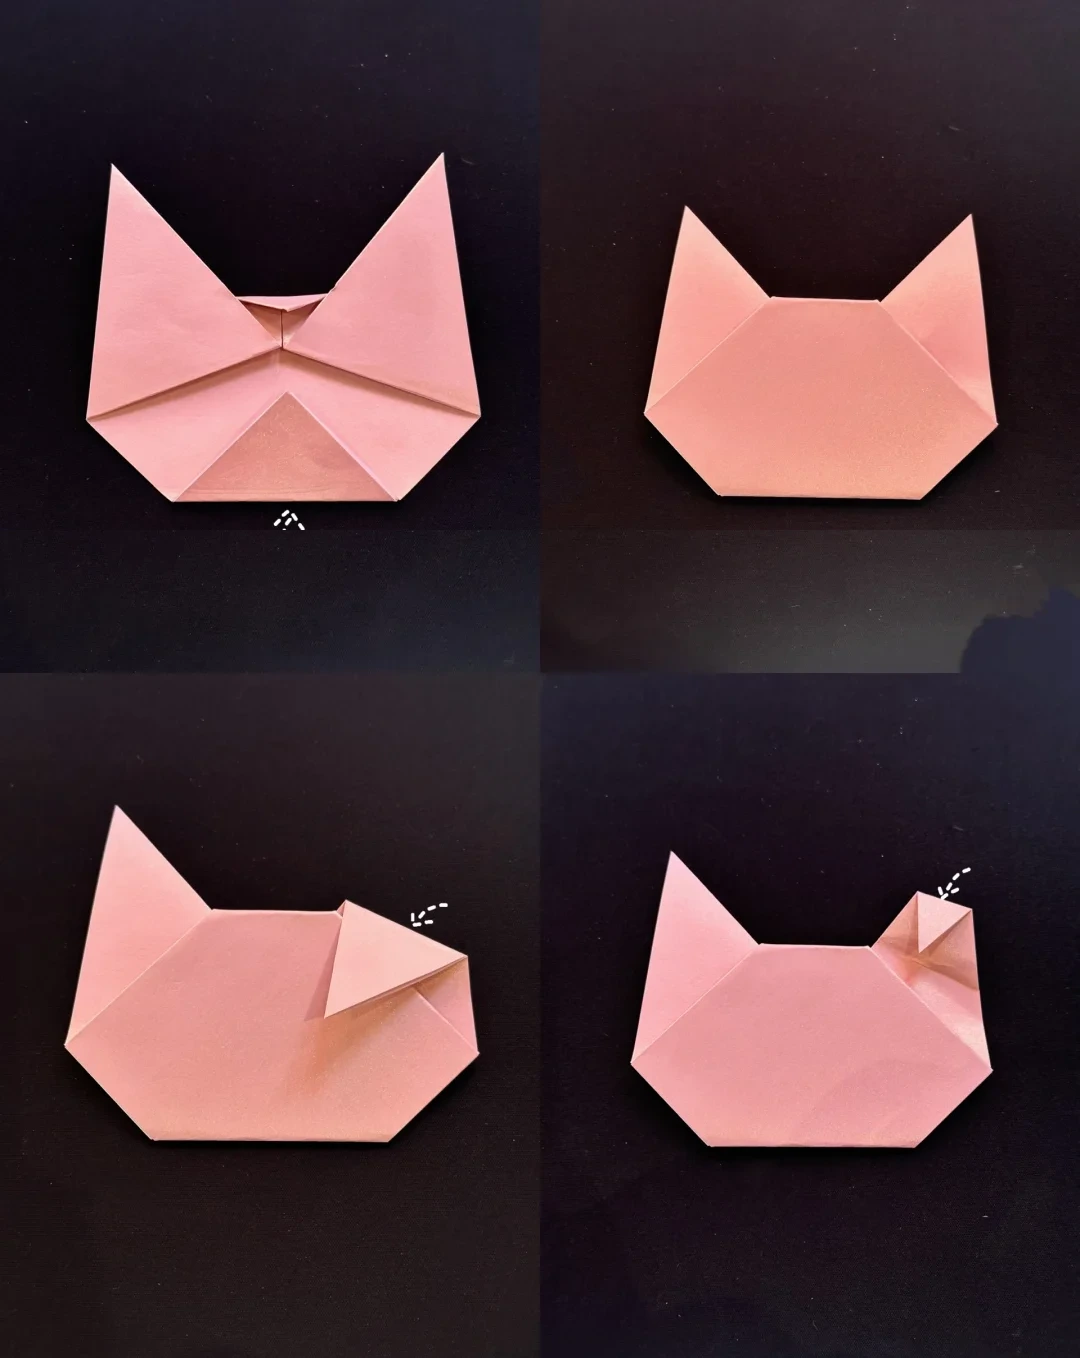
Fold the lower point upward to flatten the bottom of the face. Turn the model over.
Fold the right ear downward, then fold its small tip upward as pictured.
Repeat on the left
 Open image at full size ↗
Fold the small right ear flap back down. Repeat the same sequence on the left ear.
Round the cheeks
 Open image at full size ↗
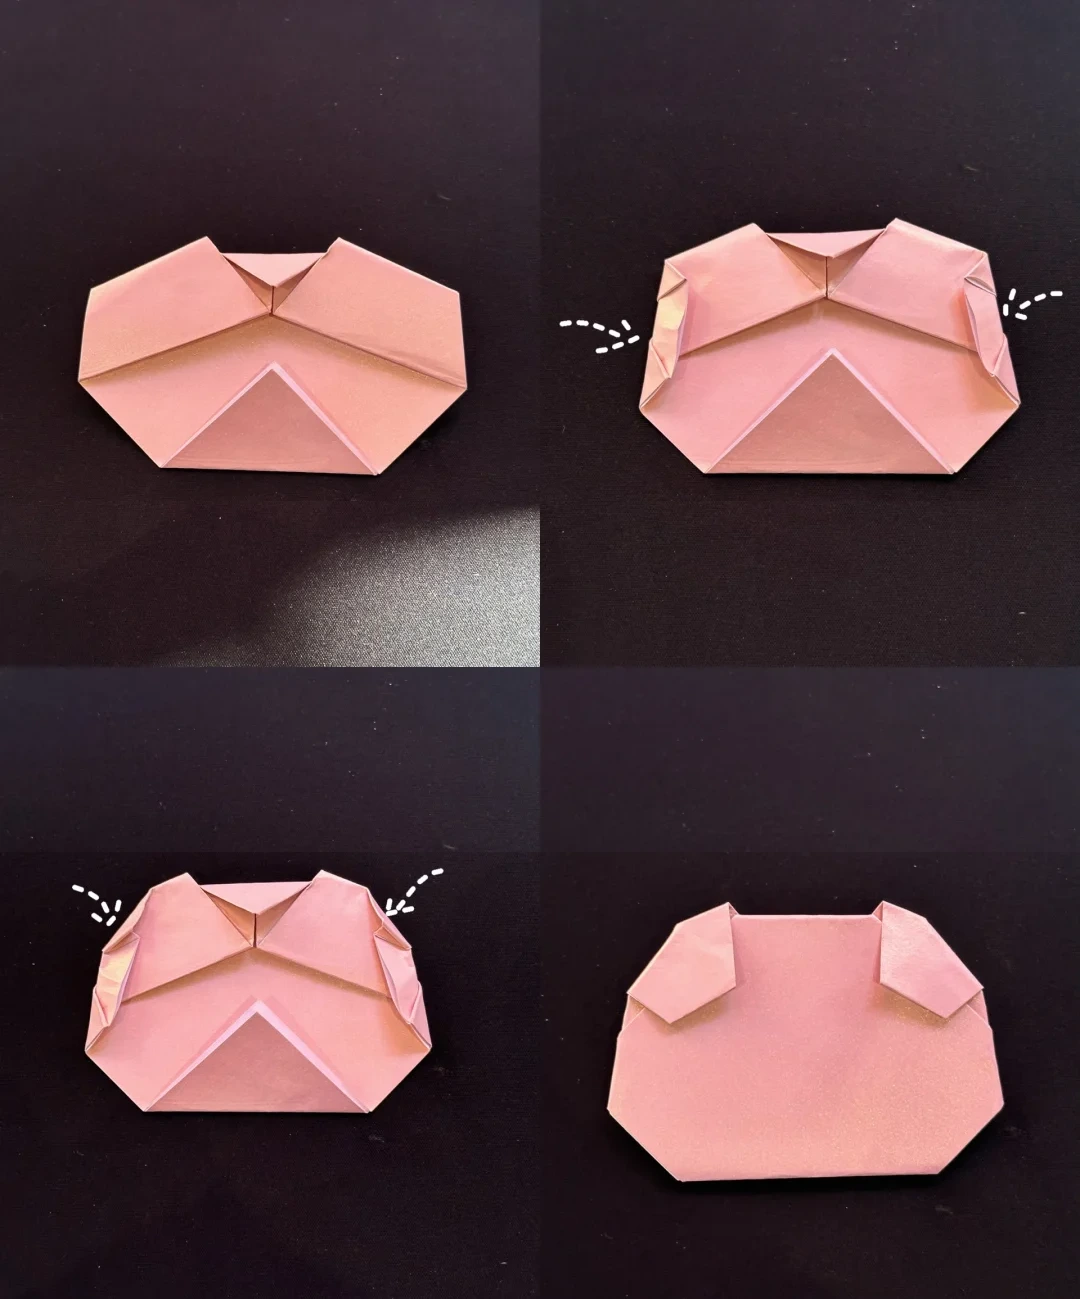
Turn the model over. Fold the outer side edges inward and tuck the upper corners inward along the guides. Turn back to the front.
Add the pig face
 Open image at full size ↗
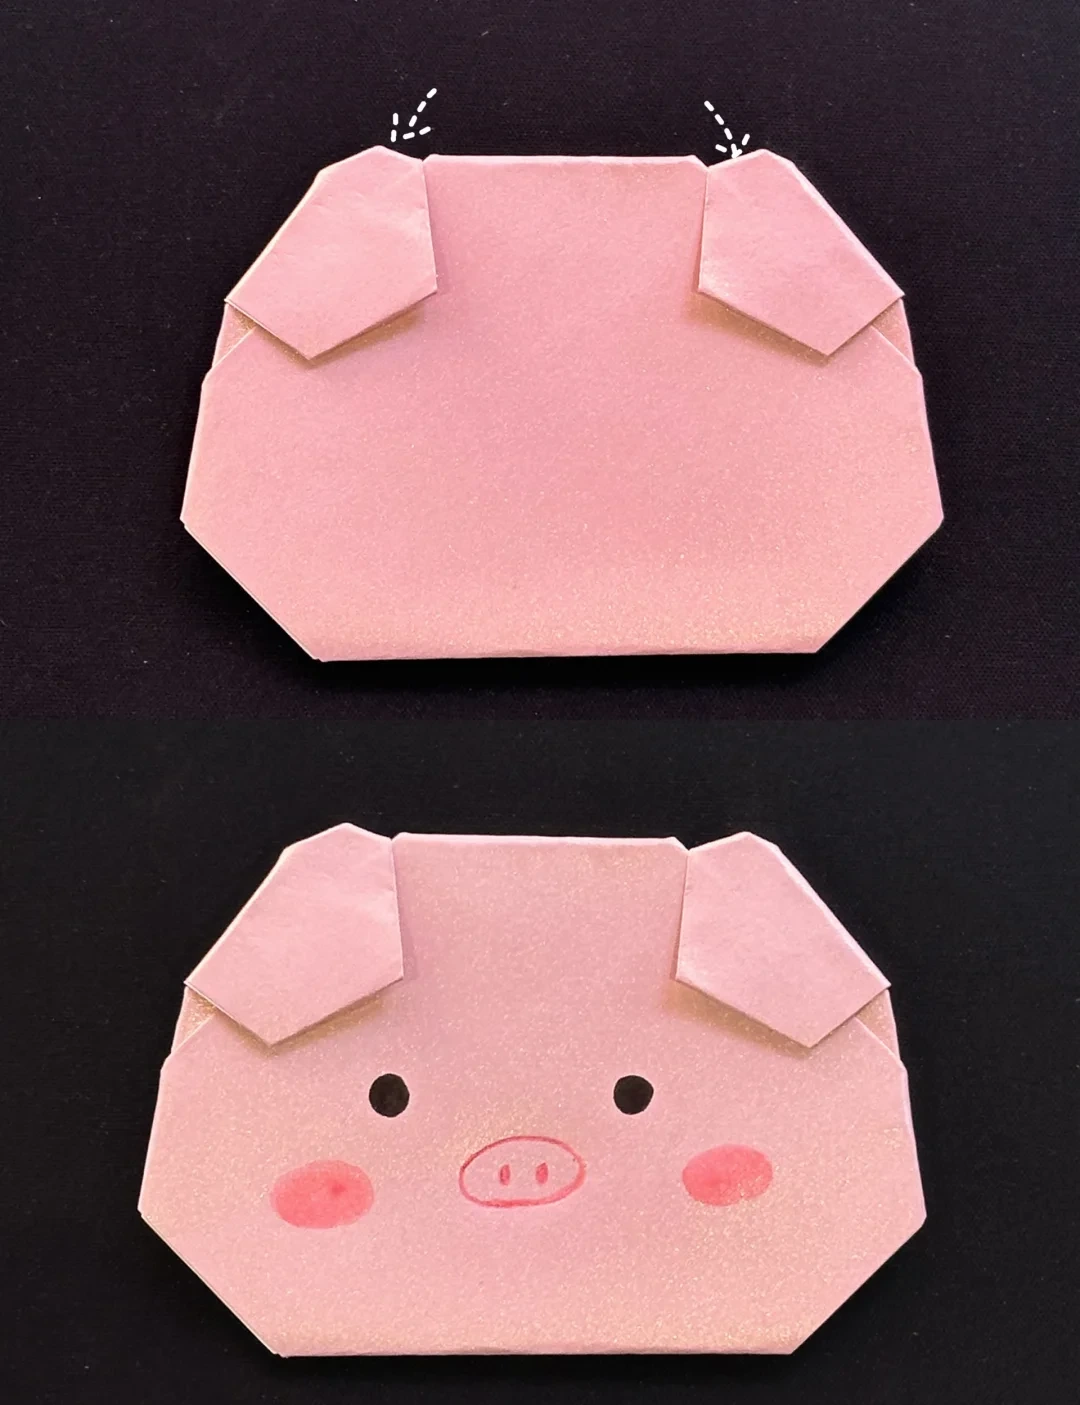
Fold the tiny upper ear corners behind. Draw two eyes, an oval snout with nostrils, and pink cheeks.
Finished model
 Open image at full size ↗
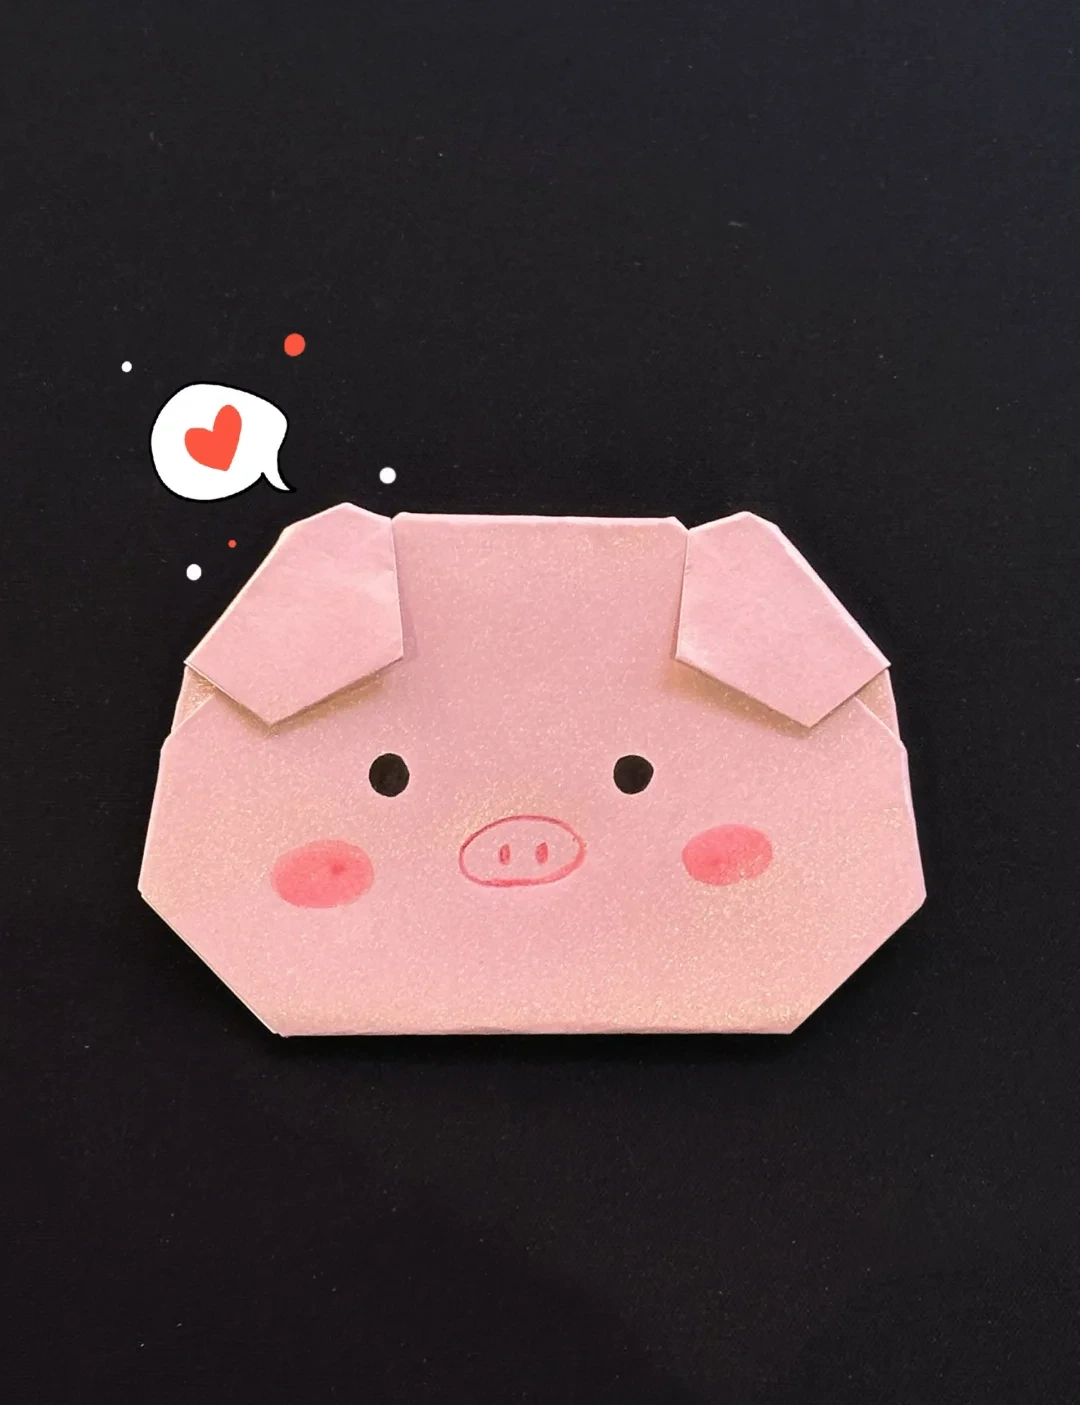
Use this finished example to compare the shape and proportions of your model.
Follow the diagrams alongside the step-by-step English instructions.
Choose your next project →