
Flowers & nature · Step-by-step guide
Raised-Center Four-Leaf Clover
Build a clover with four broad leaves and a raised star-shaped center through a sequence of careful precreases and collapses.
What you’ll need
- One green paper square
Origami · Creasing, collapse folds & shaping
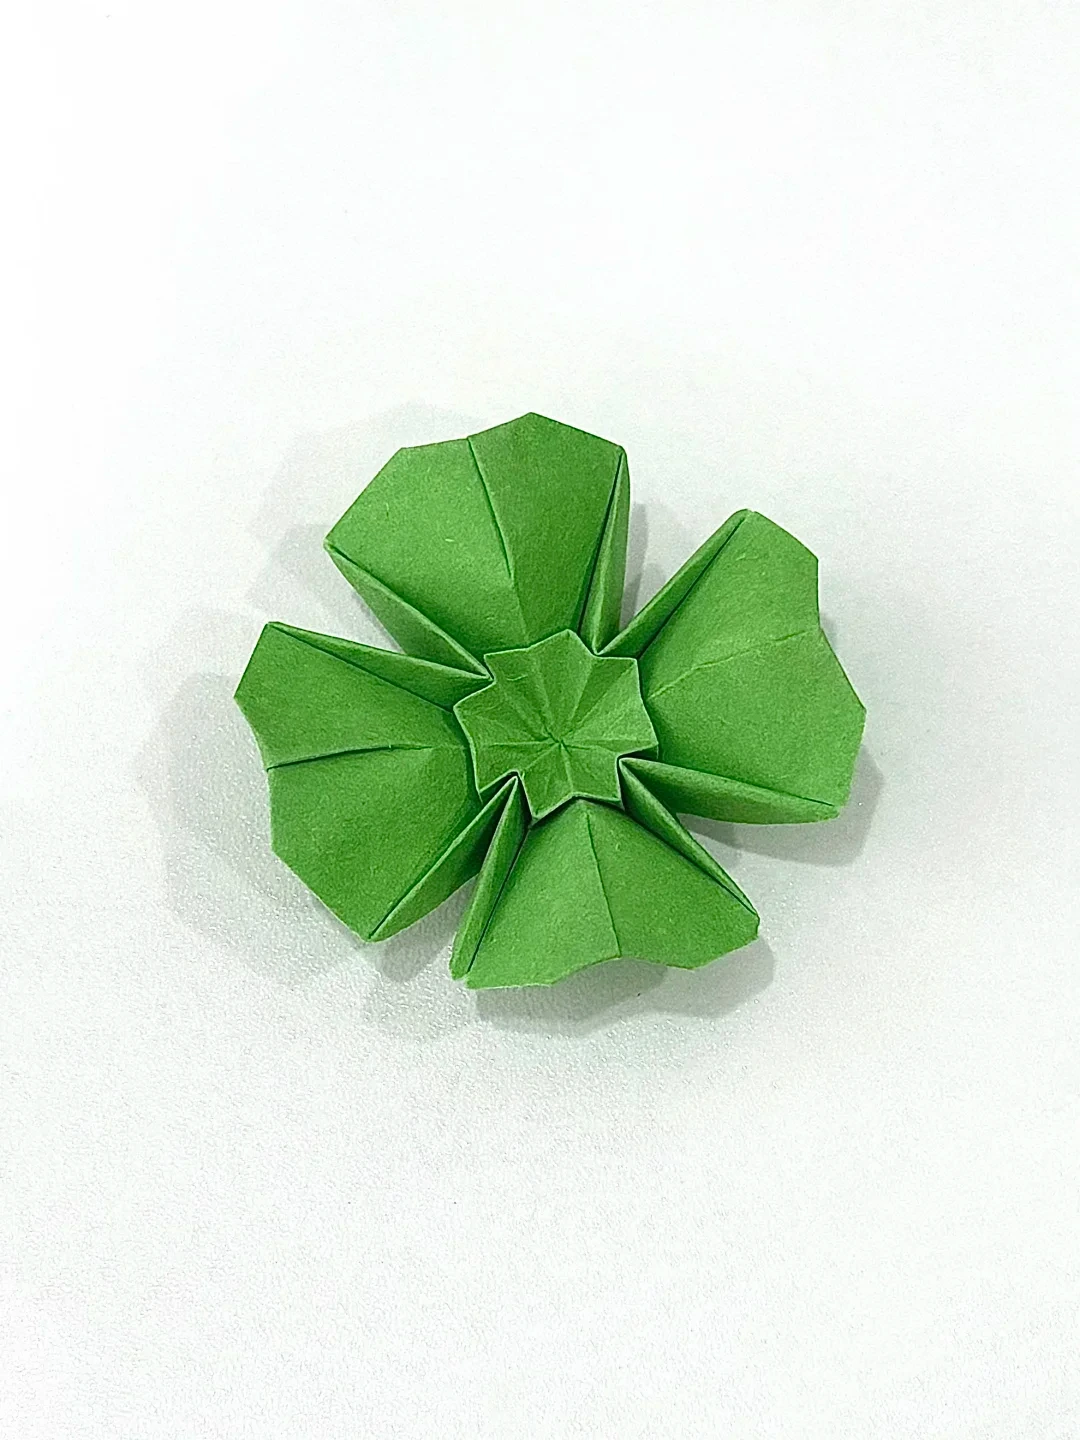
Make it, step by step.
17 steps · Original diagrams with English instructions
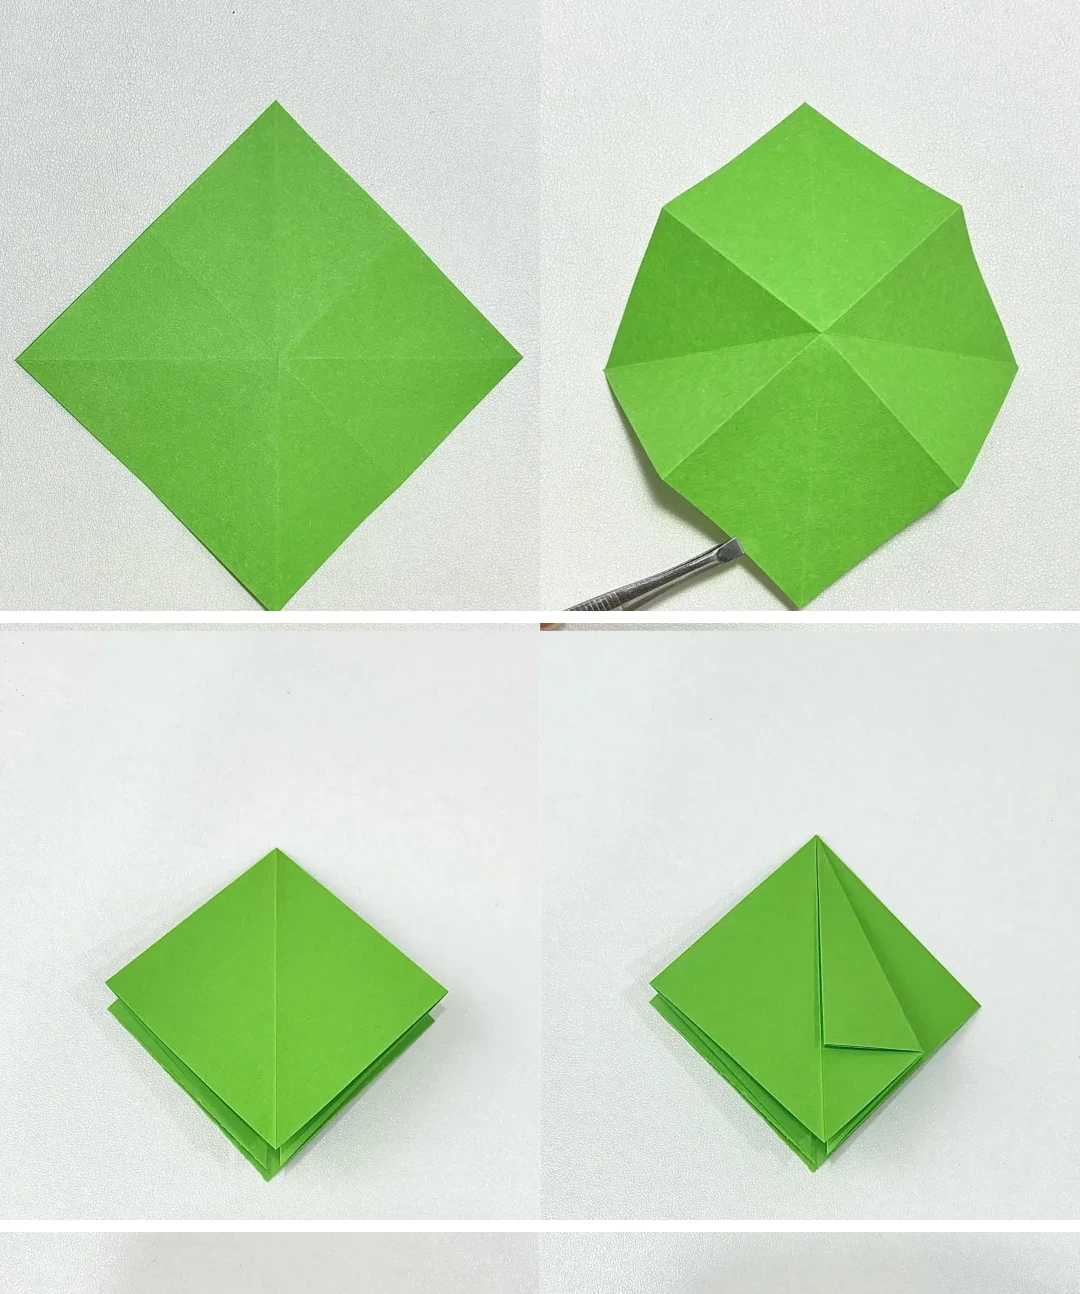
Make a square base
 Open image at full size ↗
Precrease the square horizontally, vertically, and diagonally. Collapse it into a layered square, then fold the front lower edges toward the center.
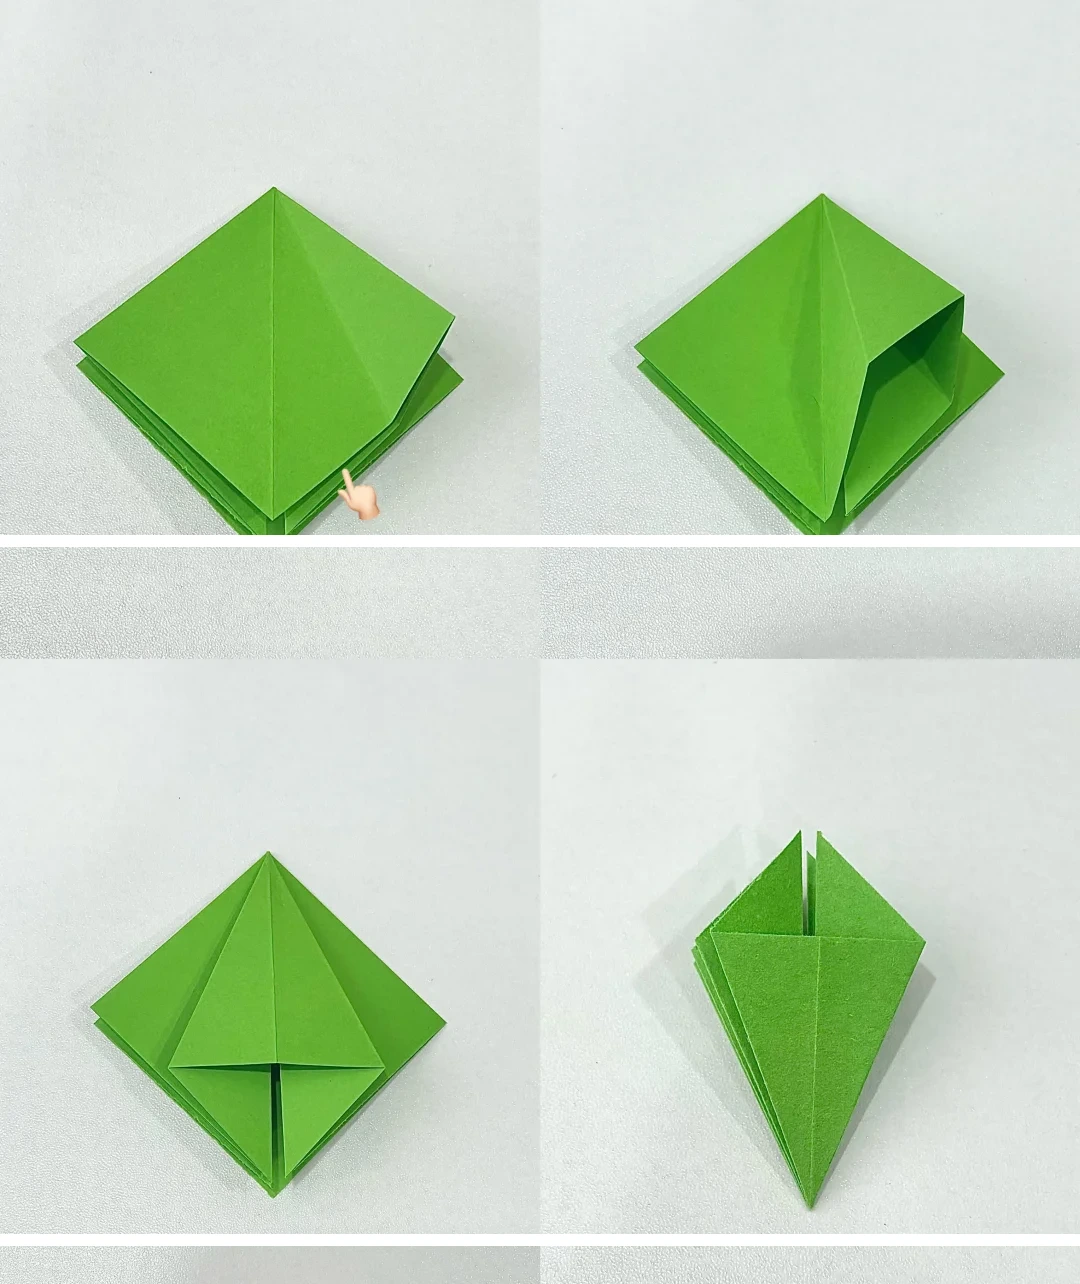
Squash the flaps
 Open image at full size ↗
Open the folded pocket and flatten it along its creases. Repeat on every face to form the narrow layered base.
Mark the upper fold
 Open image at full size ↗
Fold the pointed lower section upward as shown and crease firmly.
Mark the small triangle
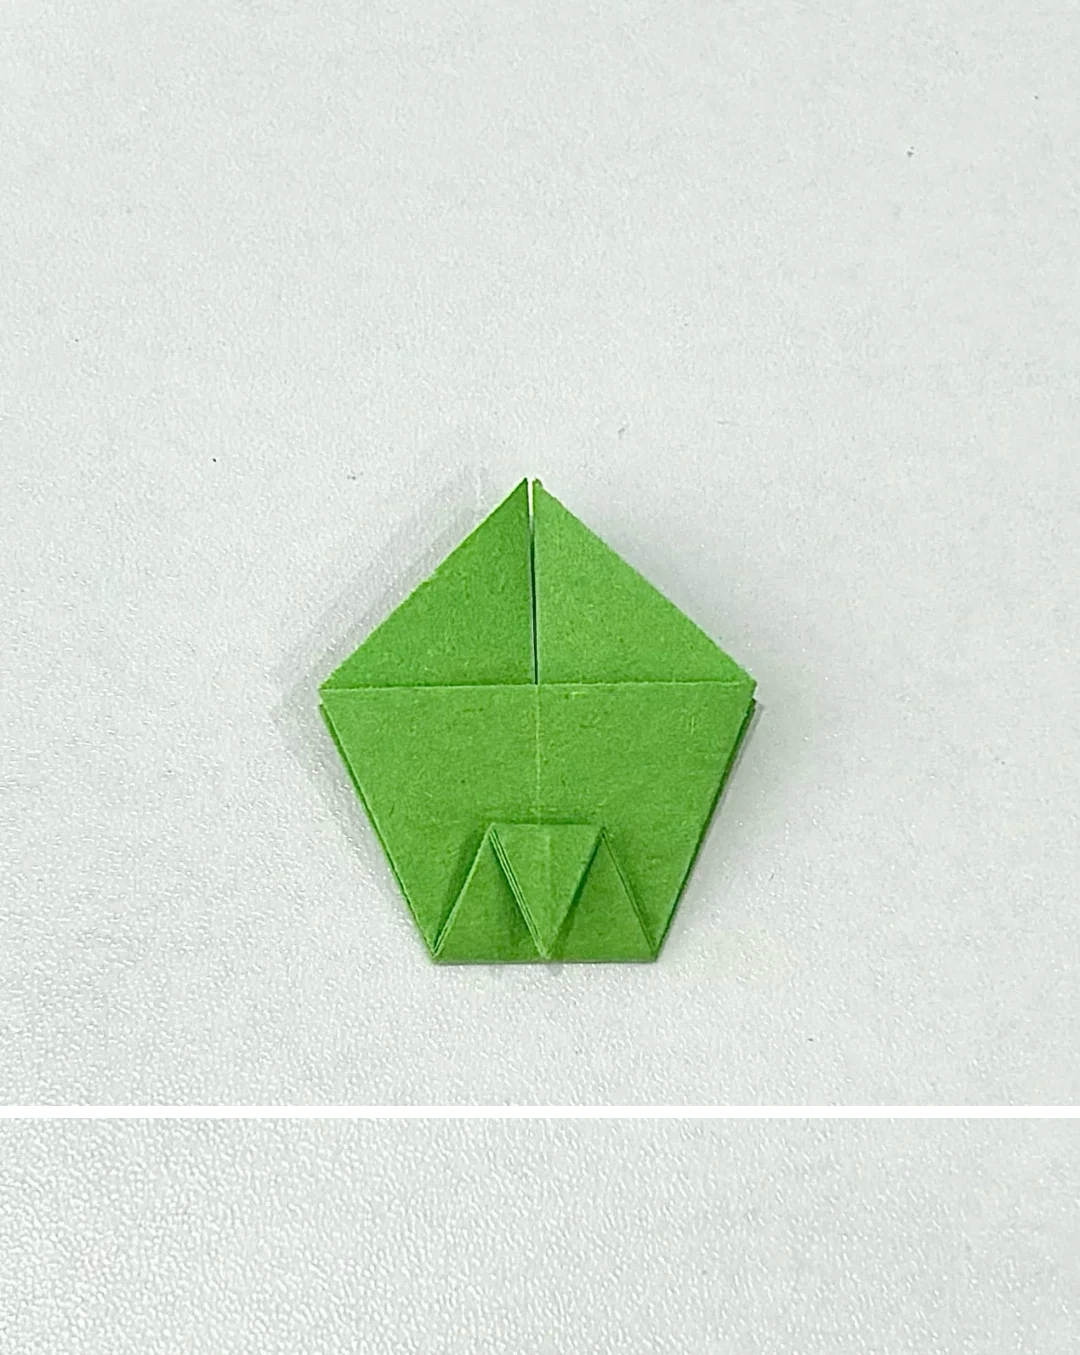 Open image at full size ↗
Fold its tip back down to create a smaller triangular guide crease.
Unfold the square
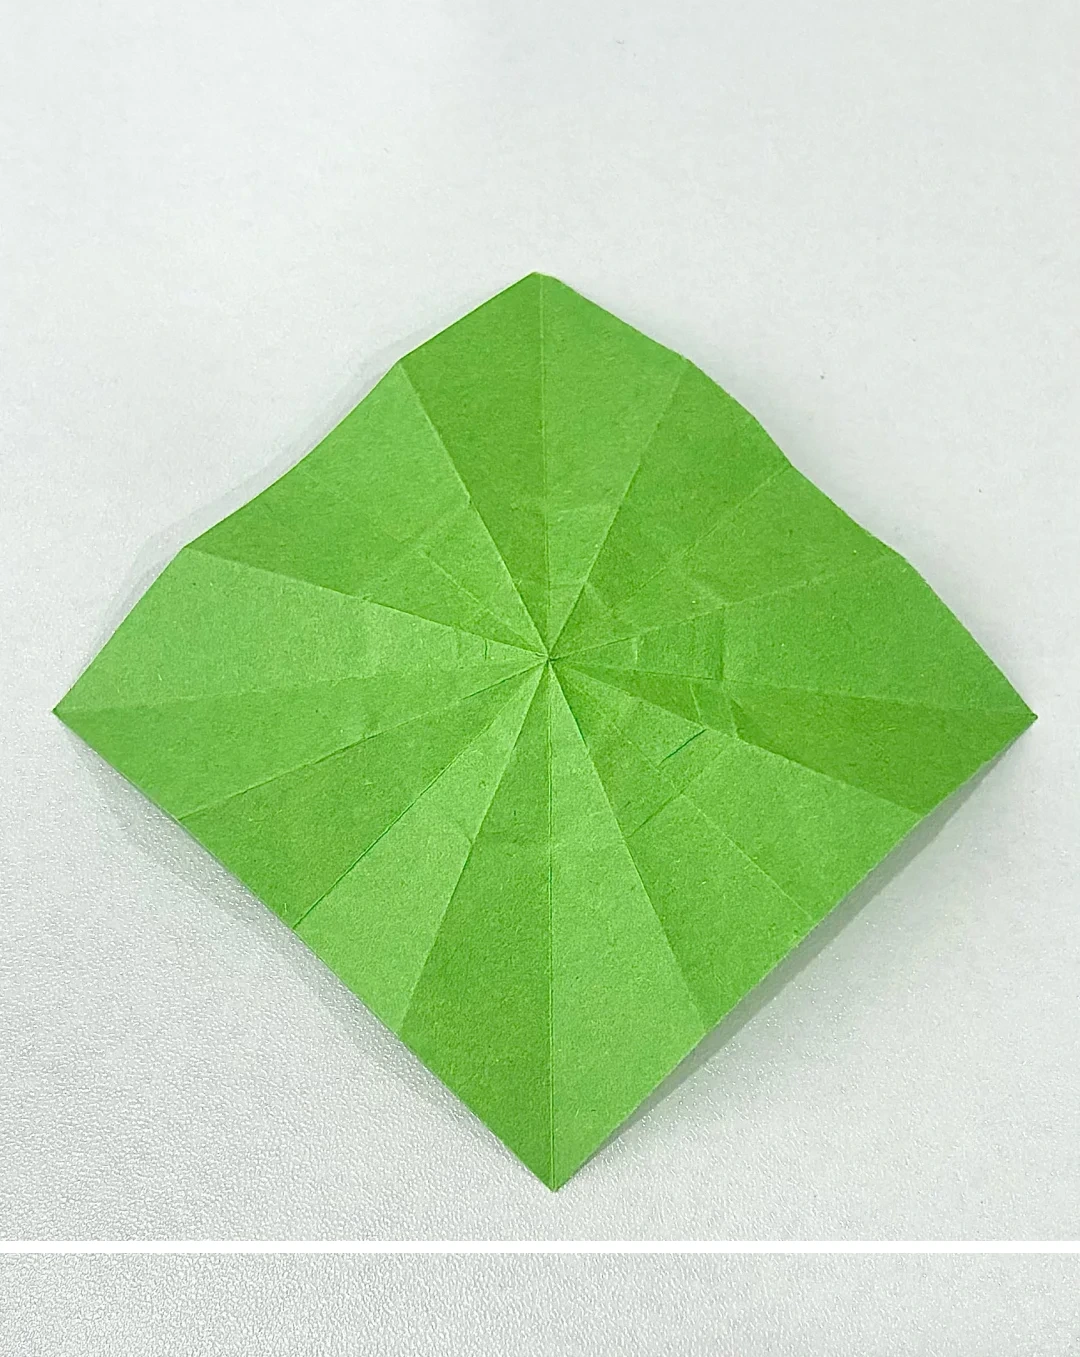 Open image at full size ↗
Open the paper fully while preserving the network of creases.
Reinforce the center
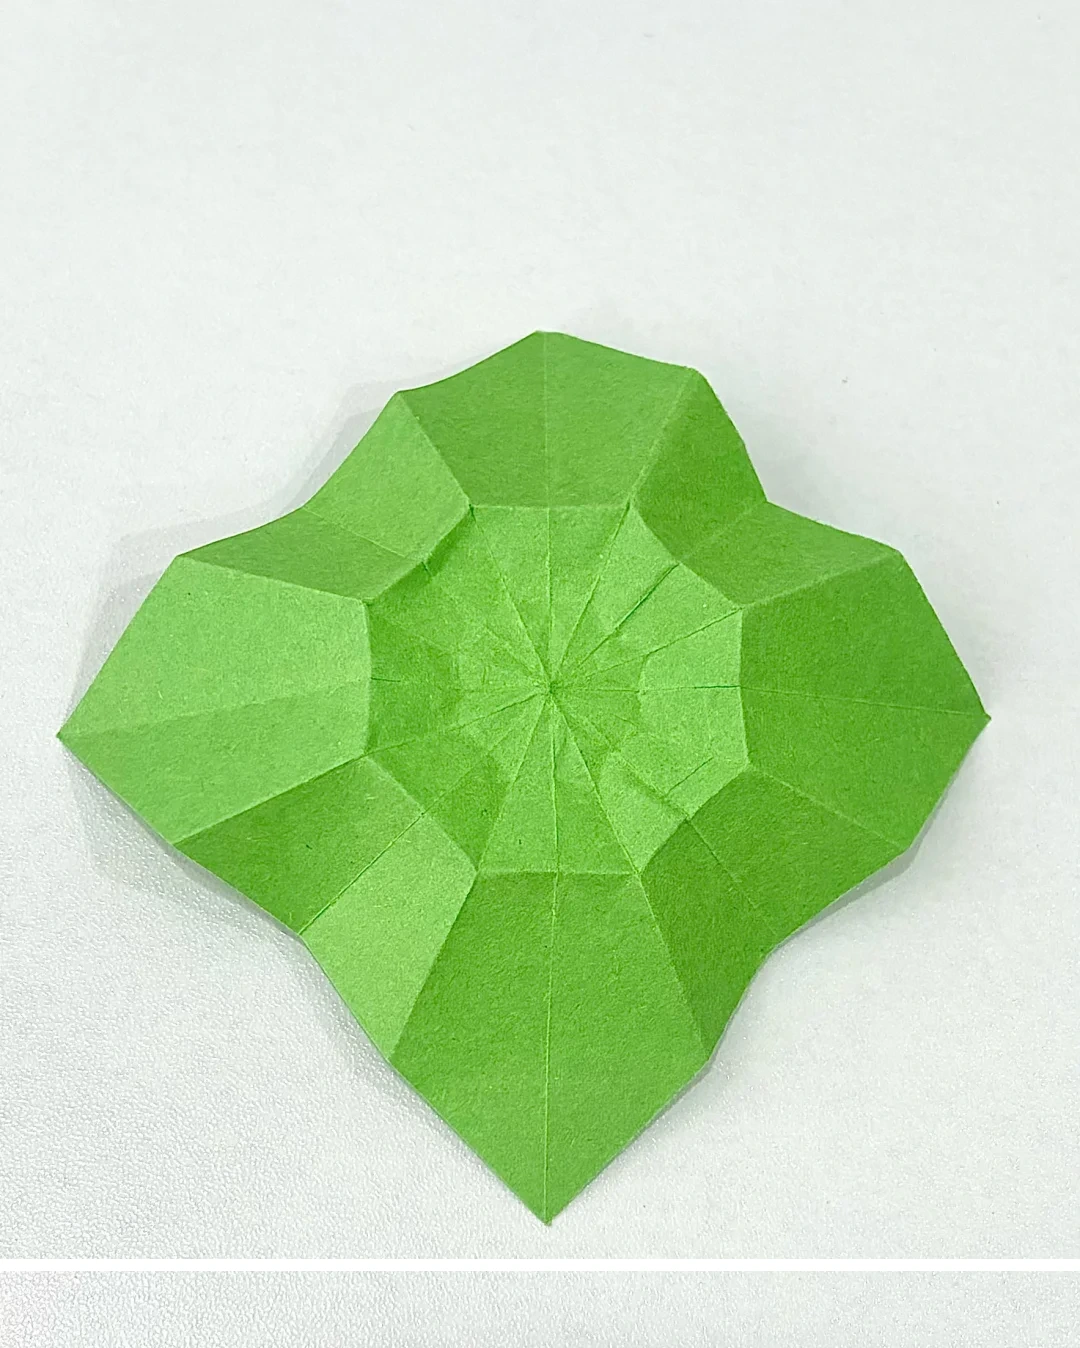 Open image at full size ↗
Strengthen the creases around the small central shape, allowing the surrounding paper to rise.
Shape the outer ring
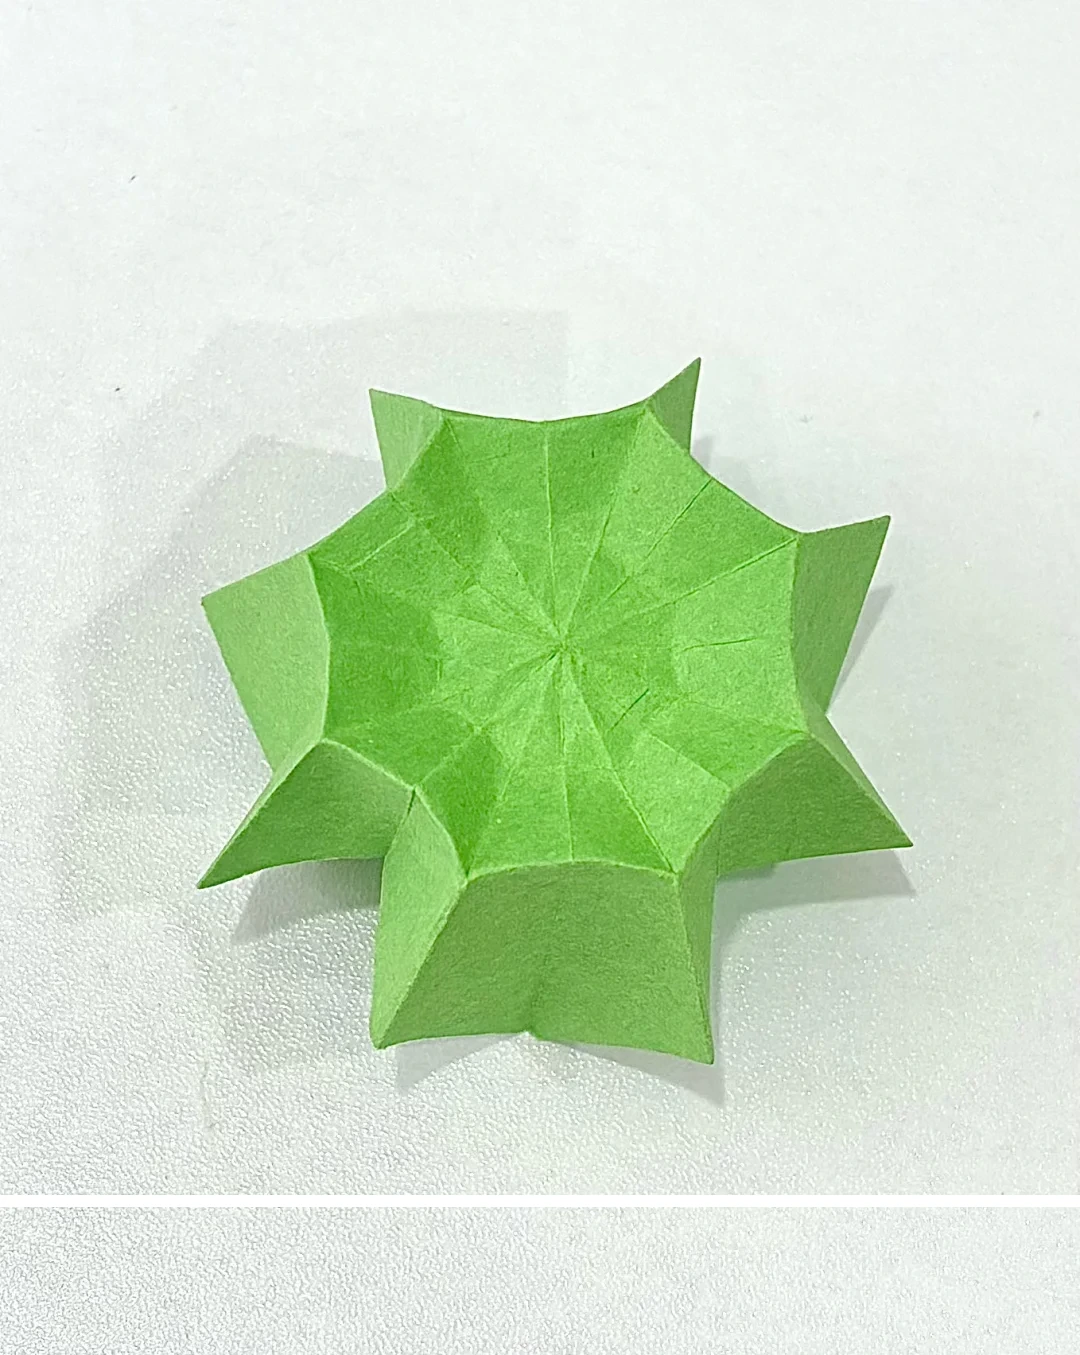 Open image at full size ↗
Reinforce the larger octagonal crease pattern outside the center.
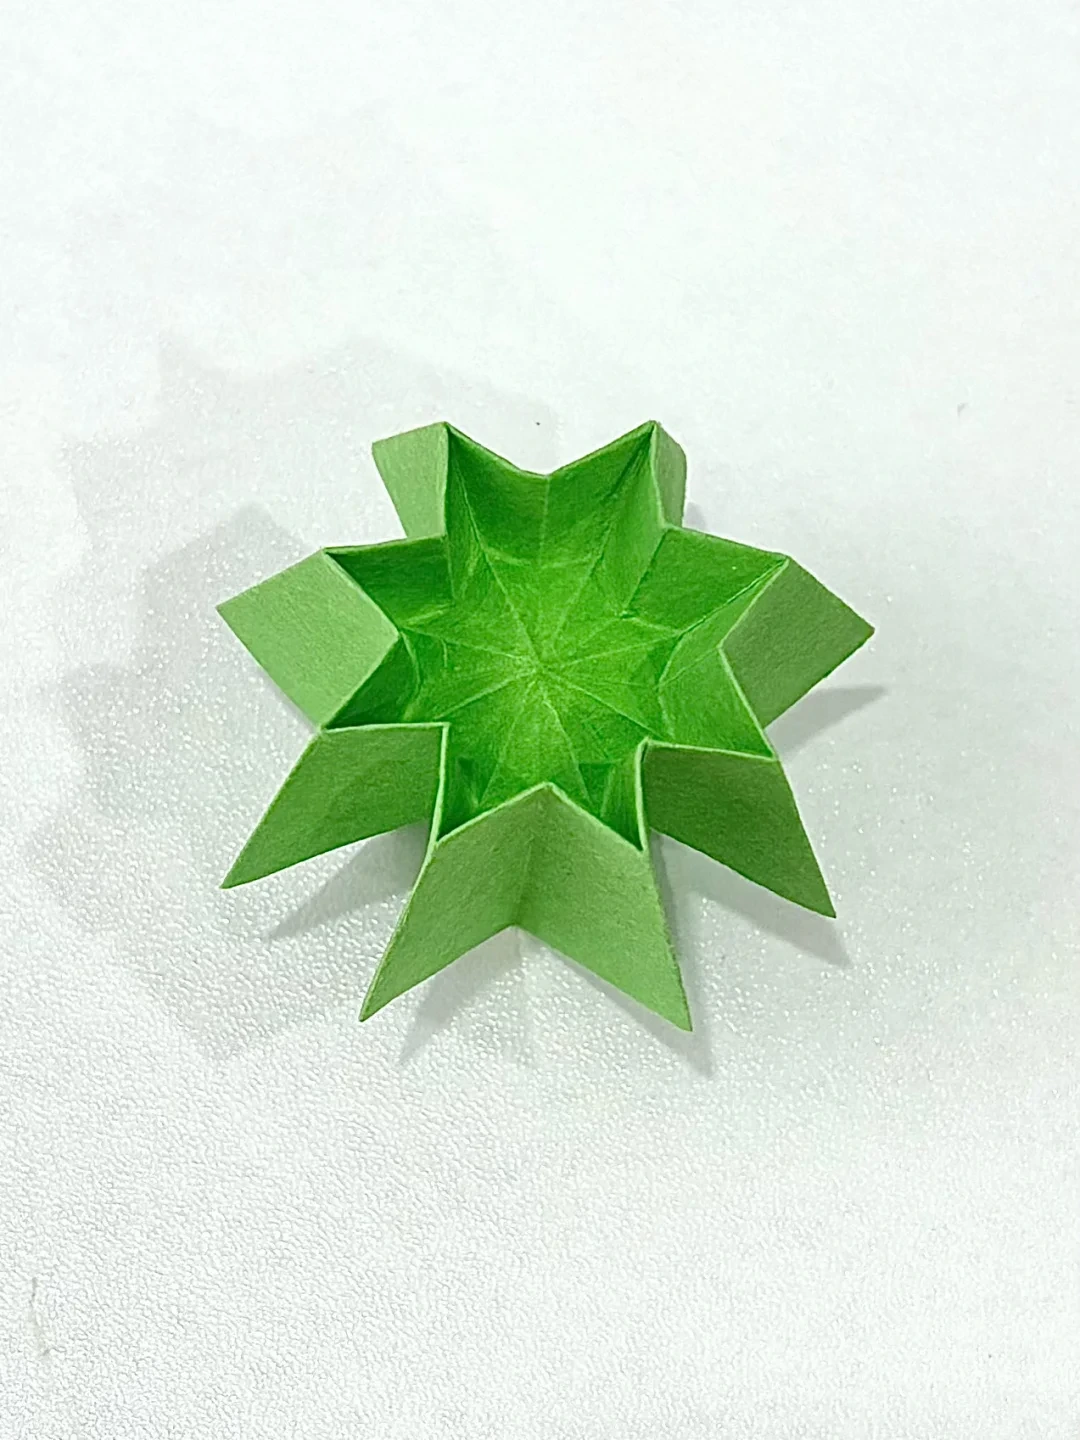
Raise the folds
 Open image at full size ↗
Lift the surrounding sections into the alternating points shown, keeping the center visible.
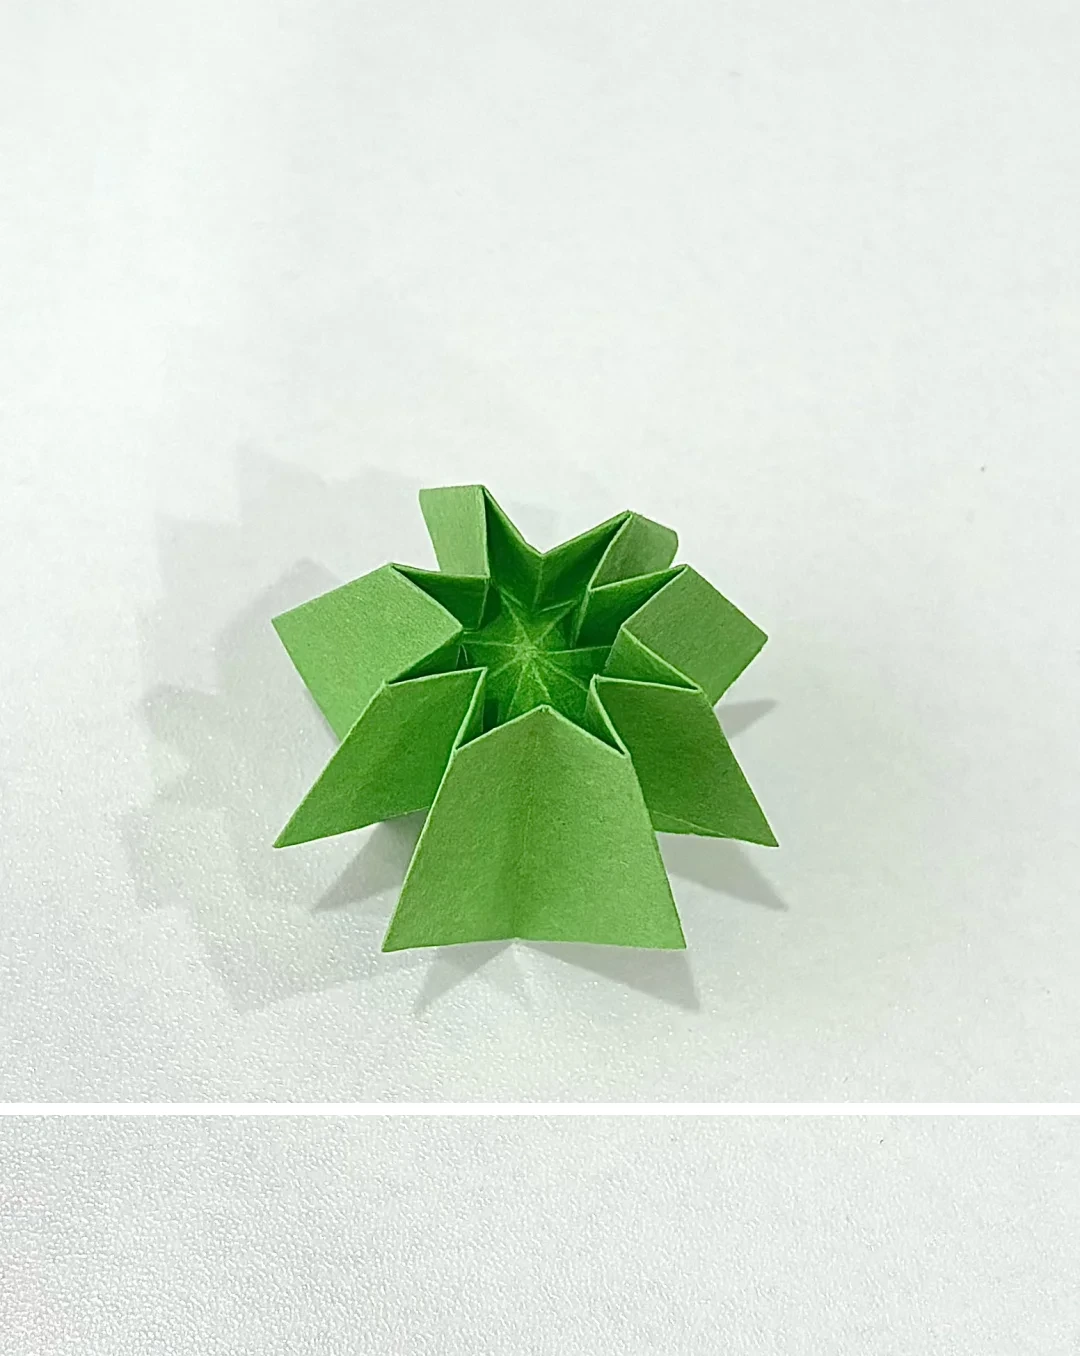
Gather the base
 Open image at full size ↗
Bring the raised folds inward along their existing creases to form a compact layered base.
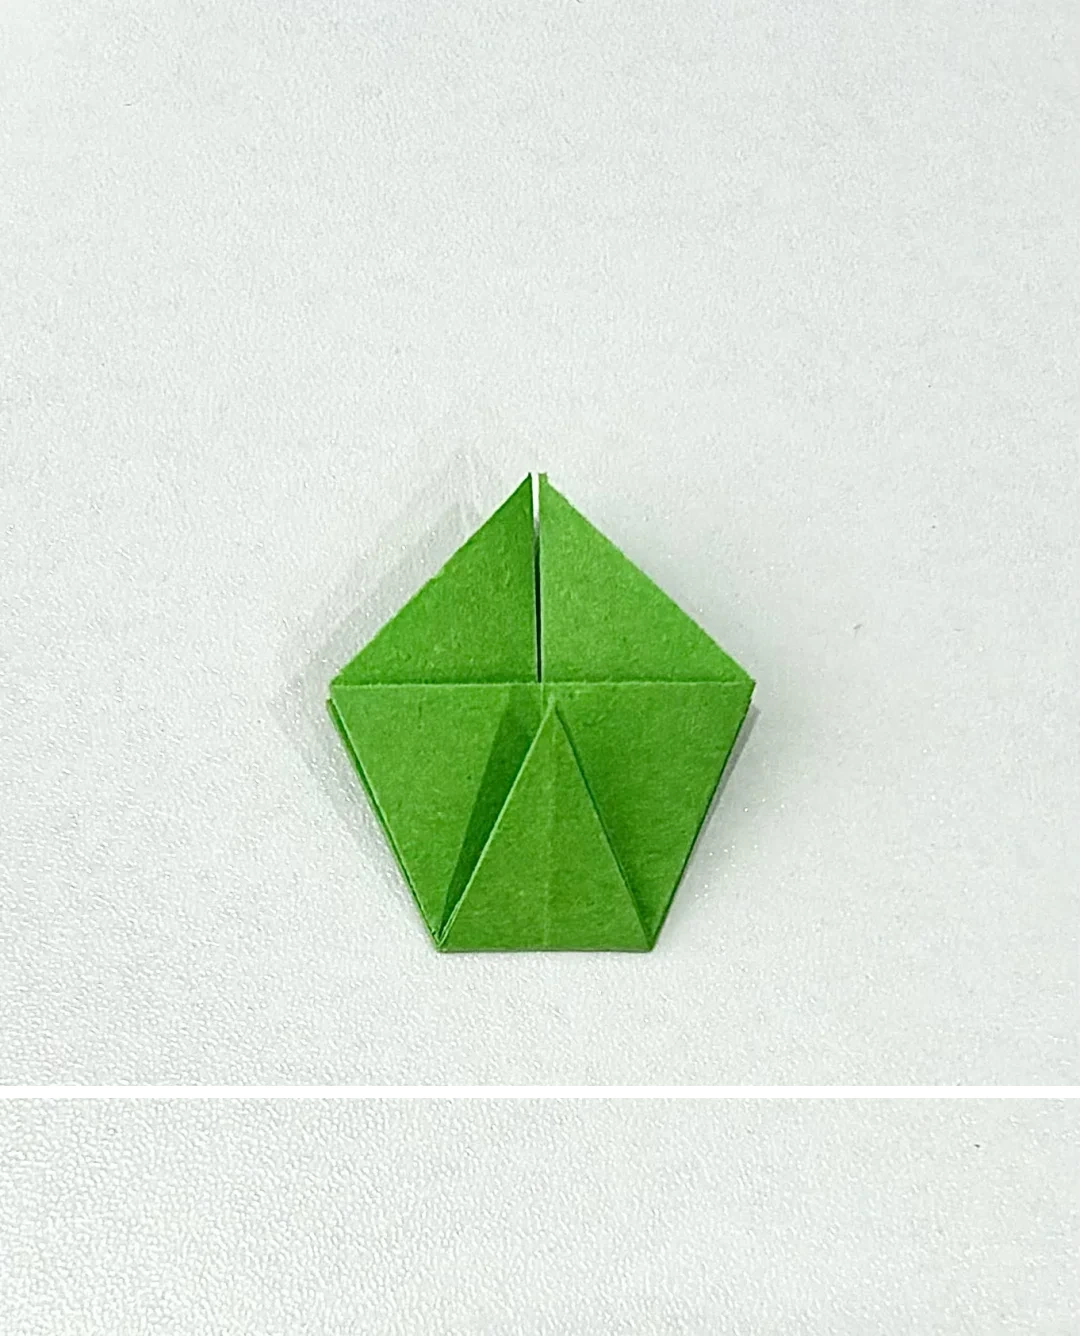
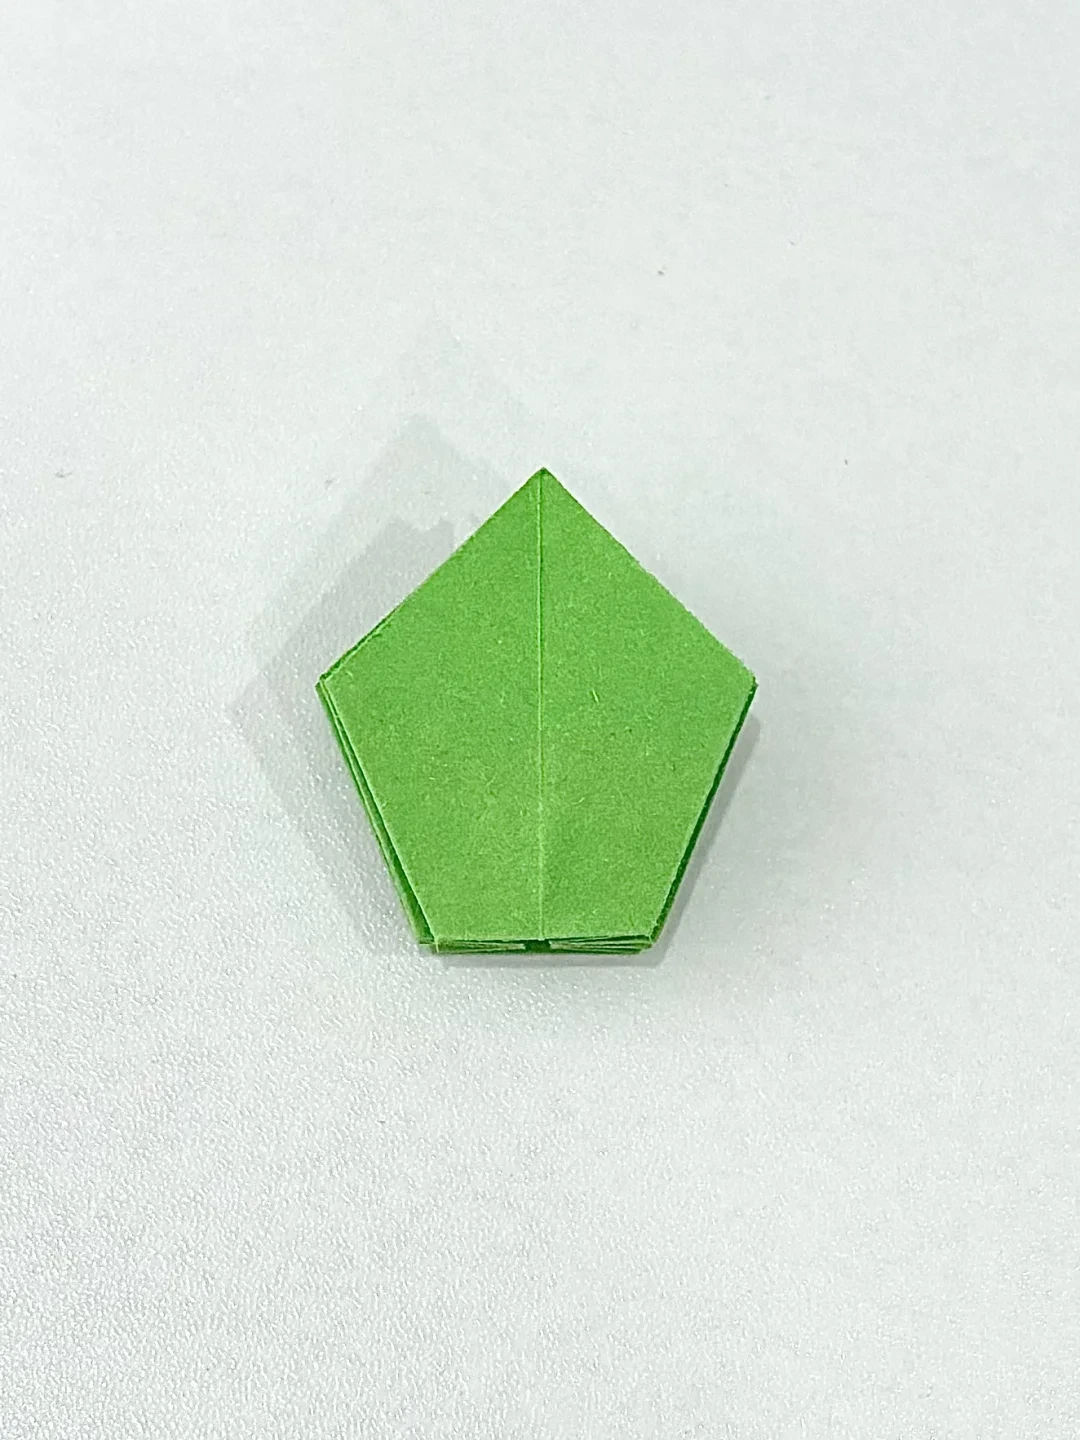
Flatten the packet
 Open image at full size ↗
Arrange the layers into the flat five-sided shape shown.
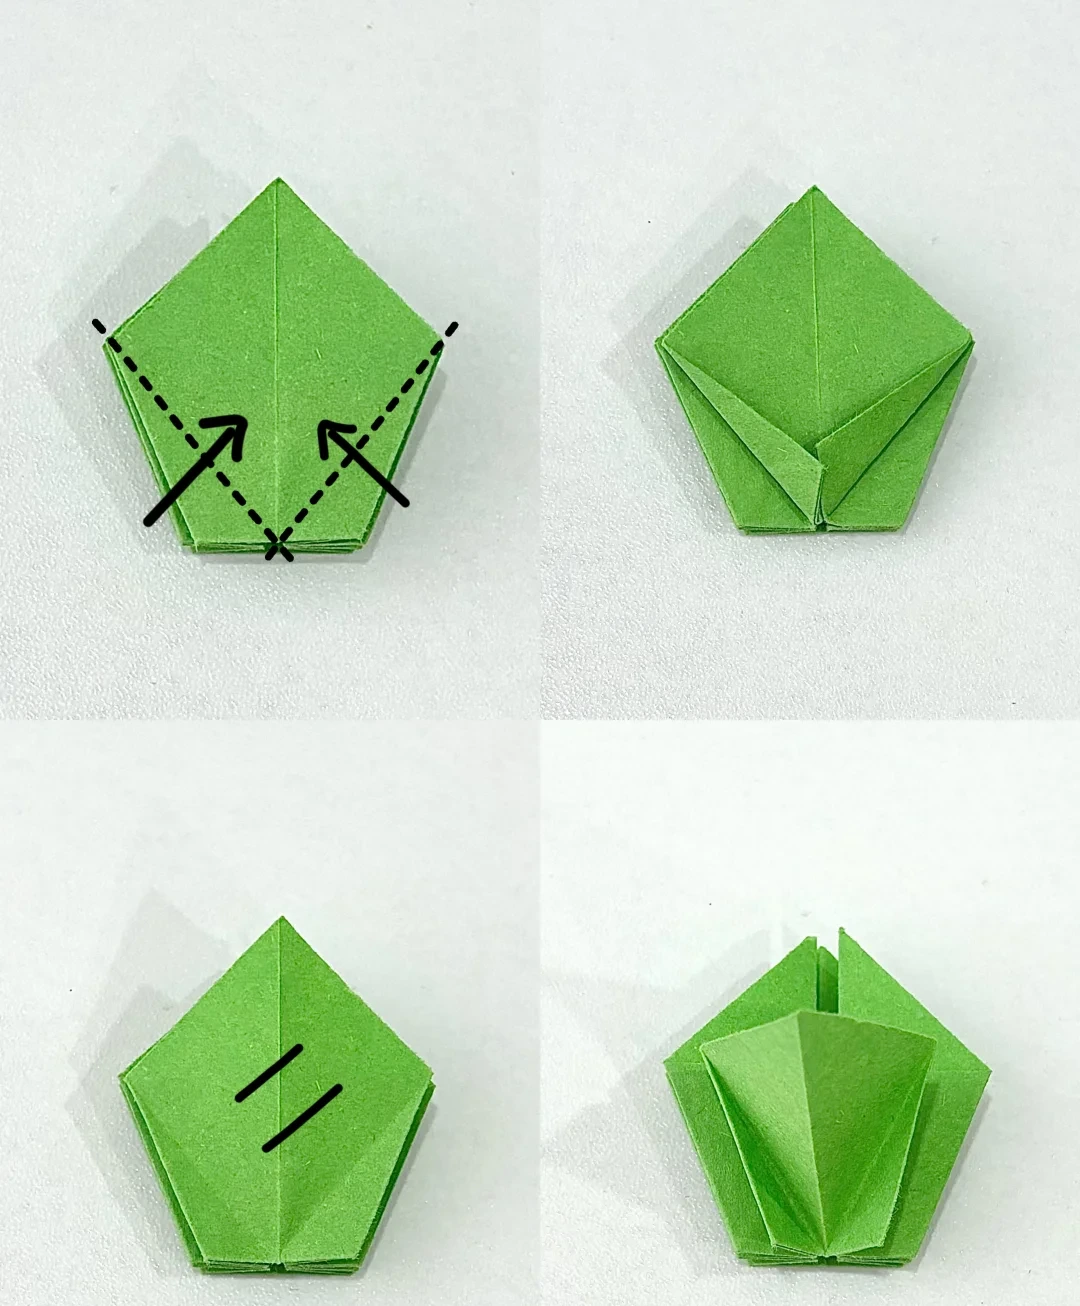
Open the side folds
 Open image at full size ↗
Fold the two lower edges inward, then open them. Reverse the indicated sections outward along those creases.
Spread one leaf section
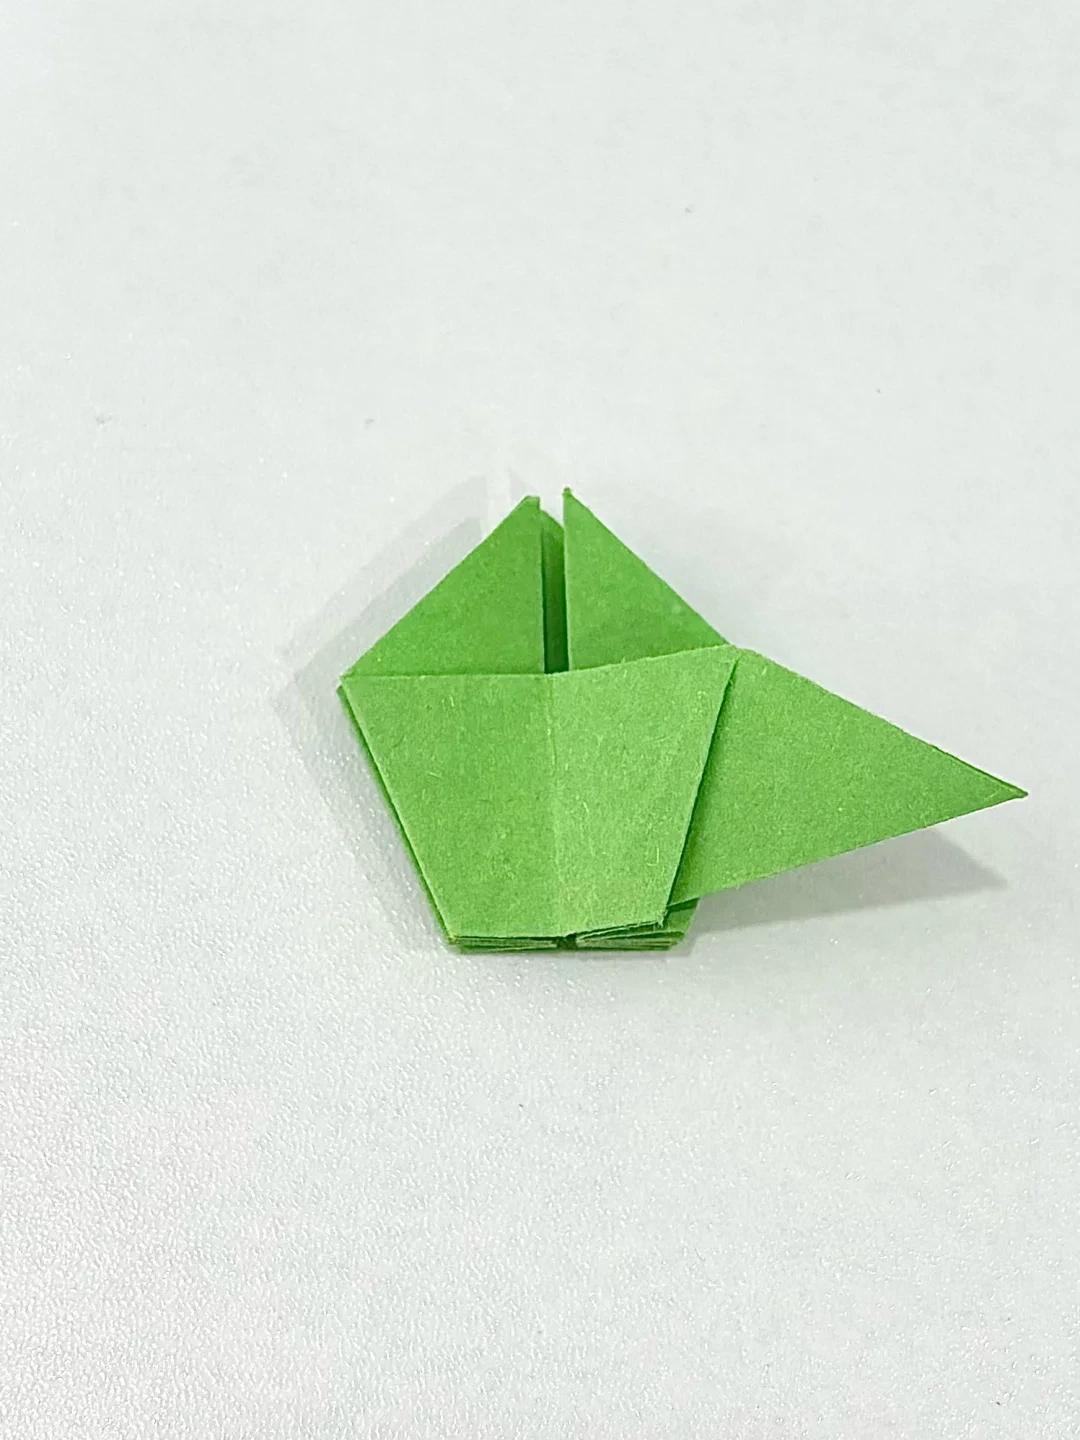 Open image at full size ↗
Pull the side flap outward while holding the central layers in place.
Repeat around the base
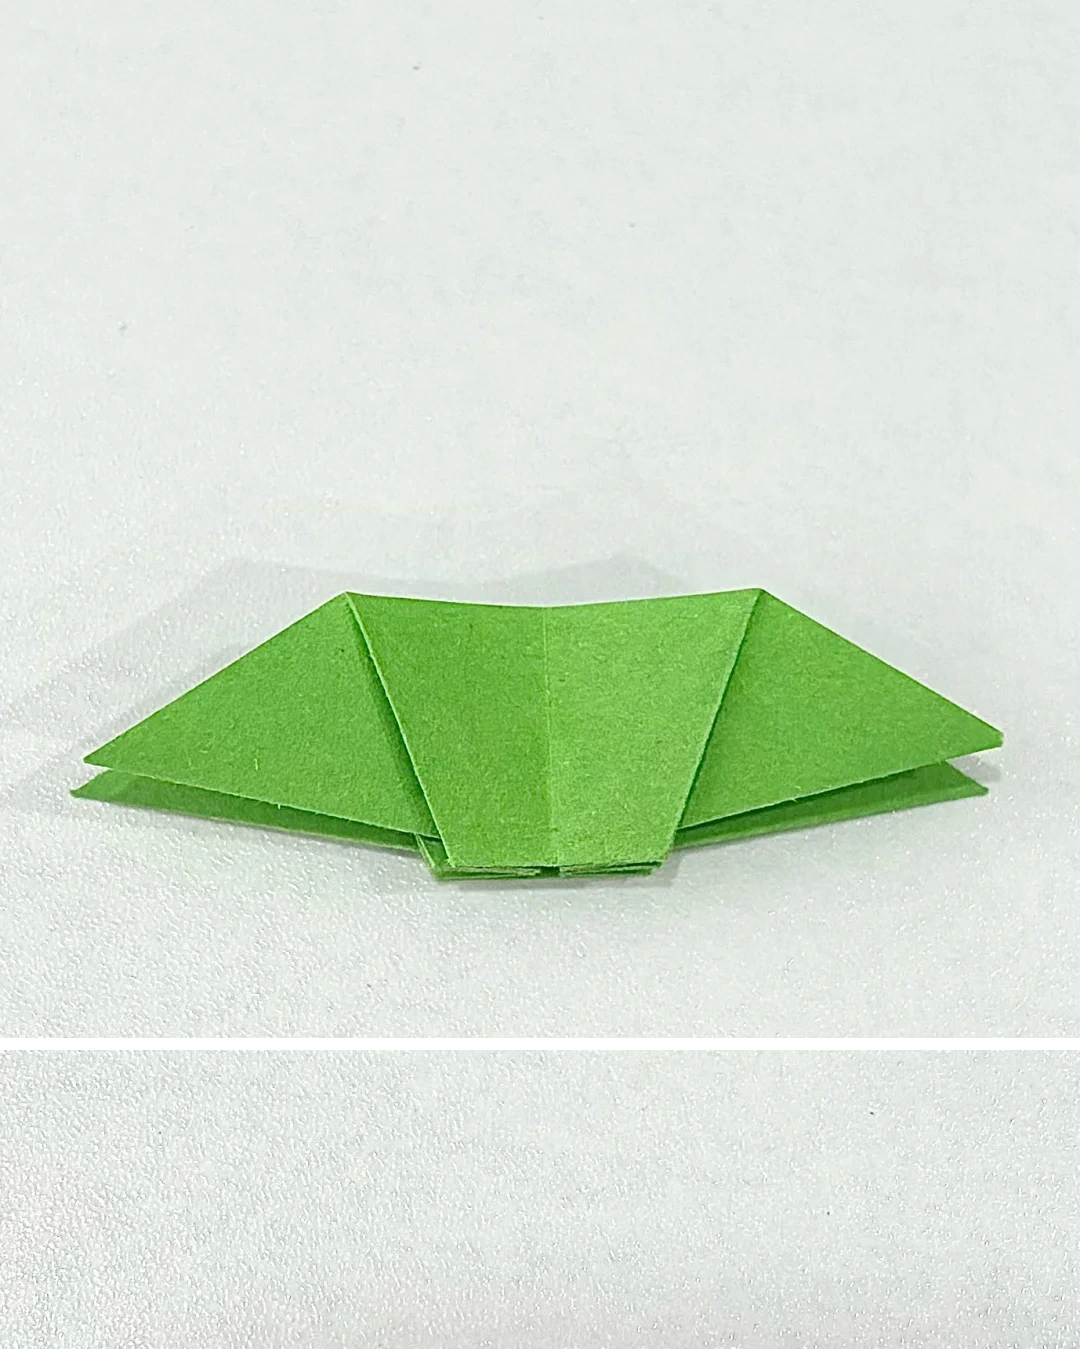 Open image at full size ↗
Repeat the same opening action on the other three sections.
Open the four arms
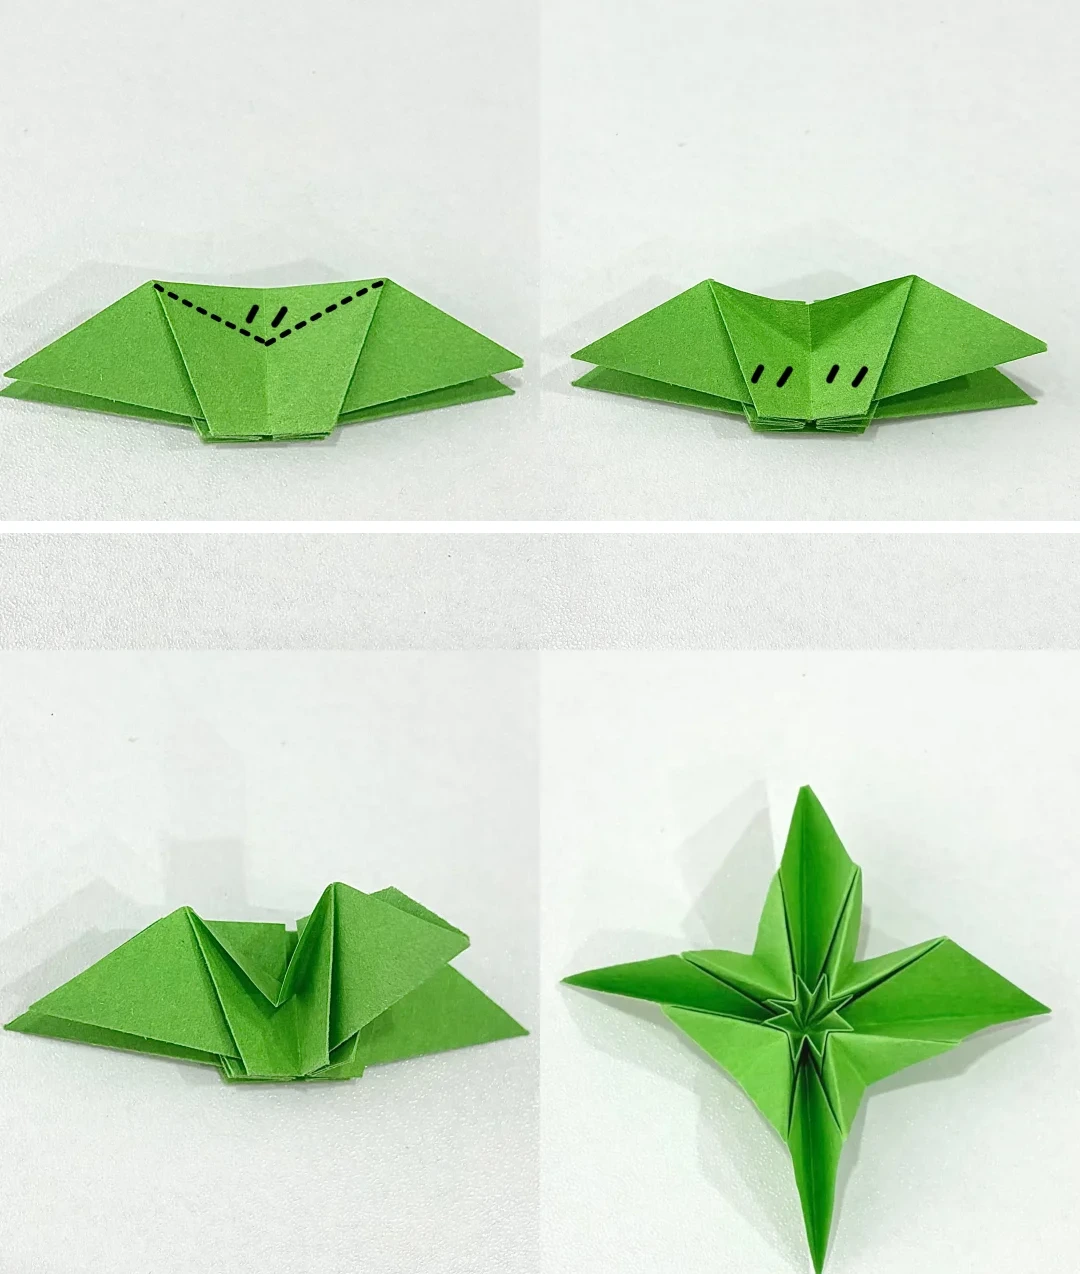 Open image at full size ↗
Pull the indicated inner section outward and bring its two sides together. Repeat around the base to create four broad arms.
Open the leaves
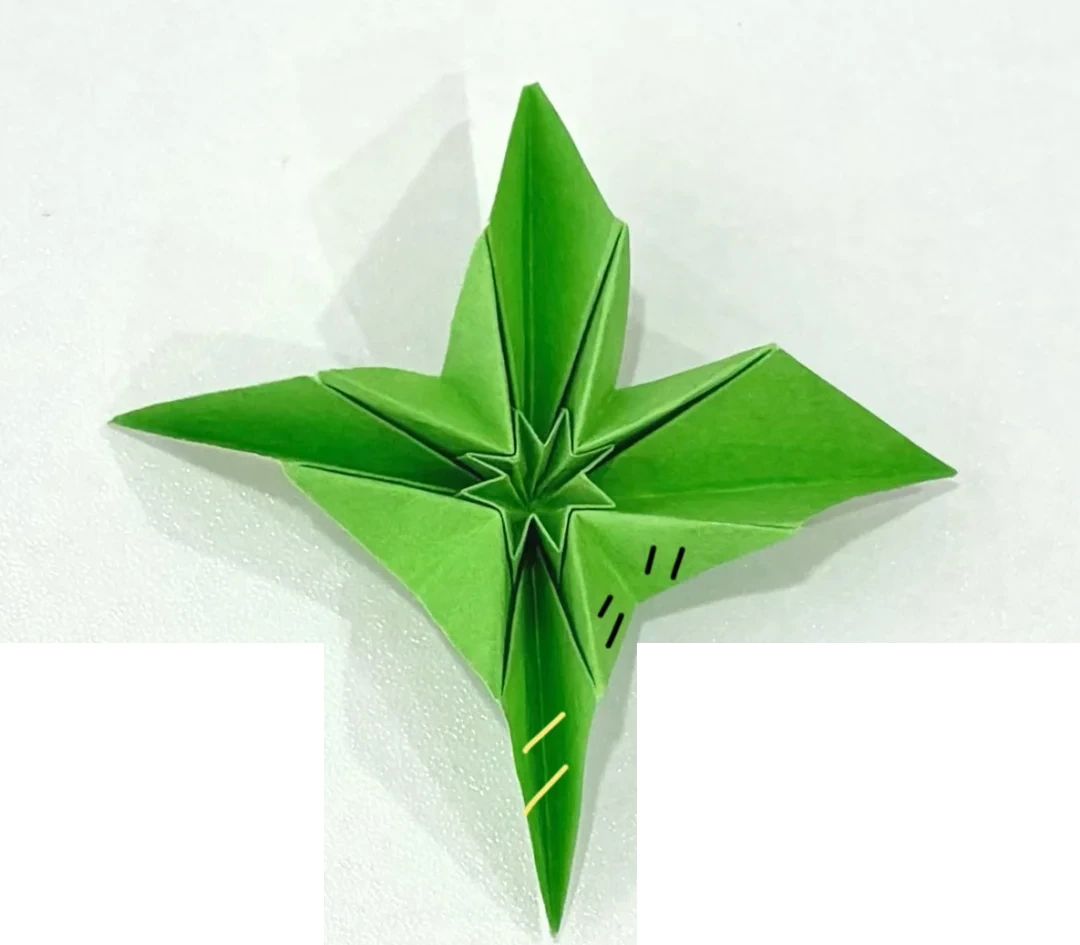 Open image at full size ↗
Bring the small triangular folds together, then open the broad leaf panels around the raised center.
Soften each leaf
 Open image at full size ↗
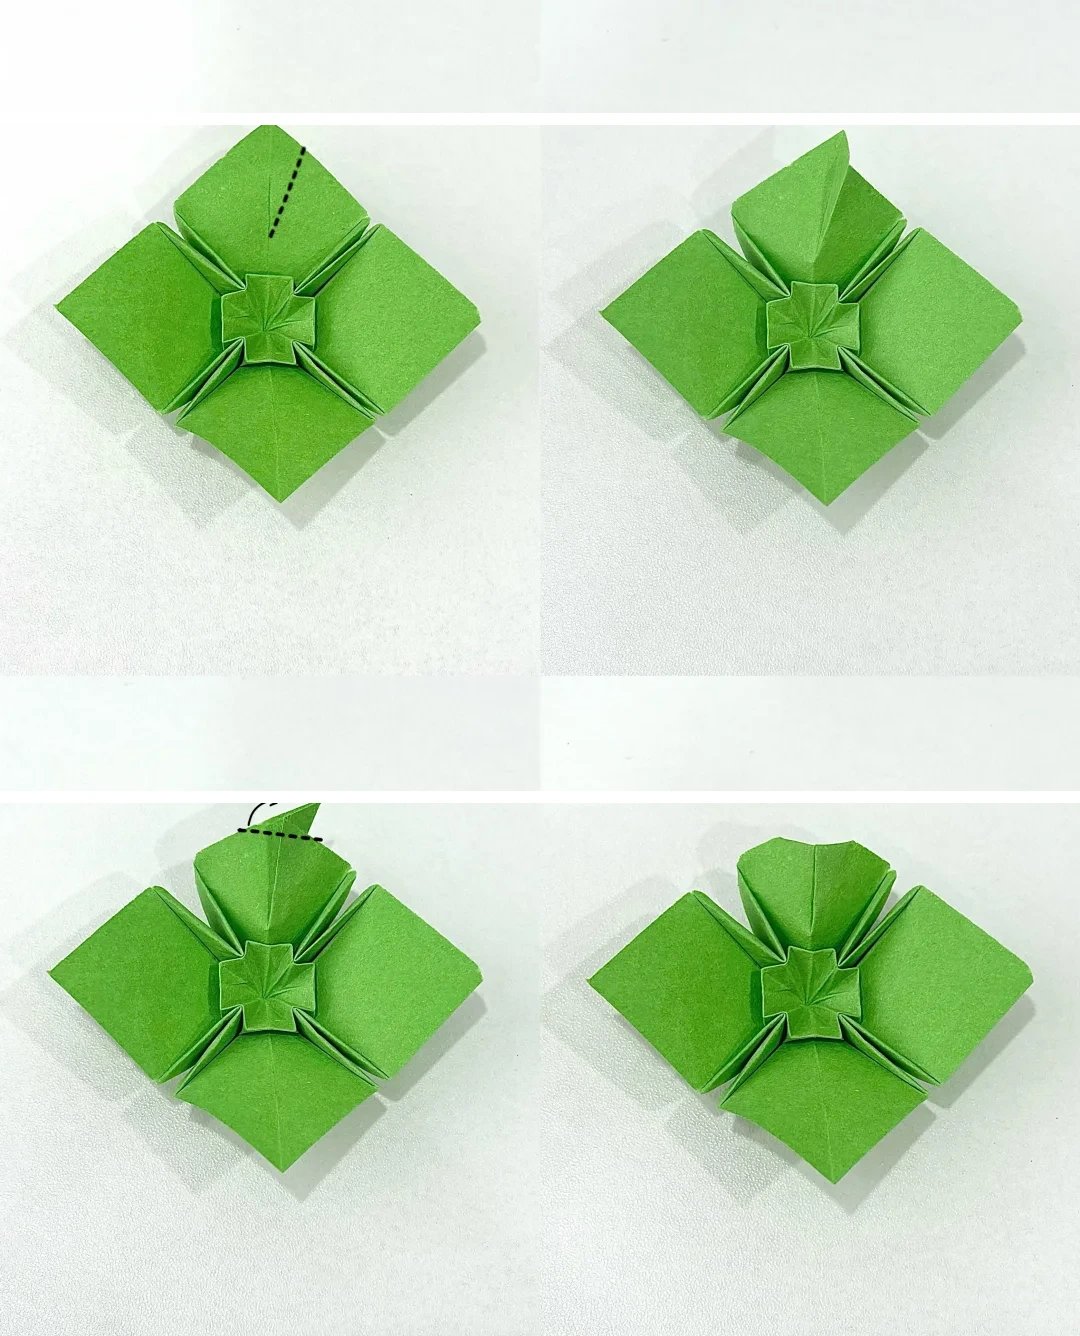
Pinch along the marked crease and fold it to the left. Fold the outer tip down to round each leaf, repeating all the way around.
Finish the clover
 Open image at full size ↗
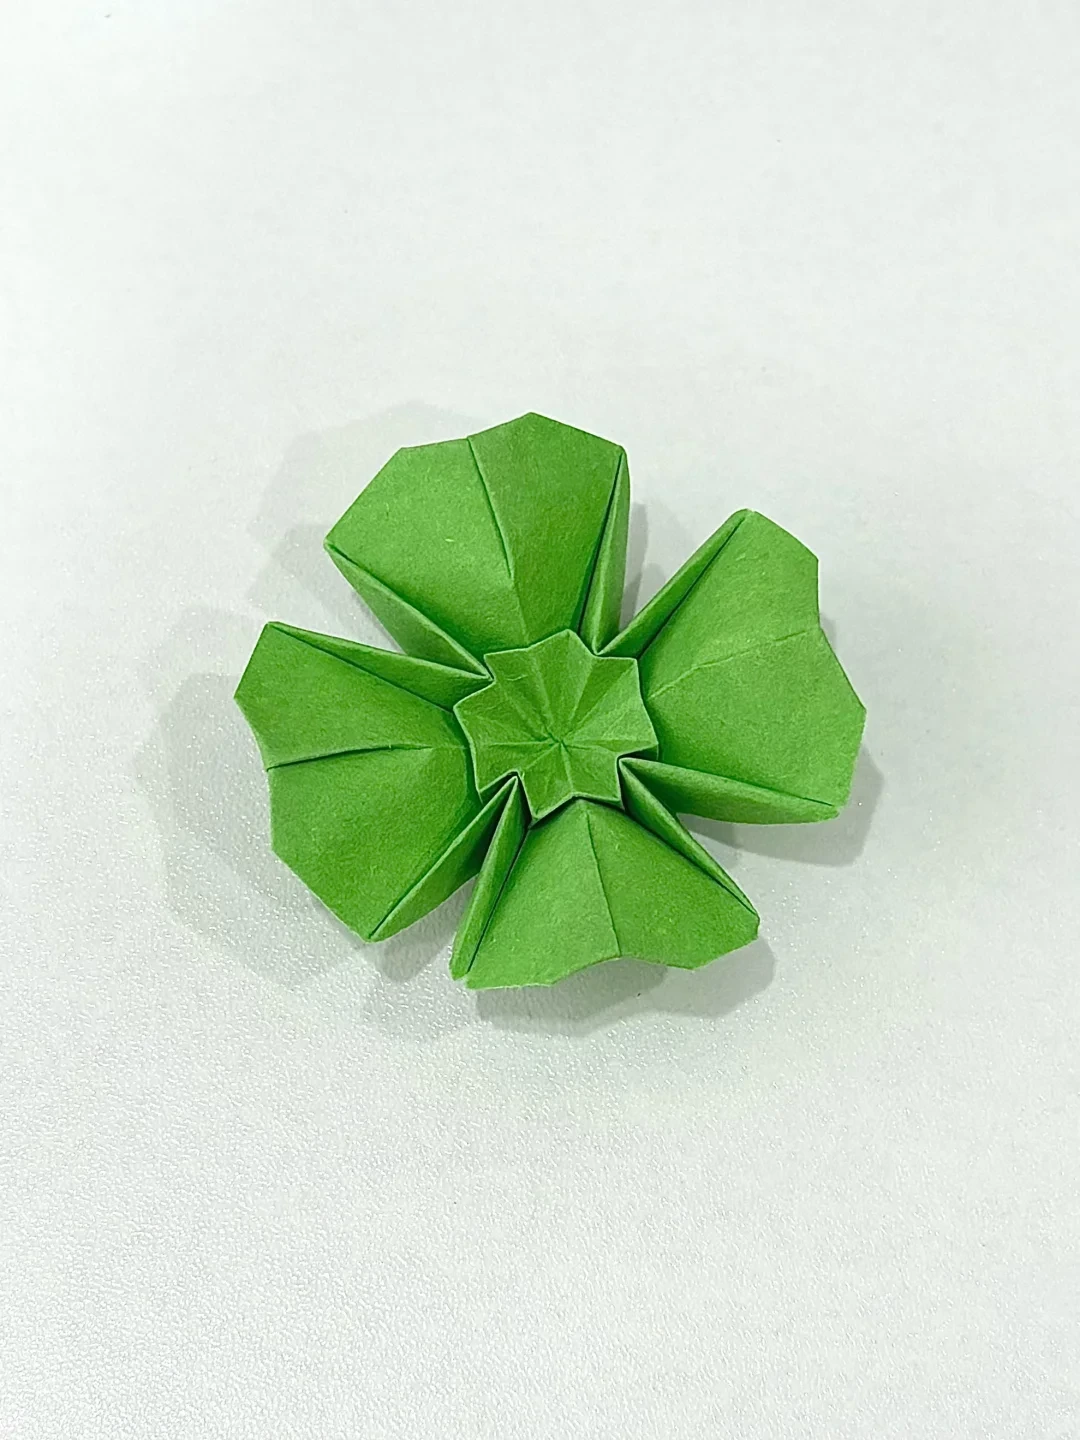
Gently spread the four leaves and adjust the raised center until the model sits evenly.
Follow the diagrams alongside the step-by-step English instructions.
Choose your next project →