
Paper toys · Step-by-step guide
Pumpkin with a Witch Hat
Fold a rounded pumpkin and a separate pointed hat, then join them for a small autumn decoration.
What you’ll need
- One orange paper square
- One 7.5 × 7.5 cm black square
- A narrow paper strip for the hatband
- Glue
Paper folding · Collapse folds & two-piece assembly
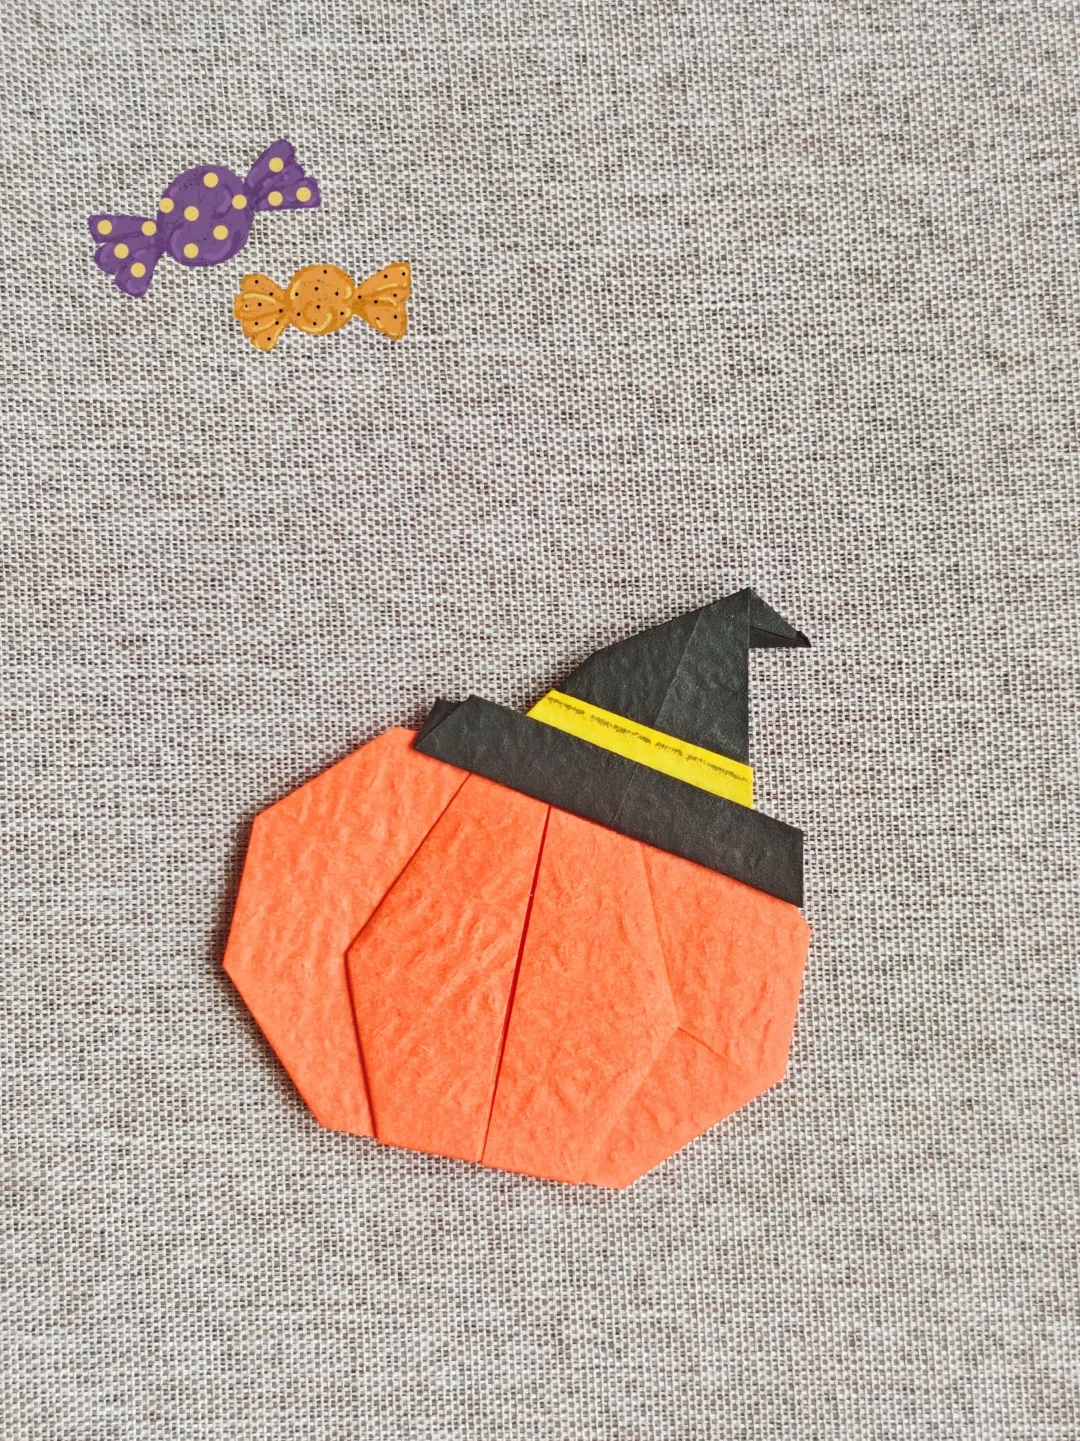
Make it, step by step.
10 steps · Original diagrams with English instructions
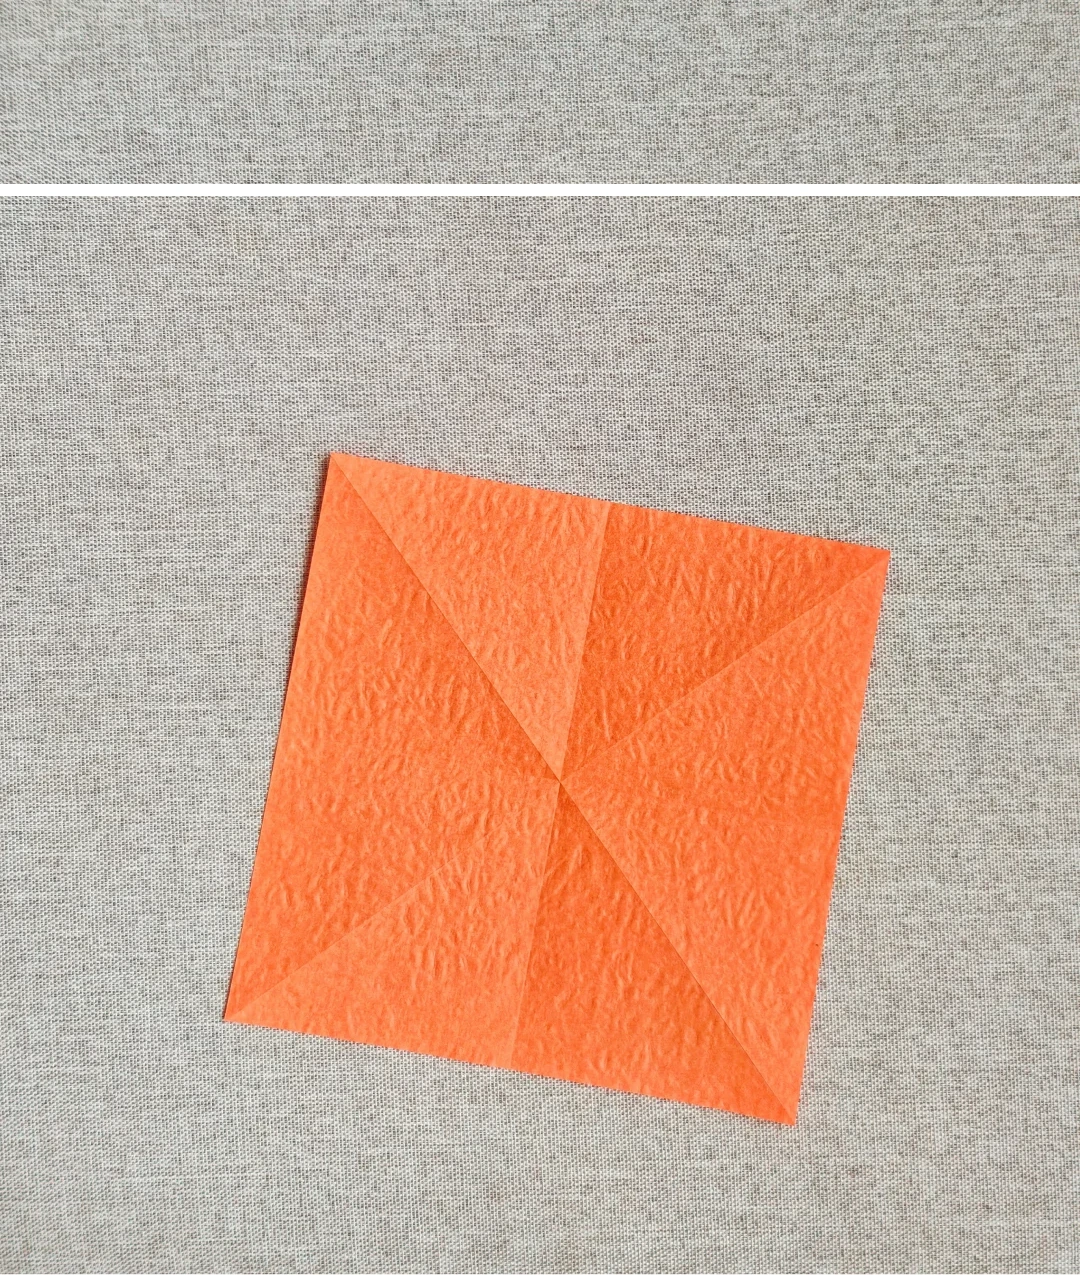
Prepare the sheets
 Open image at full size ↗
Set aside the orange square, the smaller black square and a contrasting strip for the hatband.
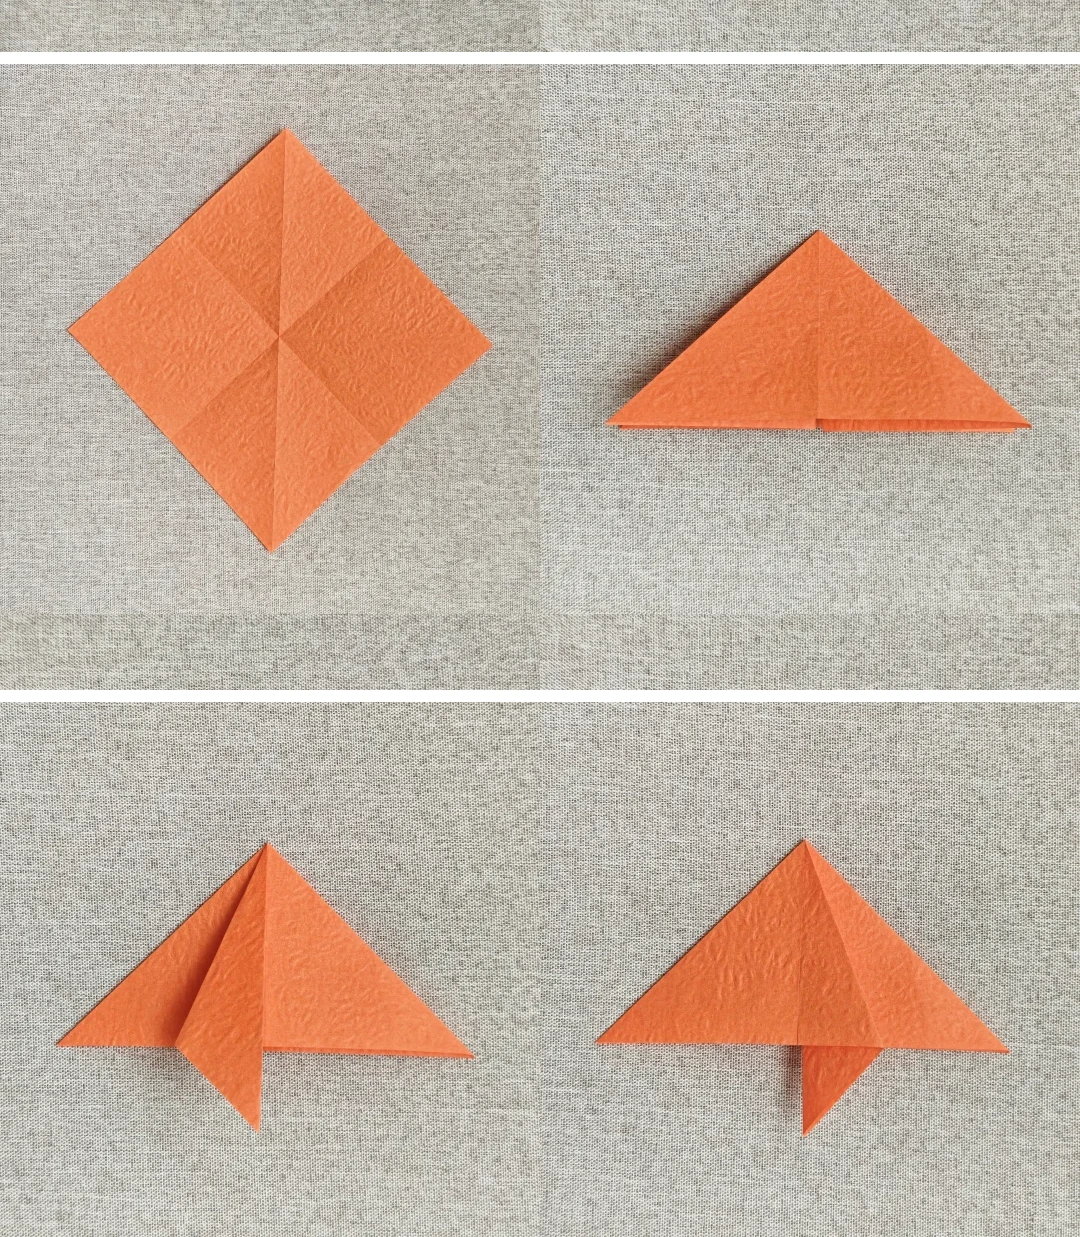
Collapse the pumpkin base
 Open image at full size ↗
Crease both diagonals and both midlines. Collapse into a triangle, then fold the indicated flap and turn it to the right.
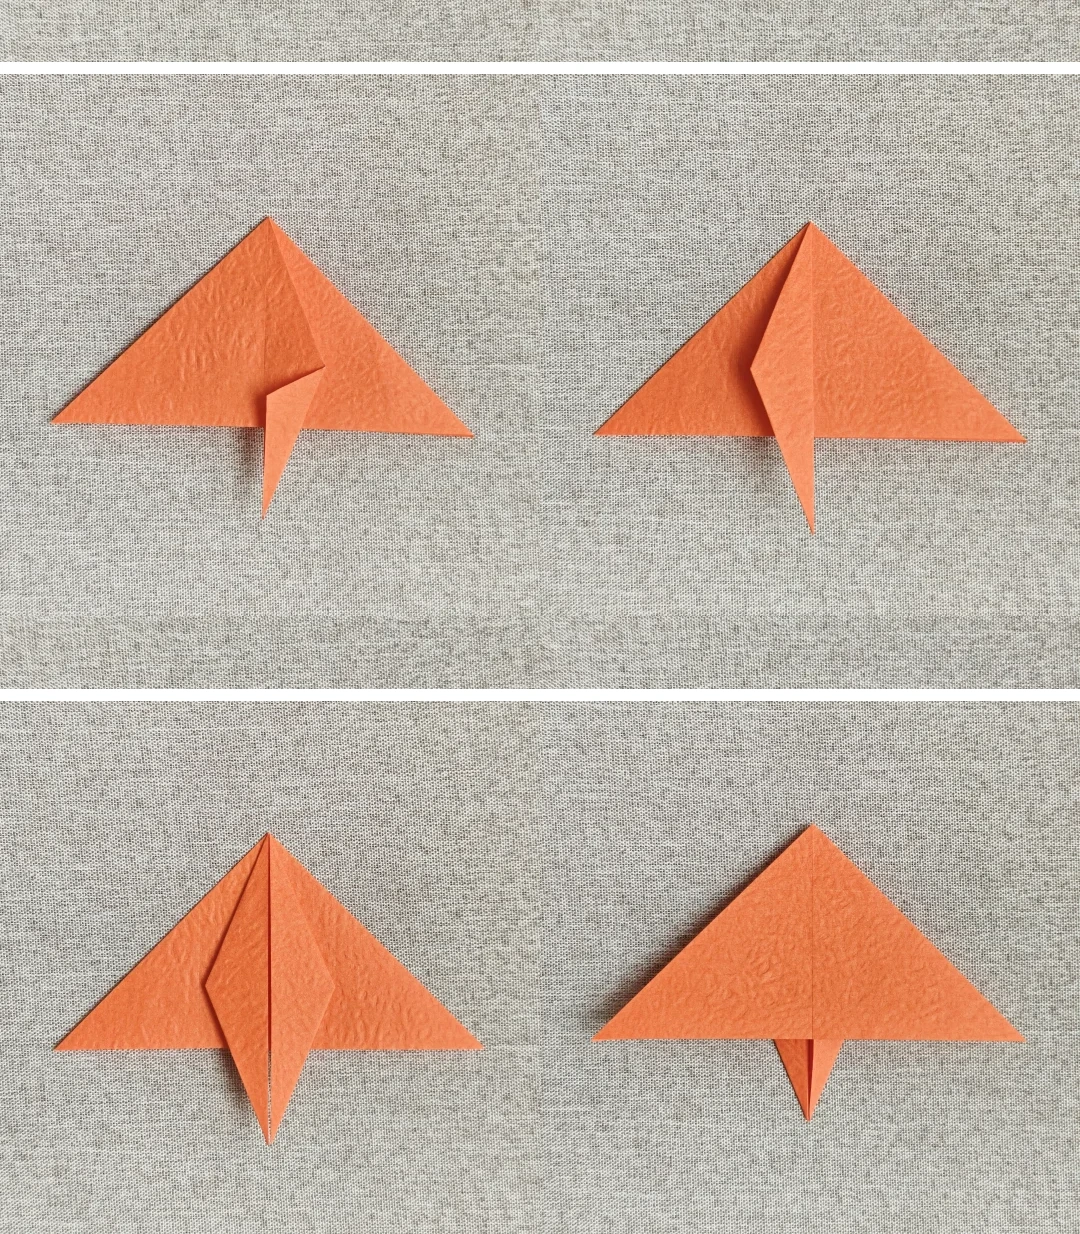
Repeat and turn
 Open image at full size ↗
Repeat on the other side, return the flaps to their positions and turn the model over.
Shape the side edges
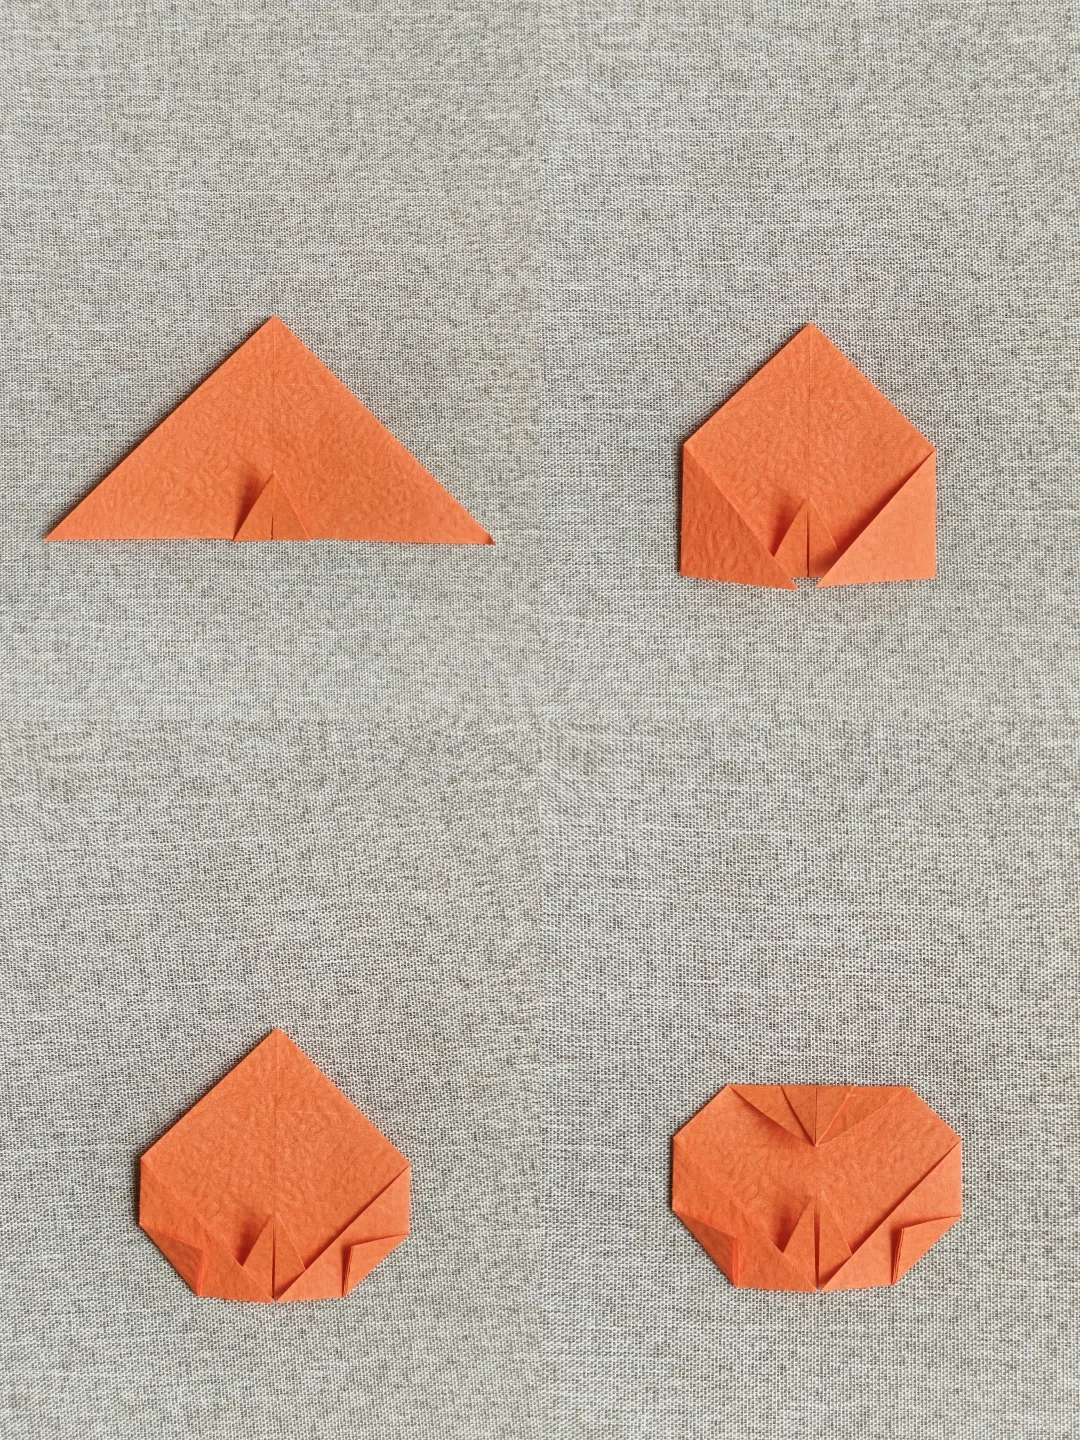 Open image at full size ↗
Fold the side corners inward, tuck the lower corners and fold the top point down, following the four panels.
Round the outline
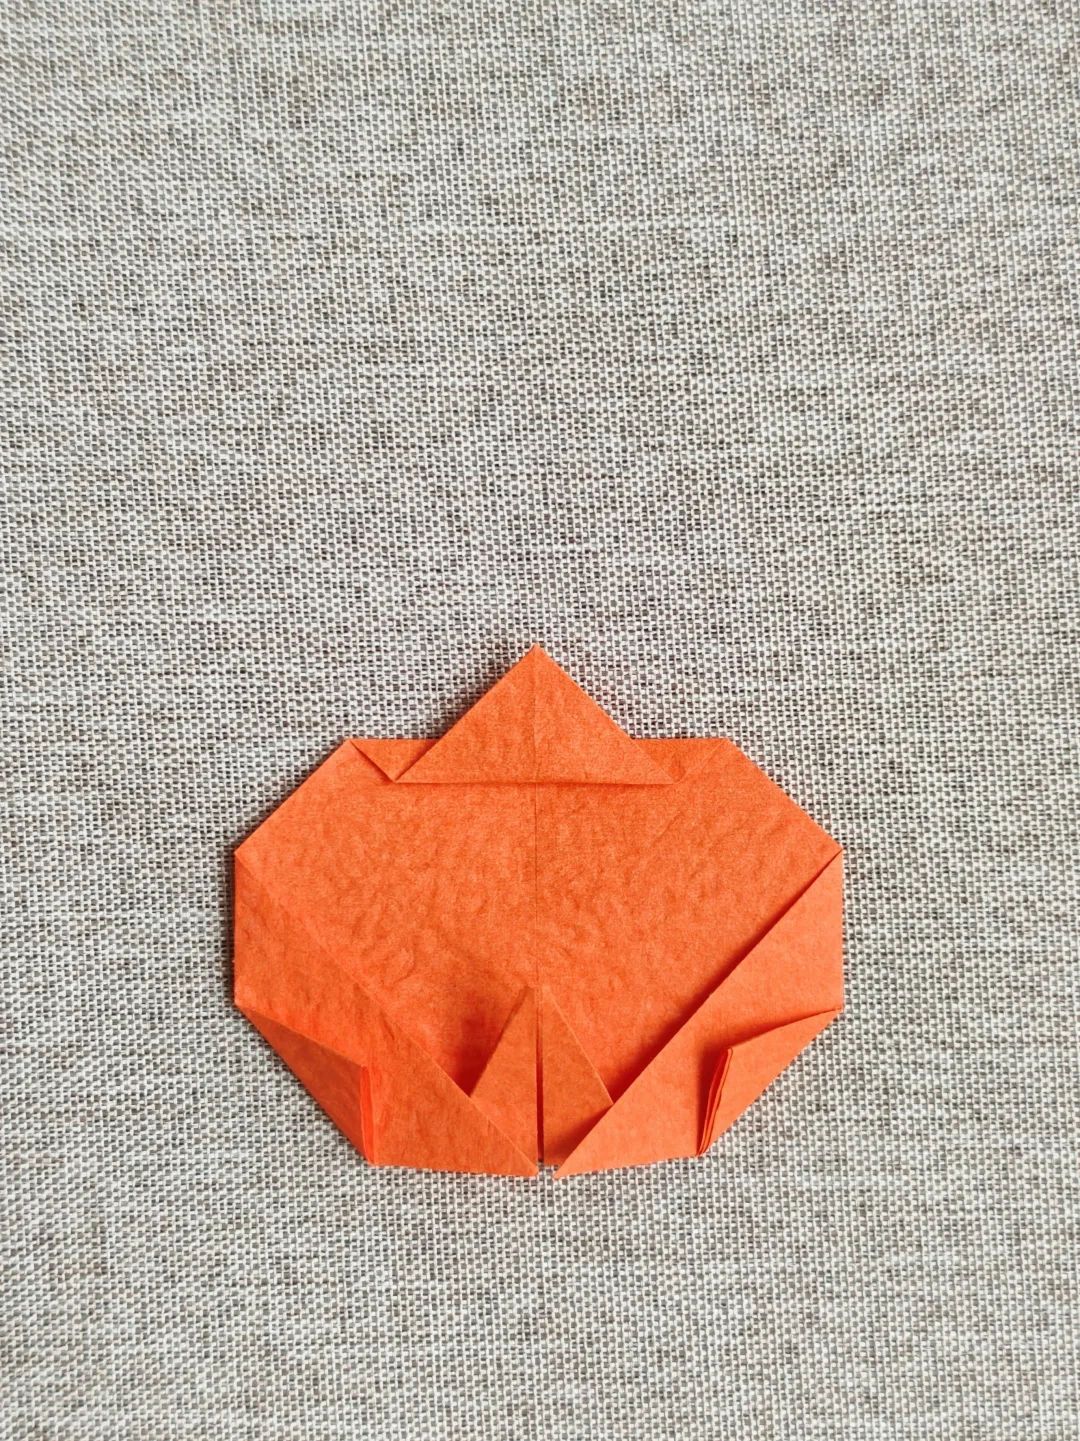 Open image at full size ↗
Fold the small top triangle back upward to make the stem, keeping the surrounding corners tucked in.
Reveal the pumpkin
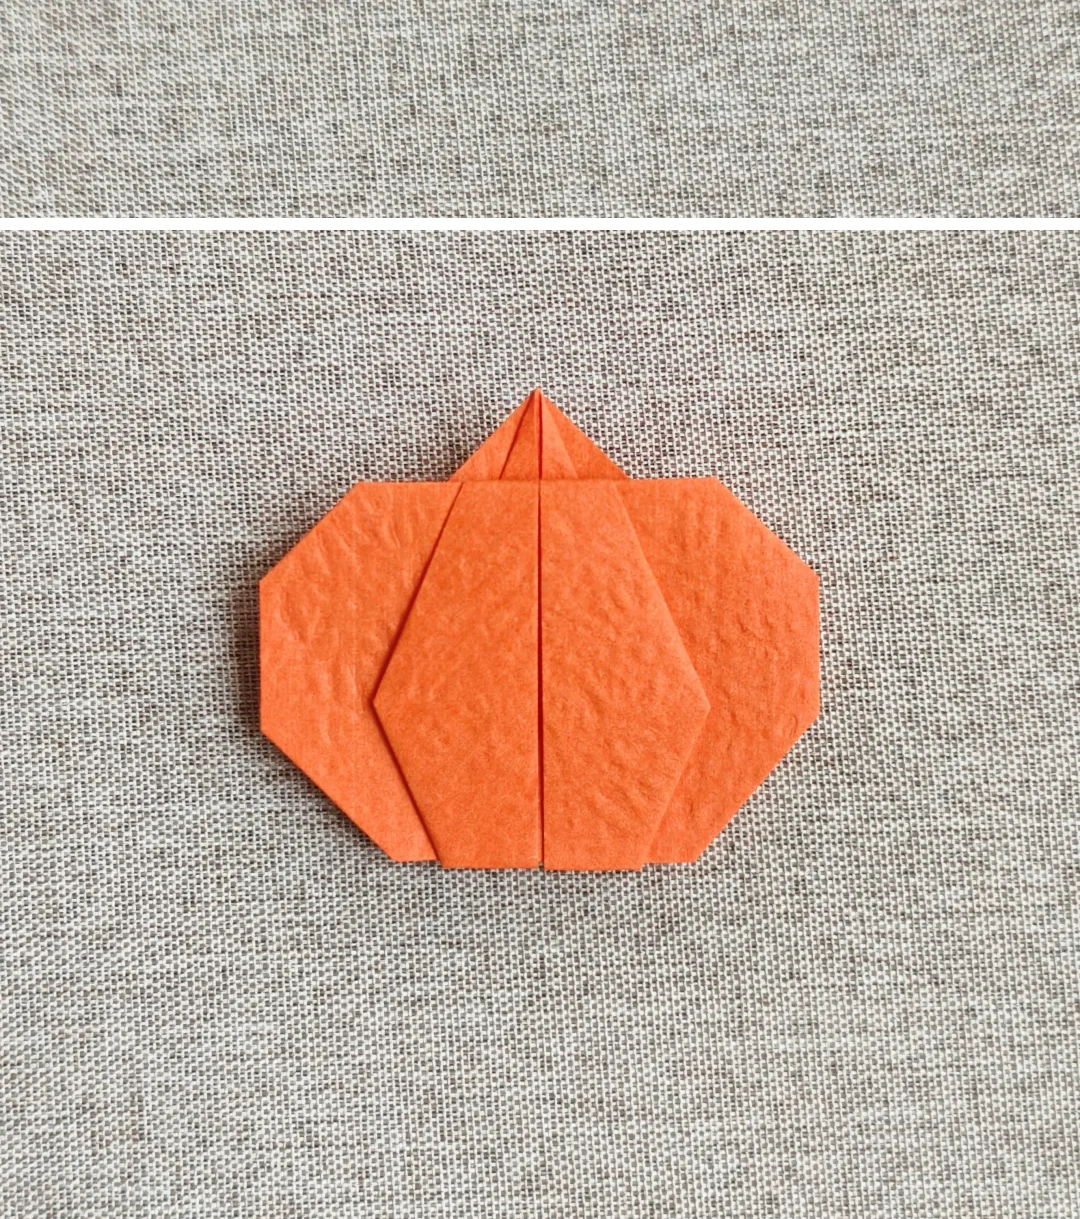 Open image at full size ↗
Turn the model over and adjust the side folds so the pumpkin is rounded and symmetrical.
Start the hat
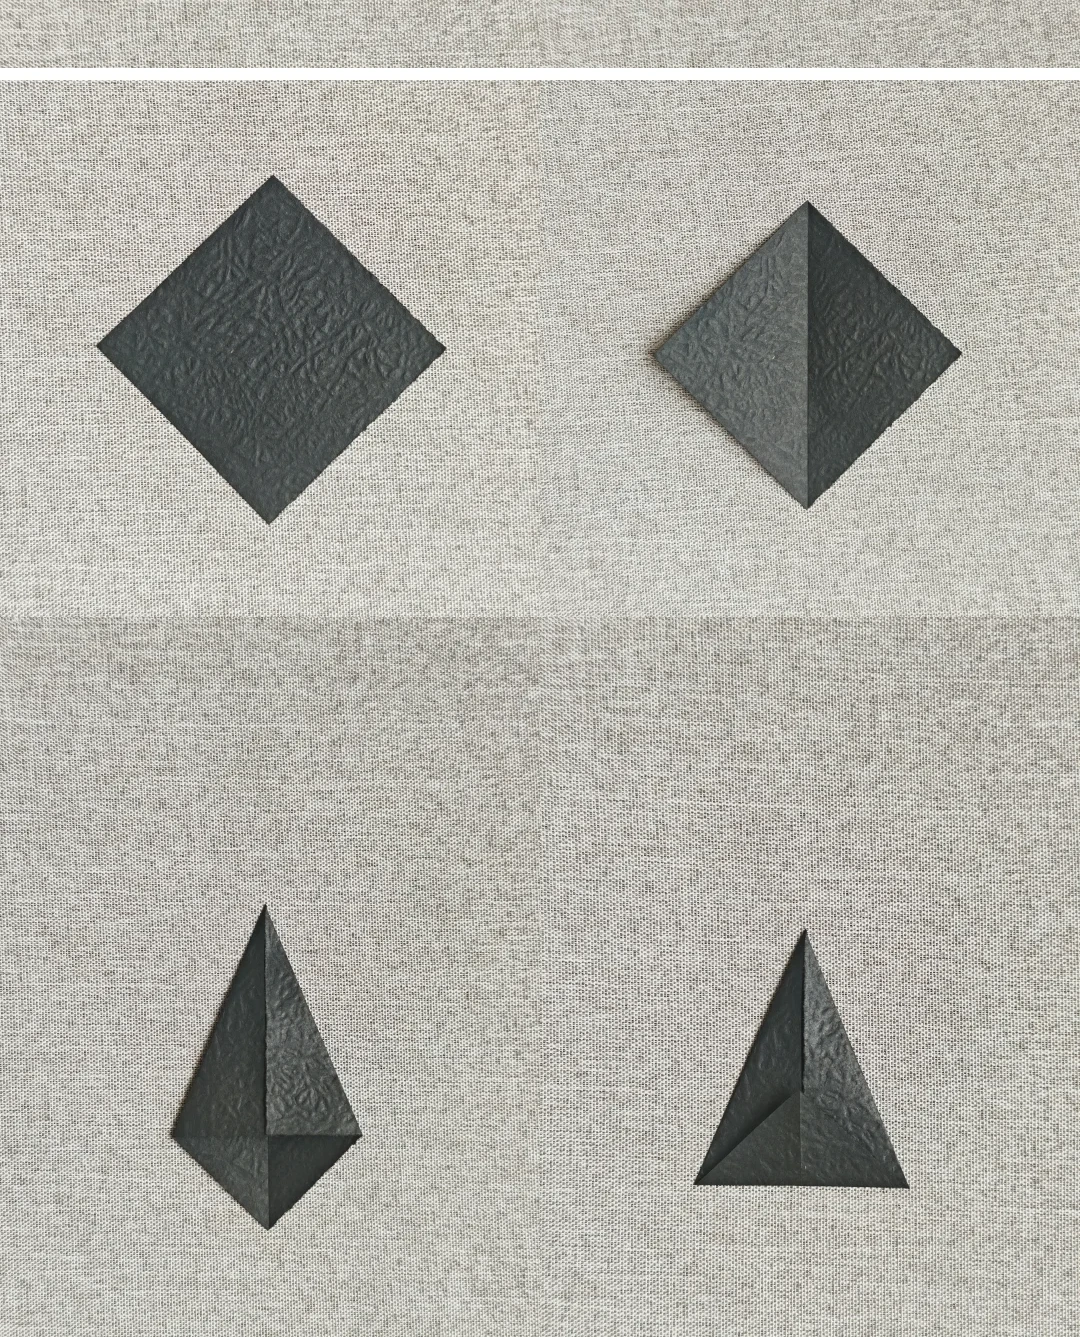 Open image at full size ↗
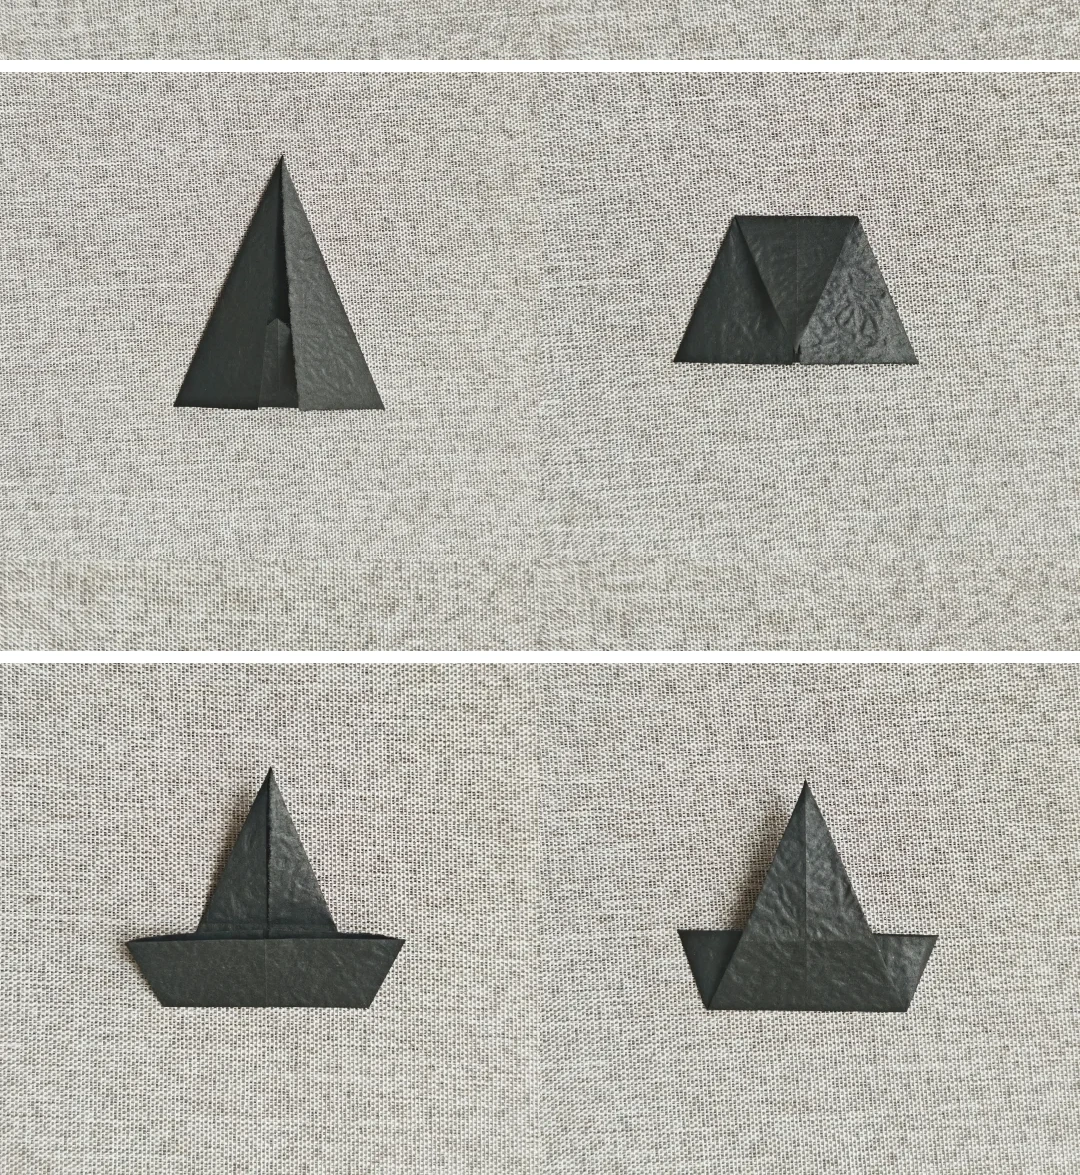
Use the 7.5 cm black square. Crease the vertical diagonal, fold both upper edges to the center and lift the lower triangle as pictured.
Form the pointed crown
 Open image at full size ↗
Tuck the lower triangular part inside. Fold and reopen the indicated flap, then turn the hat over.
Make the brim
 Open image at full size ↗
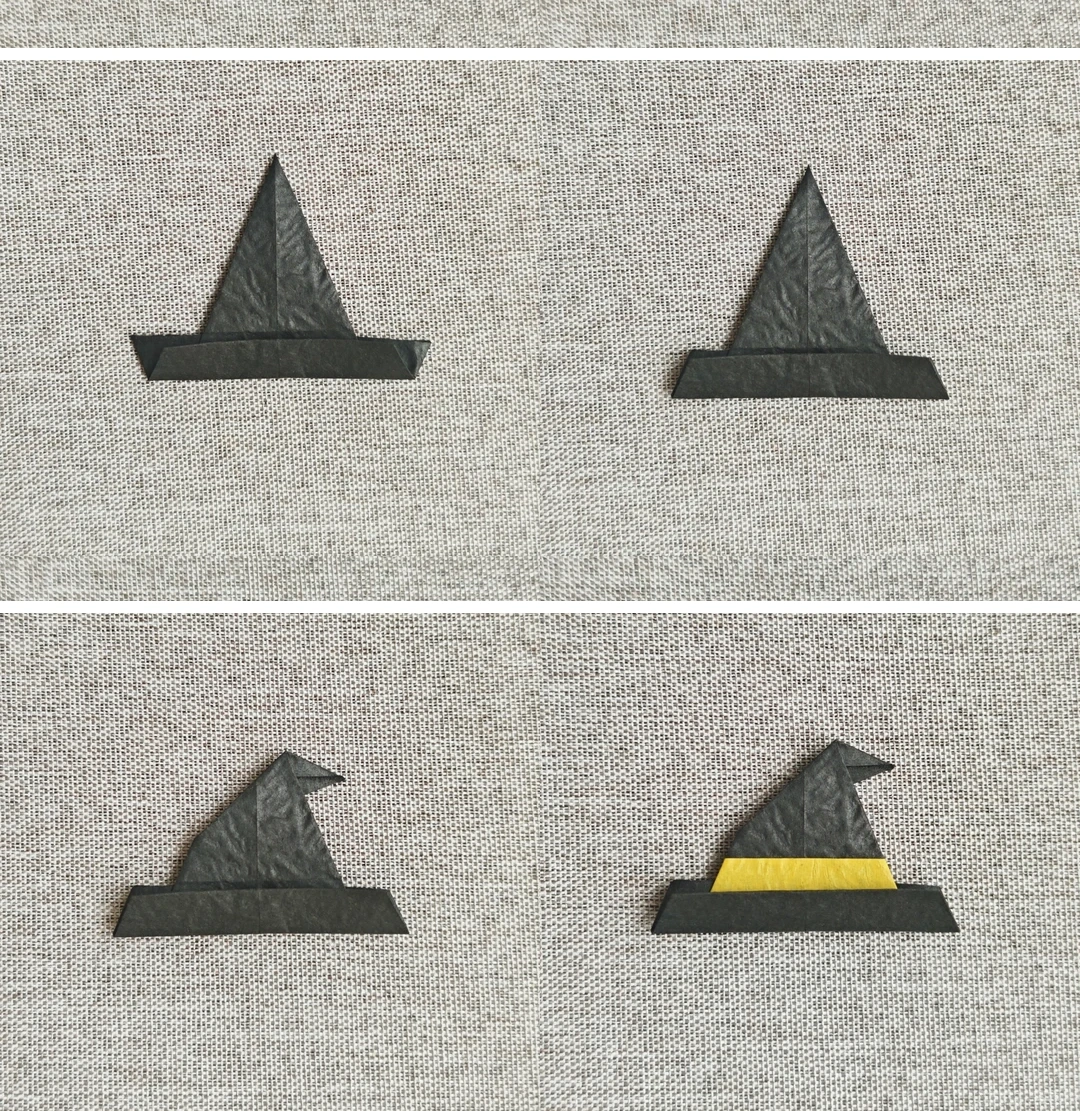
Fold the lower edge upward. Tuck the protruding side corners inward, shape the brim and attach the contrasting band.
Join the pieces
 Open image at full size ↗
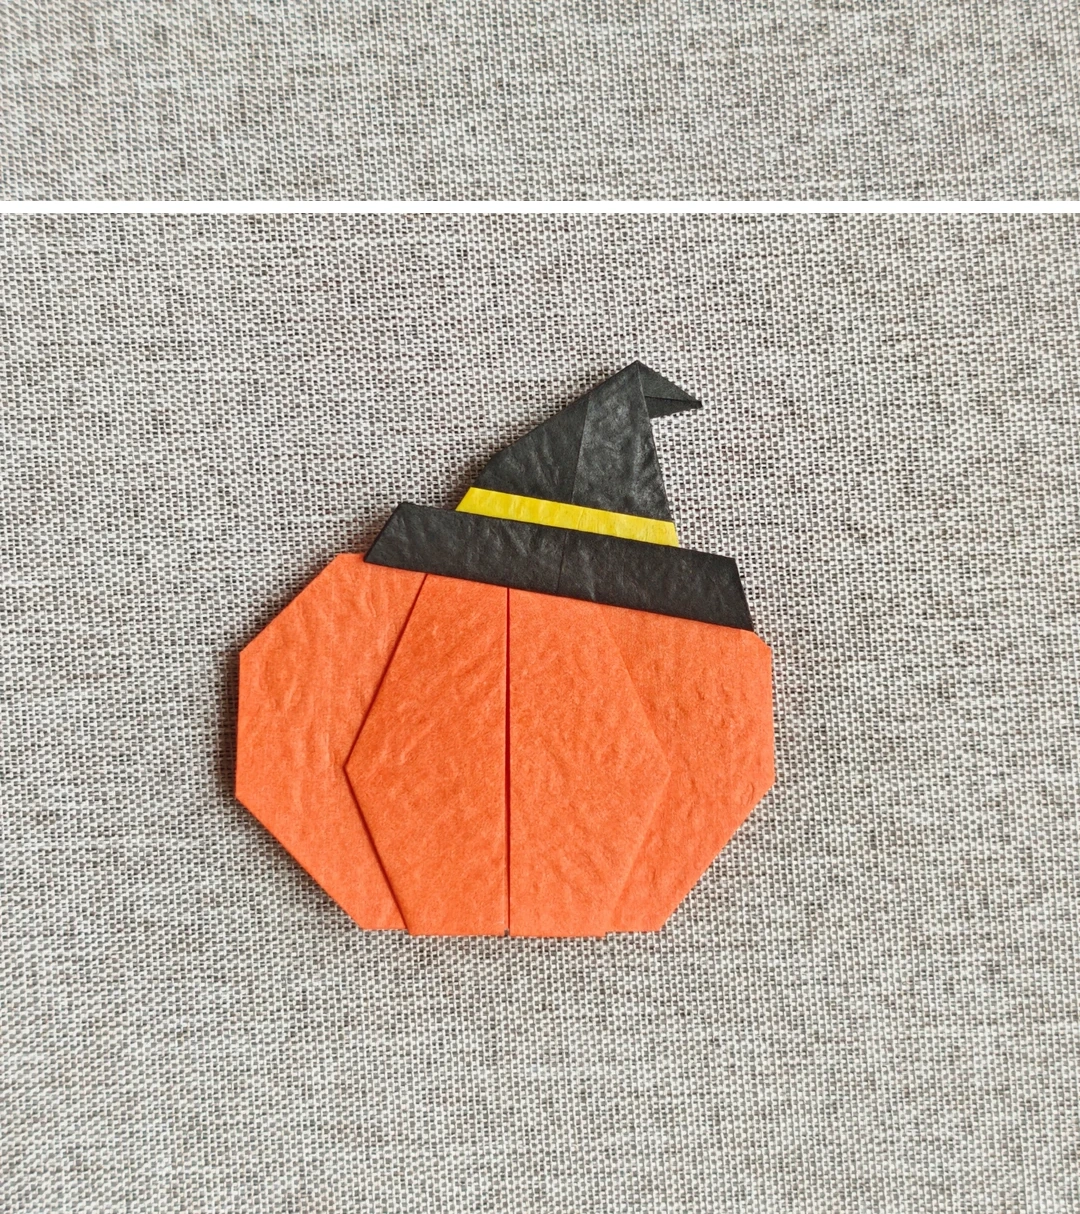
Glue the hat to the top of the pumpkin at a slight angle.
Follow the diagrams alongside the step-by-step English instructions.
Choose your next project →