
Animals · Step-by-step guide
Pocket-Sized Penguin
Make a small flat penguin, then draw its eyes and color the beak.
What you’ll need
- One square of paper
- A pen or colored pencils
Origami · Creasing, collapse folds & shaping
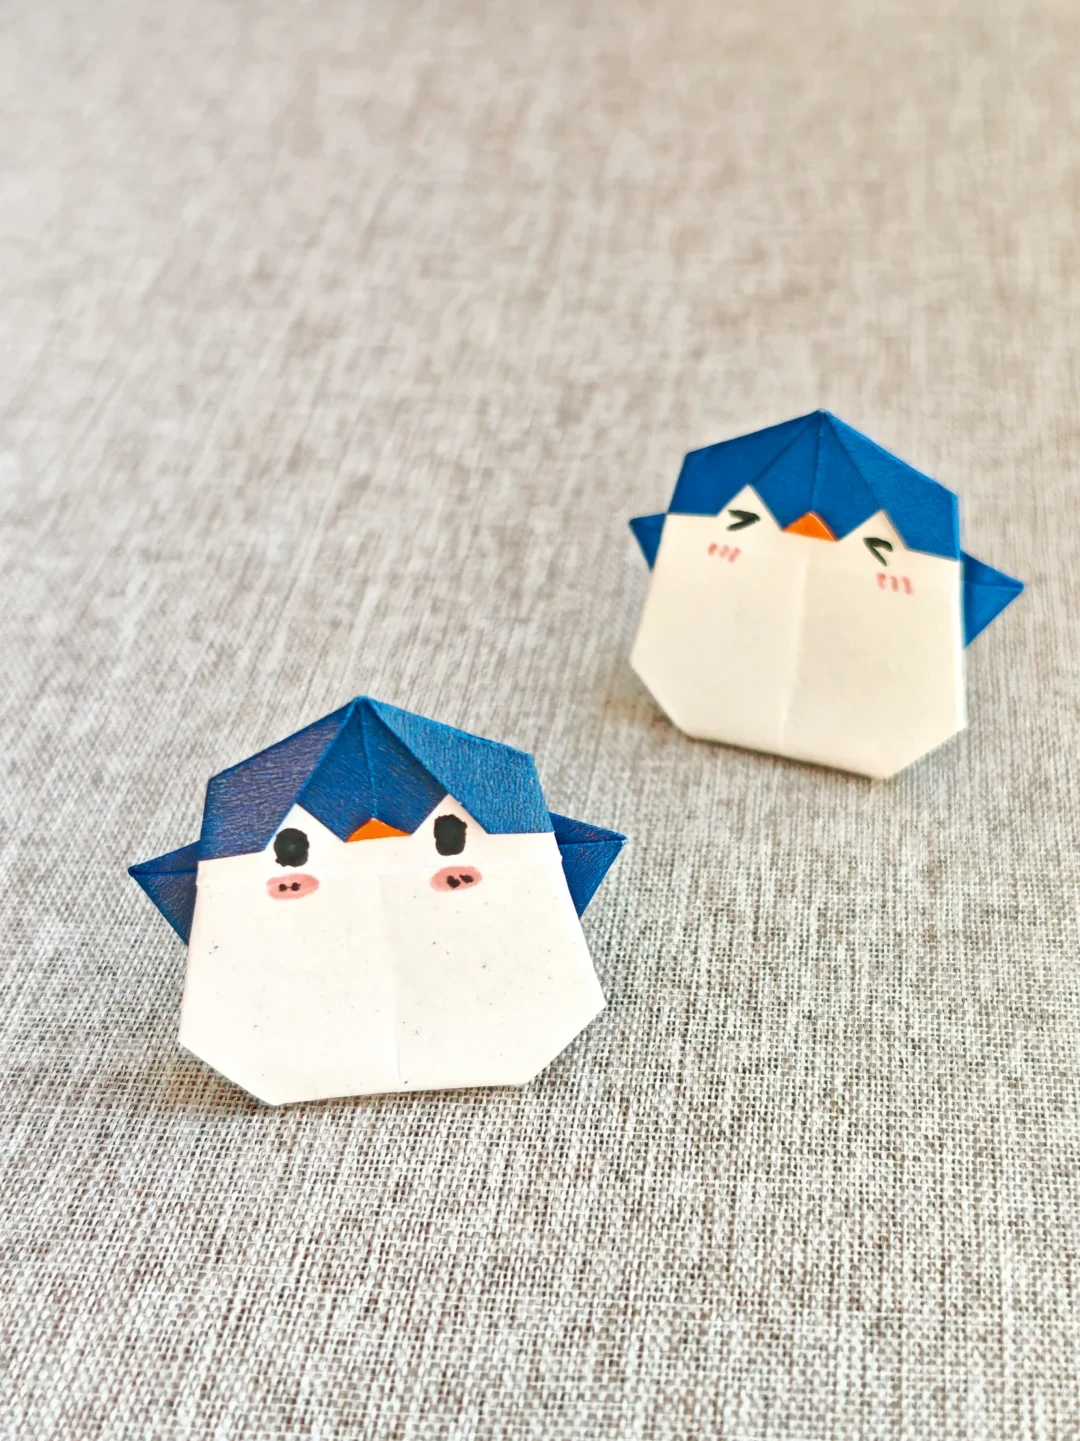
Make it, step by step.
9 steps · Original diagrams with English instructions
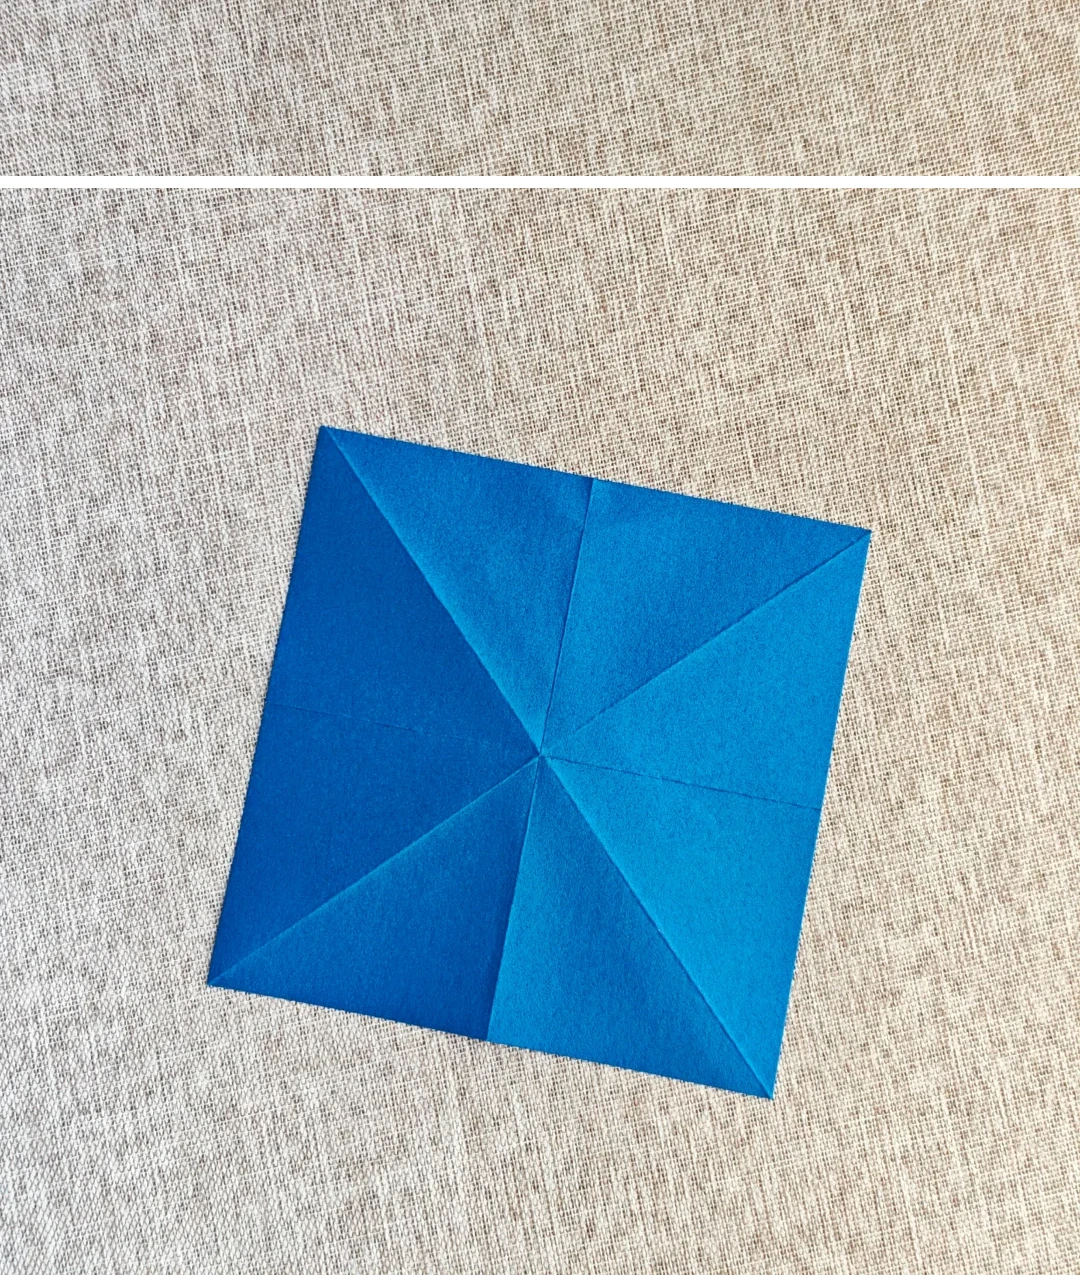
Prepare the square
 Open image at full size ↗
Choose paper with different colors on its two sides for a contrasting belly.
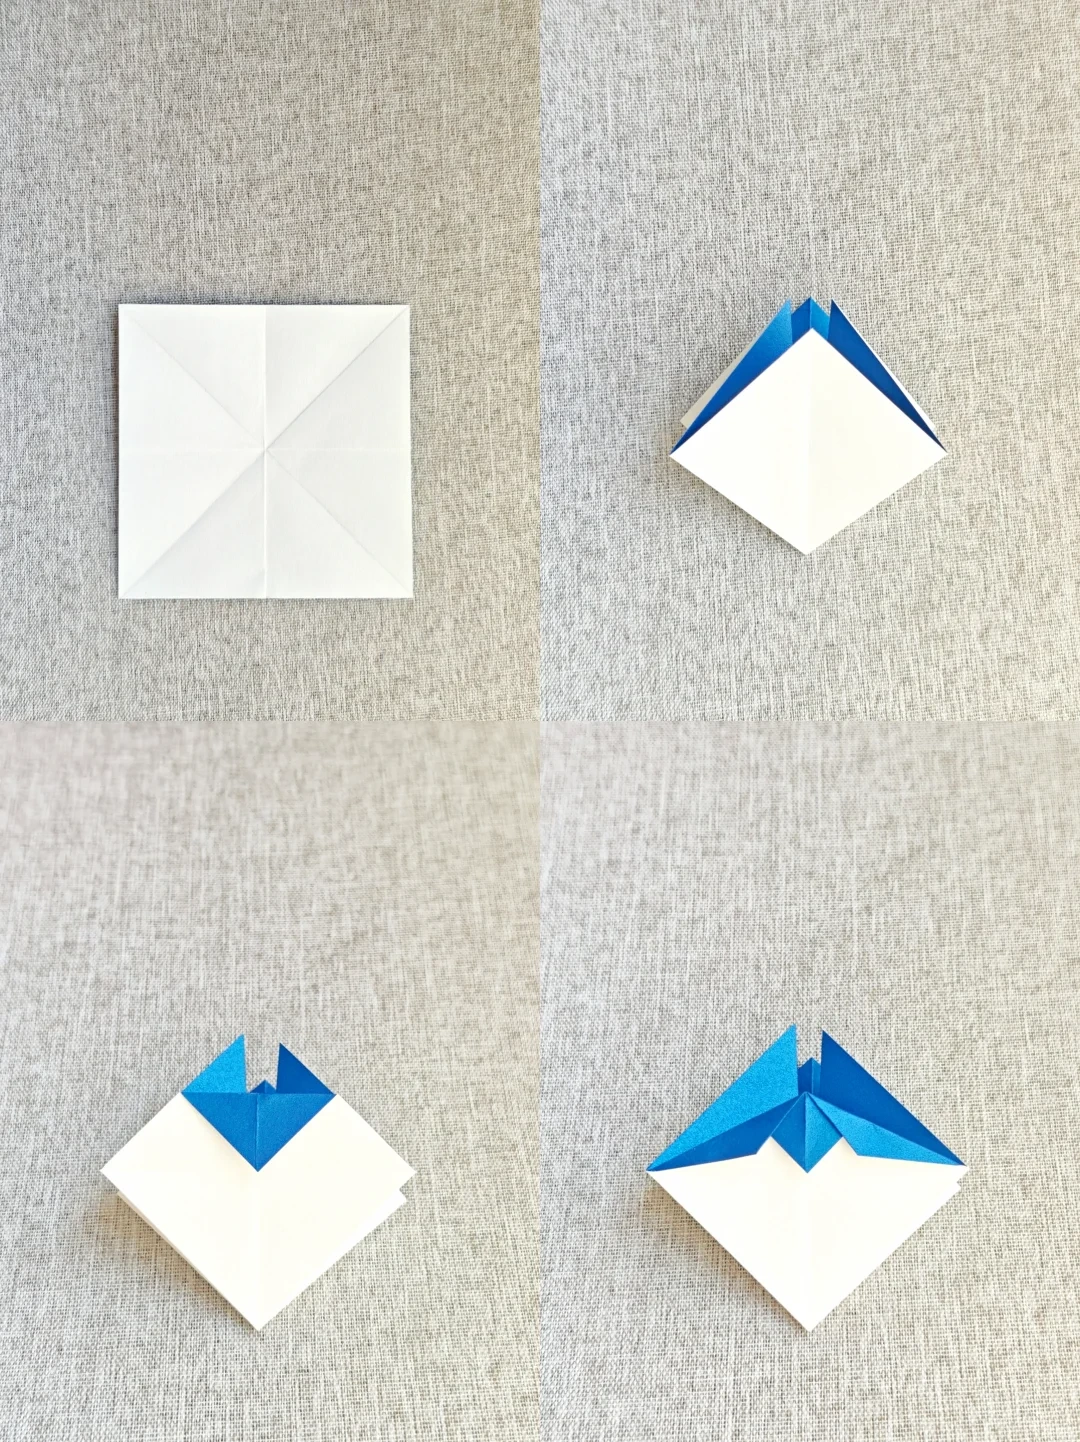
Form the basic folds
 Open image at full size ↗
Fold the square along the reference creases and bring the corners inward, following the four panels.
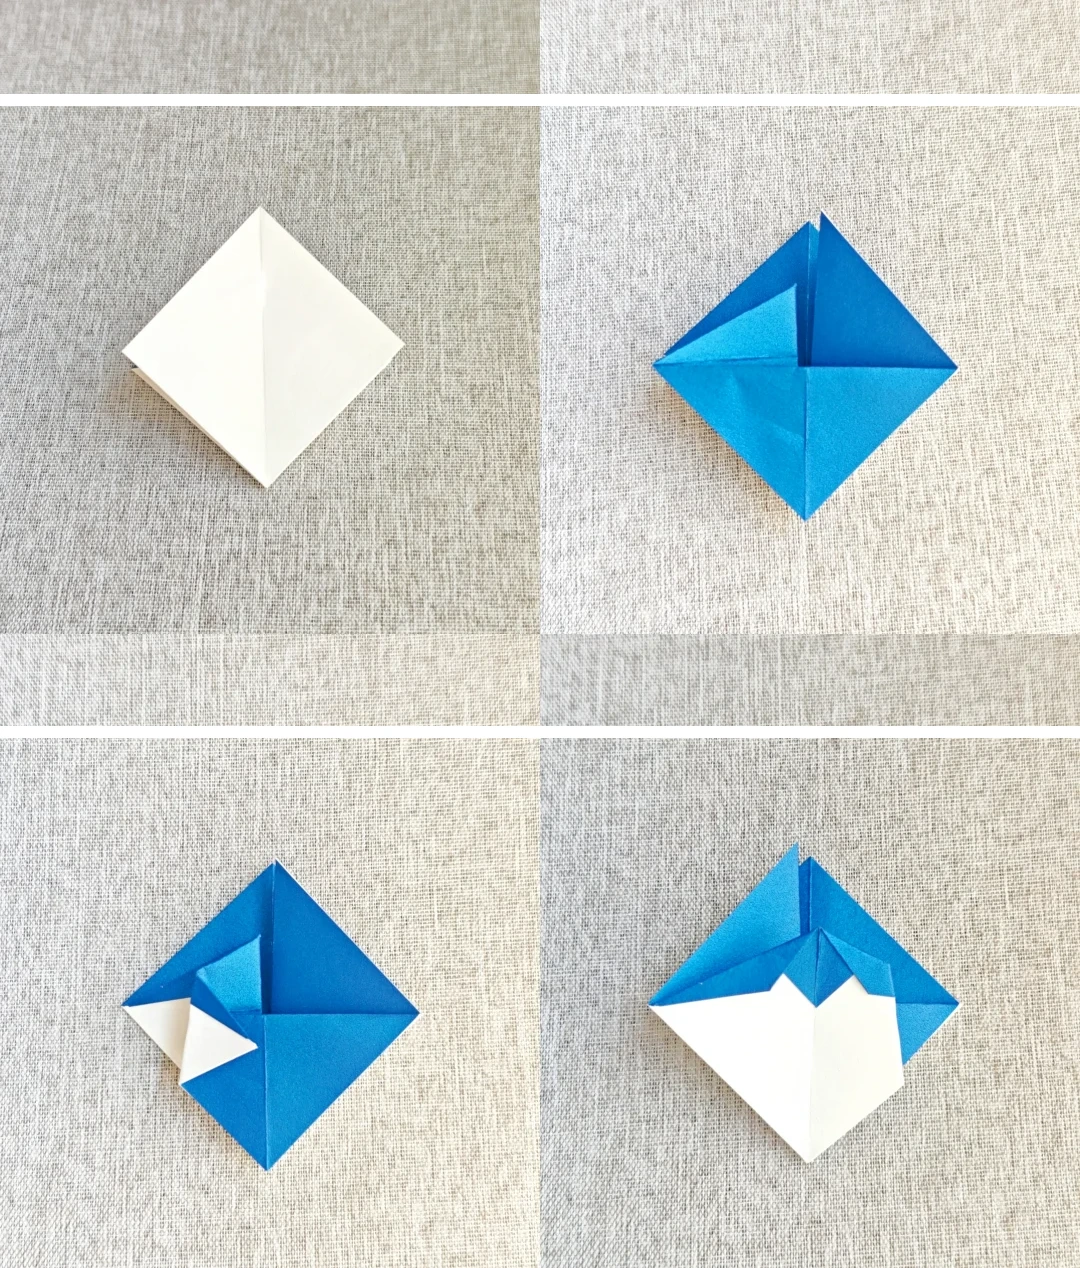
Fold one side
 Open image at full size ↗
Turn the right flap left, fold its upper section down, then return it to the right.
Repeat on the left
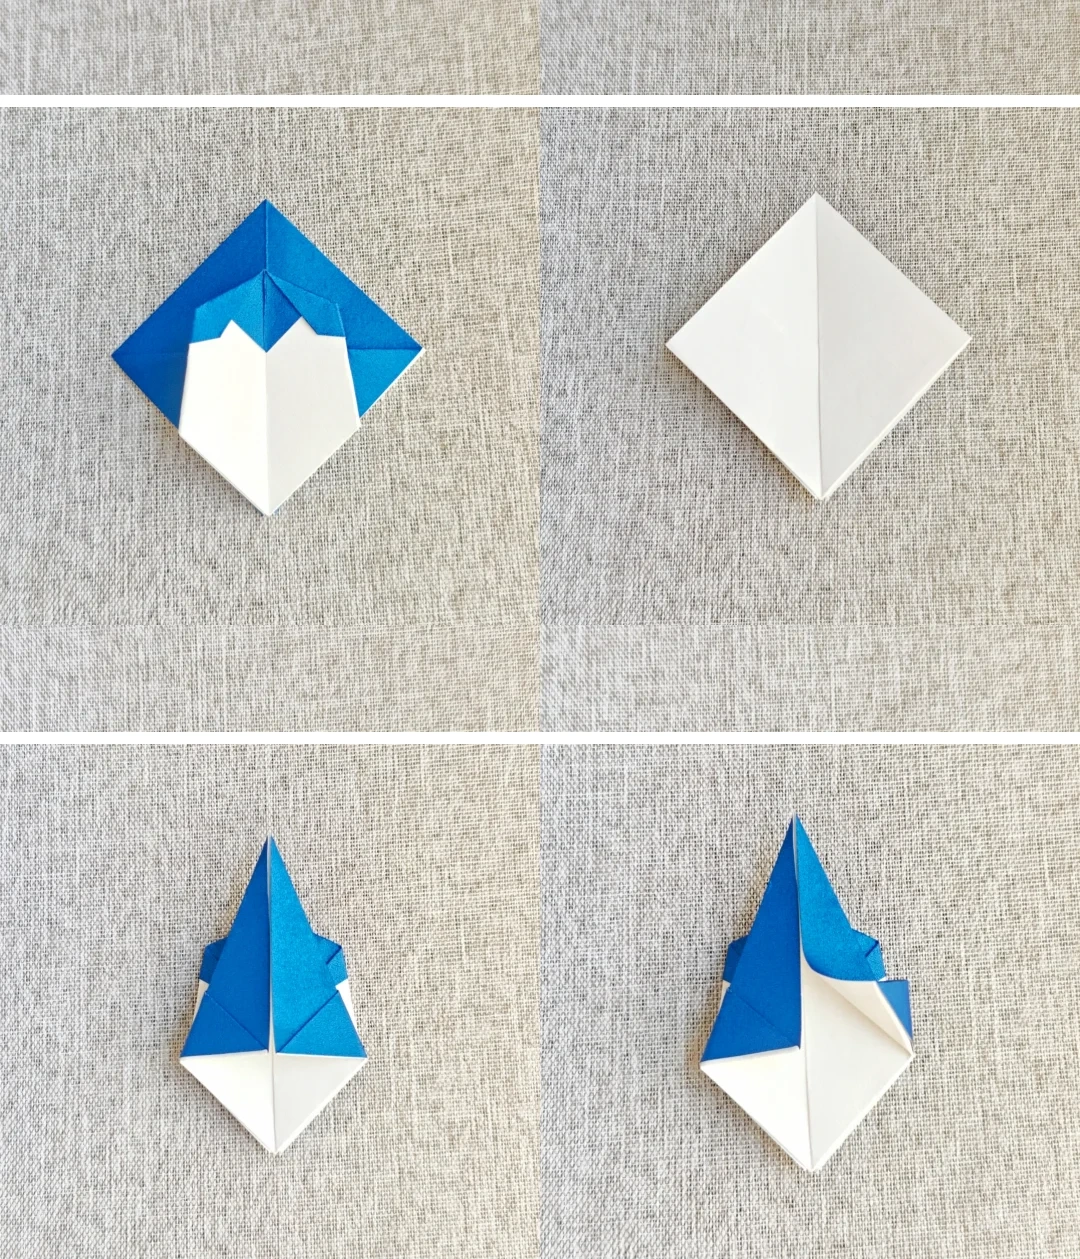 Open image at full size ↗
Repeat the flap fold on the left. Fold both sides toward the center and turn over.
Shape the head and wings
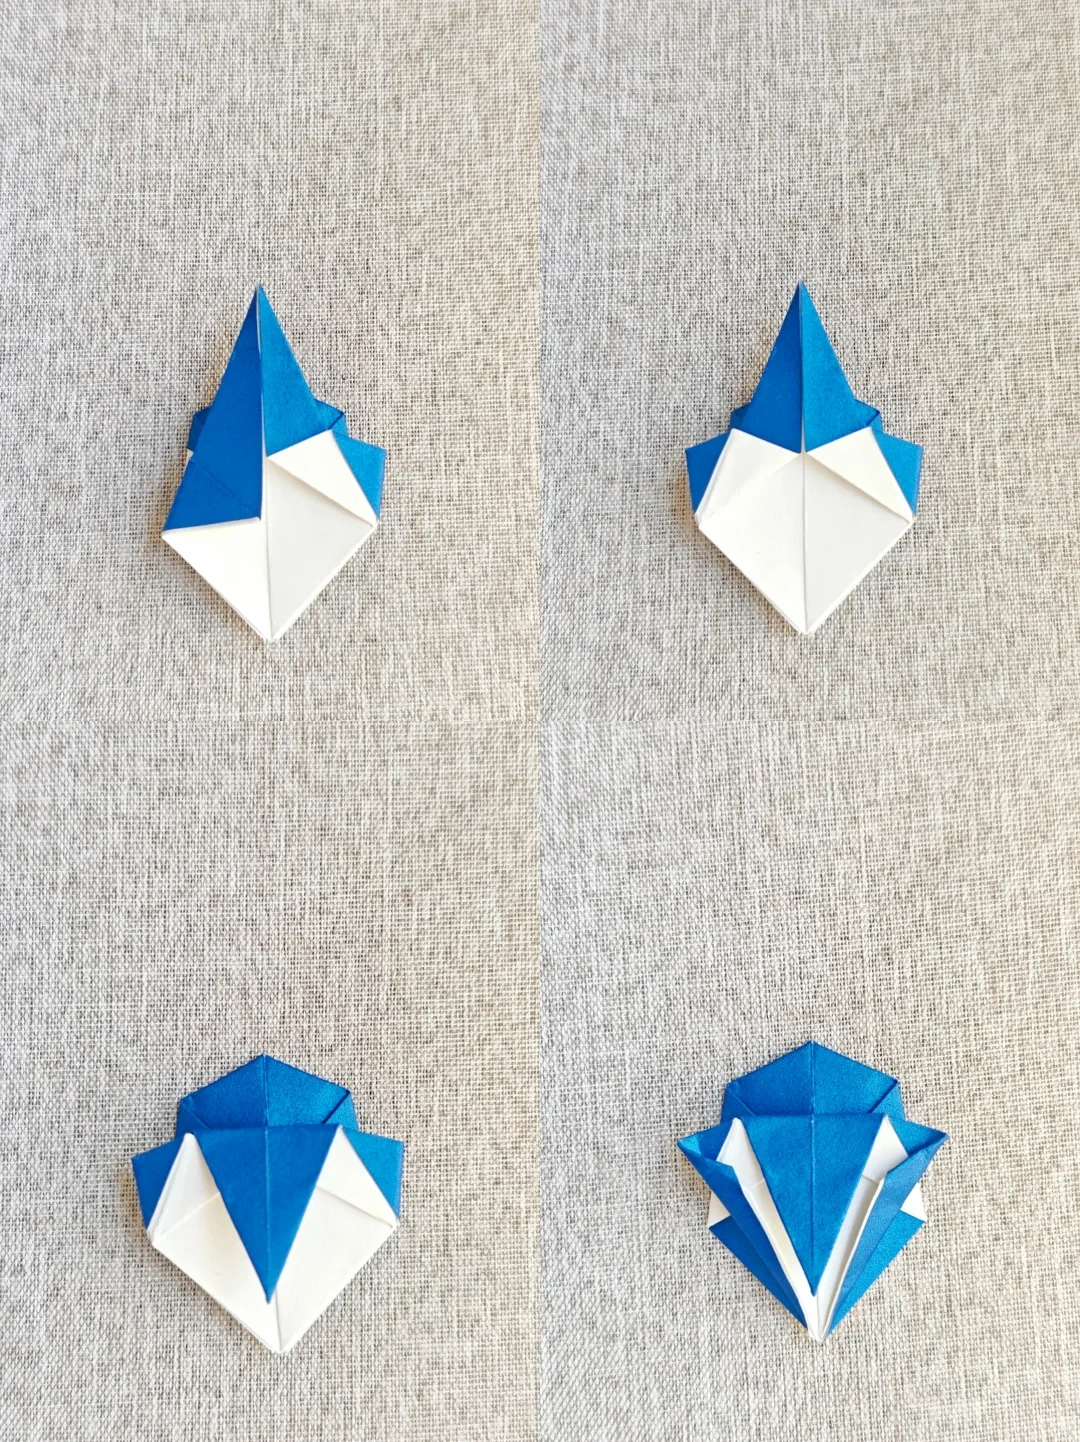 Open image at full size ↗
Fold the upper point and side sections into the arrangement shown in the panels.
Round the outline
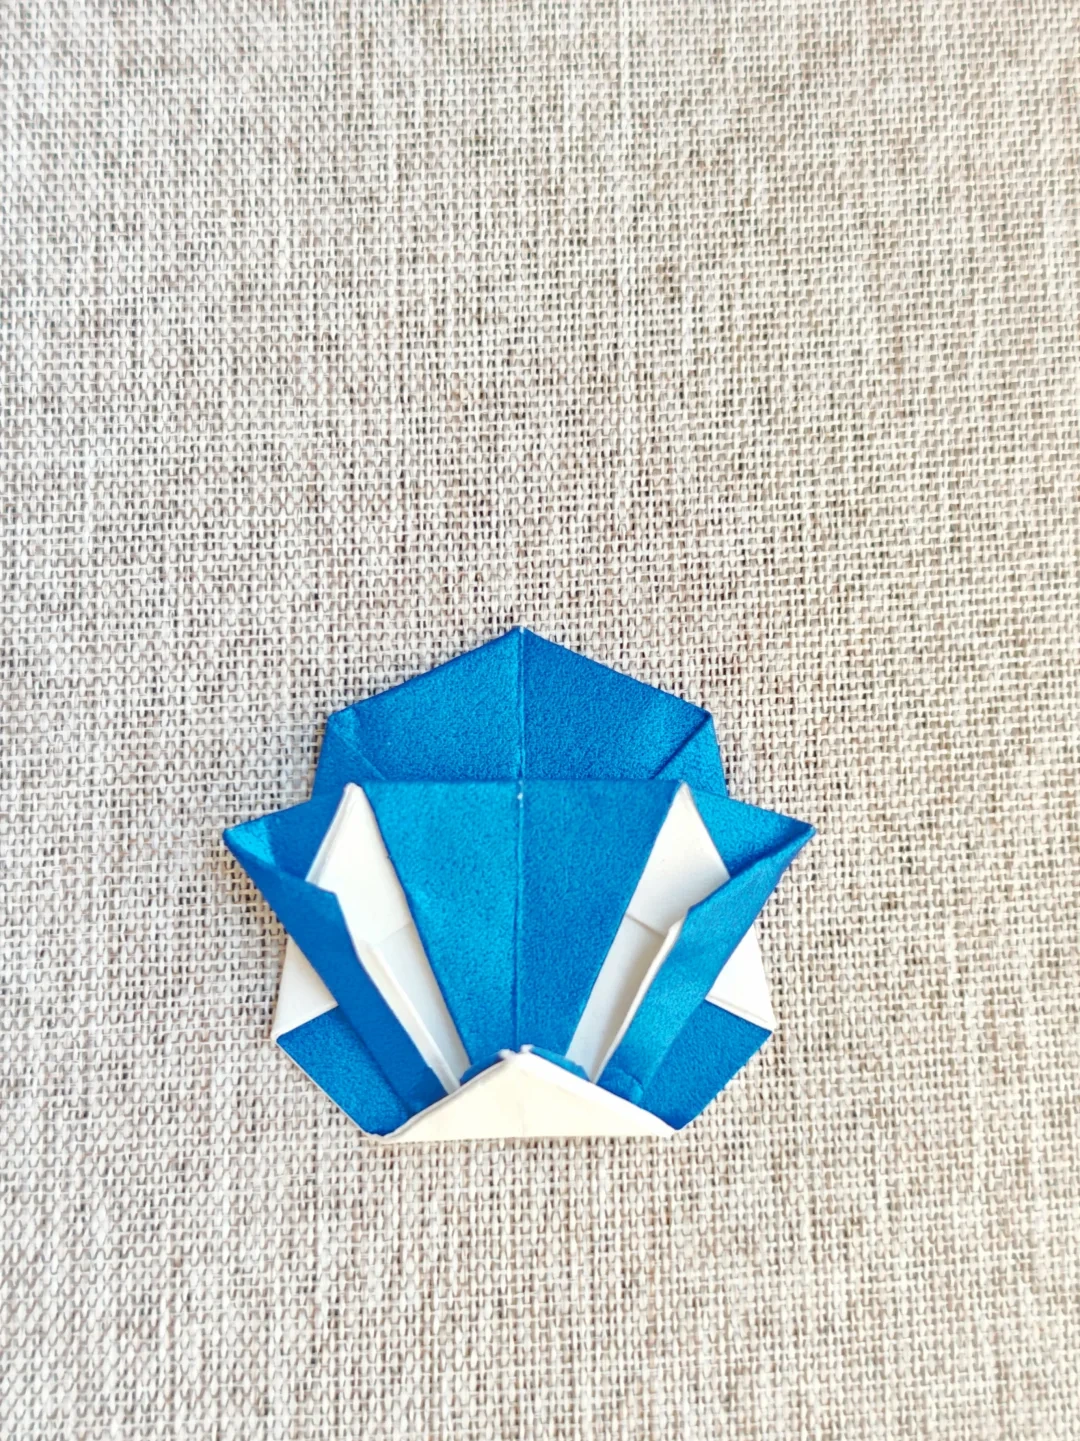 Open image at full size ↗
Fold the small outer corners inward to shape the penguin's head and body.
Turn to the front
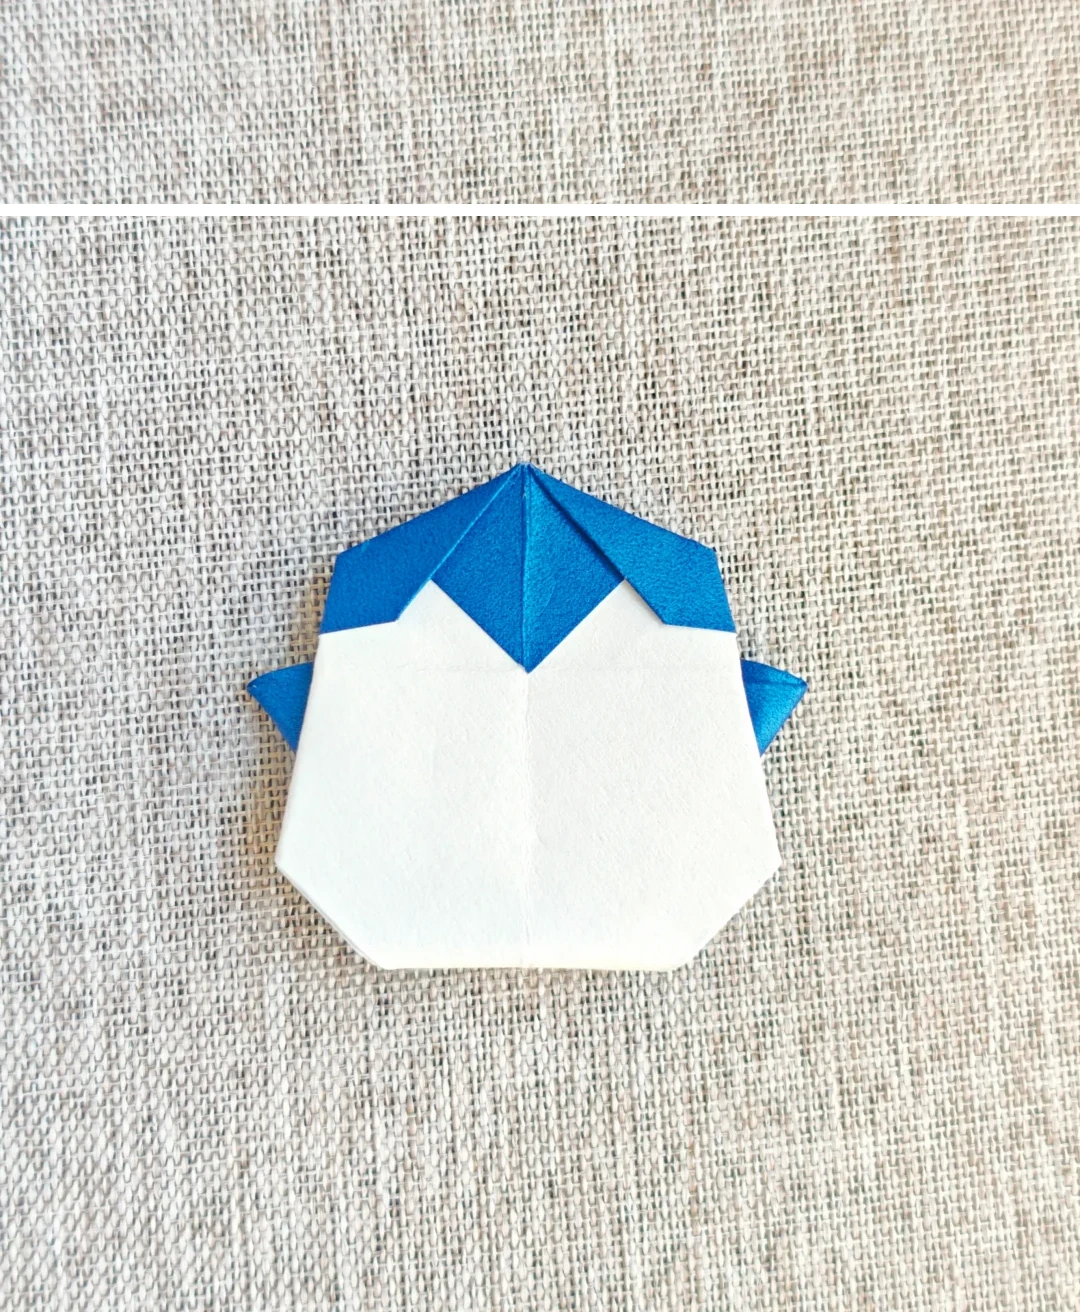 Open image at full size ↗
Turn the model over to reveal the front face.
Lift the beak
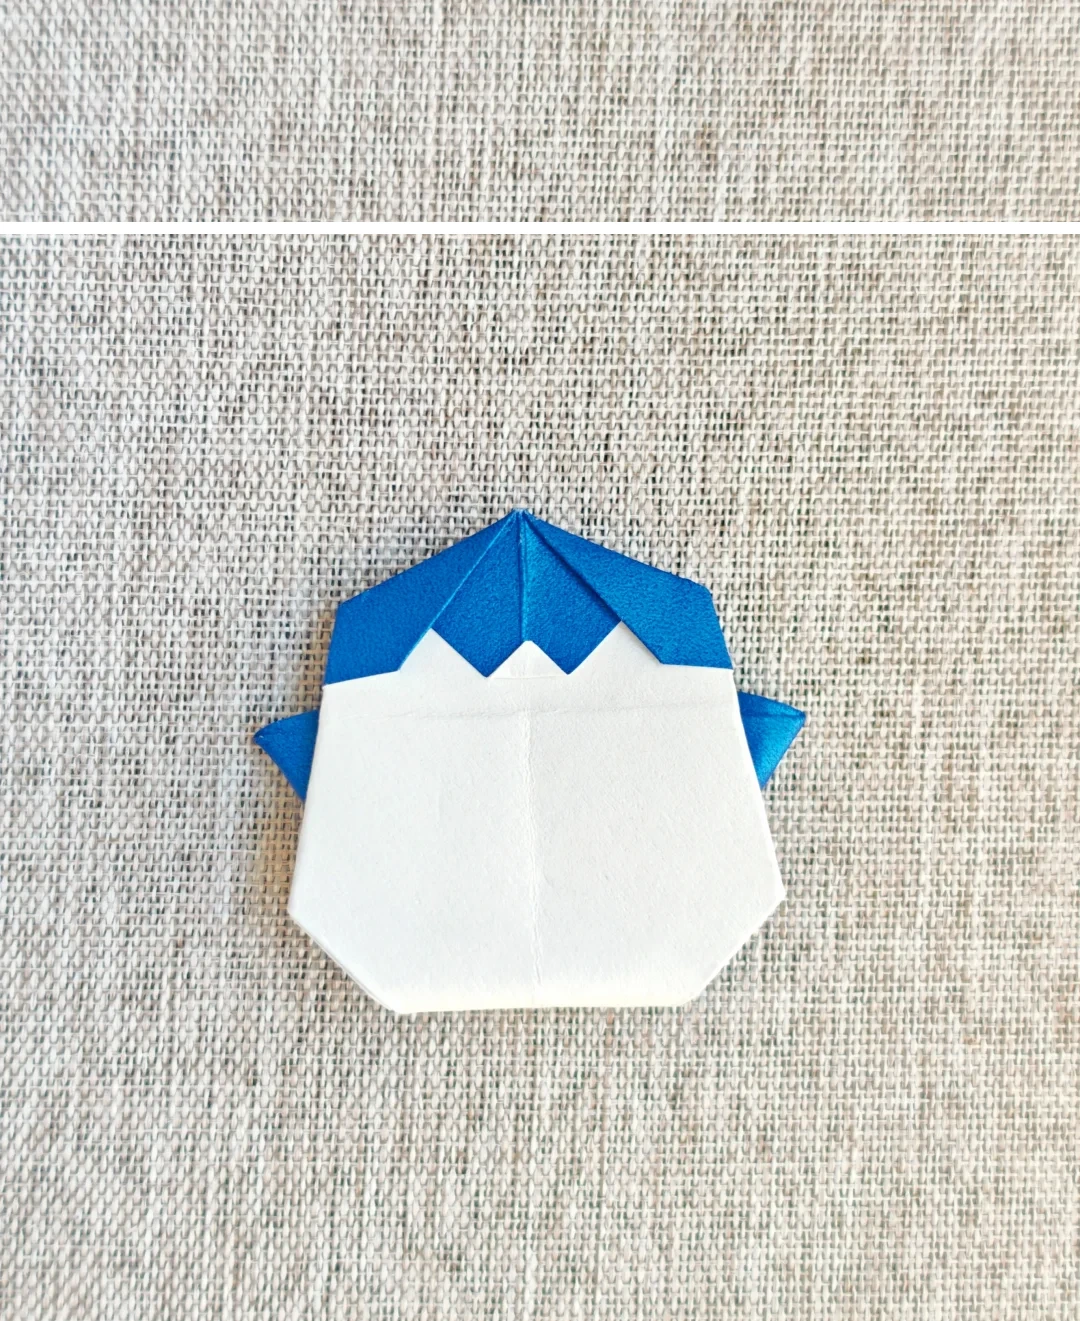 Open image at full size ↗
Fold the small center point upward.
Draw the details
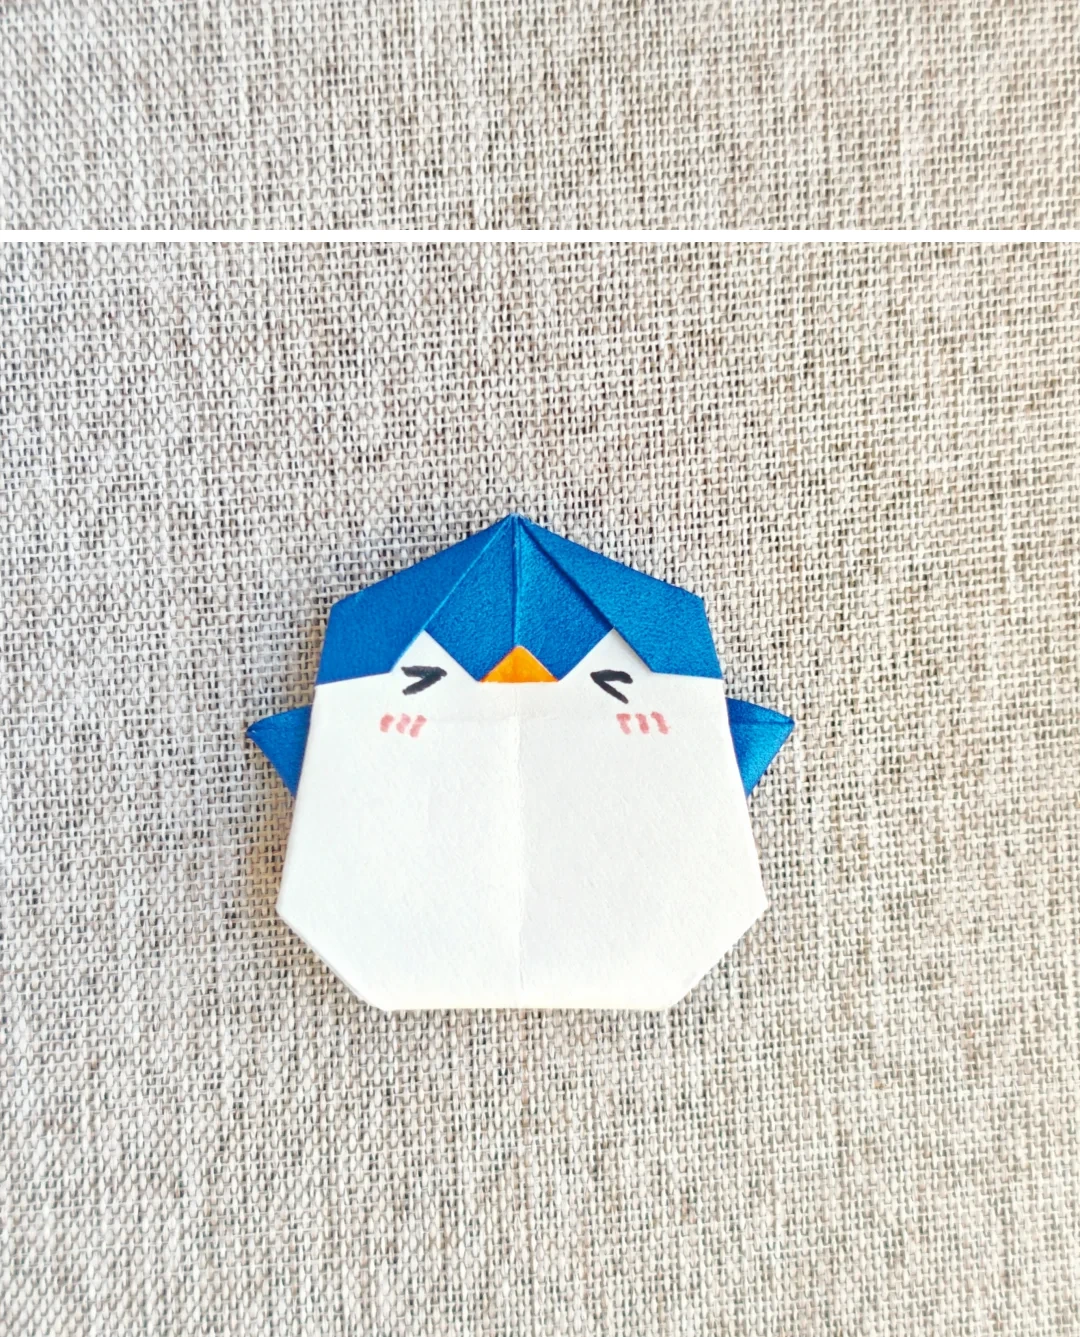 Open image at full size ↗
Add eyes and color the small beak to finish the penguin.
Follow the diagrams alongside the step-by-step English instructions.
Choose your next project →