
Animals · Step-by-step guide
Pleated Paper Butterfly
Fold and trim a butterfly with broad wings and a narrow central body.
What you’ll need
- One square of paper
- Scissors
Paper folding · Trimming, pleats & shaping
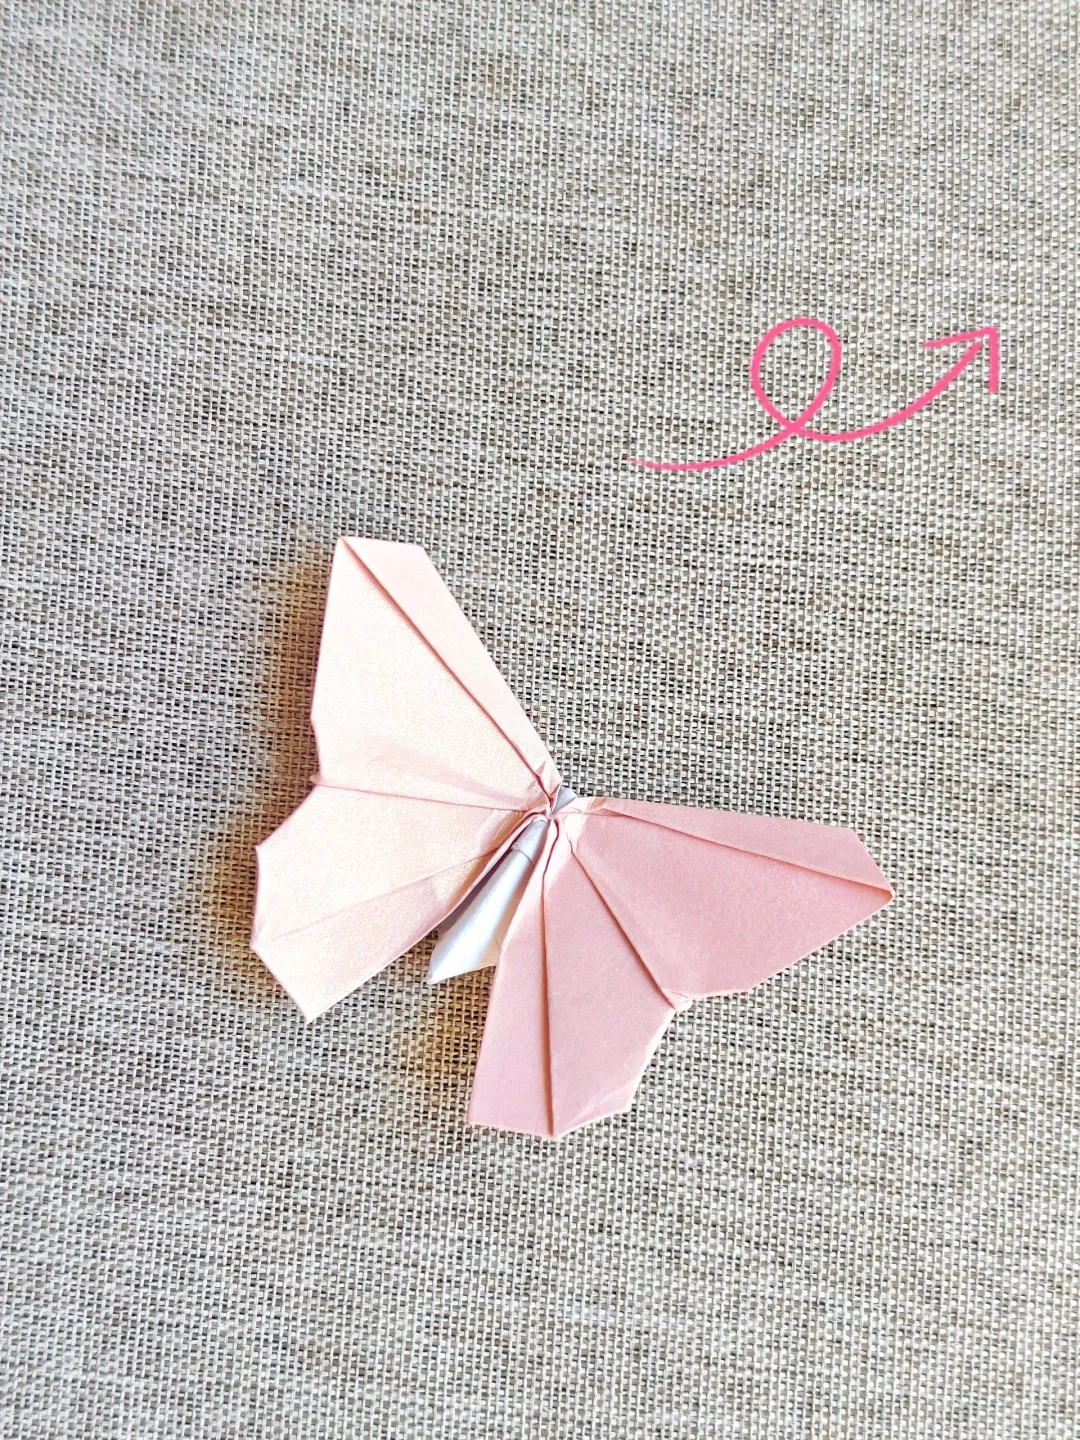
Make it, step by step.
9 steps · Original diagrams with English instructions
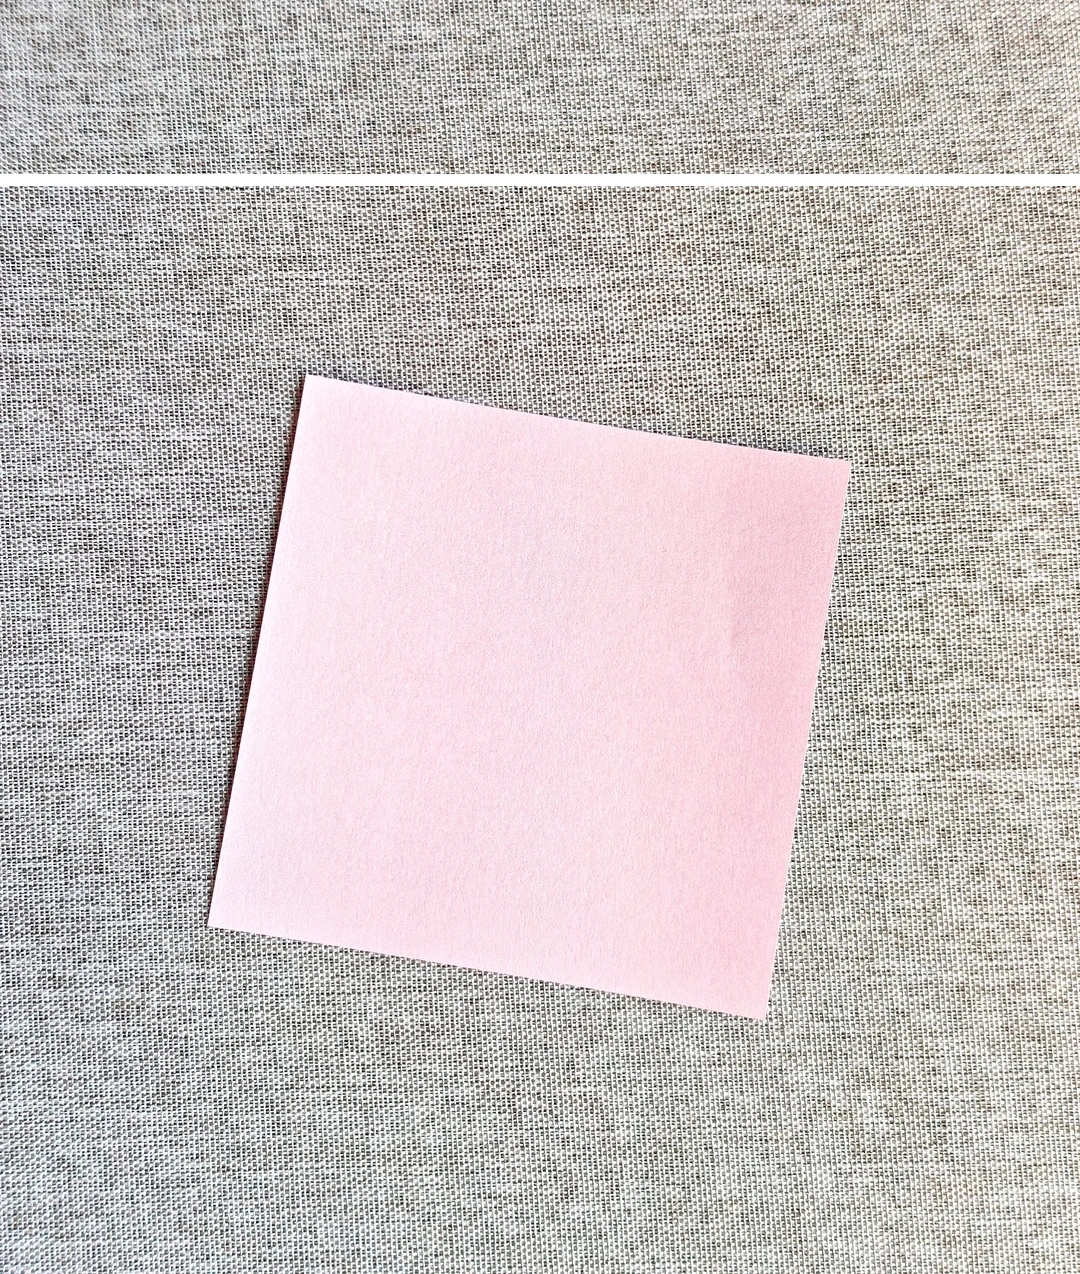
Prepare the square
 Open image at full size ↗
Use one thin square; a two-color sheet makes the folds easy to follow.
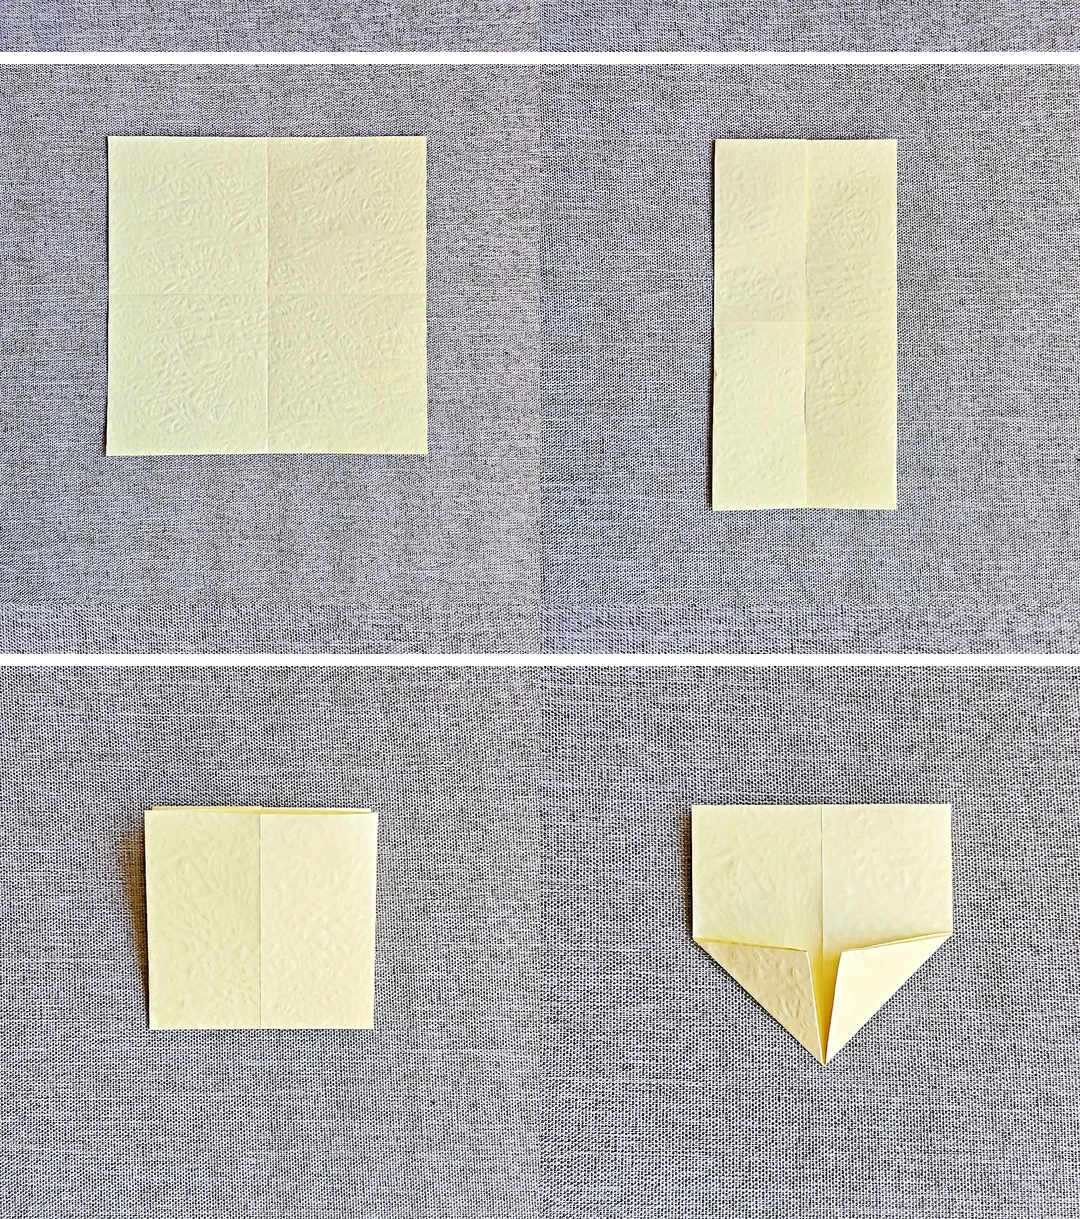
Fold the base
 Open image at full size ↗
Crease both midlines, fold the side edges to the center, fold the lower half up and make the corner folds shown.
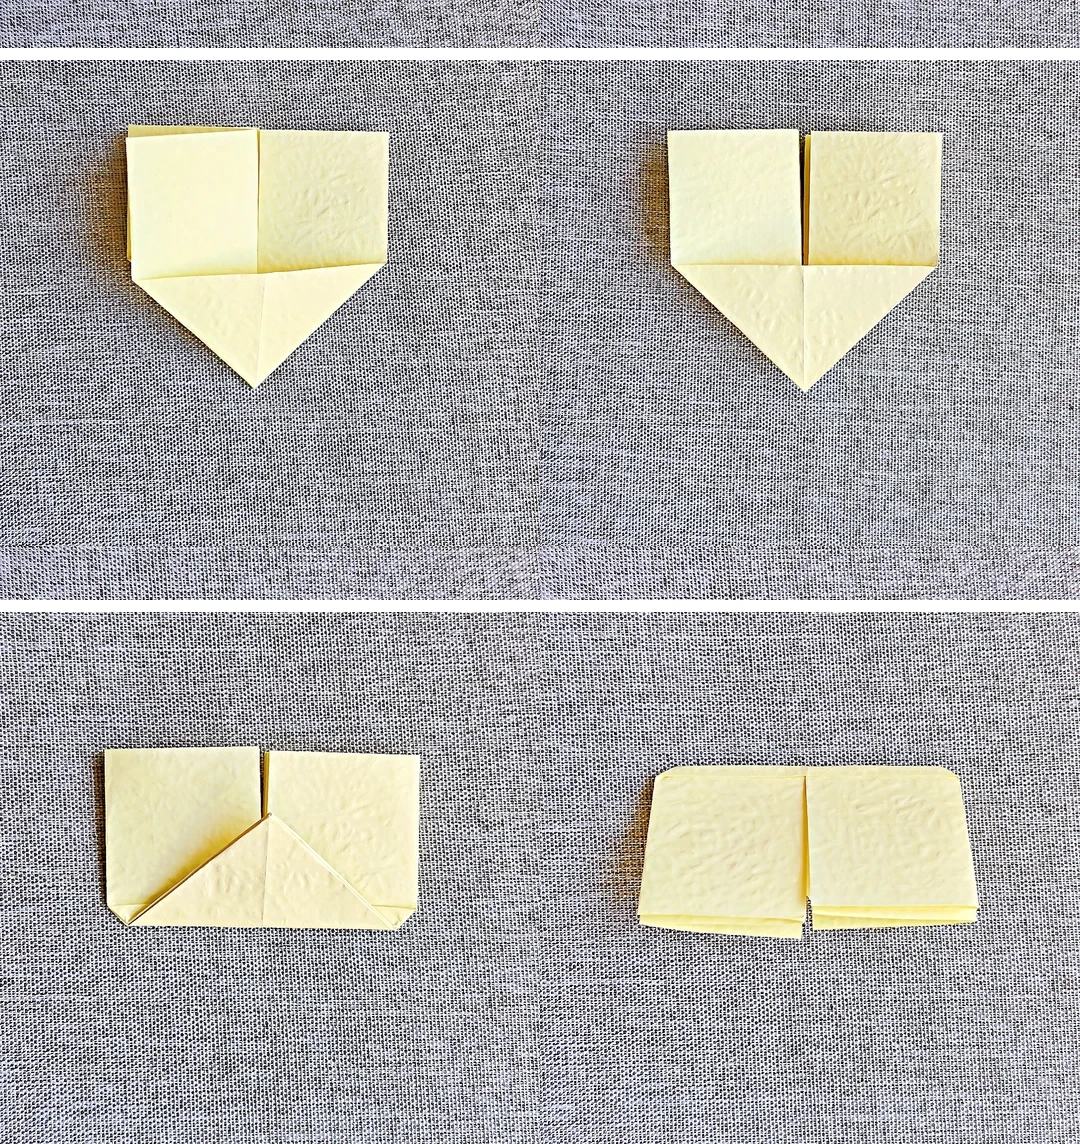
Open the side pockets
 Open image at full size ↗
Open each side along its creases. Fold upward, then turn over with the opening down.
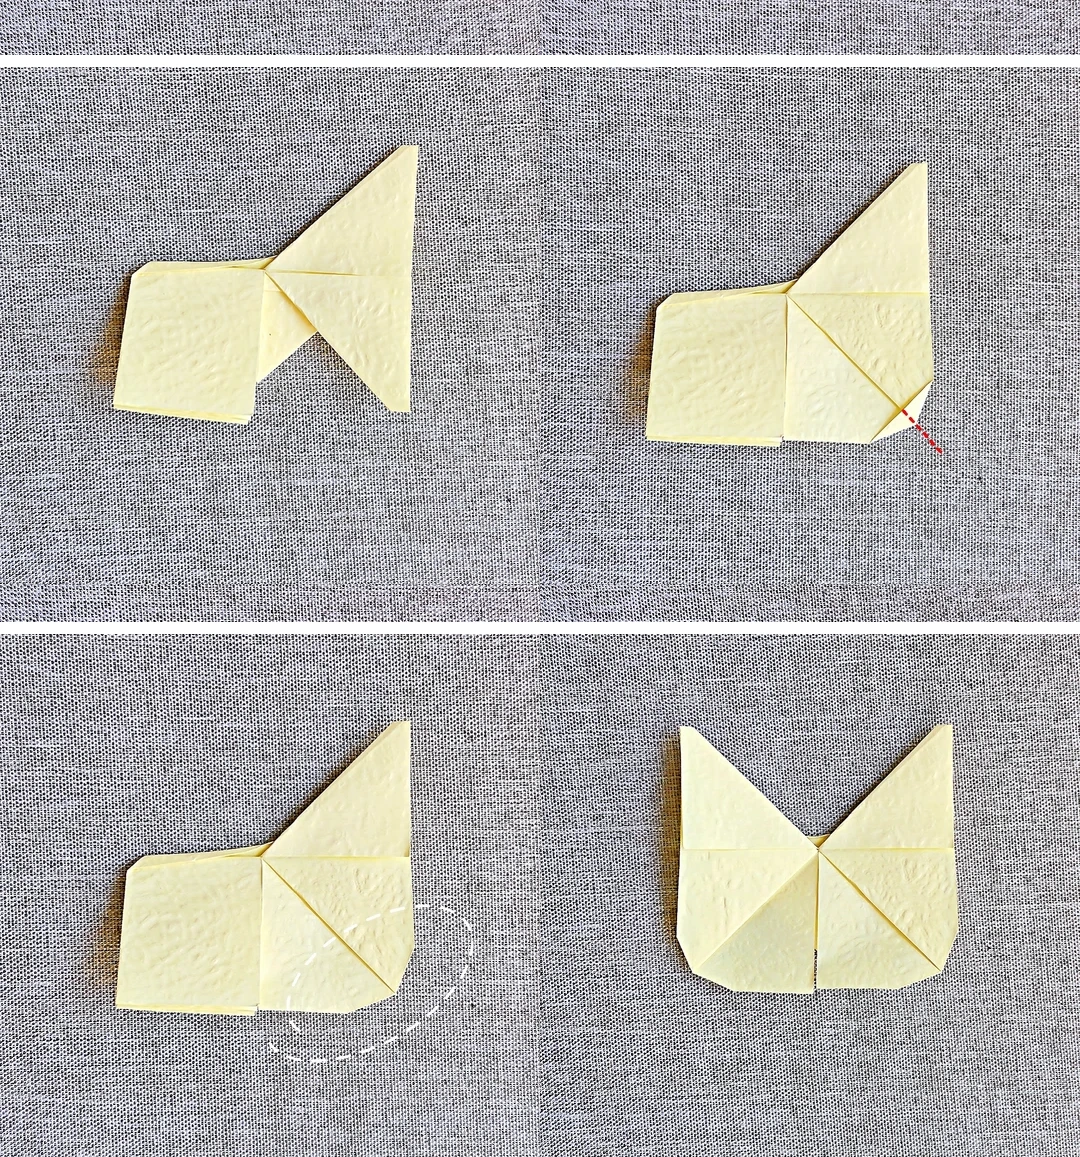
Trim the lower corners
 Open image at full size ↗
Fold the right section, open the lower part and fold the corner up. Cut along the dashed line, refold behind and repeat on the left.
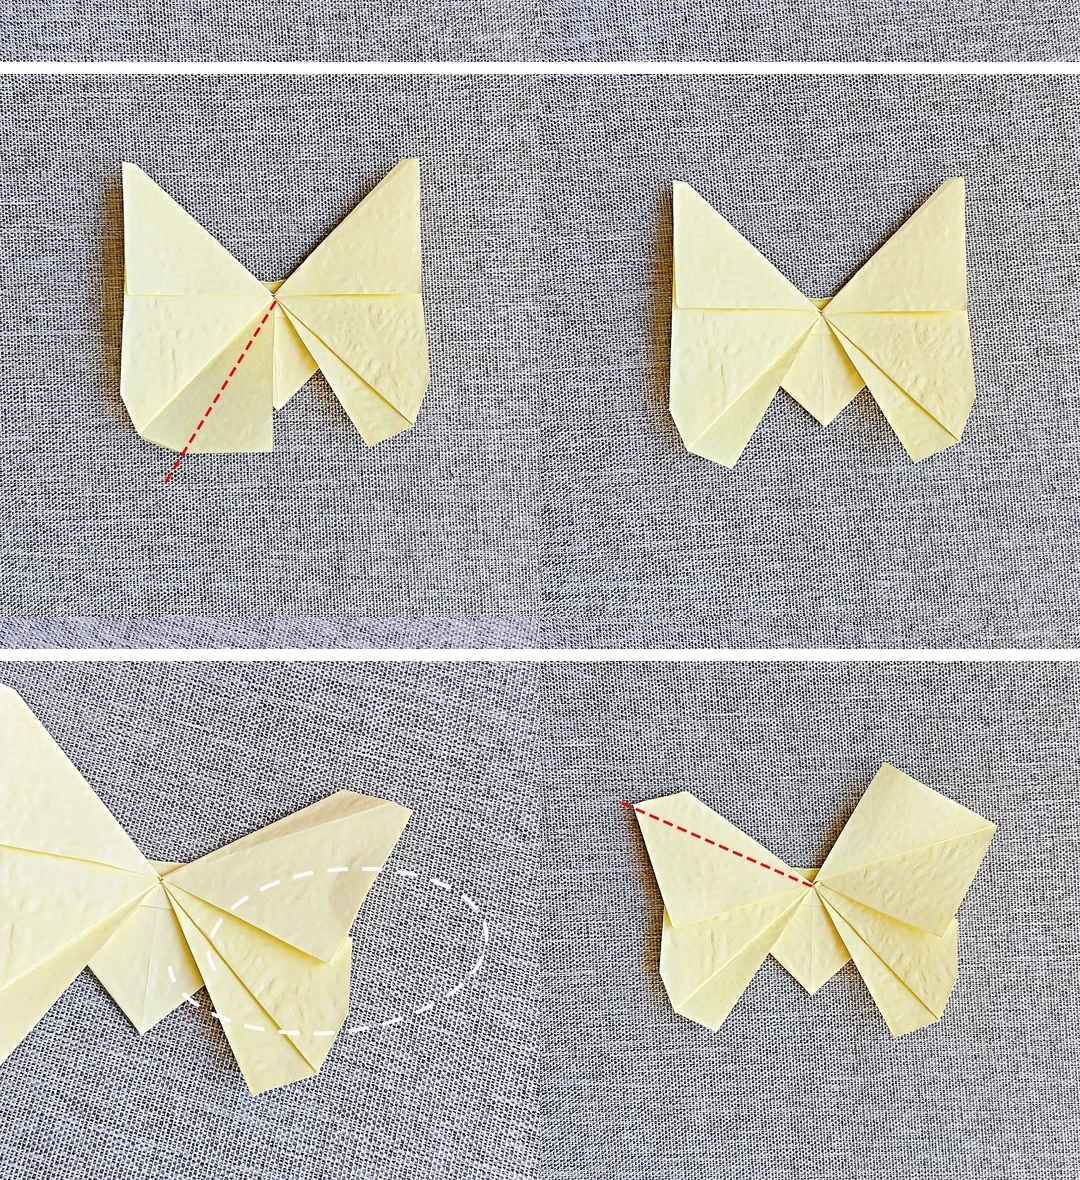
Pleat the wing bases
 Open image at full size ↗
Fold backward along the dashed lines on both sides. Pinch the center, fold the model slightly down and lift the indicated edge.
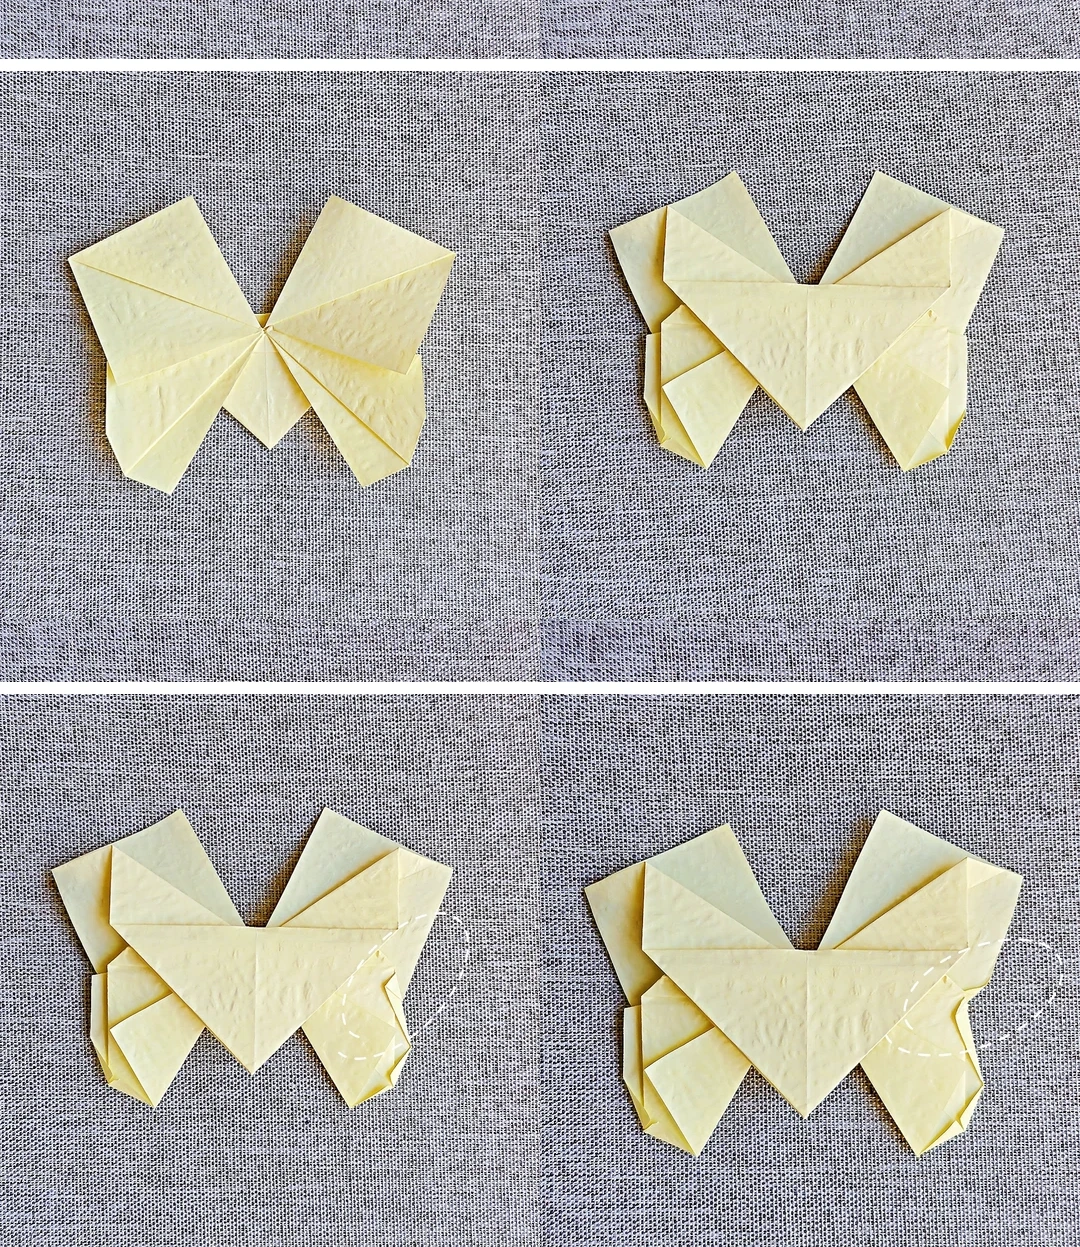
Refine the wings
 Open image at full size ↗
Repeat on the other side and turn over. Fold the small corners and lift the upper-right section slightly.
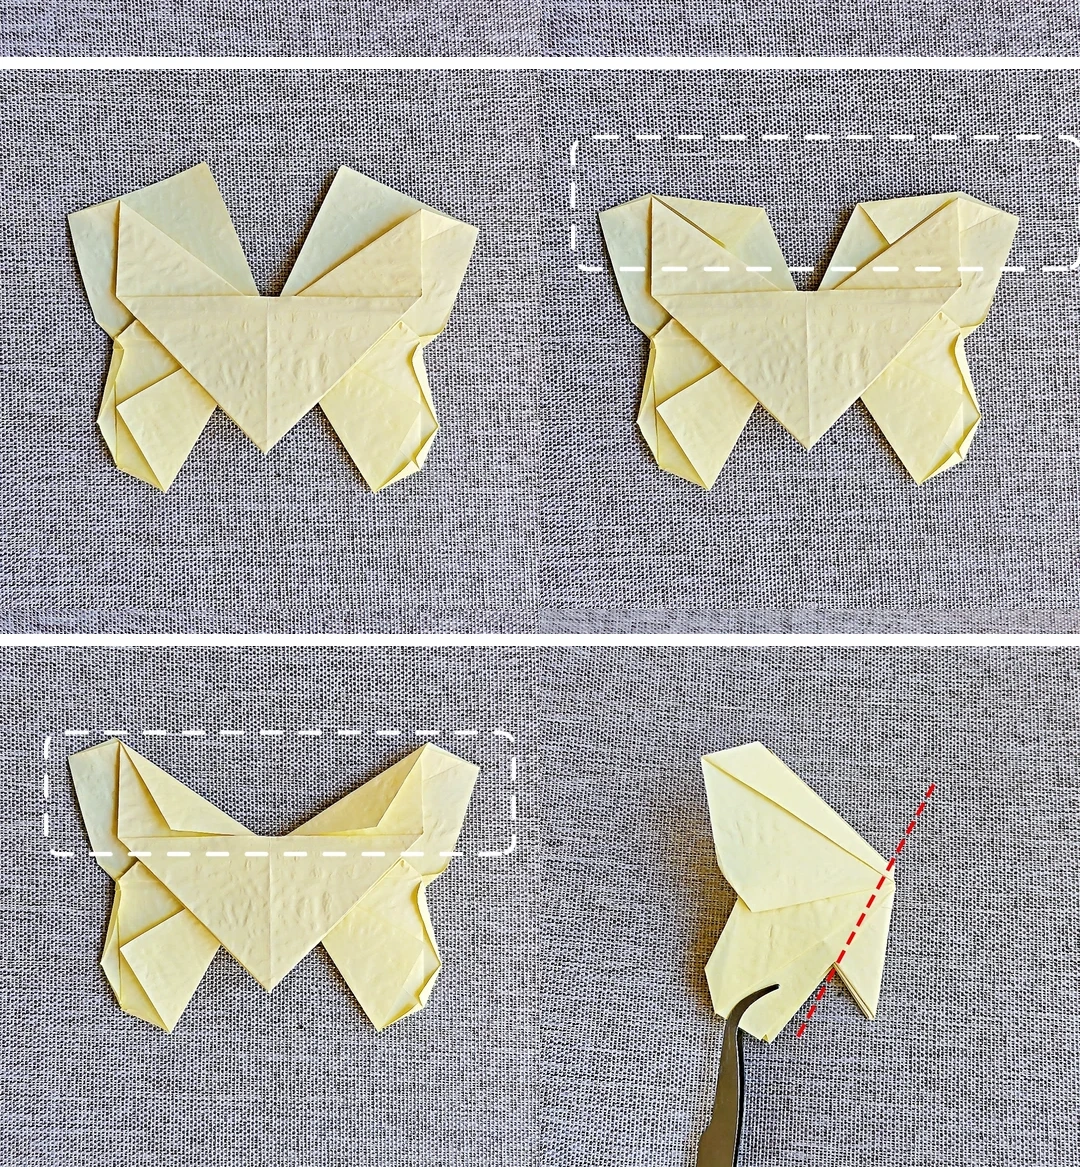
Fold the upper band
 Open image at full size ↗
Repeat on the left. Fold the top downward twice, fold the model sideways and make the return fold along the dashed line.
Shape both sides
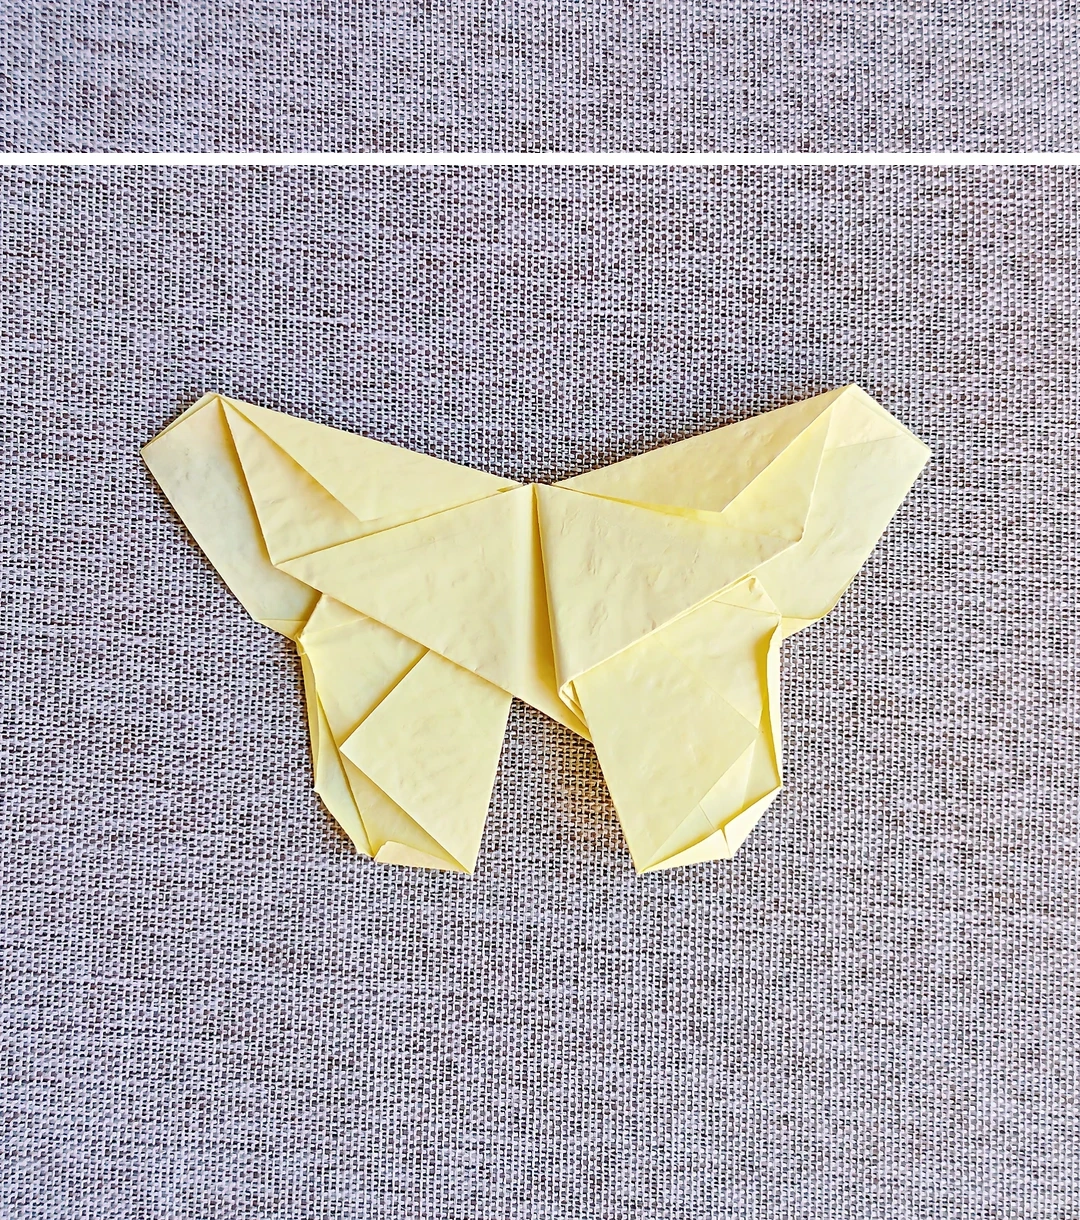 Open image at full size ↗
Make the pictured wing fold and repeat on the opposite side.
Spread the wings
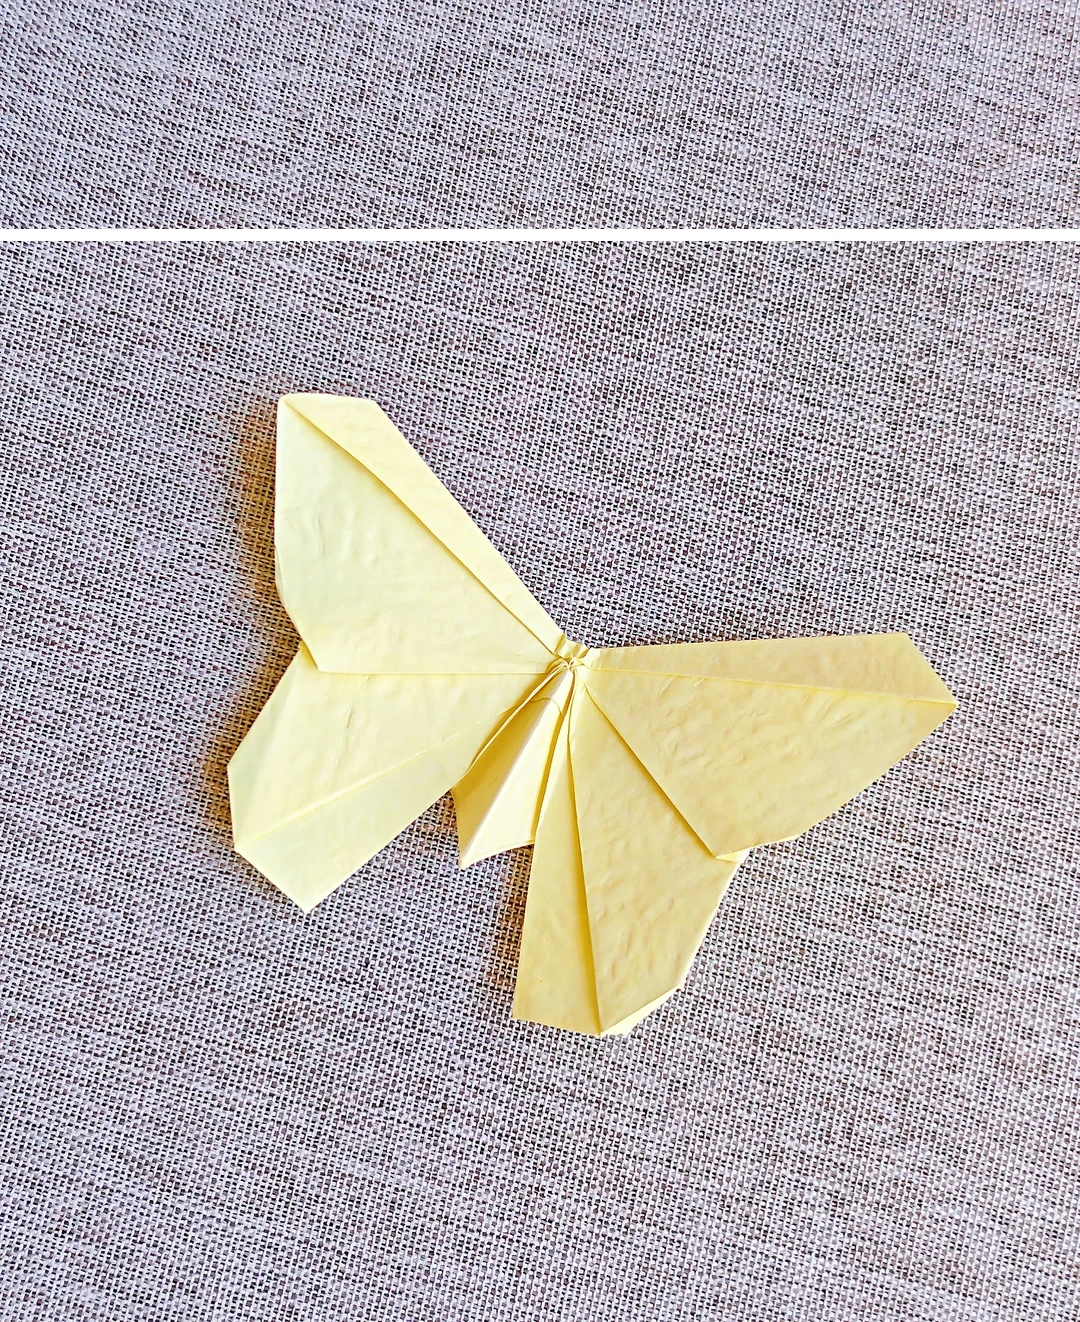 Open image at full size ↗
Open the wings and pinch the narrow center to hold the butterfly's shape.
Follow the diagrams alongside the step-by-step English instructions.
Choose your next project →