
Paper toys · Step-by-step guide
Paper Toy Rifle
Make a black-and-orange paper toy with rolled tubes, folded shapes and glued details. Follow the illustrated guide to build the model, one piece at a time.
What you’ll need
- Black A4 paper
- Orange A4 paper
- Glue
- Scissors
Paper craft · Rolling, folding, cutting & gluing
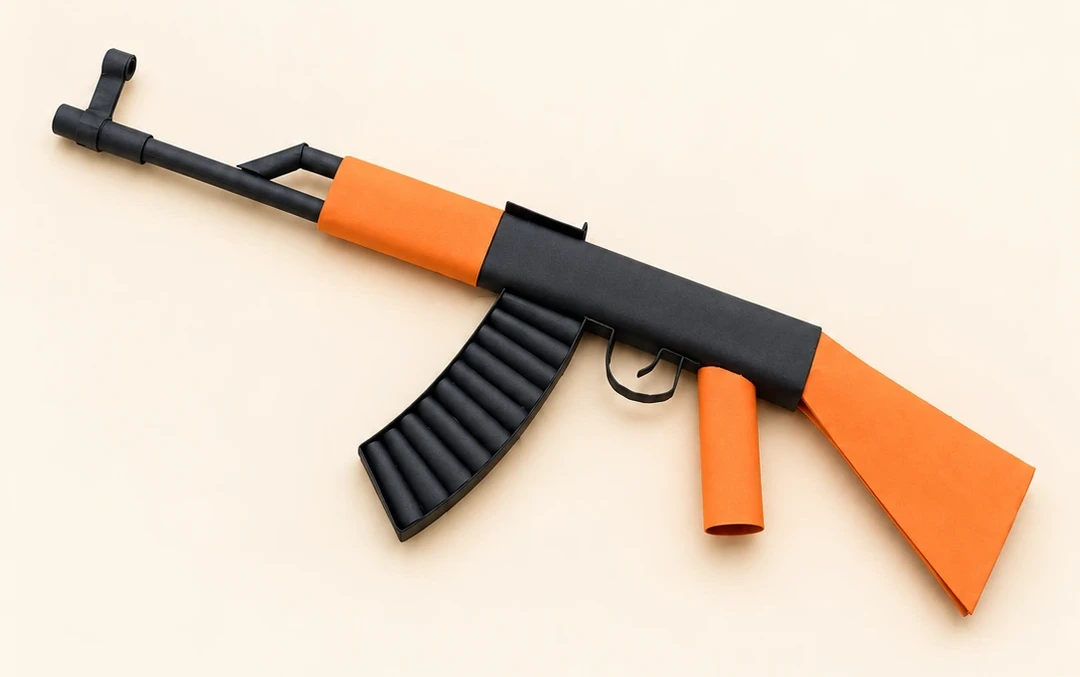
Make it, step by step.
28 steps · Original diagrams with English instructions
Roll the paper tubes
 Open image at full size ↗
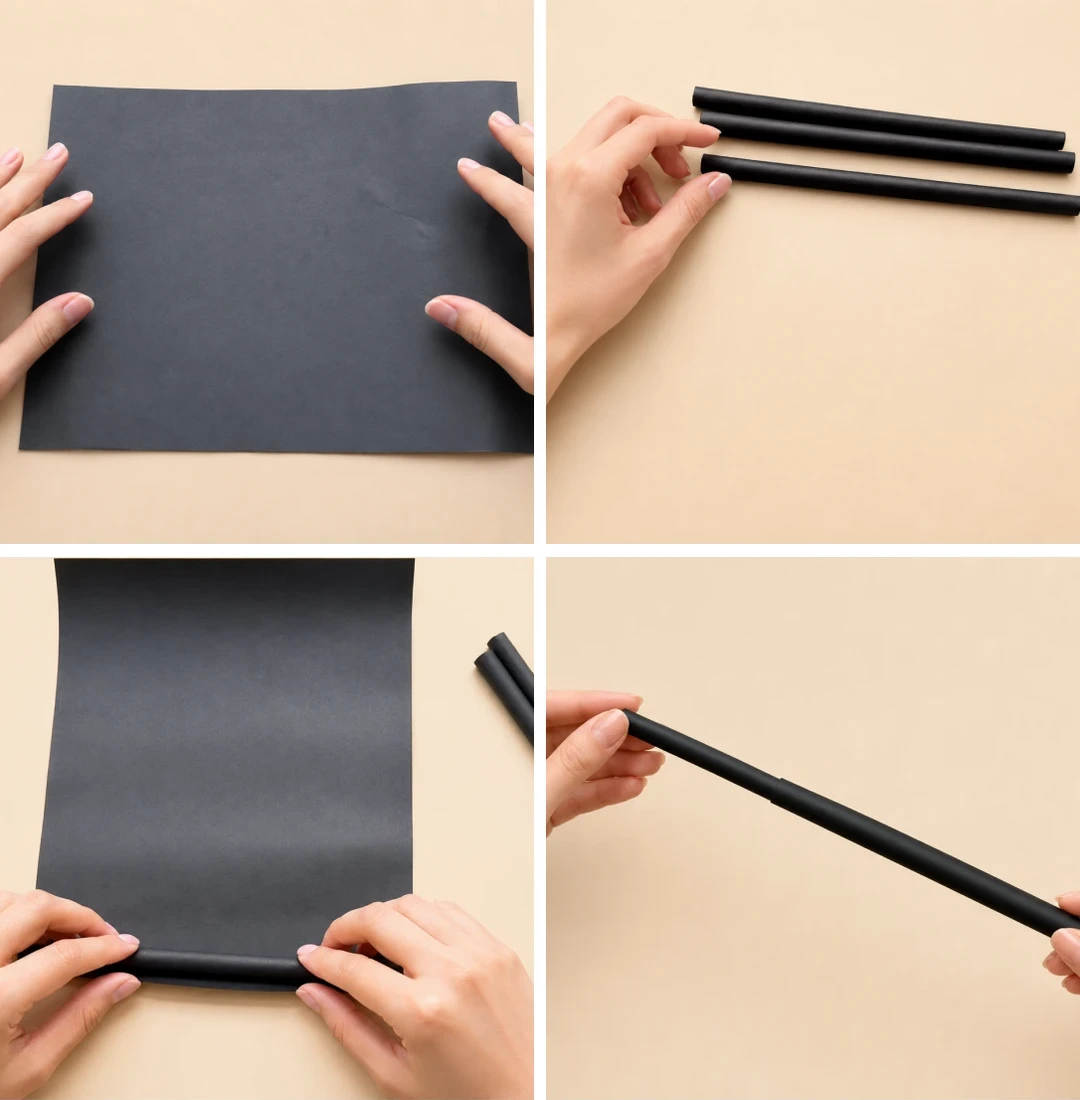
Prepare three sheets of black A4 paper.
Roll each sheet into a long paper tube to make three tubes.
Take another sheet of black A4 paper and roll it around one of the tubes, using that tube as a core.
Roll the paper tightly around the core to form the long tube shown.
Build the main body
 Open image at full size ↗
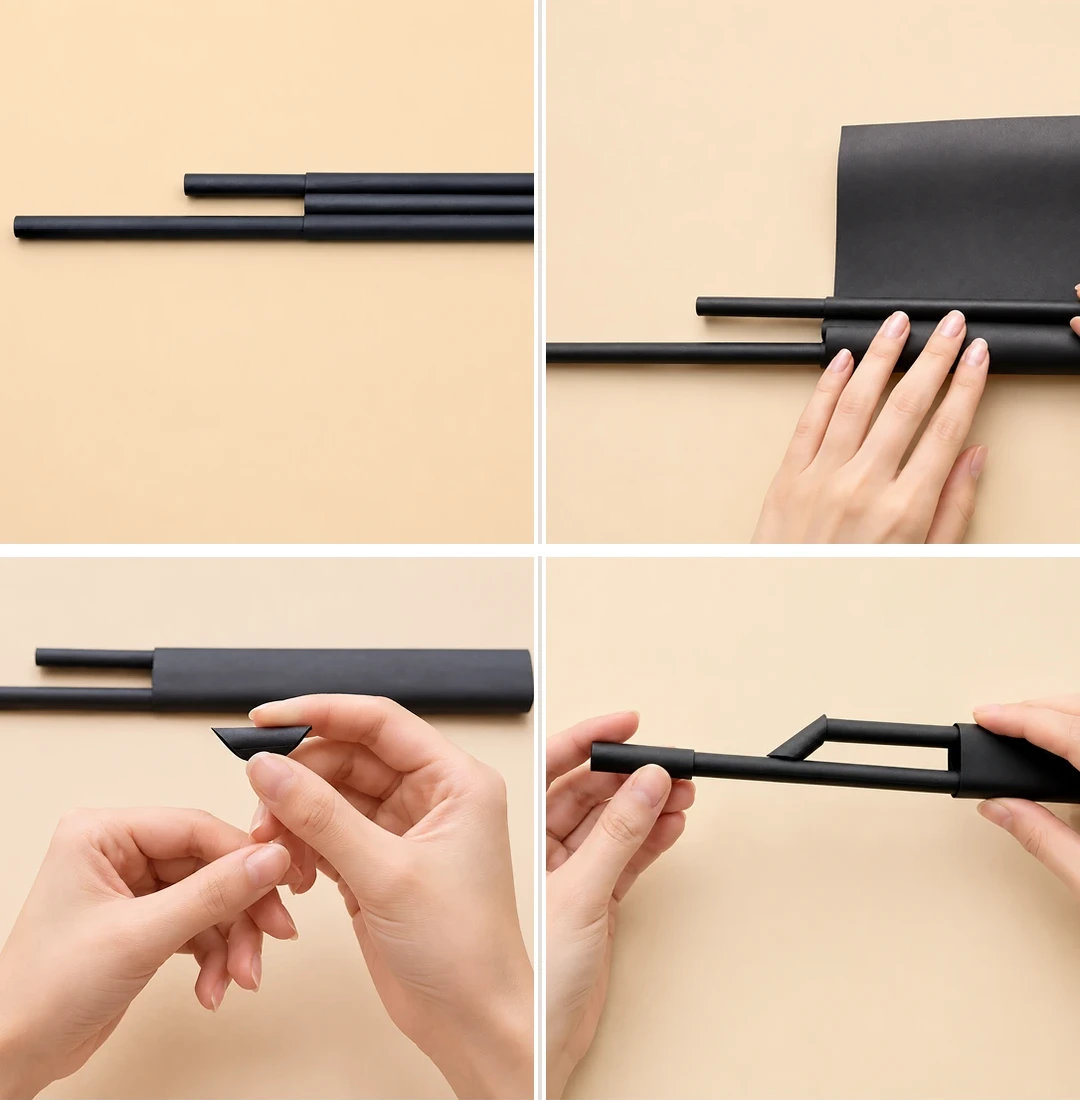
Lay the three tubes parallel to one another in a long–short–long arrangement, as shown.
Use another sheet of black A4 paper to wrap one end of all three tubes together. Glue the wrapper securely in place.
Roll two short paper tubes, each about 3 cm long. Cut one at an angle, as shown.
Slip the uncut short tube over the front end of the longest tube. Glue the angled tube between the two long tubes, as shown.
Make the small details
 Open image at full size ↗
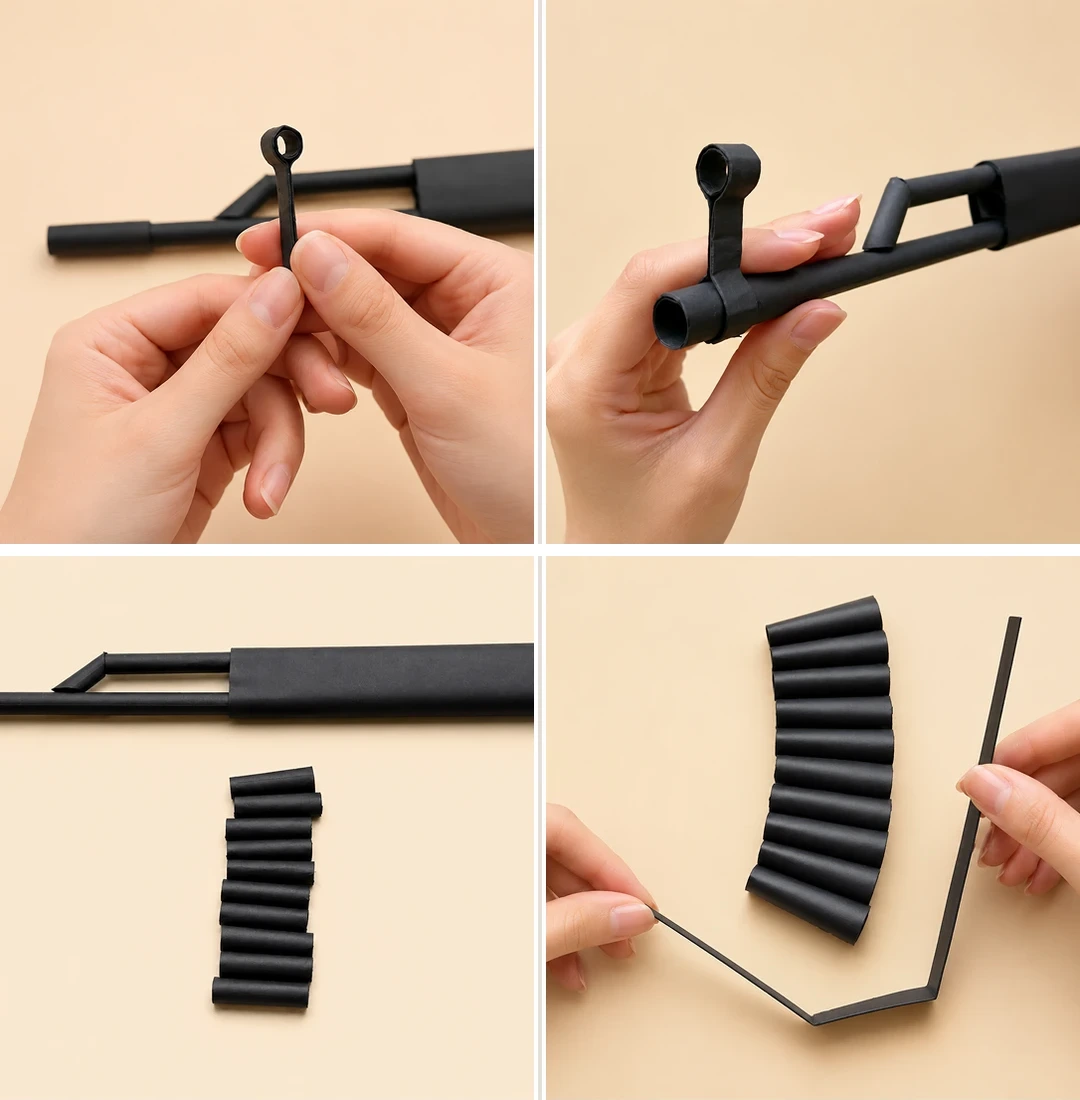
Roll a small paper ring measuring about 1 cm. Fold a long paper strip about 1 cm wide, then glue the ring and strip together.
Glue the ring assembly to the front end of the longest paper tube.
Roll ten short paper tubes and flatten both ends slightly.
Arrange the tubes with staggered ends to form a curve, as shown. Fold another long paper strip about 1 cm wide.
Add the curved panel and grip
 Open image at full size ↗
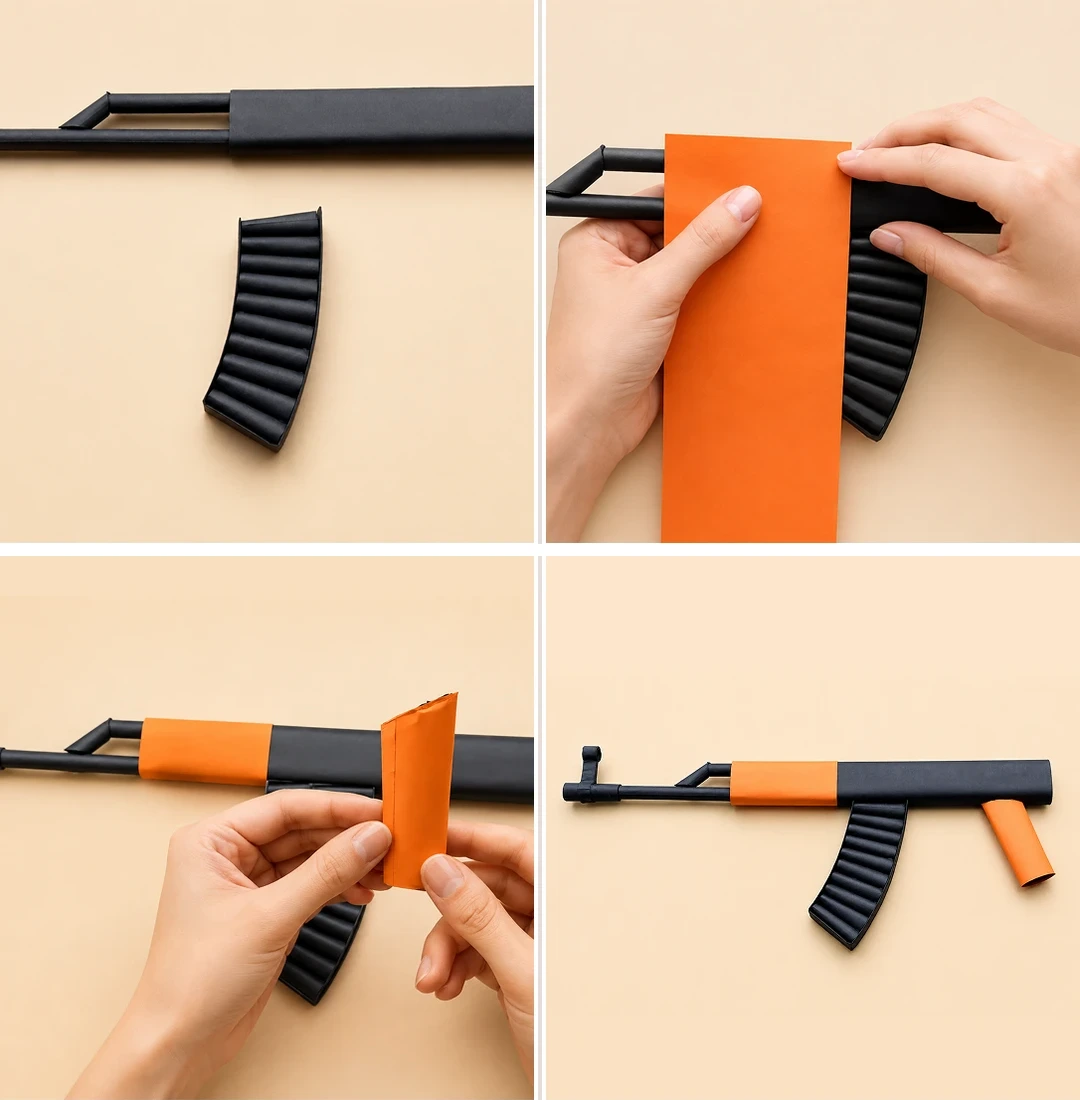
Use the long strip to glue all ten tubes together in sequence, holding the curved arrangement in place.
Wrap half a sheet of orange A4 paper around the front of the main body and glue it in place, as shown.
Roll the other half of the orange sheet into a grip. Cut one end at an angle, as shown.
Glue the grip underneath the main body, as shown.
Add the loop and start the stock
 Open image at full size ↗
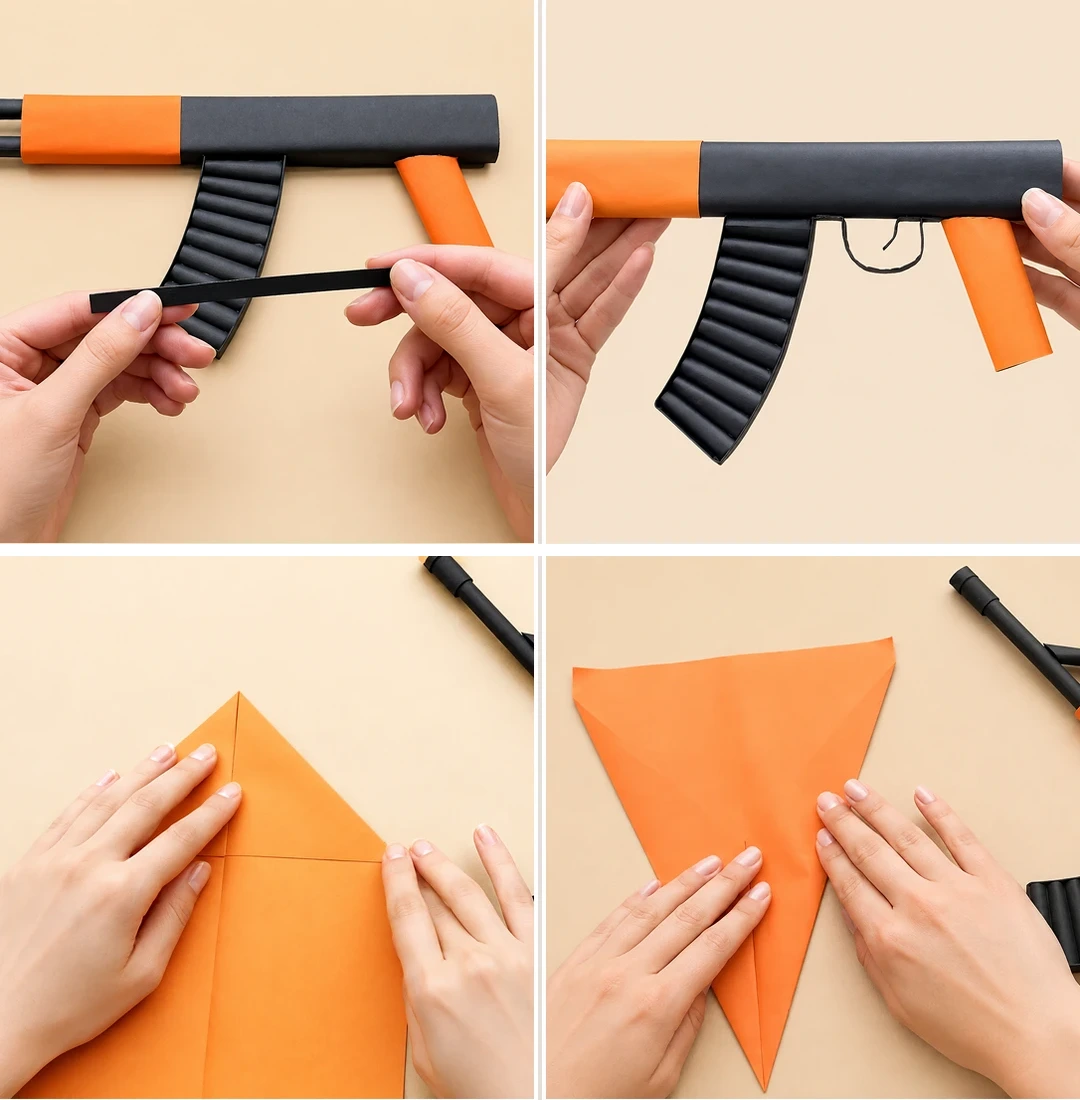
Fold another long strip of black paper about 1 cm wide.
Bend the strip into a U shape and glue it underneath the body, in front of the grip, as shown.
Fold a sheet of orange A4 paper in half along its centerline, then unfold it. Fold both corners at one end toward the center crease.
Fold the whole piece in half again along the centerline.
Shape the stock pieces
 Open image at full size ↗
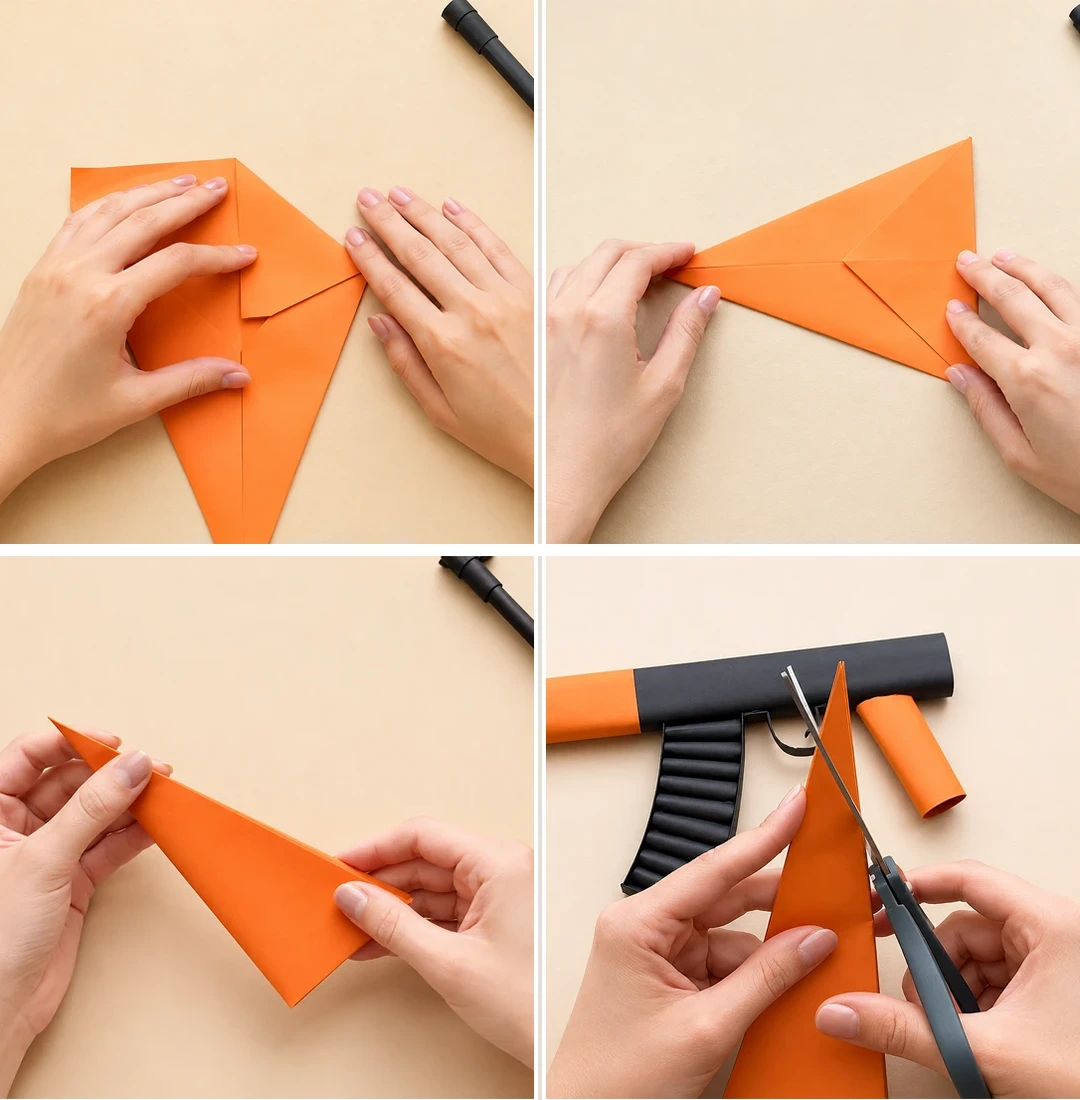
Fold both corners at the other end toward the centerline as well.
Fold the shorter triangular section toward the longer triangular section.
Fold the whole piece in half along the centerline. Repeat the same steps to make a second matching piece.
Stack the two pieces and align their edges. Trim off the excess triangular ends, as shown.
Finish the paper model
 Open image at full size ↗
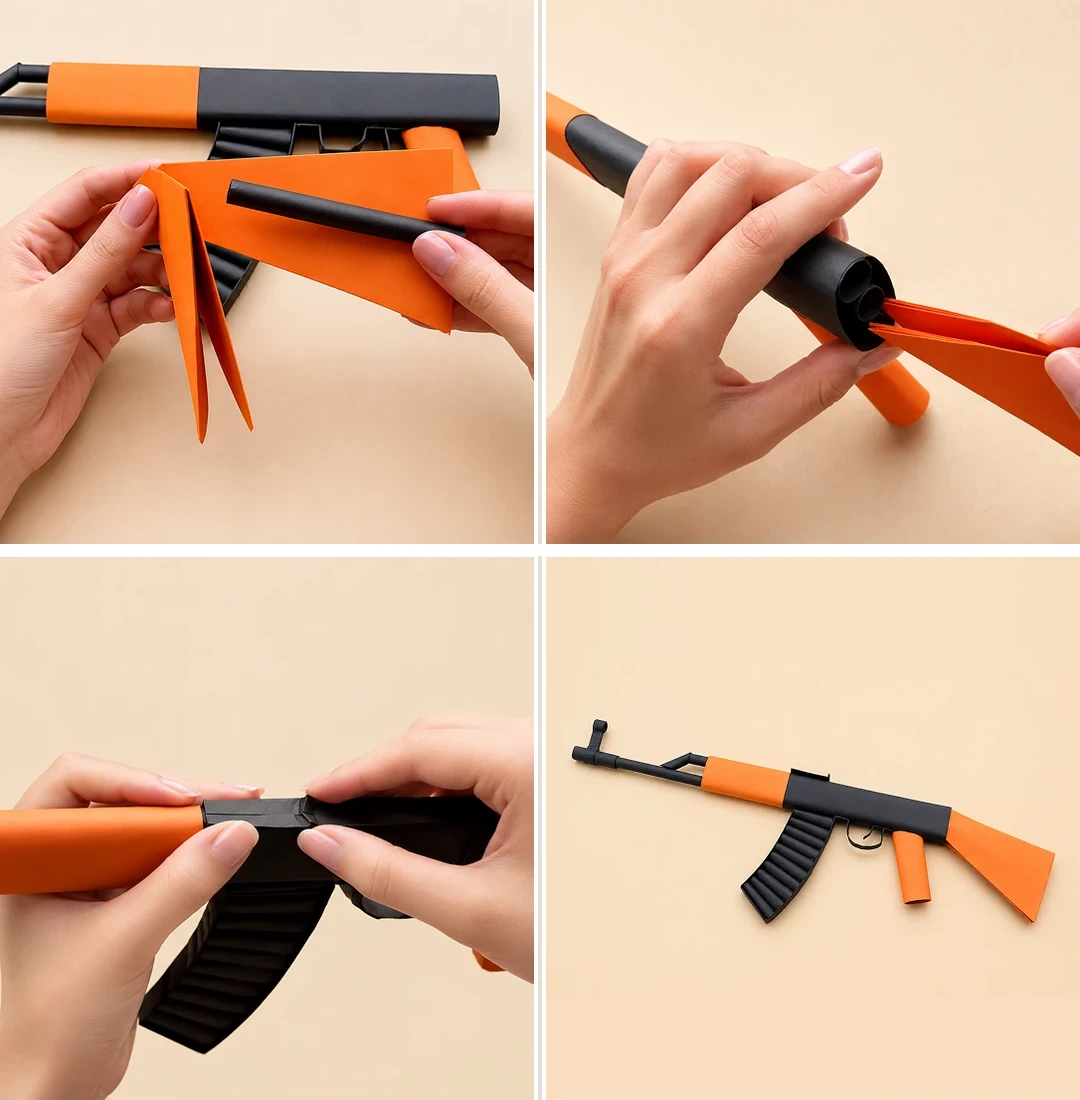
Place a black paper tube between the two folded triangular pieces, then glue the pieces together.
Insert the completed assembly into the back of the main body and secure it.
Fold a strip of black paper about 3 cm long into the shape shown, then glue it to the top of the body.
Your AK-47-style paper toy is complete!
Follow the diagrams alongside the step-by-step English instructions.
Choose your next project →