
Flowers & nature · Step-by-step guide
Paper Persimmon
Fold an orange fruit and a green leafy top, then join them into a little autumn decoration.
What you’ll need
- Orange square paper, 15 × 15 cm
- Green square paper, 7.5 × 7.5 cm
- Glue
Paper folding and shaping
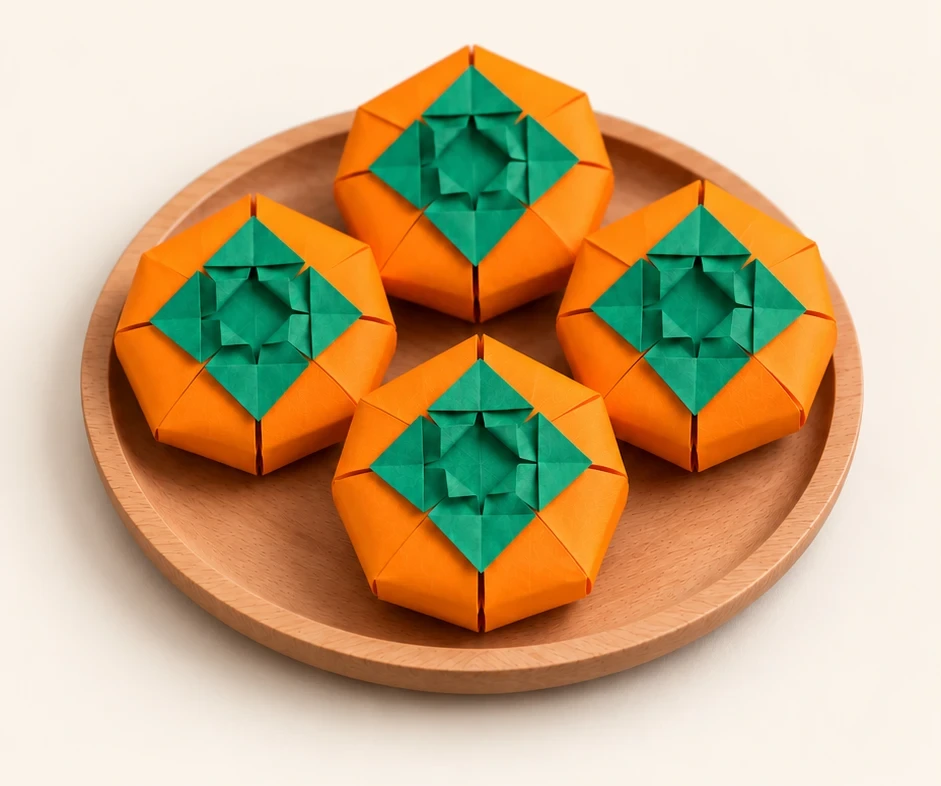
Make it, step by step.
40 steps · Original diagrams with English instructions
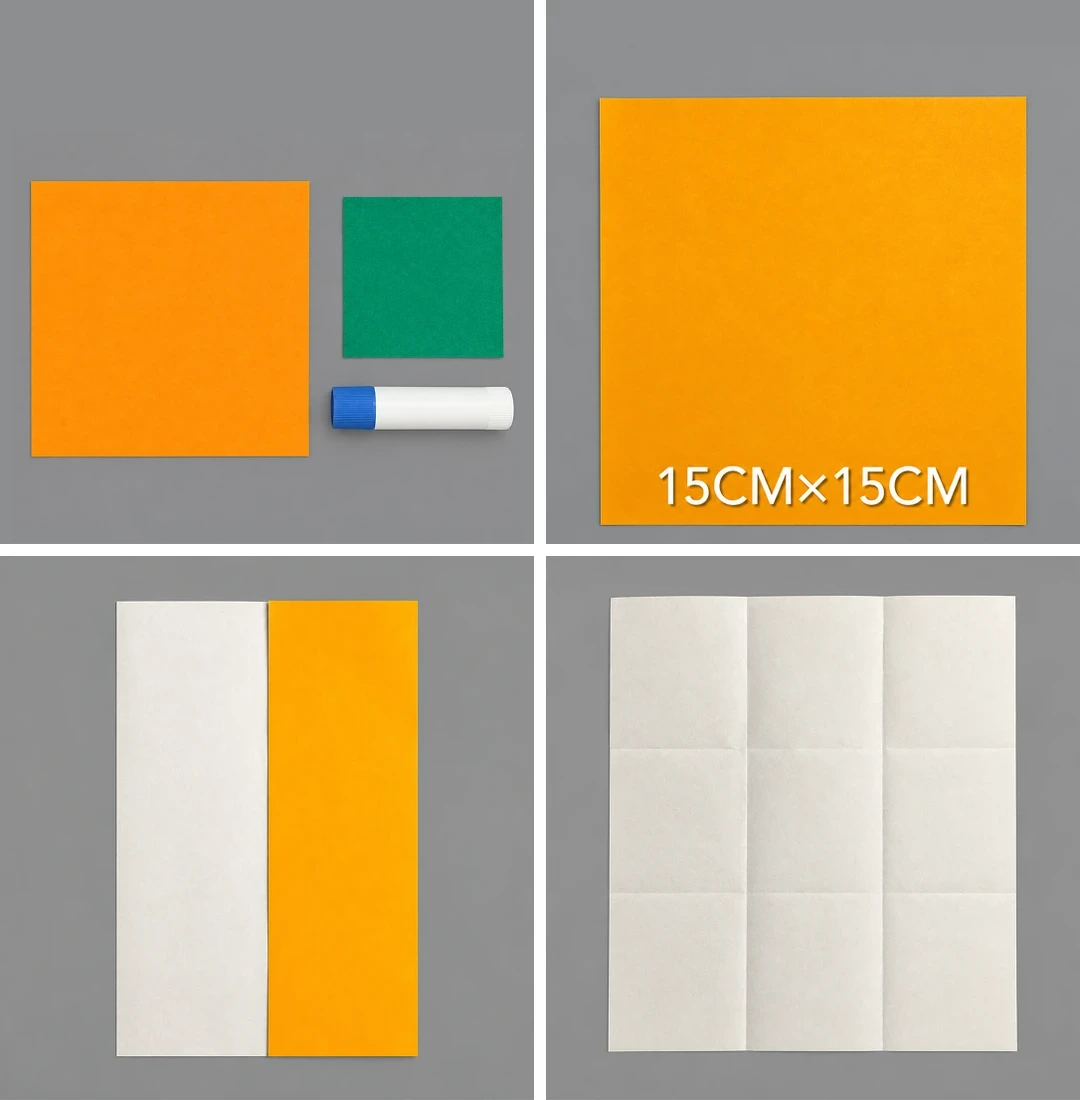
Steps 1–4
 Open image at full size ↗
Prepare the orange 15 × 15 cm square and green 7.5 × 7.5 cm square.
Begin with the orange square.
Divide the sheet into thirds and crease firmly.
Repeat in the other direction.
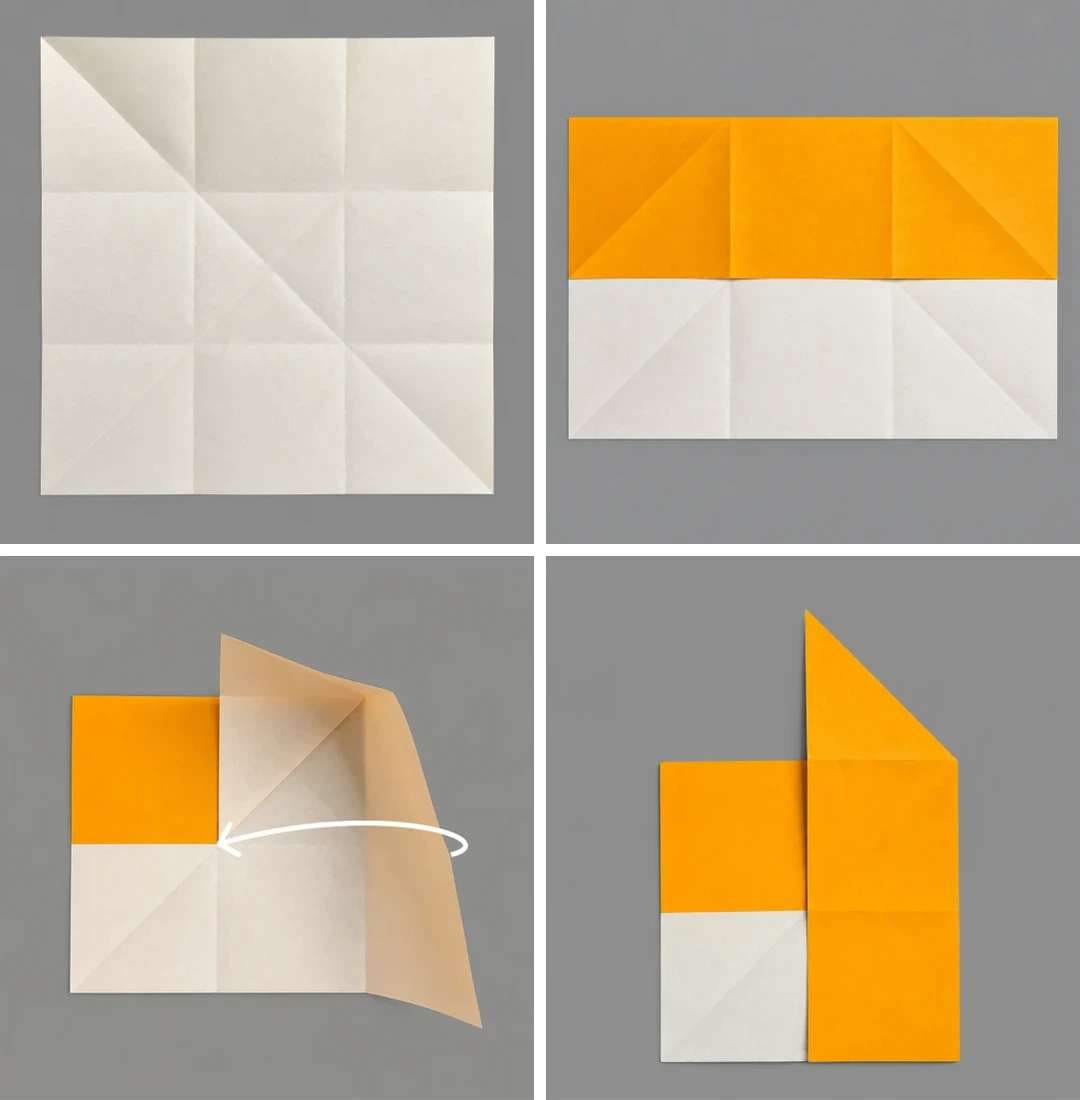
Steps 5–8
 Open image at full size ↗
Fold and unfold both diagonals.
Fold the upper edge to the horizontal centerline.
Open the right flap and spread the upper-right corner.
Flatten that pocket downward.
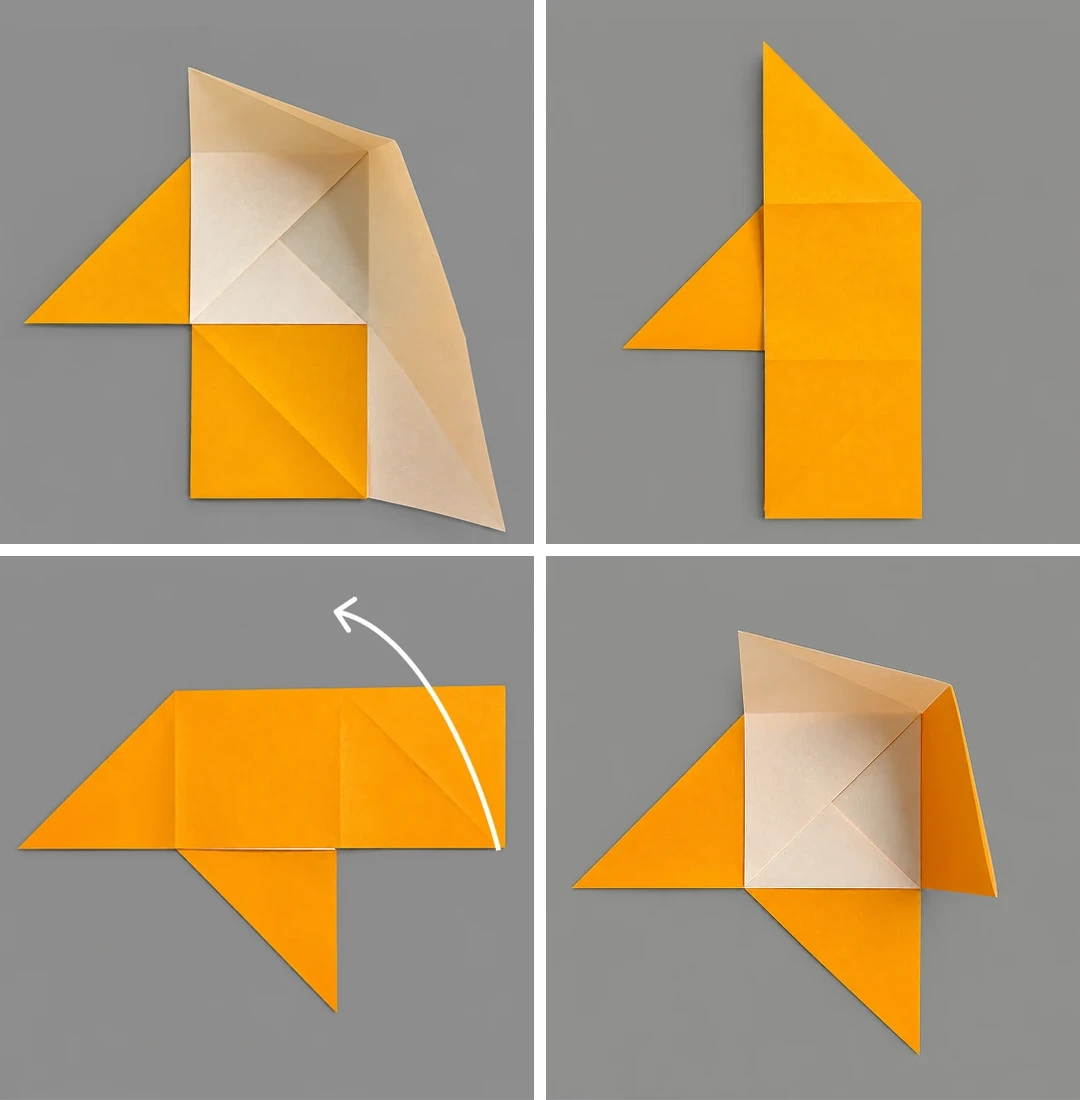
Steps 9–12
 Open image at full size ↗
Rotate 90° counterclockwise; open the right flap and spread its upper-right corner.
Flatten the pocket downward.
Rotate 90° counterclockwise again and lift the lower-right corner.
Spread the pocket at the right-hand turn.
Steps 13–16
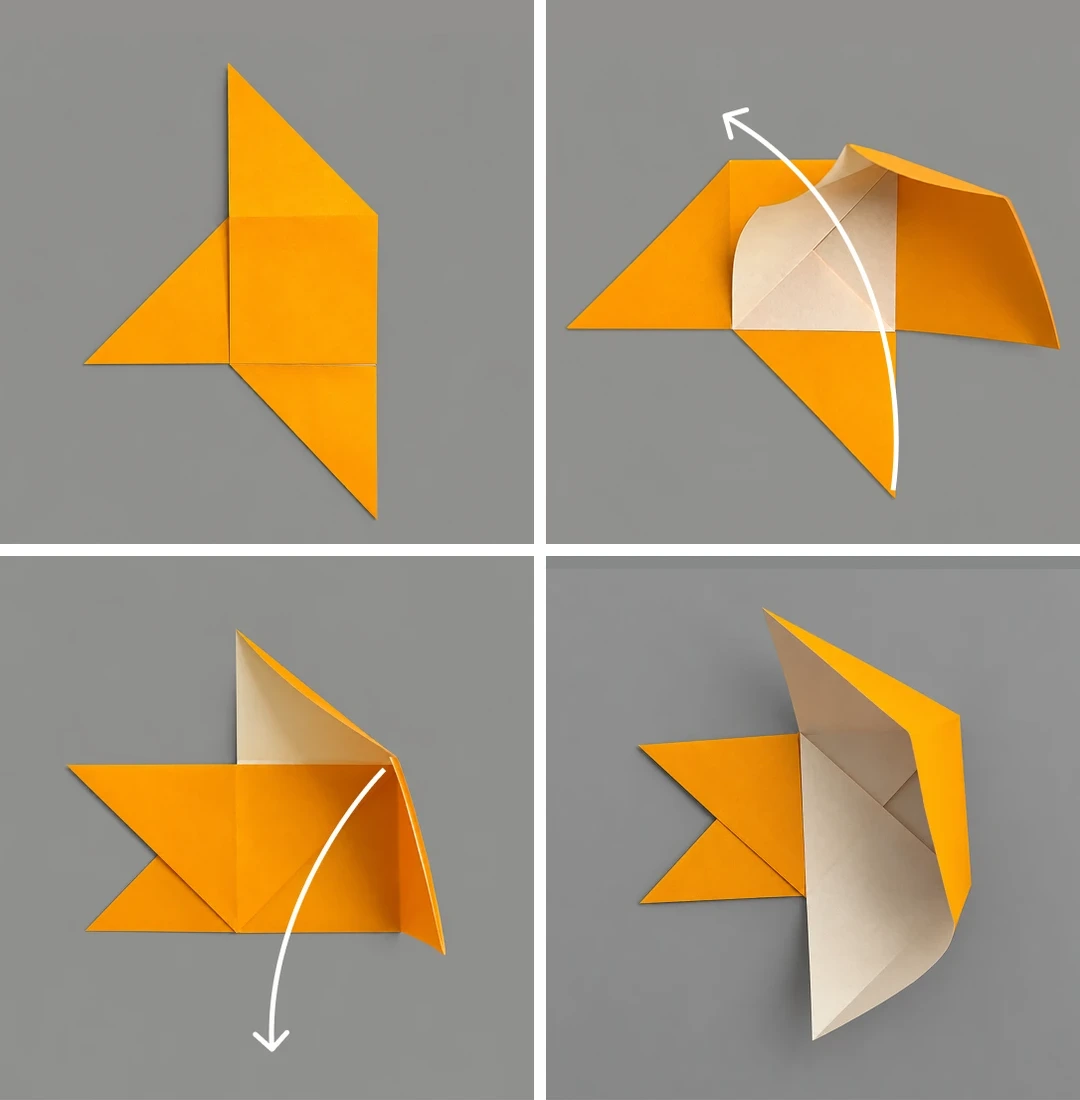 Open image at full size ↗
Flatten the pocket downward.
Lift the upper layer toward the upper left, bringing the lower-right corner across the left triangle.
Swing the opened top flap downward in the arrow’s direction.
Flatten it downward.
Steps 17–20
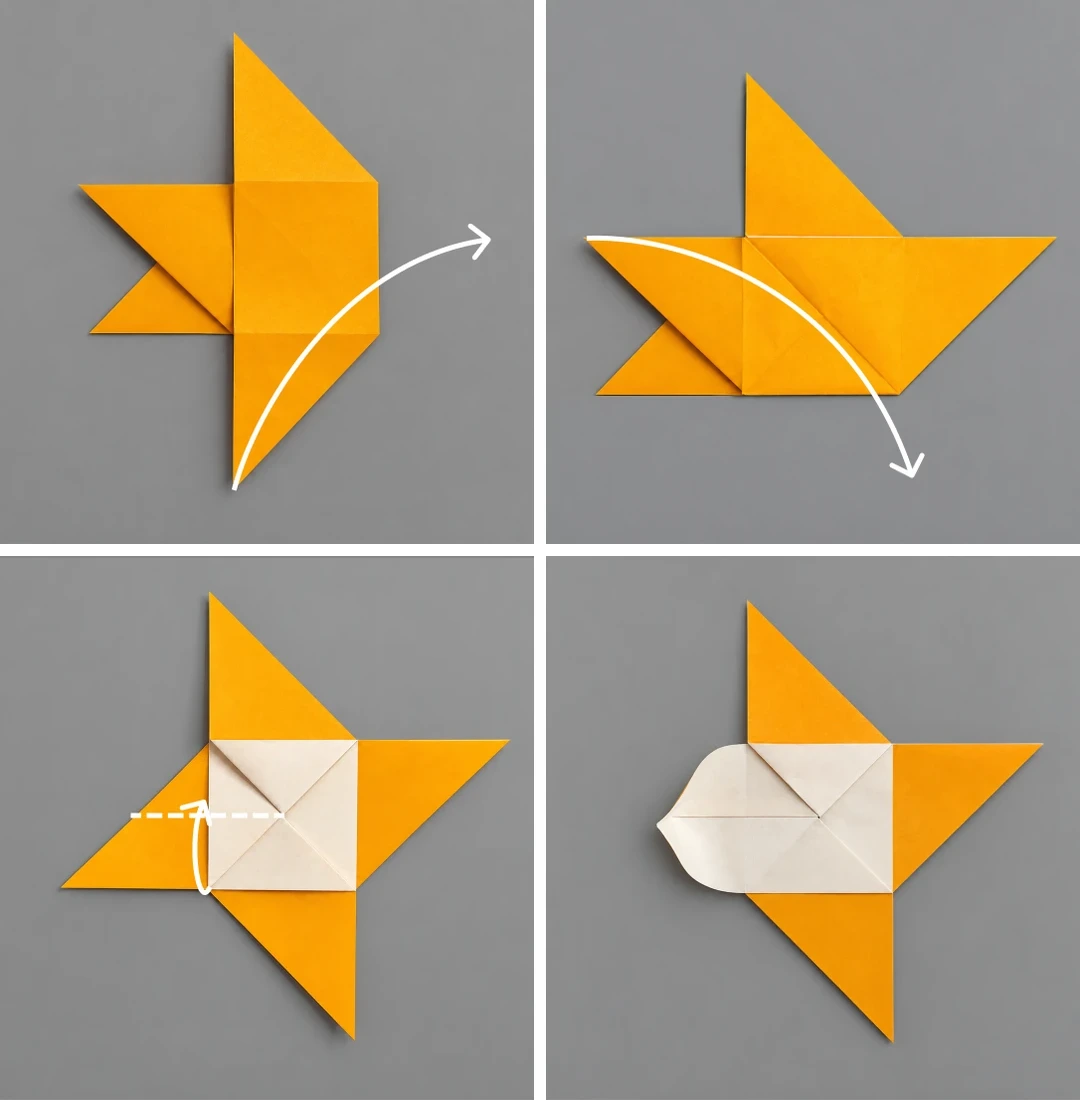 Open image at full size ↗
Swing the lower-right triangle to the right along the arrow.
Swing the left triangle diagonally down to the right.
Fold the left triangle upward along the dotted line.
Repeat on the other three corners.
Steps 21–24
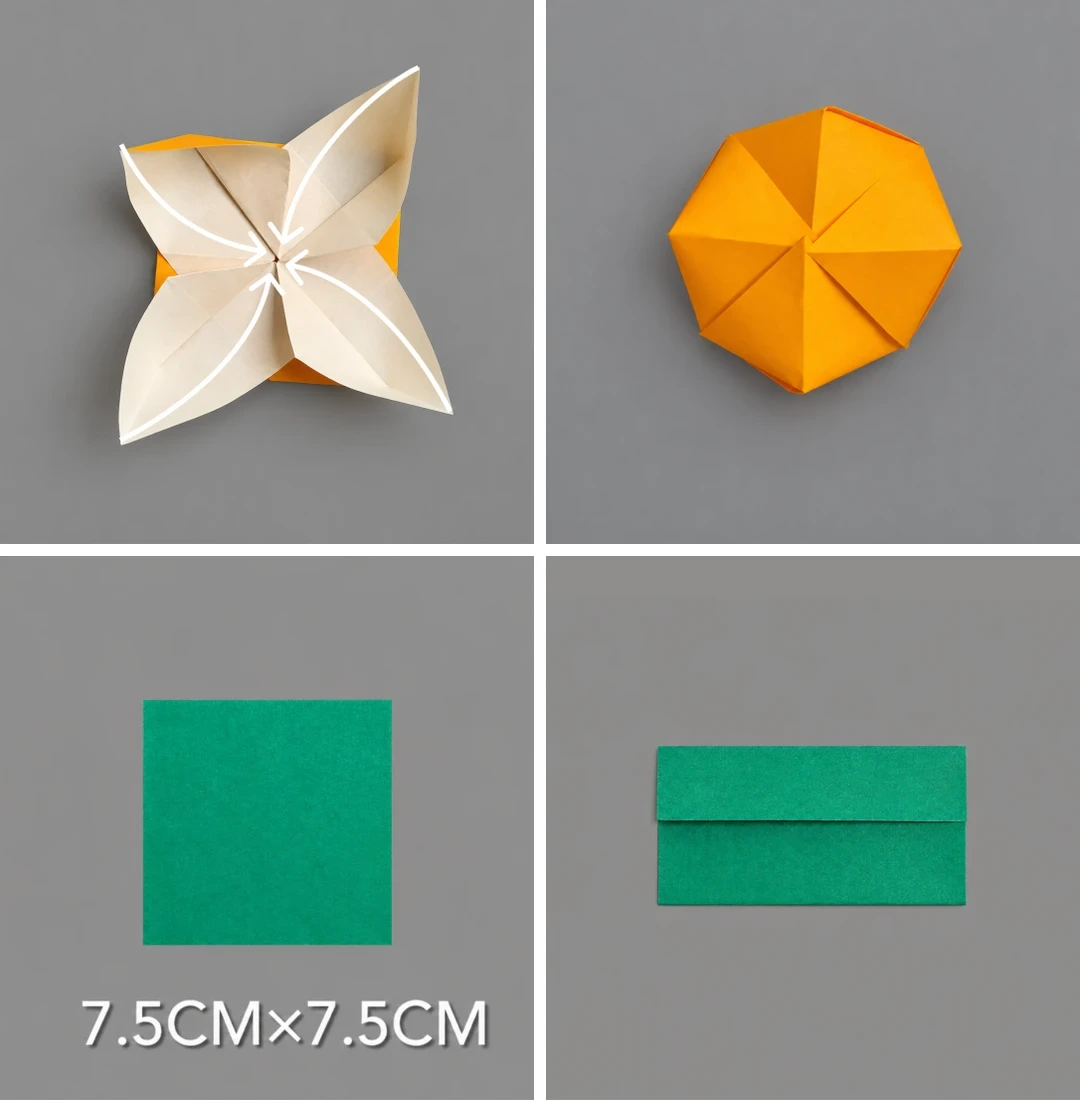 Open image at full size ↗
Bring the four opened petals toward the center.
Close them into the rounded fruit shape shown.
Take the green 7.5 × 7.5 cm square.
Fold in half horizontally and unfold.
Steps 25–28
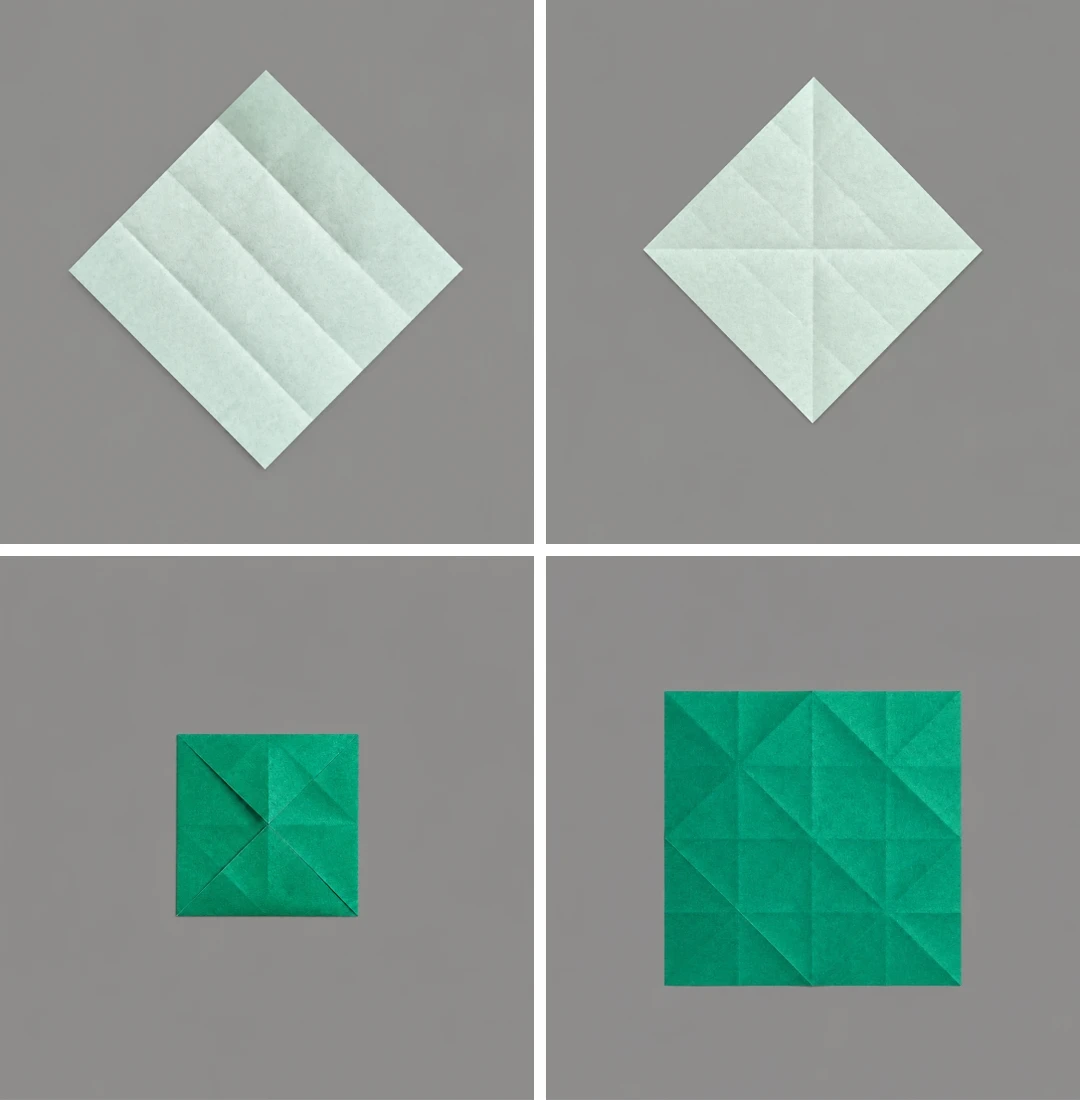 Open image at full size ↗
Fold again to mark quarters.
Crease both diagonals.
Fold all four corners to the center.
Open the paper back into a square.
Steps 29–32
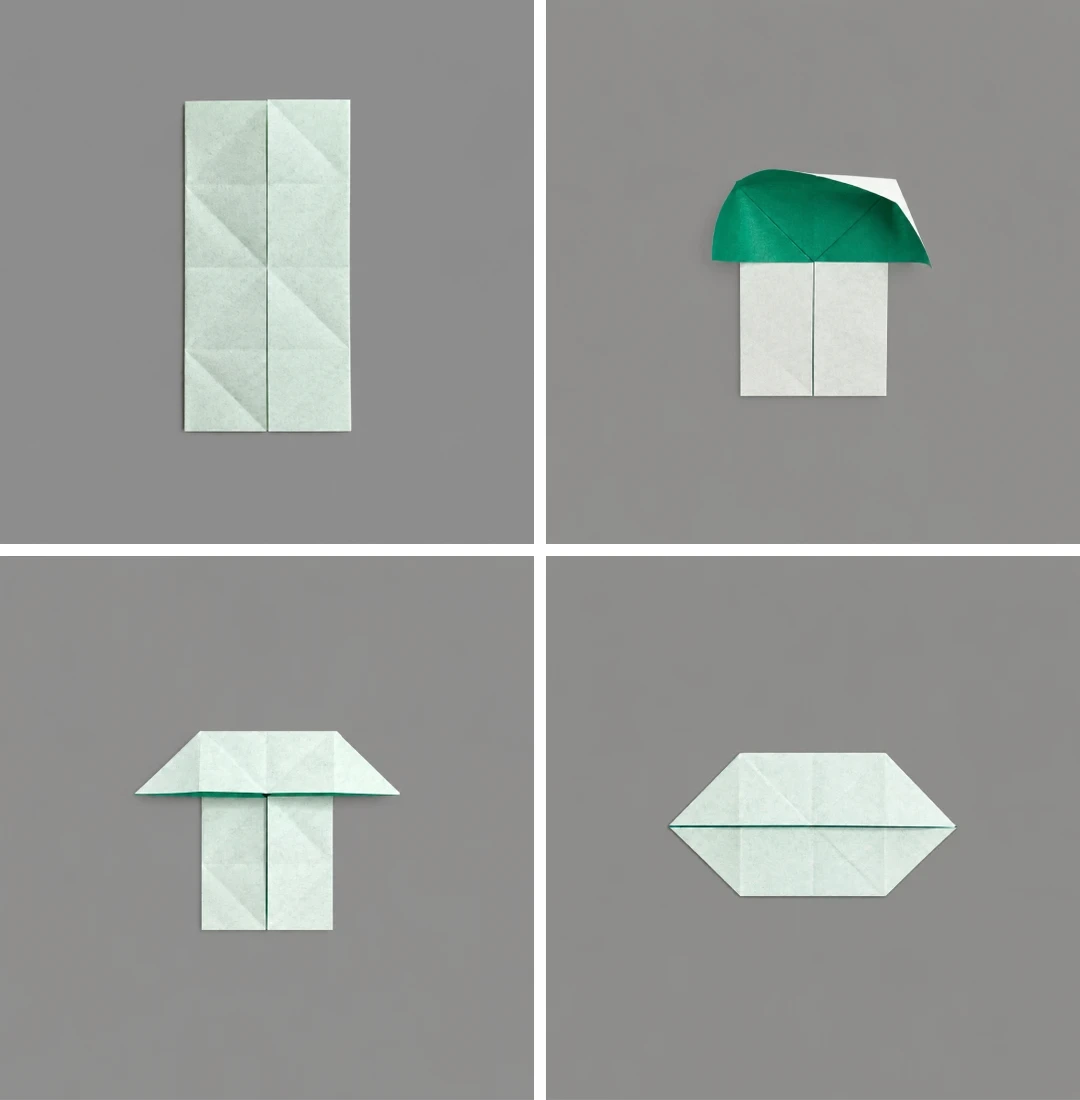 Open image at full size ↗
Fold the left and right edges toward the centerline.
Open the top end and spread both corners outward along the diagonal creases.
Flatten the top into a trapezoid.
Open and flatten the bottom in the same way.
Steps 33–36
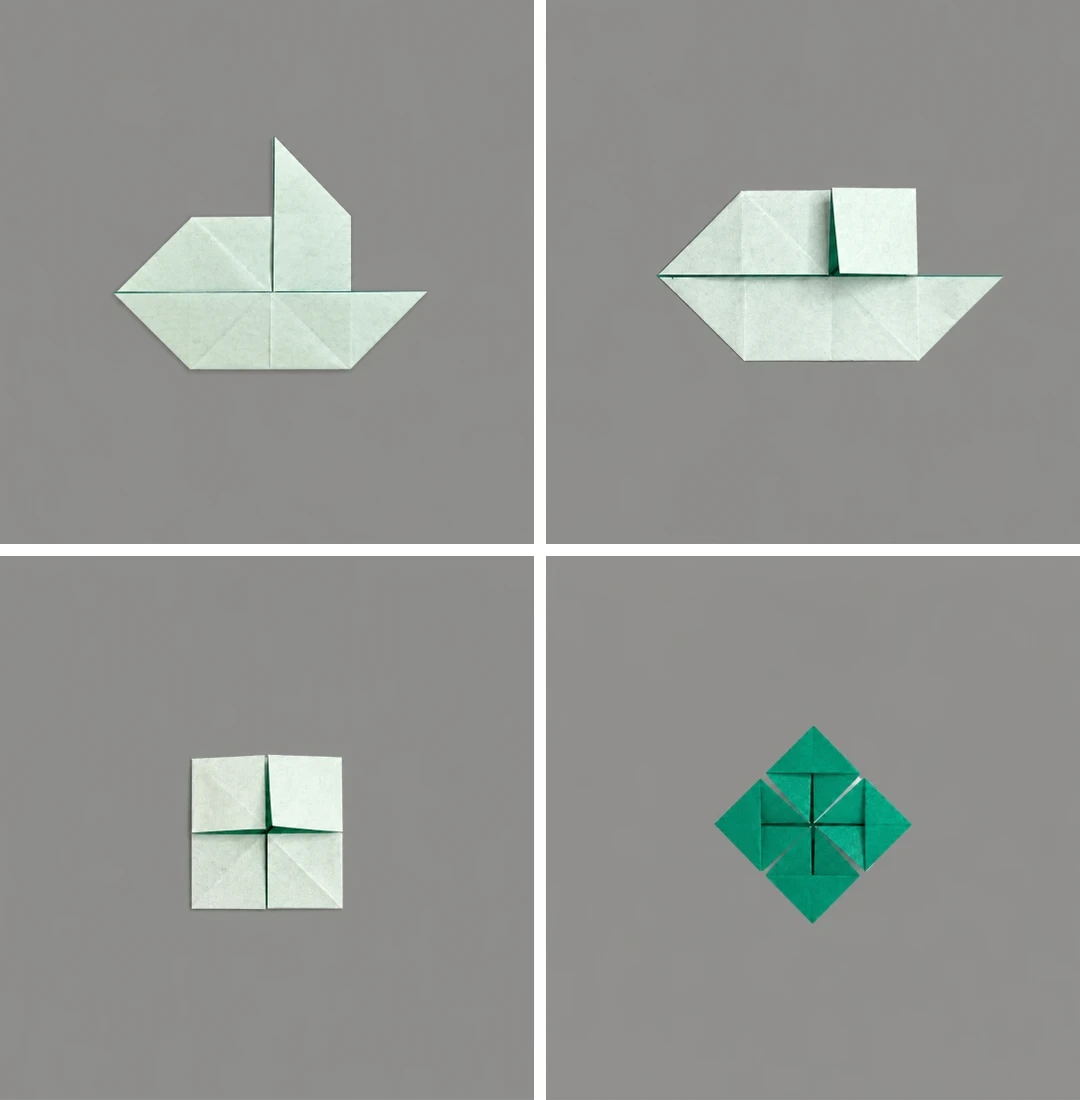 Open image at full size ↗
Lift the upper-right triangular flap along its joining crease.
Spread and flatten that triangle into a small square.
Repeat for the other three triangles.
Fold the outer corner of each small square outward.
Steps 37–40
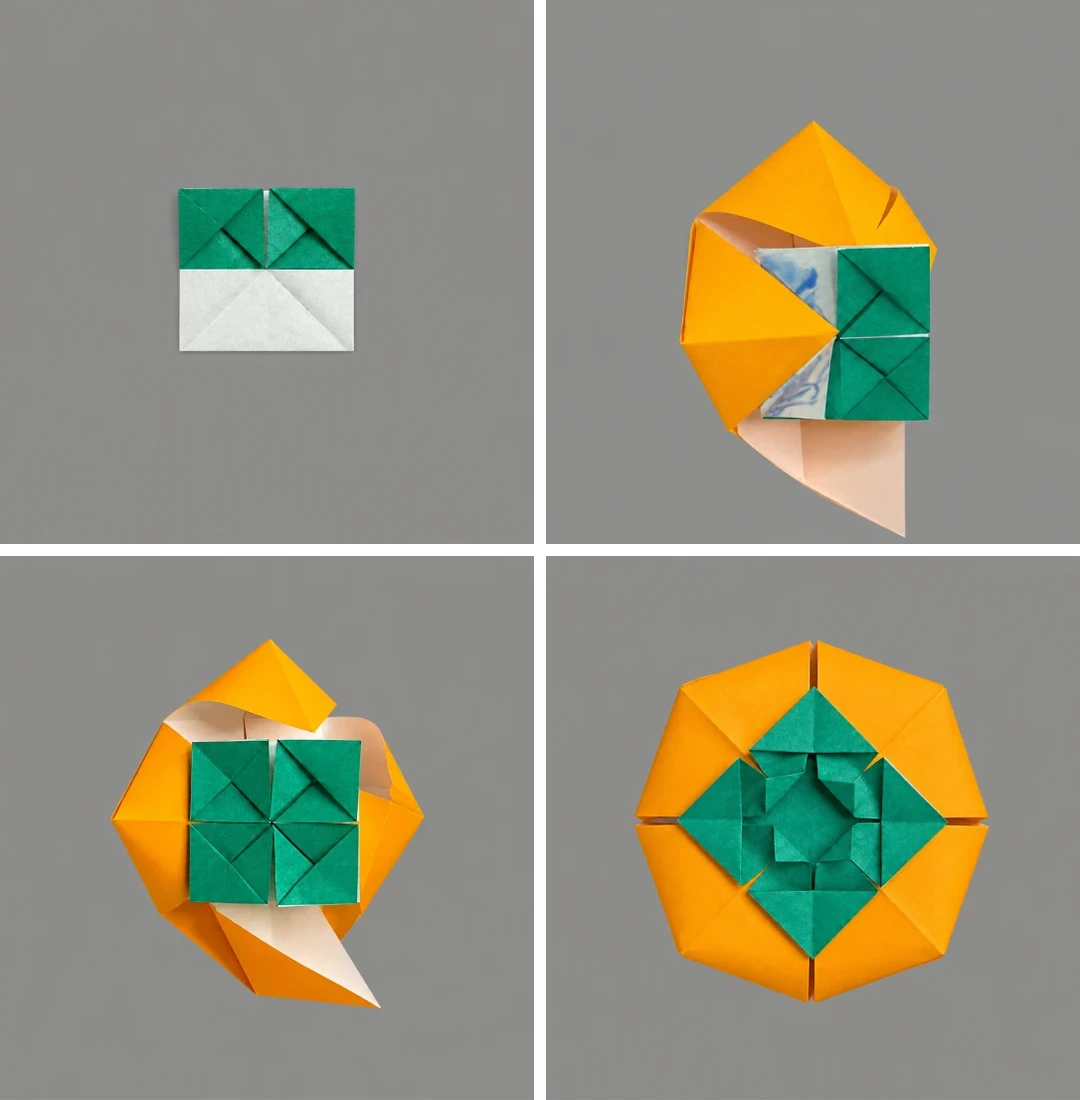 Open image at full size ↗
Lift the green layer to expose its white underside and apply glue.
Attach it to the orange triangular flaps.
Open and glue the remaining corners in turn.
Shape the fruit into a full three-dimensional persimmon.
Follow the diagrams alongside the step-by-step English instructions.
Choose your next project →