
Flowers & nature · Step-by-step guide
Paper Moth Orchid
Shape a small orchid by folding a petal base, trimming two narrow strips and opening the broad petals.
What you’ll need
- One 7.6 × 7.6 cm square
- Scissors
Paper folding · Petal folds, trimming & shaping
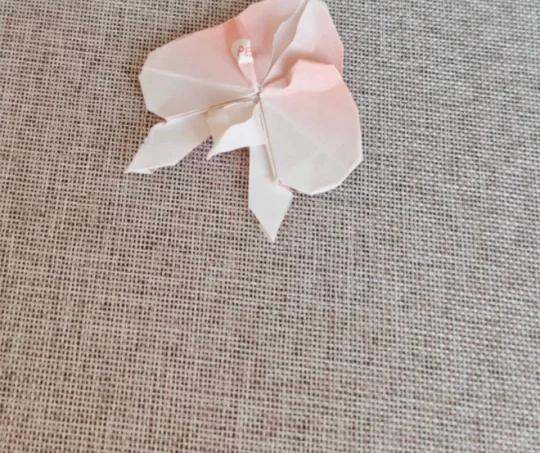
Make it, step by step.
7 steps · Original diagrams with English instructions
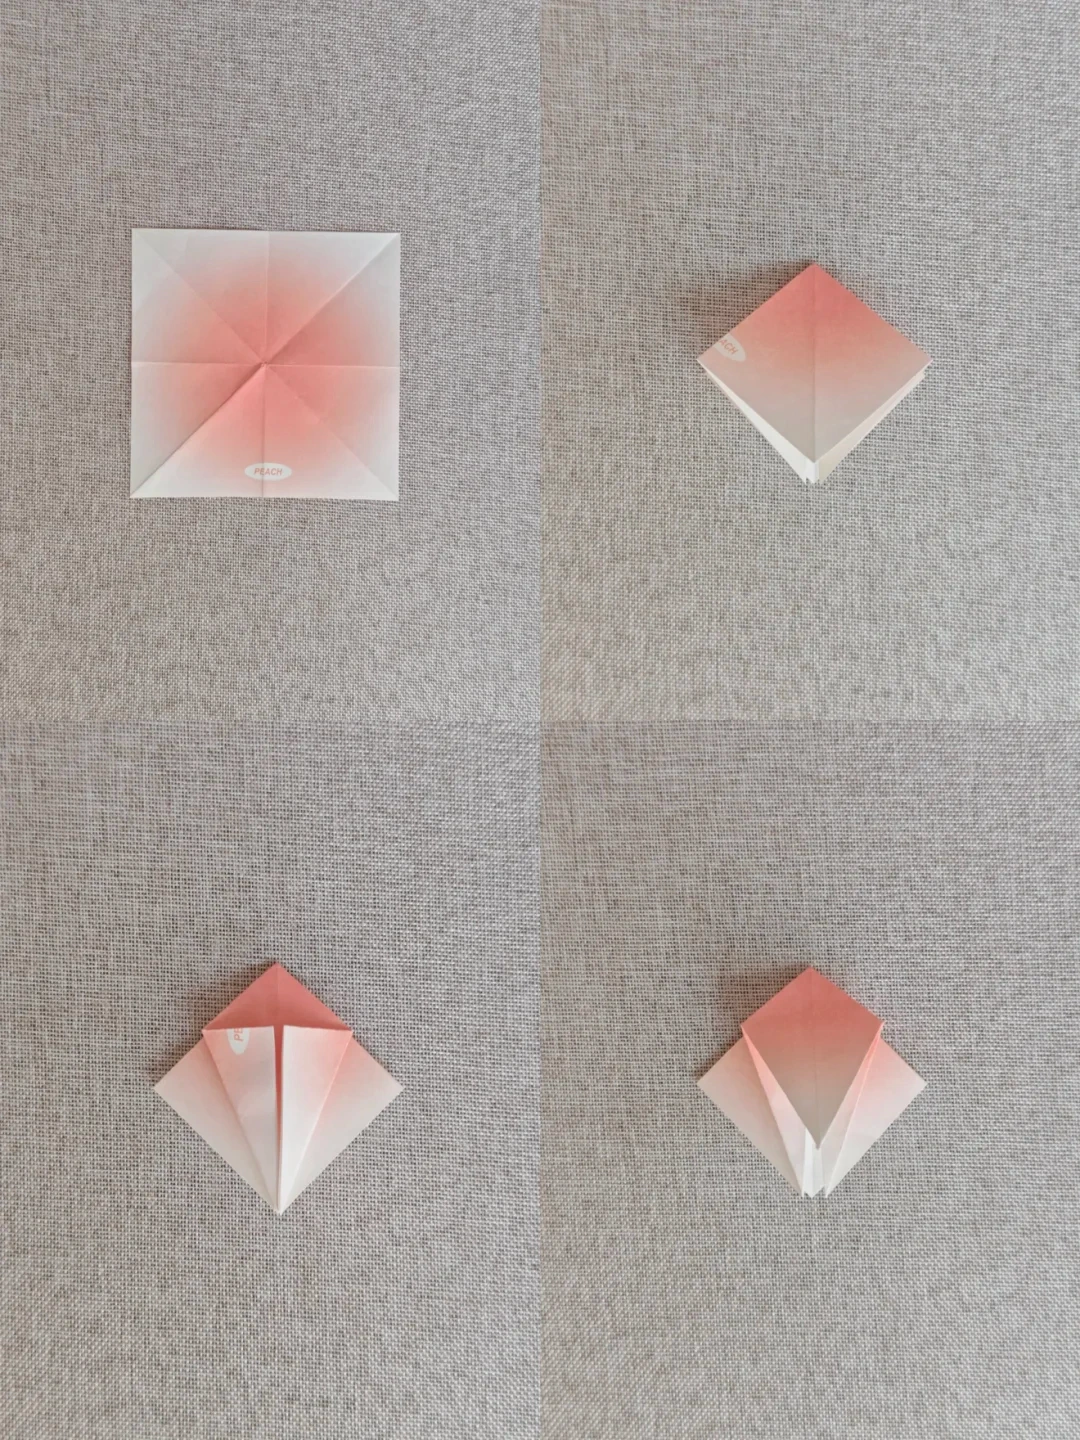
Fold the base
 Open image at full size ↗
Crease both diagonals and midlines, collapse into a square base and fold the sides inward to begin a petal fold.
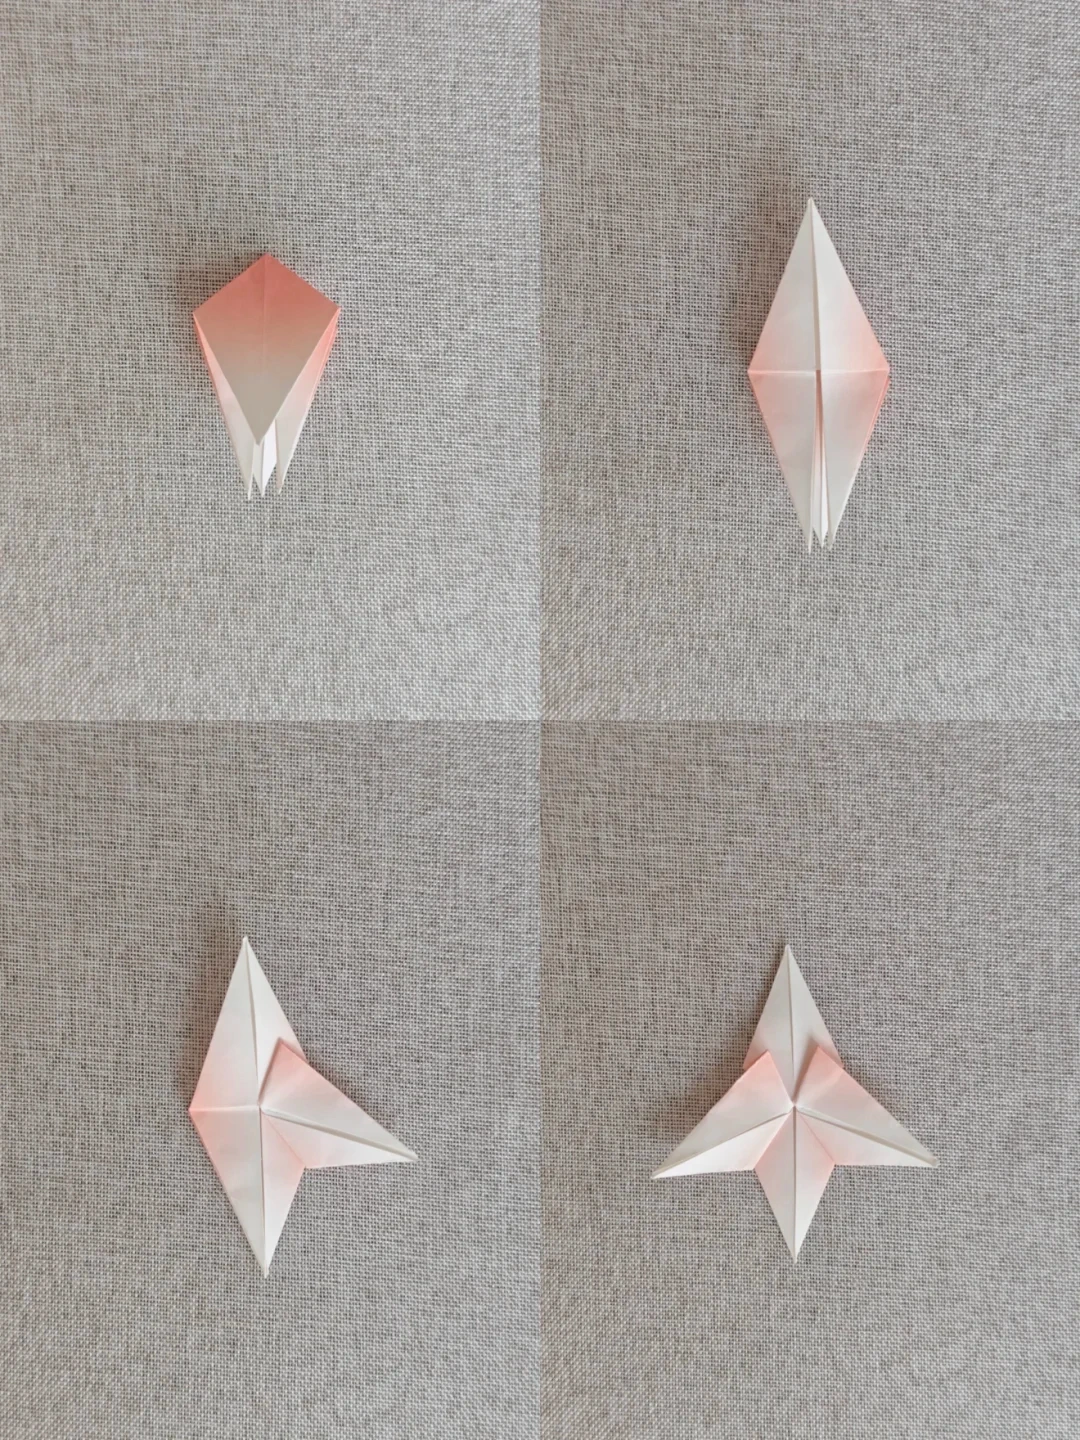
Open the petals
 Open image at full size ↗
Open and flatten the pockets into long points. Fold the points outward in the sequence shown.
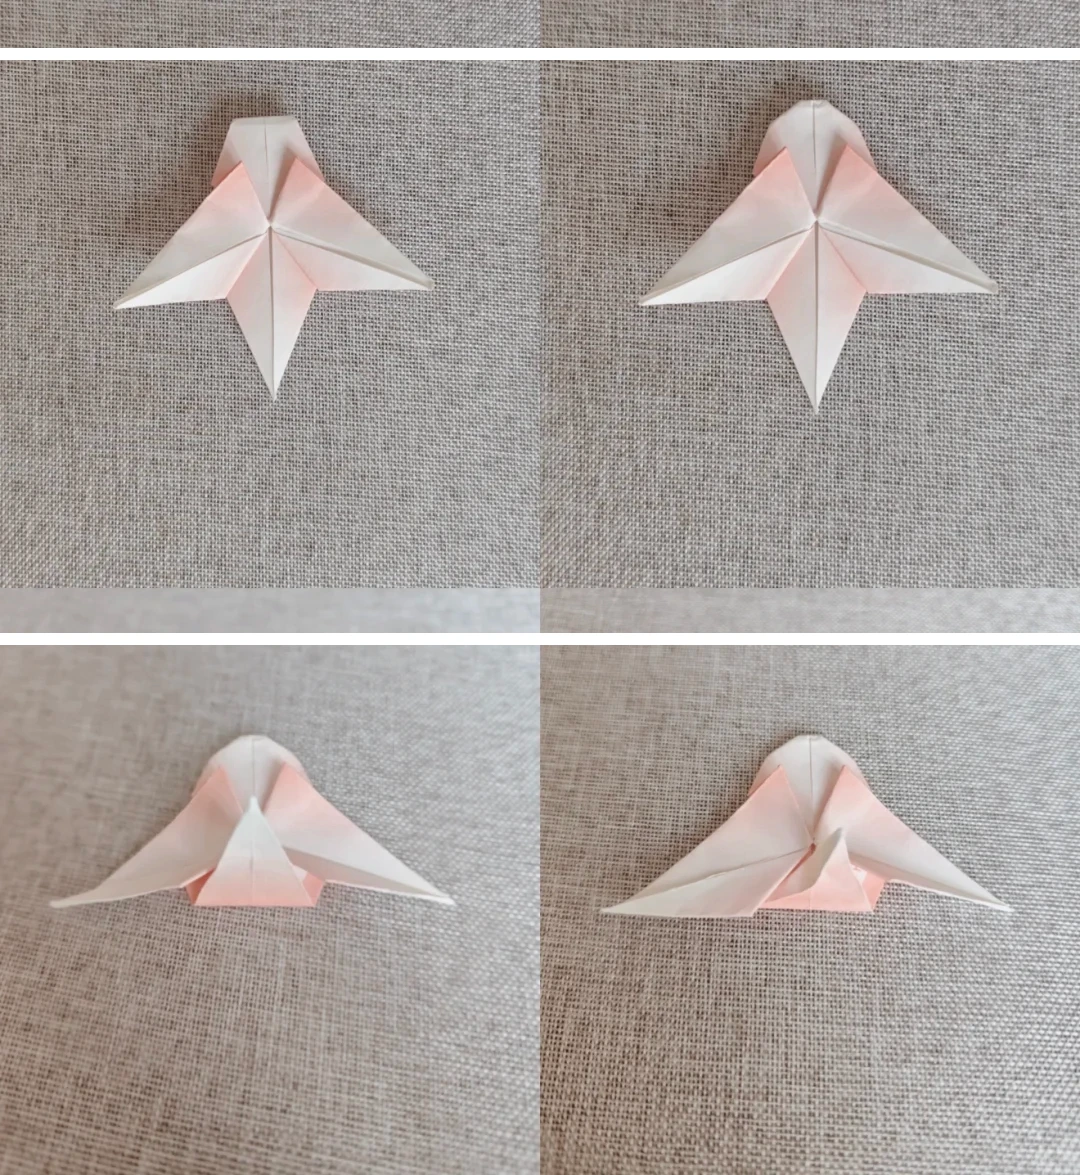
Round the upper petals
 Open image at full size ↗
Fold both side edges behind to soften the outline. Lift the lower flap slightly, stopping short of the bottom edge.
Open and cut
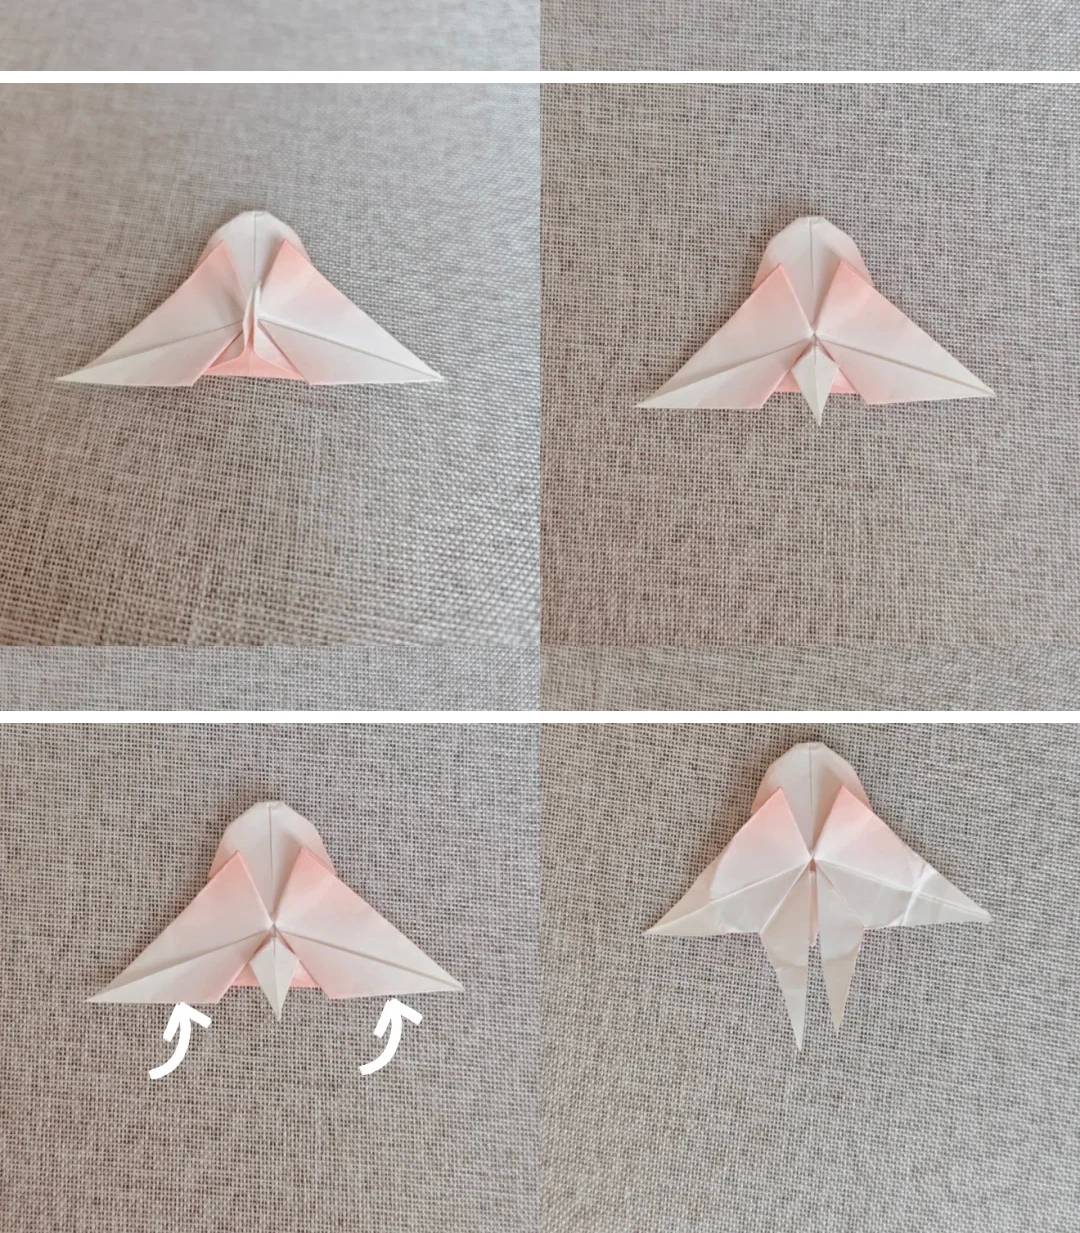 Open image at full size ↗
Open the center and fold it down. Cut along the two edges indicated by the arrows.
Fold the narrow strips
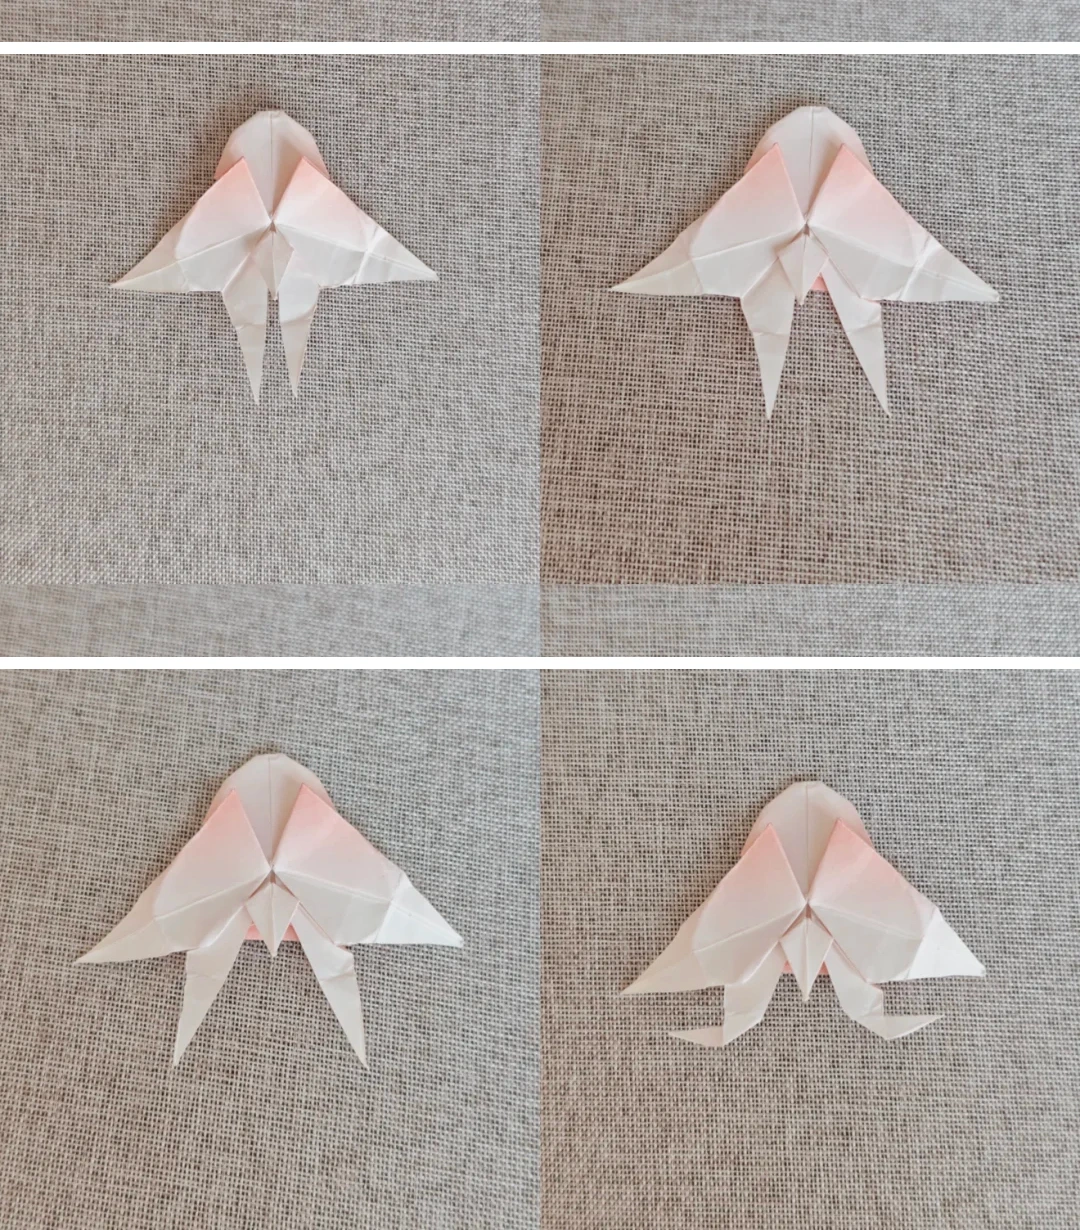 Open image at full size ↗
Press both strips beneath the raised section. Repeat on the left and tuck the right strip slightly inward.
Trim the folded ends
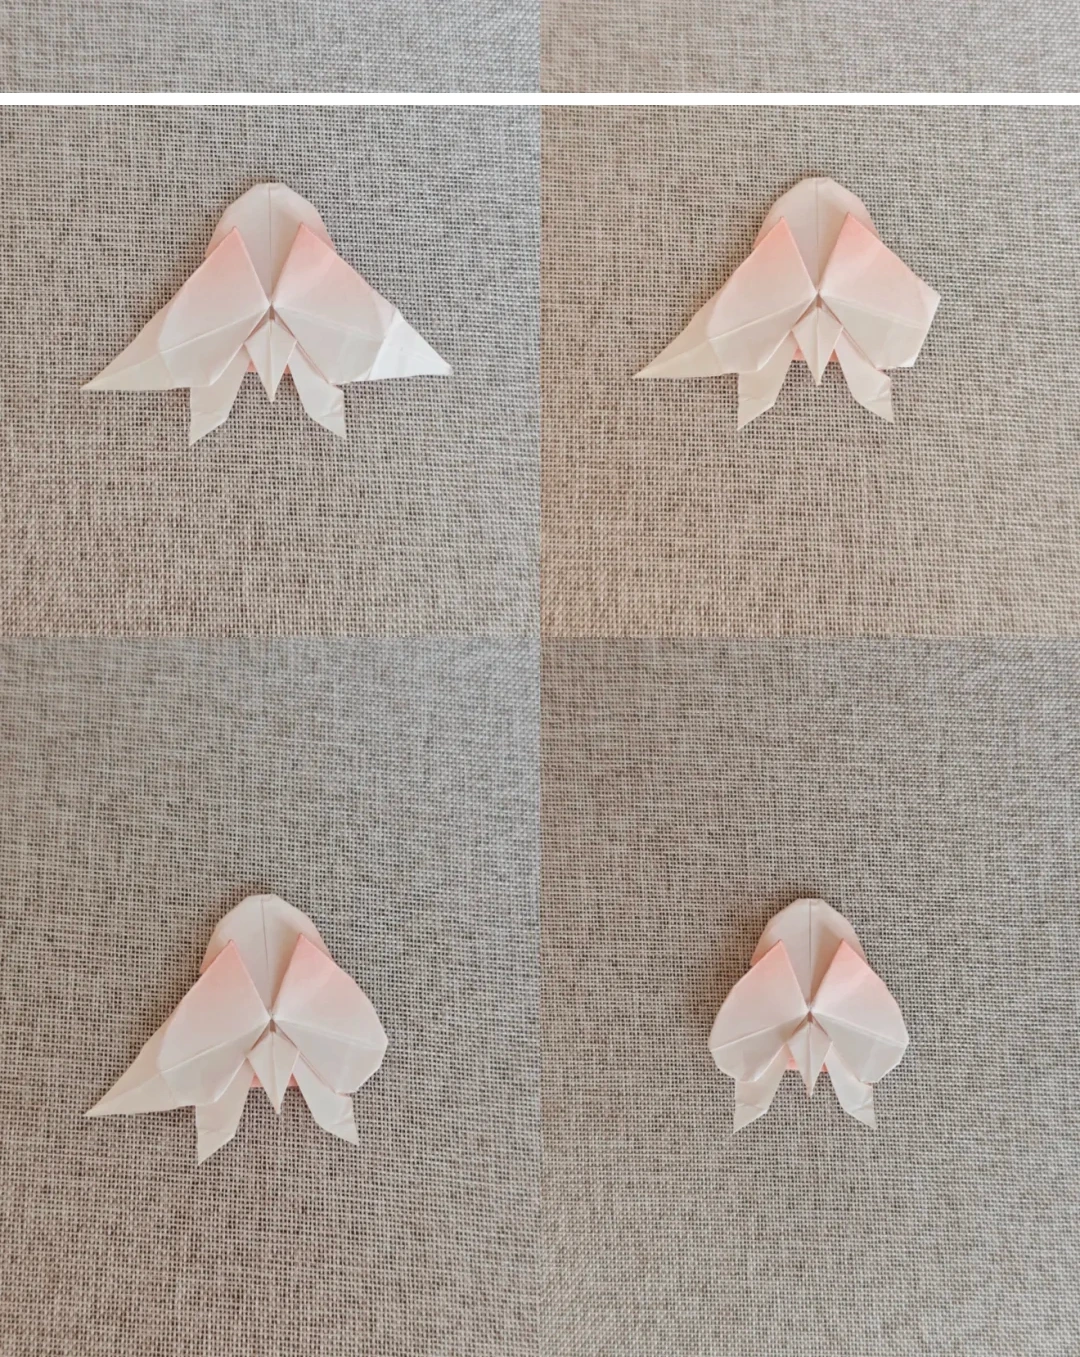 Open image at full size ↗
Cut off the folded portions of the long strips, following the pictured outline.
Shape the orchid
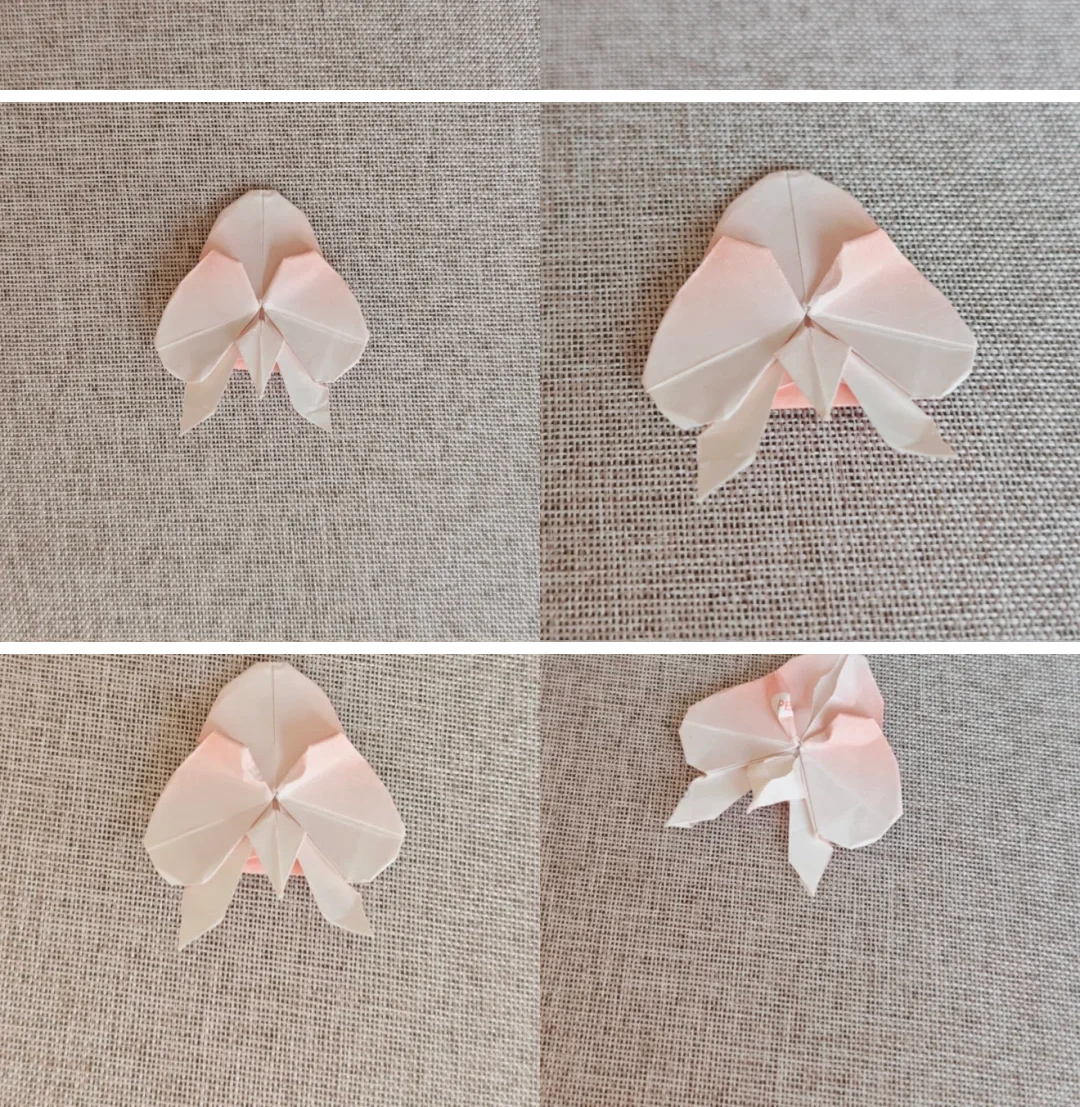 Open image at full size ↗
Fold the two sharp corners inward, press the inner side edges in, open the upper petals and pinch the small lower tip.
Follow the diagrams alongside the step-by-step English instructions.
Choose your next project →