
Paper toys · Step-by-step guide
Paper Doll with a Ceremonial Hat
Fold a small three-dimensional doll from a hat, an inflated head and an inflated body.
What you’ll need
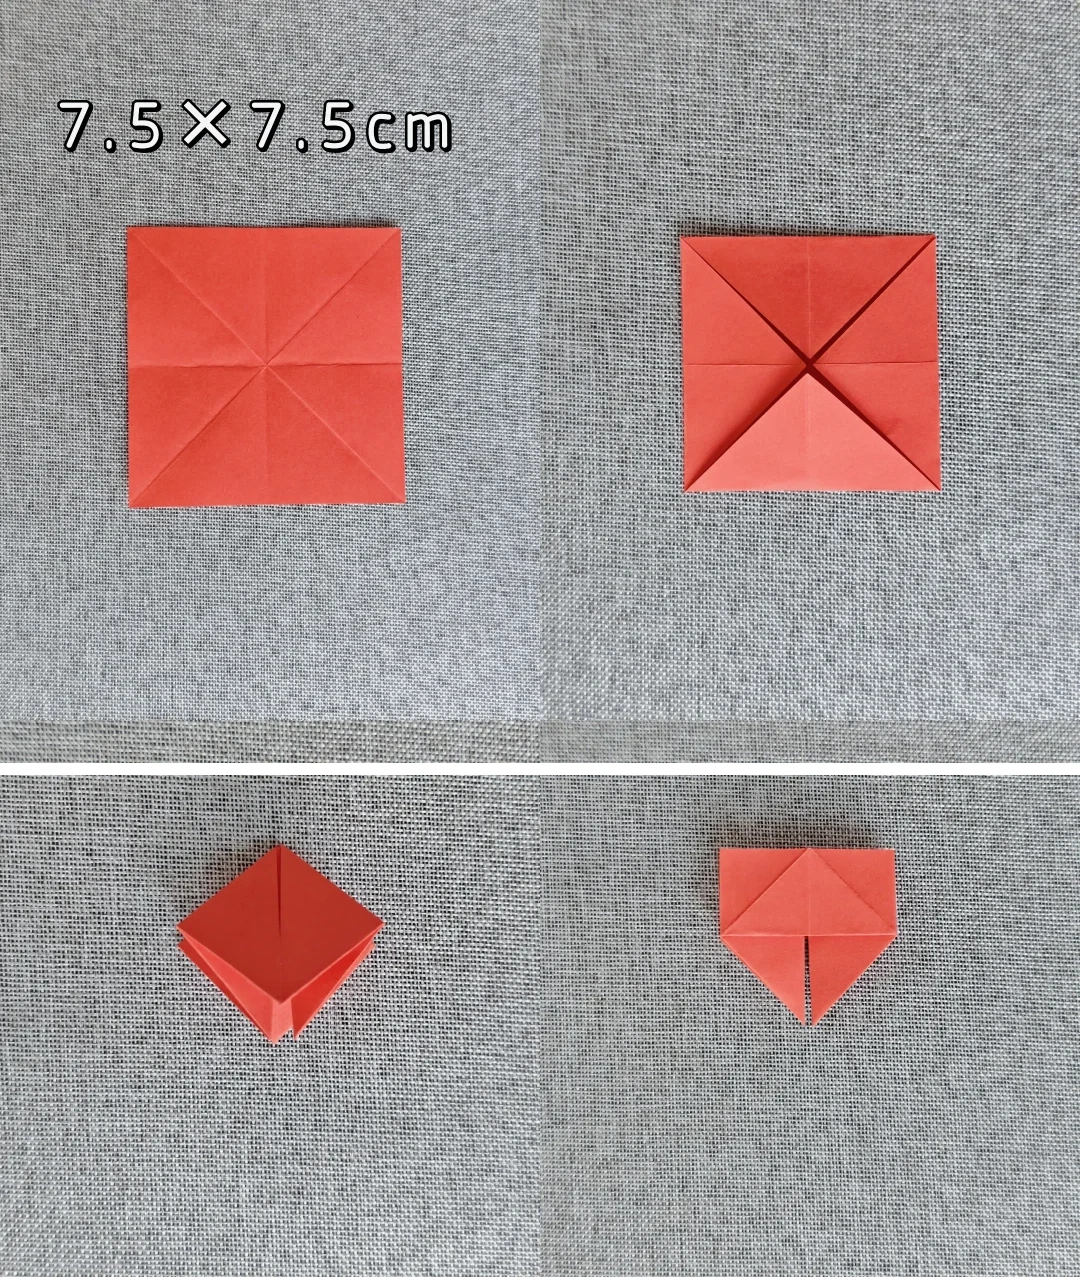
- One 7.5 × 7.5 cm square for the hat
- Two 6.5 × 6.5 cm squares for the head and body
- Glue
Paper folding · Inflated forms & three-piece assembly
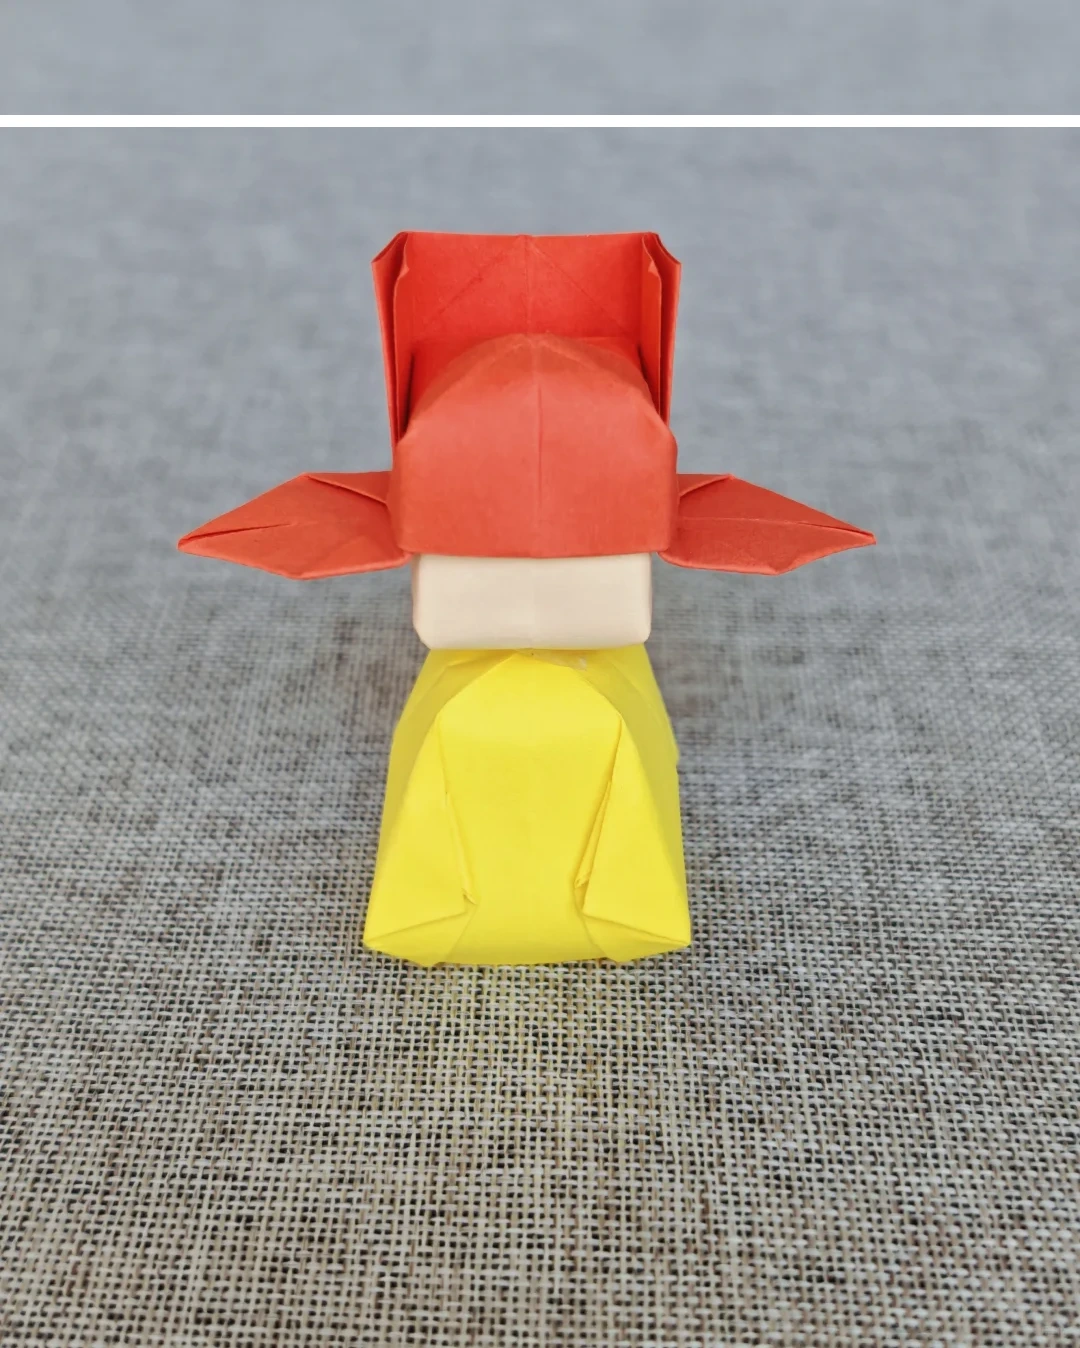
Make it, step by step.
8 steps · Original diagrams with English instructions
Start the hat
 Open image at full size ↗
Crease the 7.5 cm square, fold its corners inward and collapse the layers. Open and lift the folded section on both sides.
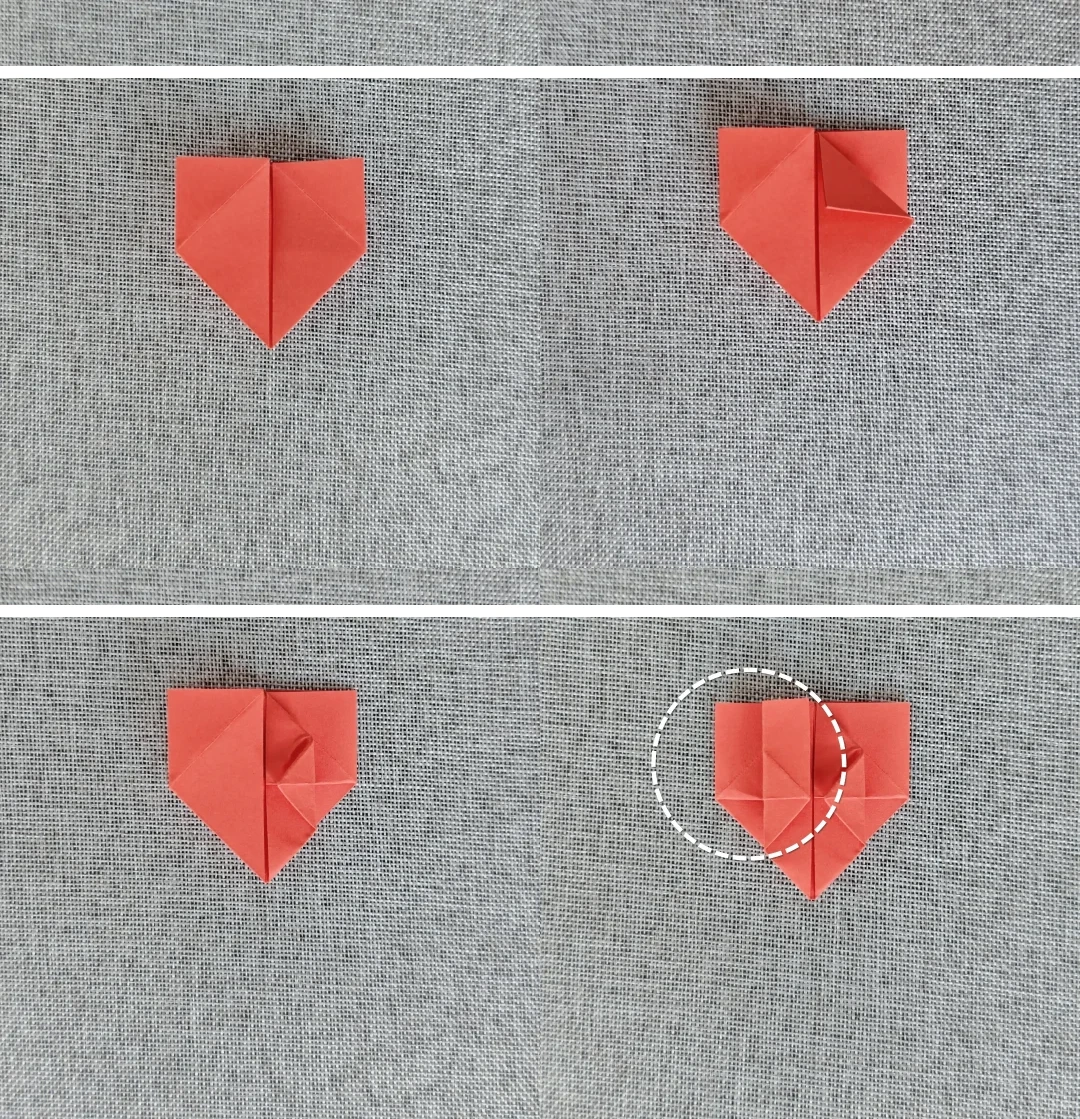
Shape the hat flaps
 Open image at full size ↗
Fold the front and back sections sideways and fold the circled flap in half.
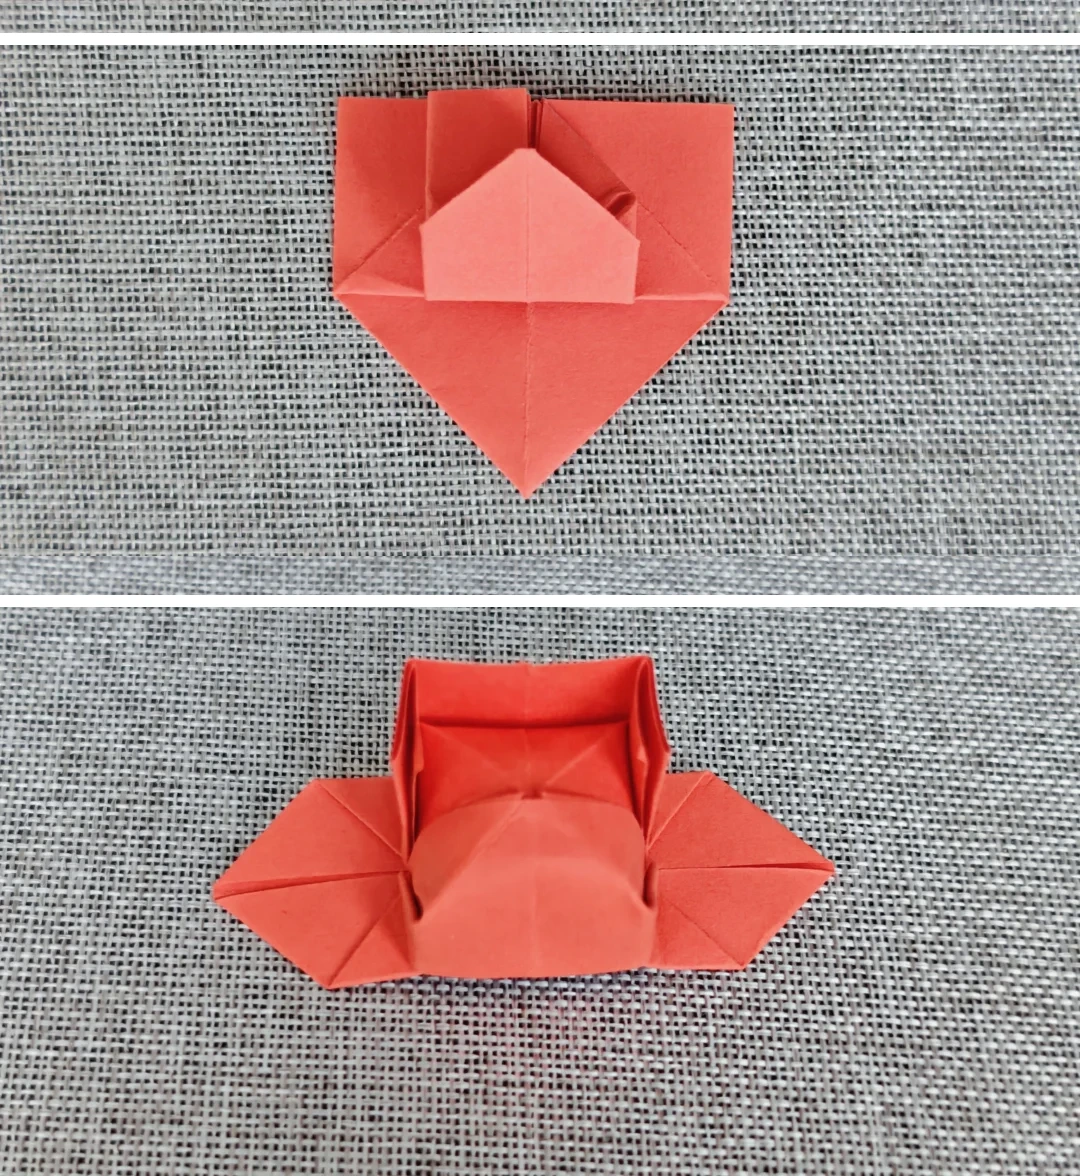
Open the hat
 Open image at full size ↗
Fold the lower section upward on both sides, then open the middle to form the crown and brim.
Start the head
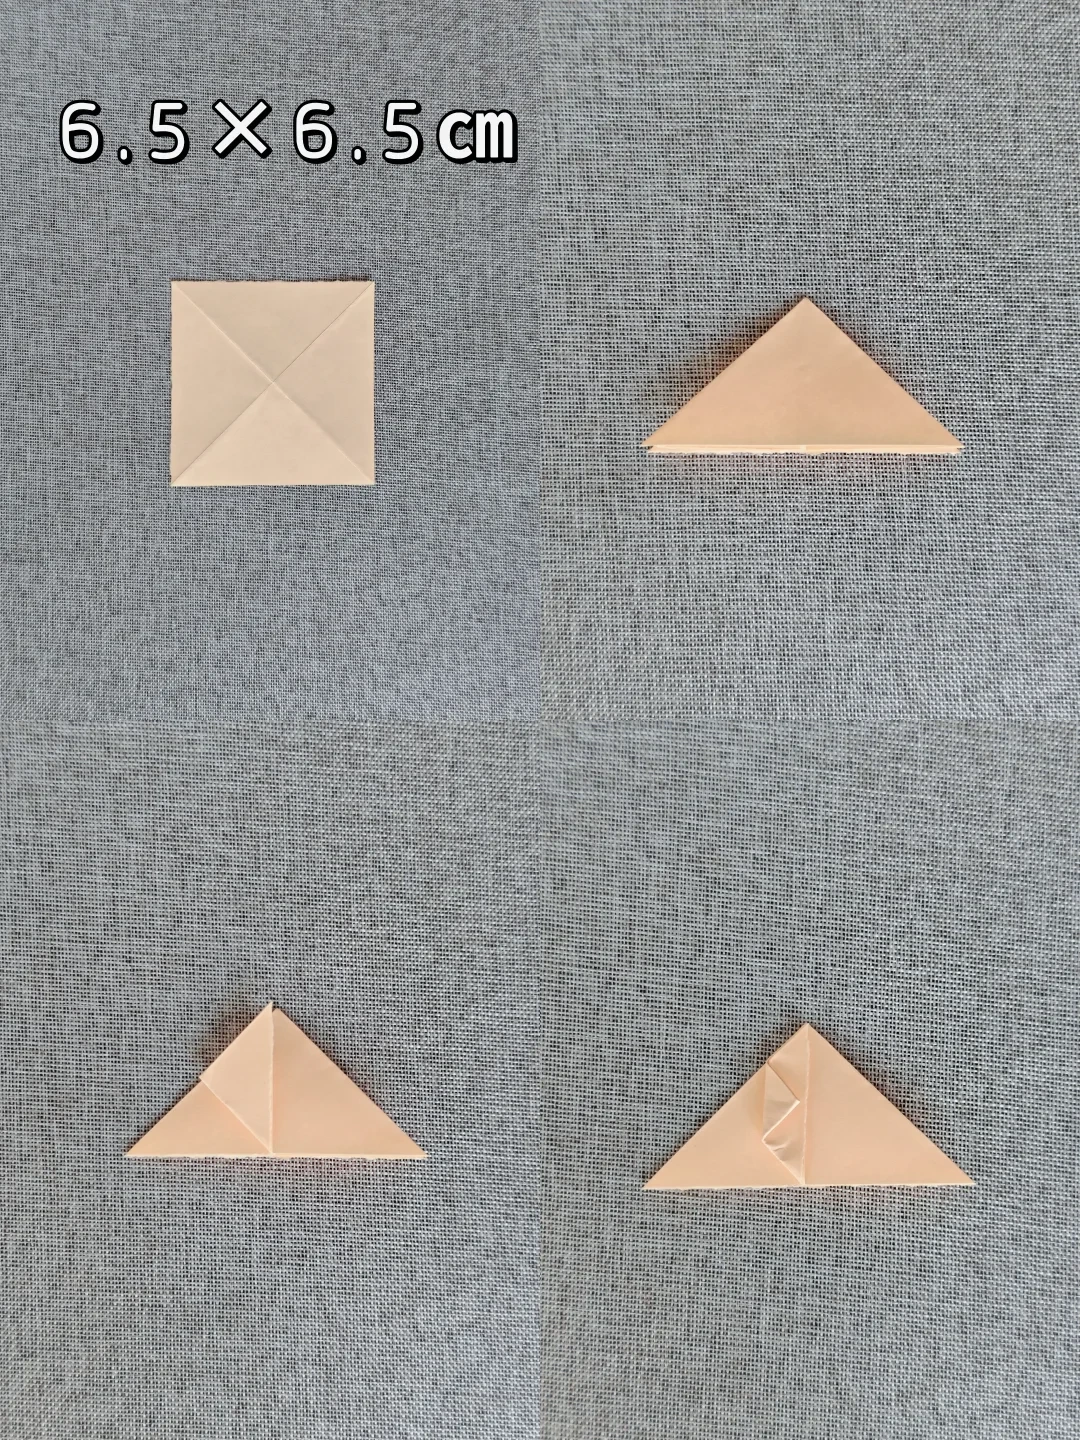 Open image at full size ↗
Crease a 6.5 cm square and collapse into a triangular waterbomb base. Lift the side corners and fold them inward as pictured.
Inflate the head
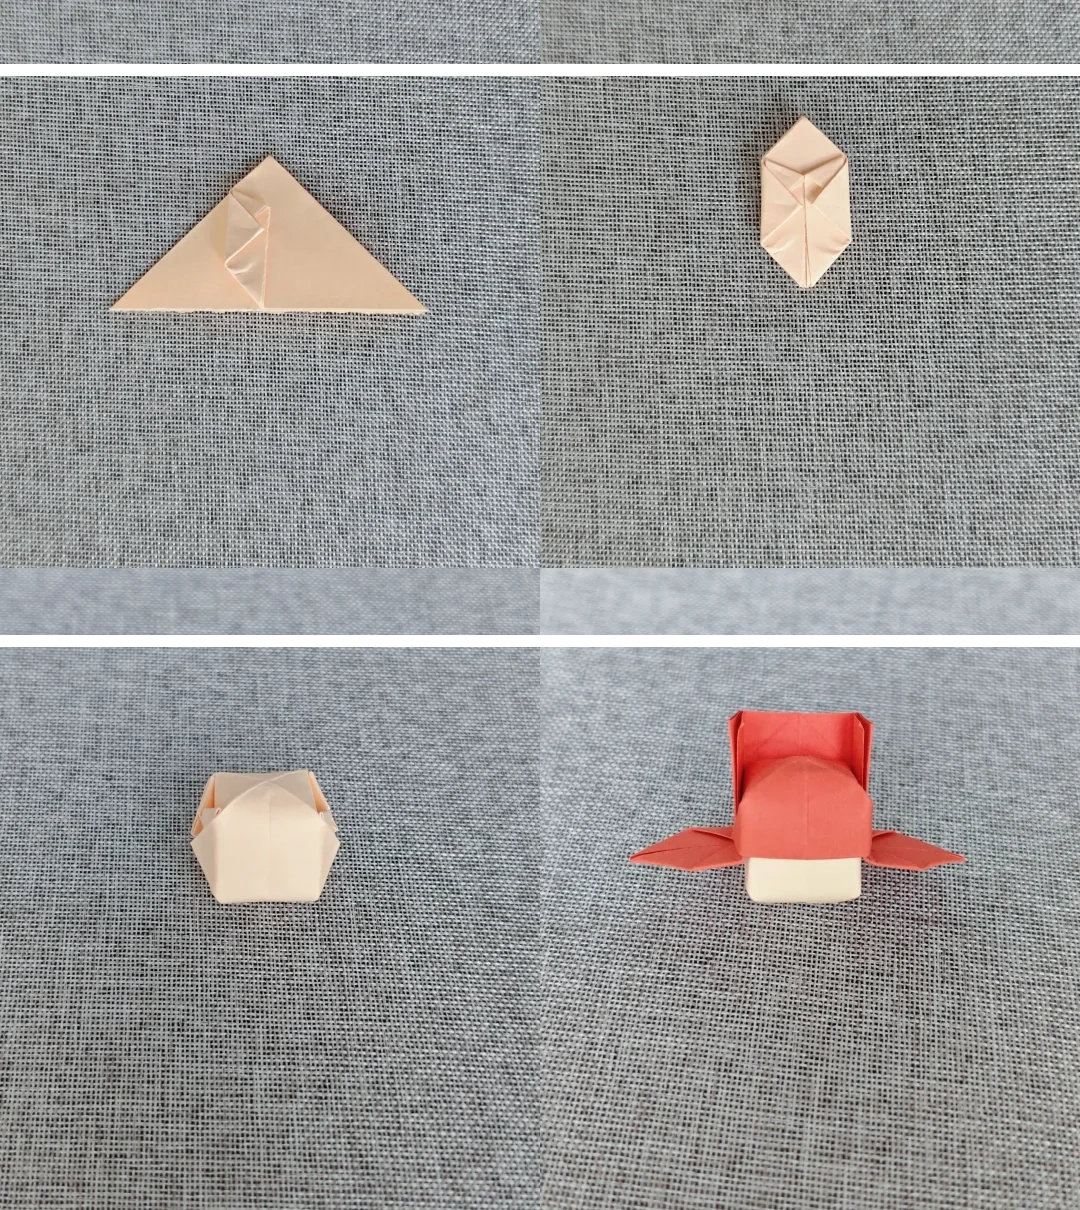 Open image at full size ↗
Tuck the upper flaps into the small triangular pockets on all four sides. Gently inflate through the lower hole and place the hat on top.
Start the body
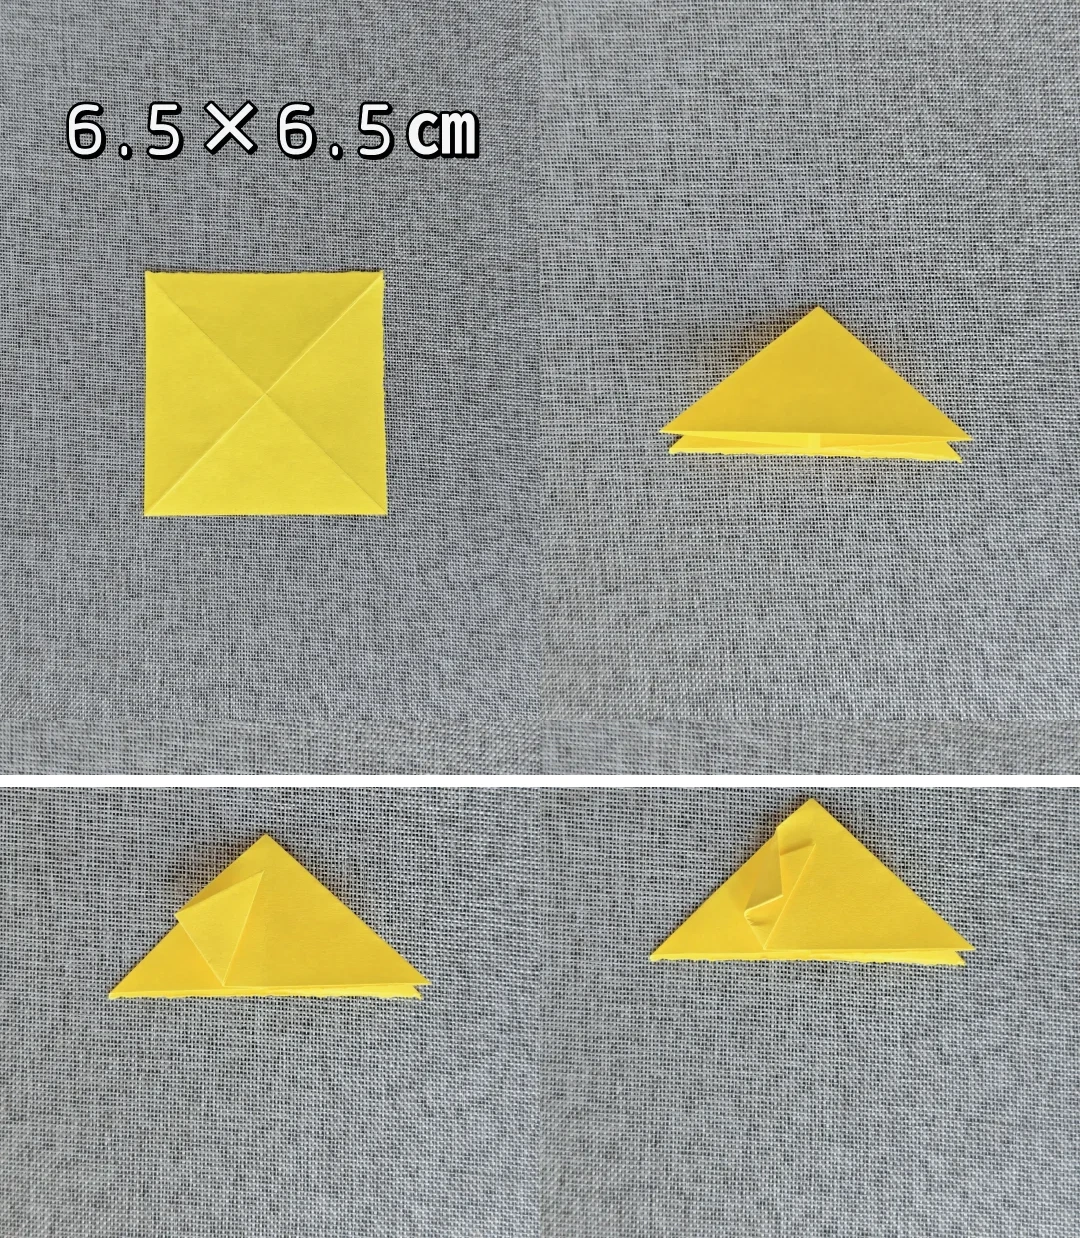 Open image at full size ↗
Use the other 6.5 cm square. Collapse the creases and fold the pointed corners toward the center, leaving a small gap below the top.
Inflate the body
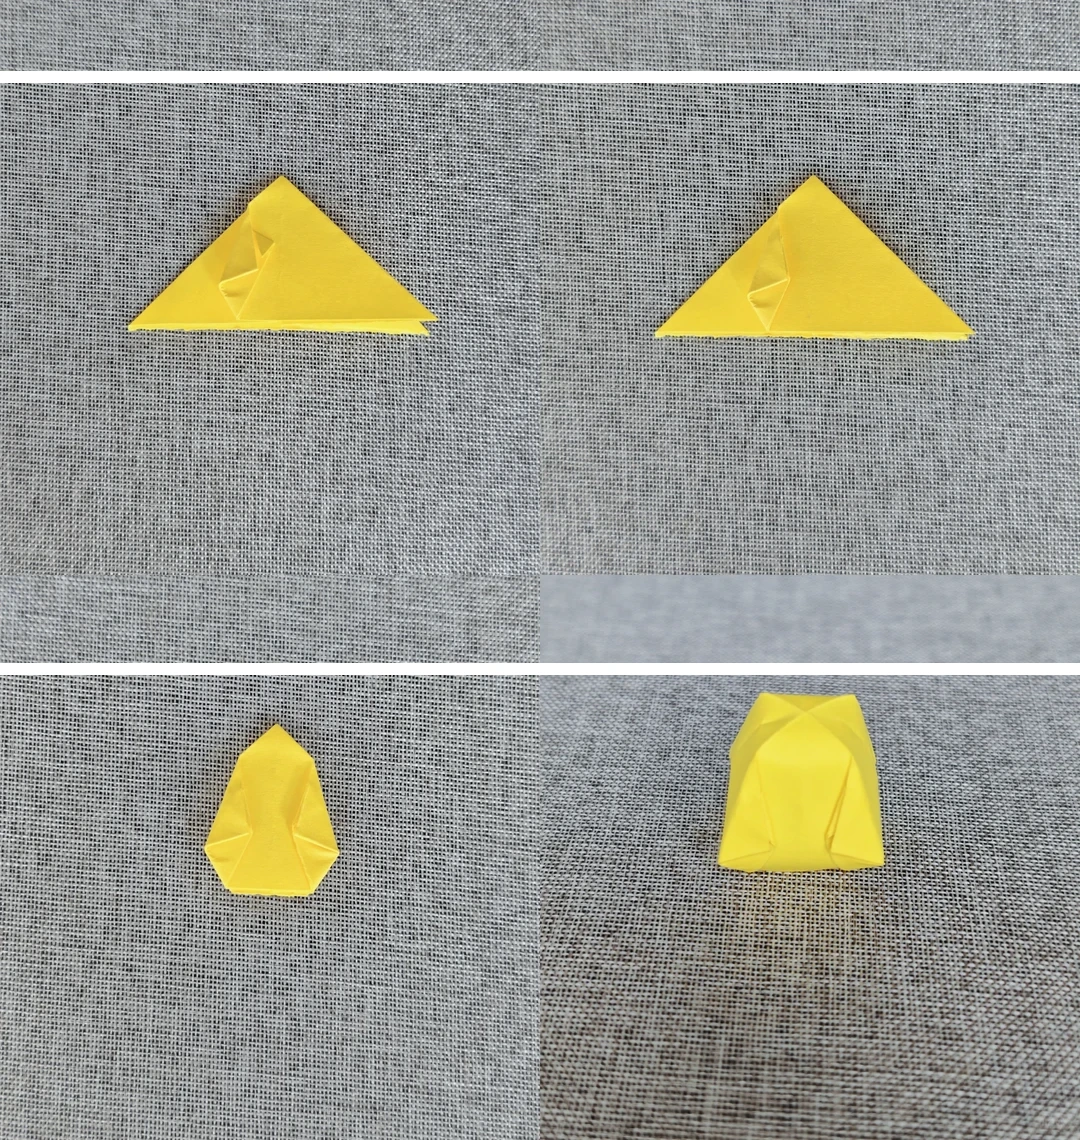 Open image at full size ↗
Fold the upper flaps down and tuck them into the triangular pockets. Repeat on all sides and inflate through the bottom opening.
Join head and body
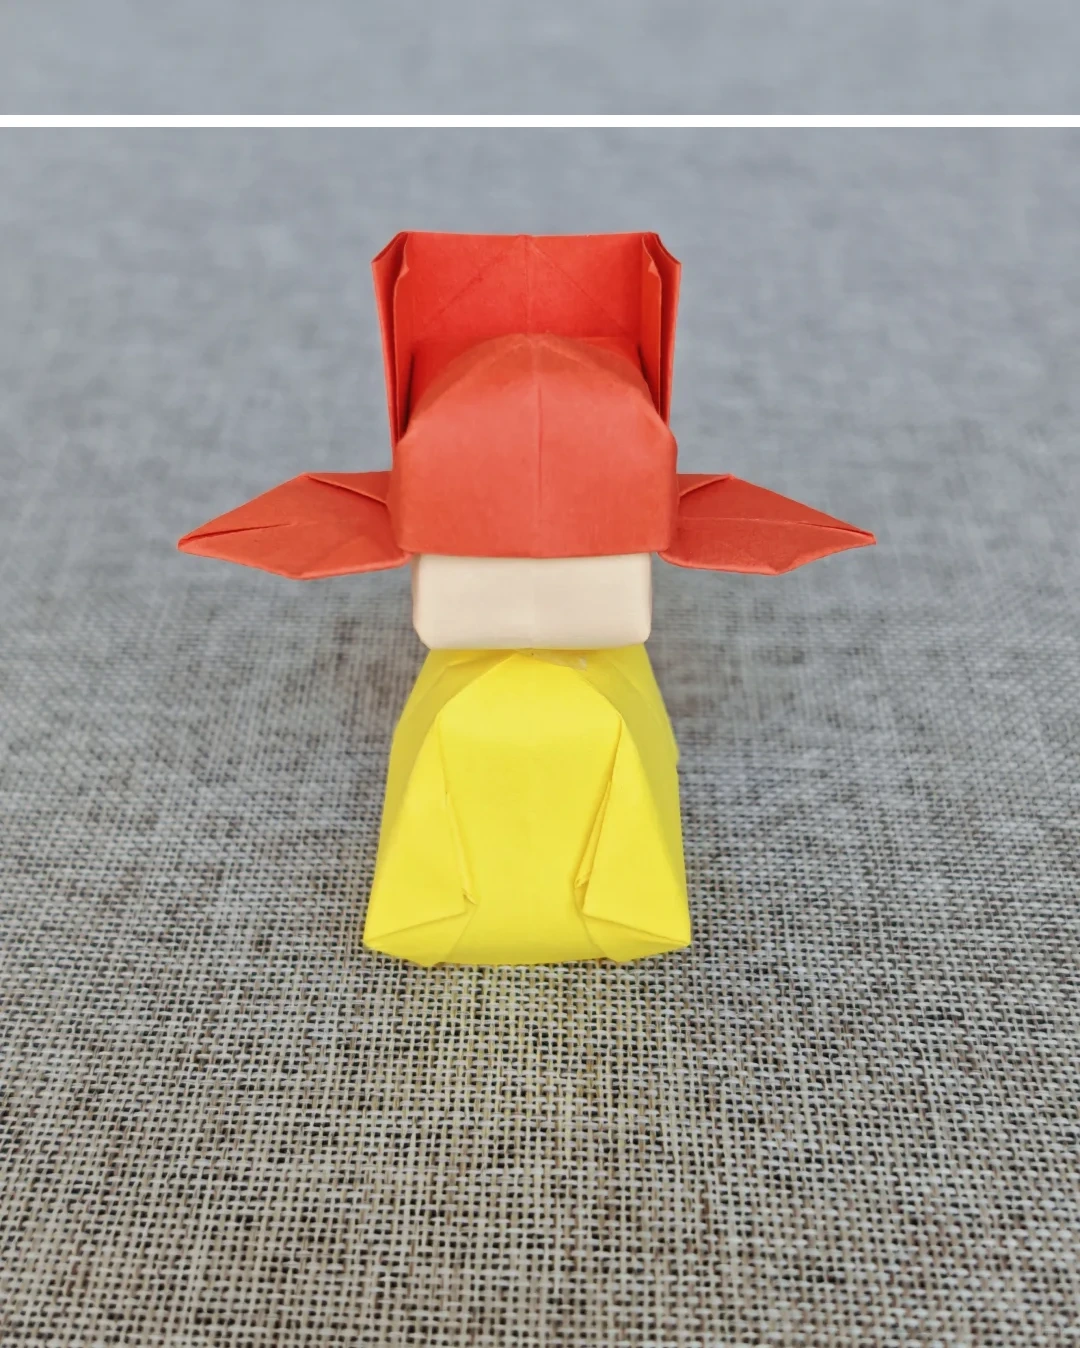 Open image at full size ↗
Glue the head onto the body and adjust the hat.
Follow the diagrams alongside the step-by-step English instructions.
Choose your next project →