
Animals · Step-by-step guide
Paper Capybara
Fold a friendly capybara with a rounded snout, little ears and a broad body.
What you’ll need
- Square paper, 20 × 20 cm
- Pen
Paper folding and shaping
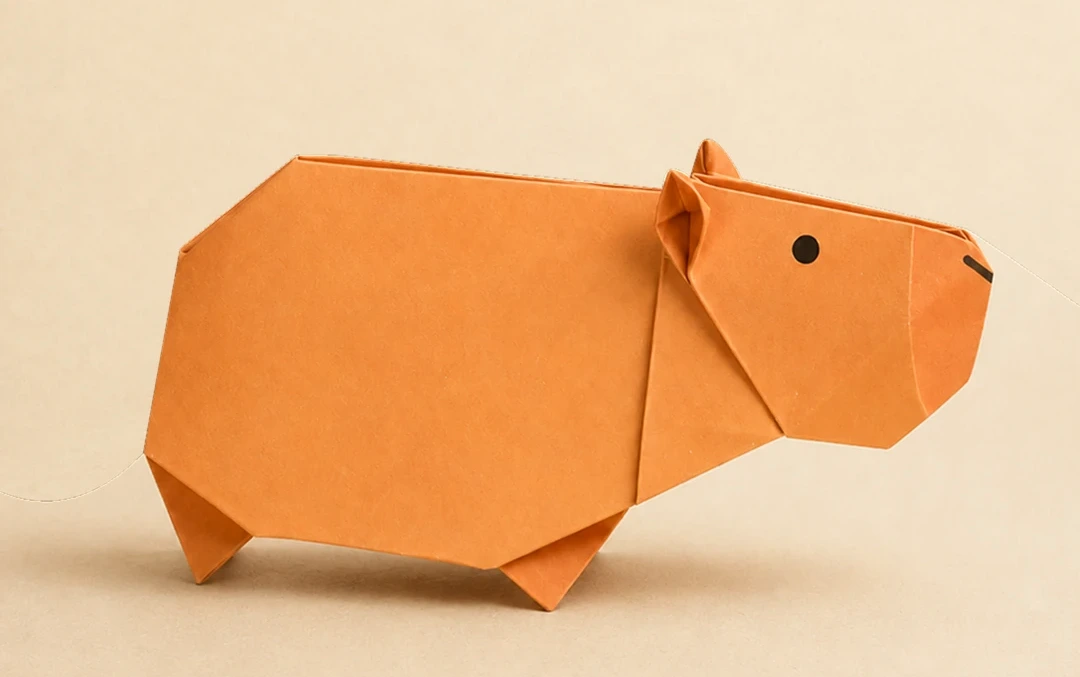
Make it, step by step.
22 steps · Original diagrams with English instructions
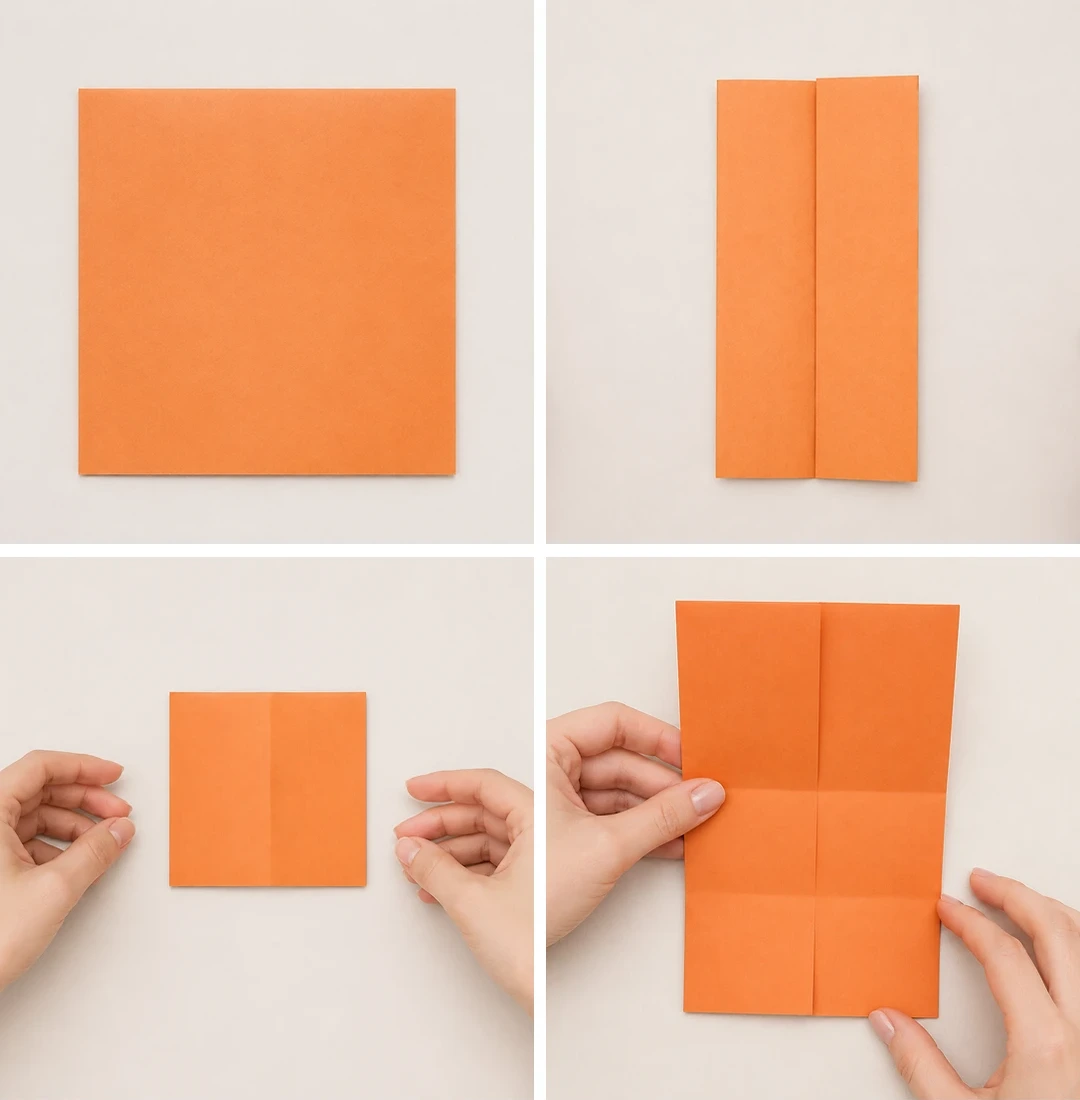
Steps 1–4
 Open image at full size ↗
Prepare a 20 × 20 cm square.
Fold along the centerline, then fold again as shown.
Fold upward from the bottom.
Open, then fold again along the illustrated crease.
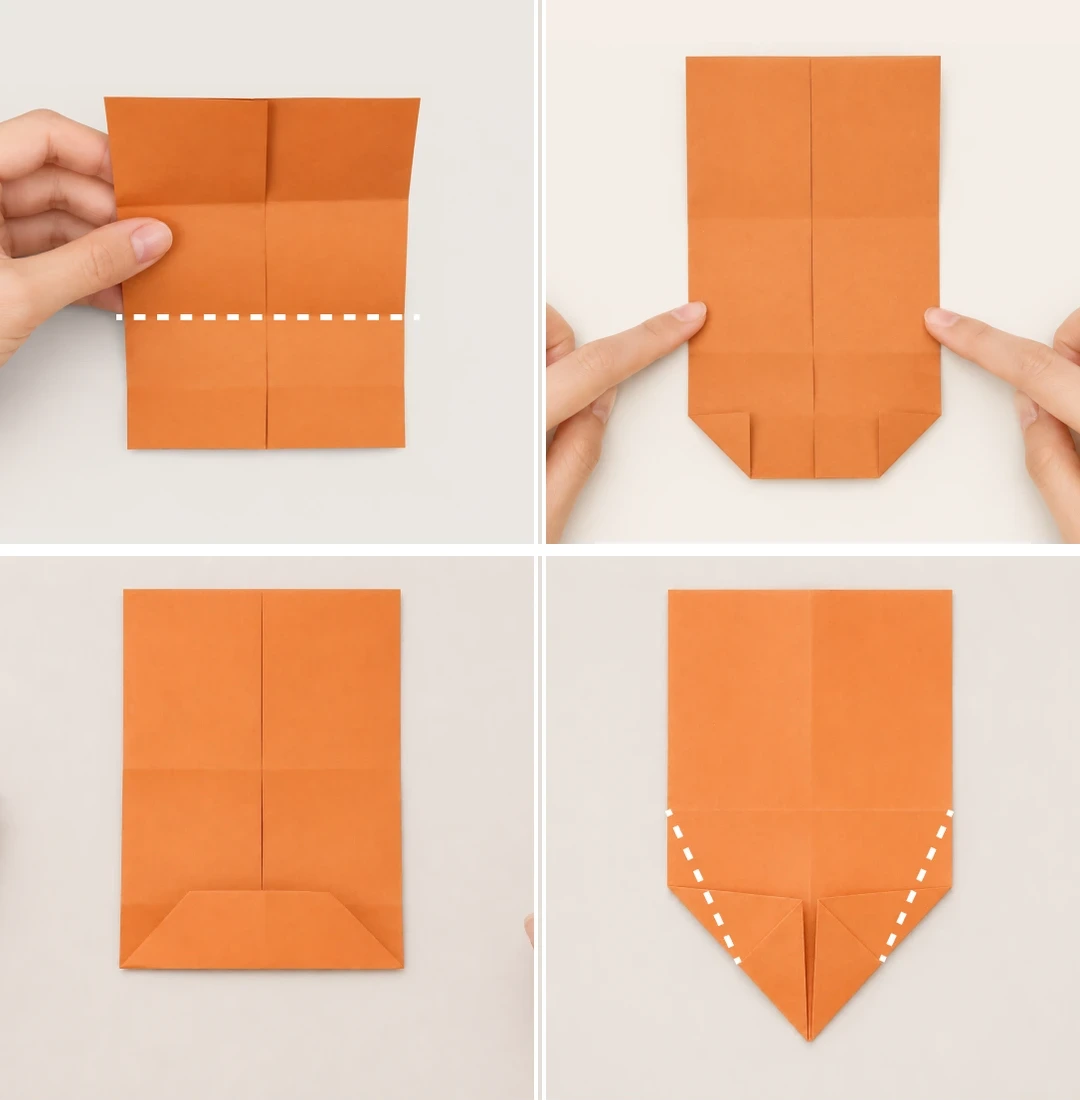
Steps 5–8
 Open image at full size ↗
Fold the lower section to the dotted line and flatten.
Fold both lower corners inward along the creases.
Fold the lower sides inward and fold the trapezoid upward.
Turn over and fold the triangular flaps along the dotted lines.
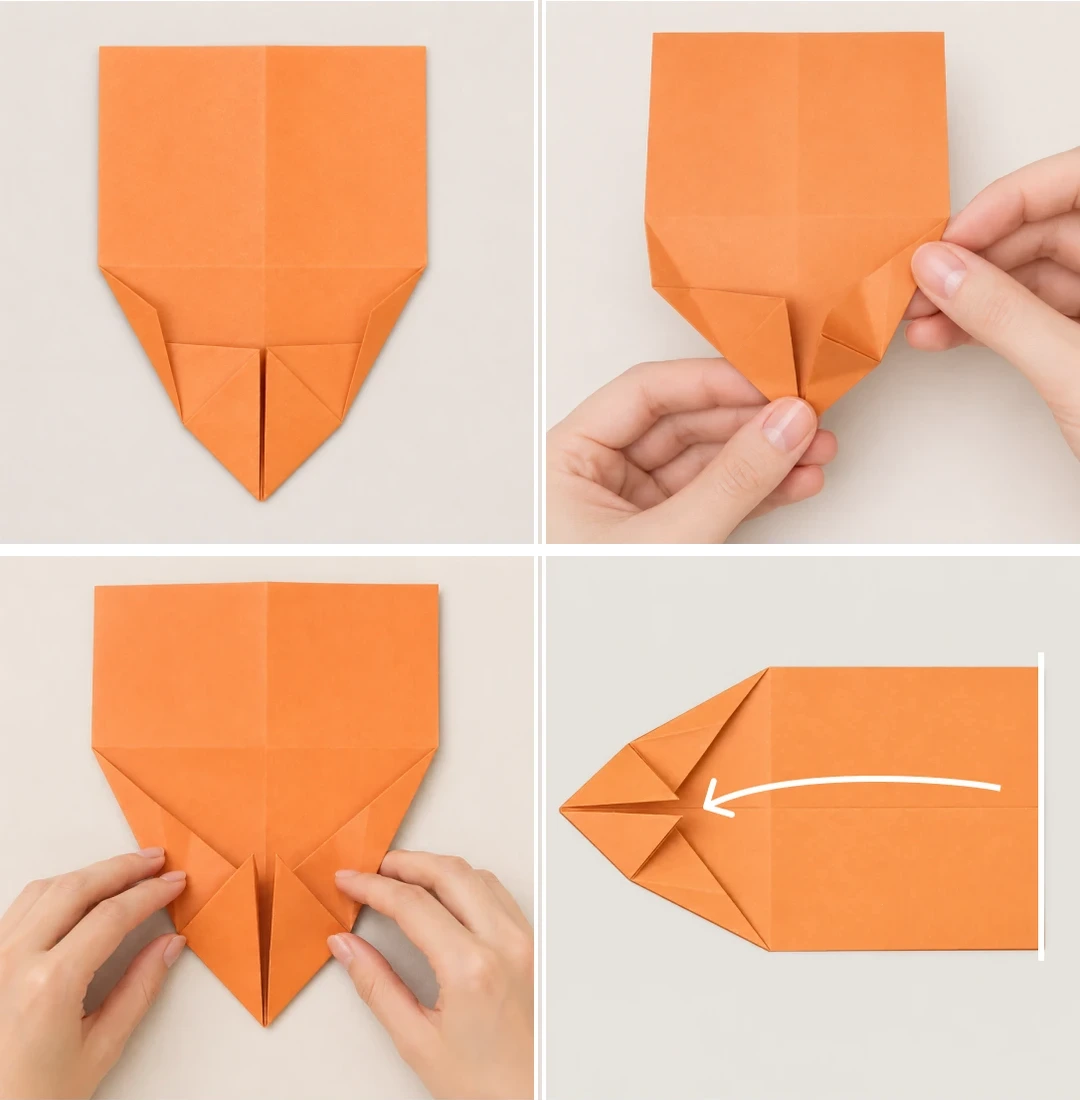
Steps 9–12
 Open image at full size ↗
Fold a triangle on each side as pictured.
Open and refold as shown.
Bring both sides inward.
Rotate the model and tuck the right edge beneath the triangle.
Steps 13–16
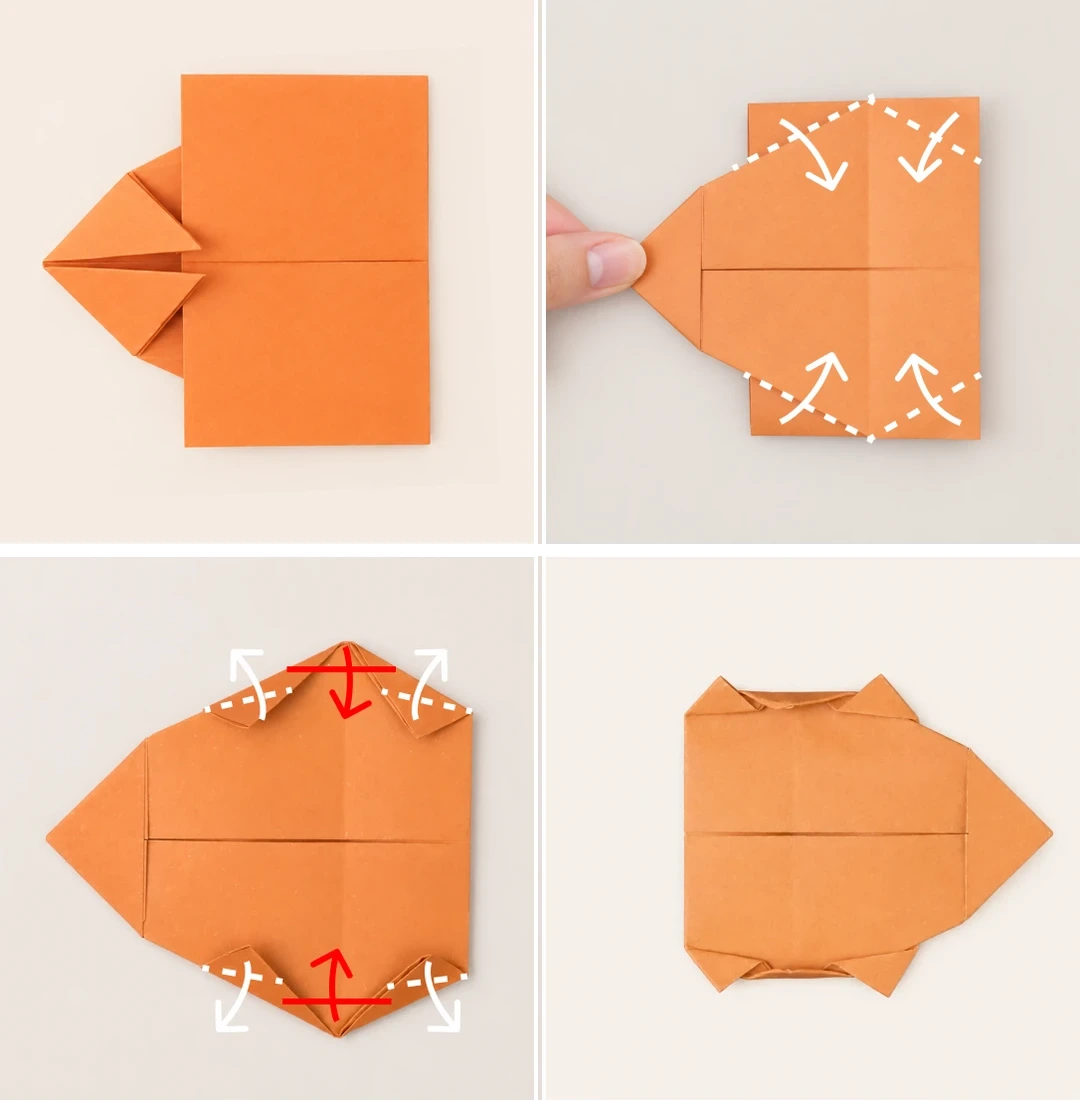 Open image at full size ↗
Fold the flap over and press it flat.
Turn over and fold the four extra corners inward.
Fold those four corners outward and fold the middle inward.
Fold the model in half from top to bottom.
Steps 17–20
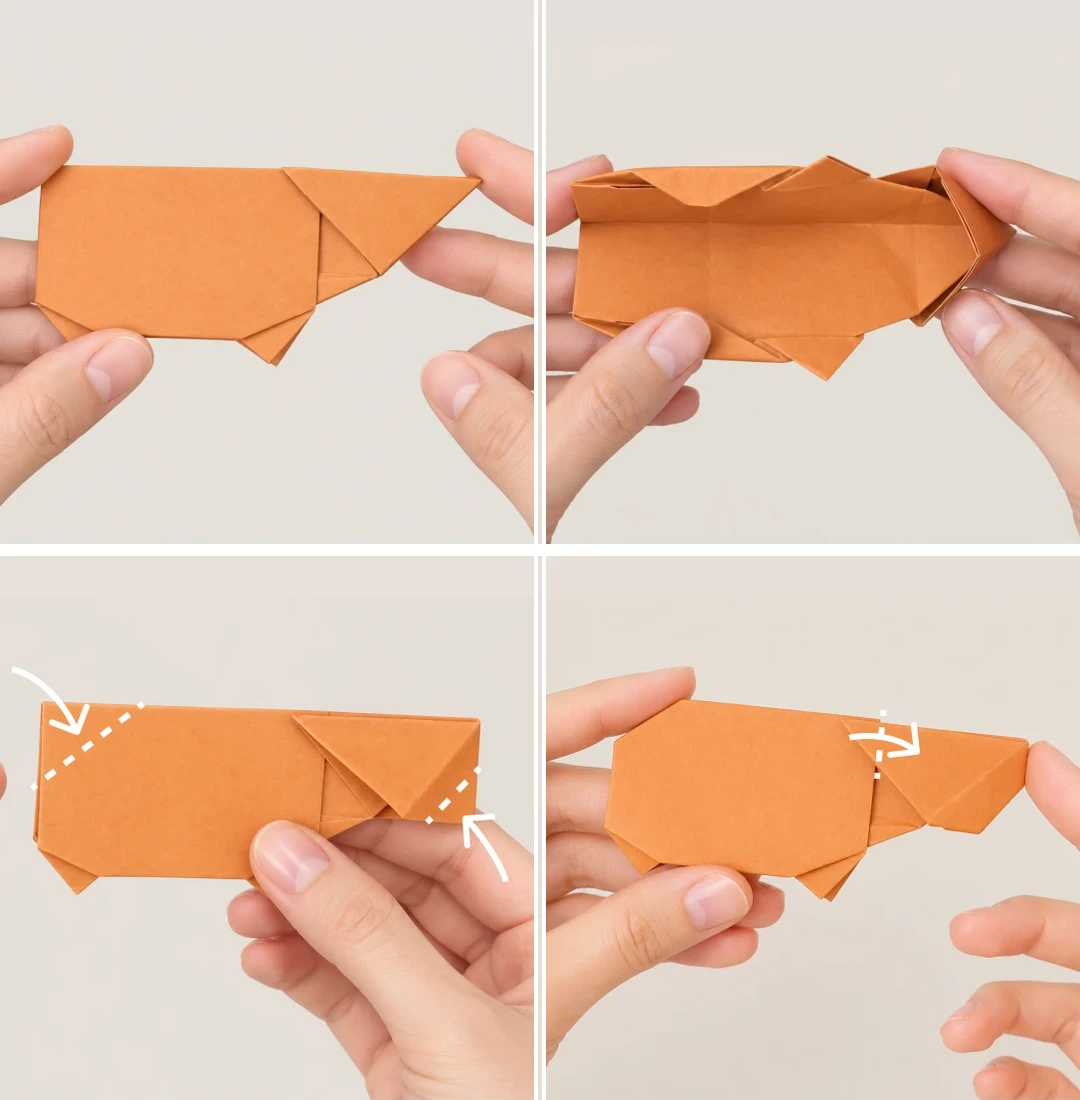 Open image at full size ↗
Open the head section.
Open the indicated corner of the head.
Fold the two corners inward.
Fold the triangle to the right and press.
Steps 21–22
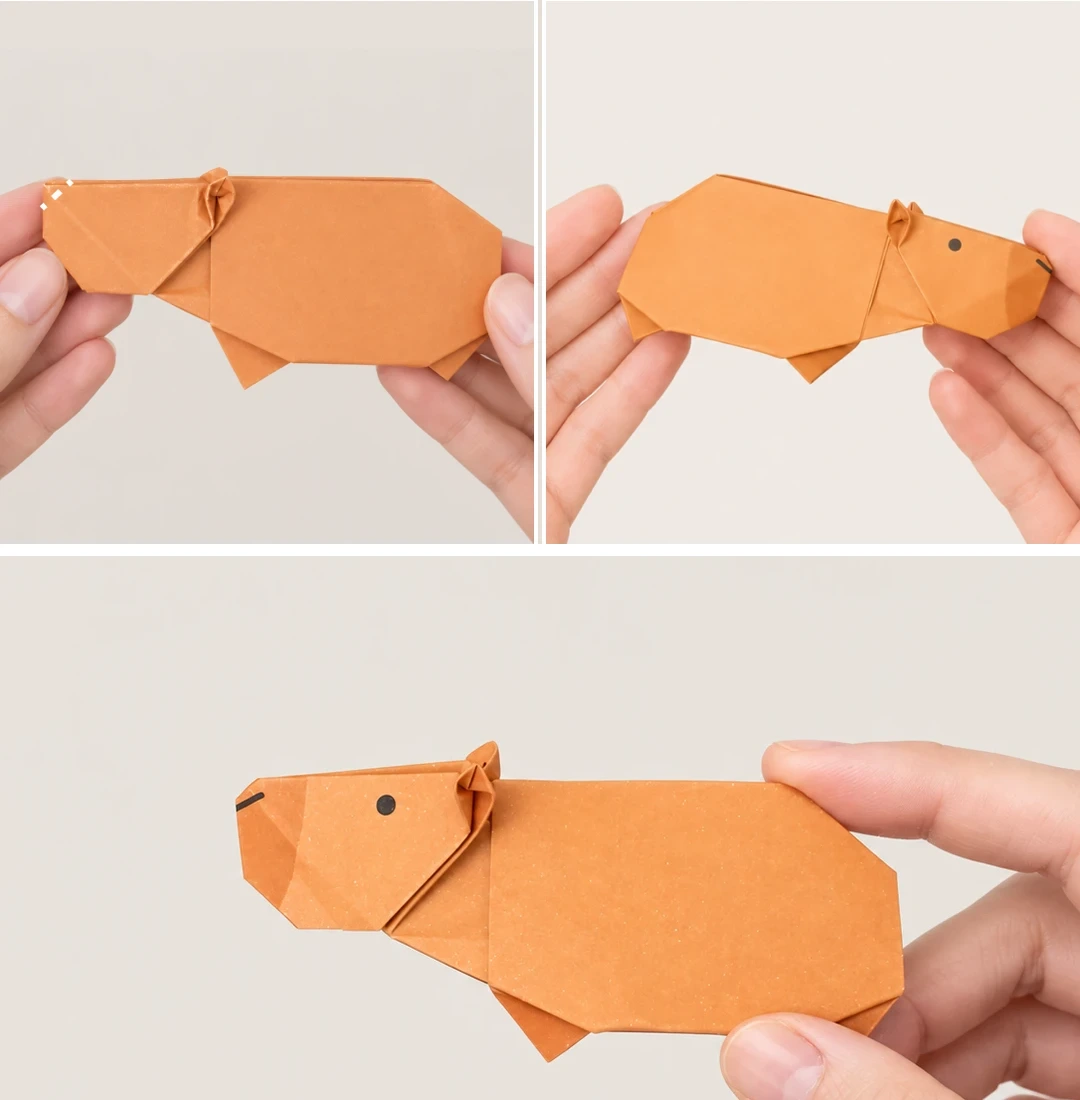 Open image at full size ↗
Fold and press the ears on both sides.
Draw the eyes and mouth to finish your capybara.
Follow the diagrams alongside the step-by-step English instructions.
Choose your next project →