
Flowers & nature · Step-by-step guide
Osmanthus Paper Flower
Fold a small four-petaled flower, then make a few more for an autumn-inspired bunch.
What you’ll need
- Square colored paper
- Optional prepared leaves and stem for display
Paper folding and shaping
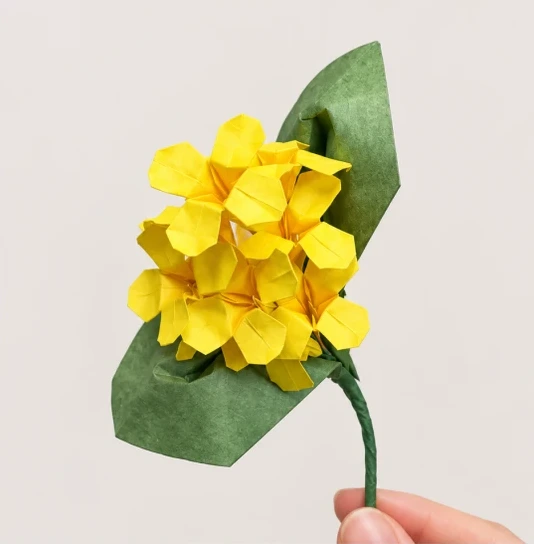
Make it, step by step.
20 steps · Original diagrams with English instructions
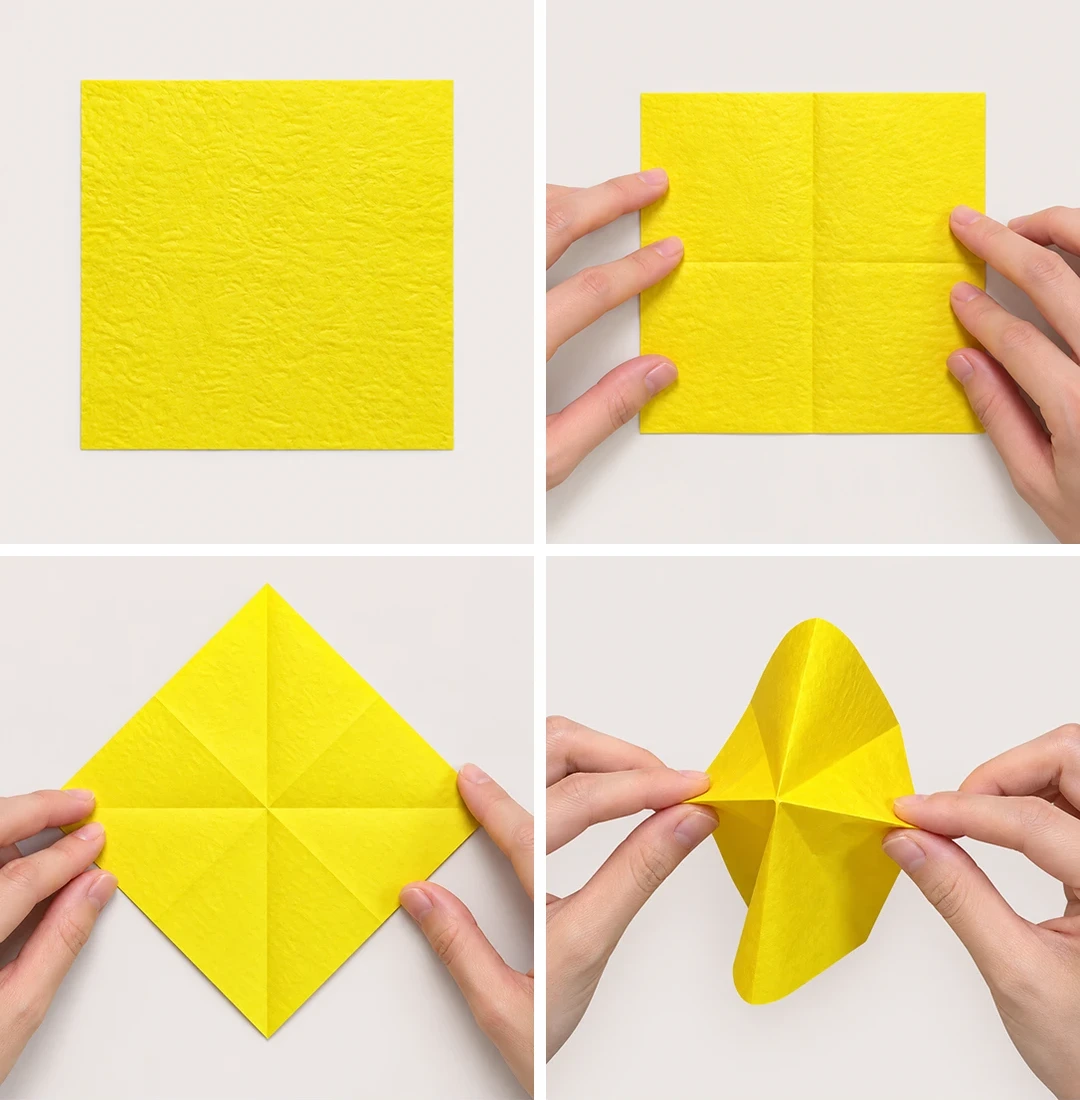
Steps 1–4
 Open image at full size ↗
Prepare a square sheet.
Fold the top and bottom together to mark a midline.
Add the other midline and diagonal creases.
Collapse inward along the creases.
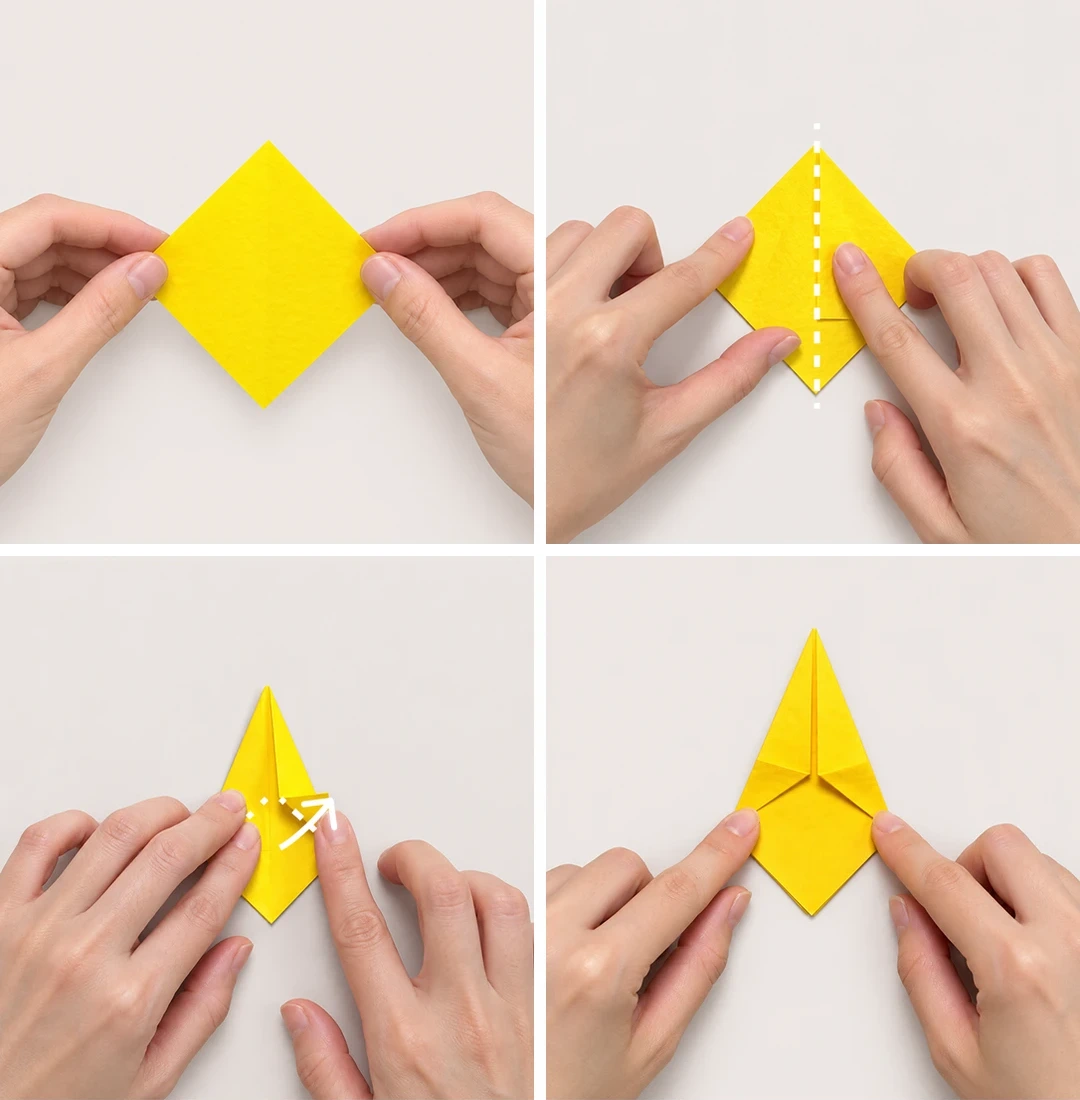
Steps 5–8
 Open image at full size ↗
Flatten into a square base.
With the open end at the top, fold both edges to the centerline; repeat on the back.
Fold the side corners outward.
Turn over and repeat.
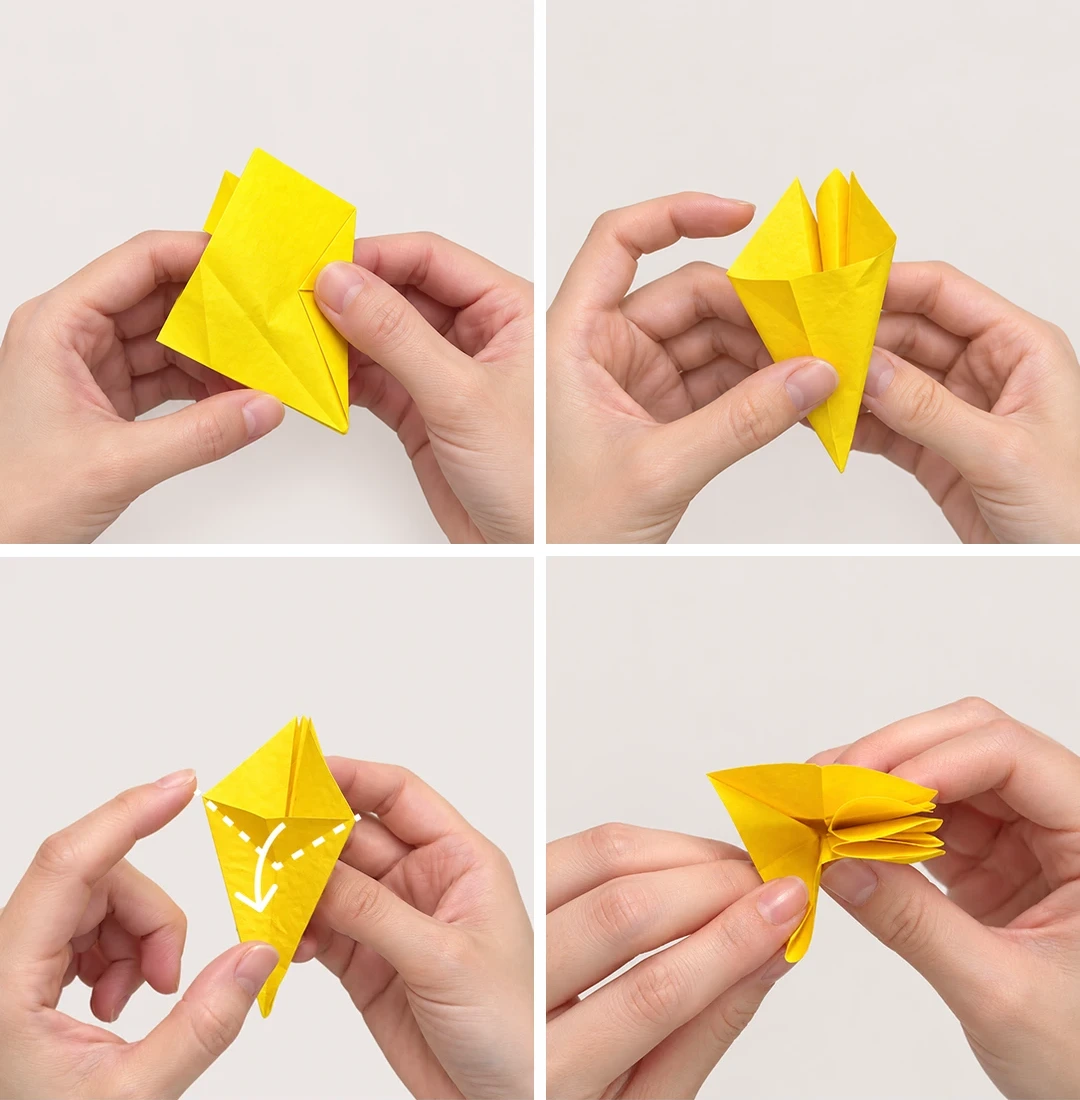
Steps 9–12
 Open image at full size ↗
Open the two sides.
Spread the corner pocket and flatten it.
Fold the triangle downward along the creases.
Repeat on the other three faces.
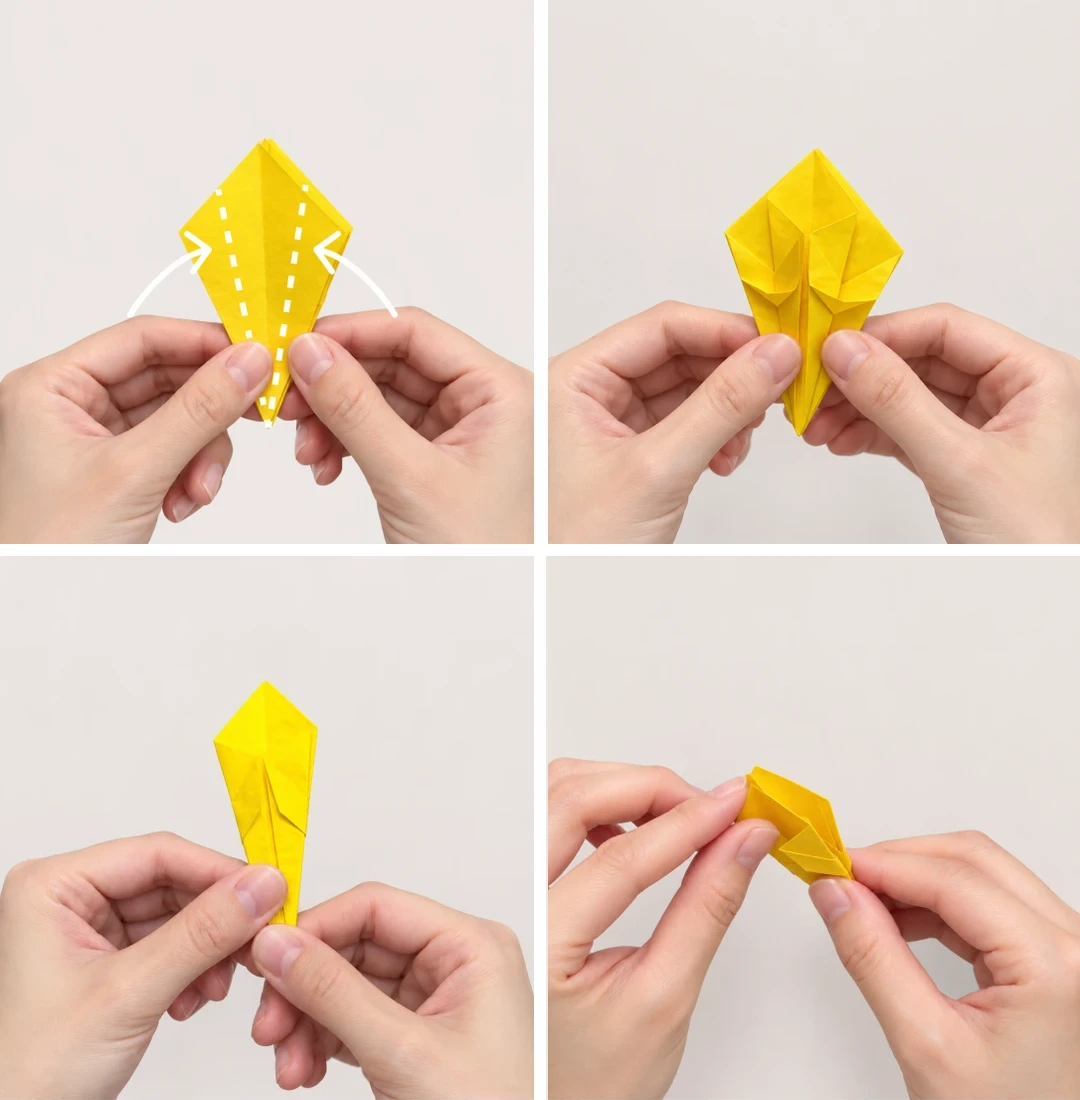
Steps 13–16
 Open image at full size ↗
Fold both edges inward toward the centerline.
Turn over and repeat.
Check the folded shape.
Fold the petals downward.
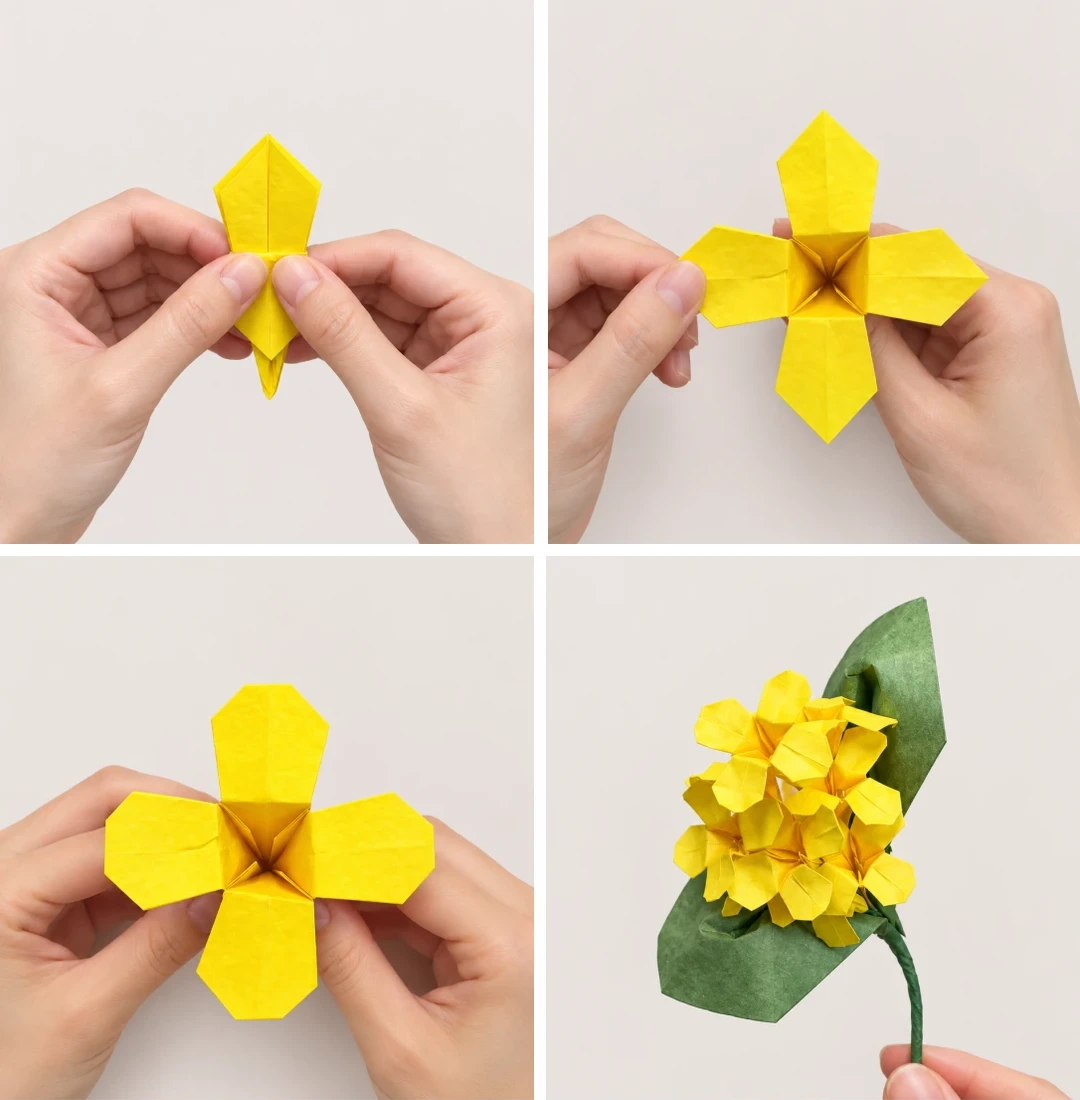
Steps 17–20
 Open image at full size ↗
Check the opened petals.
Fold the petal tips downward.
The flower is finished.
Add prepared leaves and a stem if you want to display a small bunch.
Follow the diagrams alongside the step-by-step English instructions.
Choose your next project →