
Flowers & nature · Step-by-step guide
Nested Paper Jasmine
Fold a small center and a larger outer flower, then nest them into a jasmine blossom.
What you’ll need
- One 10 × 10 cm square
- One 15 × 15 cm square
Origami · Creasing, collapse folds & shaping
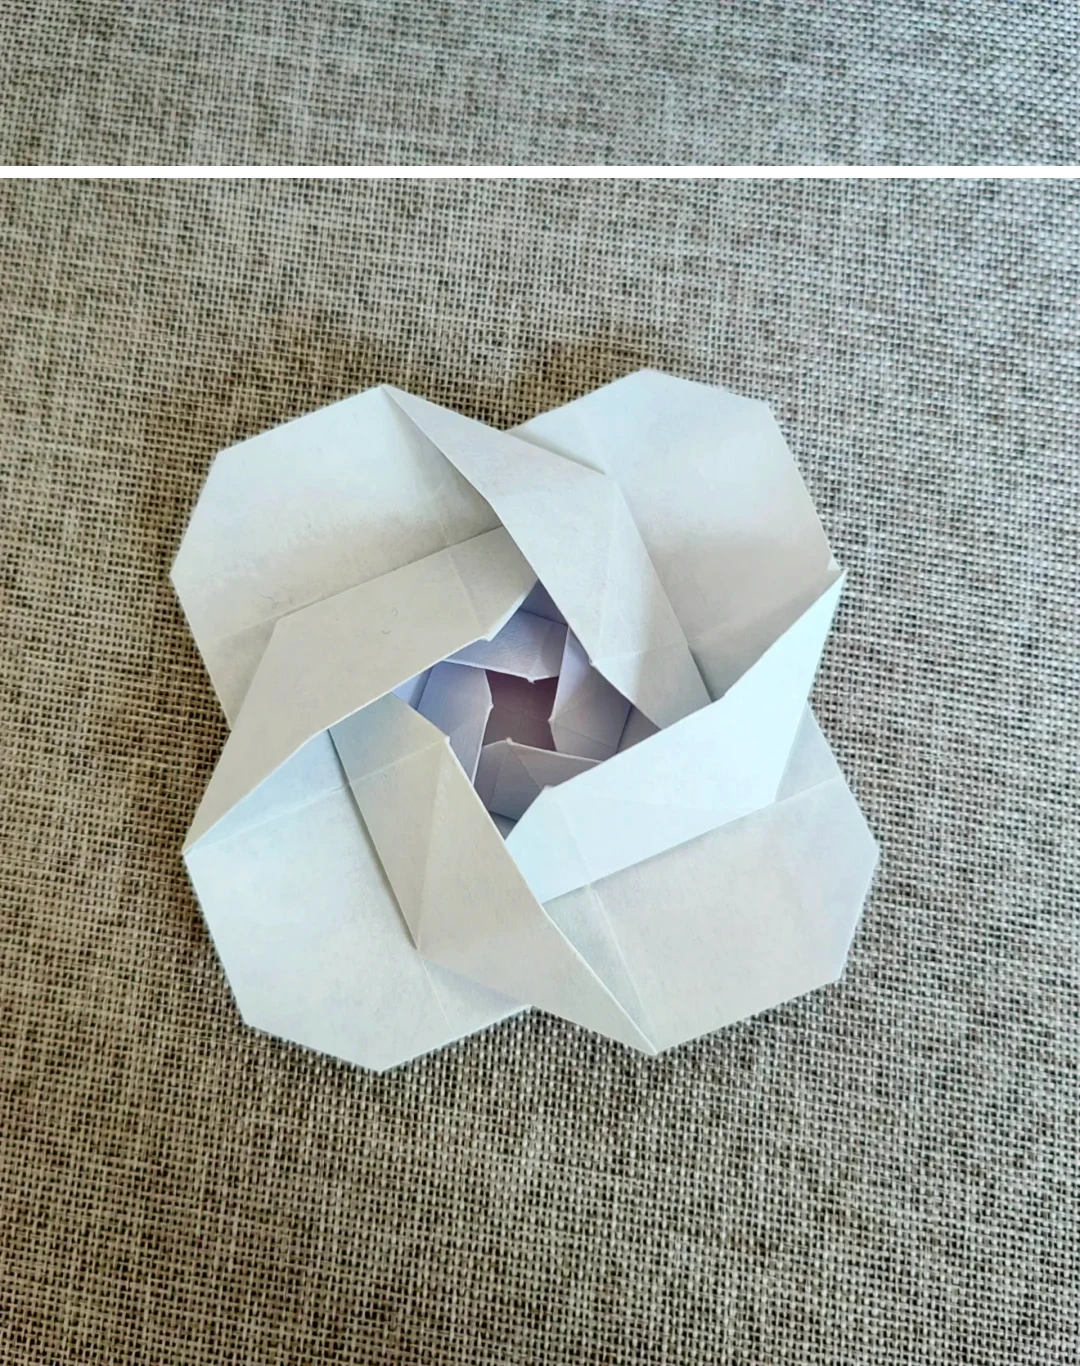
Make it, step by step.
8 steps · Original diagrams with English instructions
Crease the small square
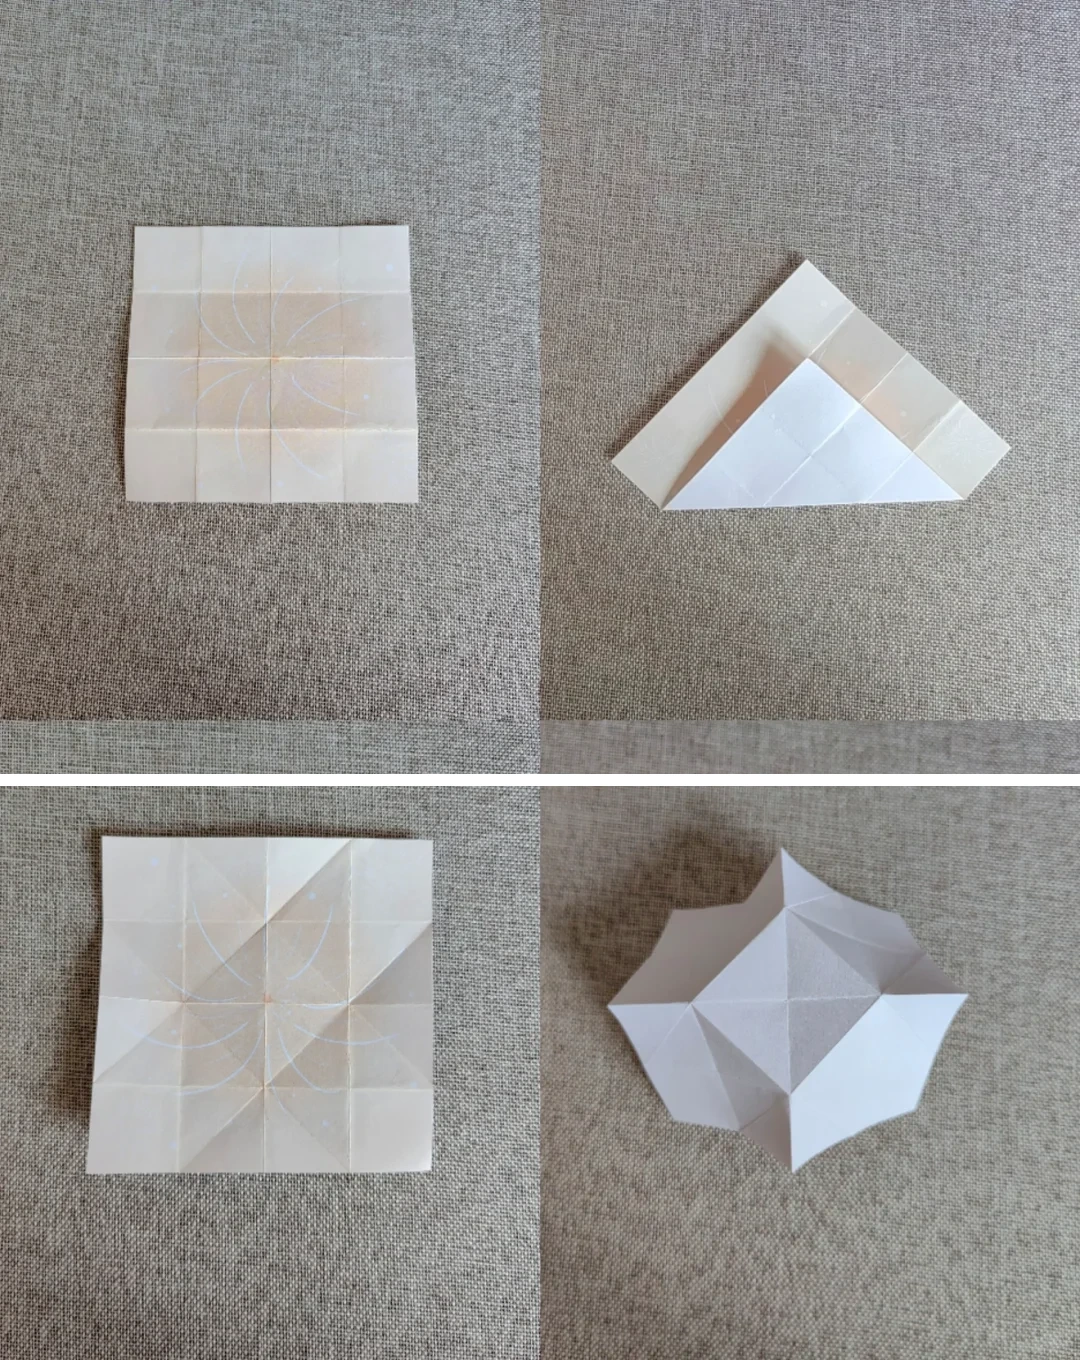 Open image at full size ↗
Use the 10 cm square. Fold the grid and diagonal creases shown, repeat on all four sides and turn over to collapse along the creases.
Flatten the inner base
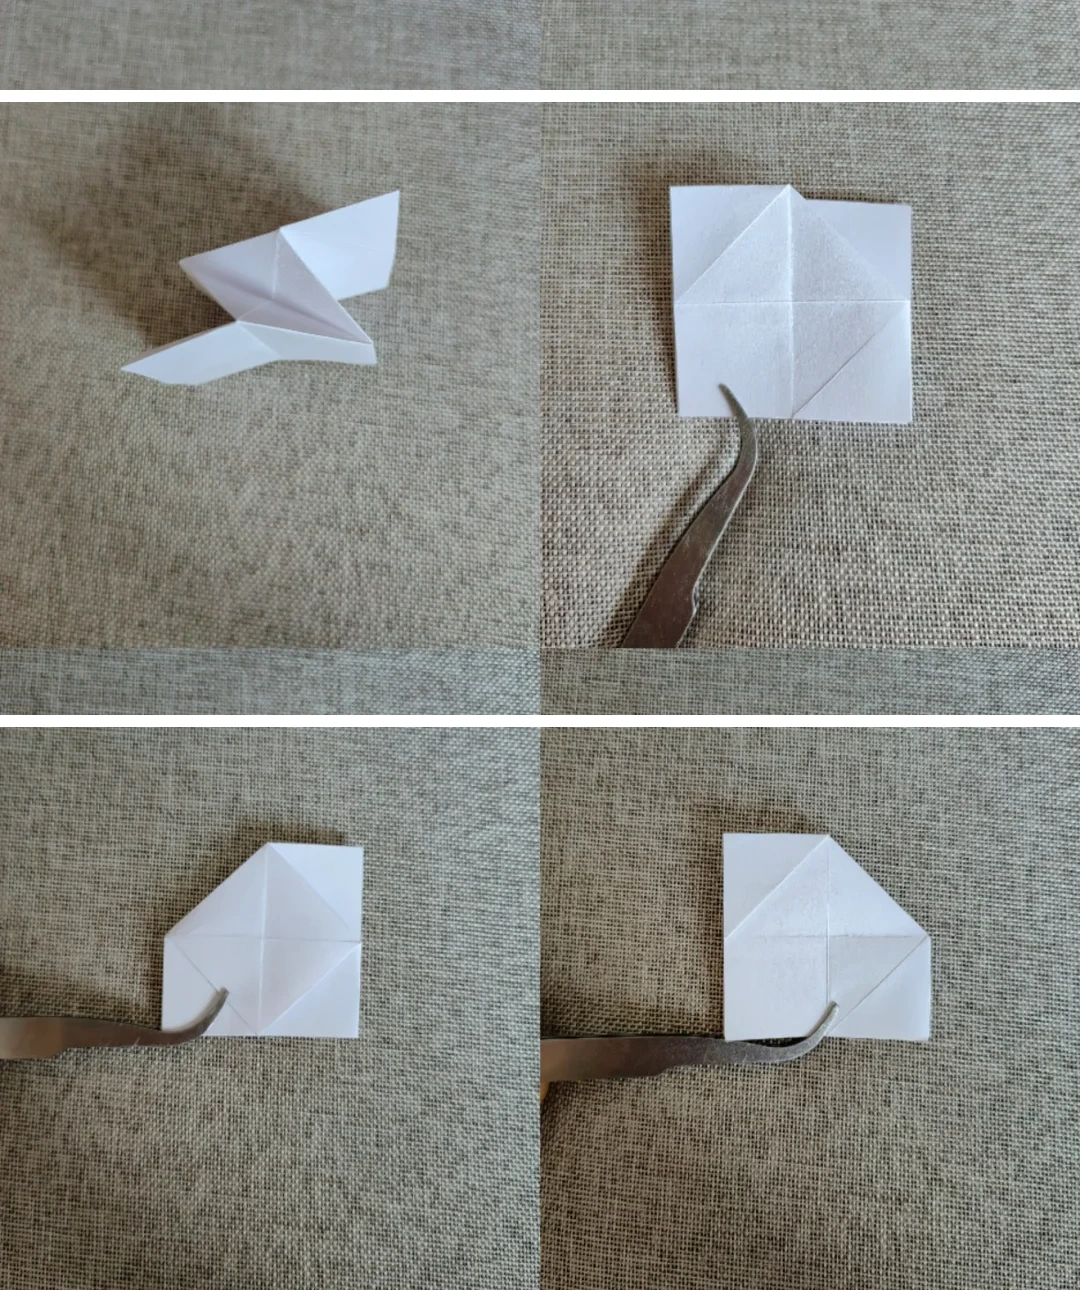 Open image at full size ↗
Flatten the collapsed model, fold the upper half down and turn over.
Rearrange the small layers
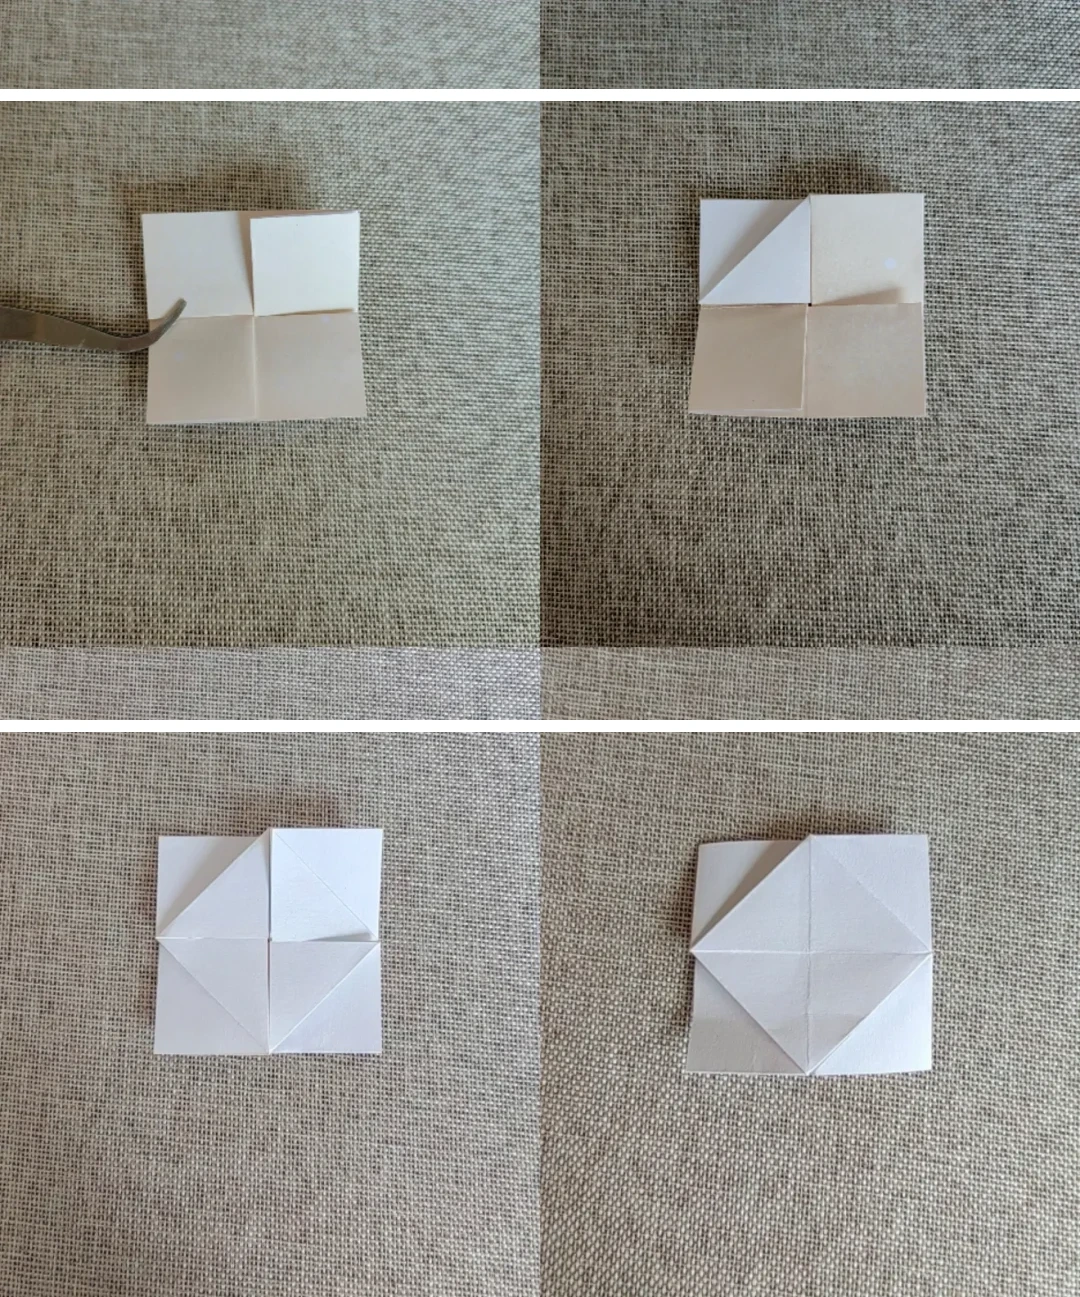 Open image at full size ↗
Fold the upper half down again, turn over and repeat the pictured flap arrangement.
Open the flower center
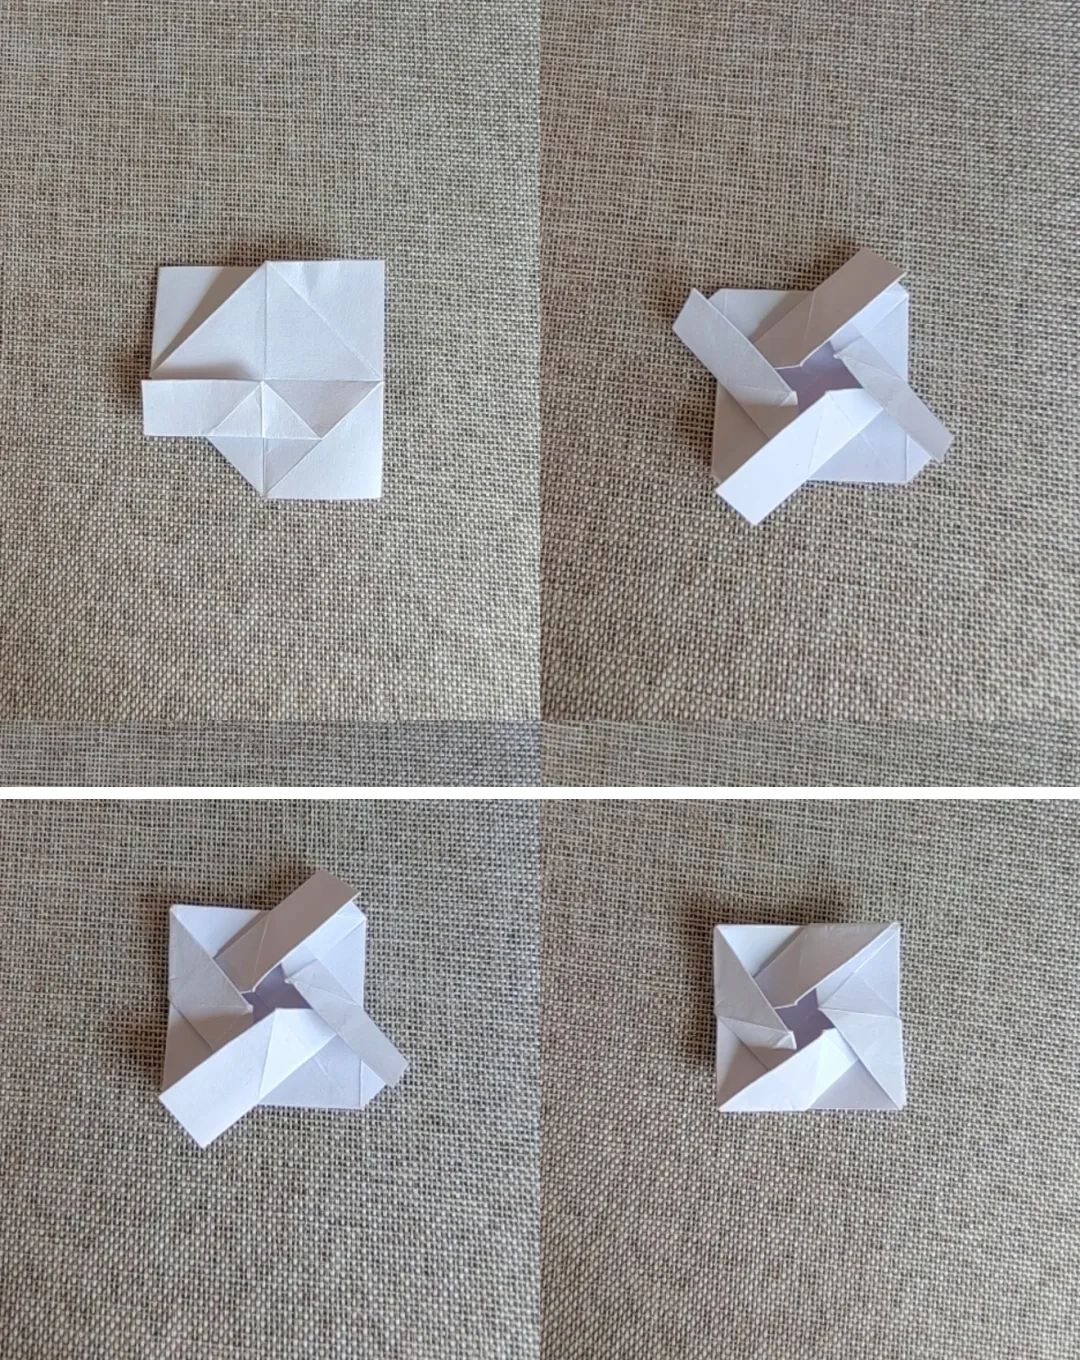 Open image at full size ↗
Wrap the triangular flap behind and gently spread the four central edges. Set this small center aside.
Start the outer flower
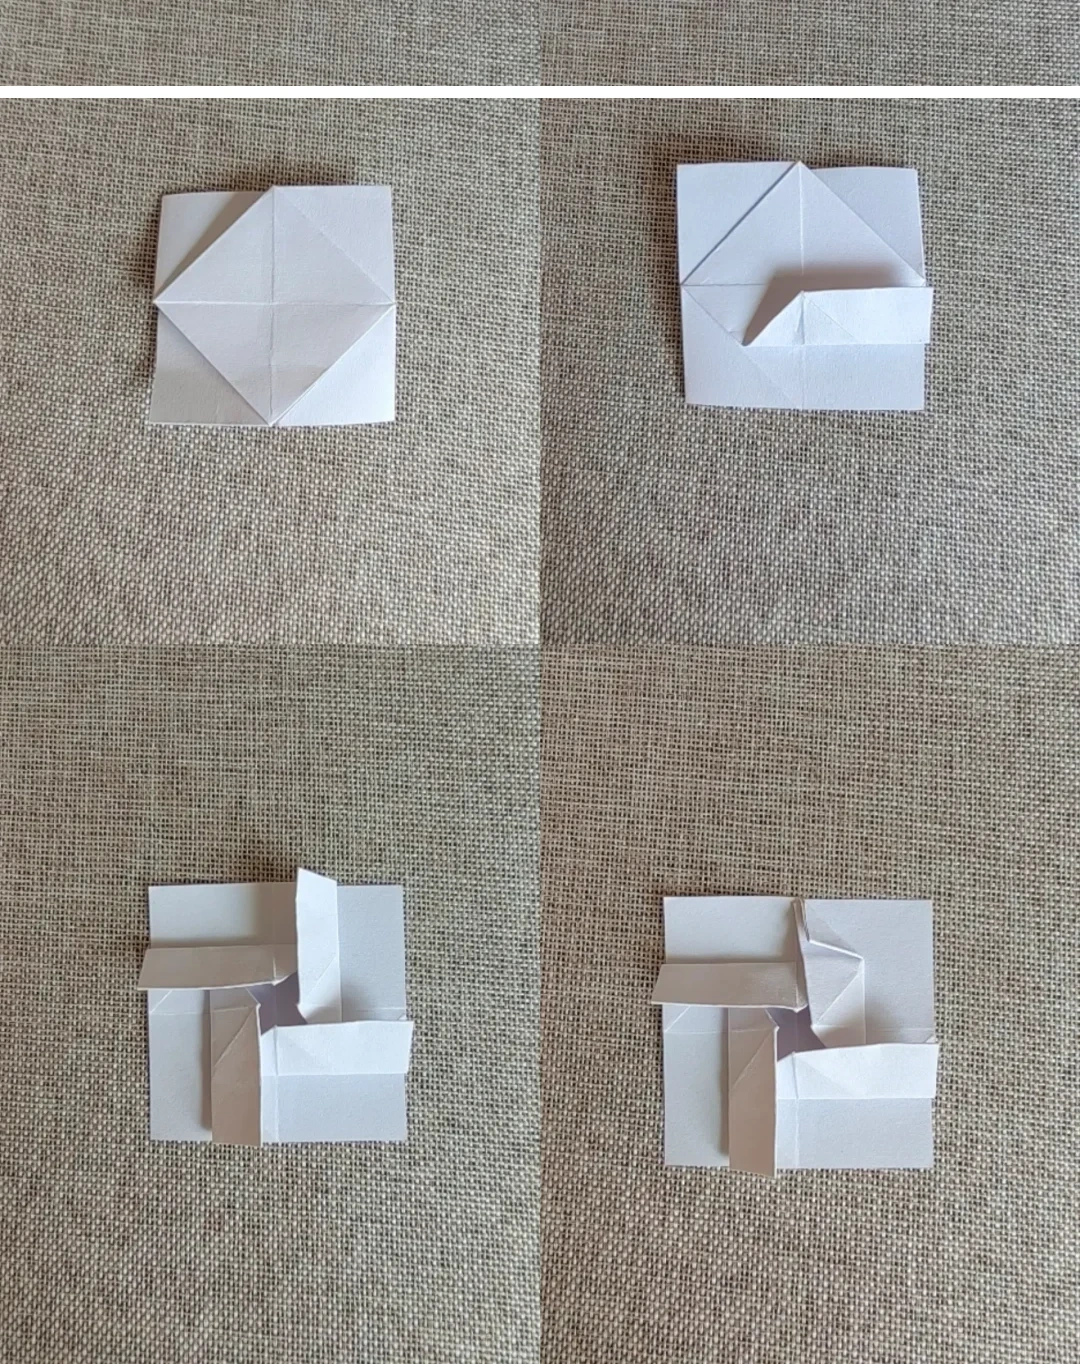 Open image at full size ↗
Repeat the preceding grid and base folds with the 15 cm square, following the four panels.
Open the outer pockets
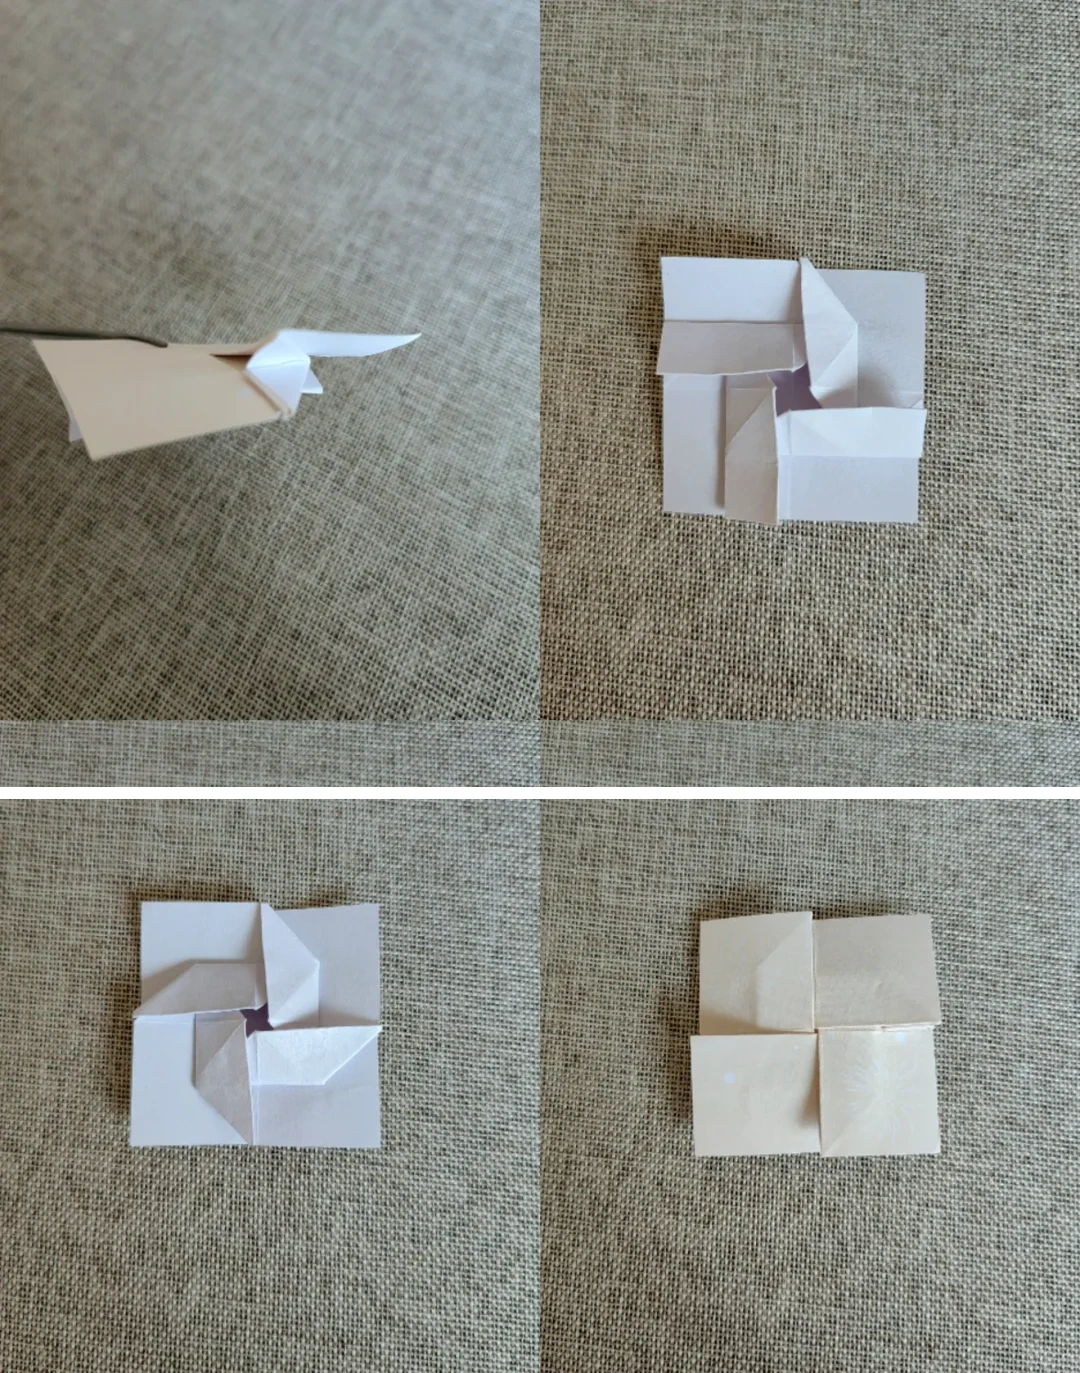 Open image at full size ↗
Lift and fold the layers around the center. Turn the model over as pictured.
Round the outer petals
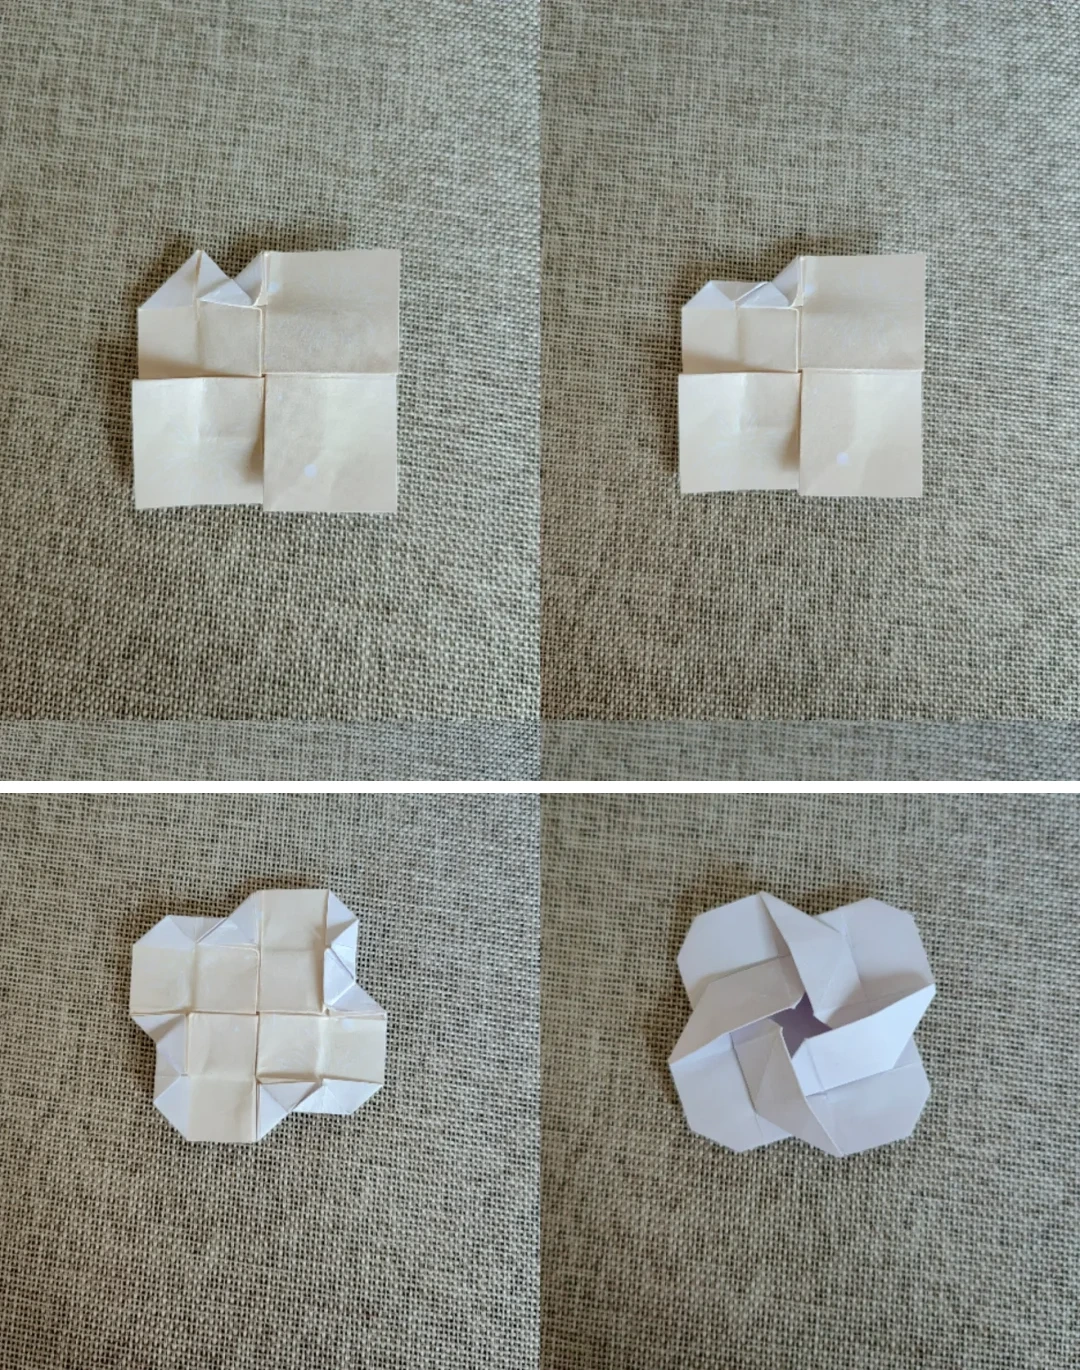 Open image at full size ↗
Tuck the small corners inward, turn over and open the four broad petals.
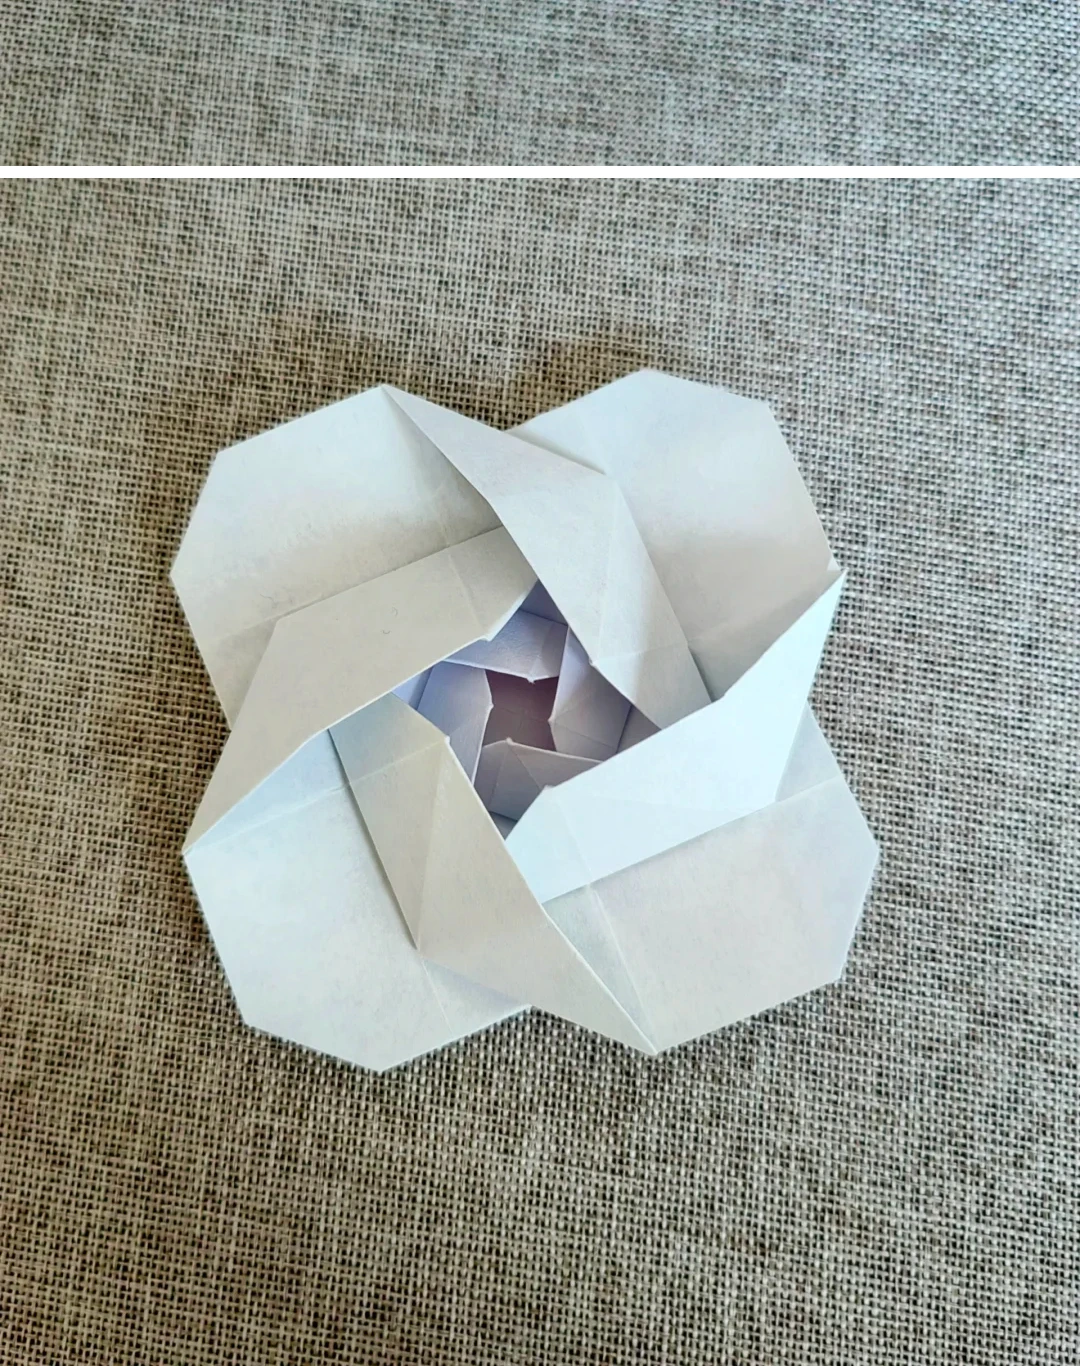
Nest the jasmine
 Open image at full size ↗
Insert the small prepared center into the opening of the larger flower.
Follow the diagrams alongside the step-by-step English instructions.
Choose your next project →