
Animals · Step-by-step guide
Moon Bunny
Make a plump little rabbit with long ears and a face of your own.
What you’ll need
- Square paper
- Pen
Paper folding and shaping
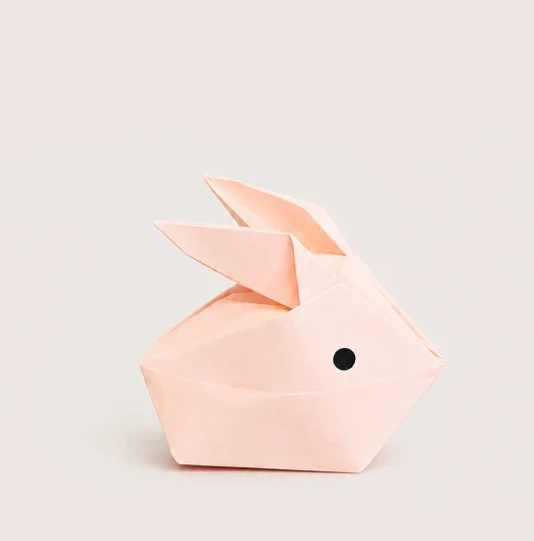
Make it, step by step.
16 steps · Original diagrams with English instructions
Steps 1–4
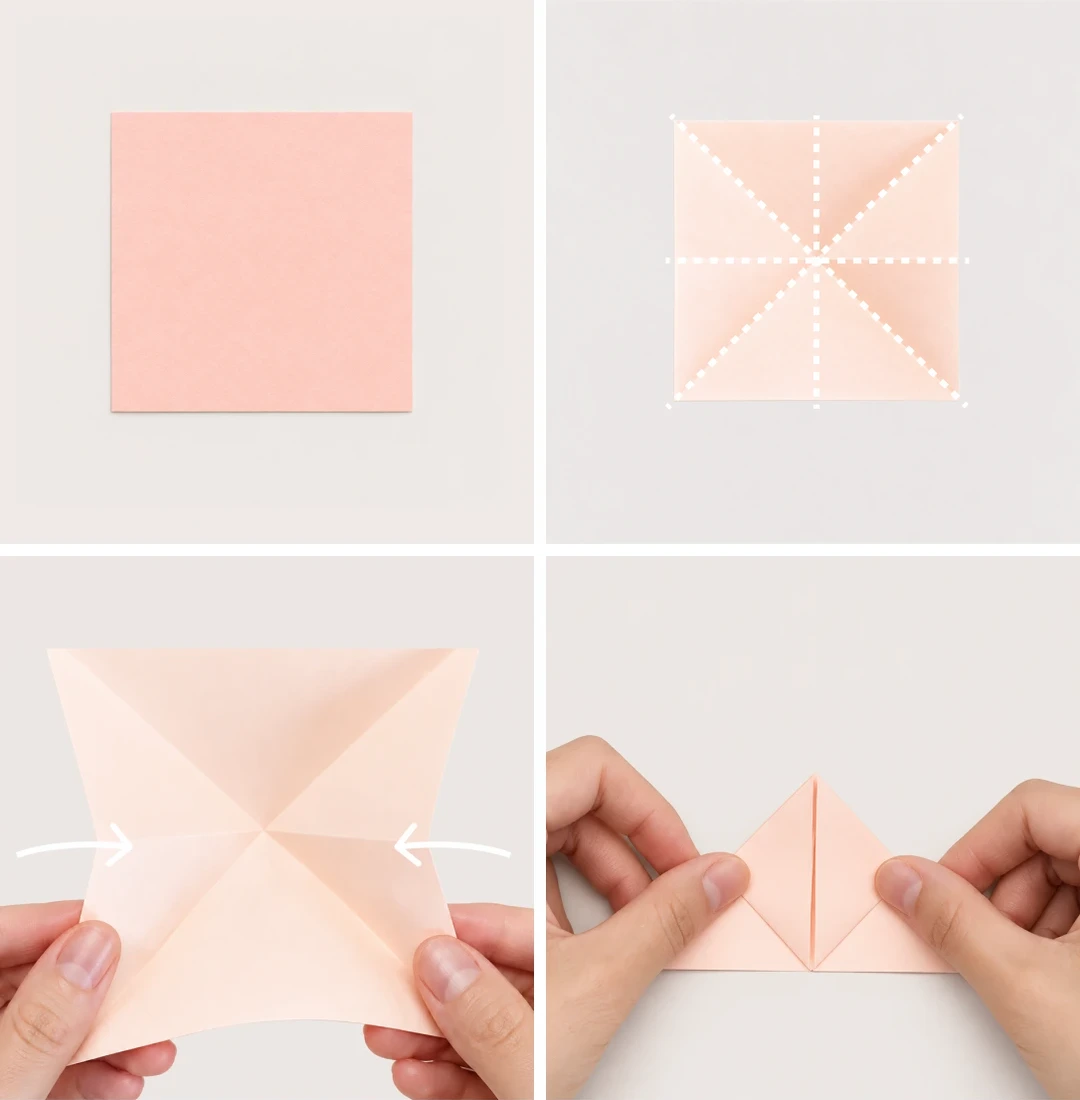 Open image at full size ↗
Prepare a square sheet.
Crease both diagonals and the horizontal and vertical midlines.
Bring the sides inward along the creases to collapse the paper.
Fold the left and right corners toward the centerline.
Steps 5–8
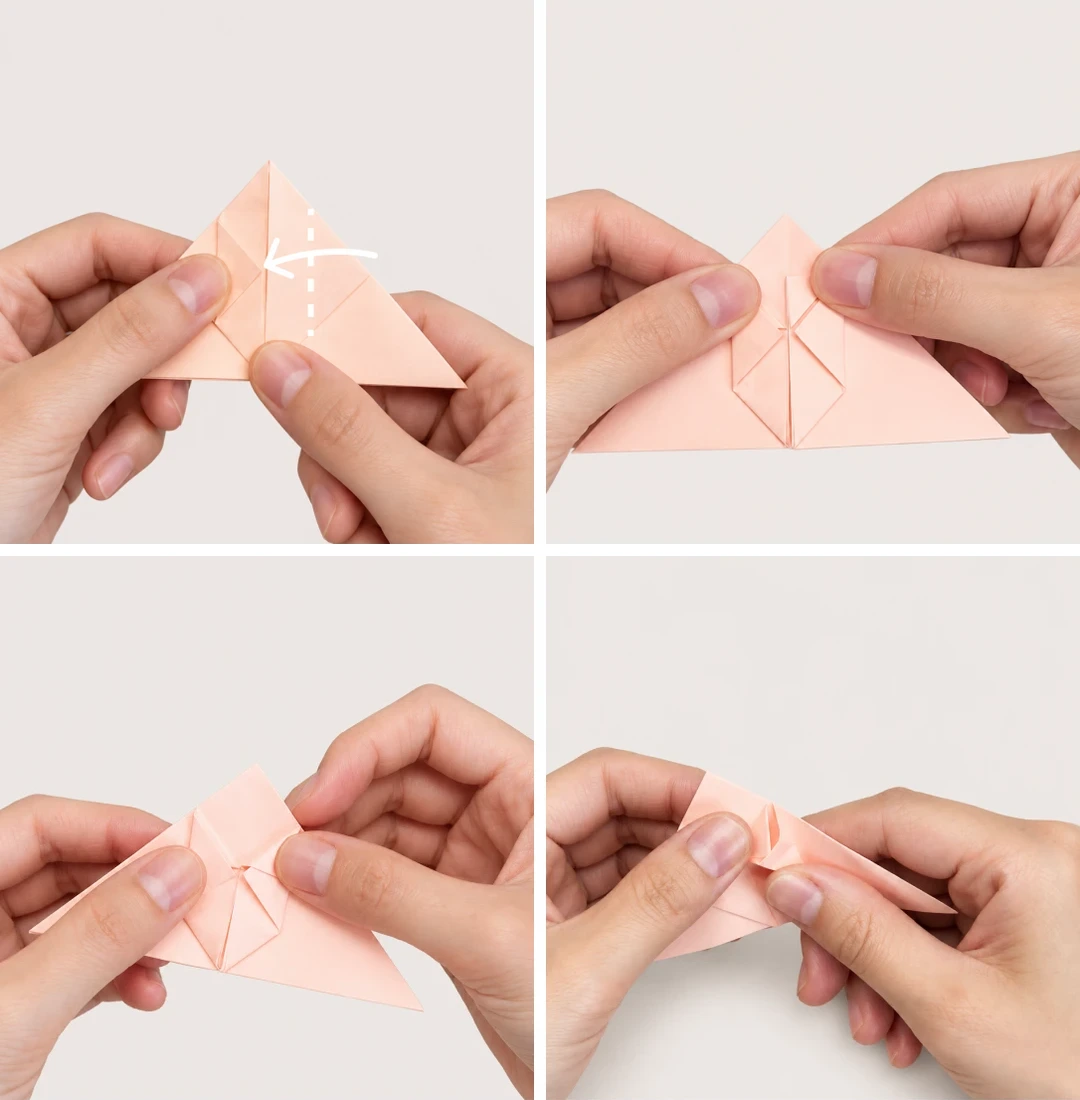 Open image at full size ↗
Fold both sides inward along the dotted lines.
Fold the upper triangle down.
Fold the small flap to the right.
Tuck it into the triangular pocket below.
Steps 9–12
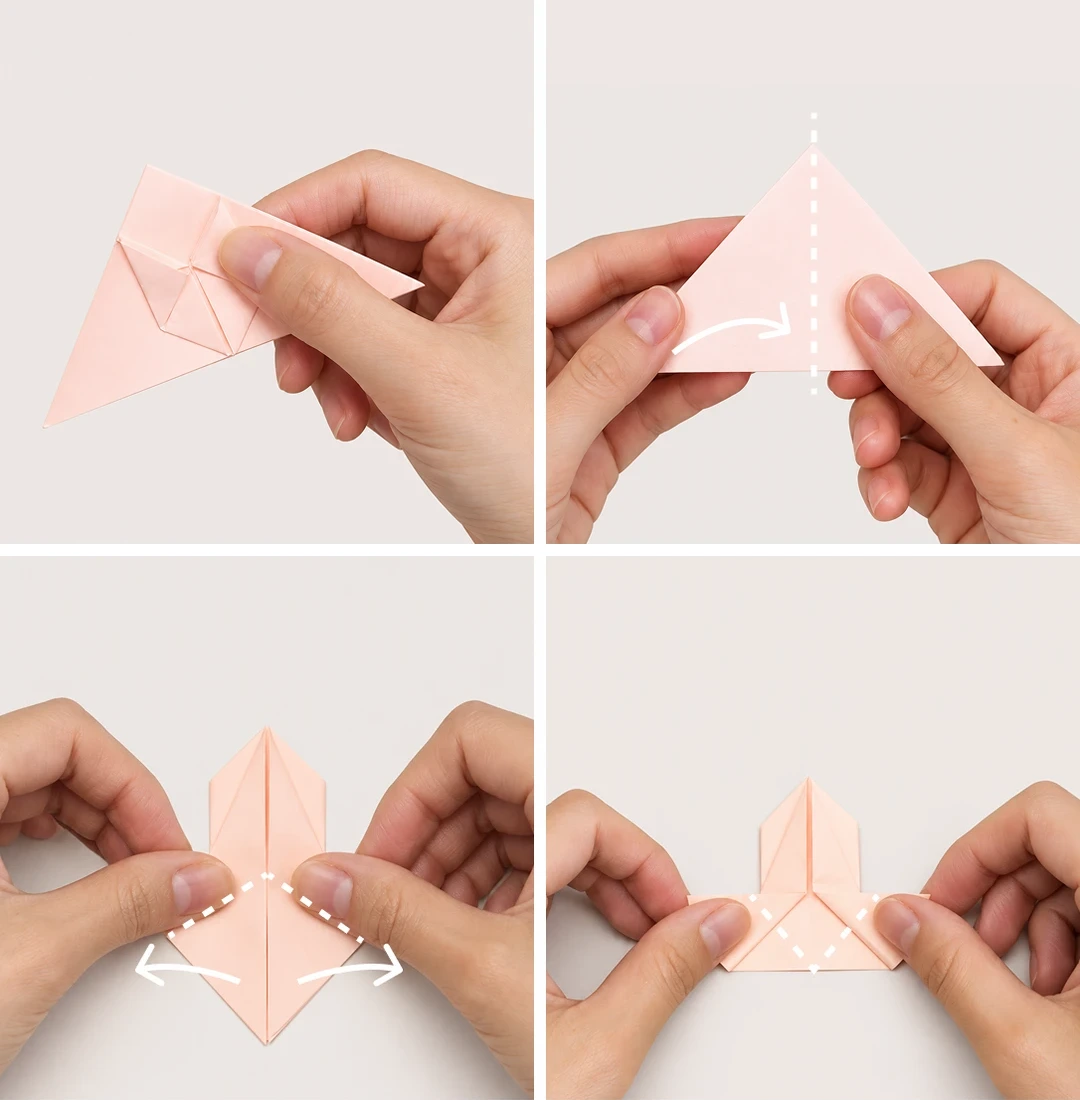 Open image at full size ↗
Repeat on the left side.
Turn over and fold the corners toward the centerline.
Open the flaps outward along the dotted lines.
Fold the indicated edges inward toward the center.
Steps 13–16
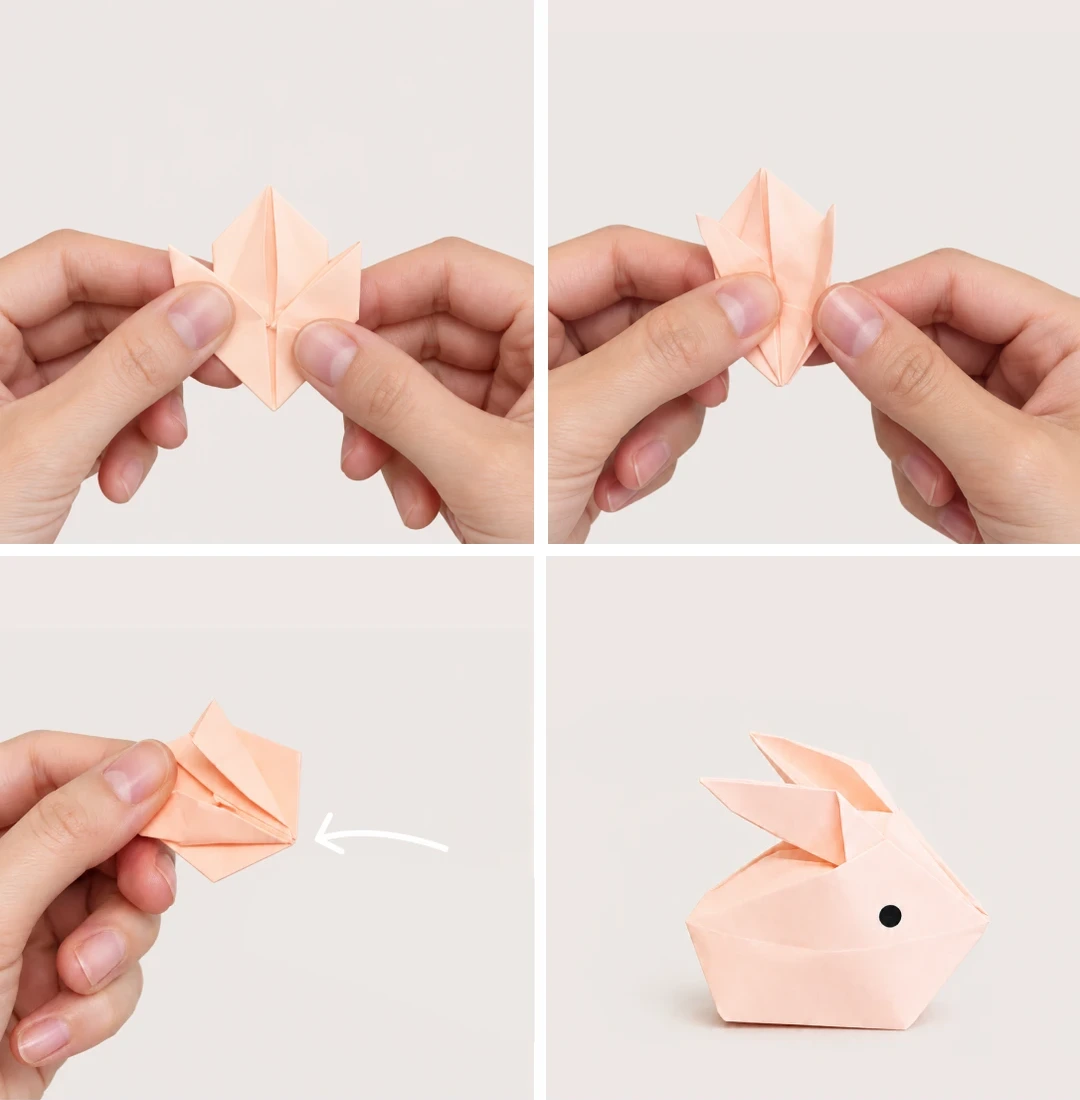 Open image at full size ↗
Fold the edges inward again.
Press the folds to match the picture.
Blow gently into the opening to inflate the body.
Draw the eyes to finish your bunny.
Follow the diagrams alongside the step-by-step English instructions.
Choose your next project →