
Flowers & nature · Step-by-step guide
Modular Gardenia
Join six folded units, curl their outer layers and add a small center to make a gardenia.
What you’ll need
- Six equal paper squares
- A prepared paper stamen
- Double-sided tape or glue
- A slim curling tool
Modular paper folding · Glued units & curled petals
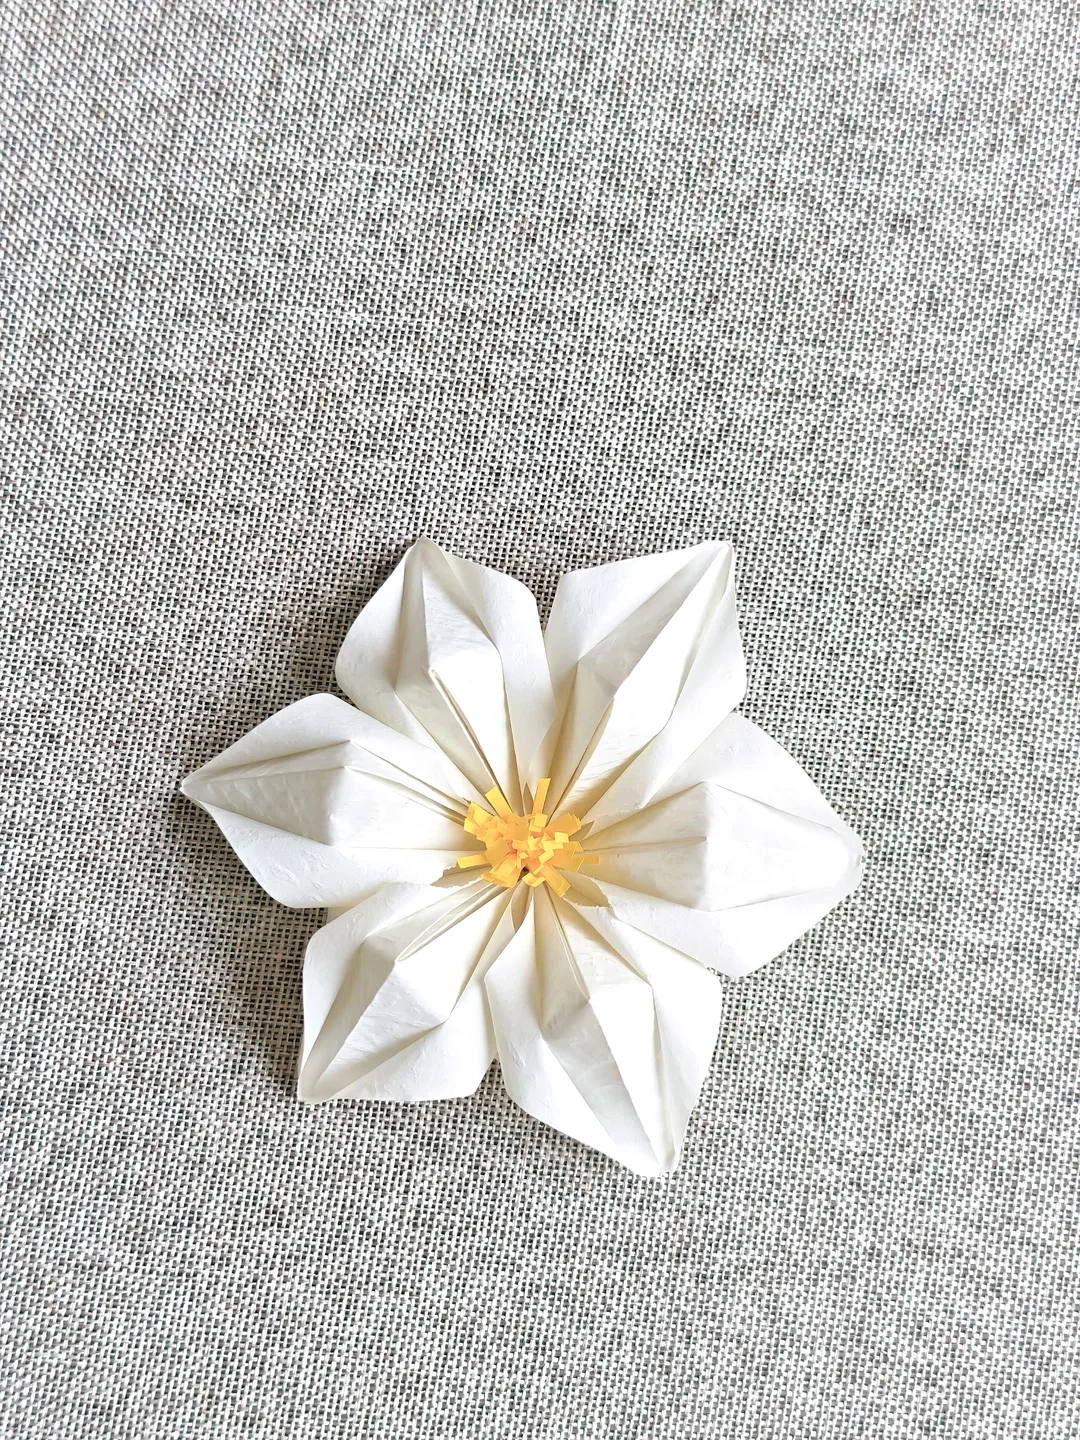
Make it, step by step.
6 steps · Original diagrams with English instructions
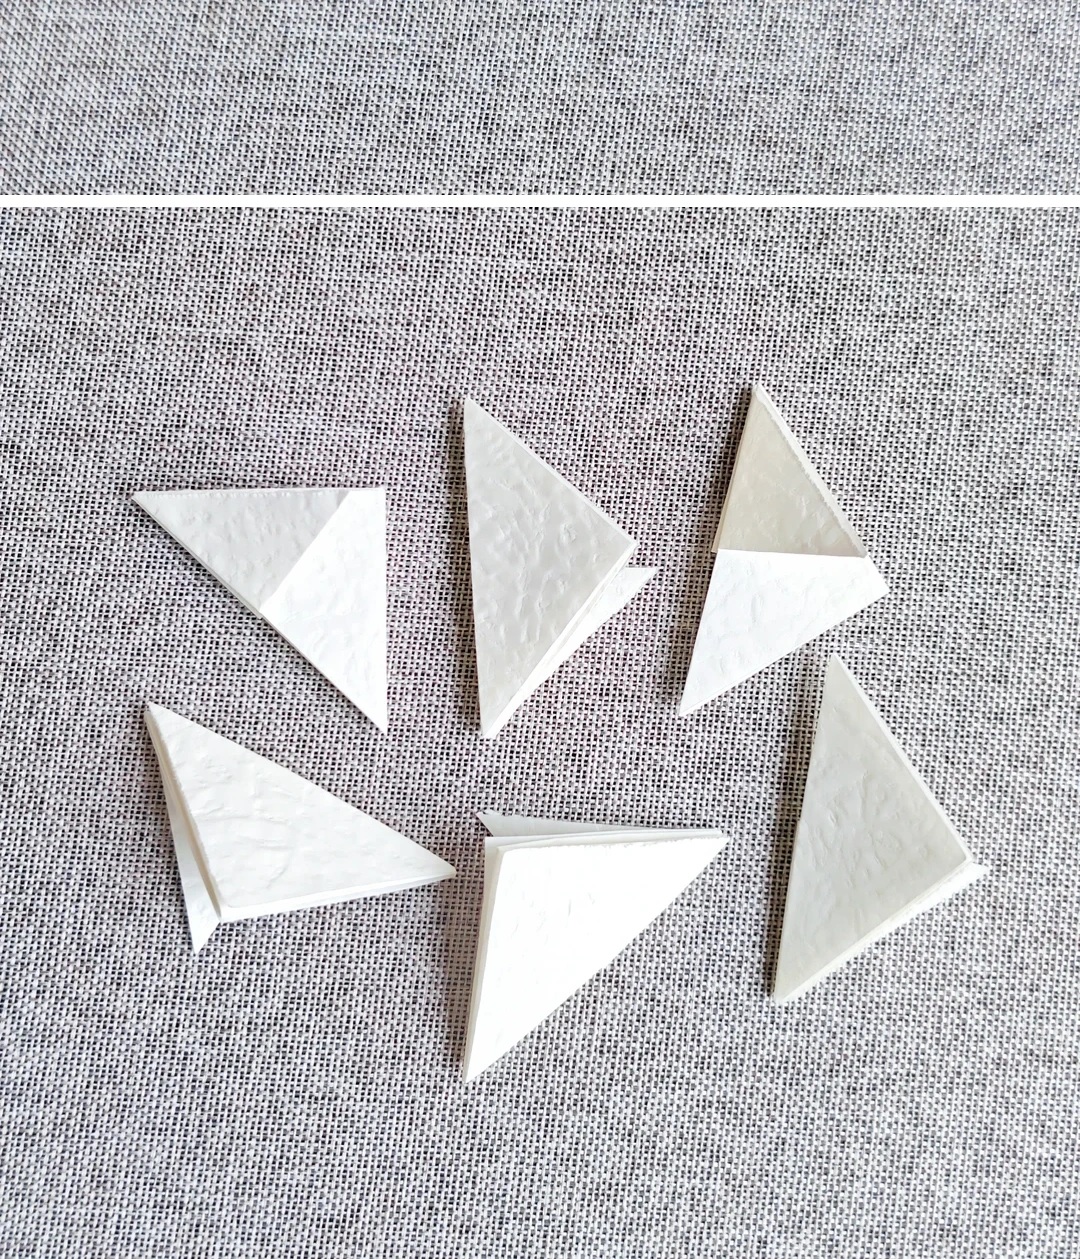
Prepare six units
 Open image at full size ↗
Set aside six equal squares and a small prepared stamen.
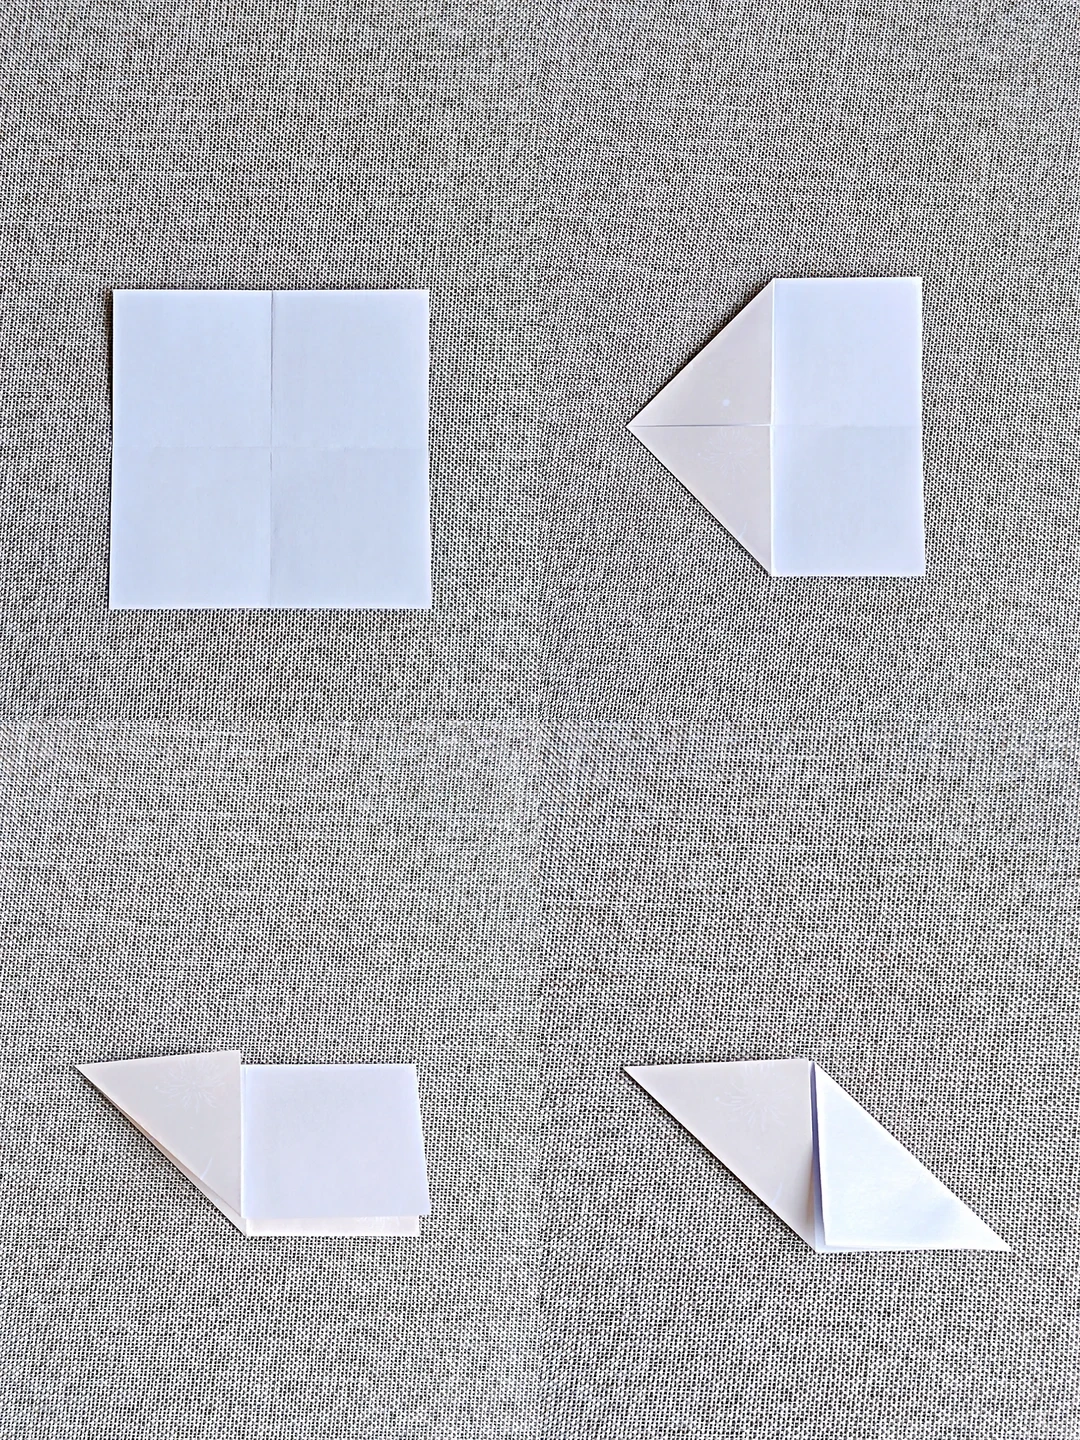
Fold the first unit
 Open image at full size ↗
Crease the square, bring the first pair of corners inward and fold the lower edges along the pictured diagonals.
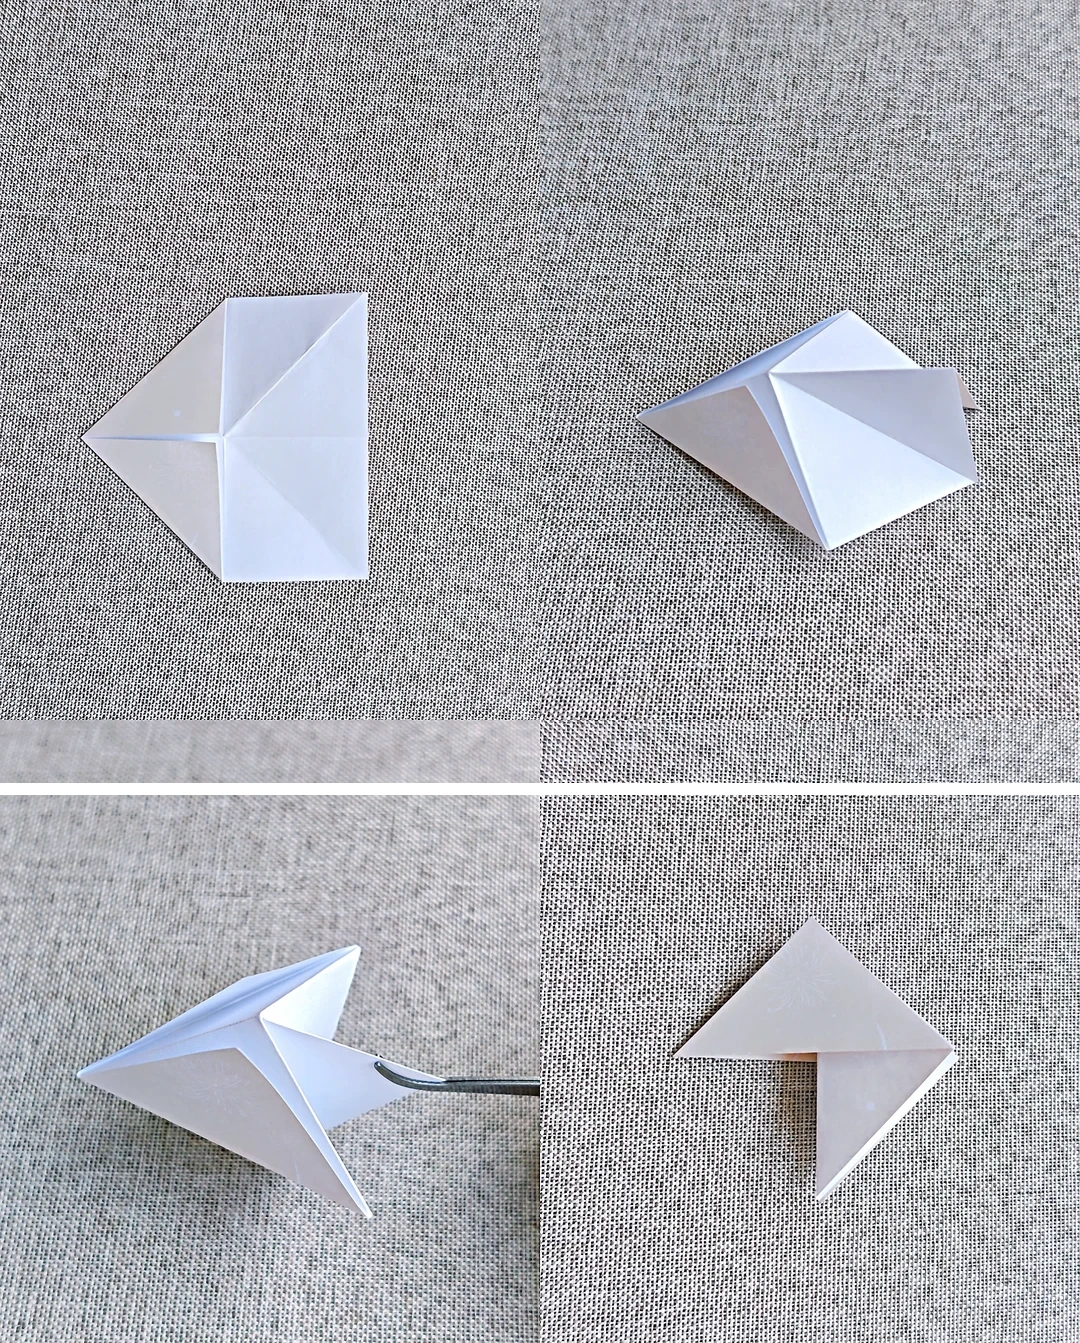
Collapse the center
 Open image at full size ↗
Fold the remaining corners, then hold both ends and push them toward the middle to collapse the unit.
Join neighboring units
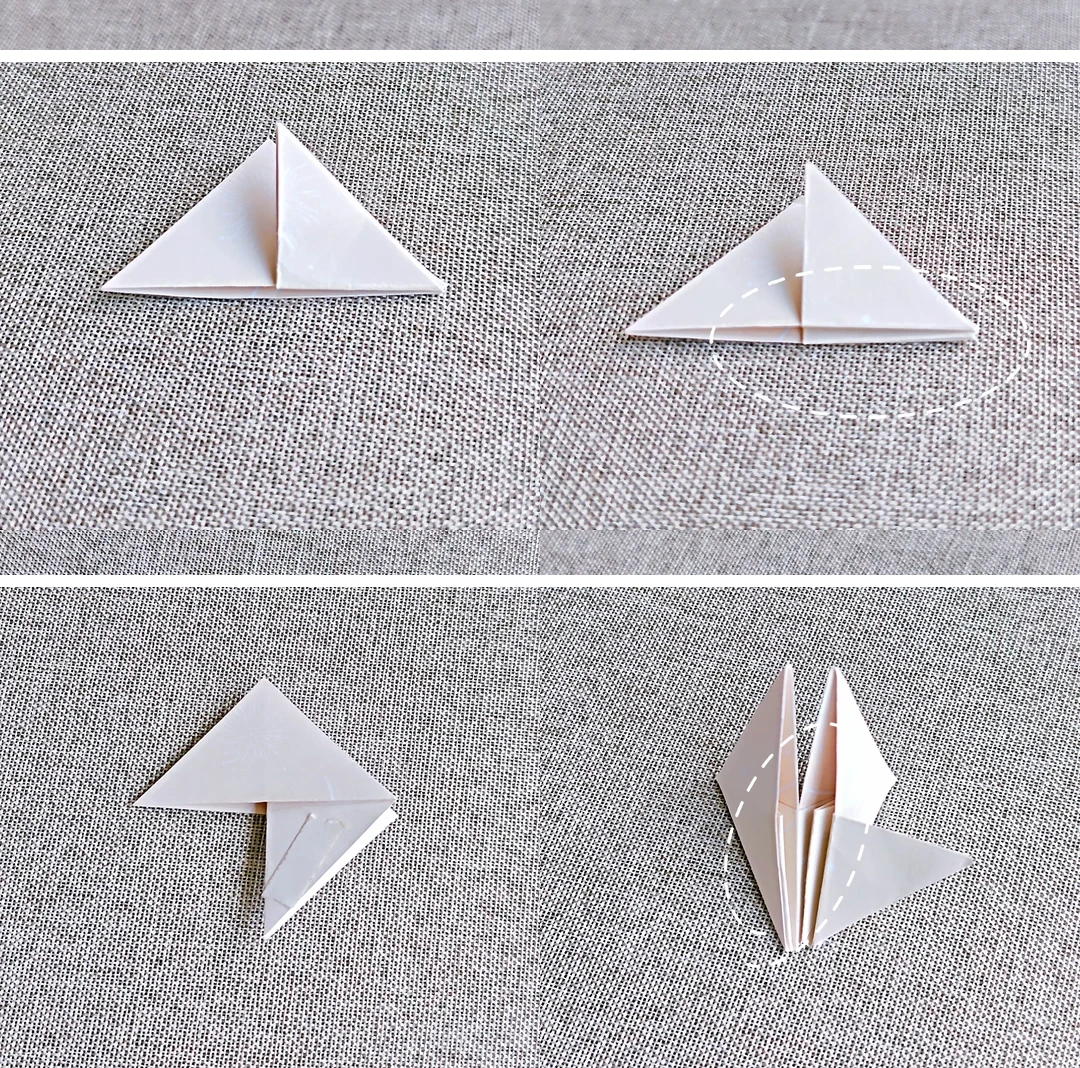 Open image at full size ↗
Tuck the upper layer into the middle gap, fold one flap down and add tape. Interlock and glue neighboring units.
Open the flower
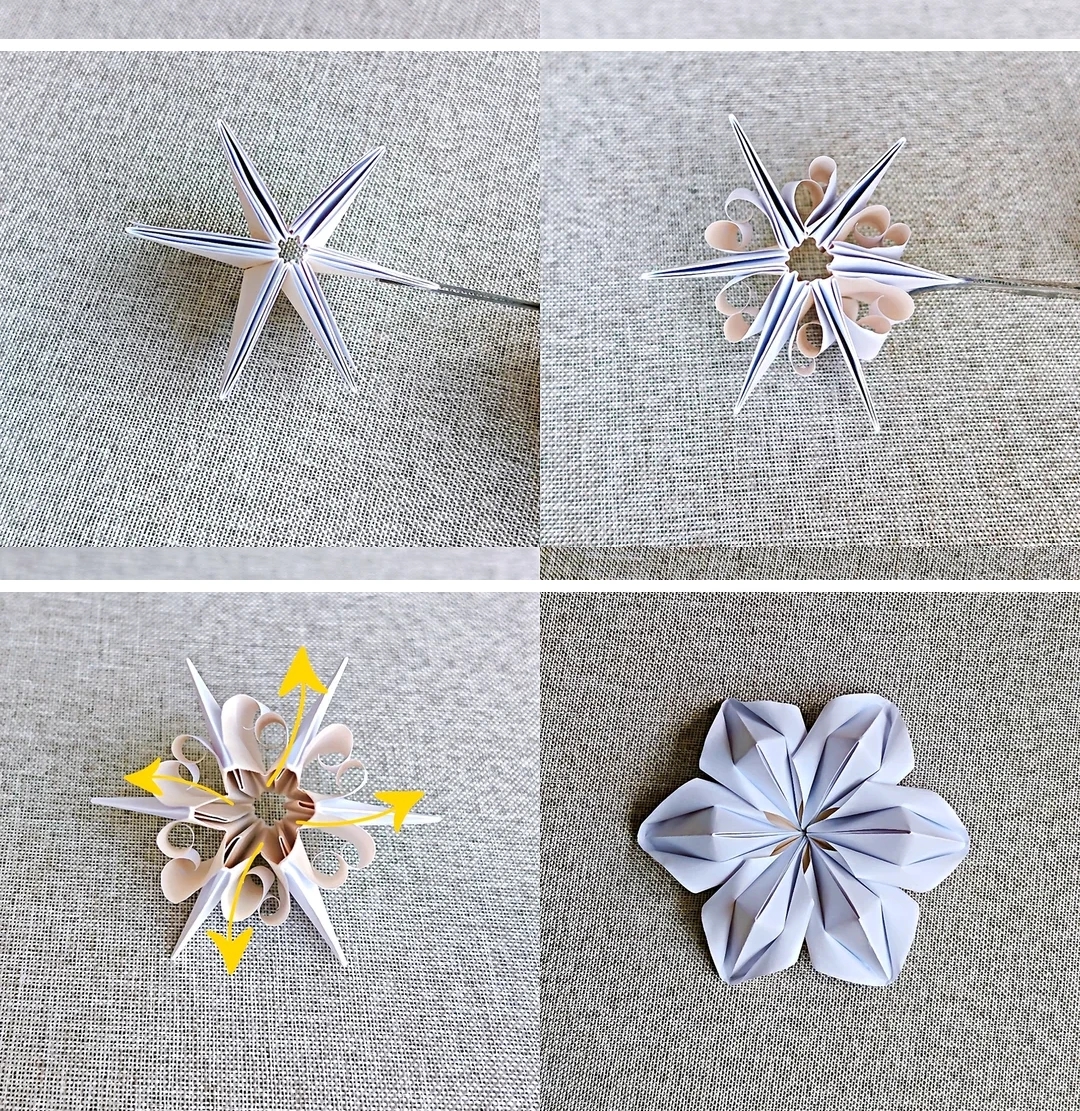 Open image at full size ↗
Close the ring. Curl the single outer layers, turn the back toward you and open the center outward and down. Turn to the front again.
Add the center
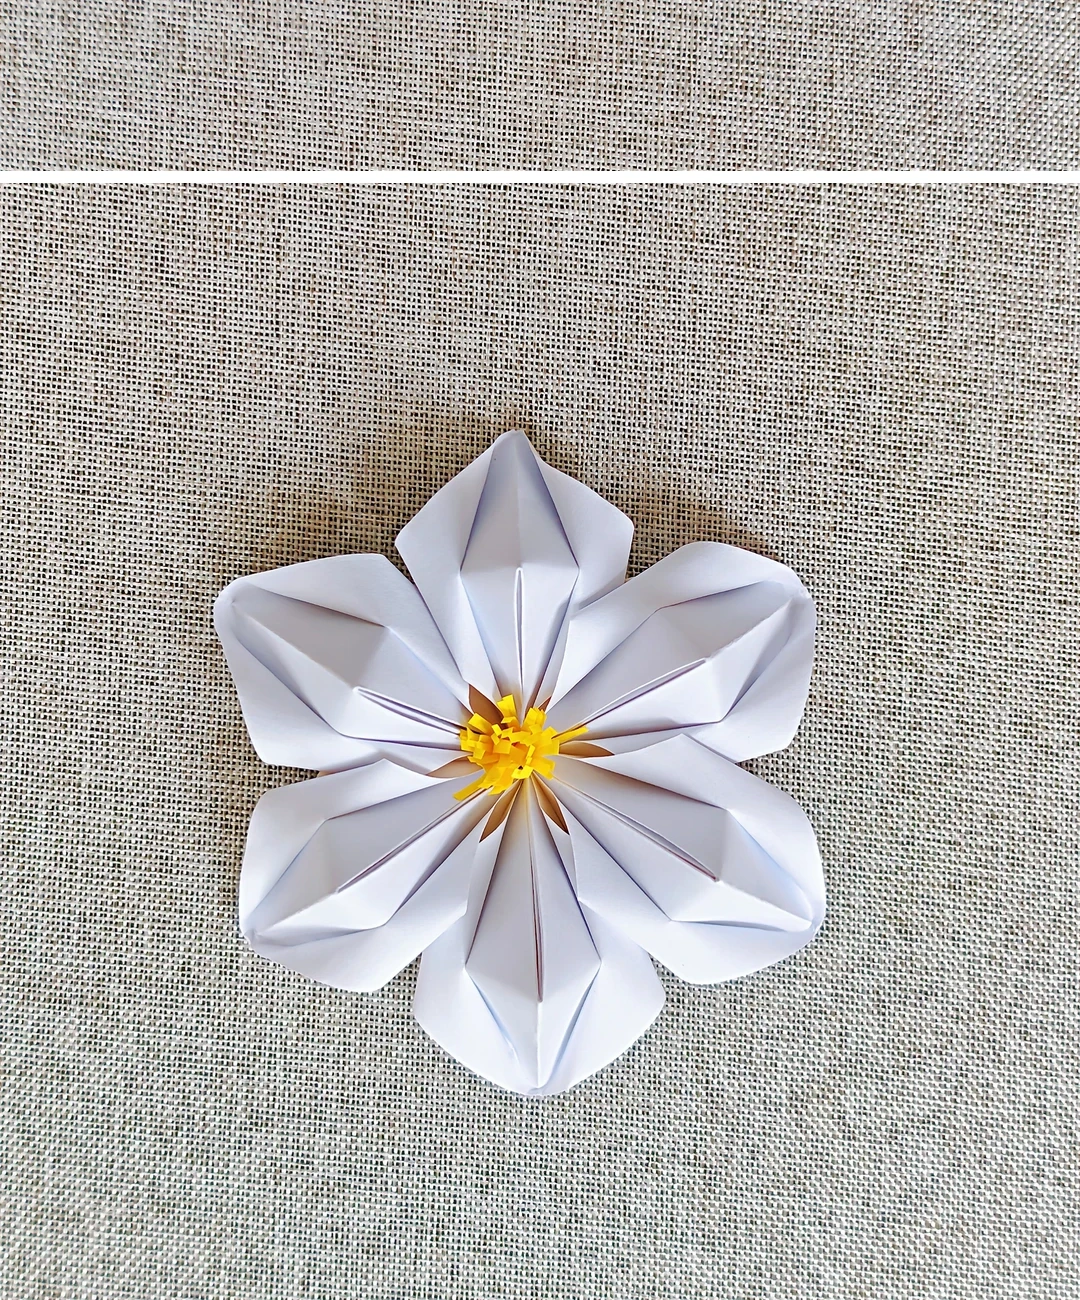 Open image at full size ↗
Insert and secure the prepared stamen in the middle.
Follow the diagrams alongside the step-by-step English instructions.
Choose your next project →