
Flowers & nature · Step-by-step guide
Miniature Paper Lily Ring
Fold two tiny three-petal units into a delicate six-petal lily, suitable for decorating a separate ring band.
What you’ll need
- Two thin white paper squares, 5 × 5 cm each
- Small yellow craft stamens
- Scissors
- Craft glue
- Tweezers, optional
- A separate ring band, optional
Paper craft · Cutting, pocket folds & flower assembly
Make it, step by step.
19 steps · Original diagrams with English instructions
Read each picture from left to right, then top to bottom. This sequence explains the flower; making the ring band is not illustrated.
A tiny flower to wear
 Open image at full size ↗
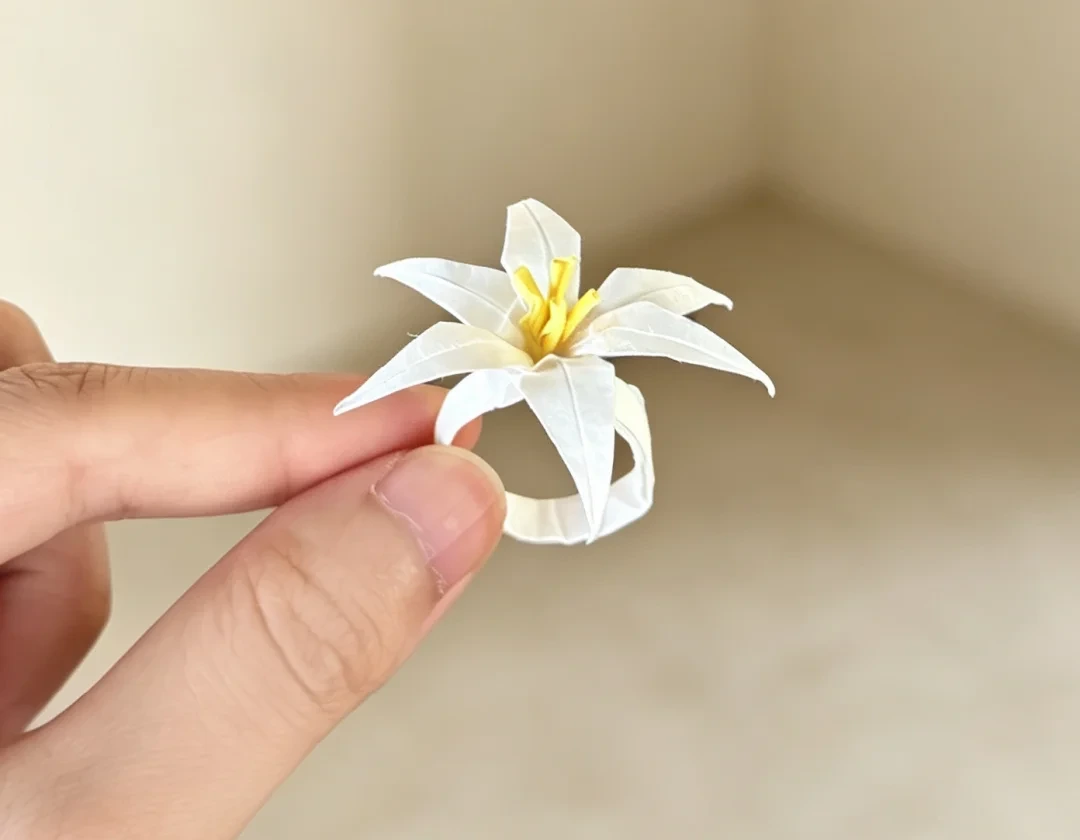
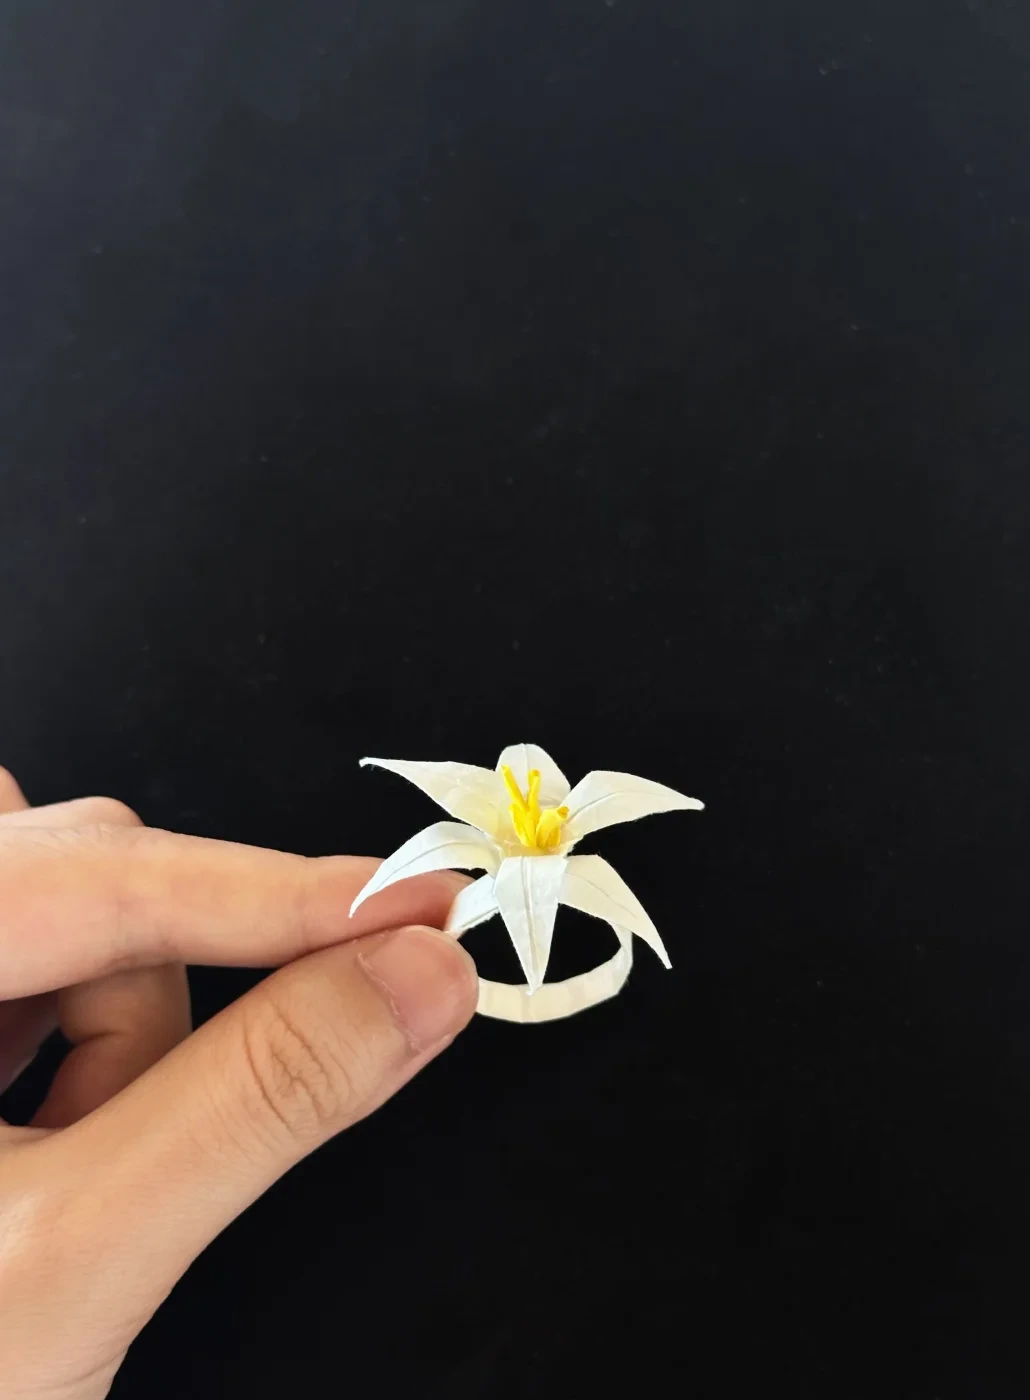
The finished flower can decorate a ring band. The photos below explain the flower folds; the band is a separate piece.
See the six-petal shape
 Open image at full size ↗
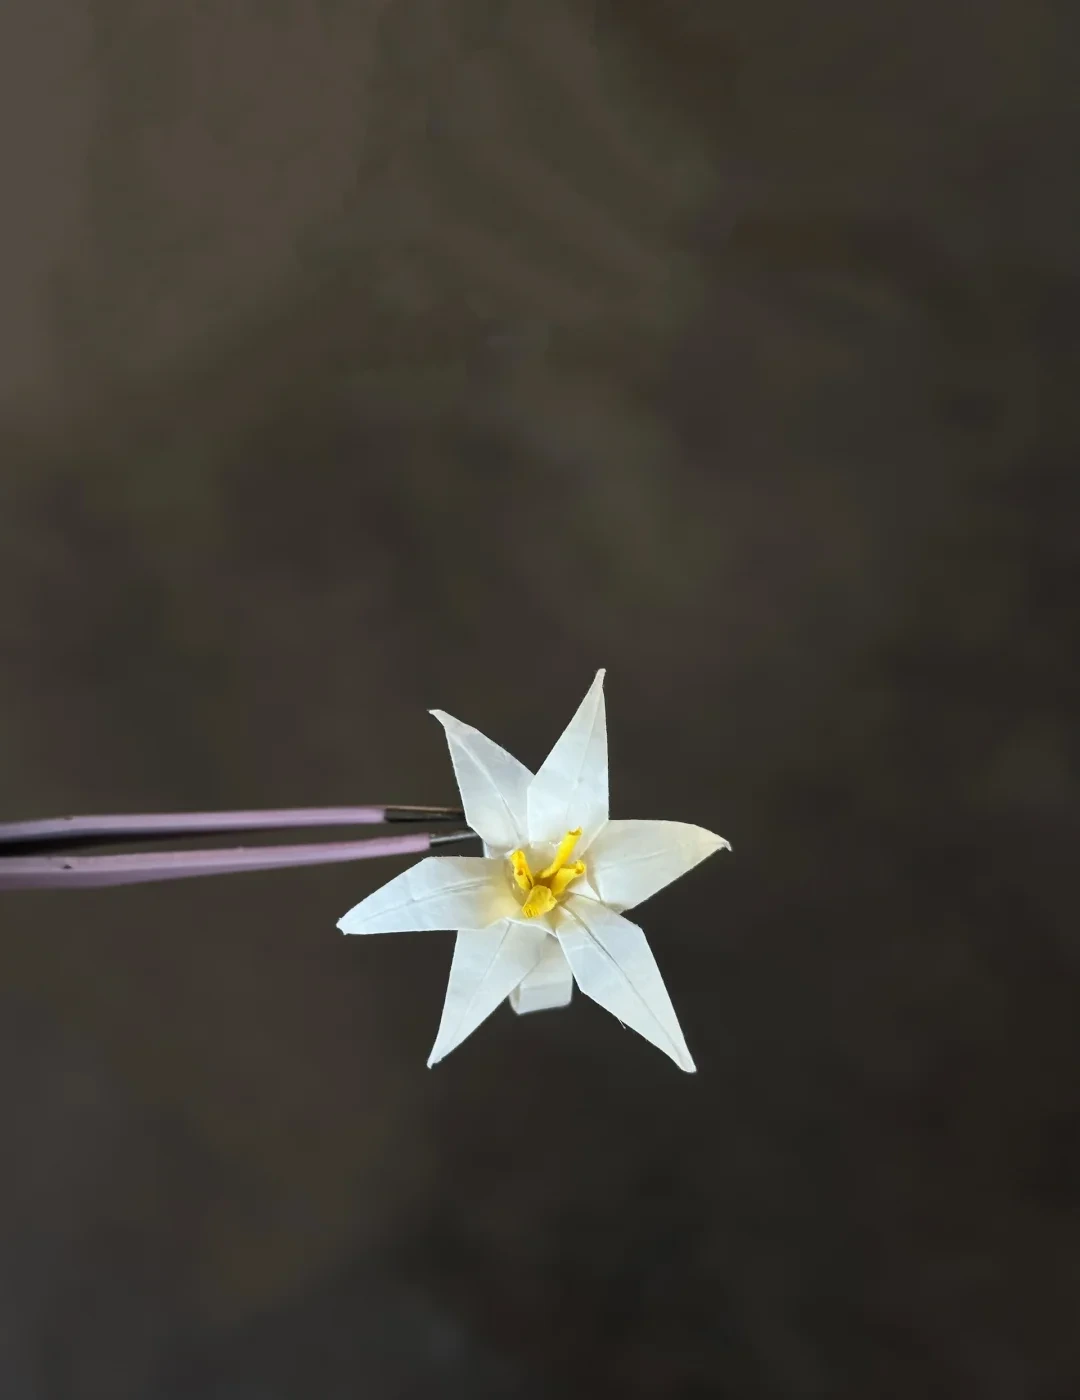
Two matching three-petal units overlap to make a six-petal lily with a small yellow center.
Mark the triangular base
 Open image at full size ↗
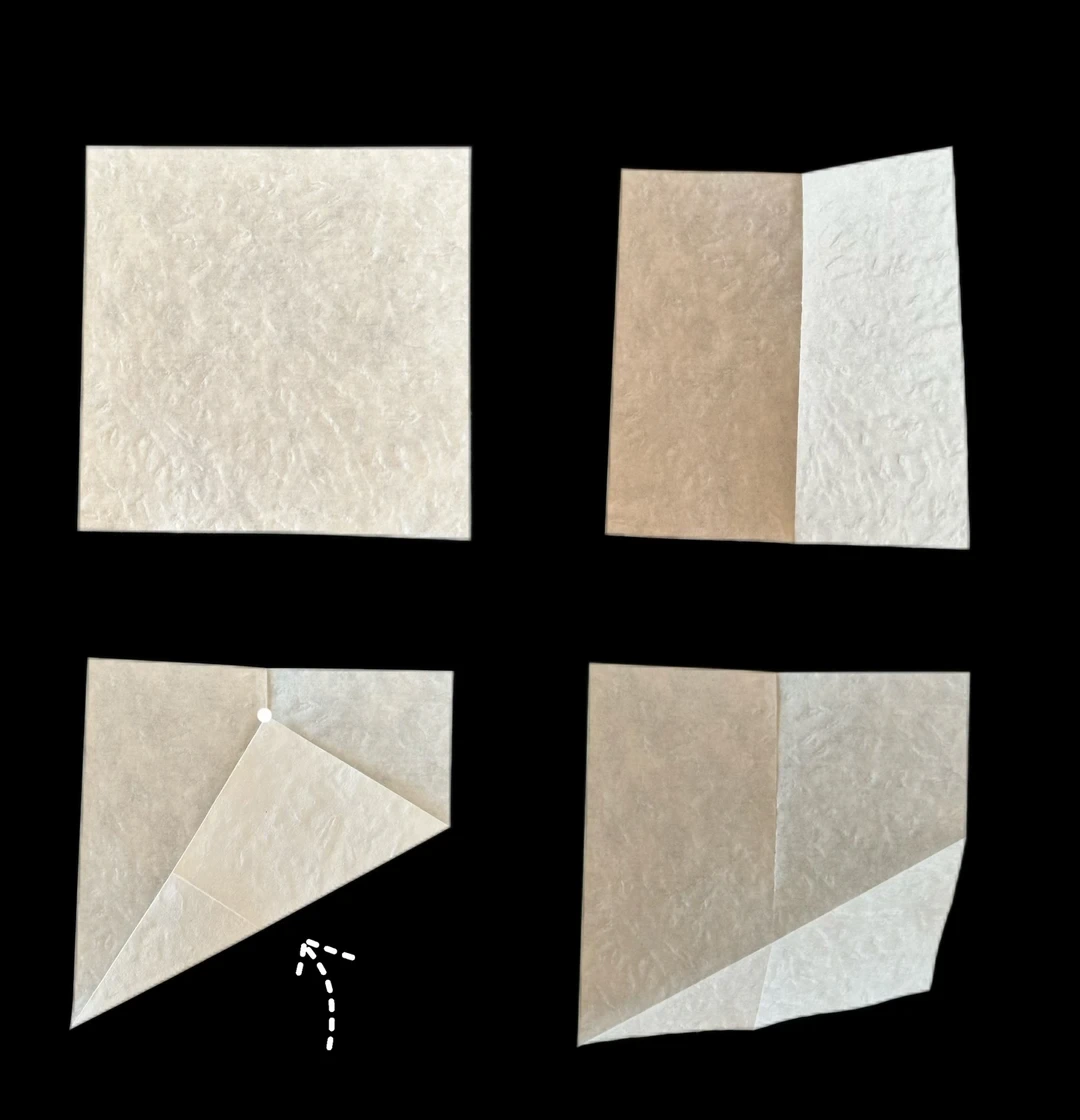
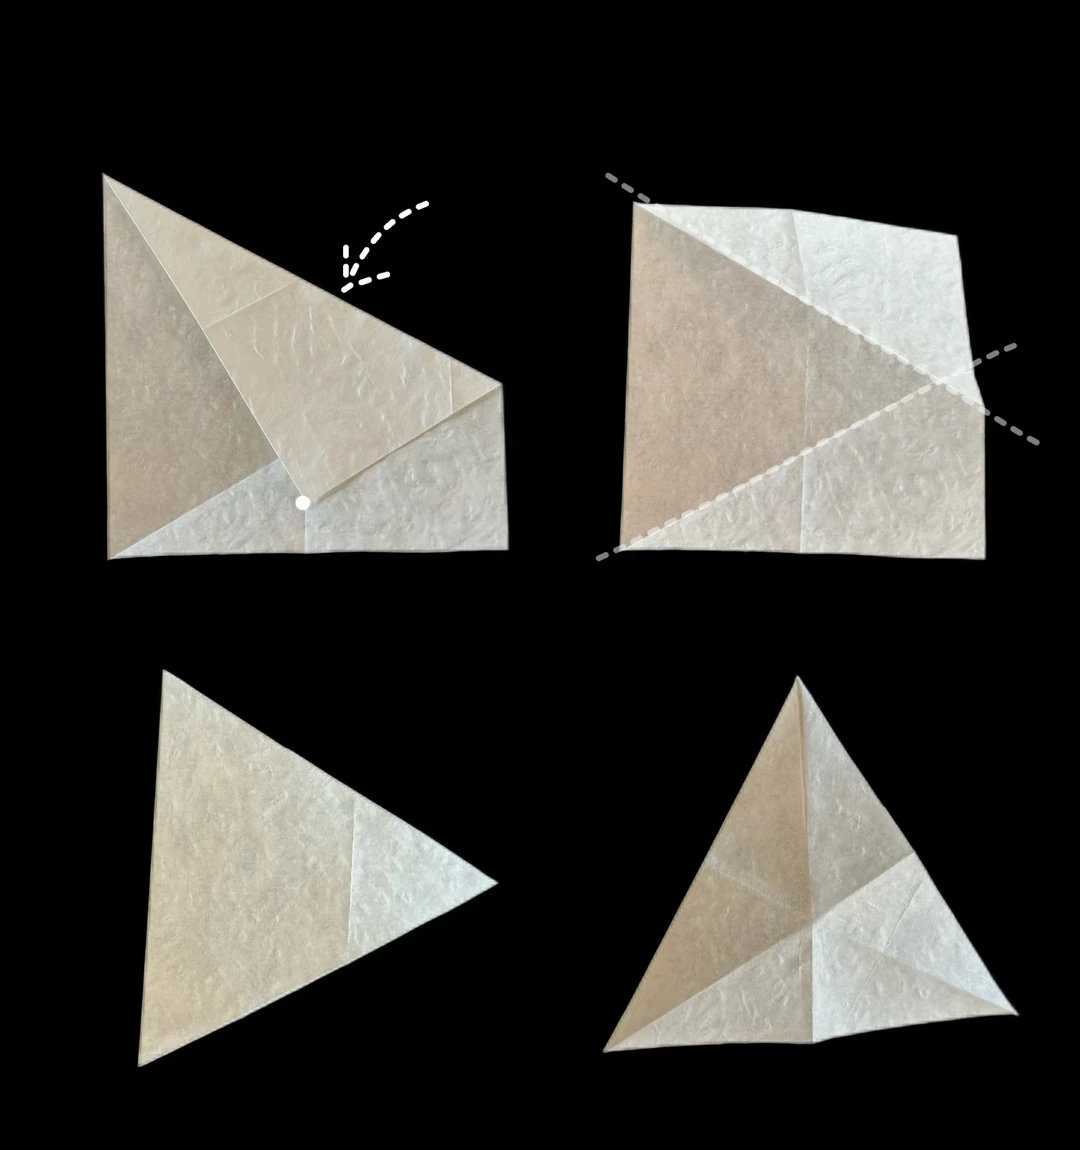
Start with a 5 × 5 cm square of thin paper. Fold it in half vertically, then unfold to mark the center.
Bring the lower-right corner upward to meet the center crease, as shown. Press the diagonal fold, then unfold it.
Cut and precrease a triangle
 Open image at full size ↗
Fold the upper-right corner down so it meets the center crease, following the dotted guide. Unfold to reveal the second diagonal.
Cut along the two diagonal creases to leave the triangle shown. Make this cut before continuing the folds.
Fold the triangle in half in all three directions, bringing each pair of corners together in turn. Open it after each fold.
Collapse the three-sided base
 Open image at full size ↗
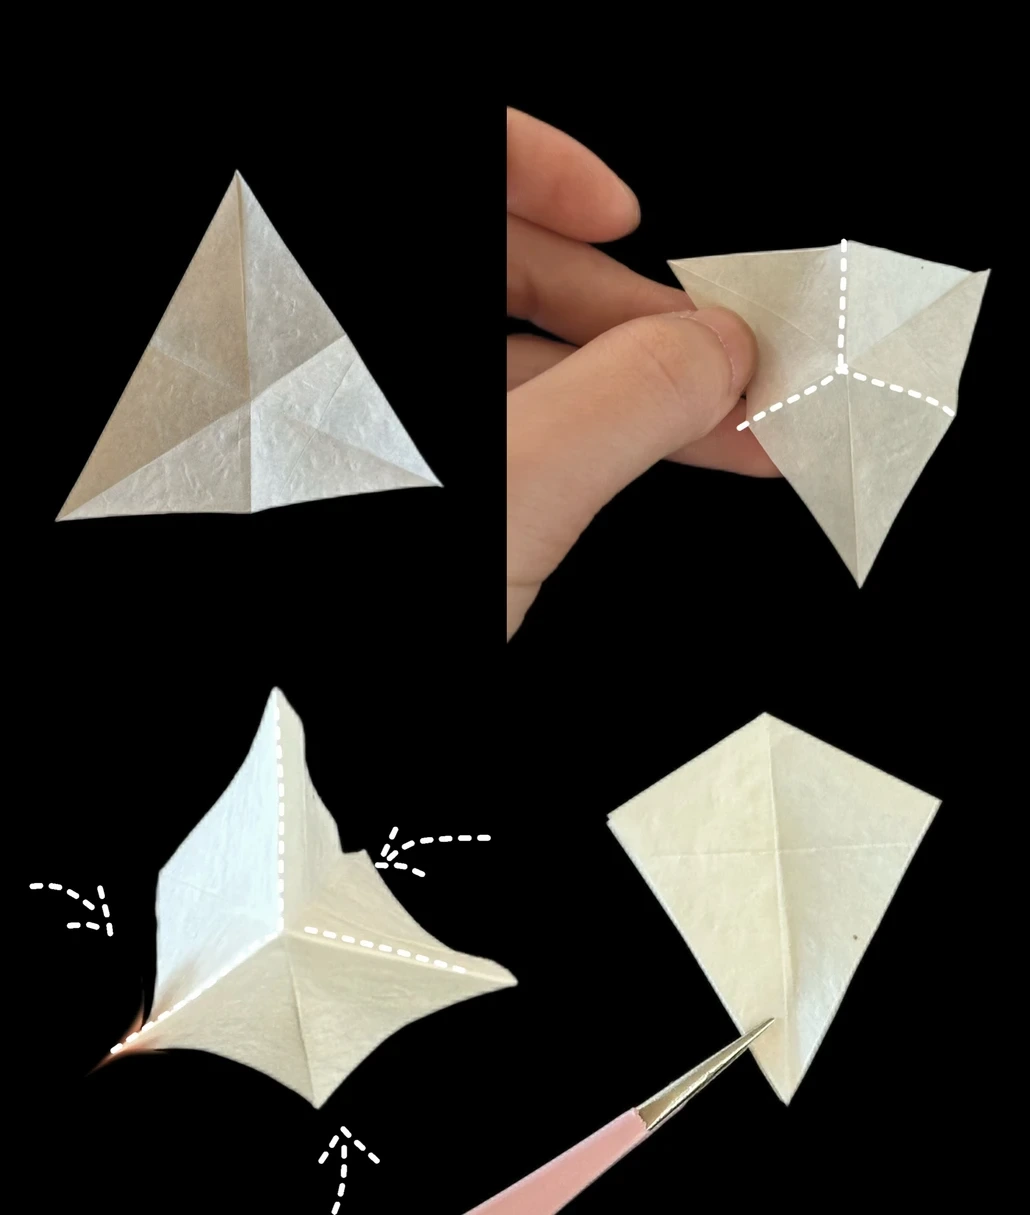
Raise the three creases that run from the triangle’s corners toward its center, matching the dotted guides.
Gather the three sides inward and flatten the layers into the compact kite-like base shown at lower right.
Open the first pocket
 Open image at full size ↗
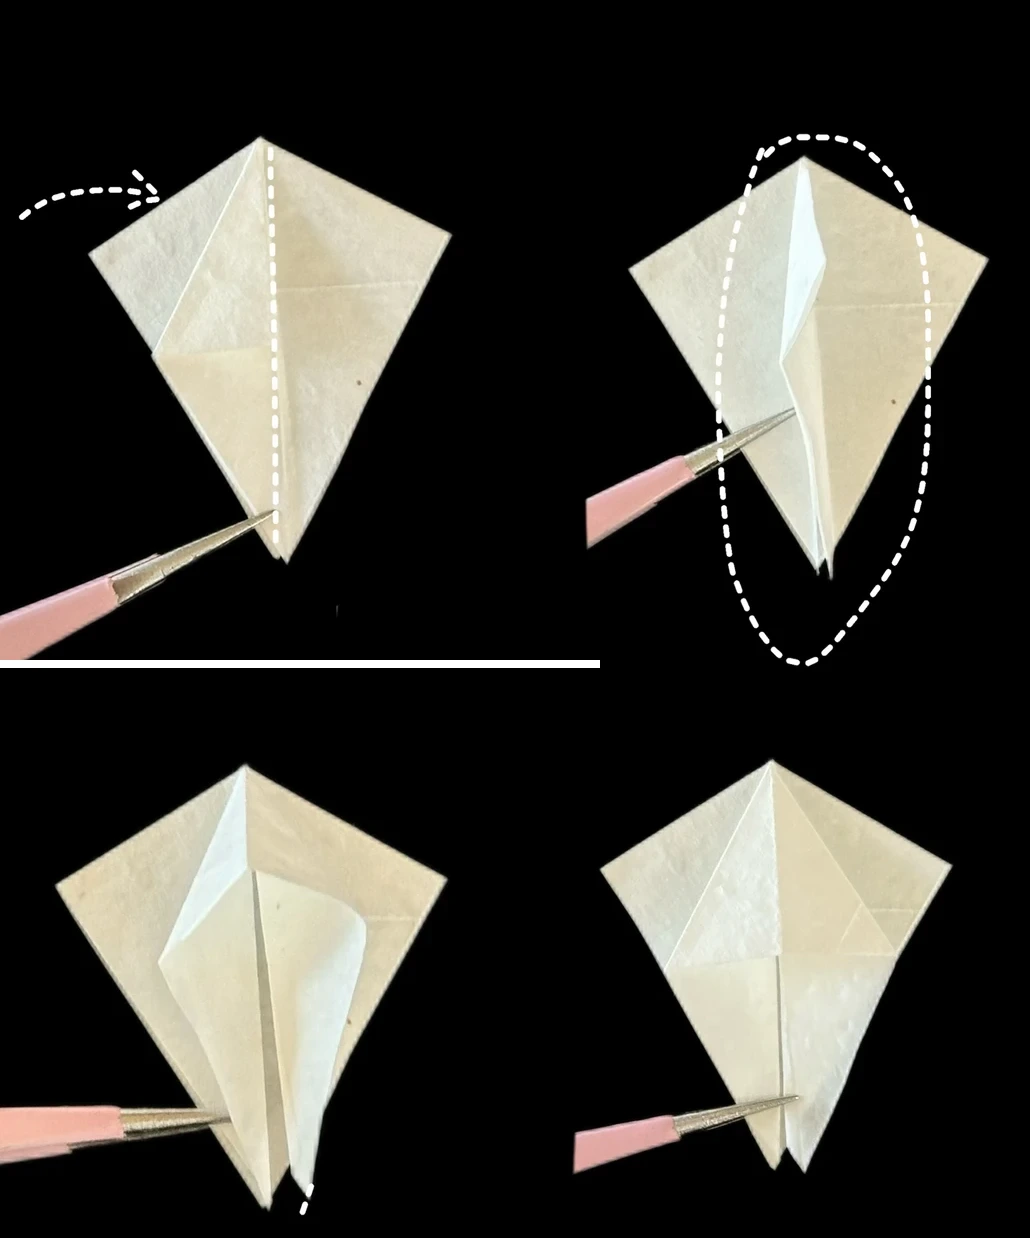
Fold the left edge of the front flap toward the center line and crease it.
Lift this folded flap upright, open its pocket from the middle, and squash it flat. Align the pocket’s center crease with the center of the base.
Lengthen the petal folds
 Open image at full size ↗
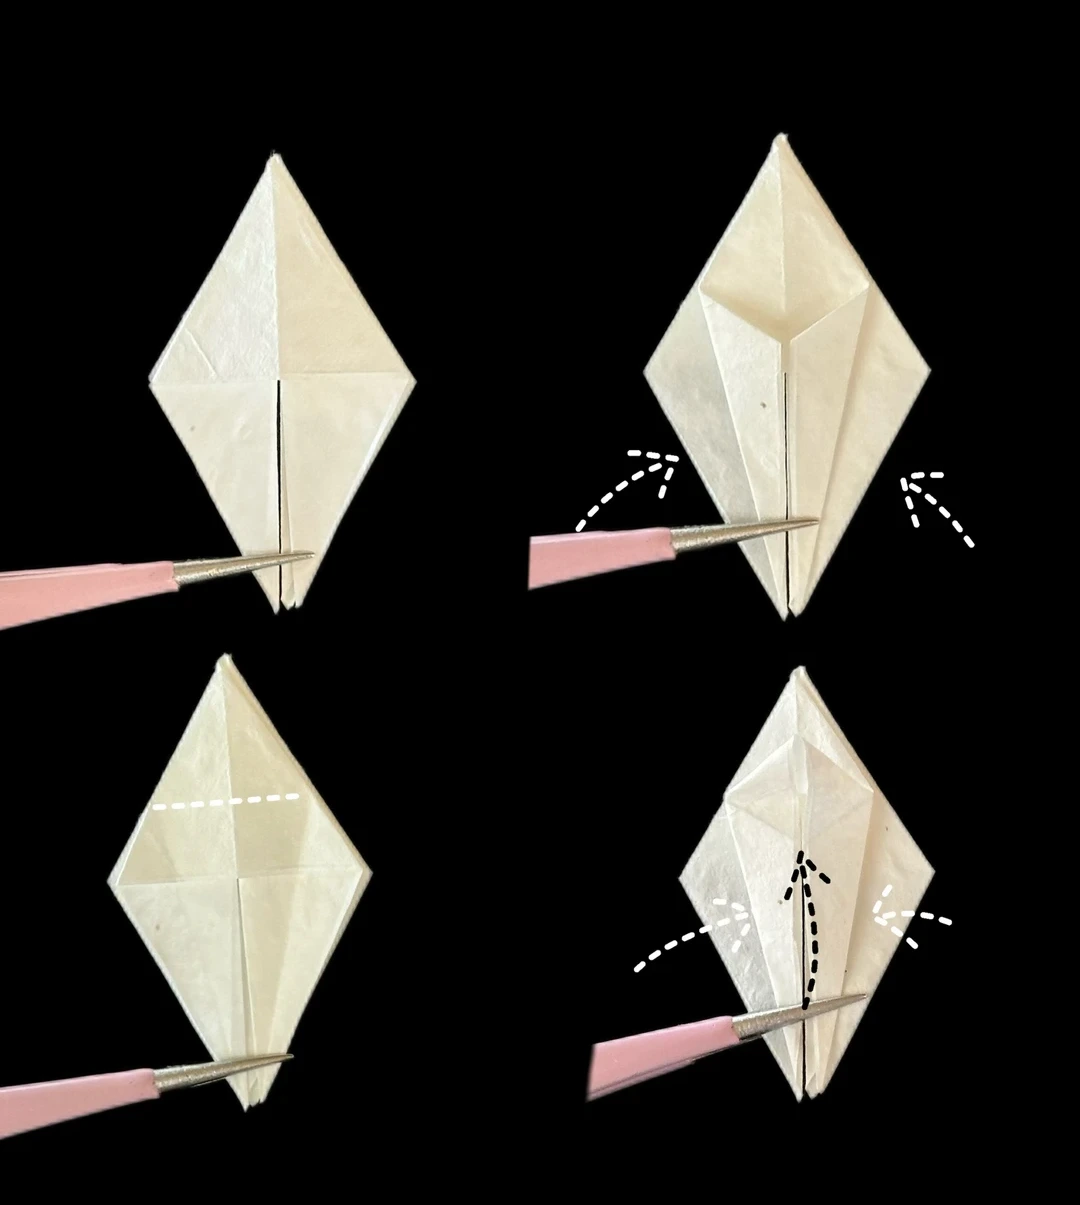
Repeat the pocket fold on the other two faces of the base.
Fold the two lower edges of one face toward the center line, then unfold them.
Lift the lower point upward along the horizontal dotted guide. Bring the sides inward along the new creases and flatten the raised flap.
Tuck the small triangle inside
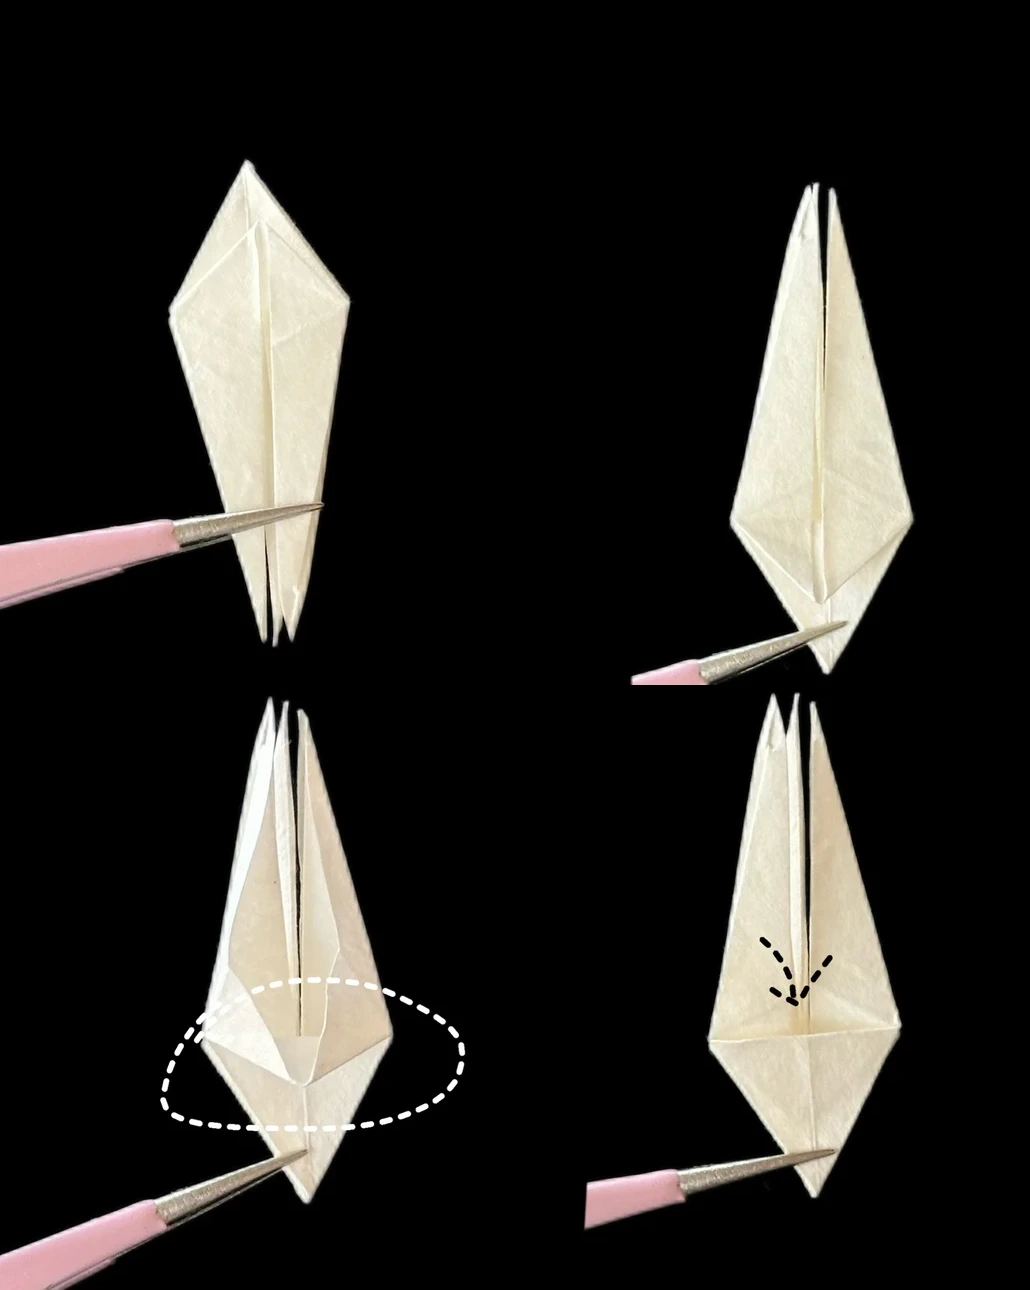 Open image at full size ↗
Repeat the lifting fold on the other two faces. Rotate the model so the long split points face upward.
Open the small triangular section at the bottom of a face and reverse it inward, following the indicated fold. Flatten the layers again.
Narrow the petal edges
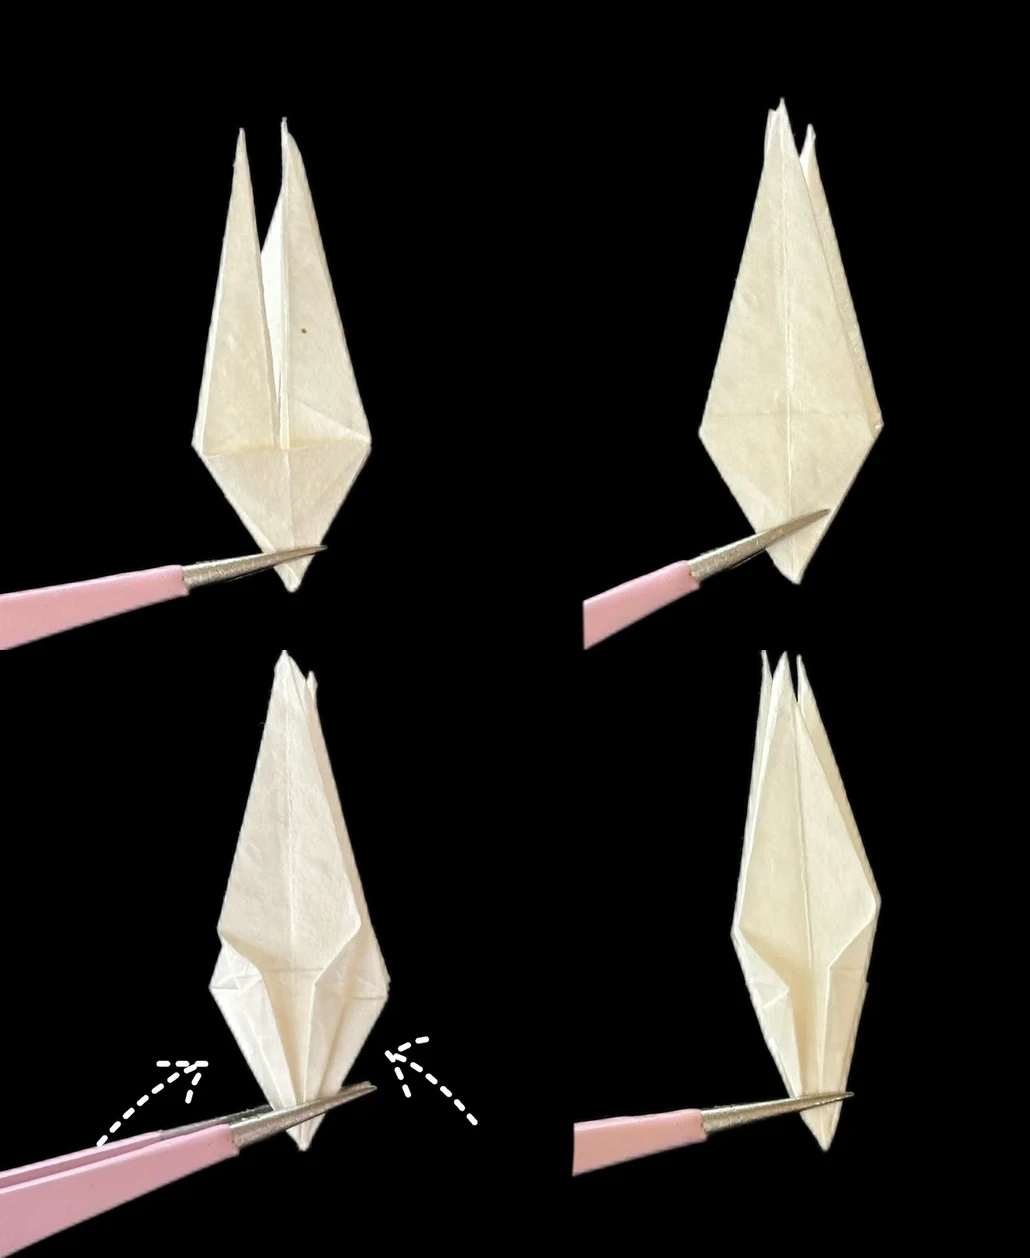 Open image at full size ↗
Repeat the inward tuck on the other two faces. Turn a layer sideways like a page to expose a smooth face.
Fold the long side edges inward a little, following the arrows. Repeat on the other two faces to narrow all three petals.
Assemble the lily
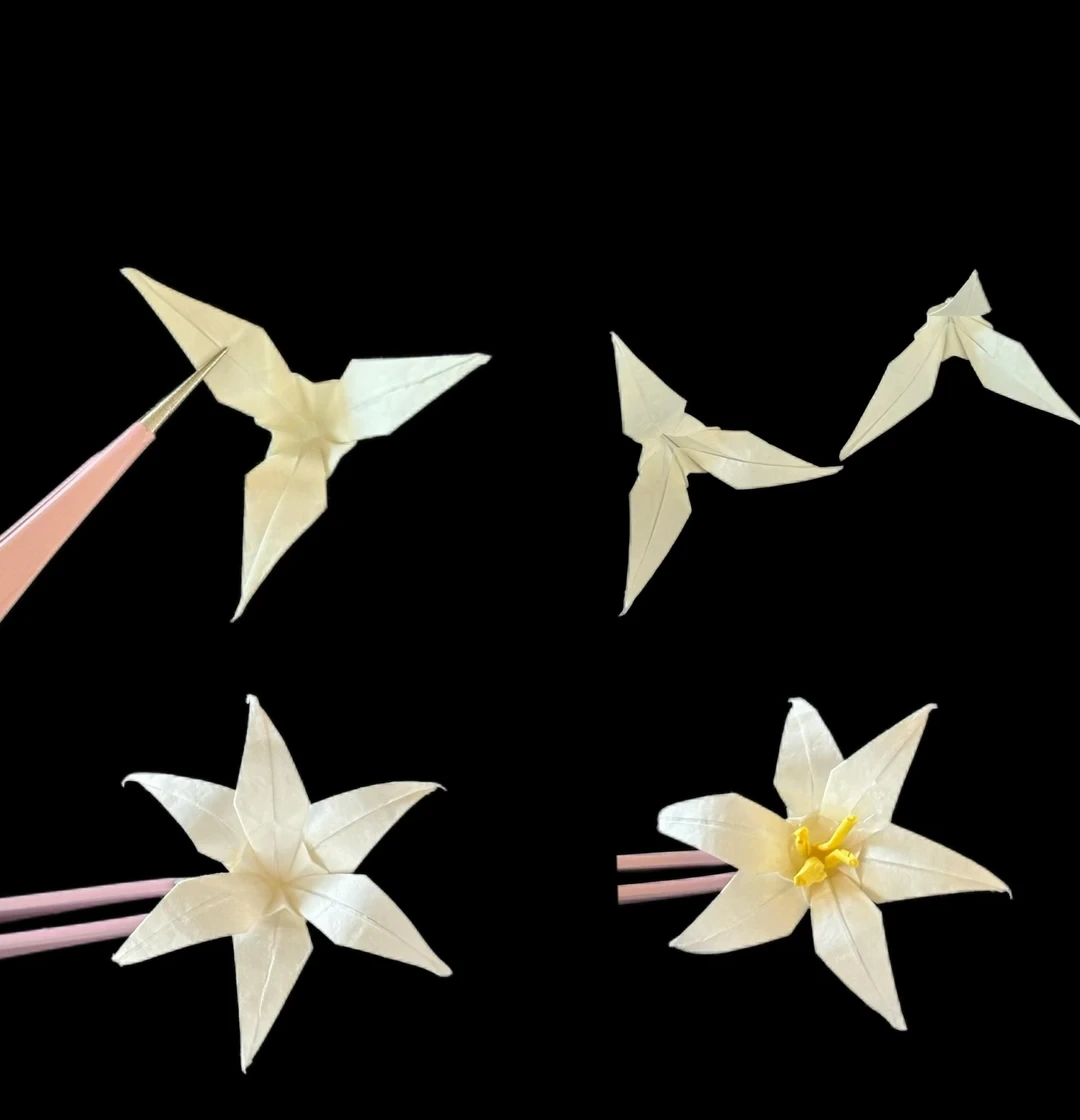 Open image at full size ↗
Gently spread the three long points into petals. Shape their tips outward and make a second matching three-petal unit.
Stack the two units with their petals offset. Secure their centers with a small amount of craft glue.
Add small yellow craft stamens at the center and let the glue dry before handling.
Flower mounted on a band
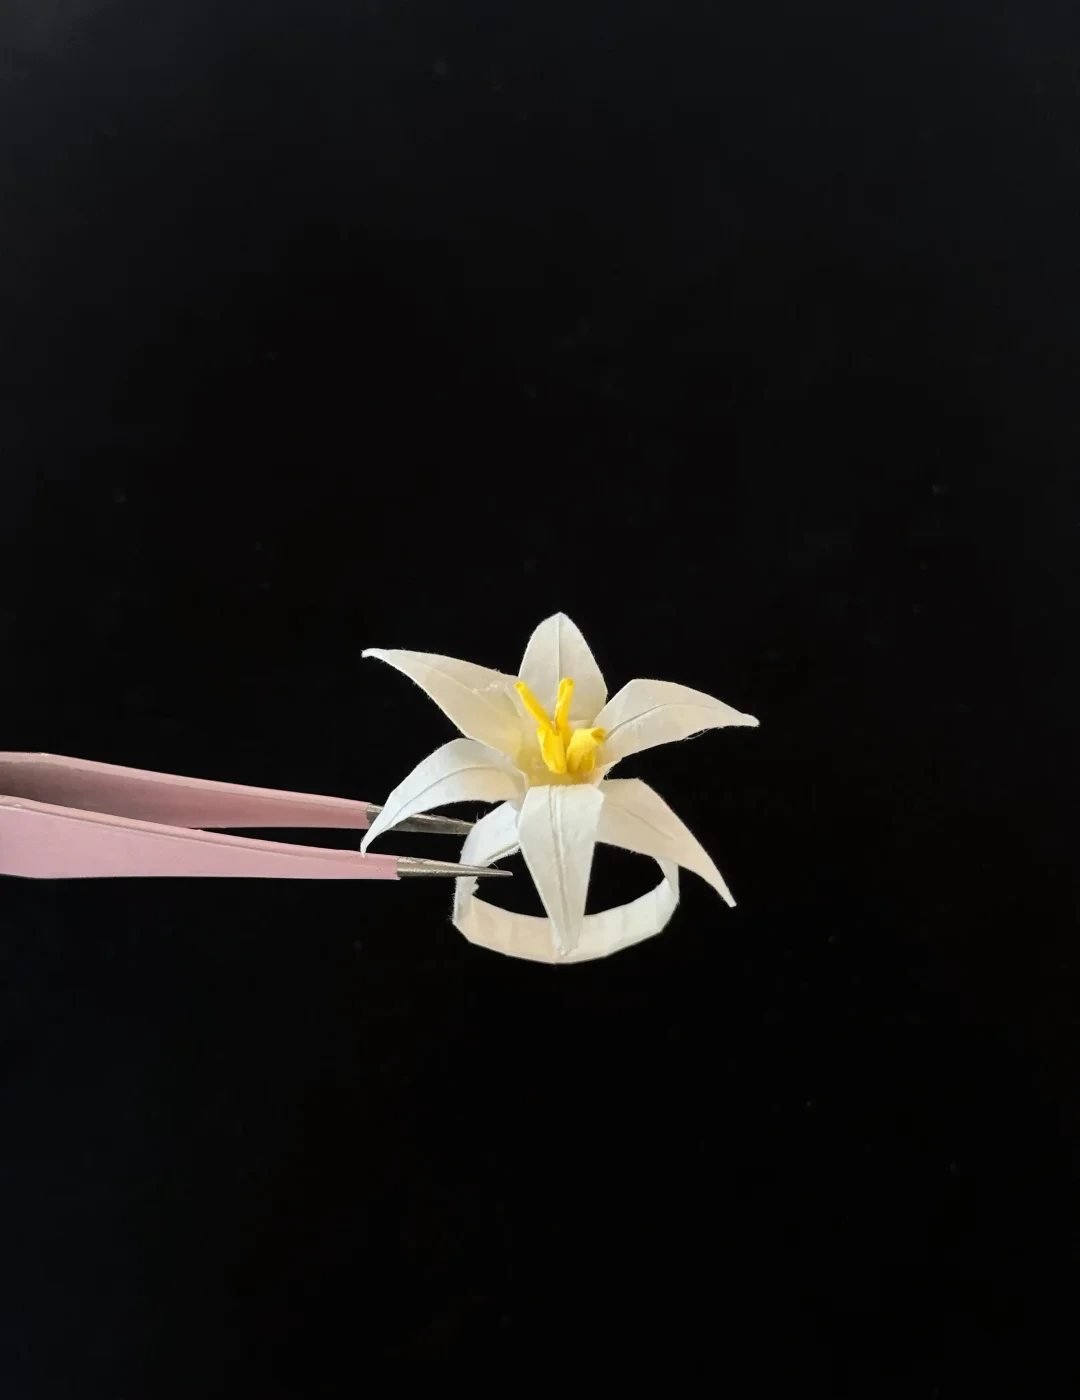 Open image at full size ↗
The finished example uses a separate ring band. Band-making and attachment are not illustrated in this photo sequence.
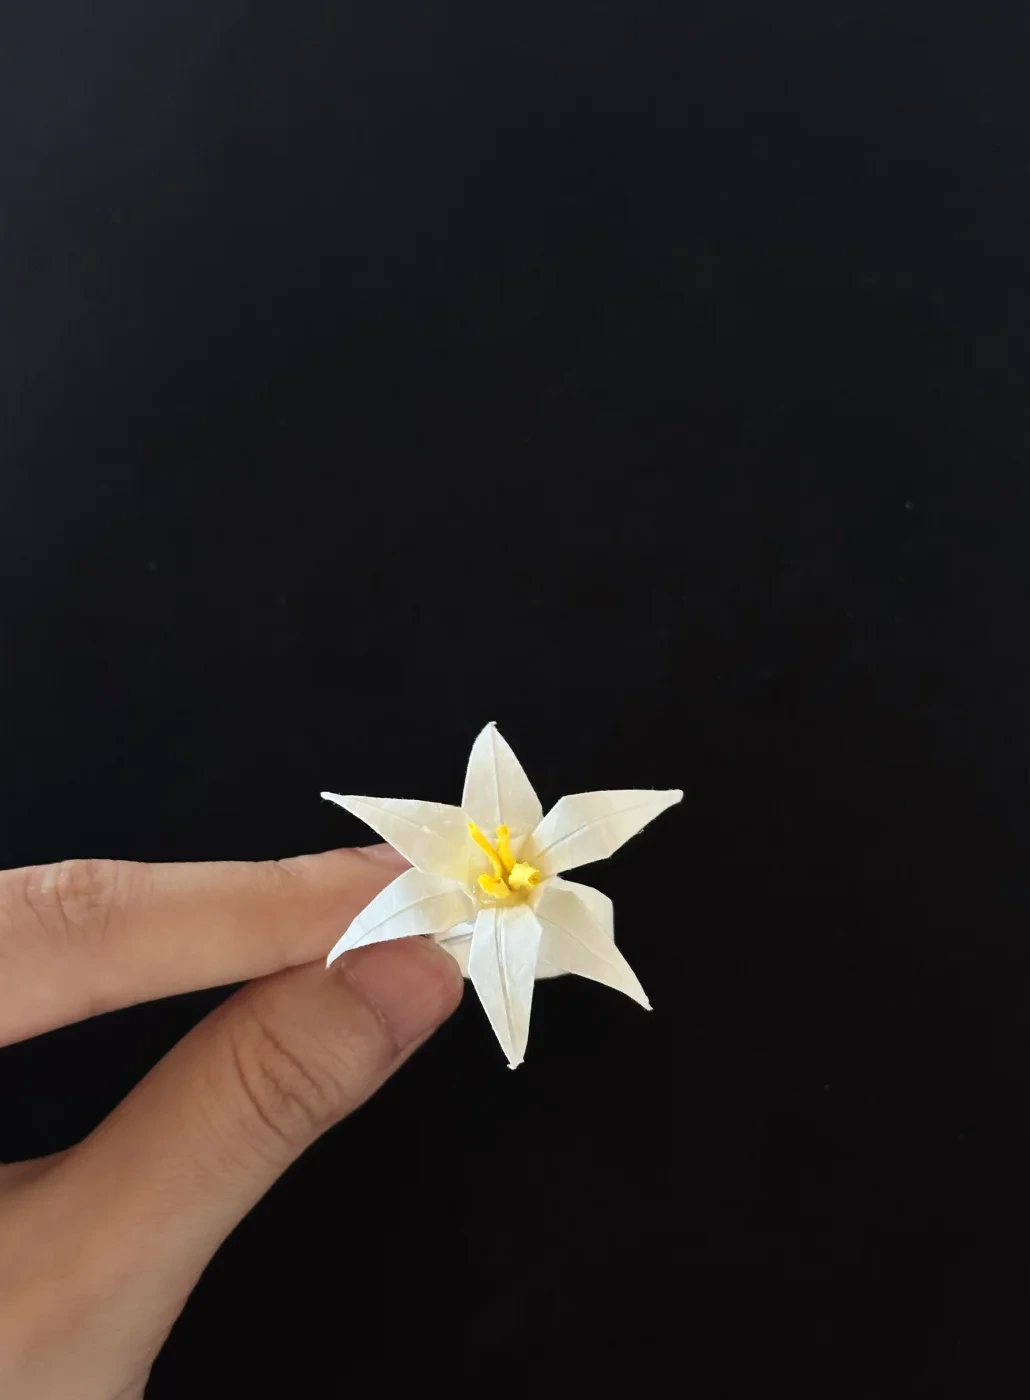
Adjust the finished petals
 Open image at full size ↗
Space the six petals evenly around the yellow center and gently curl their tips outward.
Follow the diagrams alongside the step-by-step English instructions.
Choose your next project →