
Flowers & nature · Step-by-step guide
Miniature Lily Bouquet
Fold tiny four-petal lilies and gather them into a small paper bouquet.
What you’ll need
- Several 5 × 5 cm thin paper squares
- Small craft stems
- Craft glue
- Wrapping paper and ribbon, optional
- Tweezers, optional
Paper craft · Folding and assembly
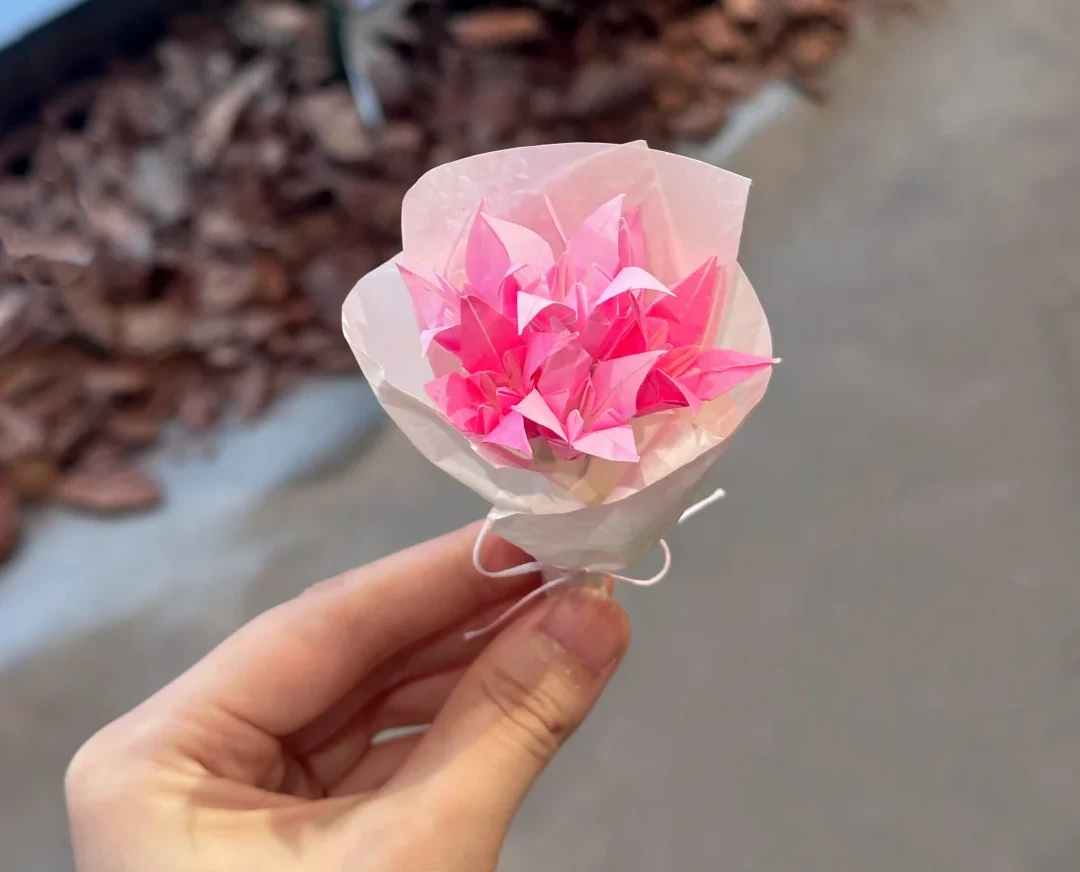
Make it, step by step.
9 steps · Original diagrams with English instructions
Read each picture from left to right, then top to bottom.
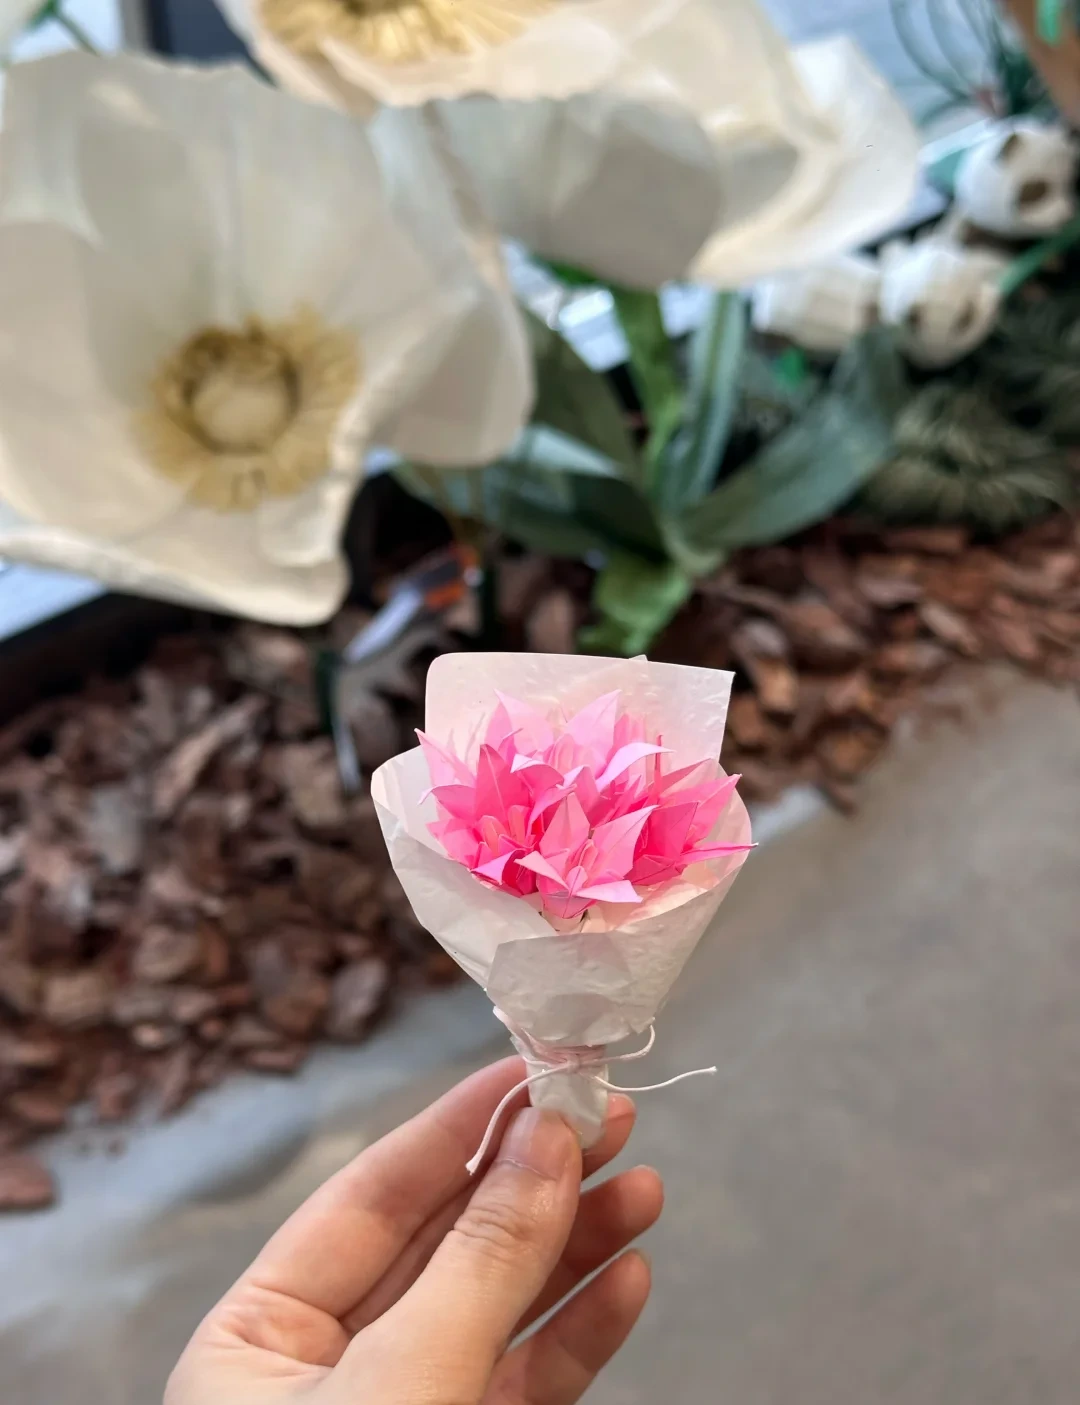
Finished model
 Open image at full size ↗
The completed model, shown from another angle to help check its shape and proportions.
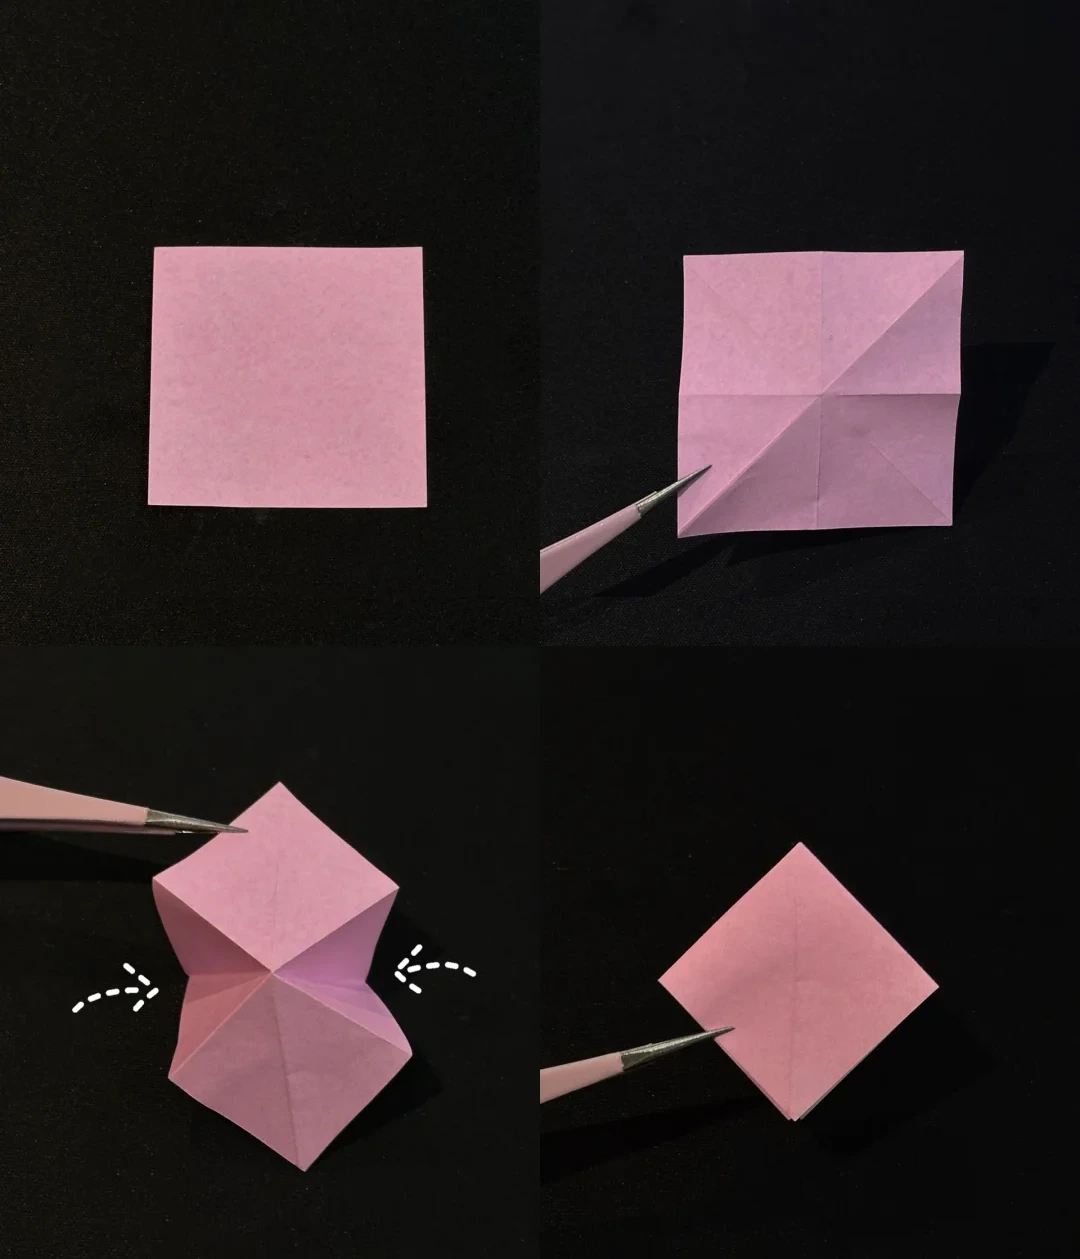
Make a square base
 Open image at full size ↗
Crease each square along both diagonals and both midlines. Bring the sides inward and flatten into a layered square.
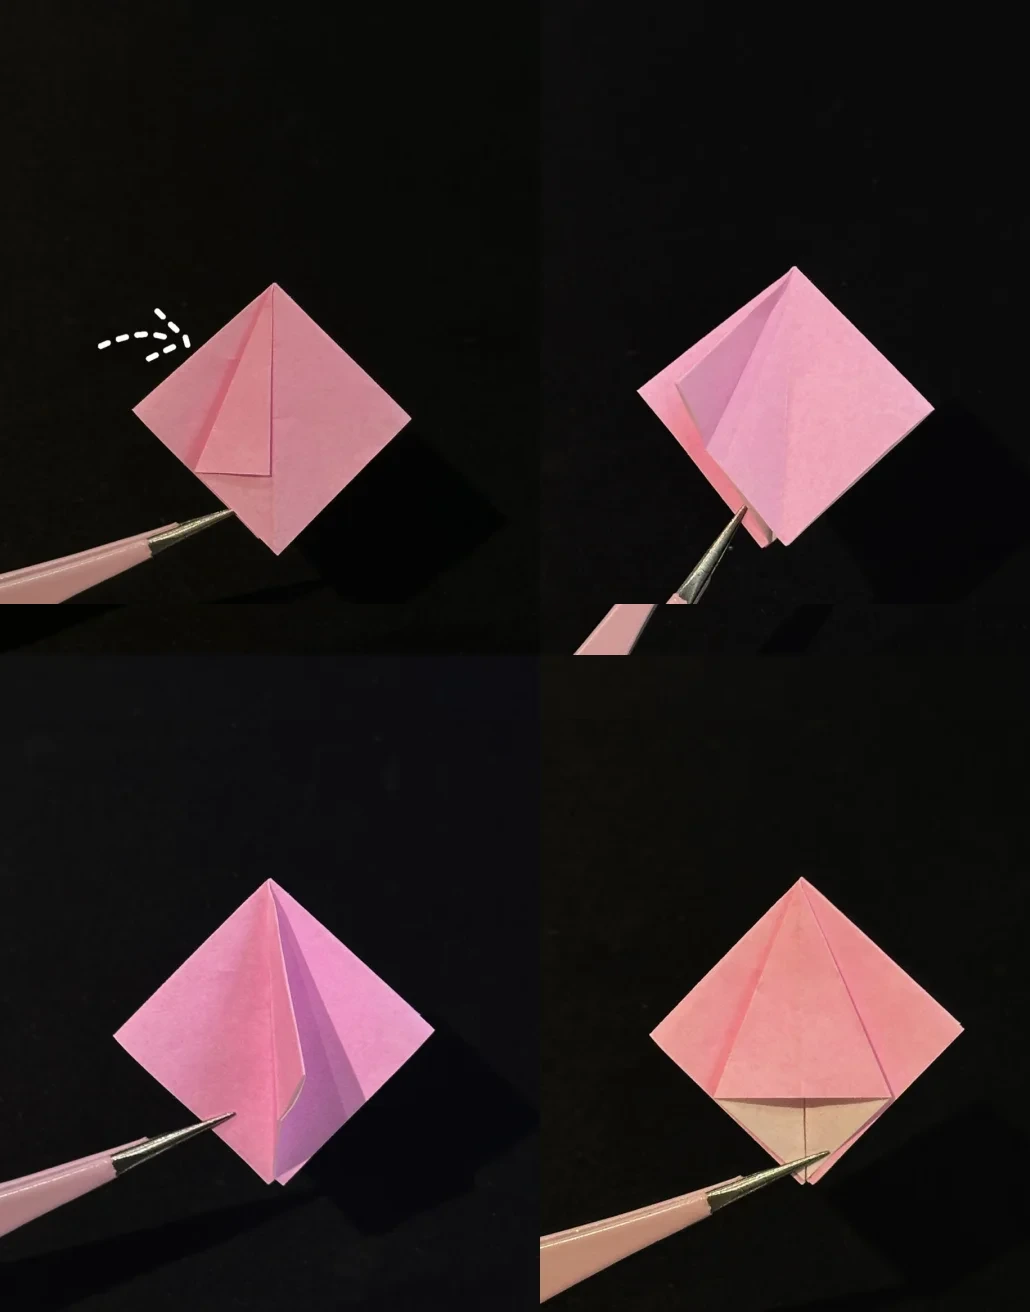
Squash a pocket
 Open image at full size ↗
Fold an edge toward the center and unfold. Lift the flap upright, open its pocket, and squash it flat along the crease.
Lift the petal fold
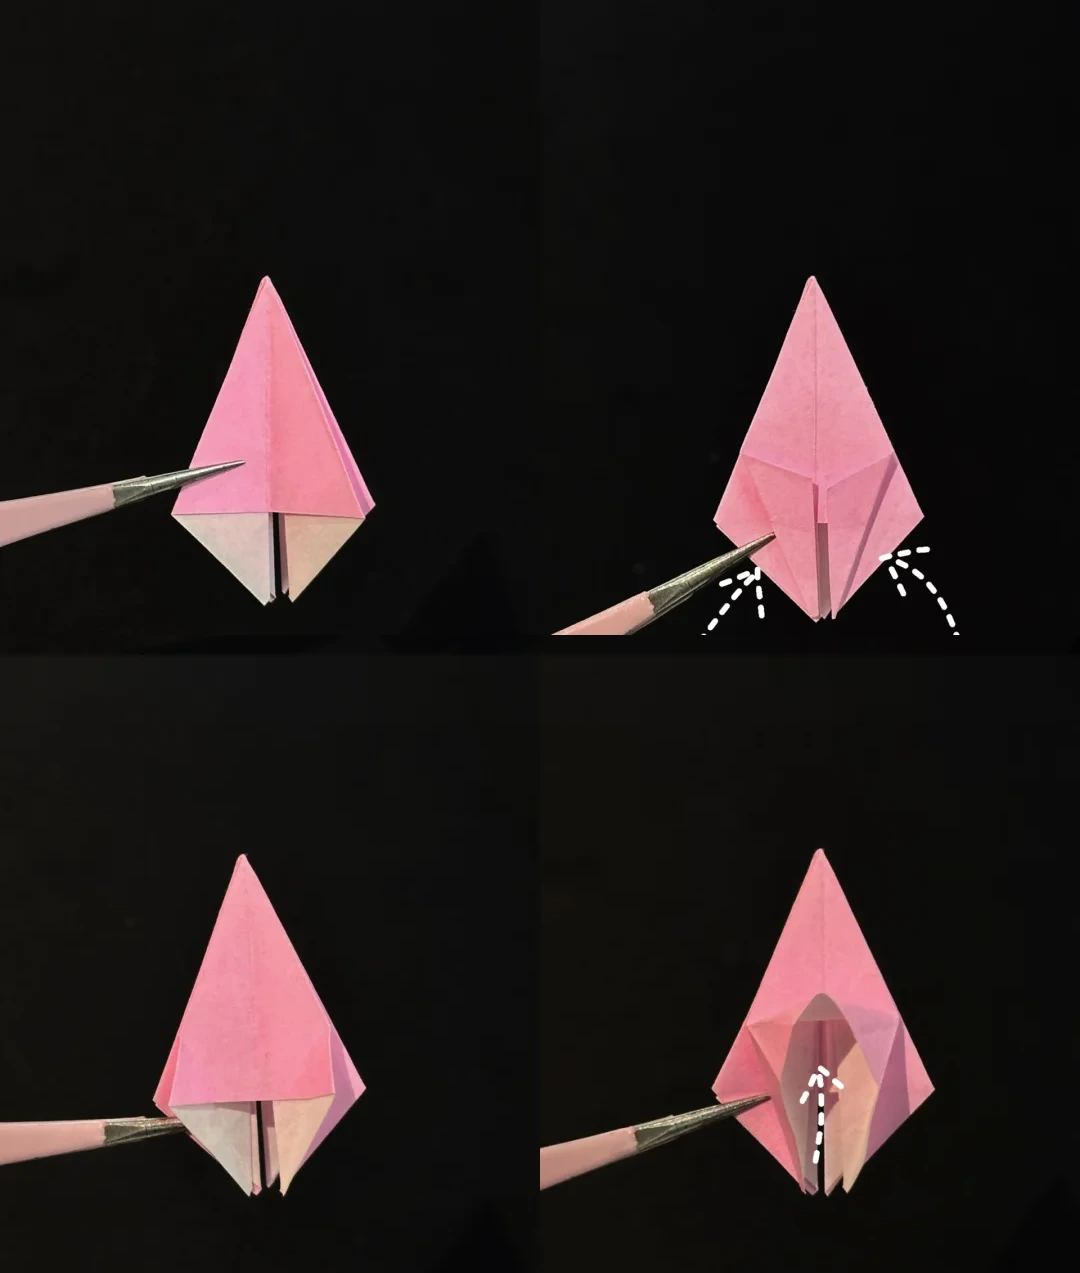 Open image at full size ↗
Repeat the pocket fold on the other faces. Fold the lower edges toward the center, unfold them, then lift the lower point upward.
Repeat around the base
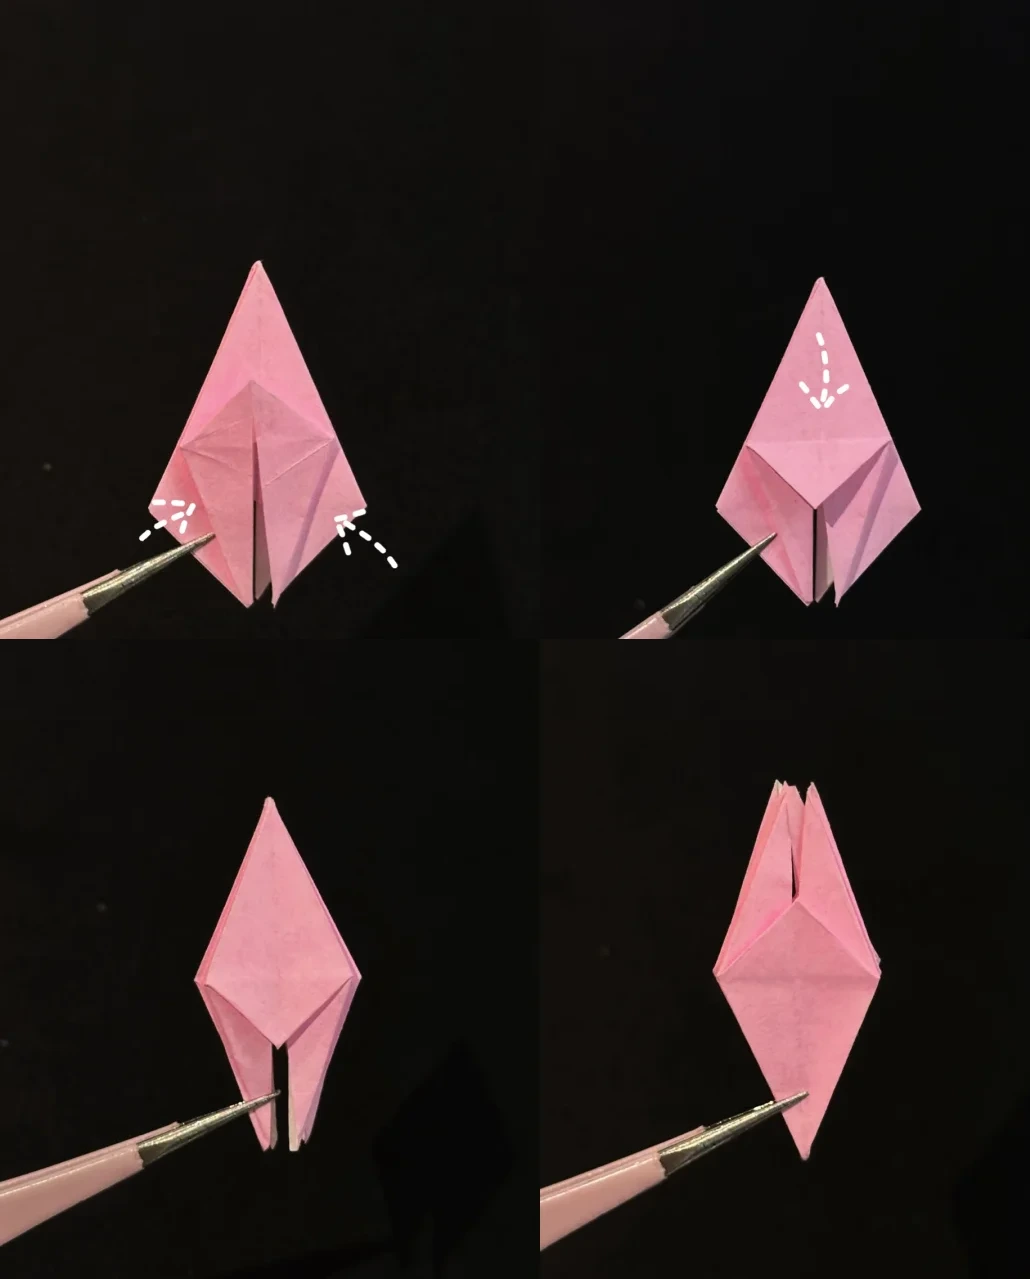 Open image at full size ↗
Bring the sides inward along the new creases and flatten the lifted flap. Fold its small triangle downward. Repeat on the other faces, then rotate the model.
Spread four petals
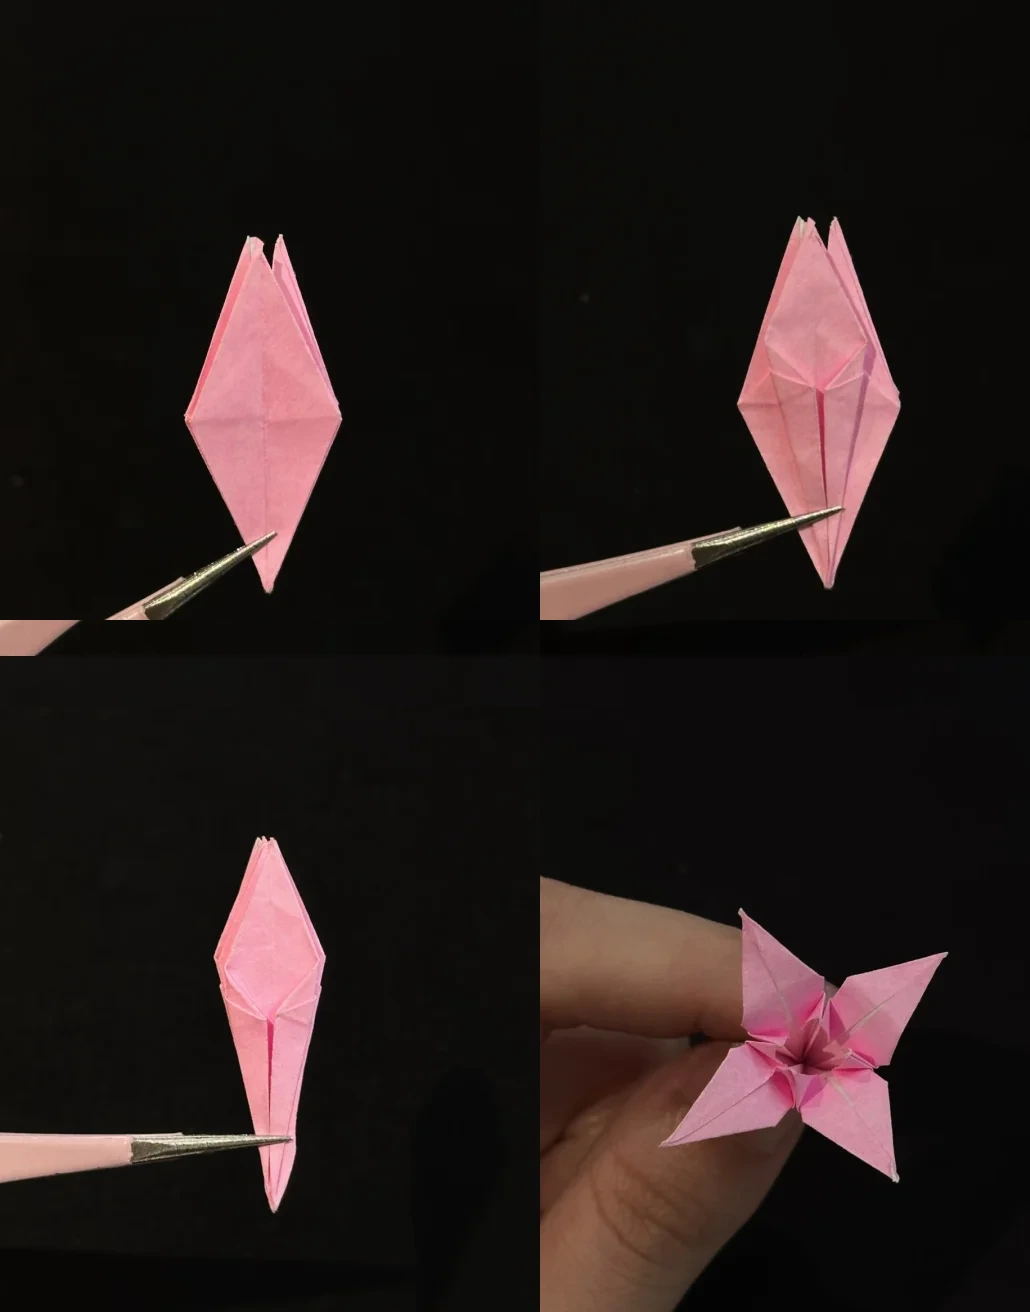 Open image at full size ↗
Turn the layers to expose a smooth face. Fold its sides toward the center and repeat around the model. Gently pull the four long points outward to open the lily.
Prepare a stem
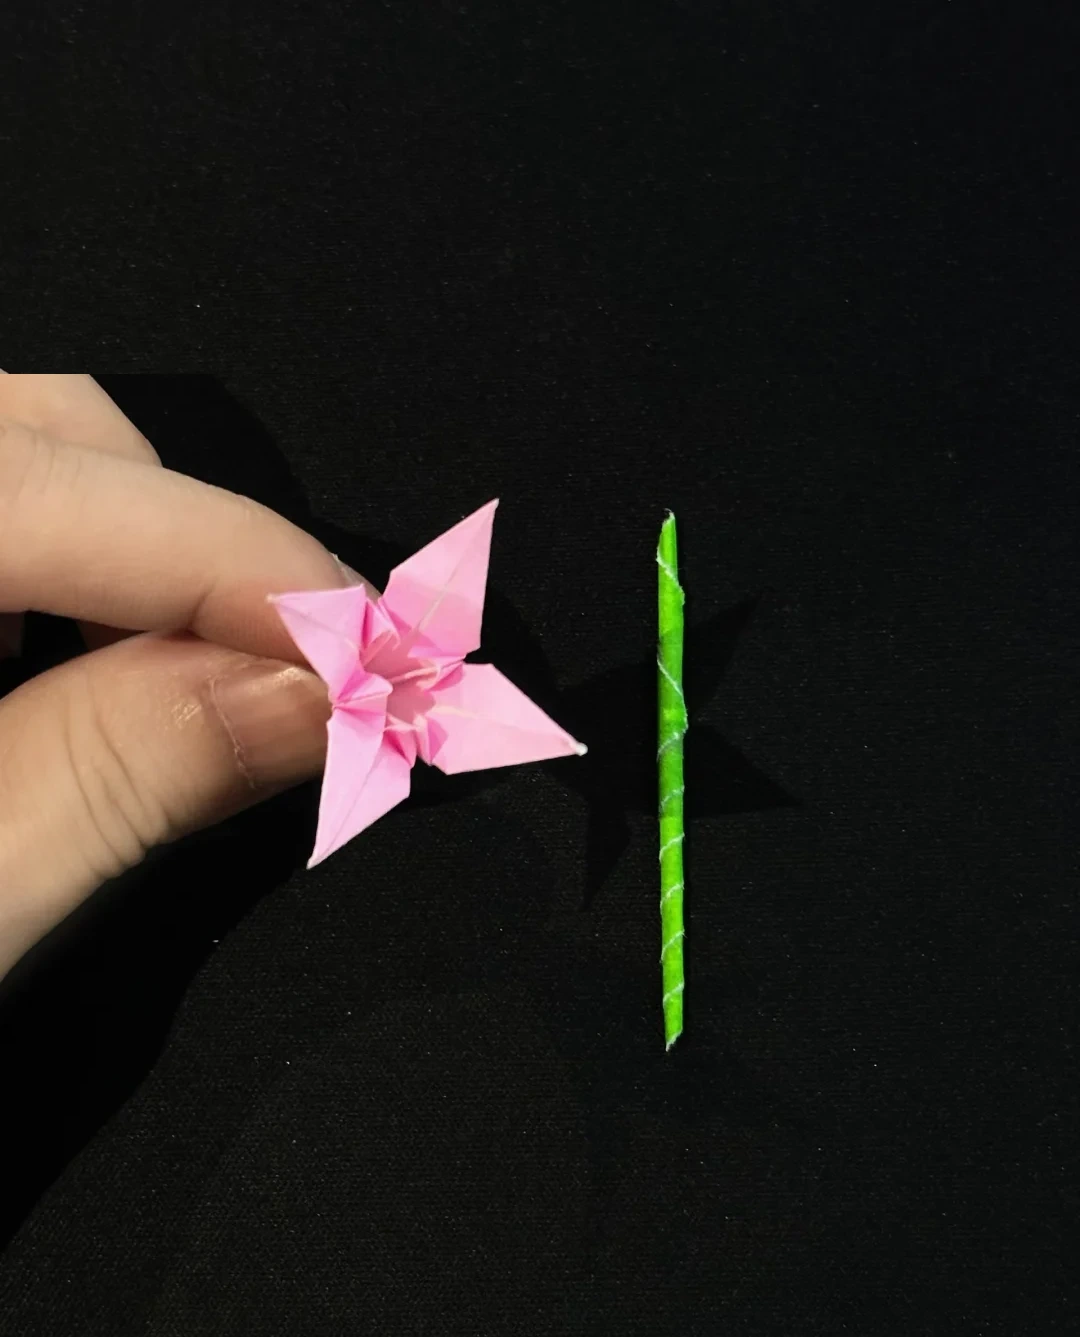 Open image at full size ↗
Set a small craft stem beside the finished flower.
Make more flowers
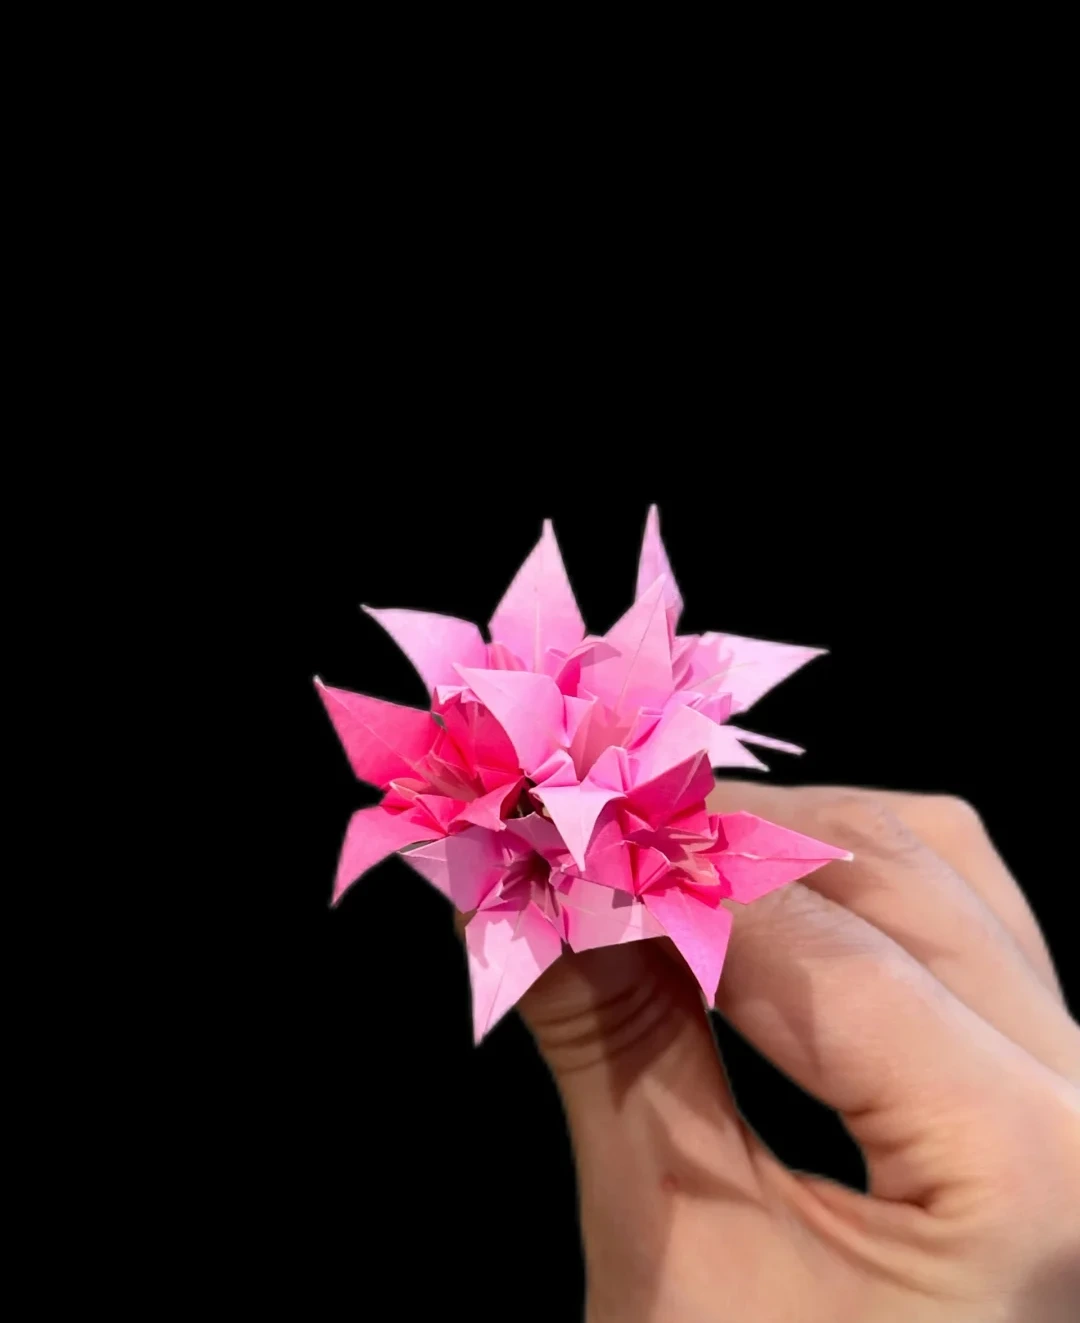 Open image at full size ↗
Repeat the folding sequence to make enough lilies for a small bouquet.
Attach the flowers
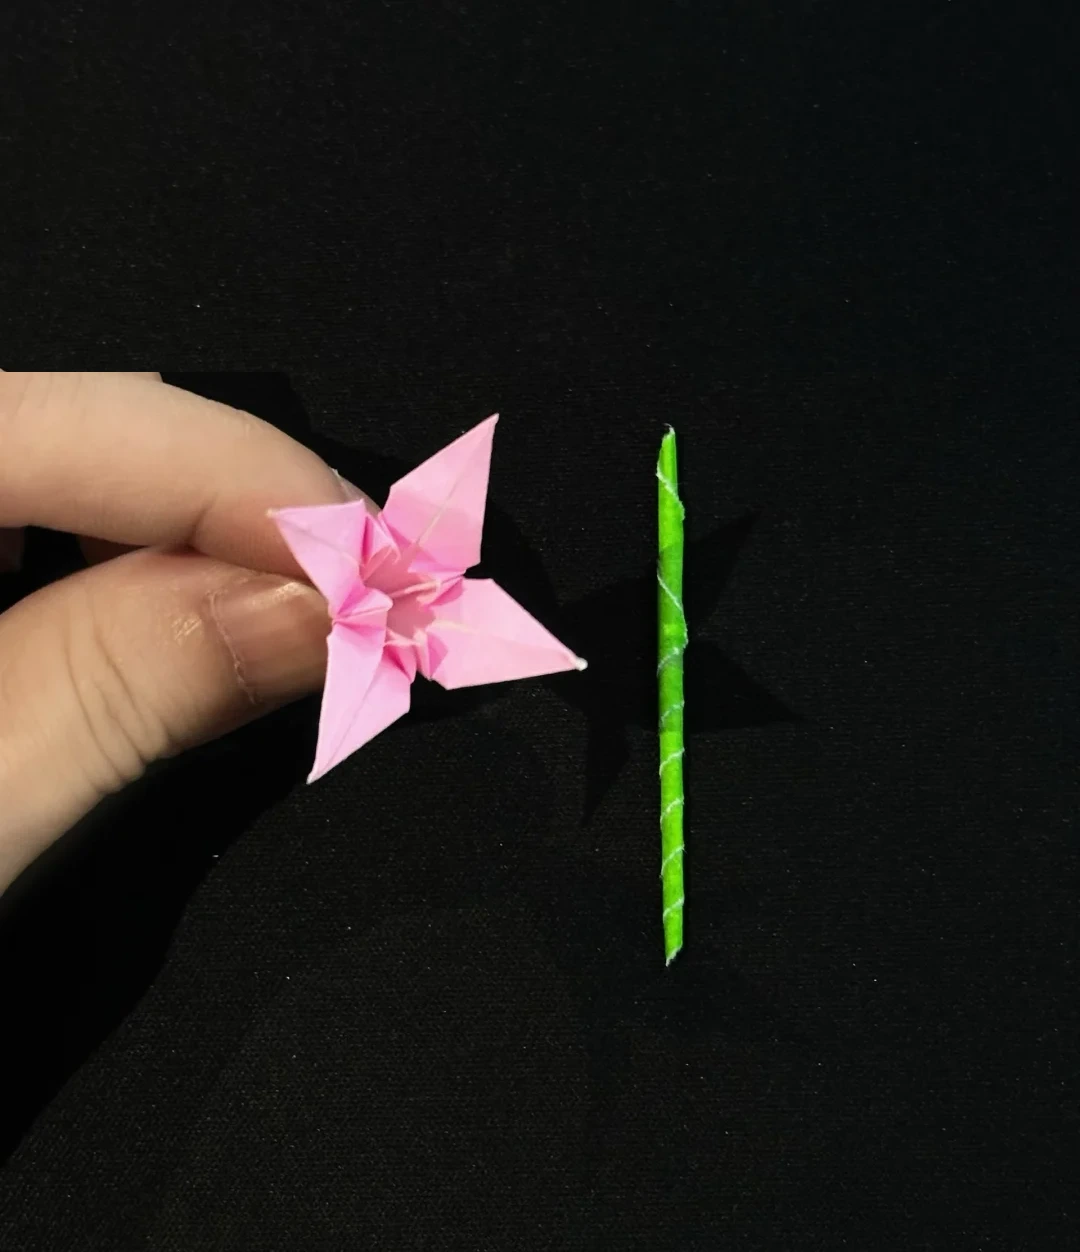 Open image at full size ↗
Fix each flower to a stem with craft glue. Let the joints dry before gathering the stems.
Wrap the bouquet
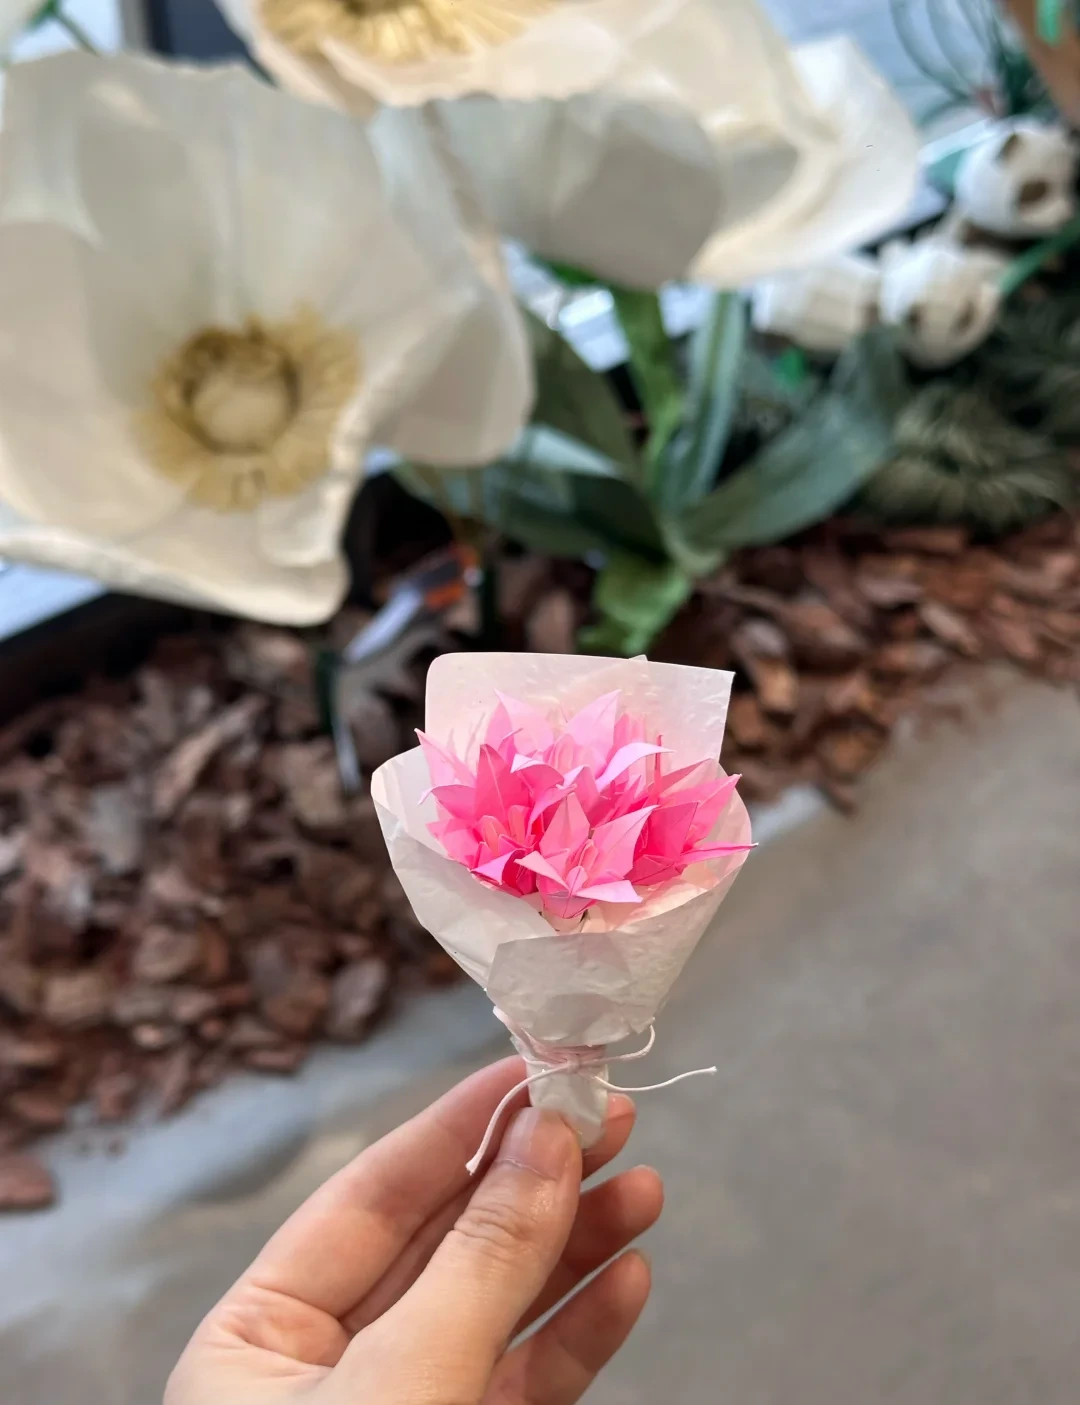 Open image at full size ↗
Gather the flowers, wrap the stems, and tie them together. The wrapping is shown as a finished example rather than a separate folding sequence.
Follow the diagrams alongside the step-by-step English instructions.
Choose your next project →