
Animals · Step-by-step guide
Little Folded Seal
Fold a flat seal with small flippers and a forked tail. The paired folds give the body a neat, symmetrical outline.
What you’ll need
- One paper square
- A fine marker for the face, optional
Origami · Creasing, collapse folds & shaping
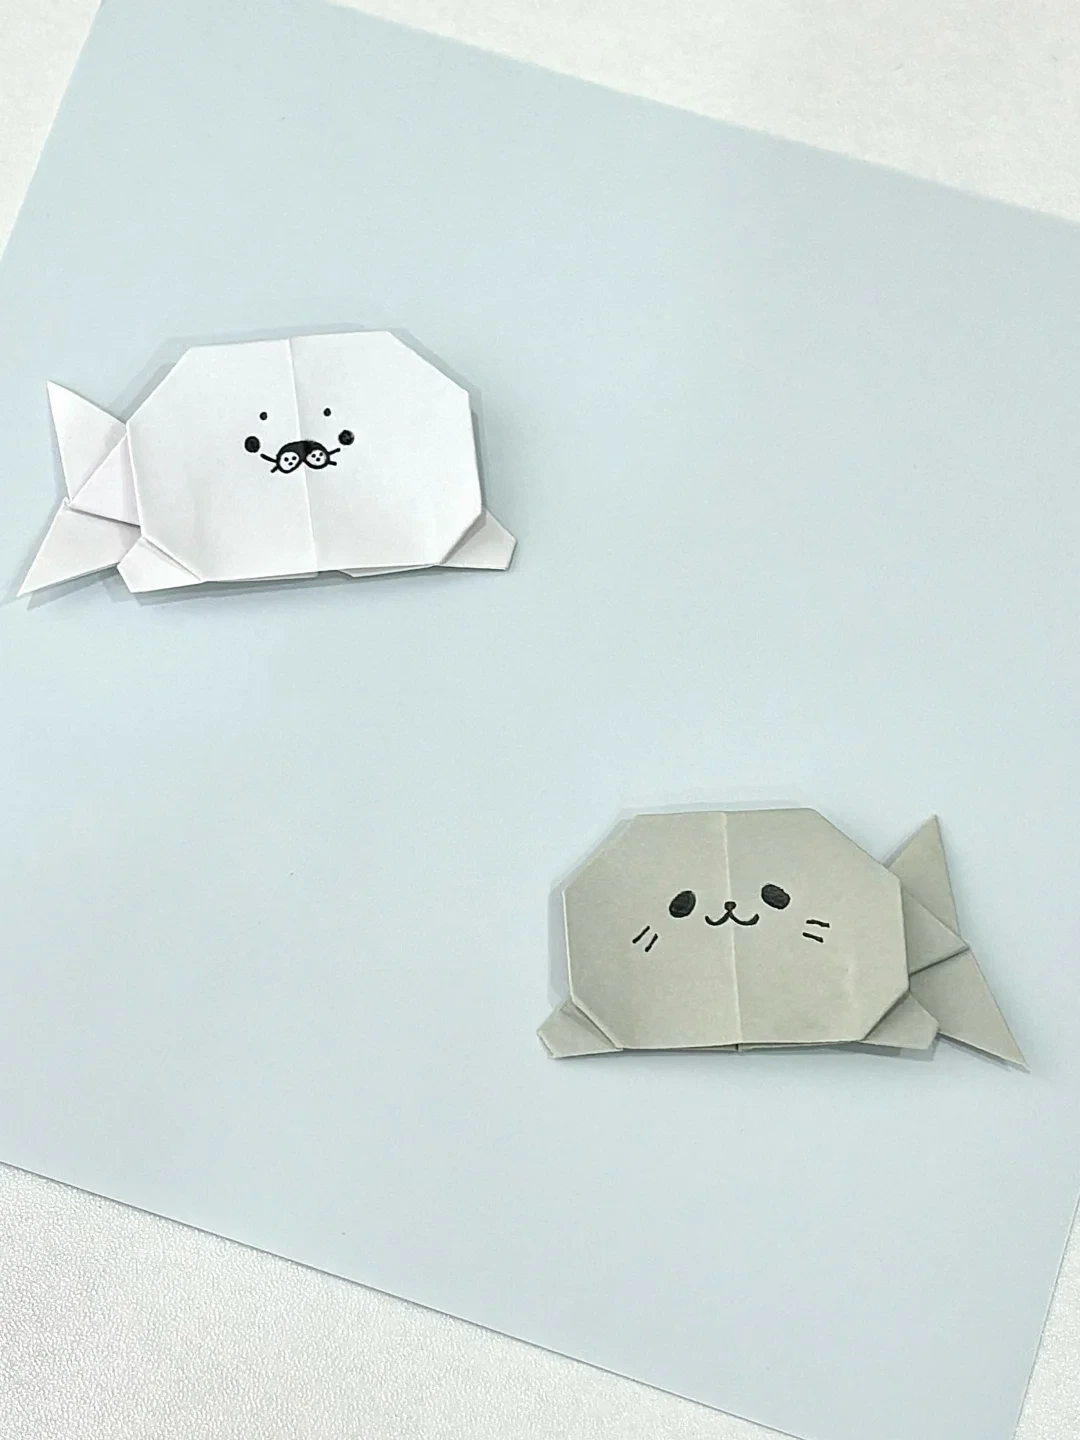
Make it, step by step.
17 steps · Original diagrams with English instructions
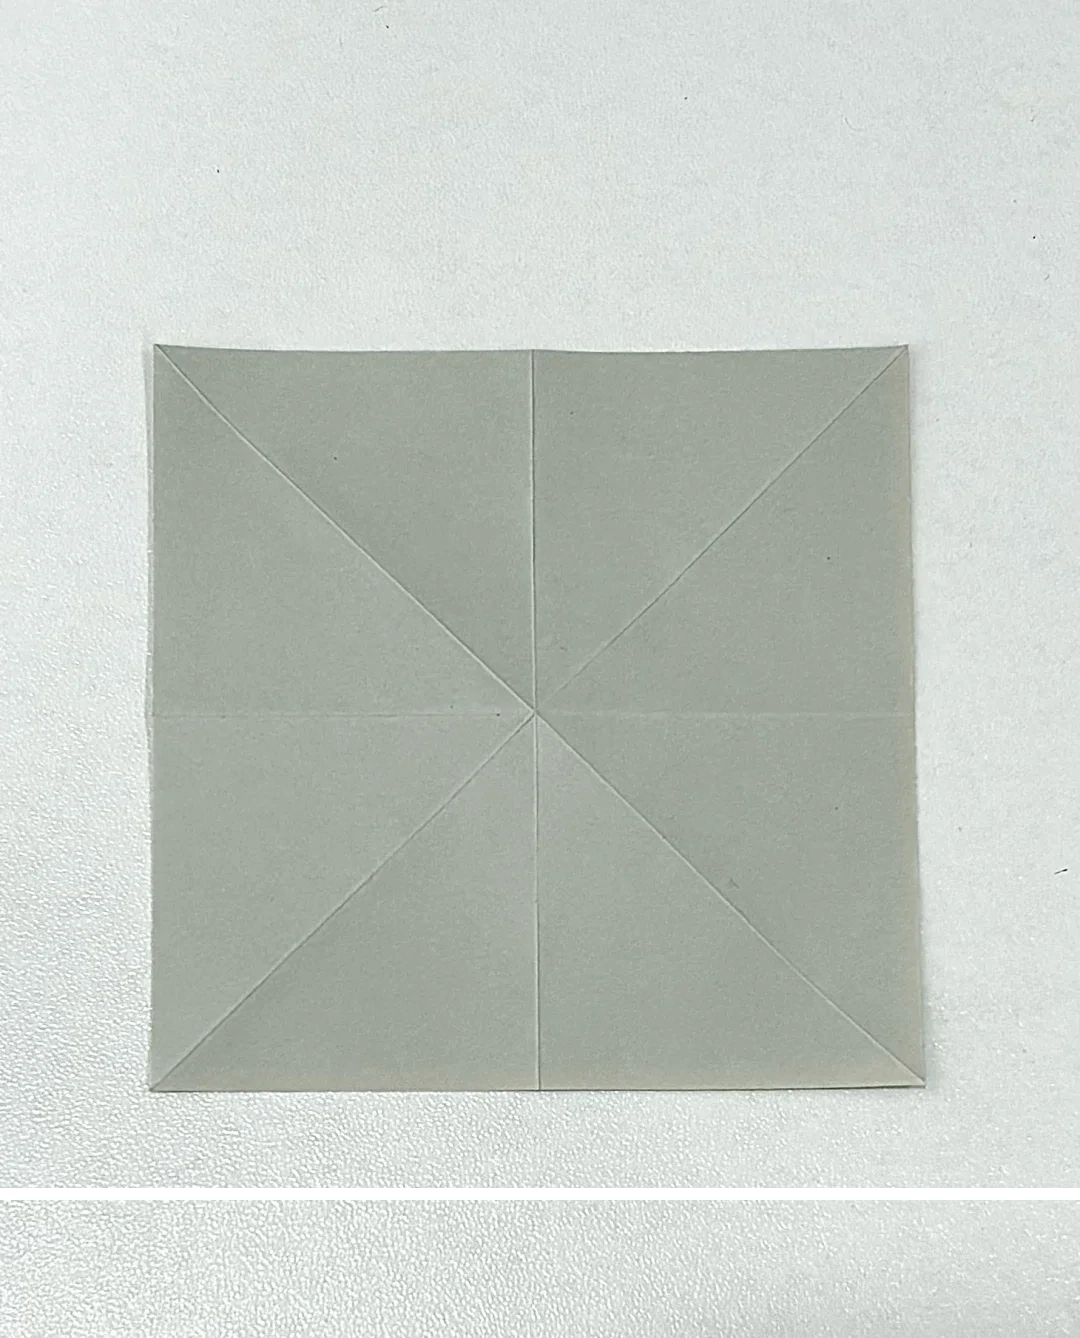
Precrease the square
 Open image at full size ↗
Fold both diagonals and both straight center lines, then open the paper.
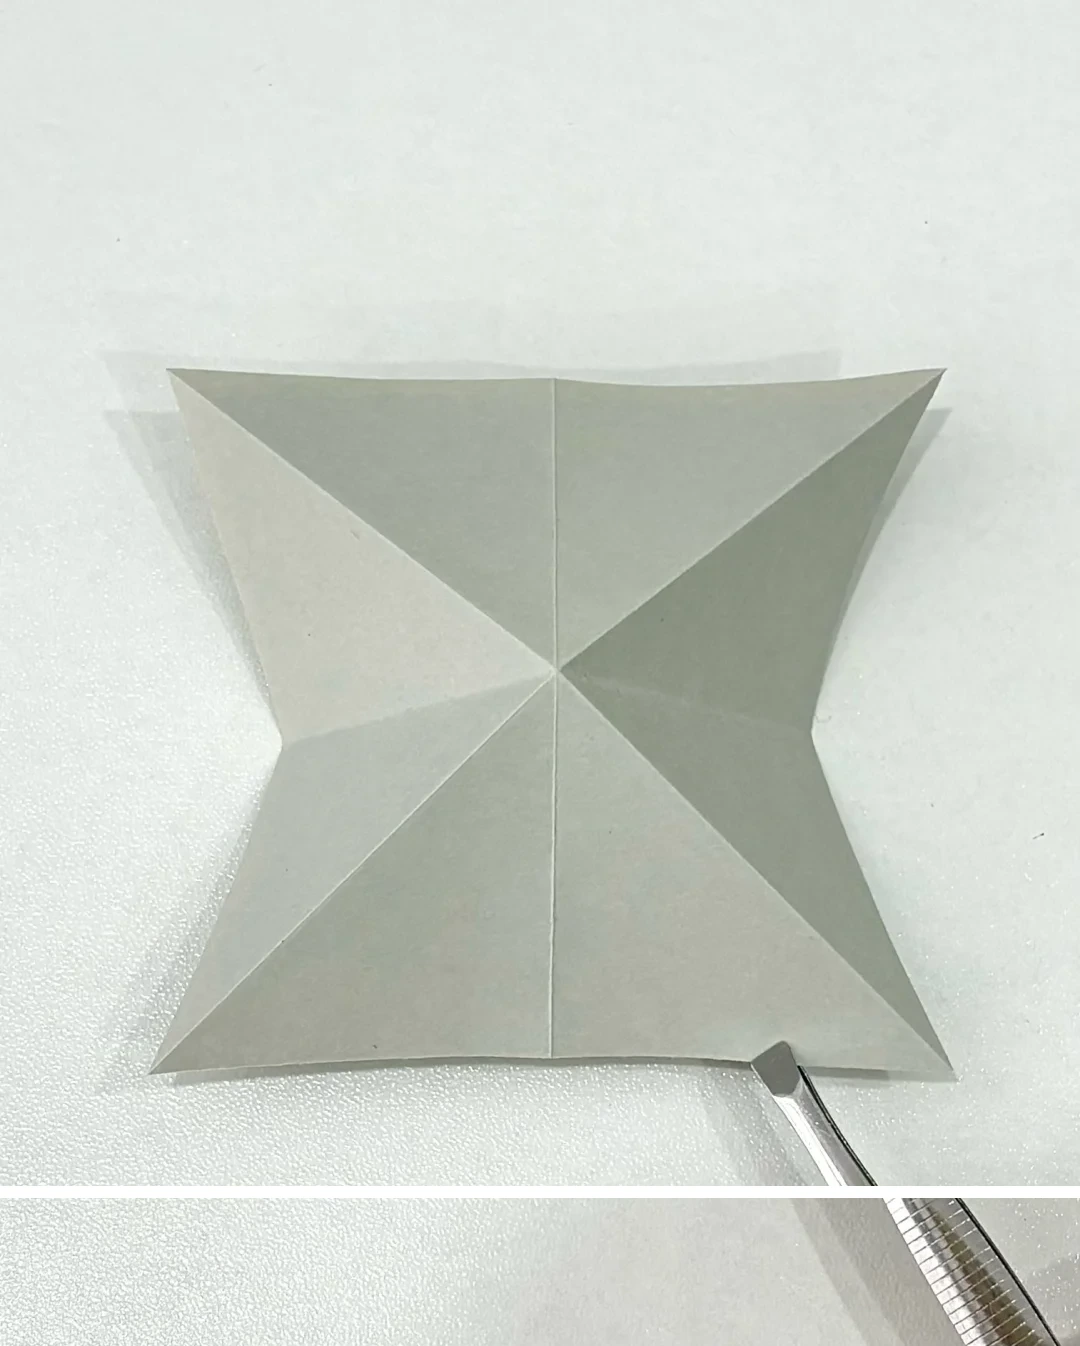
Collapse the base
 Open image at full size ↗
Push the straight creases inward to bring the paper into a layered triangular base.
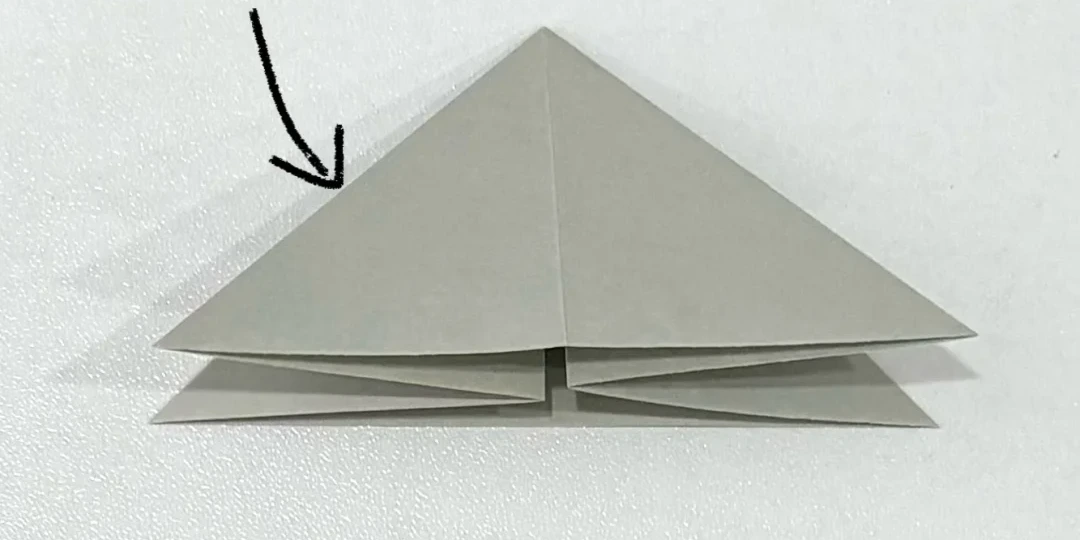
Turn a layer
 Open image at full size ↗
Move one front layer to the right, like turning a page.
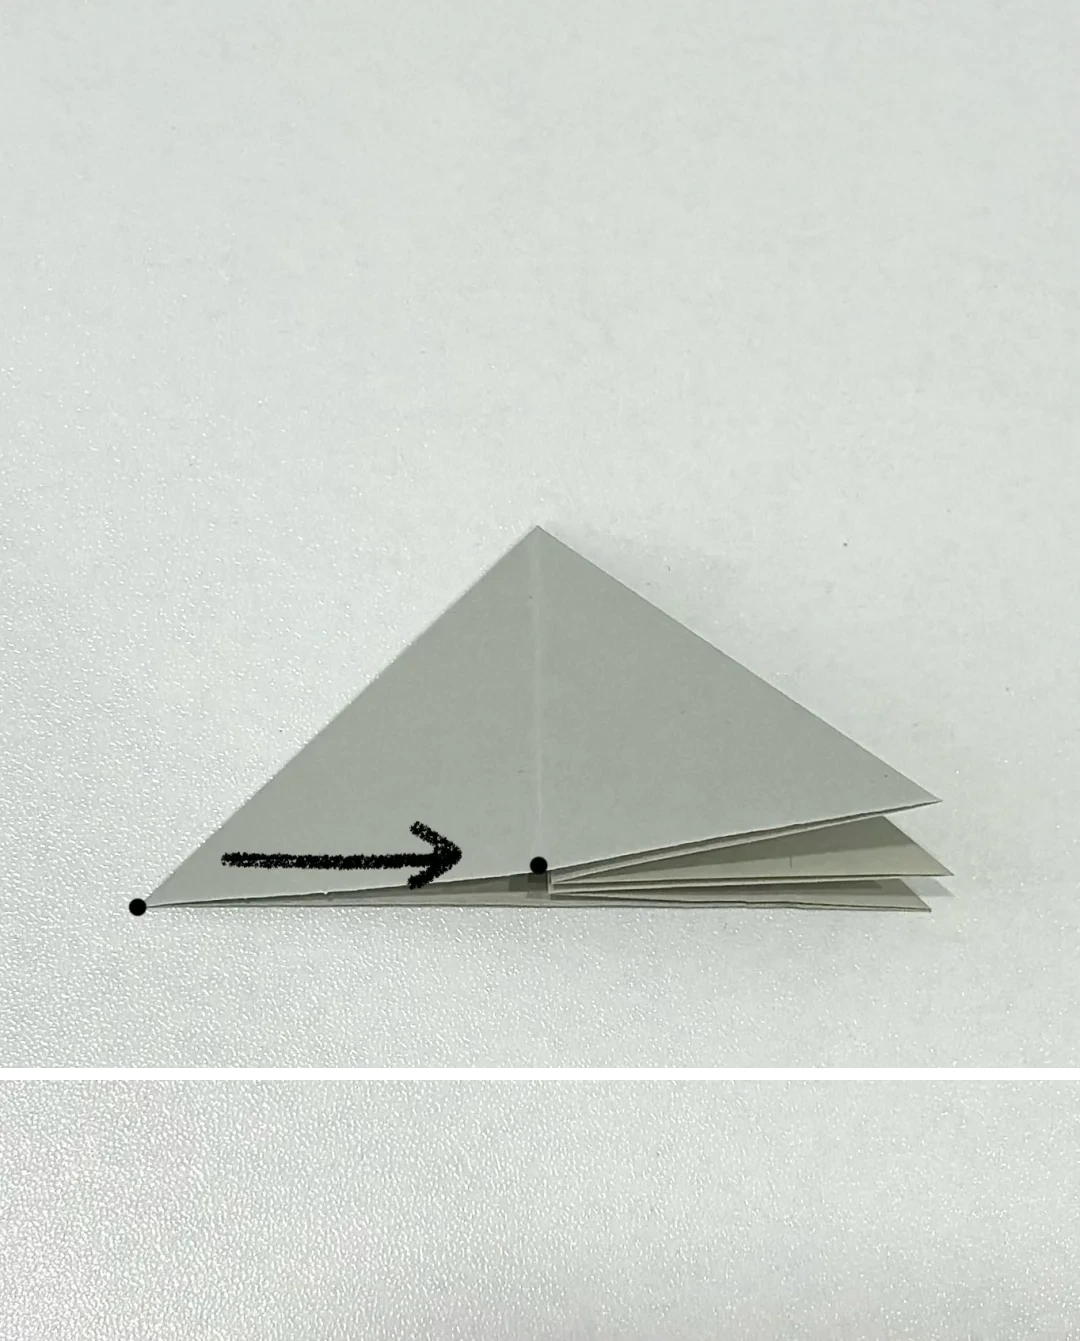
Fold the left section
 Open image at full size ↗
Bring the left point toward the right along the arrow.
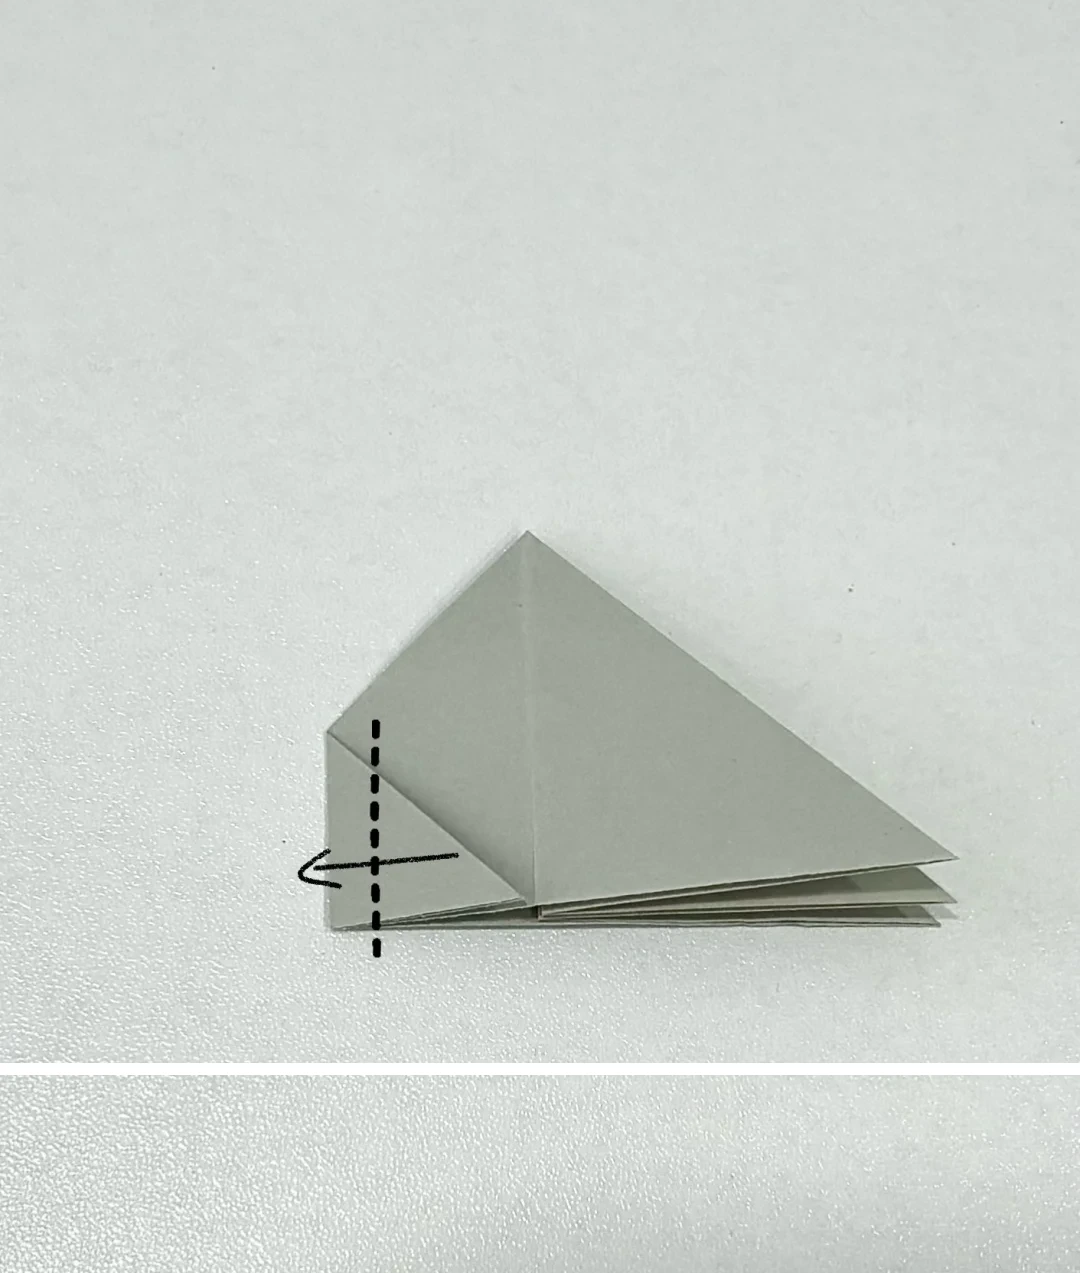
Mark a third
 Open image at full size ↗
Fold about one third of this section back toward the left, then unfold to leave a guide crease.
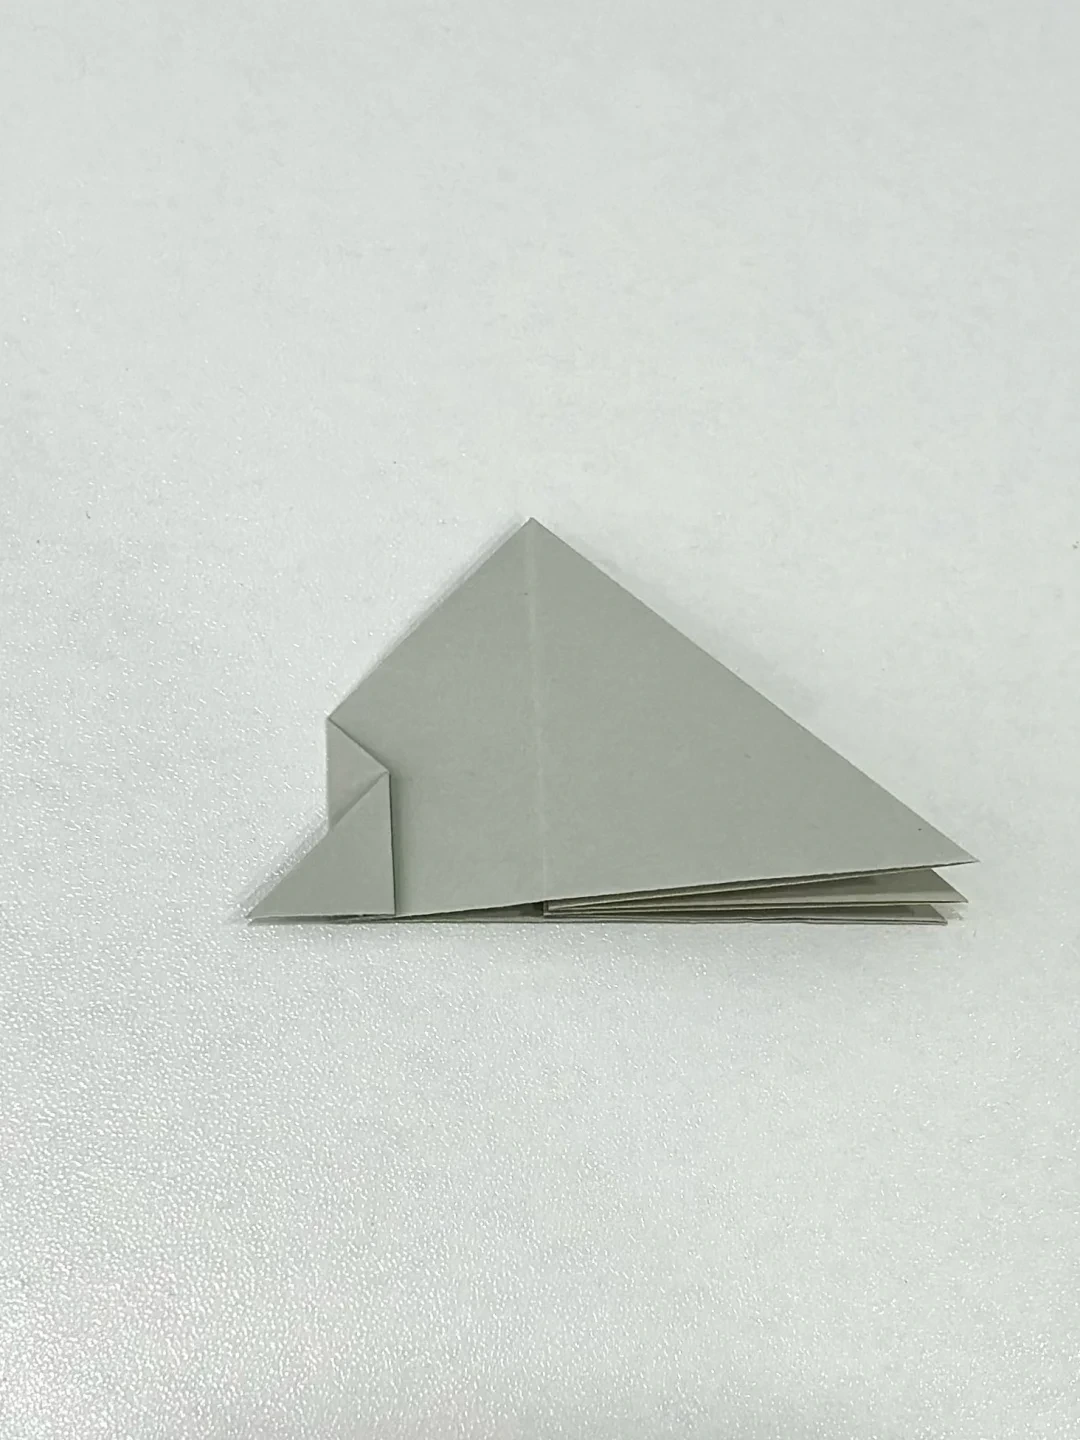
Check the crease
 Open image at full size ↗
Keep the small crease visible while holding the remaining layers flat.
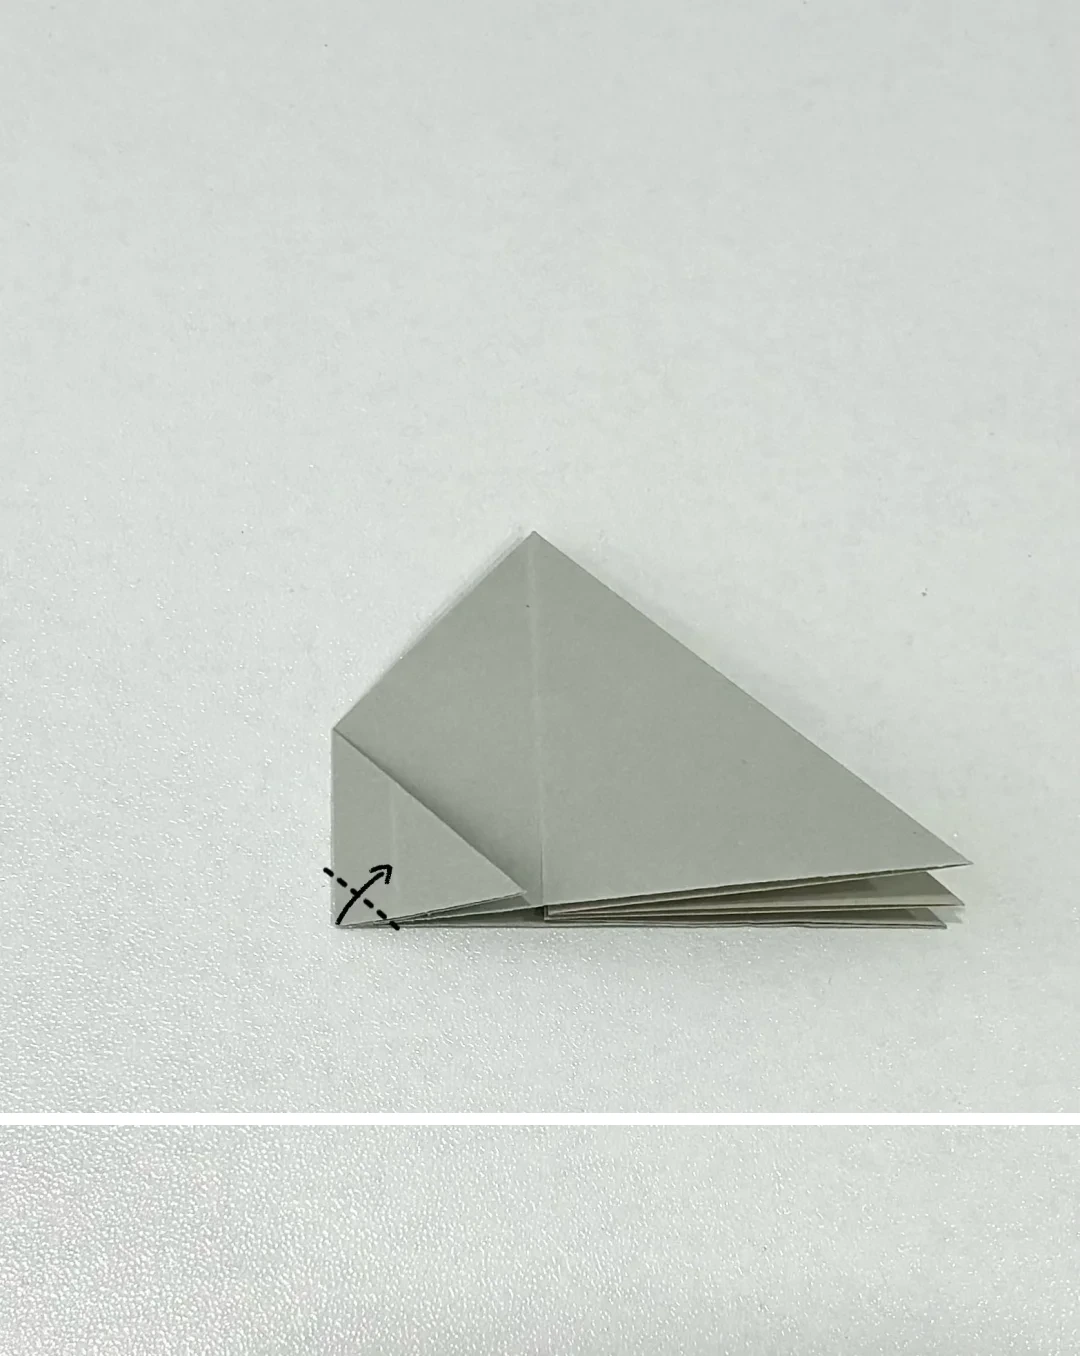
Fold a small corner
 Open image at full size ↗
Fold the tiny lower triangular corner upward along the dotted line.
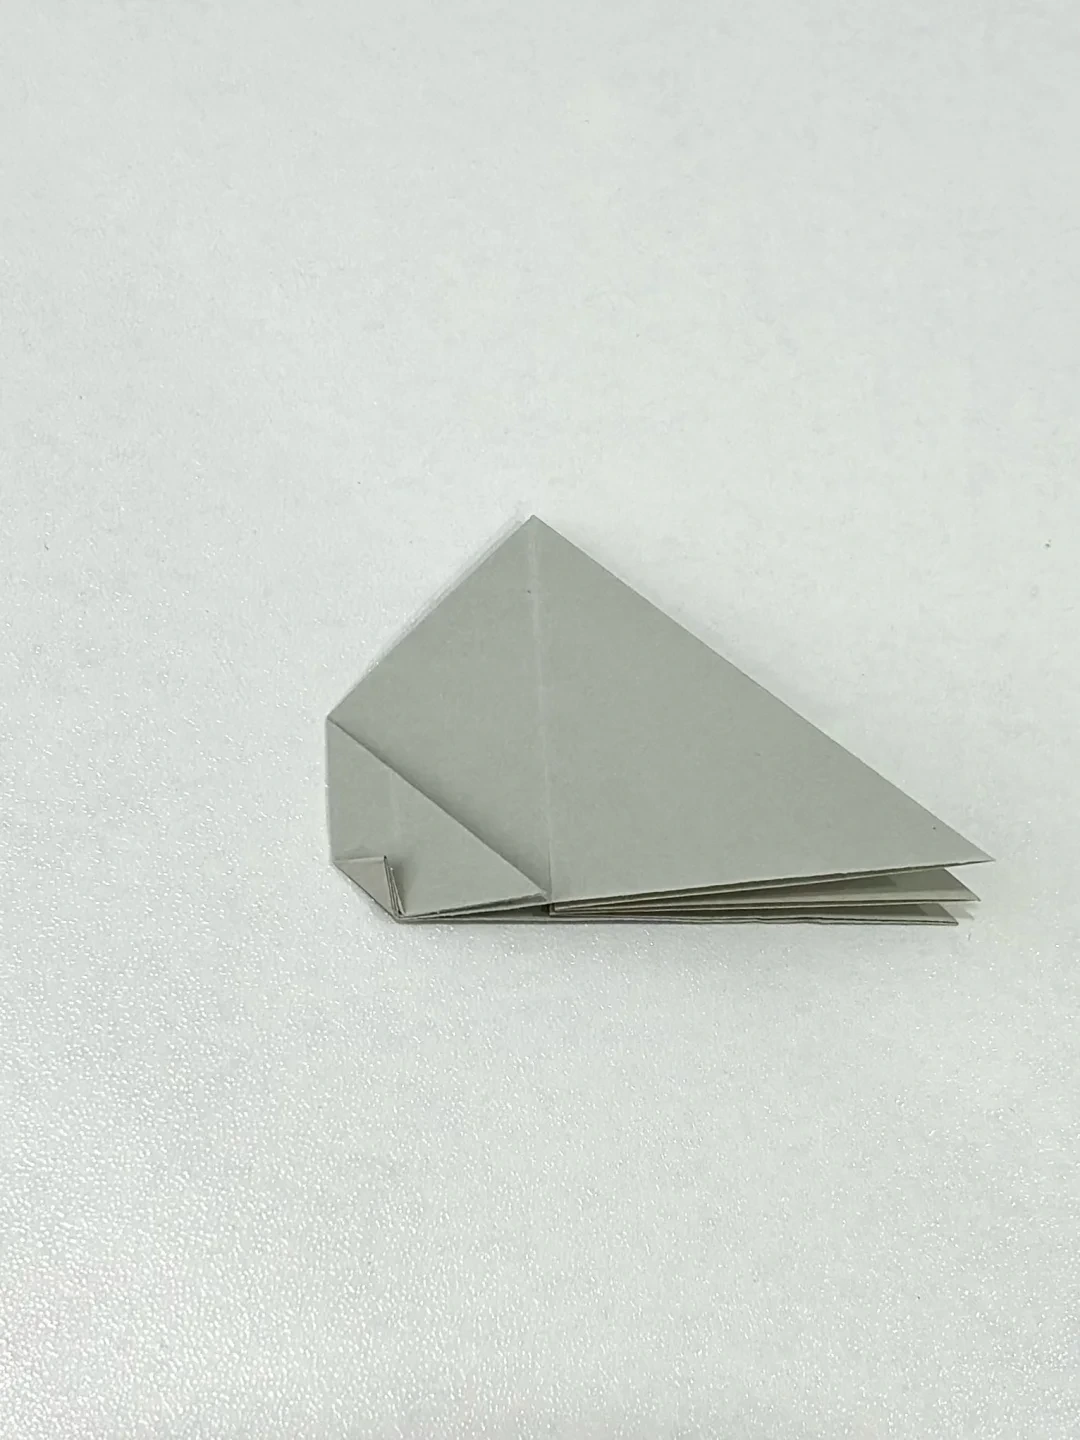
Flatten the corner
 Open image at full size ↗
Press the little triangle flat against the body.
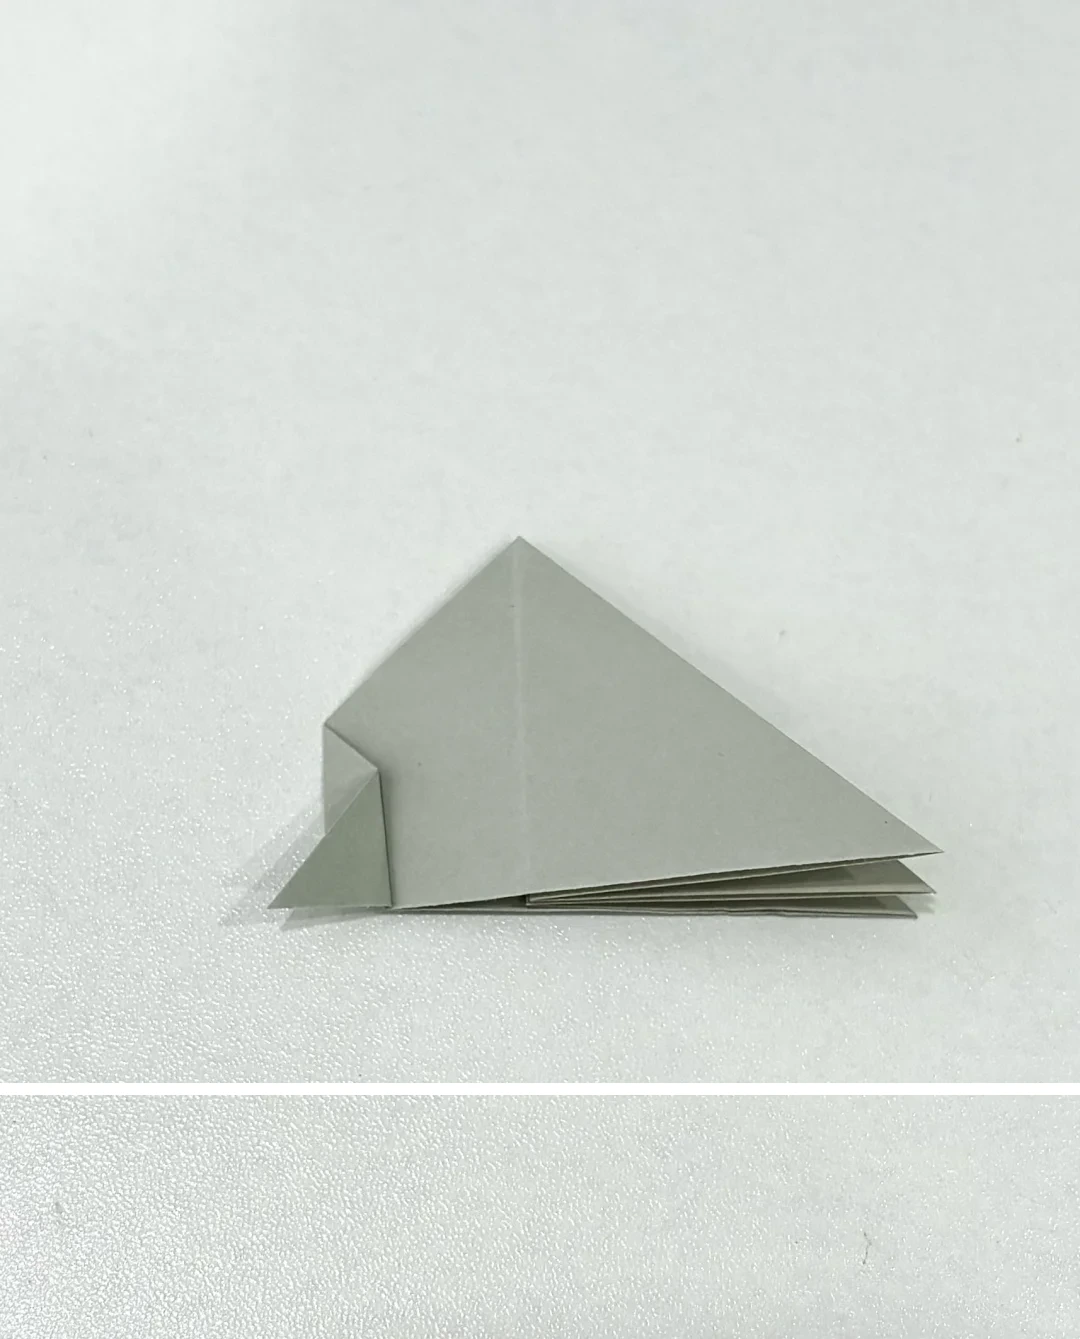
Return the flap
 Open image at full size ↗
Fold the section back along its earlier crease.
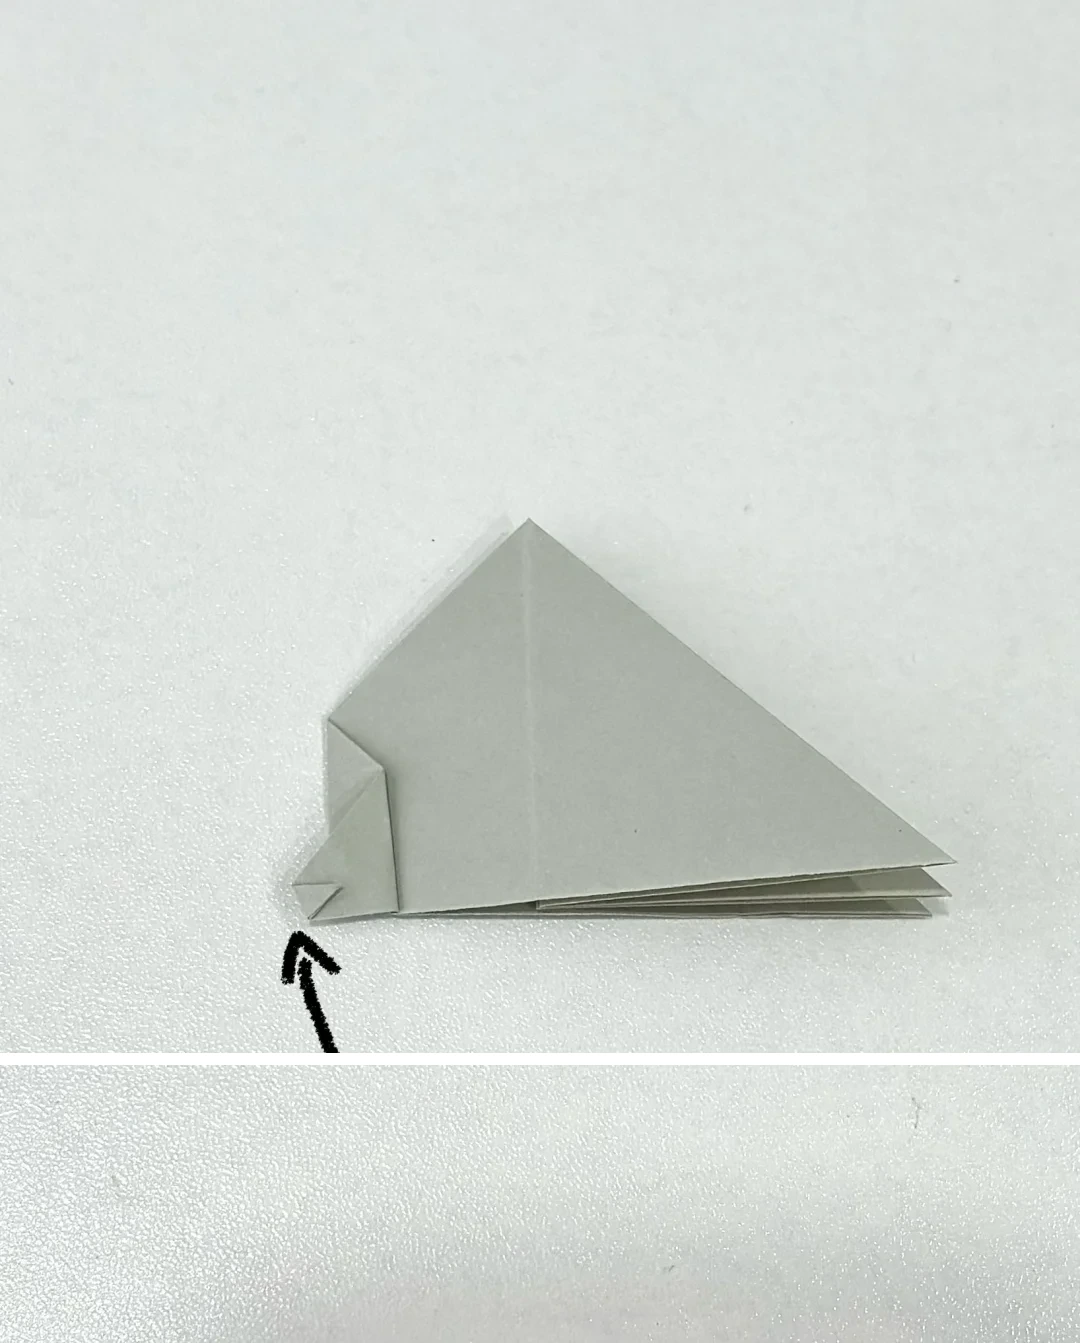
Make a second small corner
 Open image at full size ↗
Fold a tiny corner inward at the indicated lower edge.
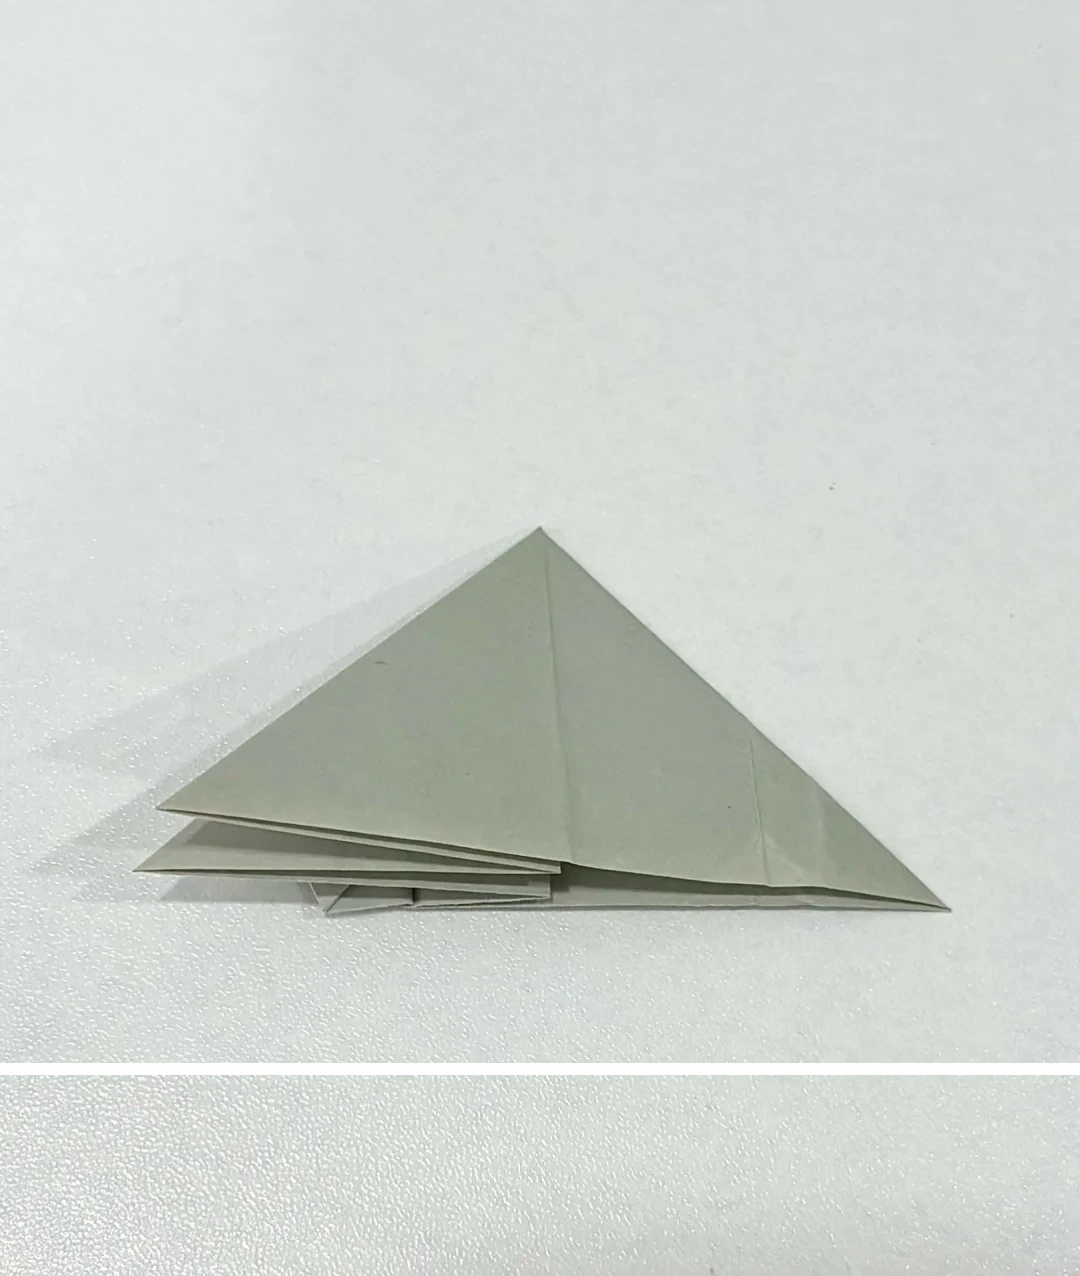
Expose the other side
 Open image at full size ↗
Turn two layers toward the left to reveal the other half of the model.
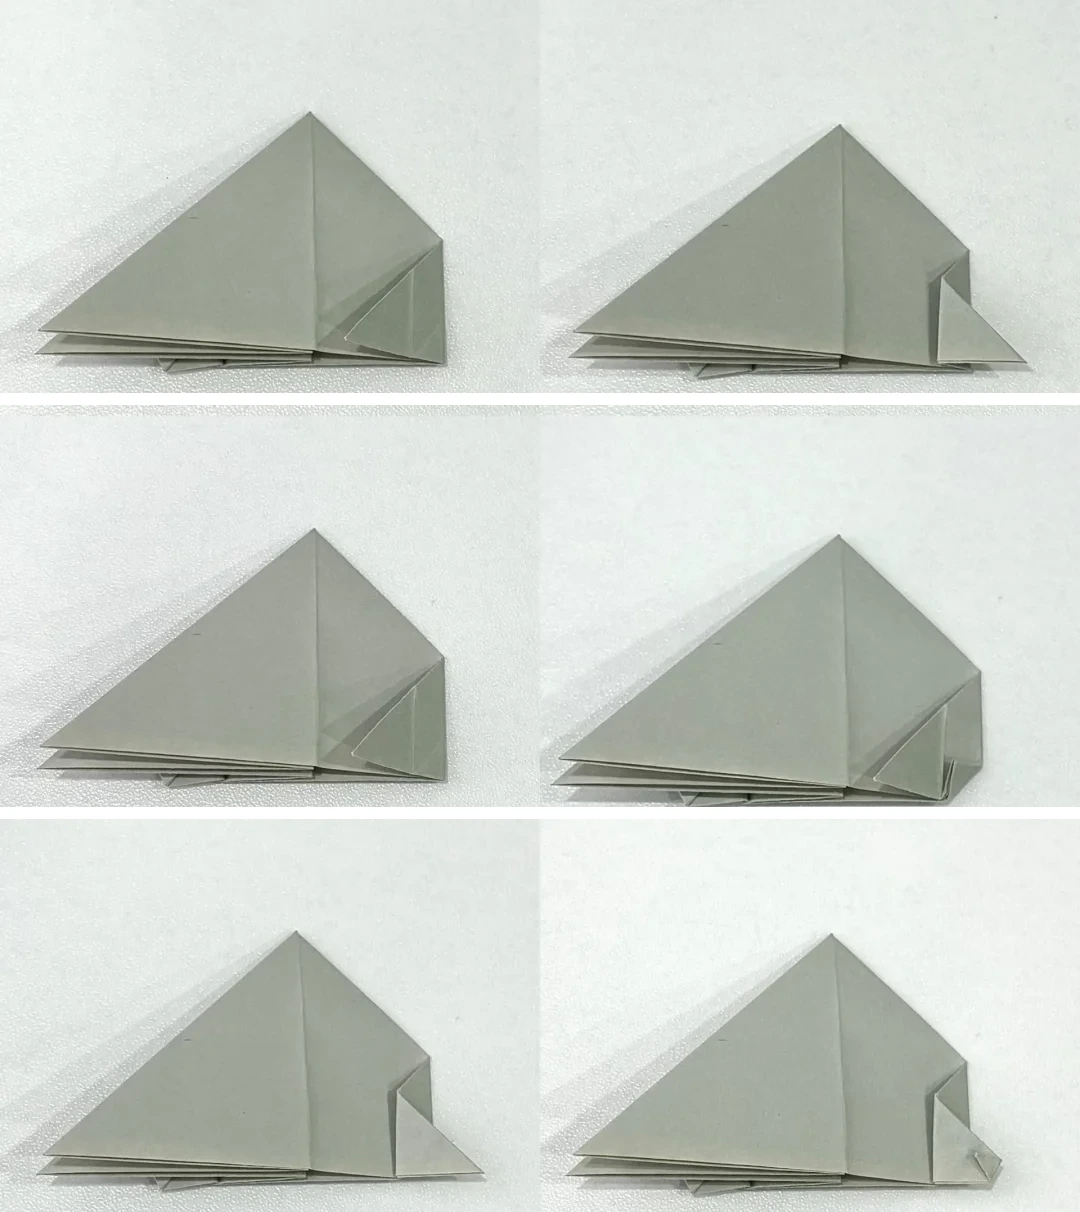
Repeat the flipper folds
 Open image at full size ↗
Fold this side halfway left, then about one third back to the right. Fold the small corner up, return the flap, and make the second tiny corner.
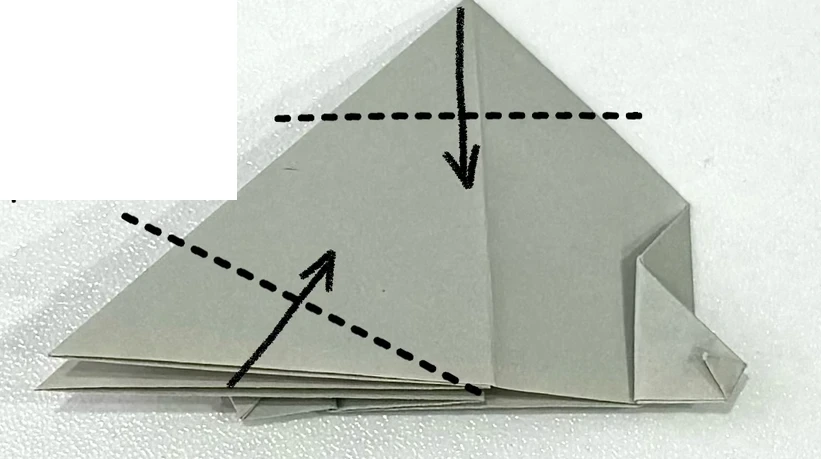
Shape the body and tail
 Open image at full size ↗
Fold the upper point down along the horizontal guide. Lift the two middle layers together along the diagonal guide to form the tail section.
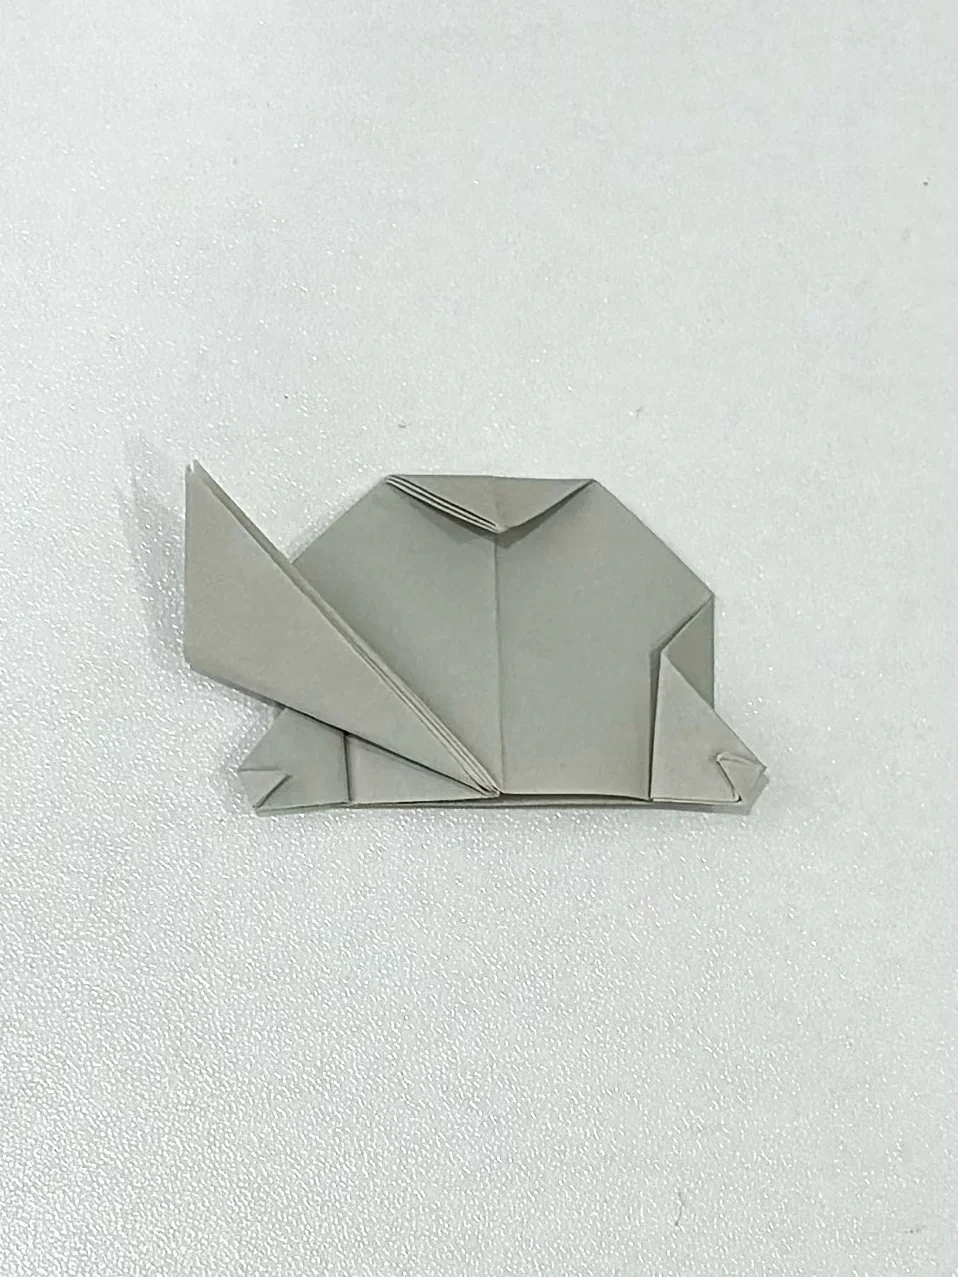
Flatten the body
 Open image at full size ↗
Settle the folds into a broad body with the tail pointing upward to one side.
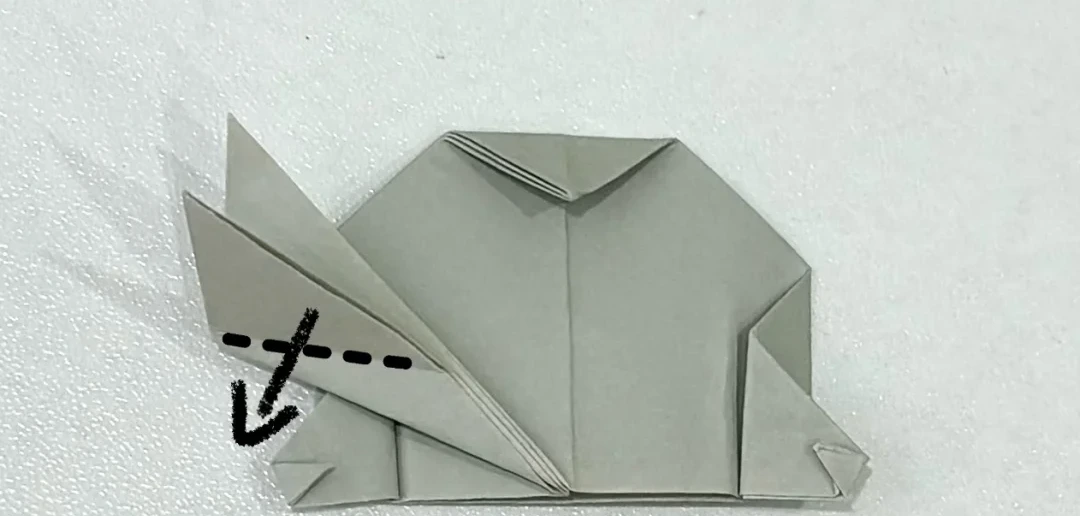
Fork the tail
 Open image at full size ↗
Fold the upper tail layer down along the dotted line.
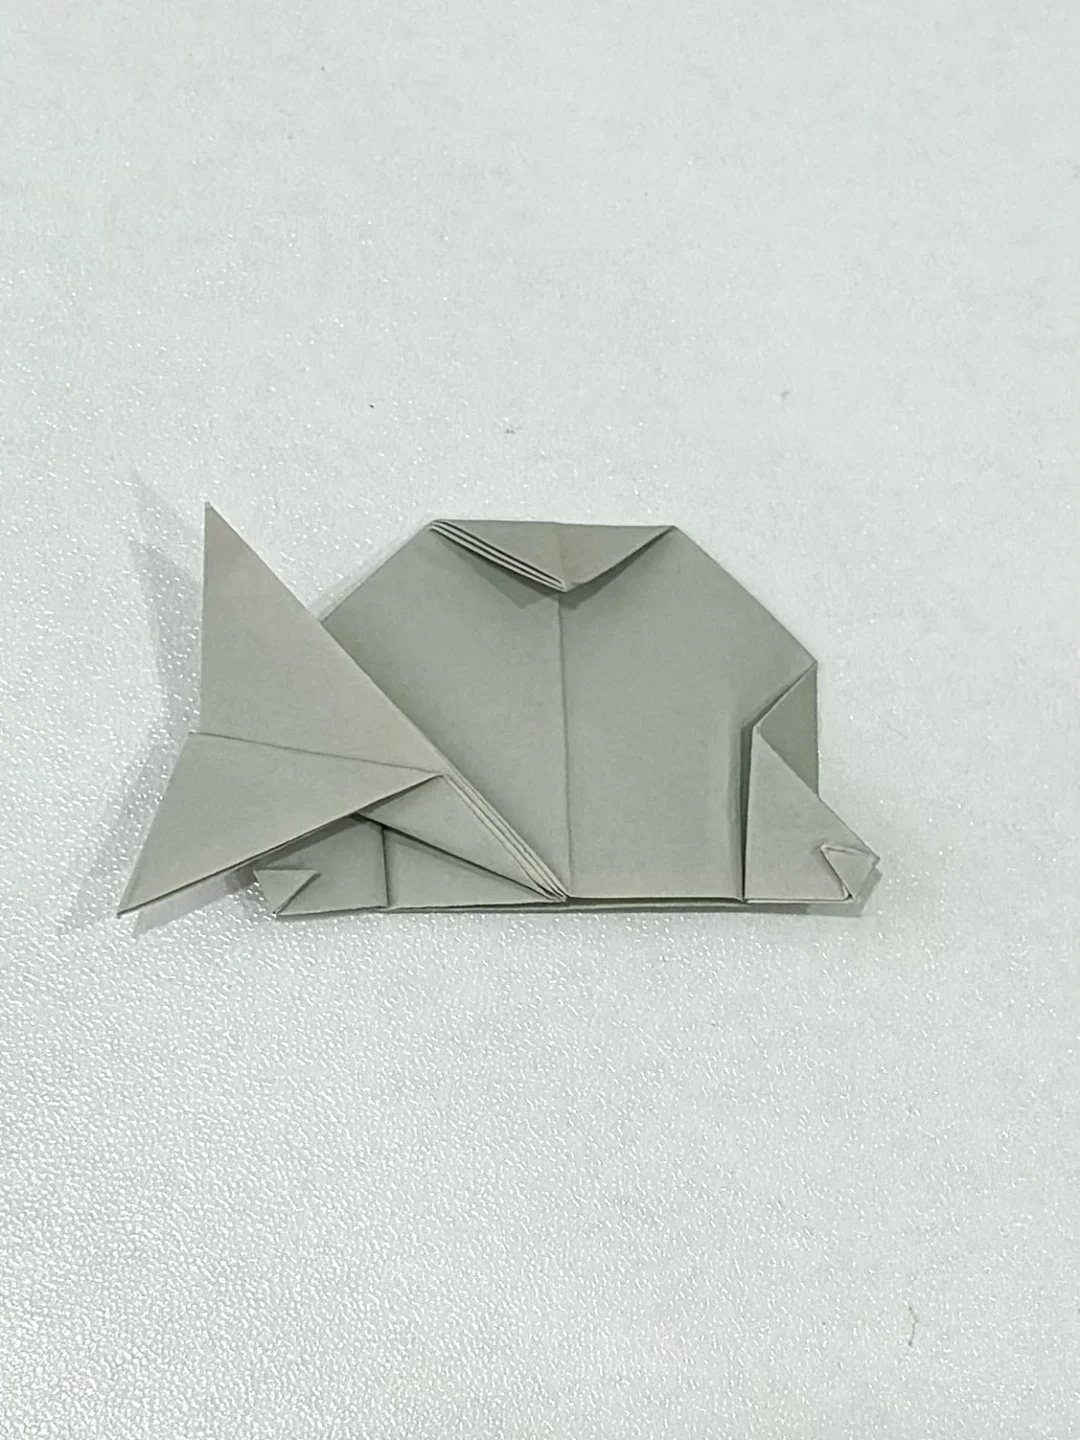
Arrange the tail
 Open image at full size ↗
Spread the two tail points slightly and flatten the small flippers beneath the body.
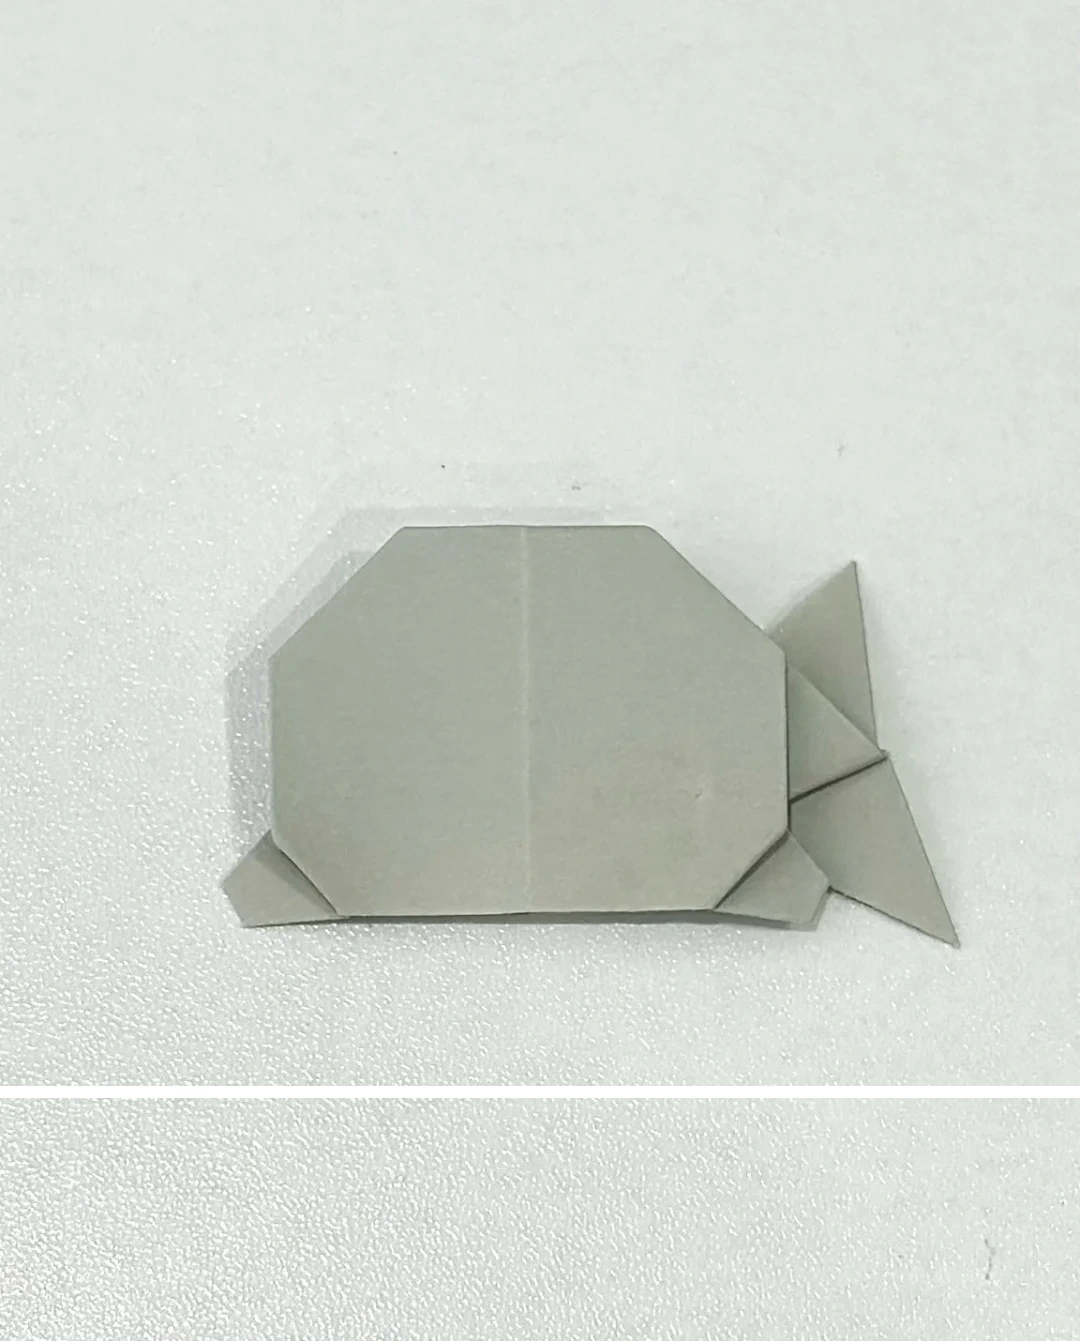
Turn and decorate
 Open image at full size ↗
Turn the seal over. Add eyes, a nose, and whiskers if desired.
Follow the diagrams alongside the step-by-step English instructions.
Choose your next project →