
Decorations · Step-by-step guide
Linked Heart Bracelet
Fold heart units with long connecting tabs, then link them into a bracelet sized to fit.
What you’ll need
- Several equal paper squares in two colors
- Glue
Modular paper folding · Heart units & glued links
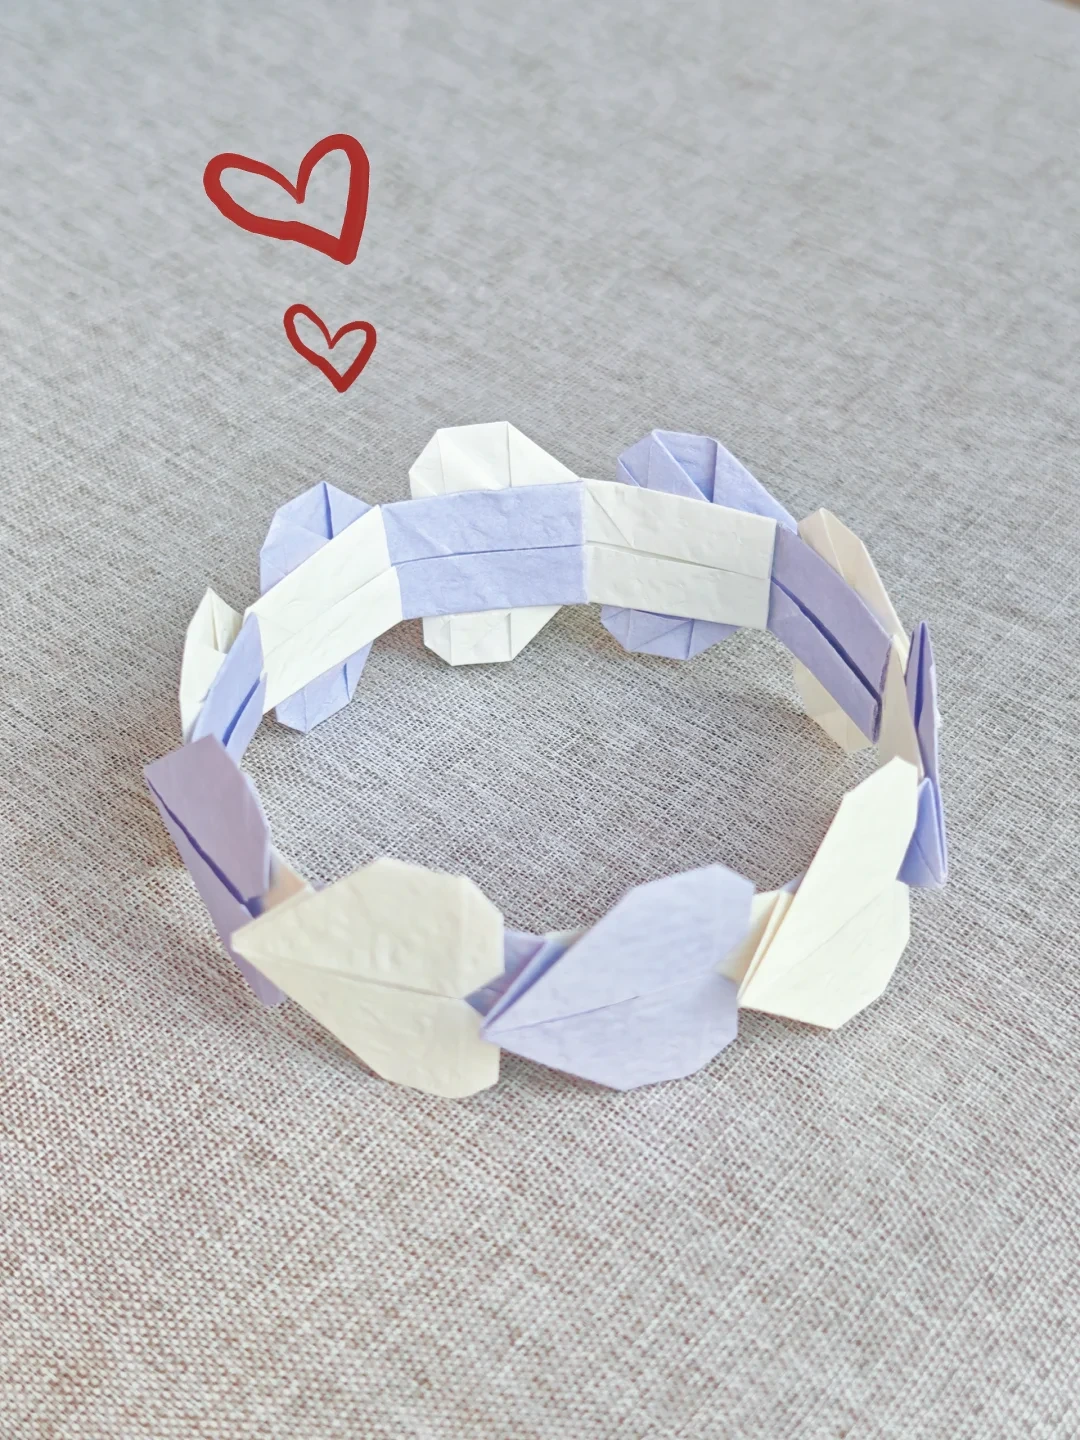
Make it, step by step.
15 steps · Original diagrams with English instructions
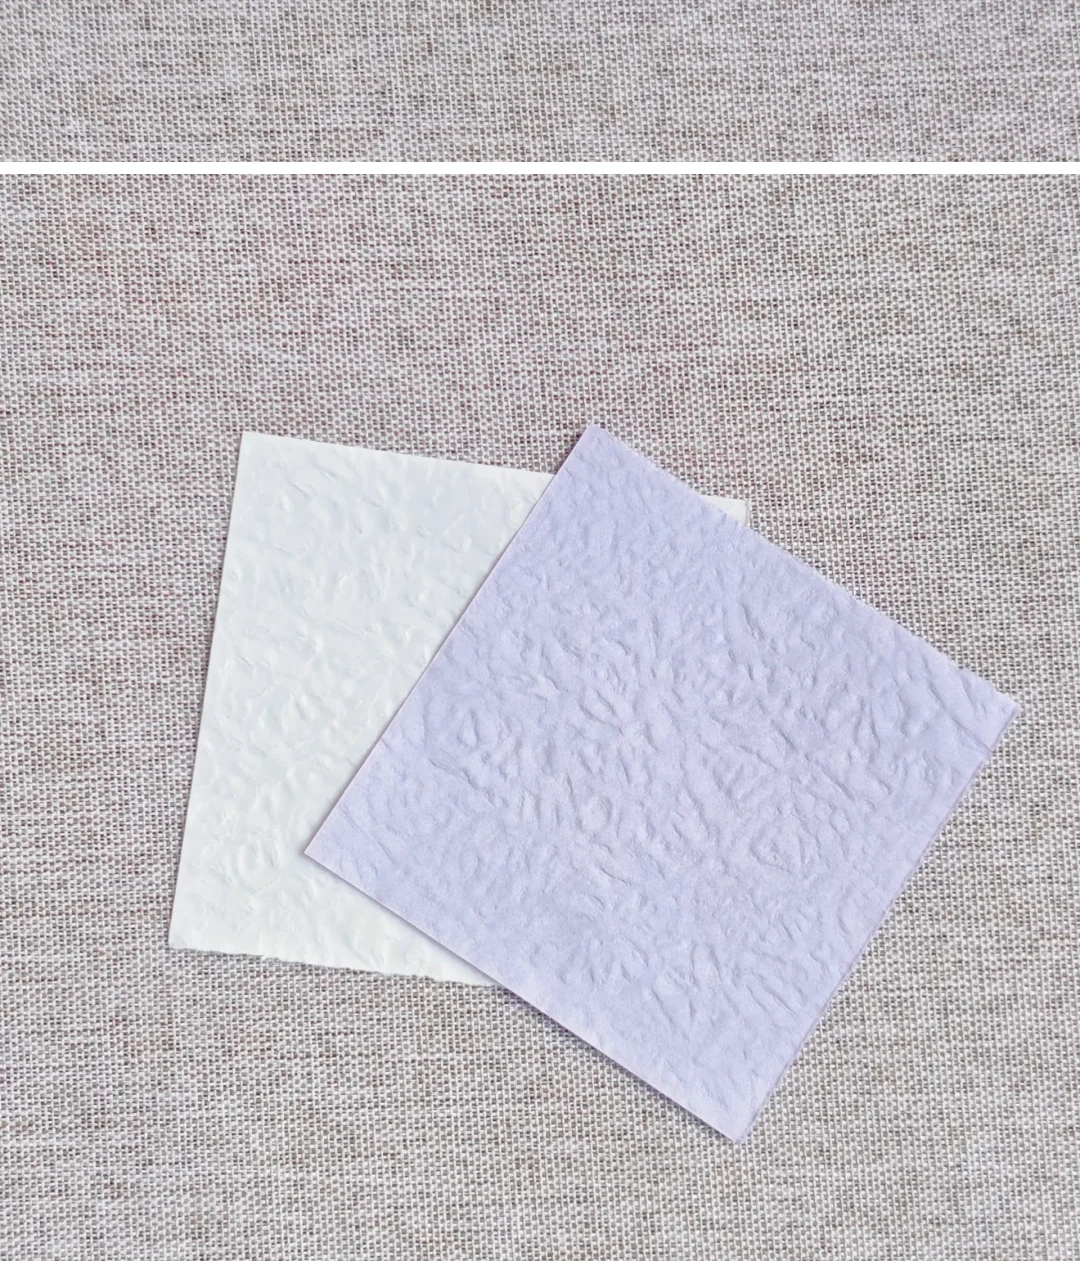
Prepare matching squares
 Open image at full size ↗
Use equal-sized squares so the heart units and tabs line up.
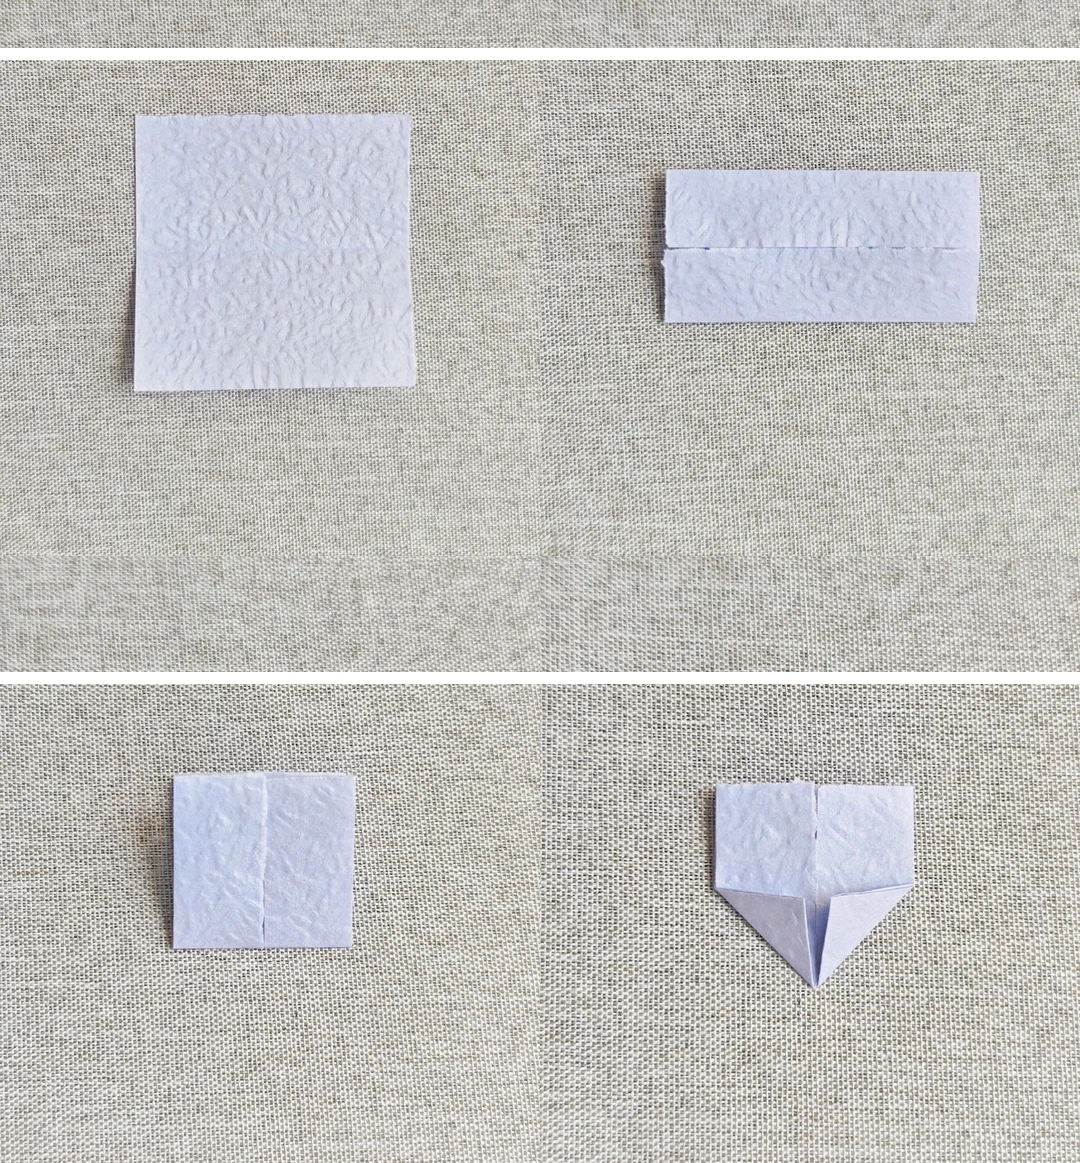
Make the reference folds
 Open image at full size ↗
Fold in half and unfold, bring both edges to the middle, then fold the layers together with the opening up. Fold the lower corners to the center.
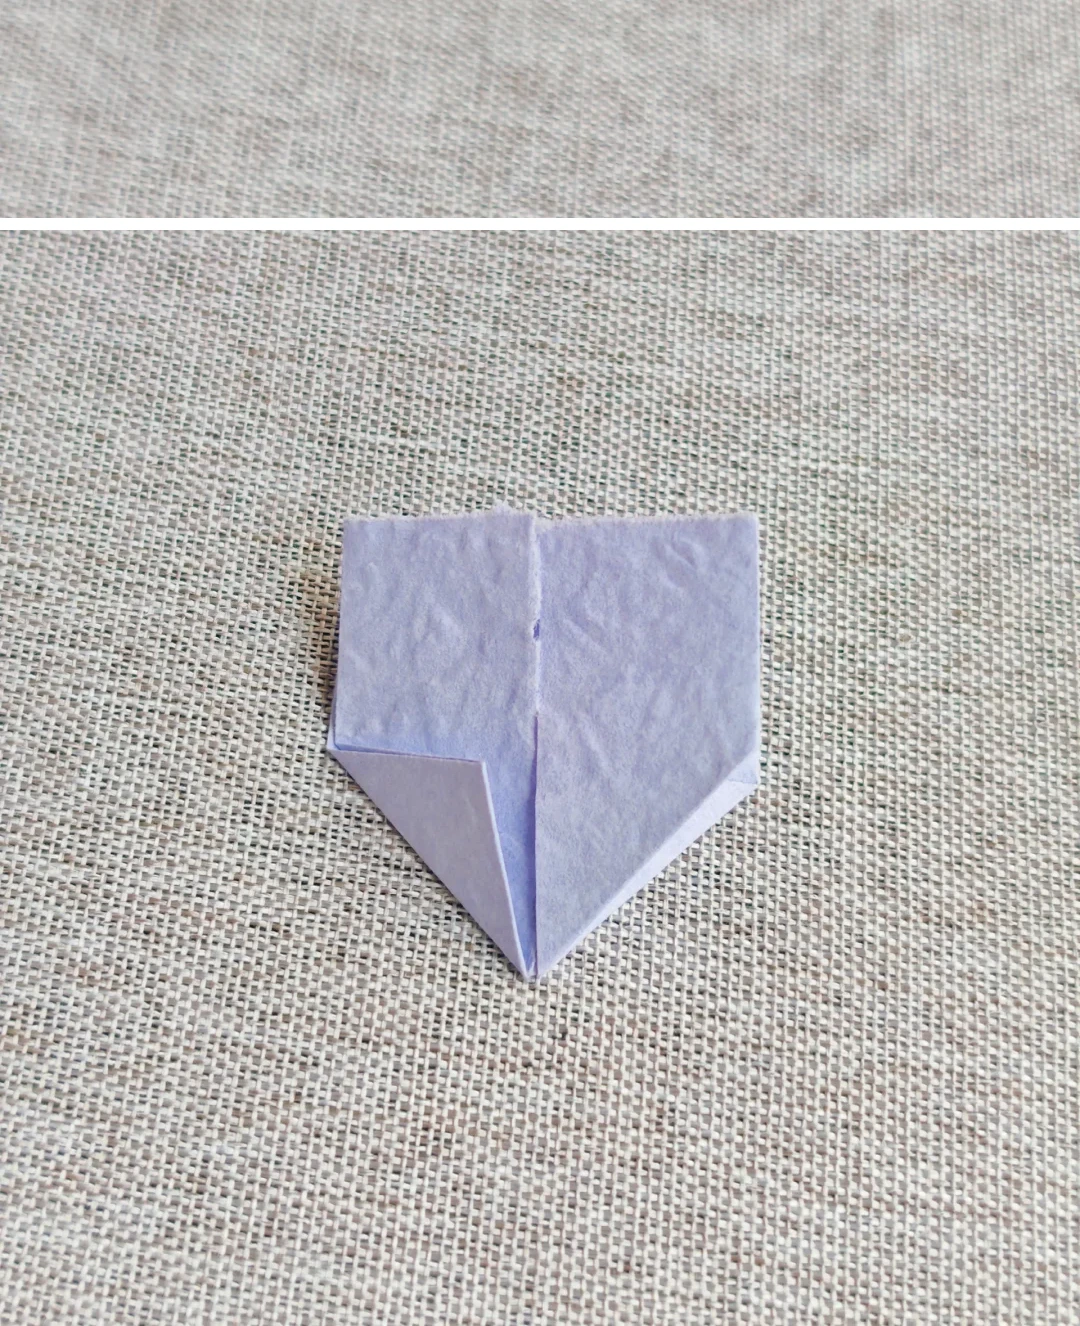
Tuck the first triangle
 Open image at full size ↗
Reverse the first triangular fold inward along its crease.
Tuck the other triangle
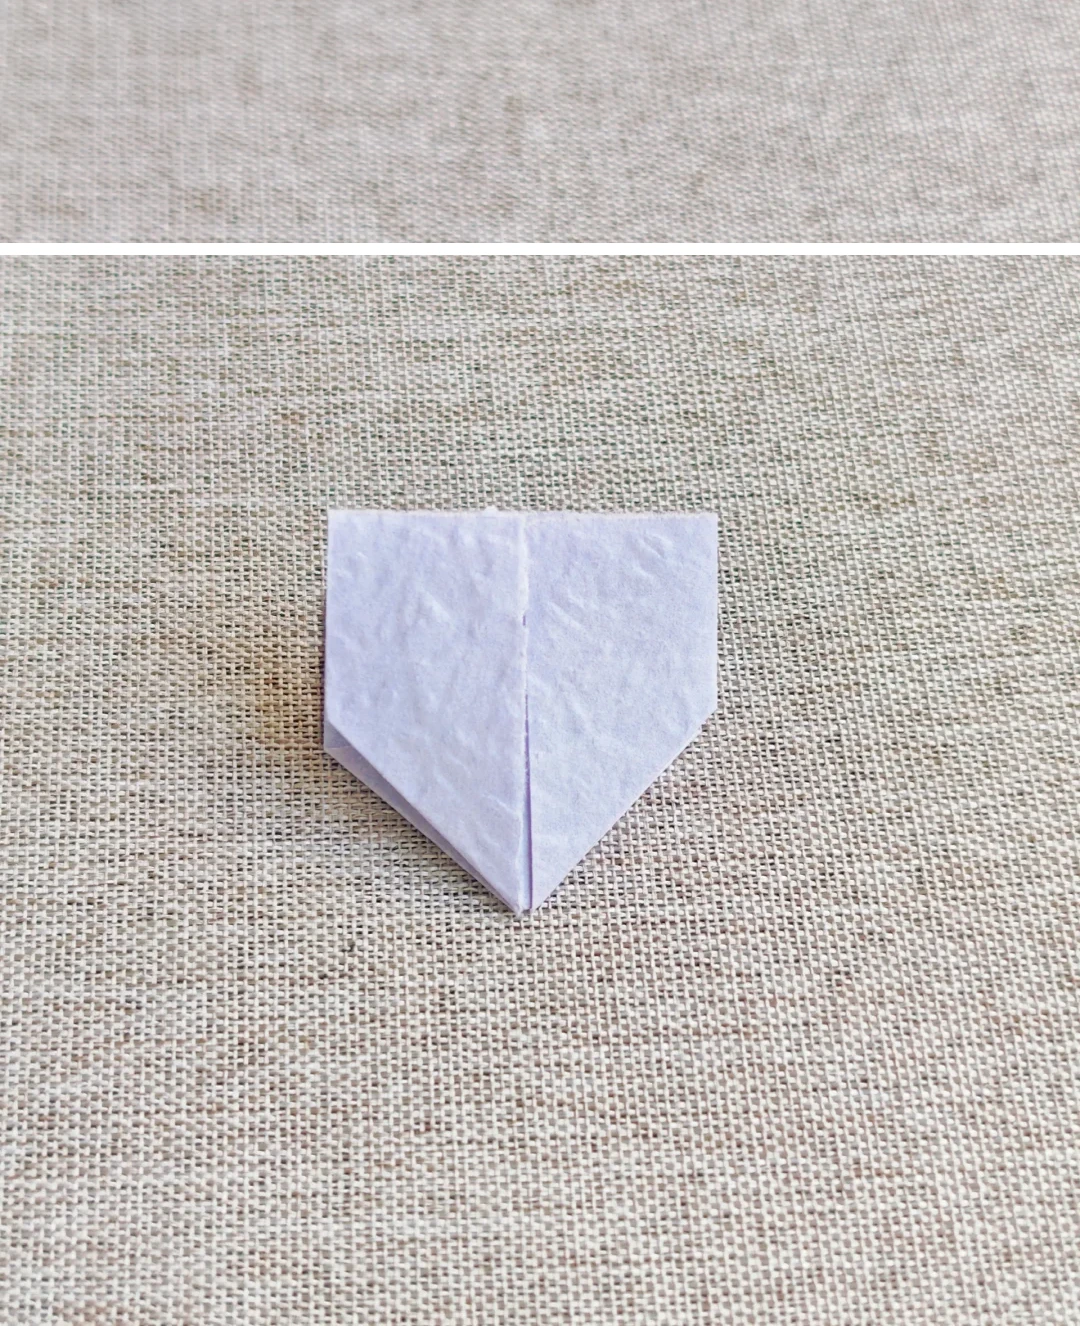 Open image at full size ↗
Repeat on the opposite side.
Open the middle
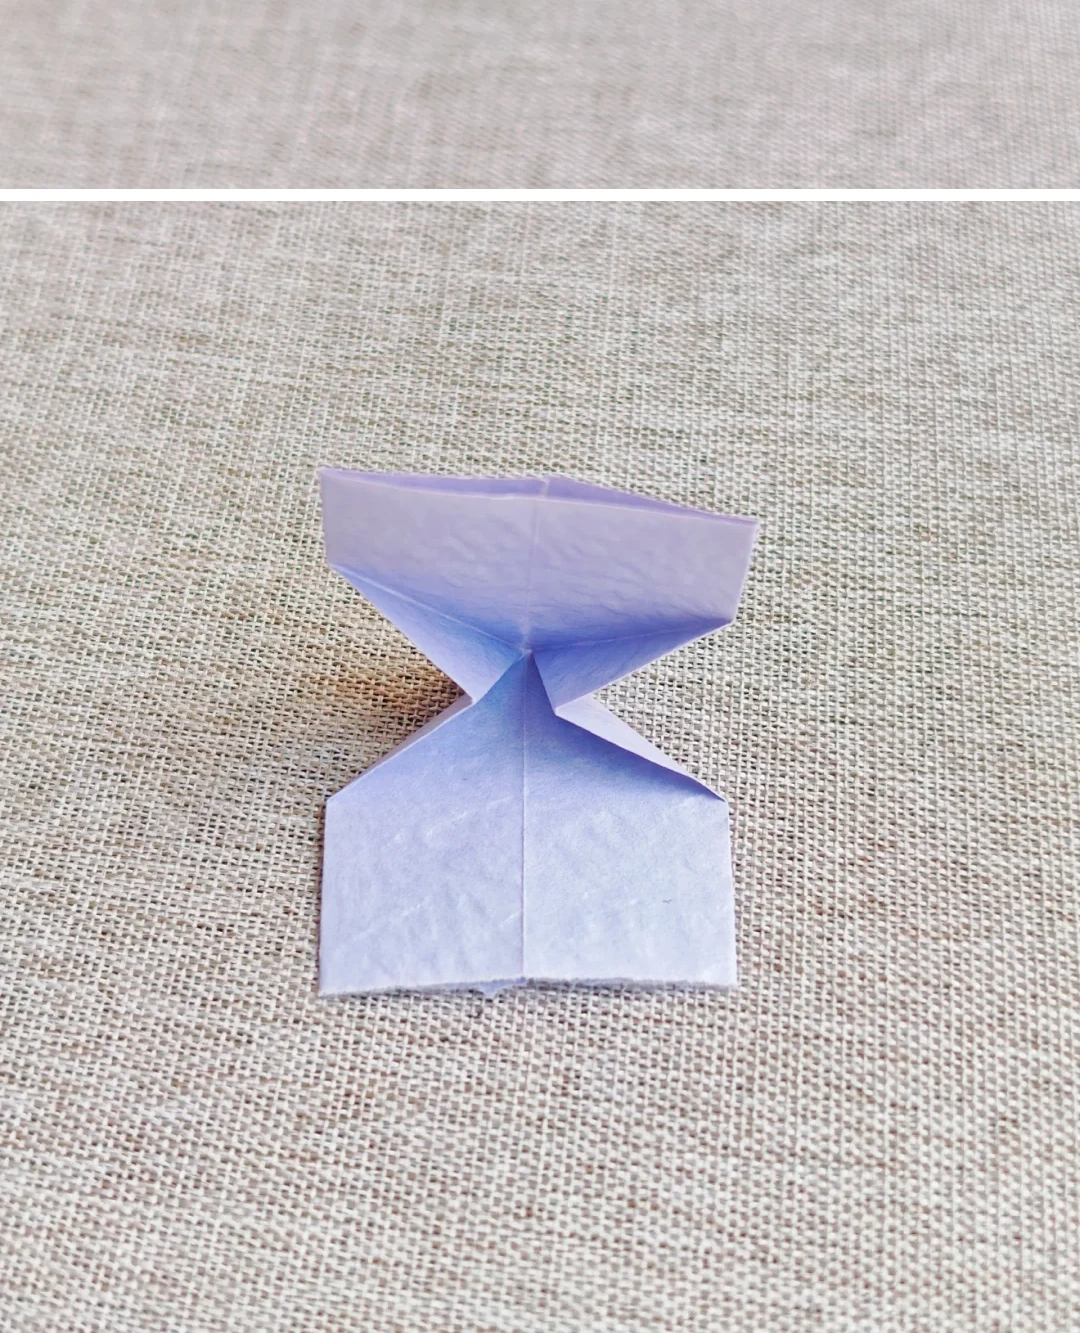 Open image at full size ↗
Face the opening toward you and spread the central pocket.
Narrow one side
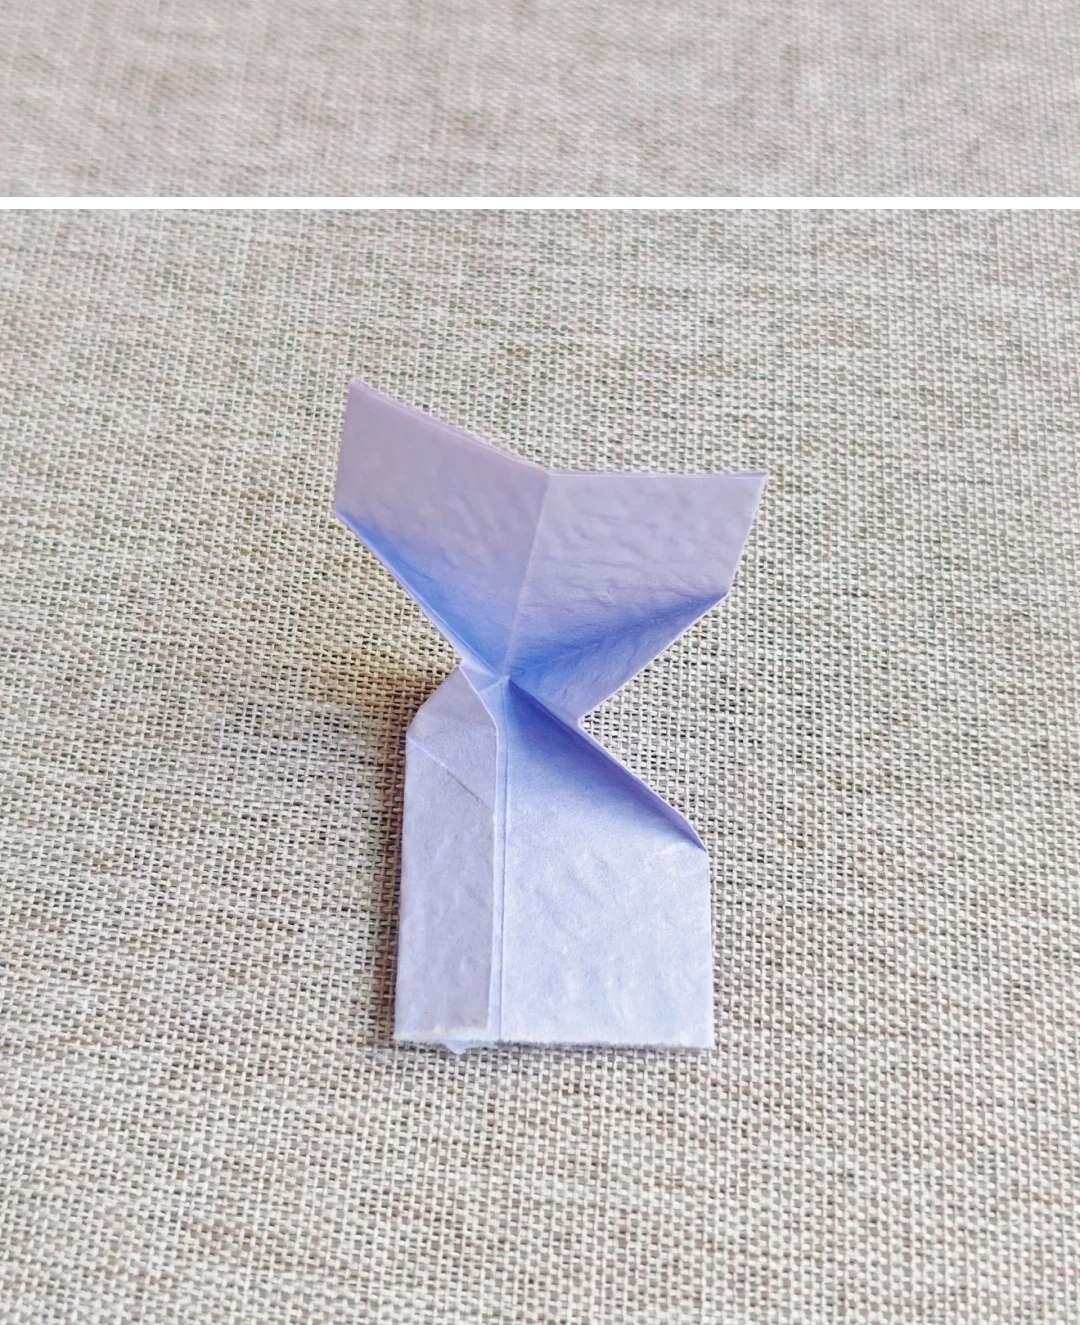 Open image at full size ↗
Fold one long edge toward the center.
Narrow the other side
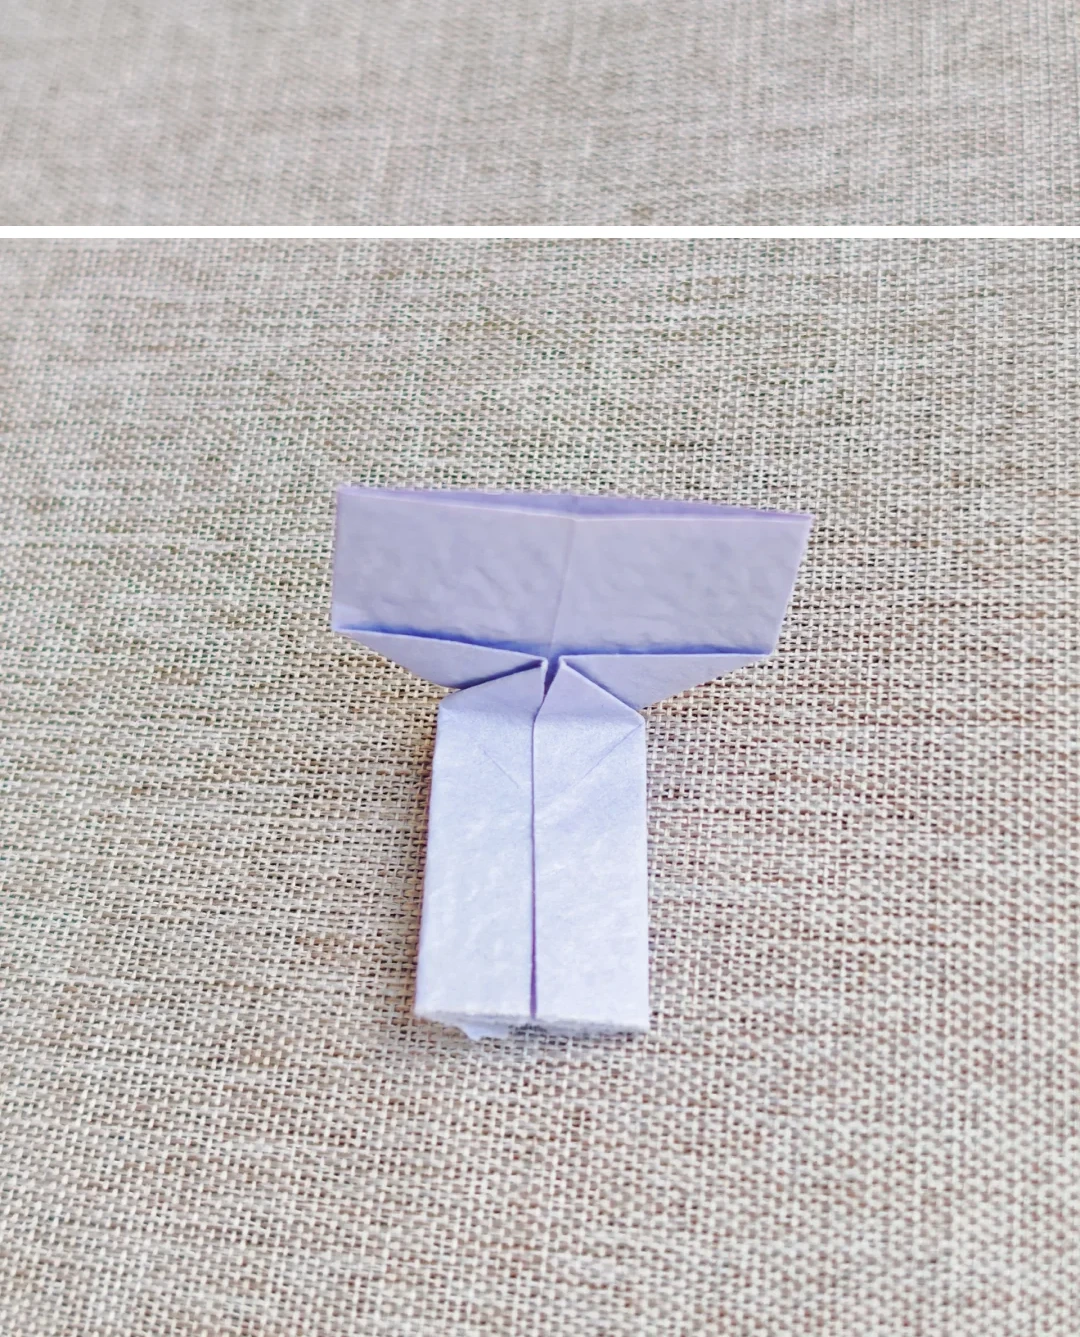 Open image at full size ↗
Fold the opposite edge to meet it.
Flatten the raised section
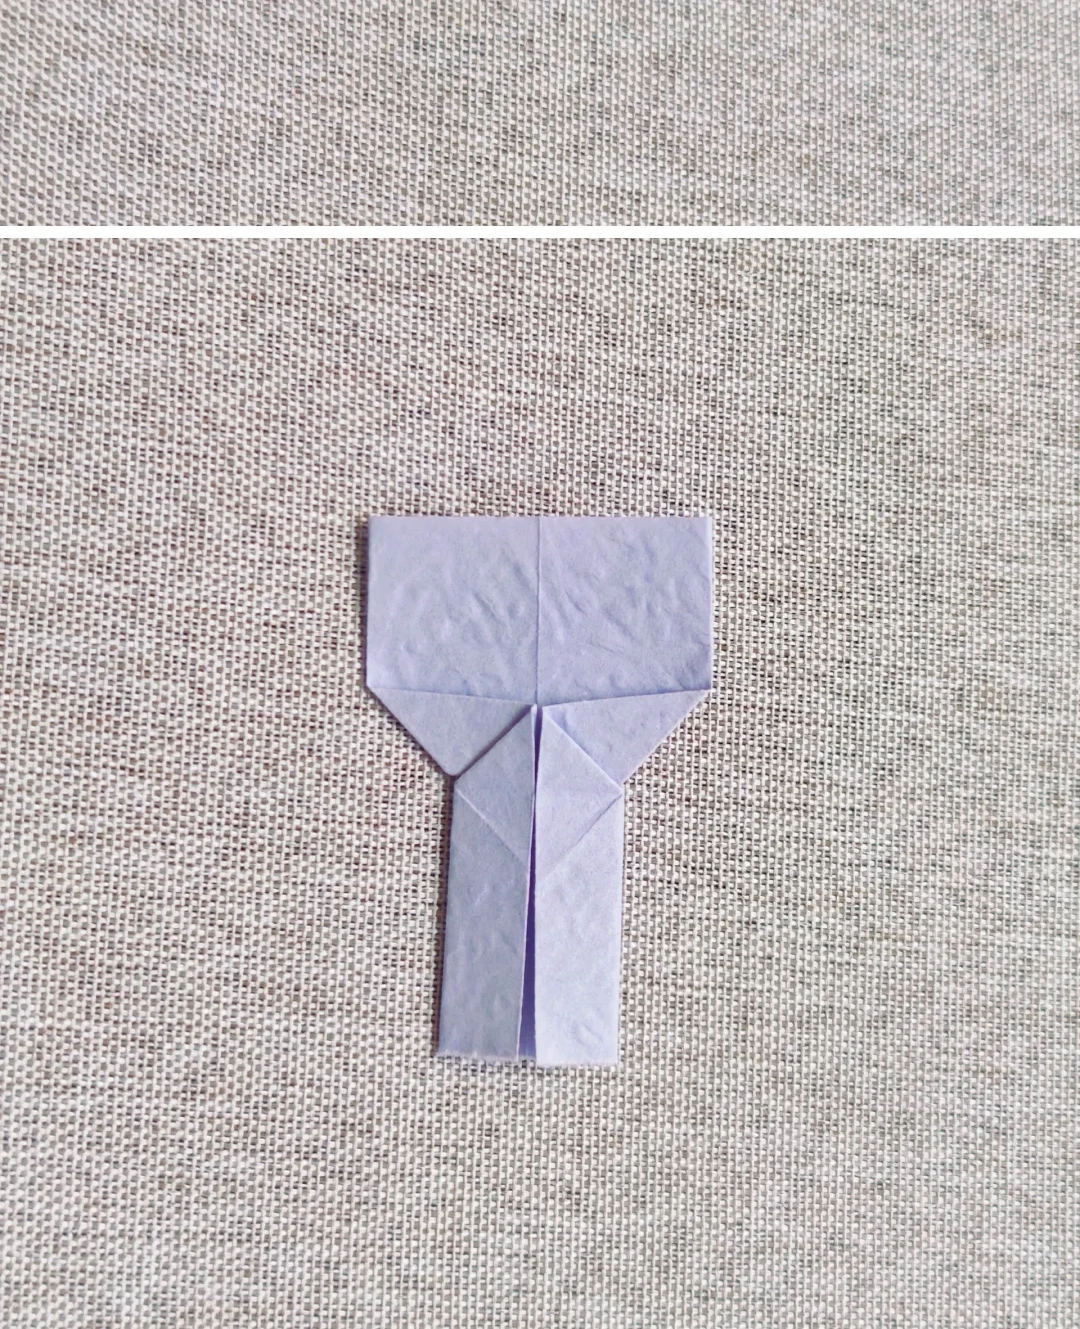 Open image at full size ↗
Fold the raised heart section upward and press it flat.
Fold the top edge
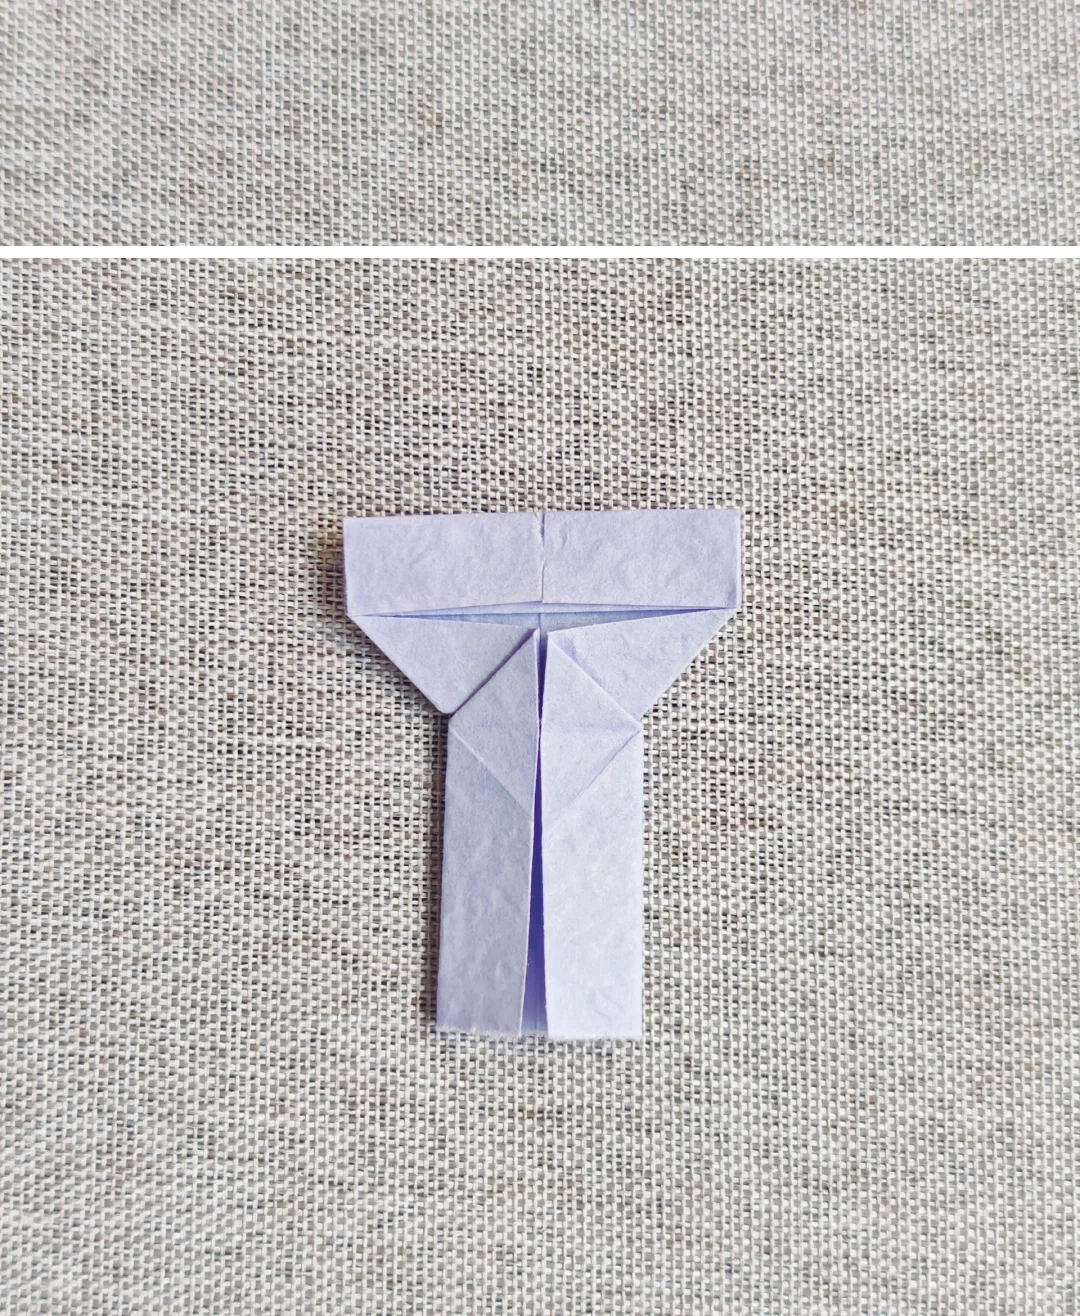 Open image at full size ↗
Fold the upper edge downward as pictured.
Squash the side pockets
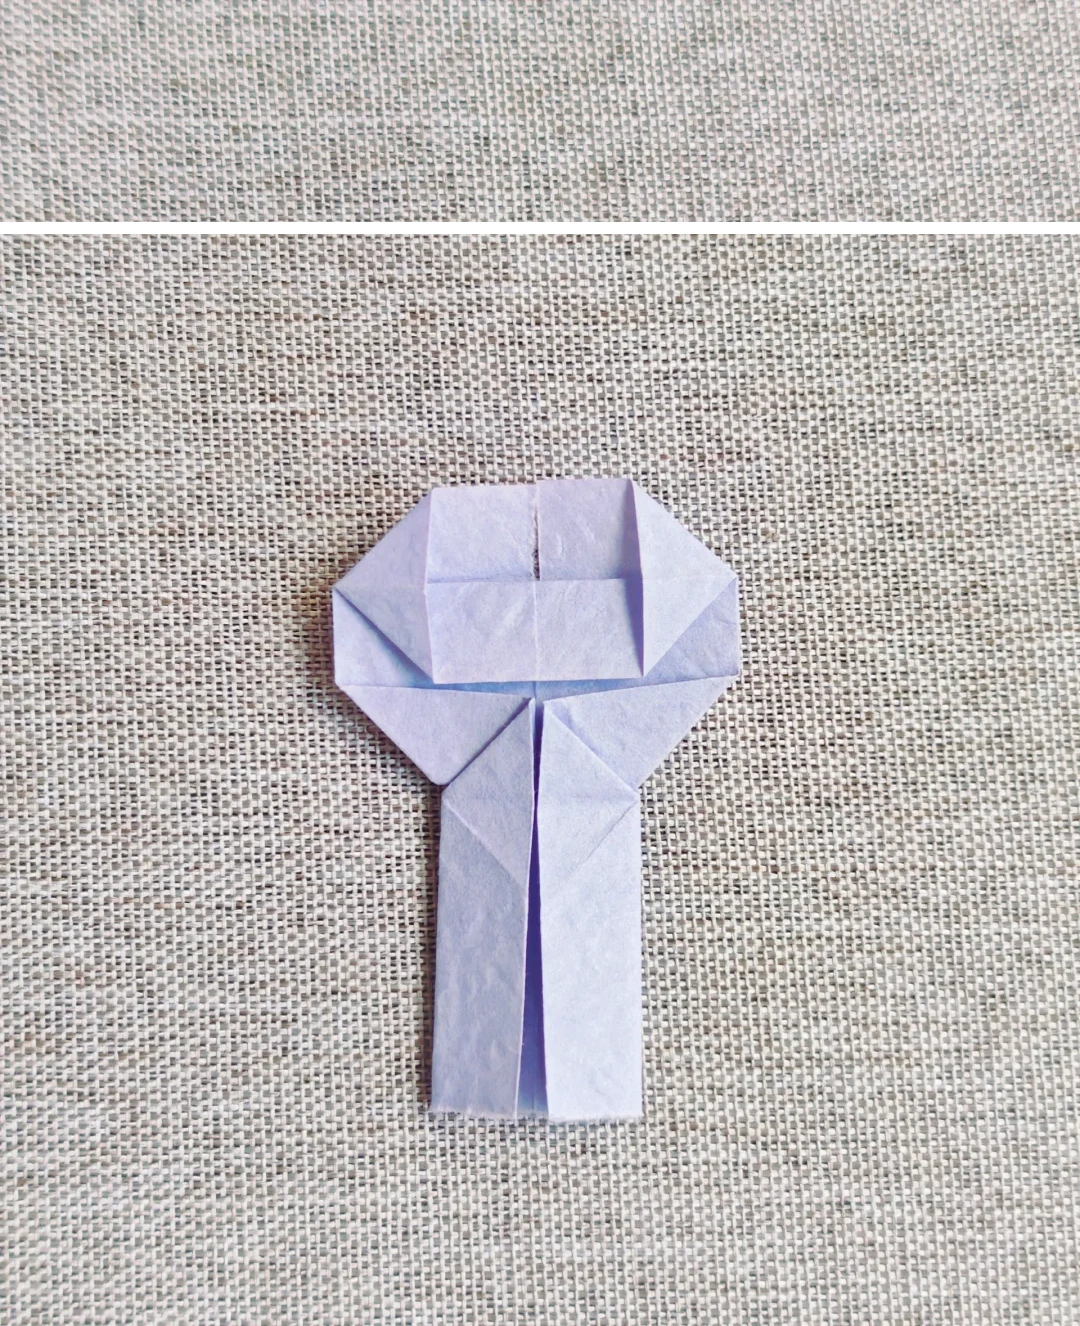 Open image at full size ↗
Open both small side pockets and flatten them outward.
Shape the heart lobes
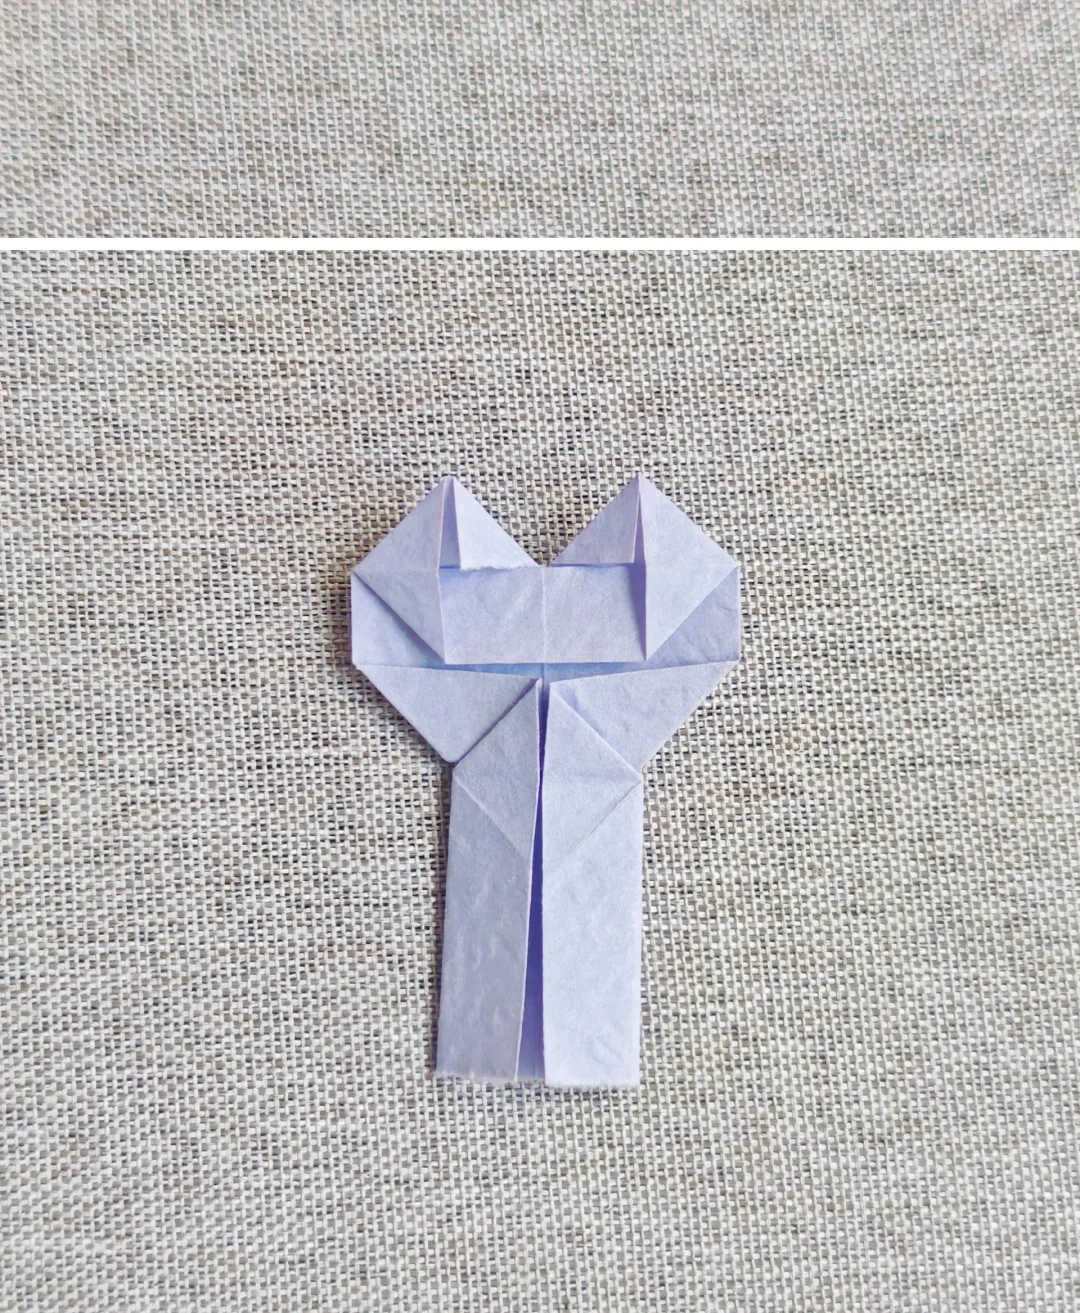 Open image at full size ↗
Fold the inner corners down to make the dip at the top of the heart.
Round the tips
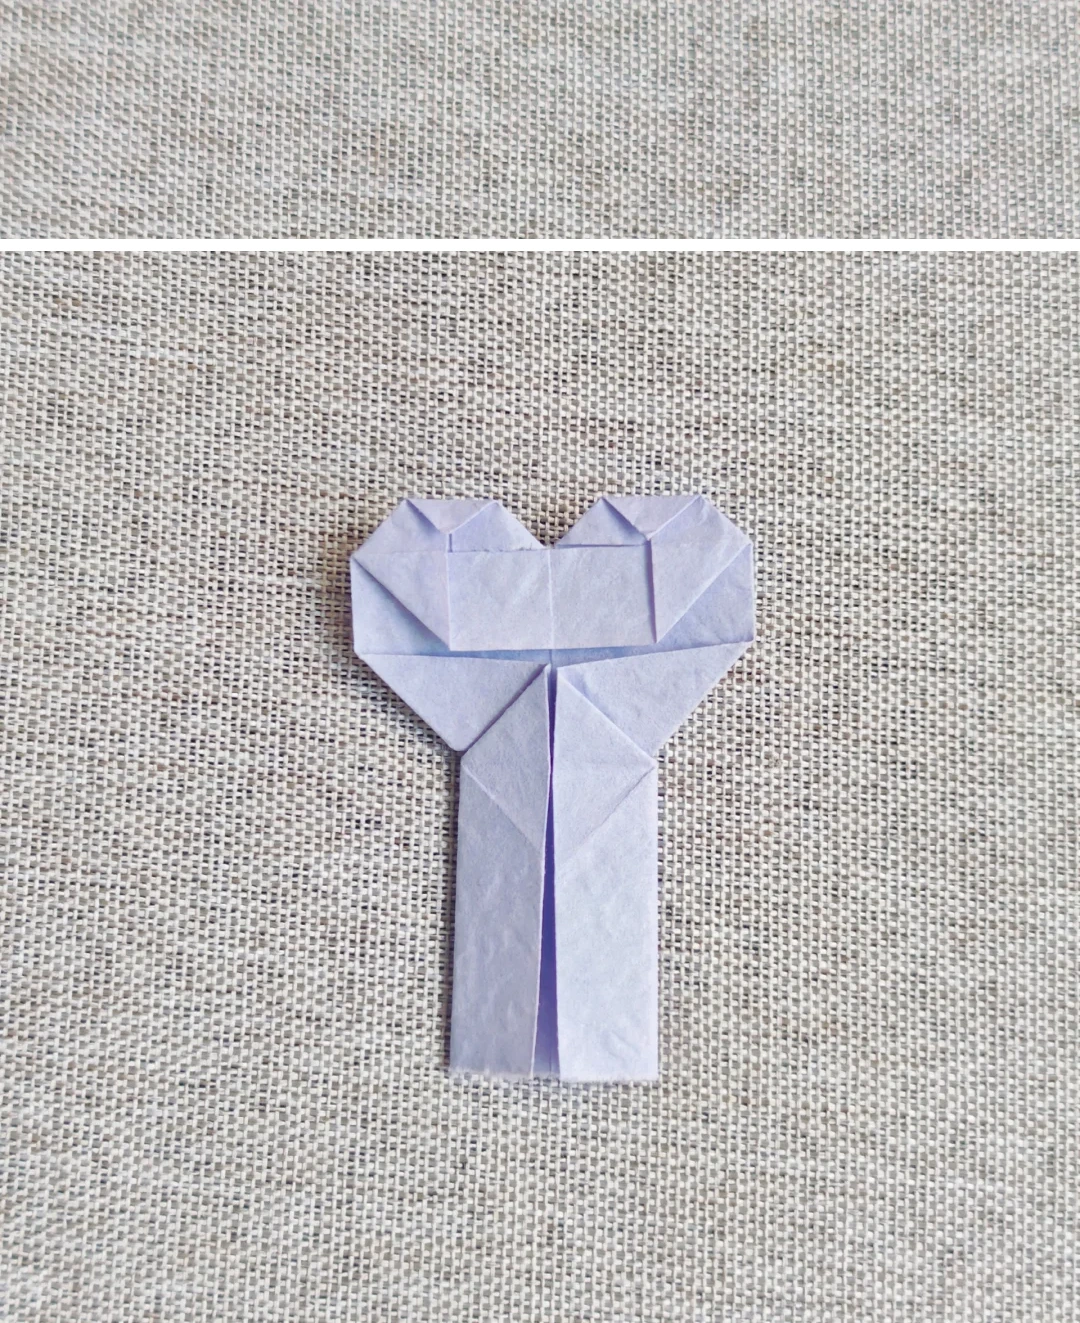 Open image at full size ↗
Fold the two sharp upper tips downward.
Turn to the front
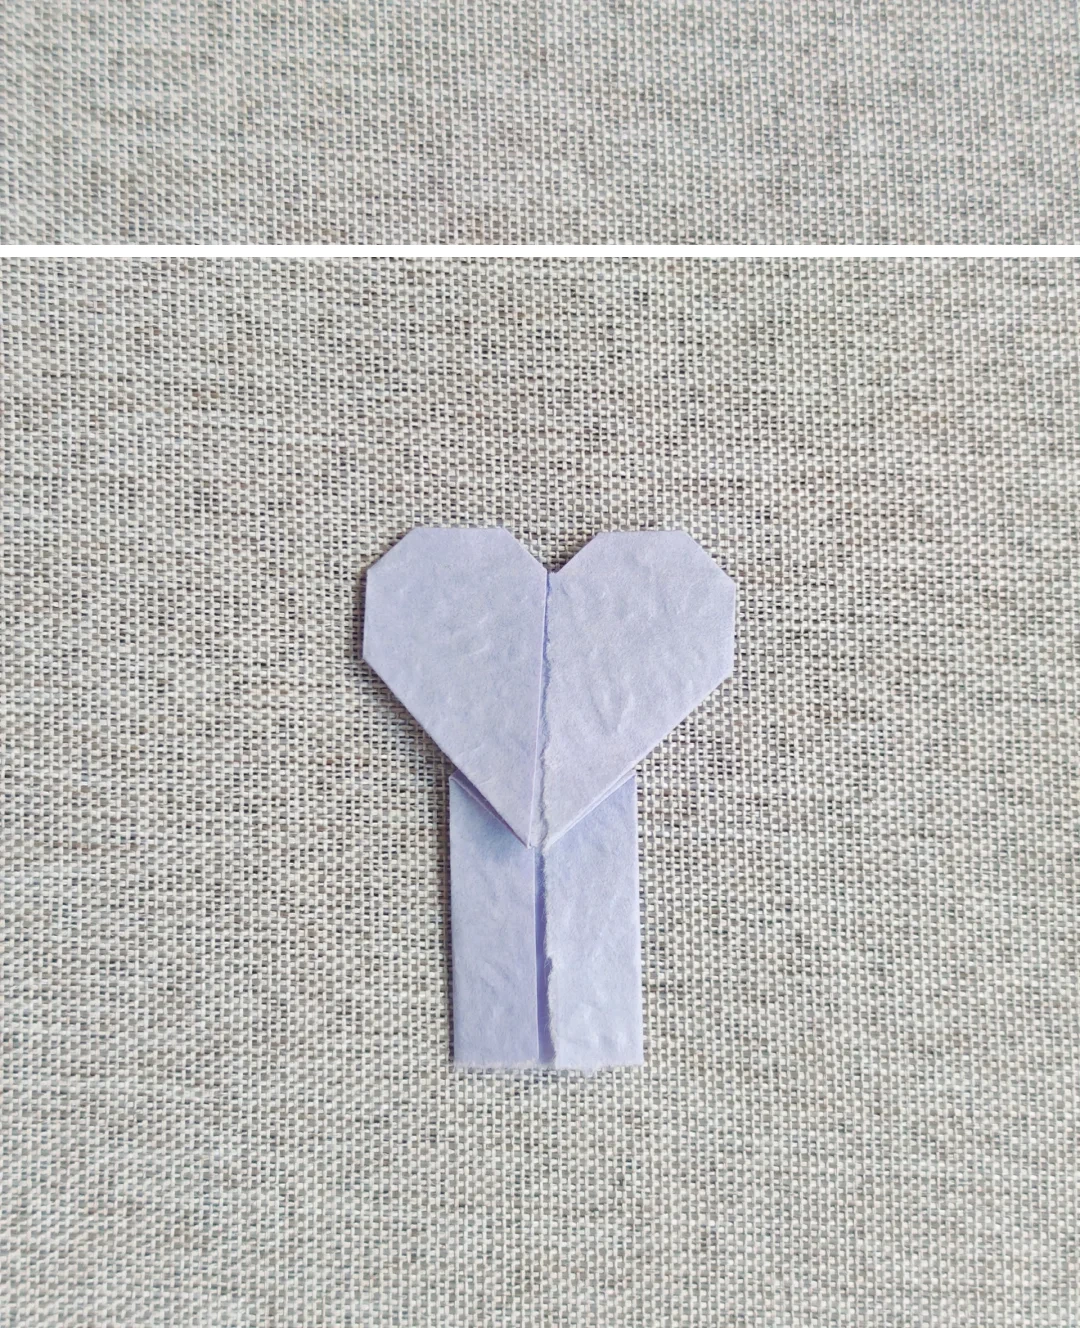 Open image at full size ↗
Turn over to check the heart and its long tab.
Join the tabs
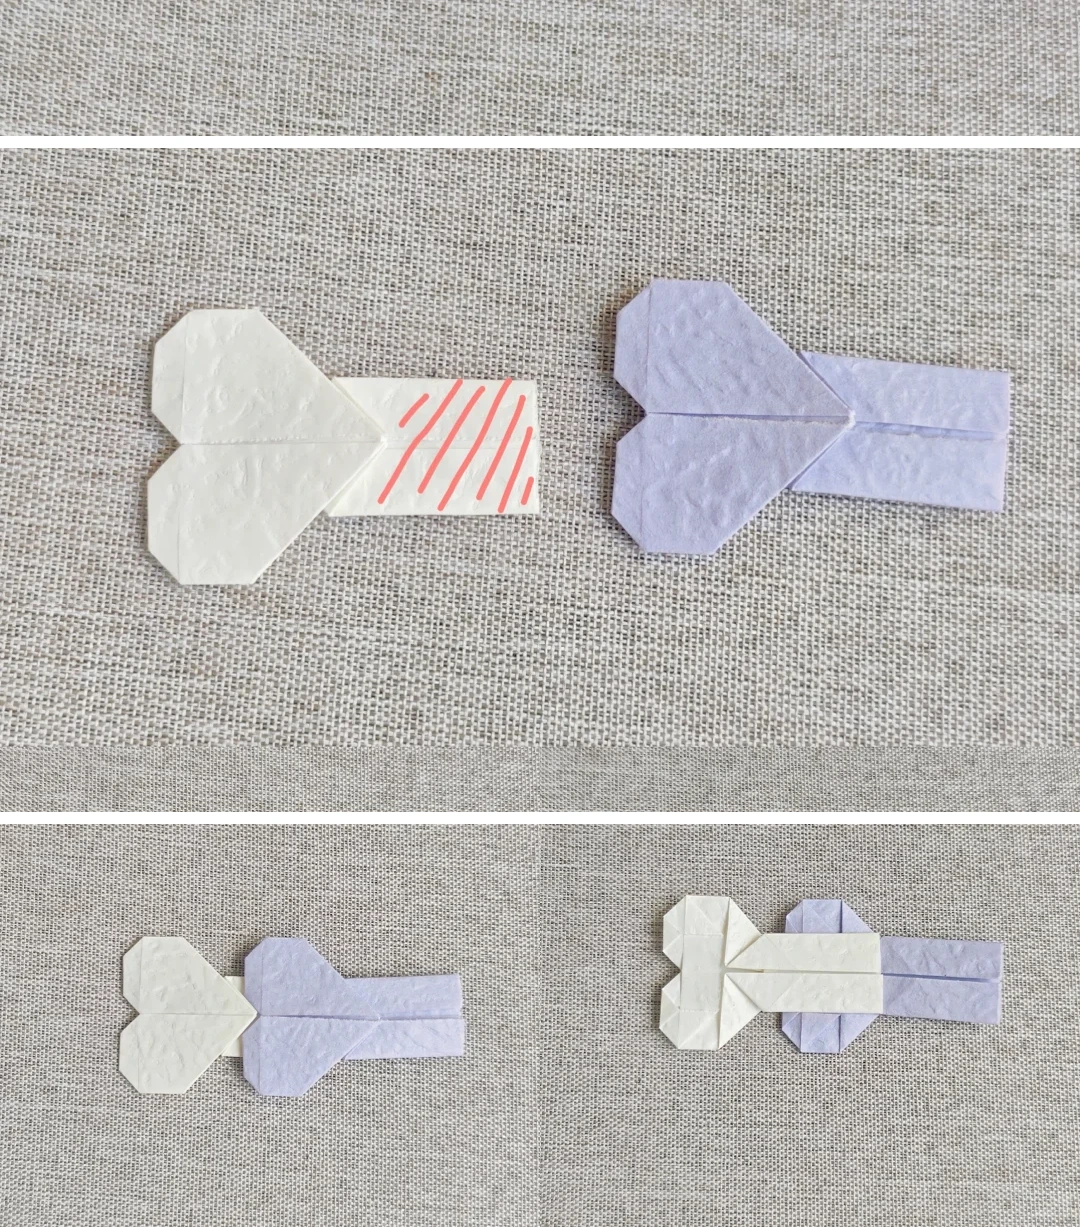 Open image at full size ↗
Apply glue to the marked tab and slide it behind the next heart. Check the front and back views.
Close the bracelet
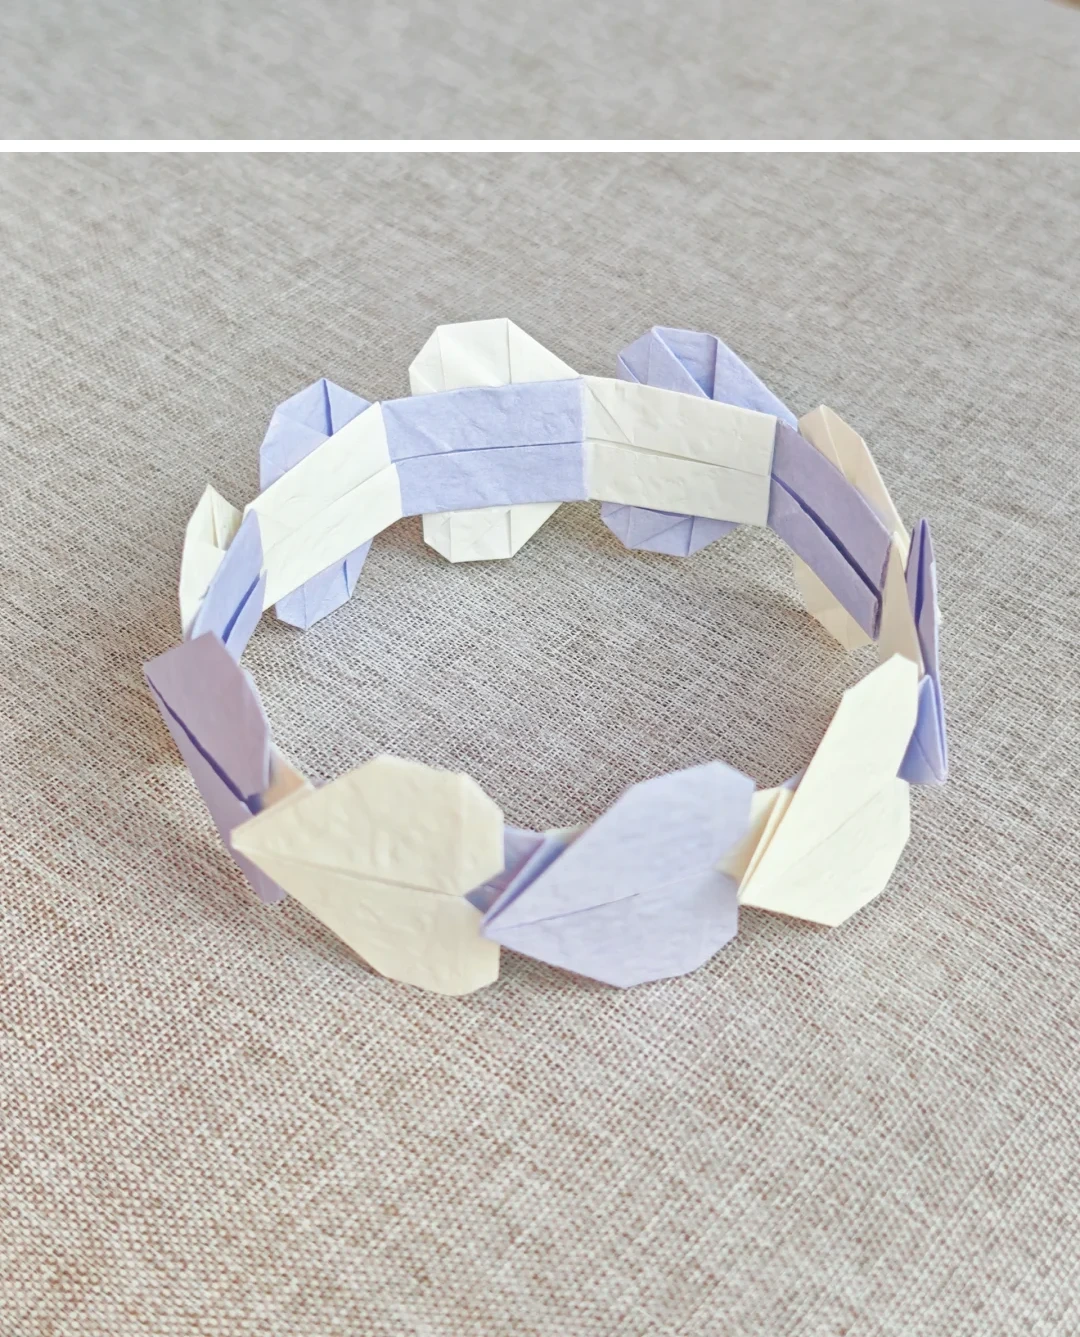 Open image at full size ↗
Add enough hearts to fit, then glue the final tab behind the first heart.
Follow the diagrams alongside the step-by-step English instructions.
Choose your next project →