
Decorations · Step-by-step guide
Layered Six-Point Snowflake
Fold a six-point snowflake with overlapping diamond-shaped facets.
What you’ll need
- One 15 × 15 cm square
- Scissors
Paper folding · Hexagon cutting & layered squash folds
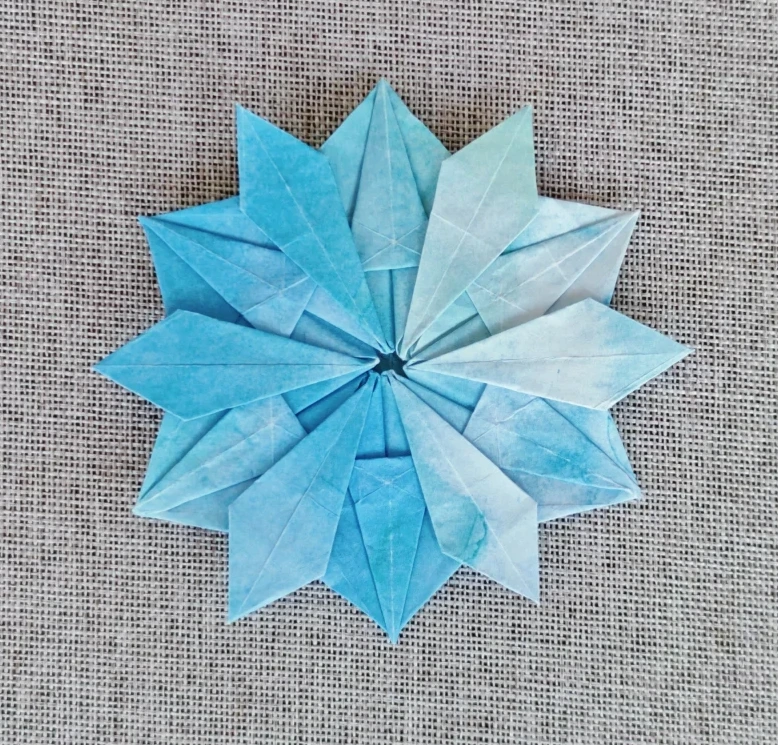
Make it, step by step.
10 steps · Original diagrams with English instructions
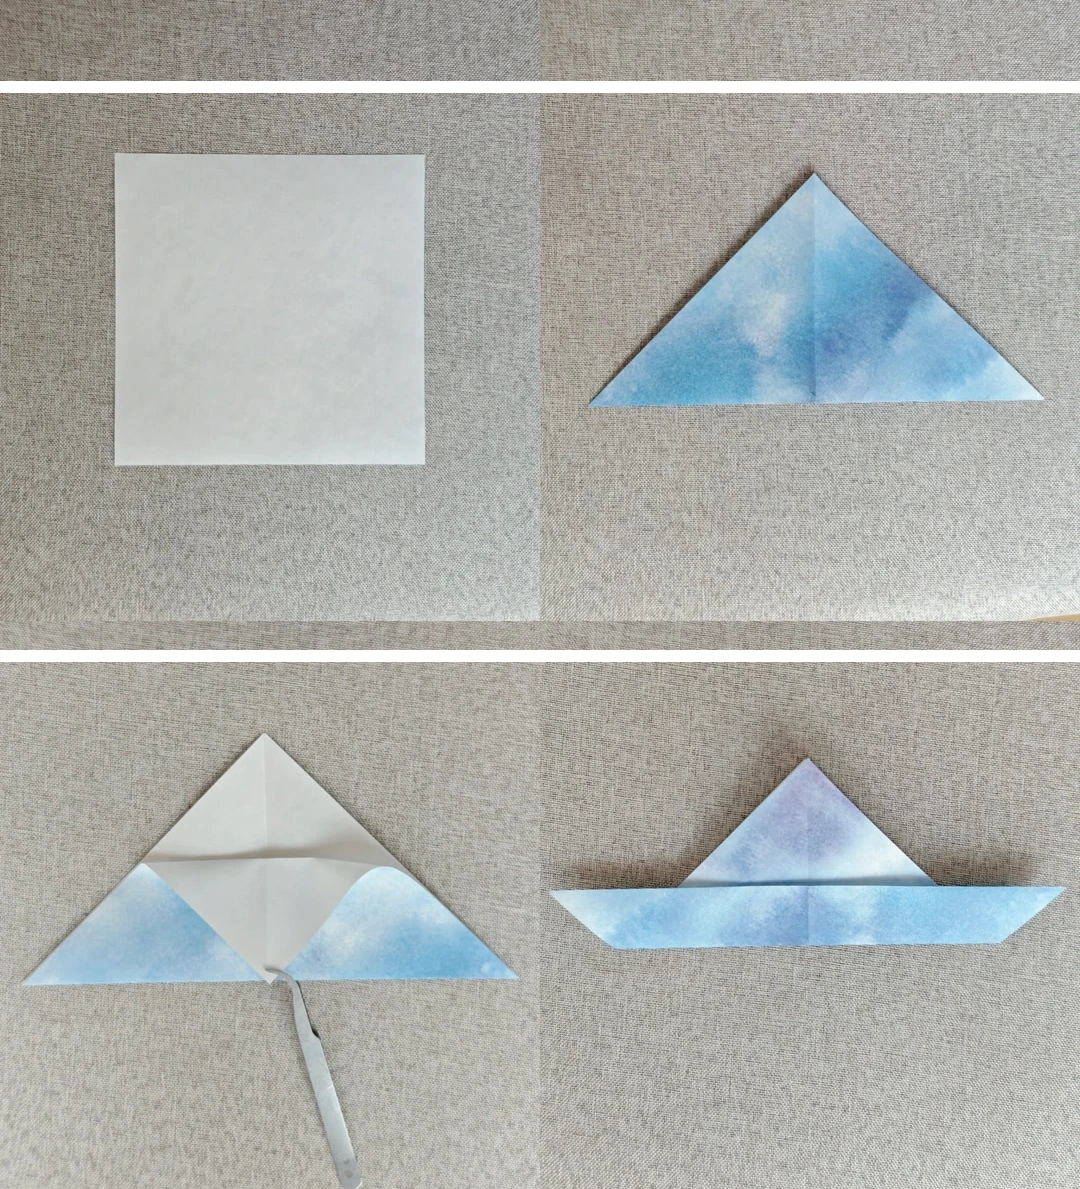
Set the reference folds
 Open image at full size ↗
Fold the square into a triangle. Reinforce its center crease and bring the lower edge to that crease as shown.
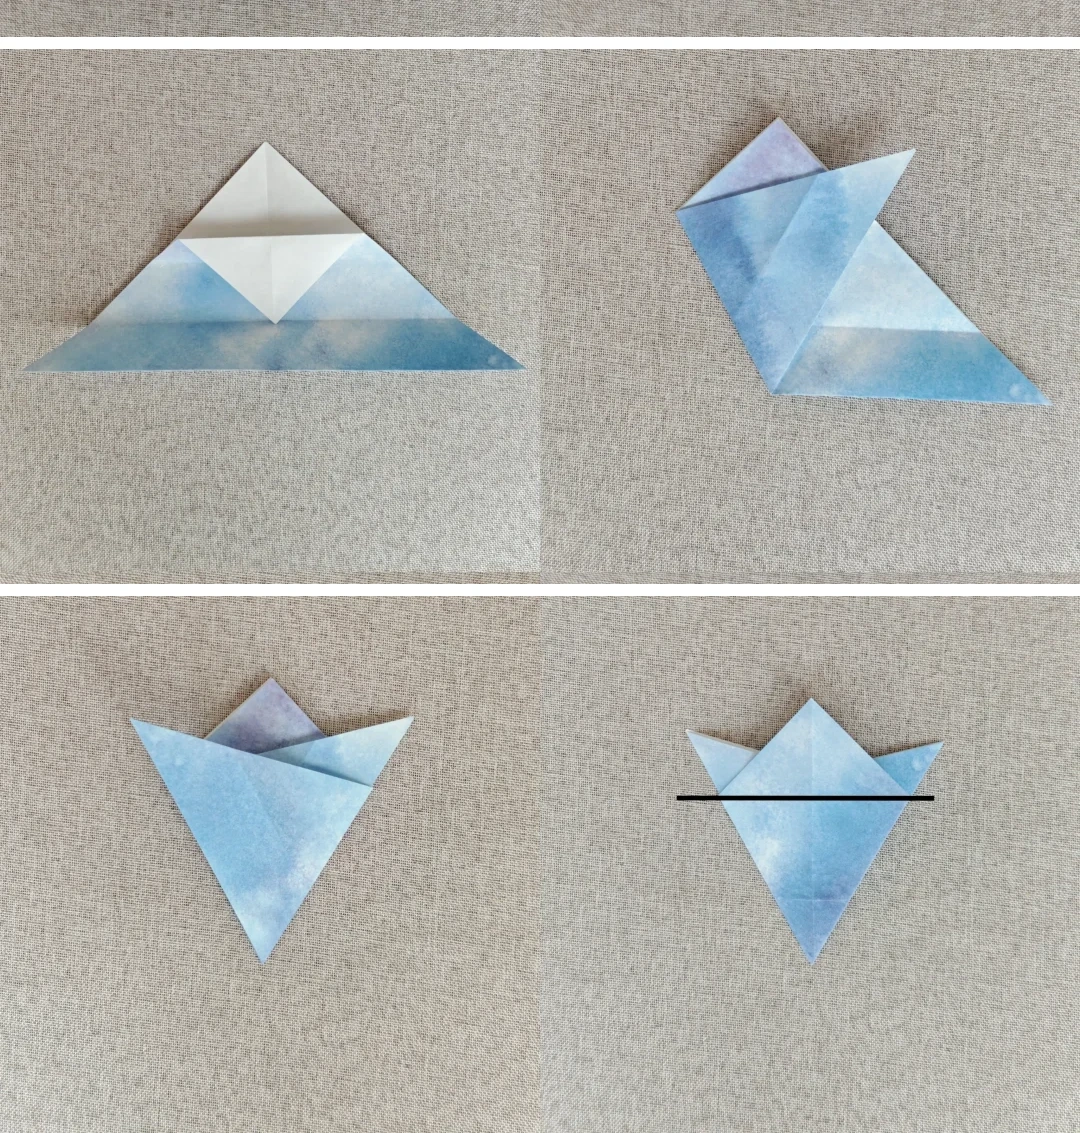
Cut a hexagon
 Open image at full size ↗
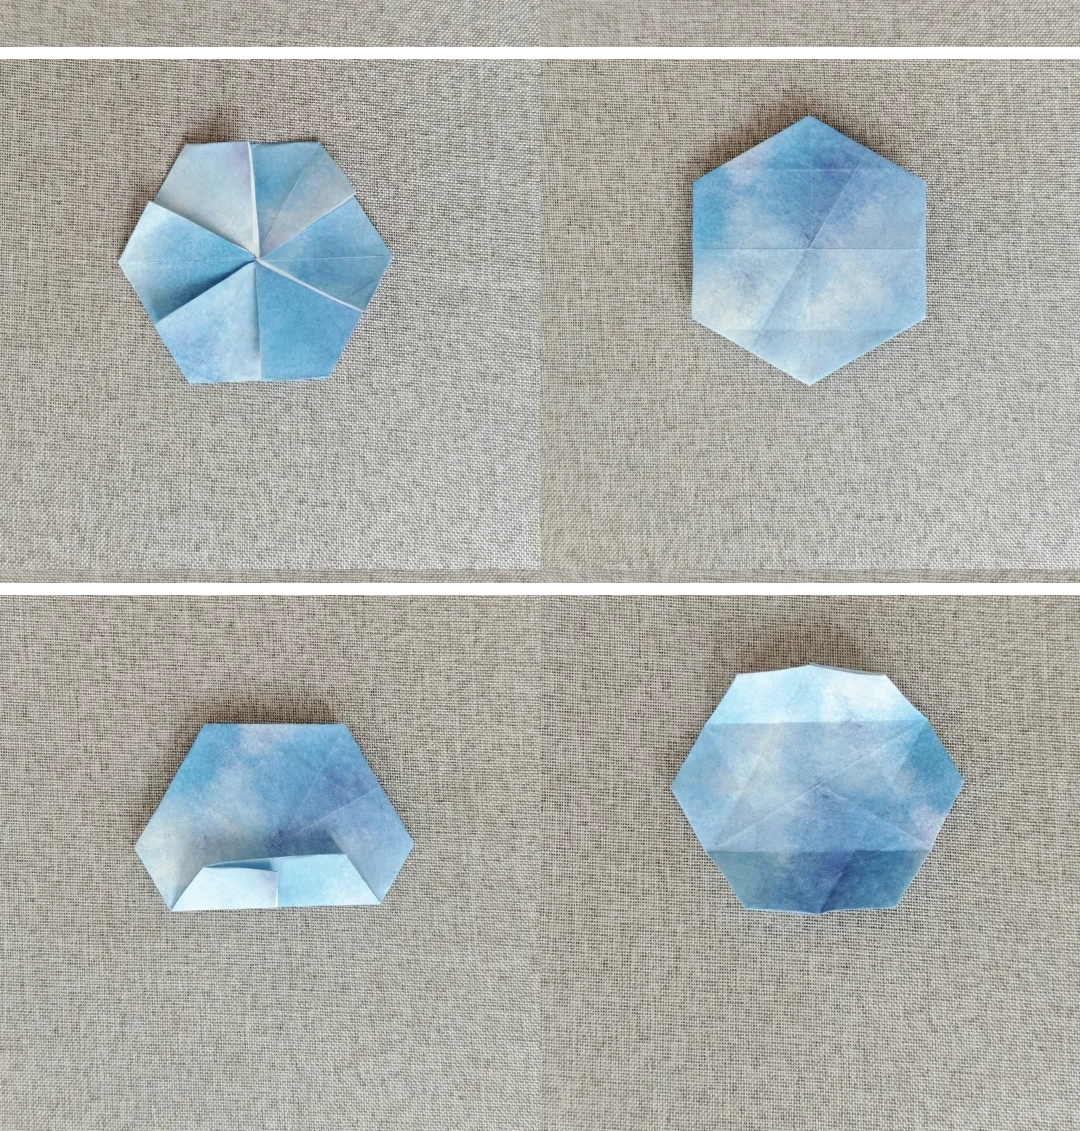
Align the side edge with the reference endpoint, fold the layers together, turn over and cut along the horizontal guide.
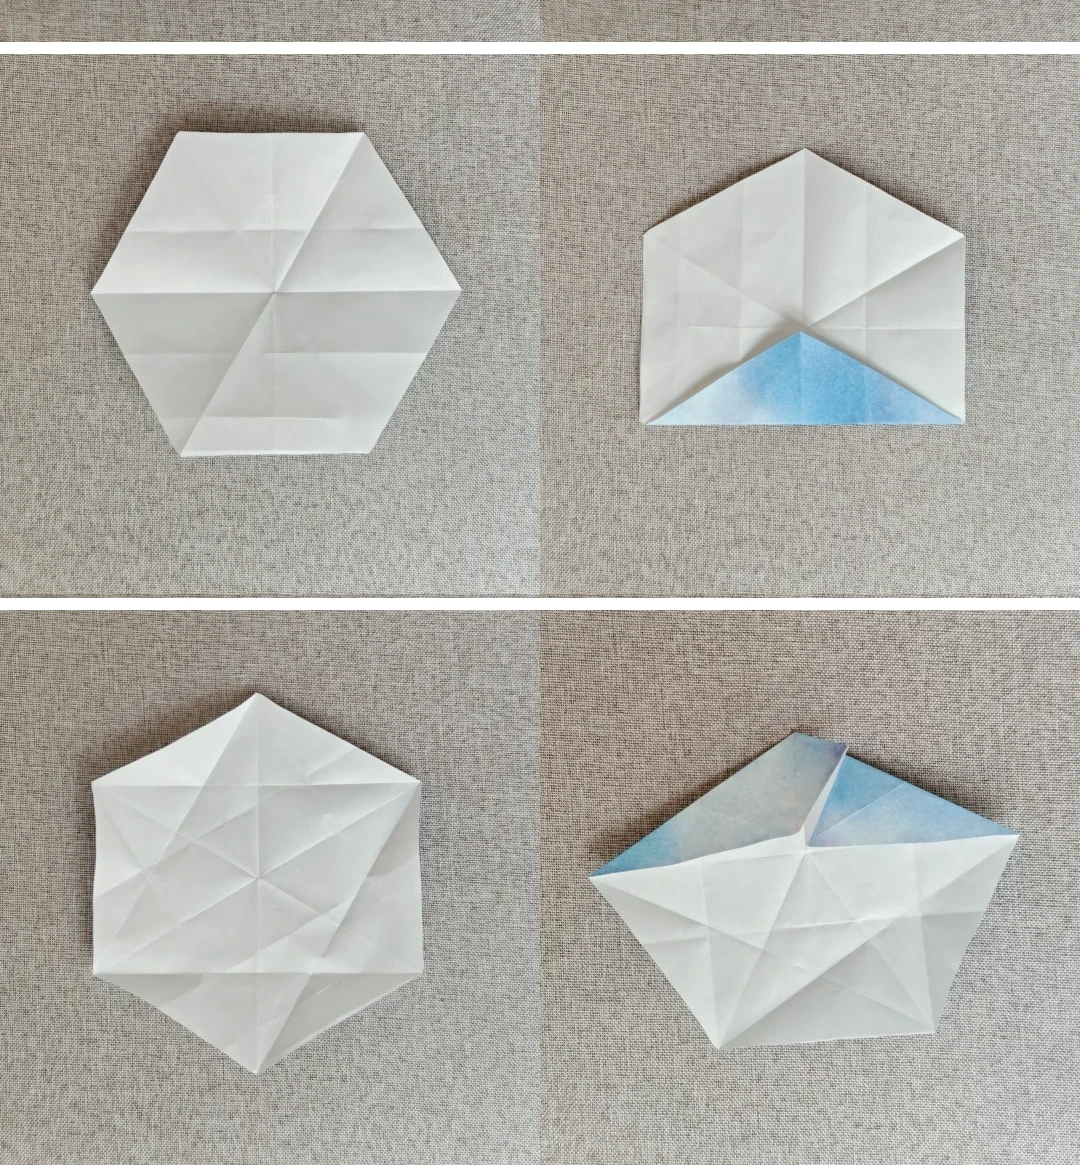
Fold the radial pattern
 Open image at full size ↗
Open the hexagon. Fold each corner inward and reopen, then gather neighboring sections and lay each overlap to one side.
Crease the reverse
 Open image at full size ↗
Complete the circle and turn over. Fold each lower edge toward the center, unfolding to reveal the new pattern.
Open the six points
 Open image at full size ↗
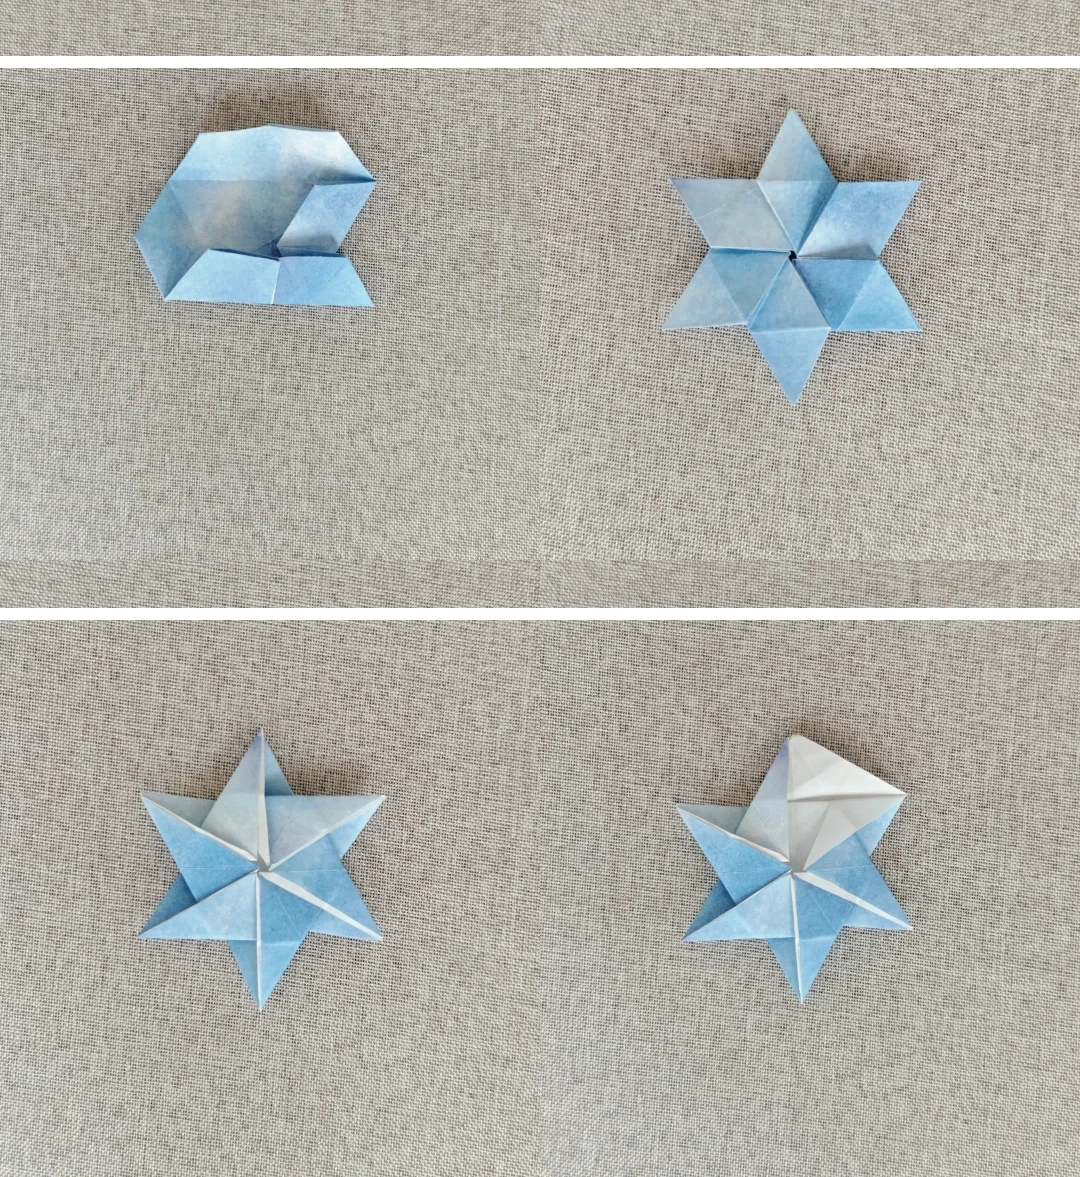
Fold around the center, letting overlaps extend outward. Turn over and lift the first section along its crease.
Lift the neighboring sections
 Open image at full size ↗
Open and lift each adjacent corner. Turn over and crease a diamond in half sideways.
Squash the raised triangles
 Open image at full size ↗
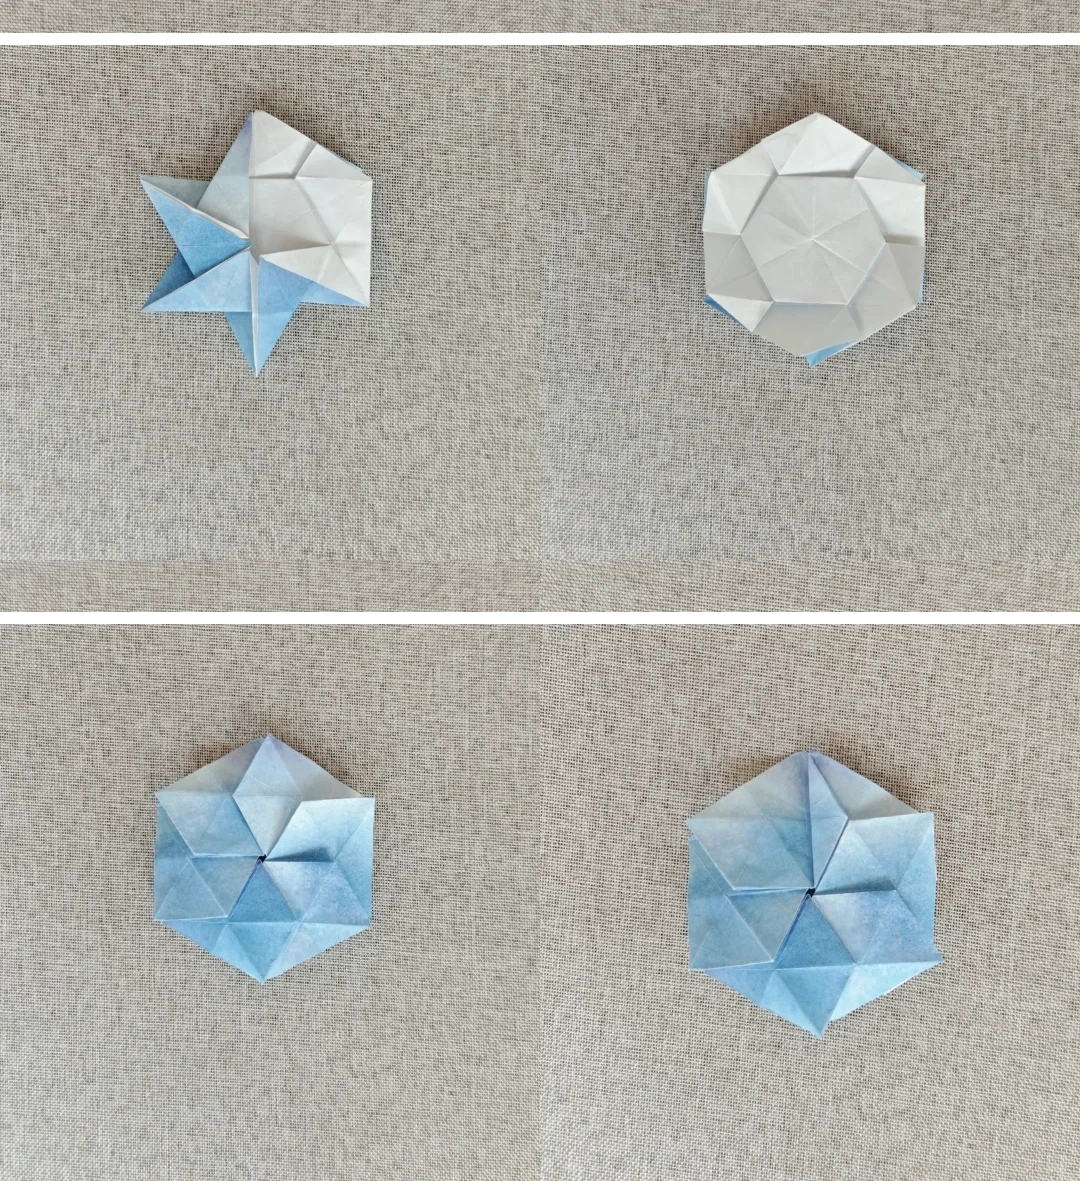
Turn the diamond right, pinch up a triangular ridge along the center crease, then open and flatten it. Repeat on the neighboring ridge.
Repeat the facet folds
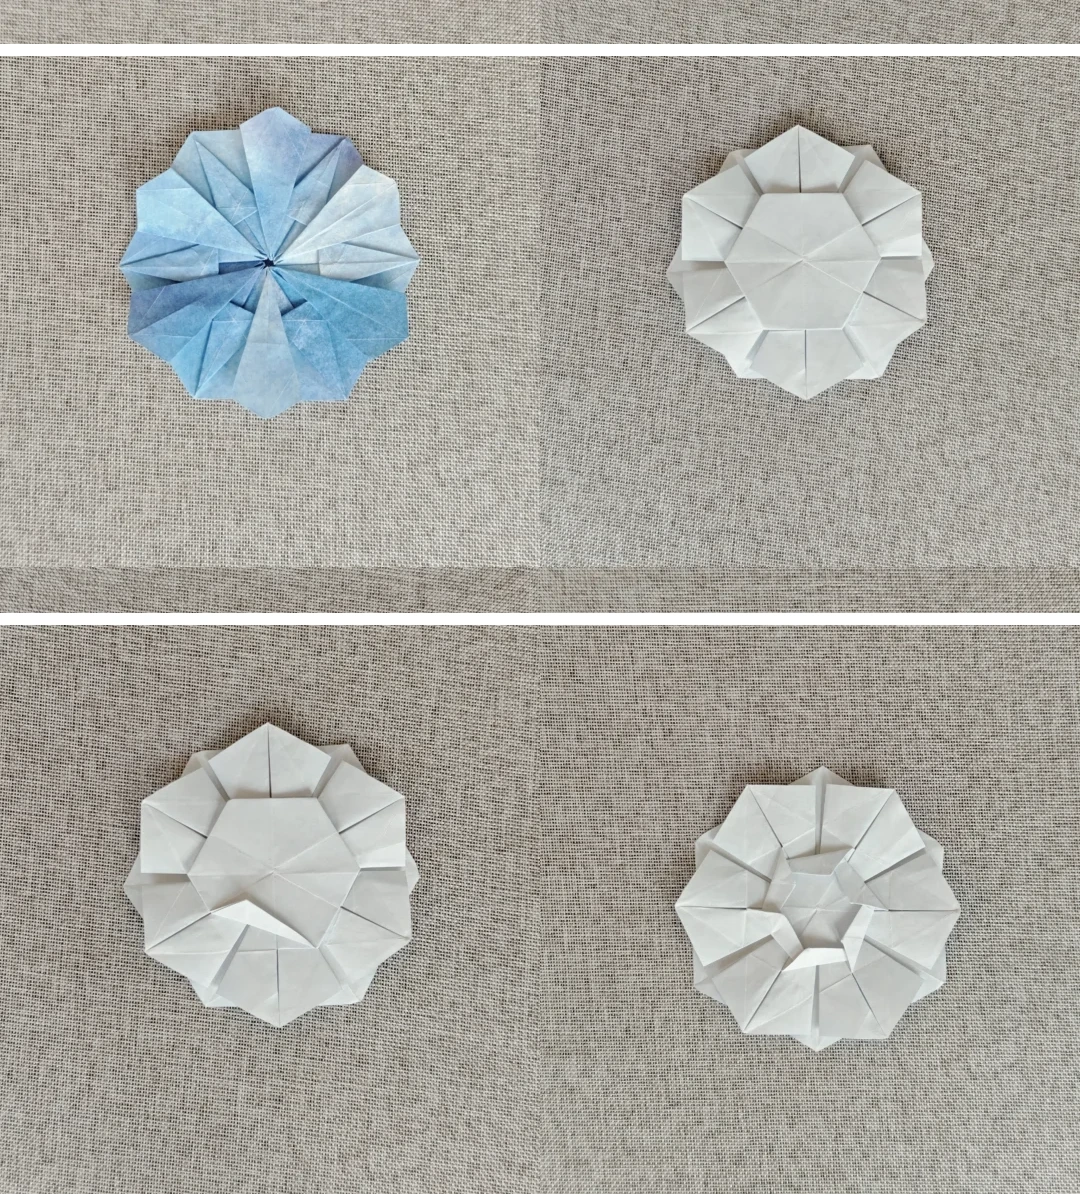 Open image at full size ↗
Work all the way around, turn over and repeat the indicated edge fold on each sector.
Refine the tips
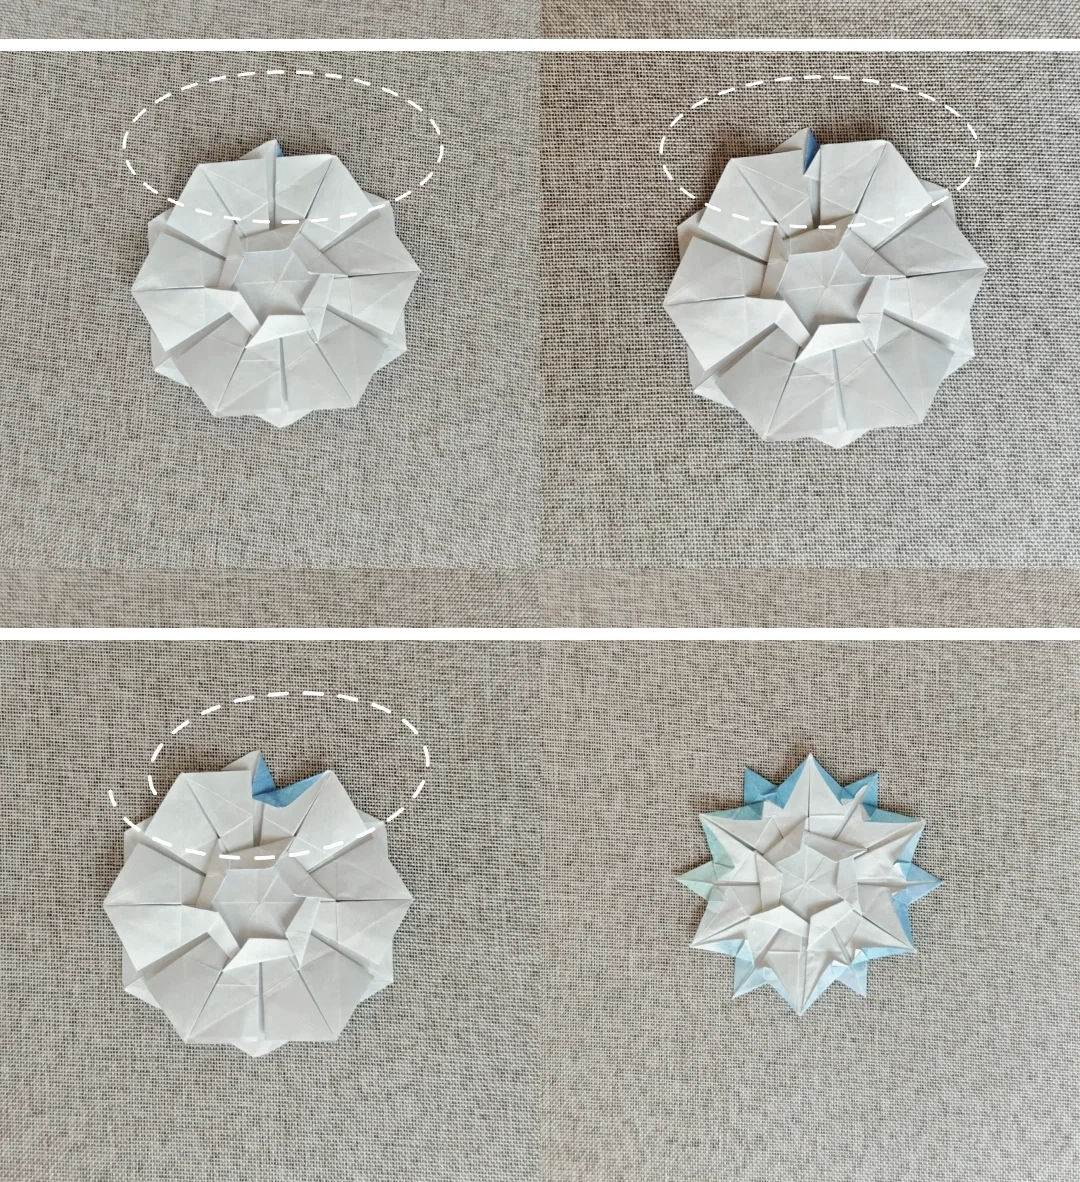 Open image at full size ↗
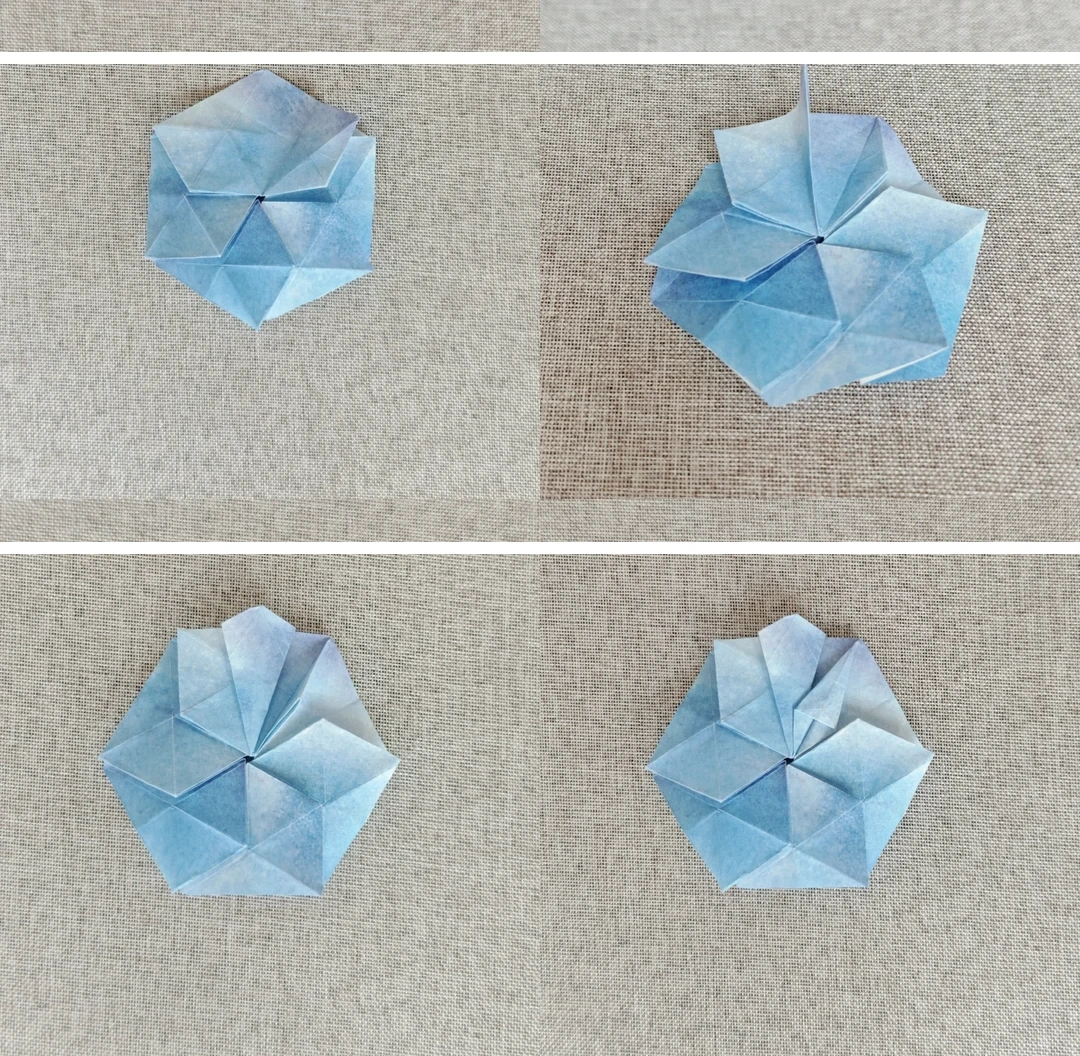
Fold a sloping edge inward, open it and press it down inside. Fold the small triangle down and repeat around the model.
Reveal the snowflake
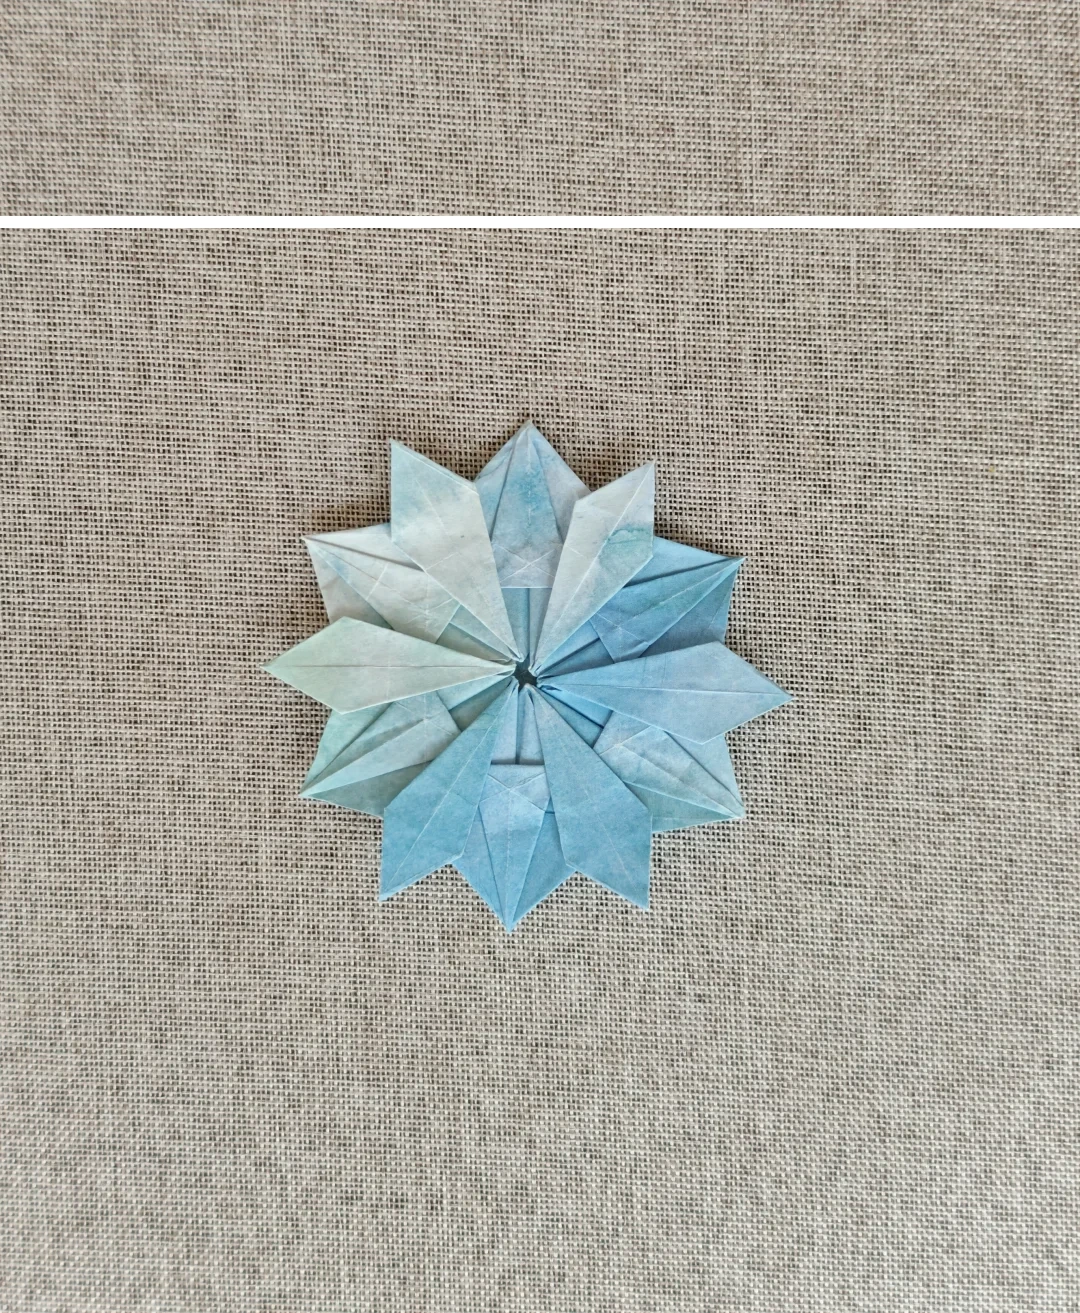 Open image at full size ↗
Turn the finished model over and adjust the six points.
Follow the diagrams alongside the step-by-step English instructions.
Choose your next project →