
Flowers & nature · Step-by-step guide
Layered Paper Carnation
Build a ruffled carnation from six nested petal units and a separate green calyx.
What you’ll need
- Six red paper squares
- One green square for the calyx
- A prepared paper stem
- Glue
Modular paper folding · Pleated petals & glued assembly
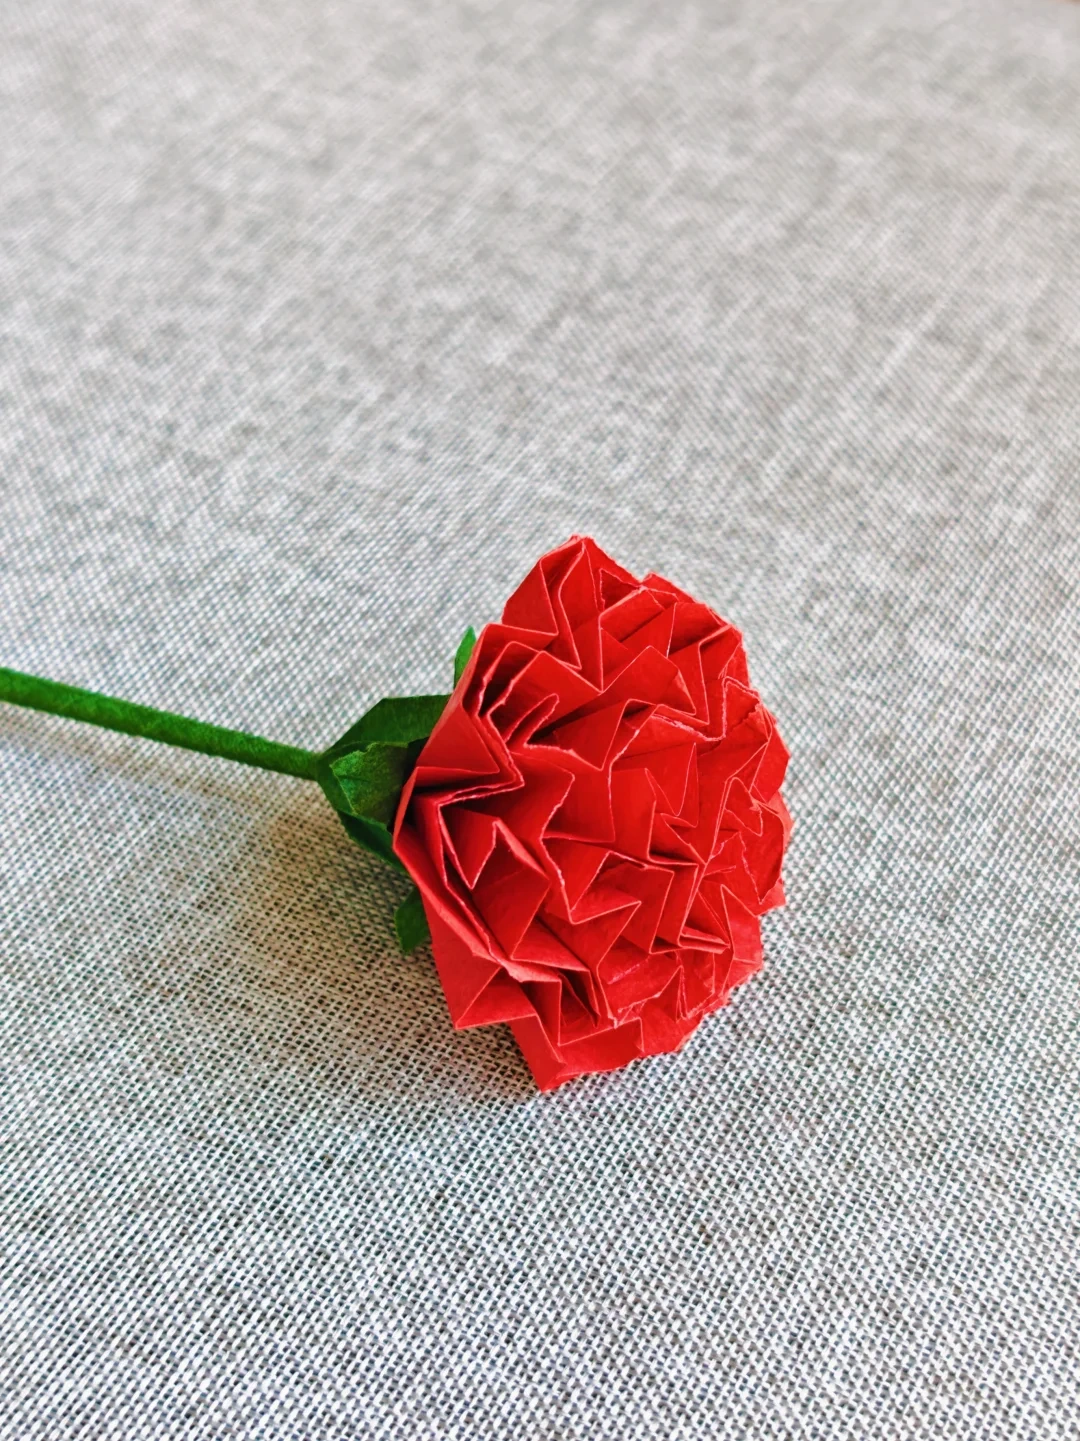
Make it, step by step.
9 steps · Original diagrams with English instructions
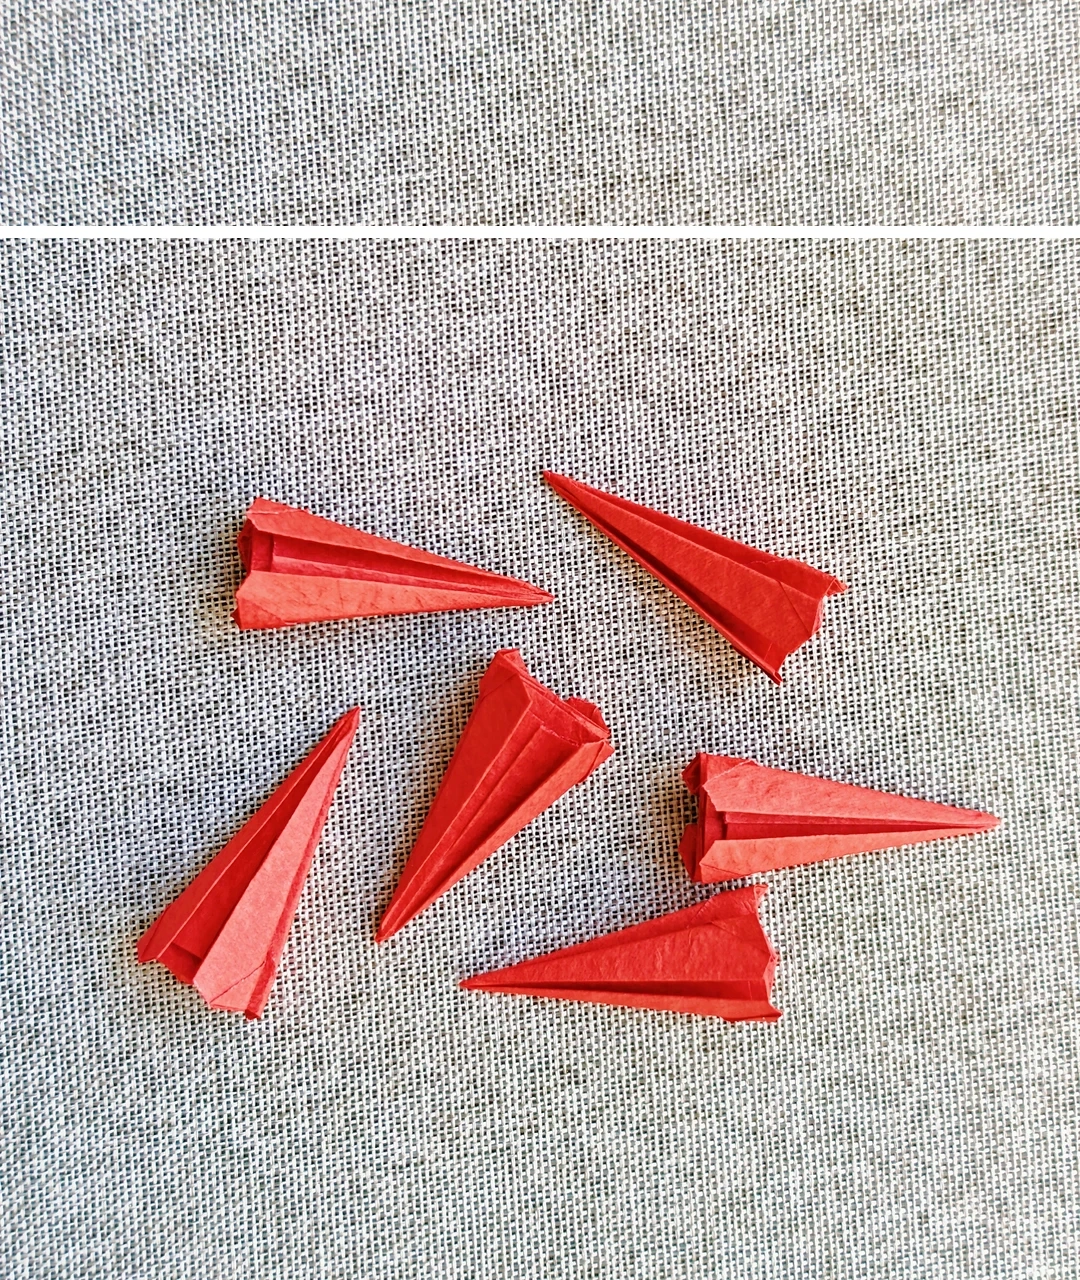
Prepare the pieces
 Open image at full size ↗
Set aside six red squares, one green square and a prepared stem.
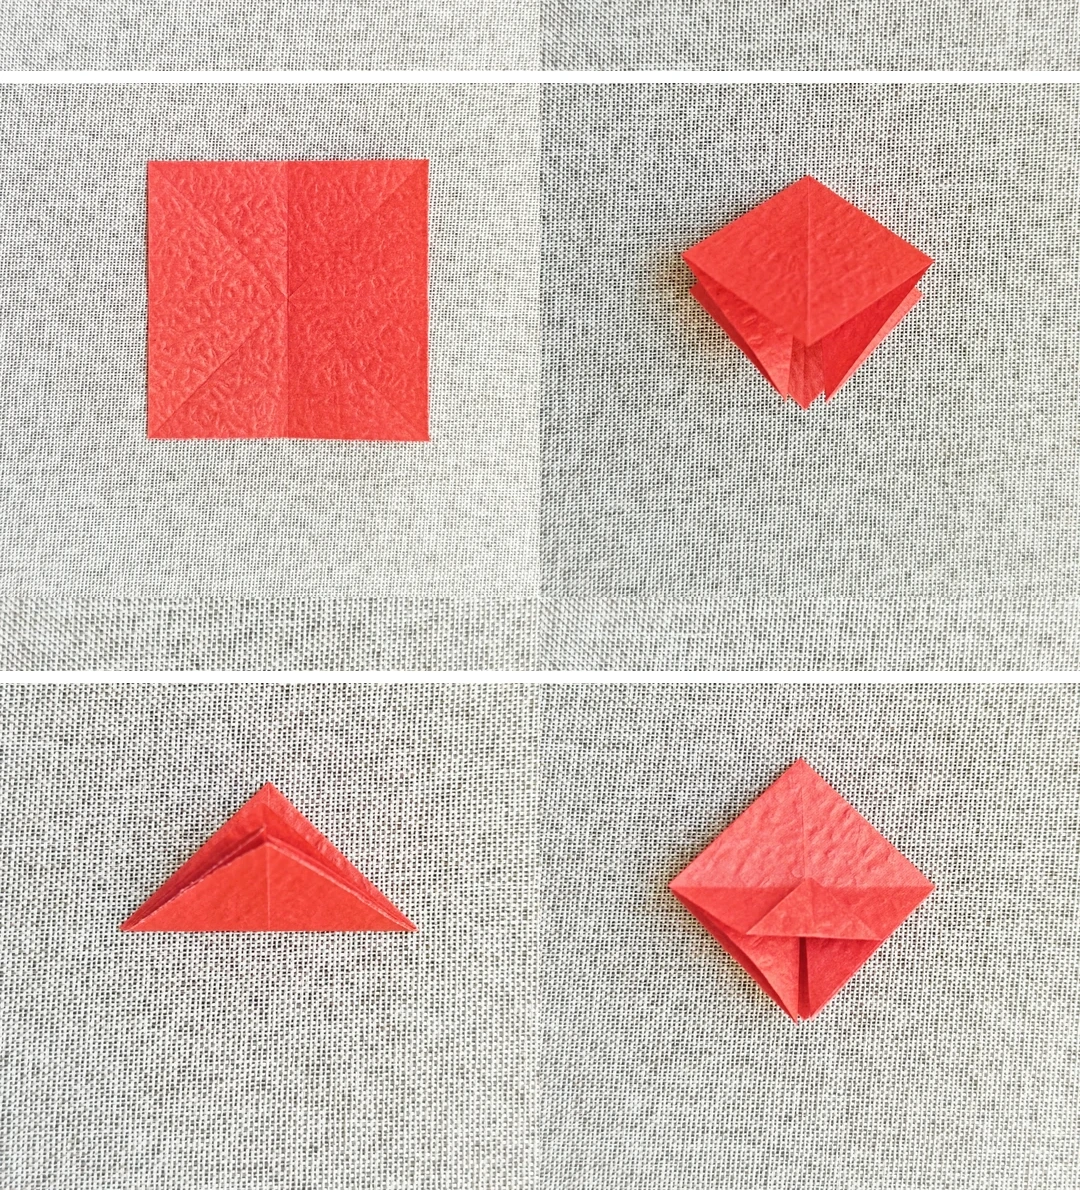
Fold a petal base
 Open image at full size ↗
Crease both diagonals and midlines, collapse the square and fold the lower section upward as pictured.
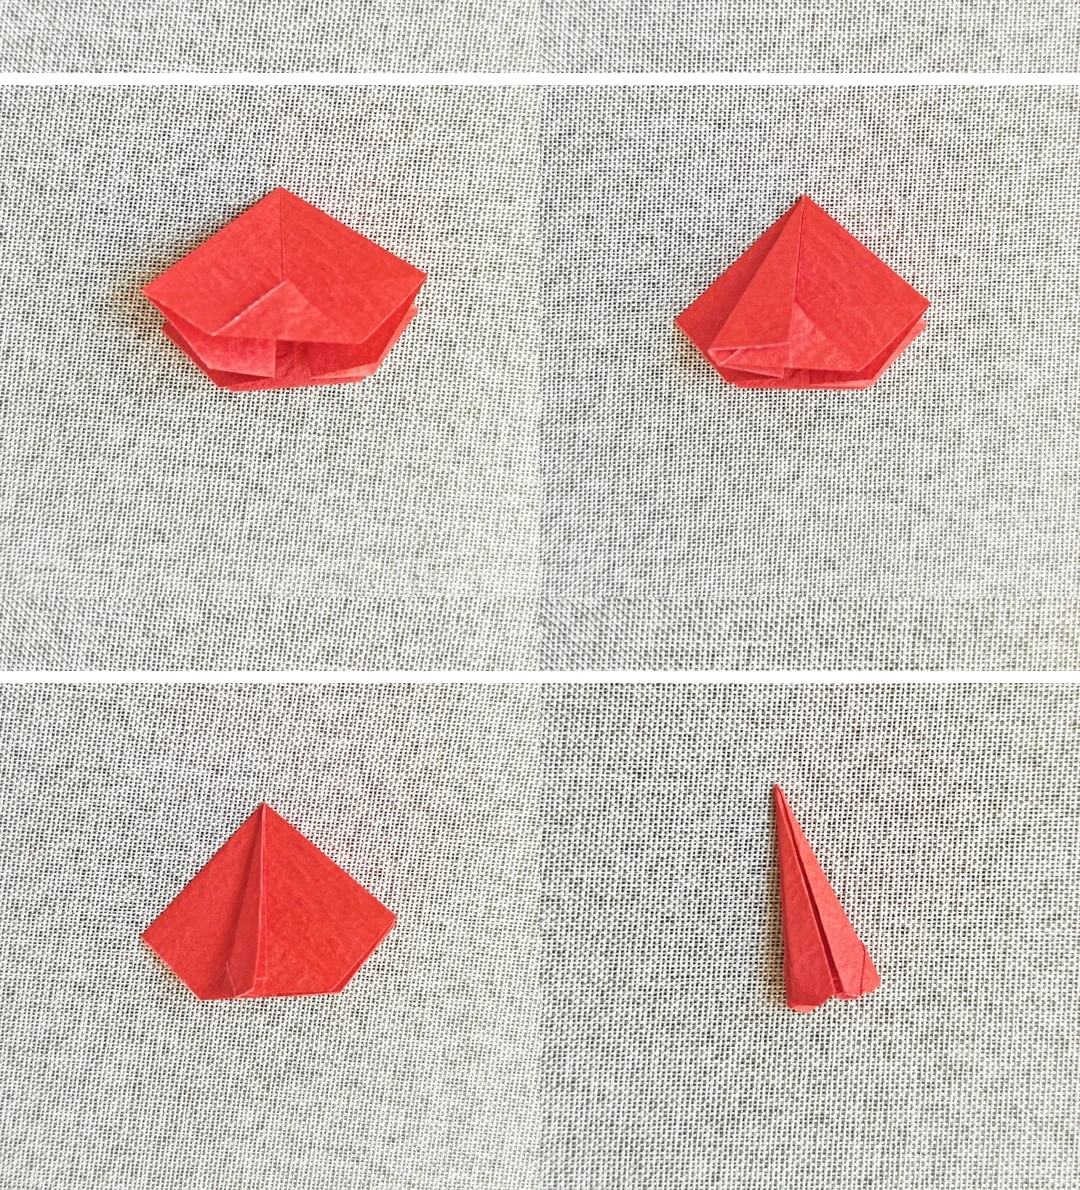
Pleat the unit
 Open image at full size ↗
Repeat on all faces. Fold each face toward its center and fold again to make narrow pleats.
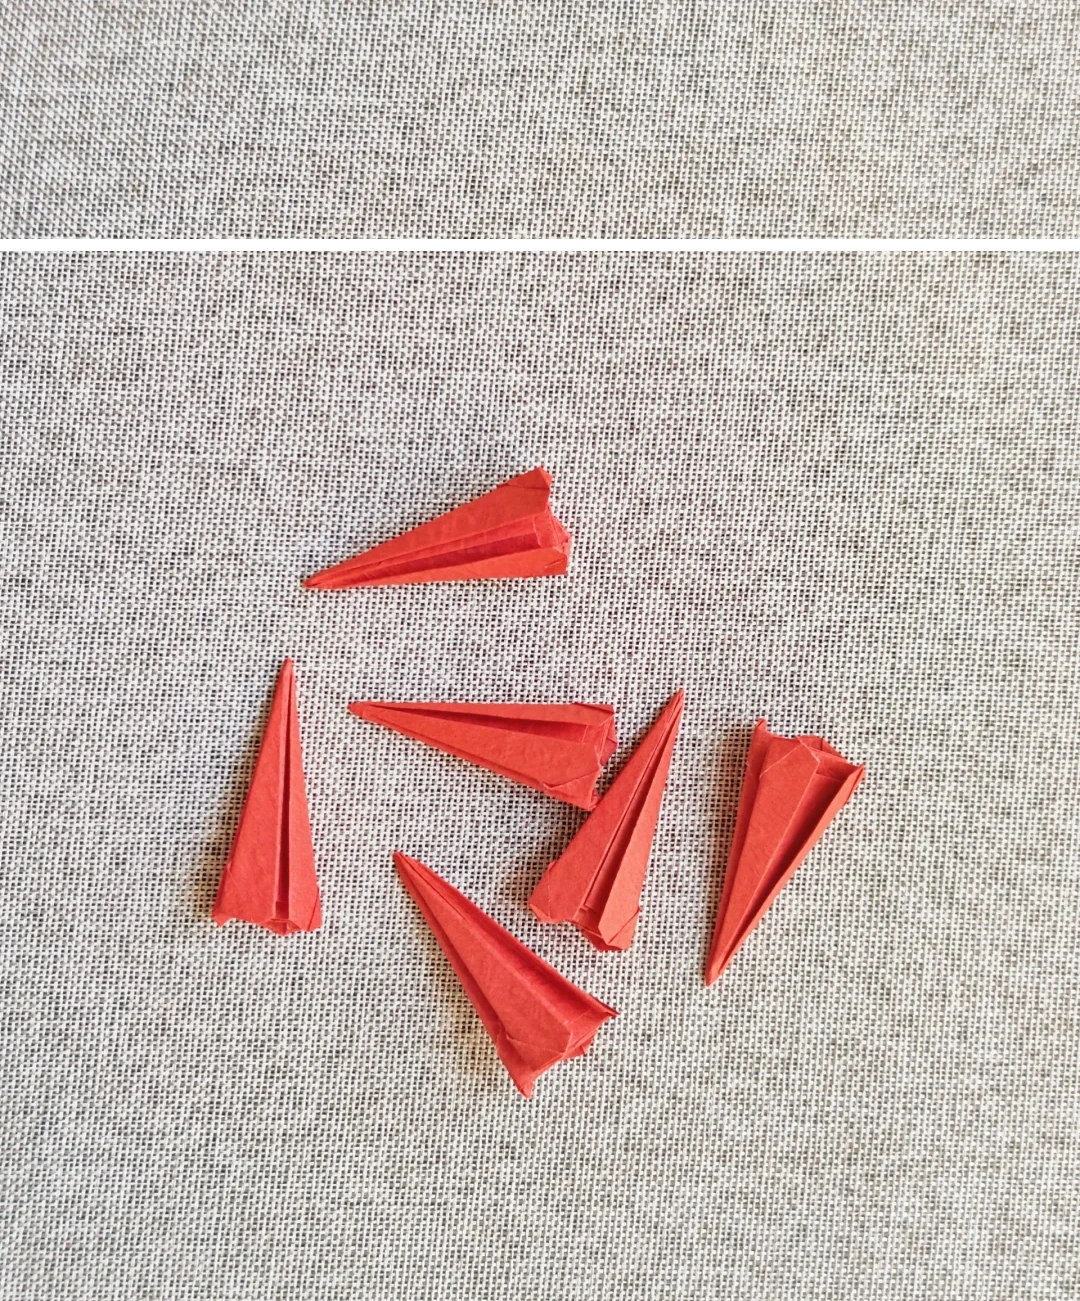
Make six units
 Open image at full size ↗
Repeat the folding sequence on all six red squares.
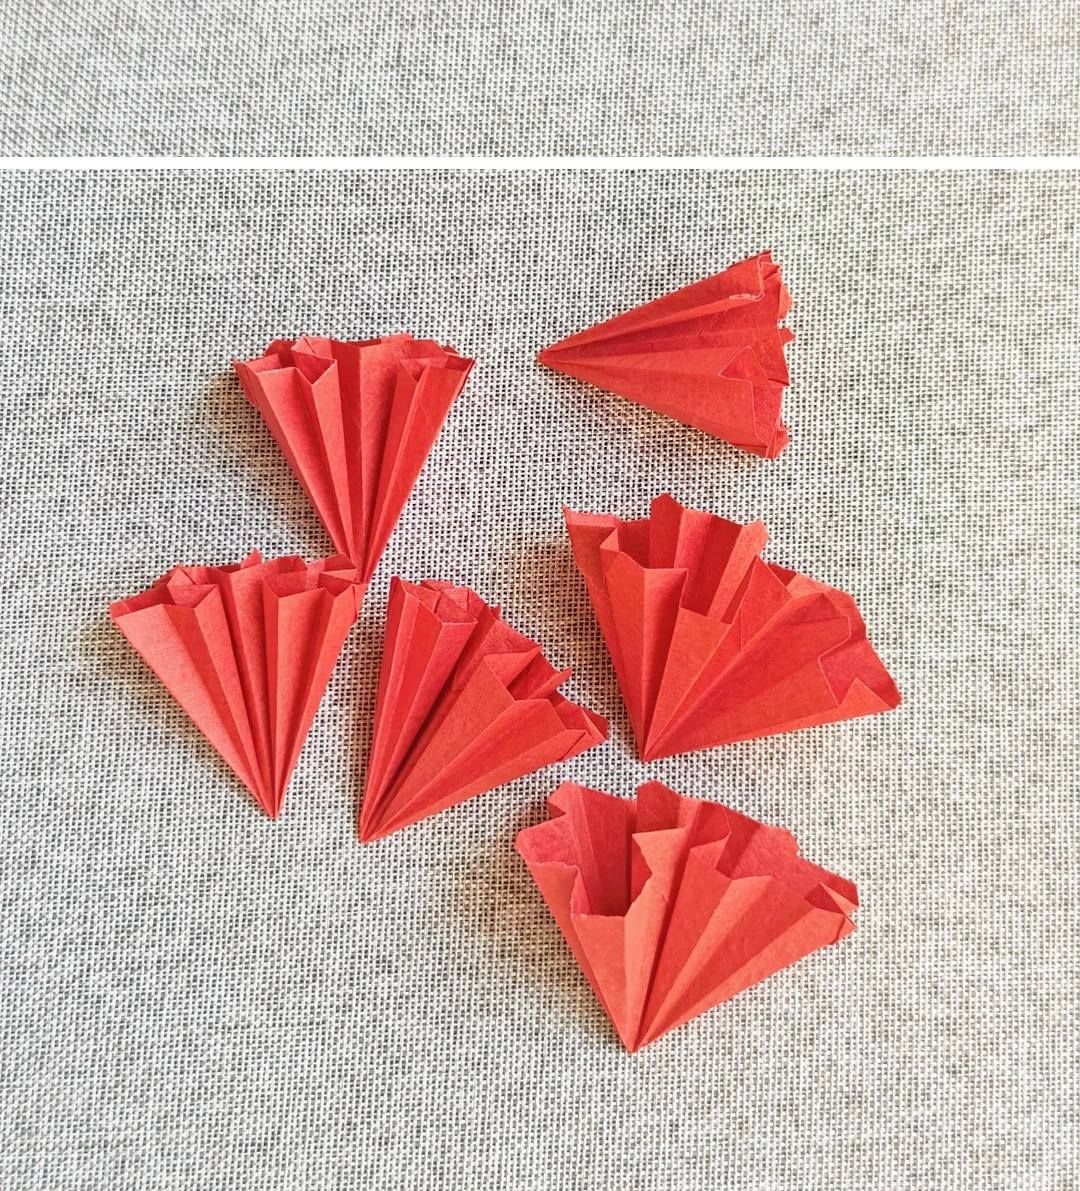
Open the pleats
 Open image at full size ↗
Spread each unit and arrange its folds into a small ruffled fan.
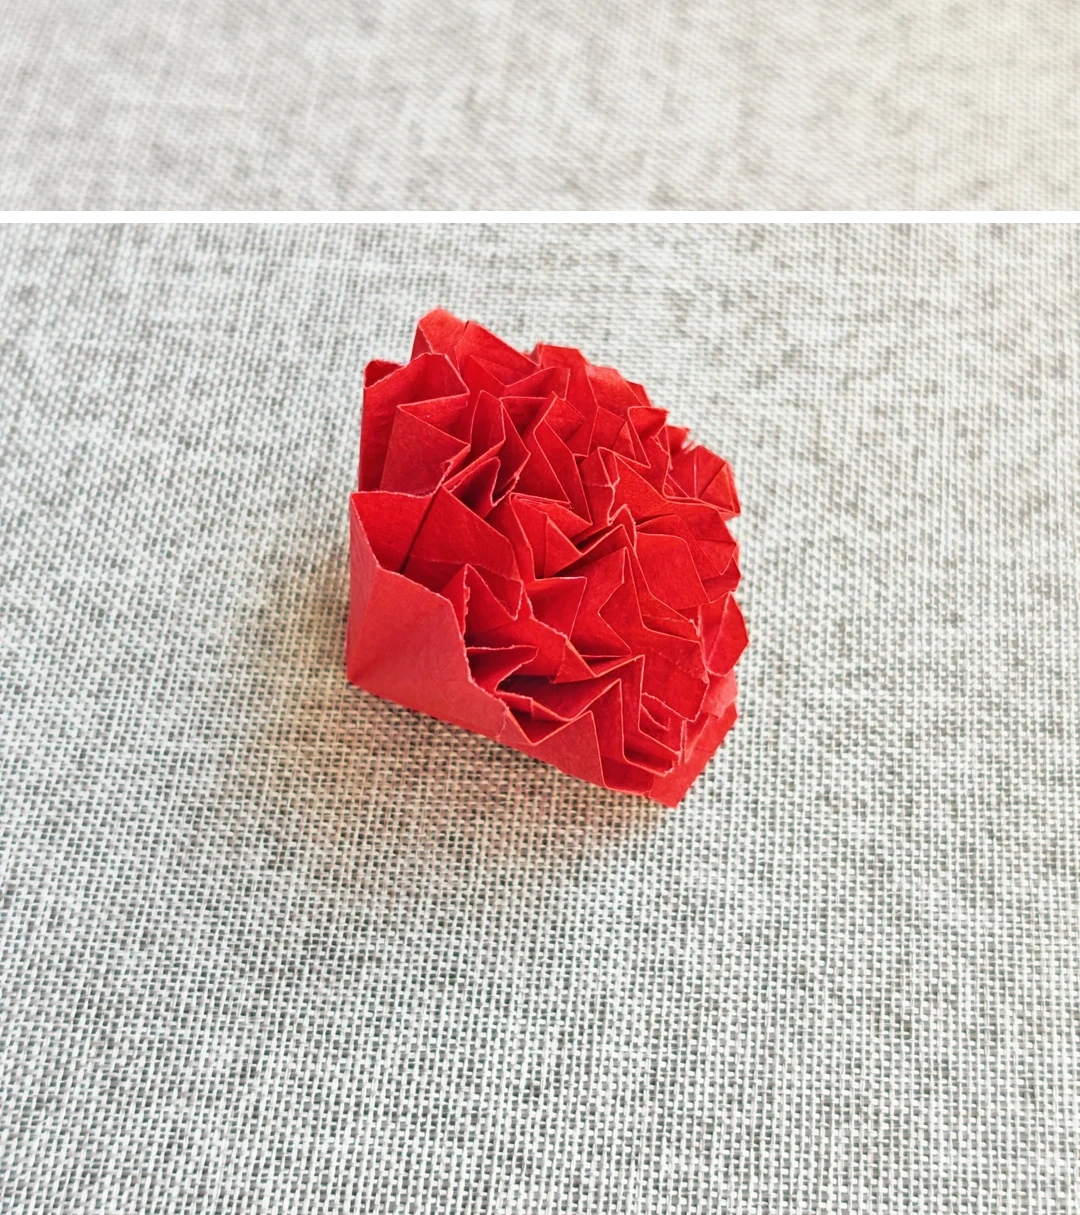
Nest the flower
 Open image at full size ↗
Apply glue near the bases and nest the six units together into the flower head.
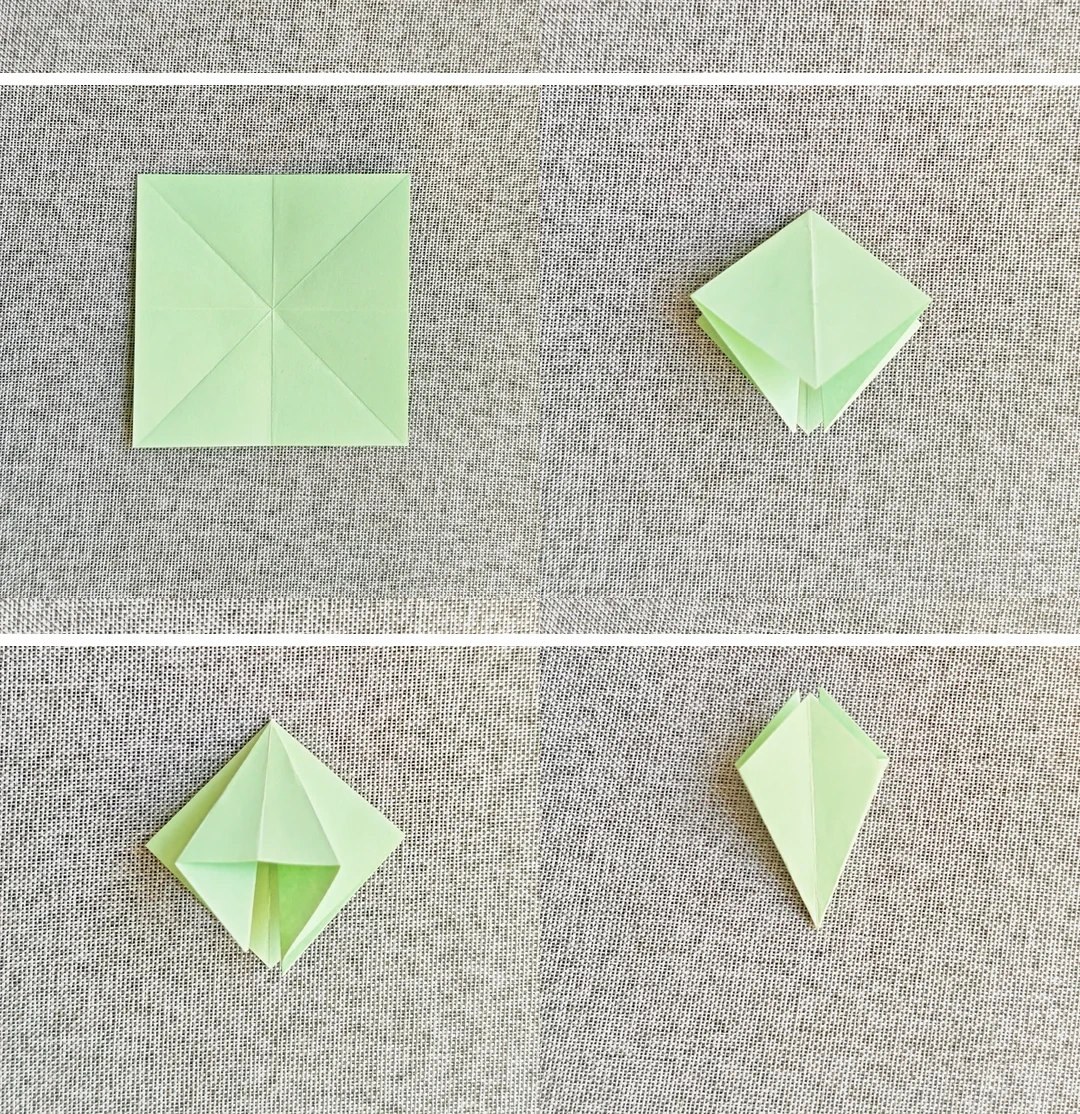
Start the calyx
 Open image at full size ↗
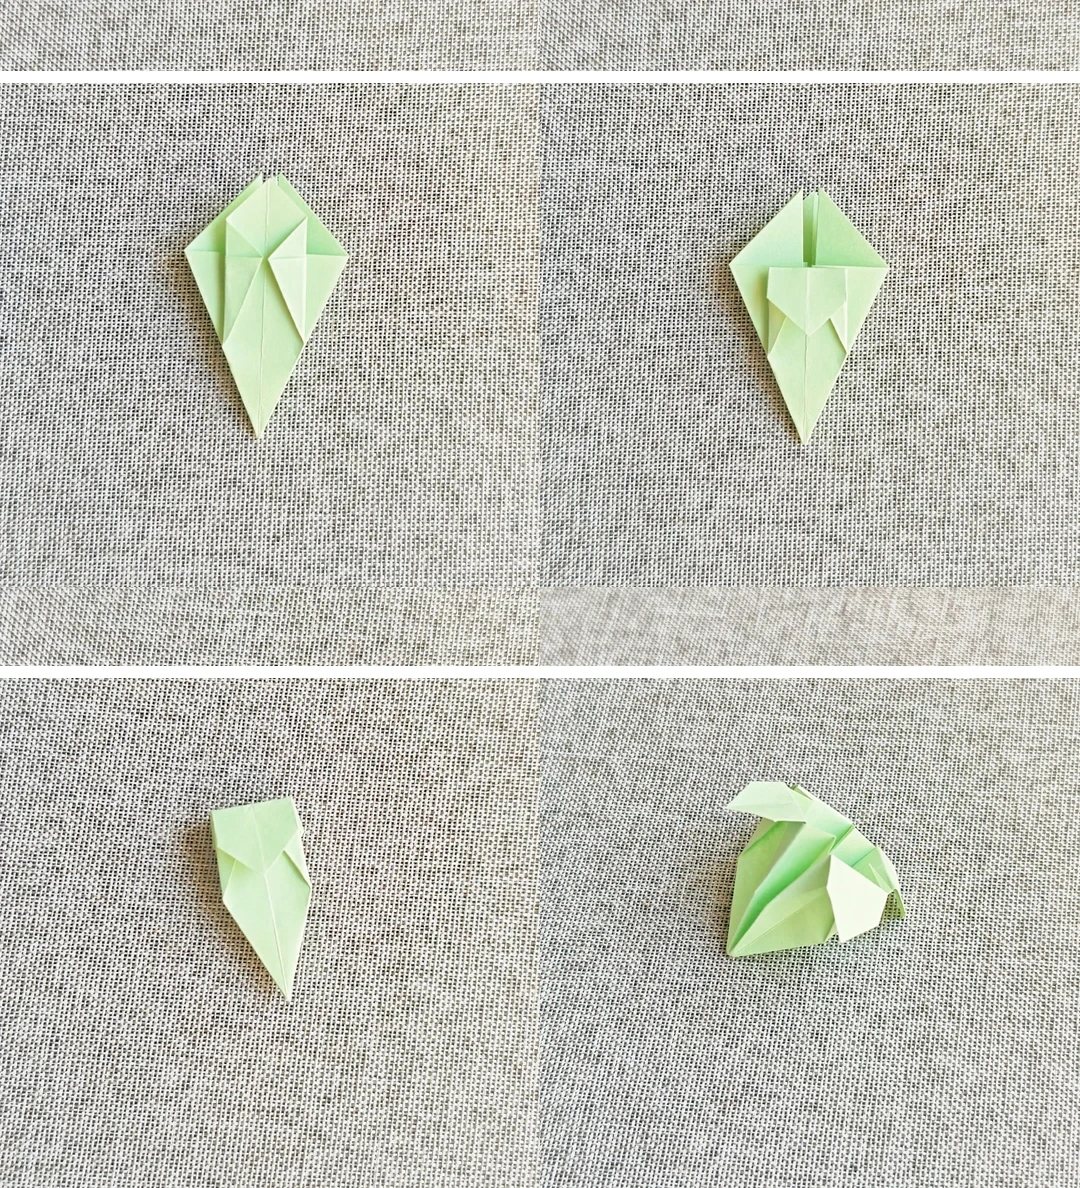
Crease and collapse the green square. Stand one flap upright, open it and squash it flat. Repeat on all faces.
Shape the calyx
 Open image at full size ↗
Fold the sides inward, fold the upper flap down and repeat around the base. Open the middle slightly.
Assemble the carnation
 Open image at full size ↗
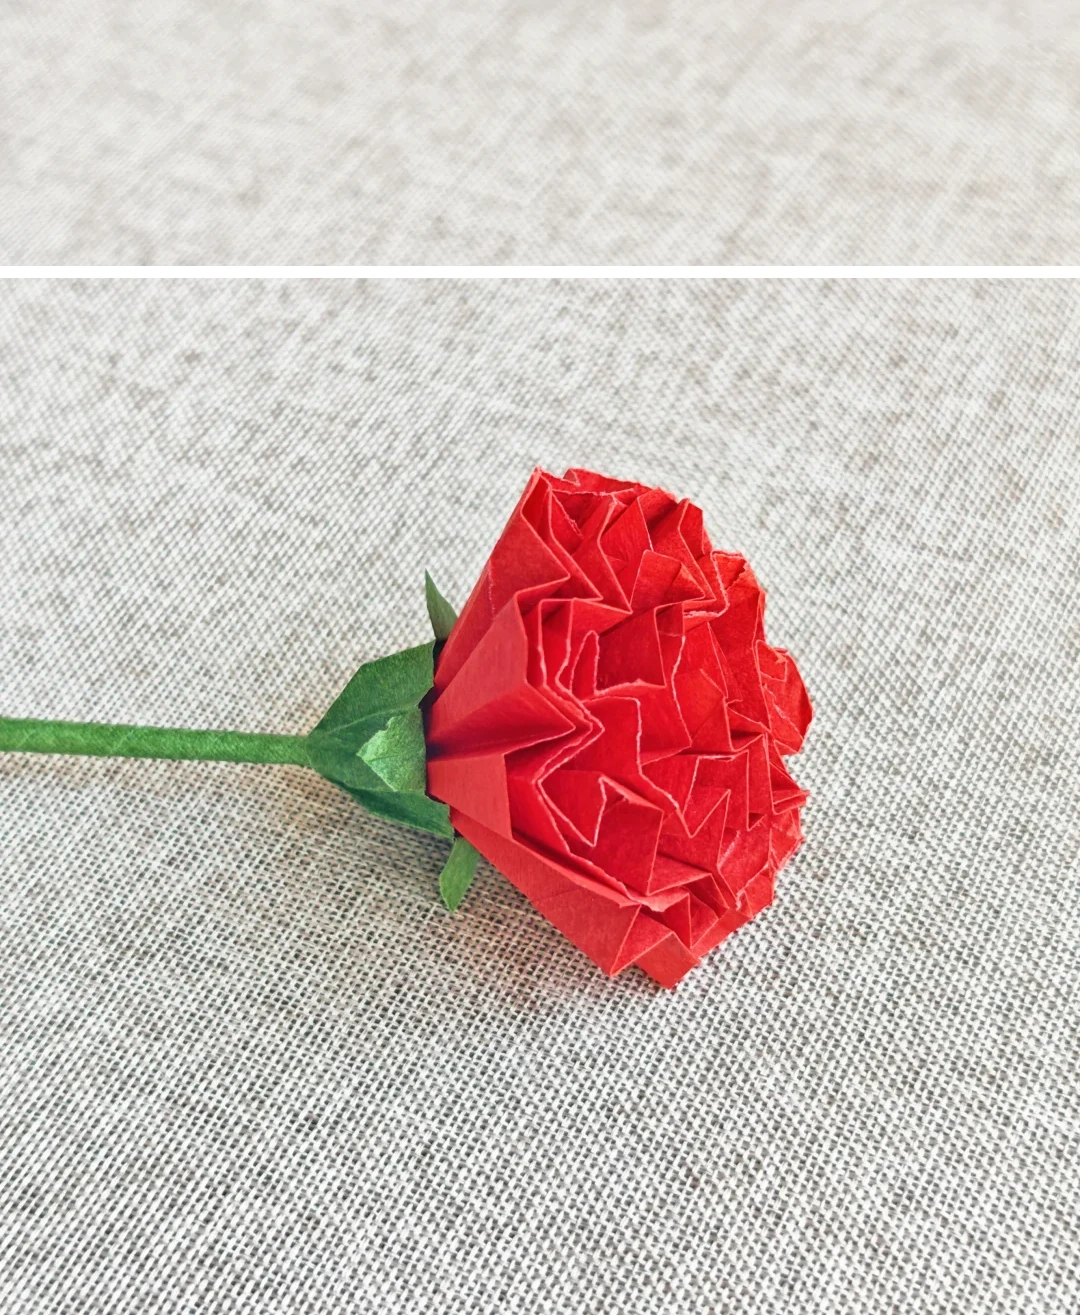
Glue the green calyx beneath the flower and attach the prepared stem.
Follow the diagrams alongside the step-by-step English instructions.
Choose your next project →