
Flowers & nature · Step-by-step guide
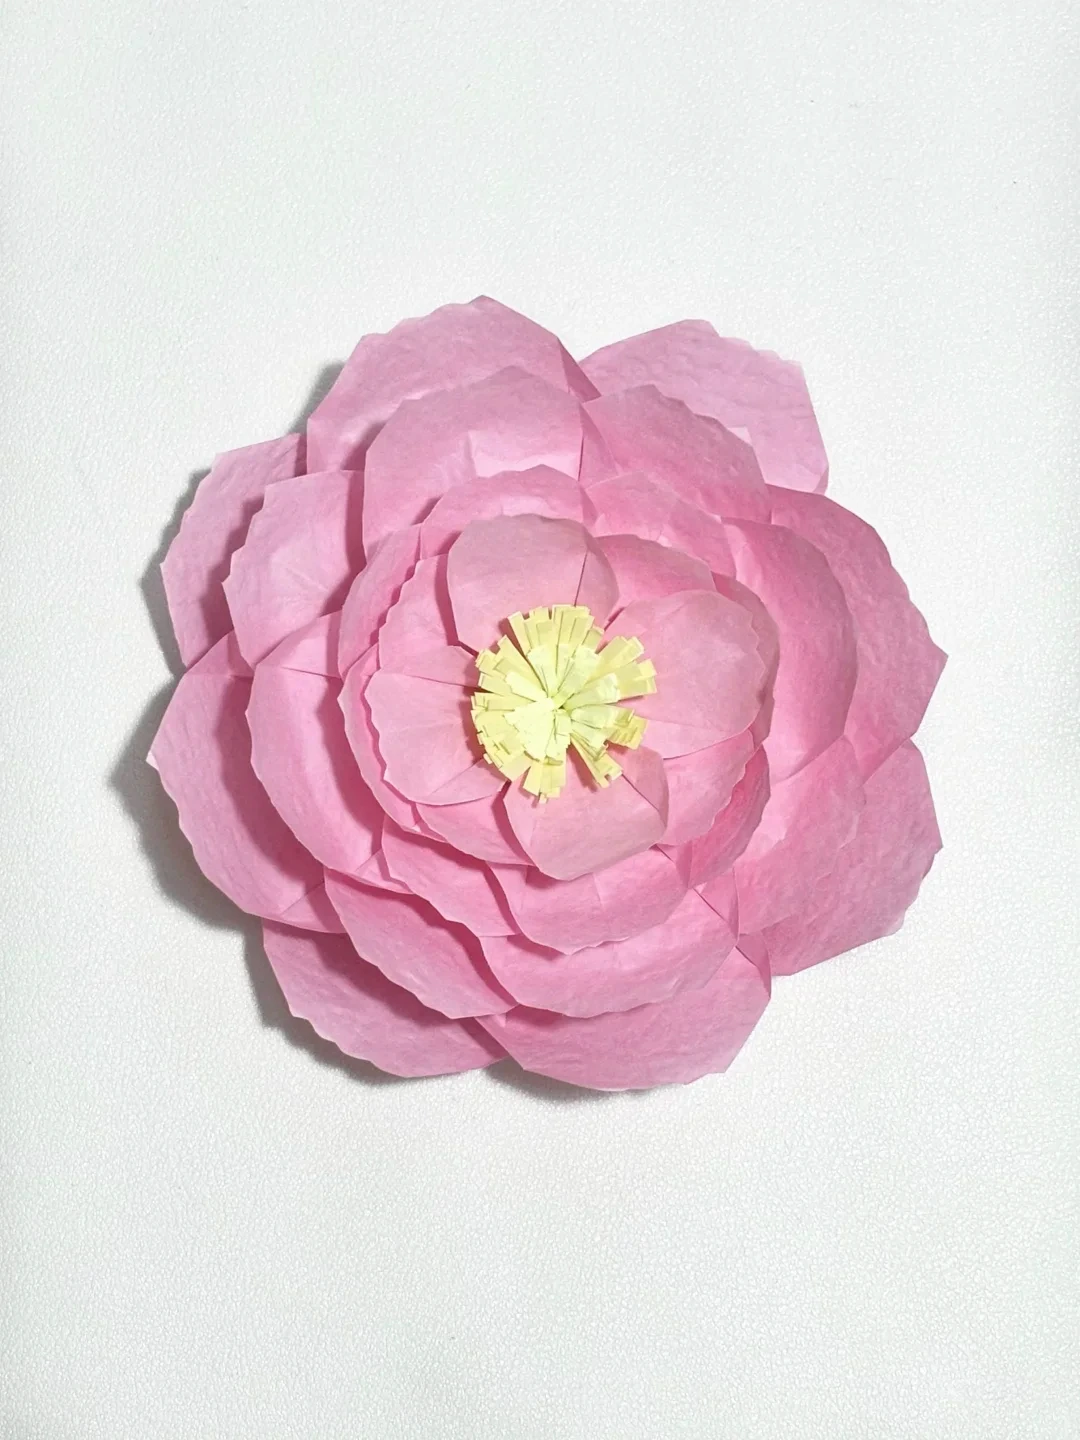
Layered Fringed-Center Peony
Stack eight softly shaped petal units around a rolled fringe center to make a full paper peony.
What you’ll need
- Eight pink paper squares: two each at 7.5, 9, 12, and 15 cm
- Yellow paper strips, 7.5 × 2 cm and 9 × 2.5 cm
- Scissors
- Craft glue
Paper craft · Pleating, petal trimming, fringes & layered assembly
Make it, step by step.
17 steps · Original diagrams with English instructions
Prepare four sizes
 Open image at full size ↗
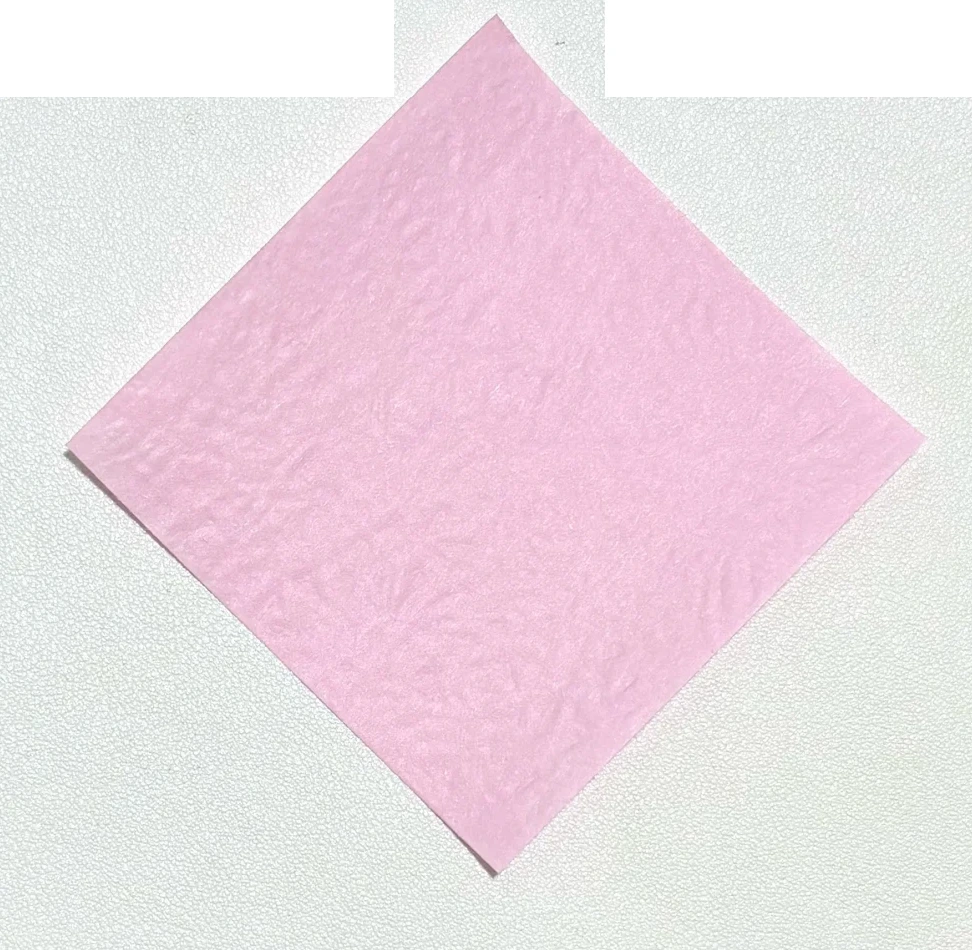
Cut two squares in each size: 7.5, 9, 12, and 15 cm. Use the same fold sequence for all eight squares.
Mark the first thirds
 Open image at full size ↗
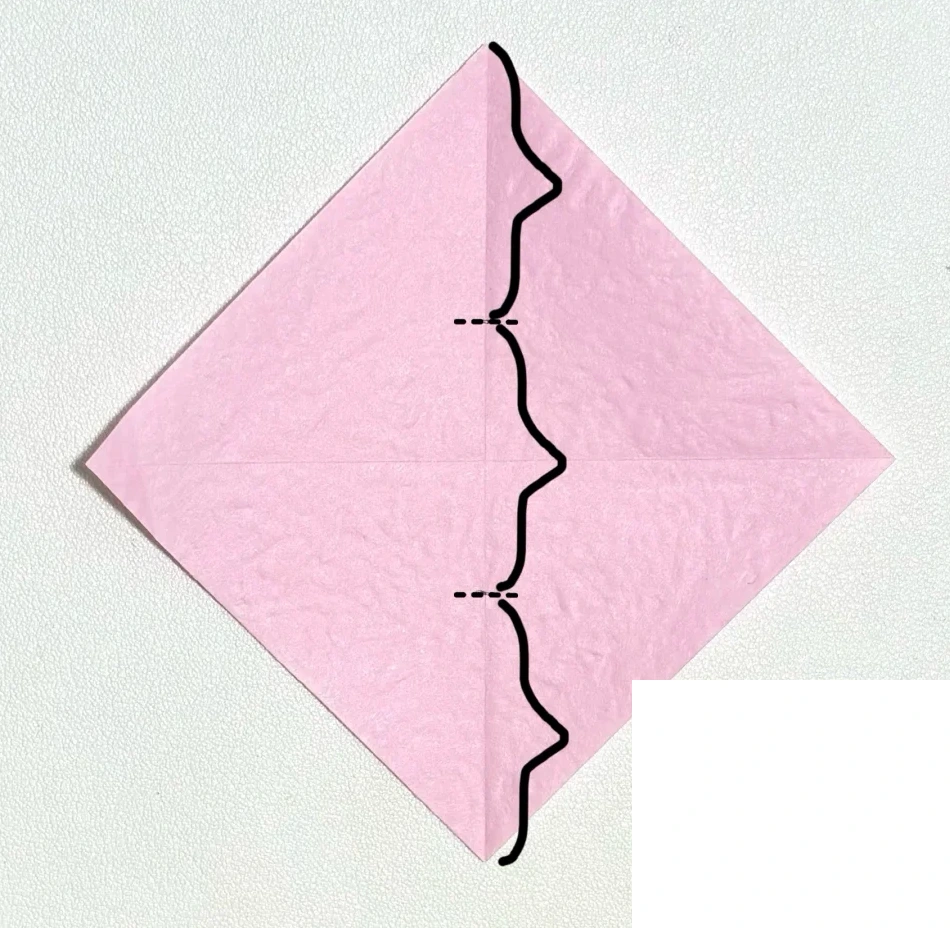
Place a square like a diamond. Mark its horizontal and vertical center lines, then divide the point-to-point distance into thirds as shown.
Check the horizontal folds
 Open image at full size ↗
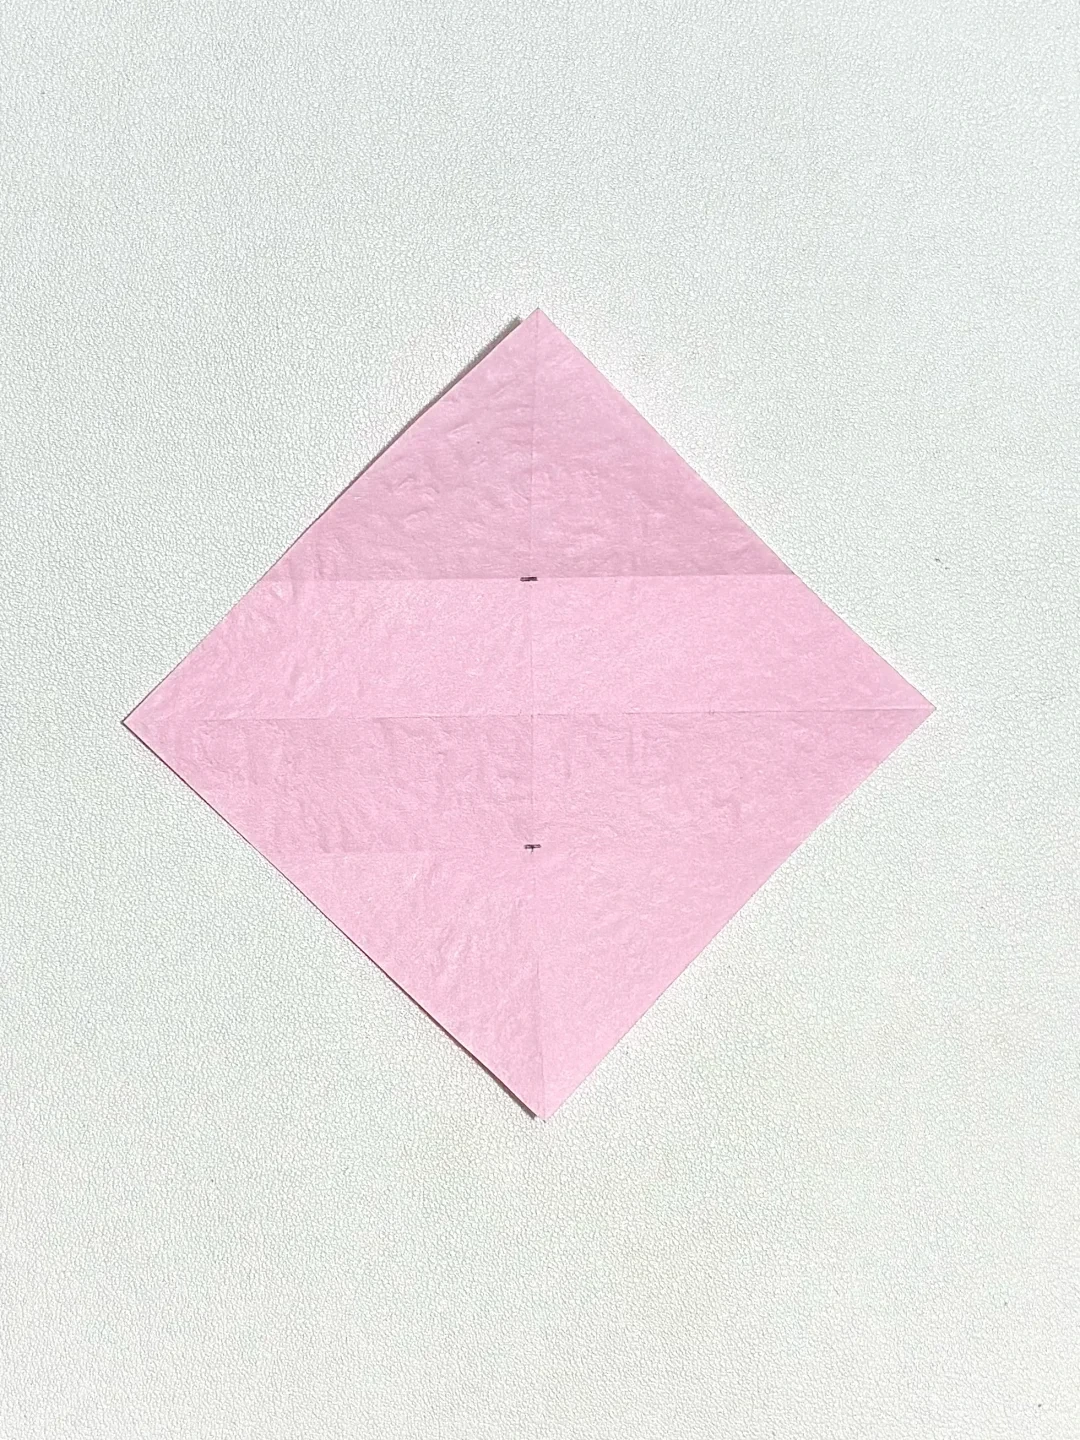
Open the sheet and reinforce the two parallel guide creases.
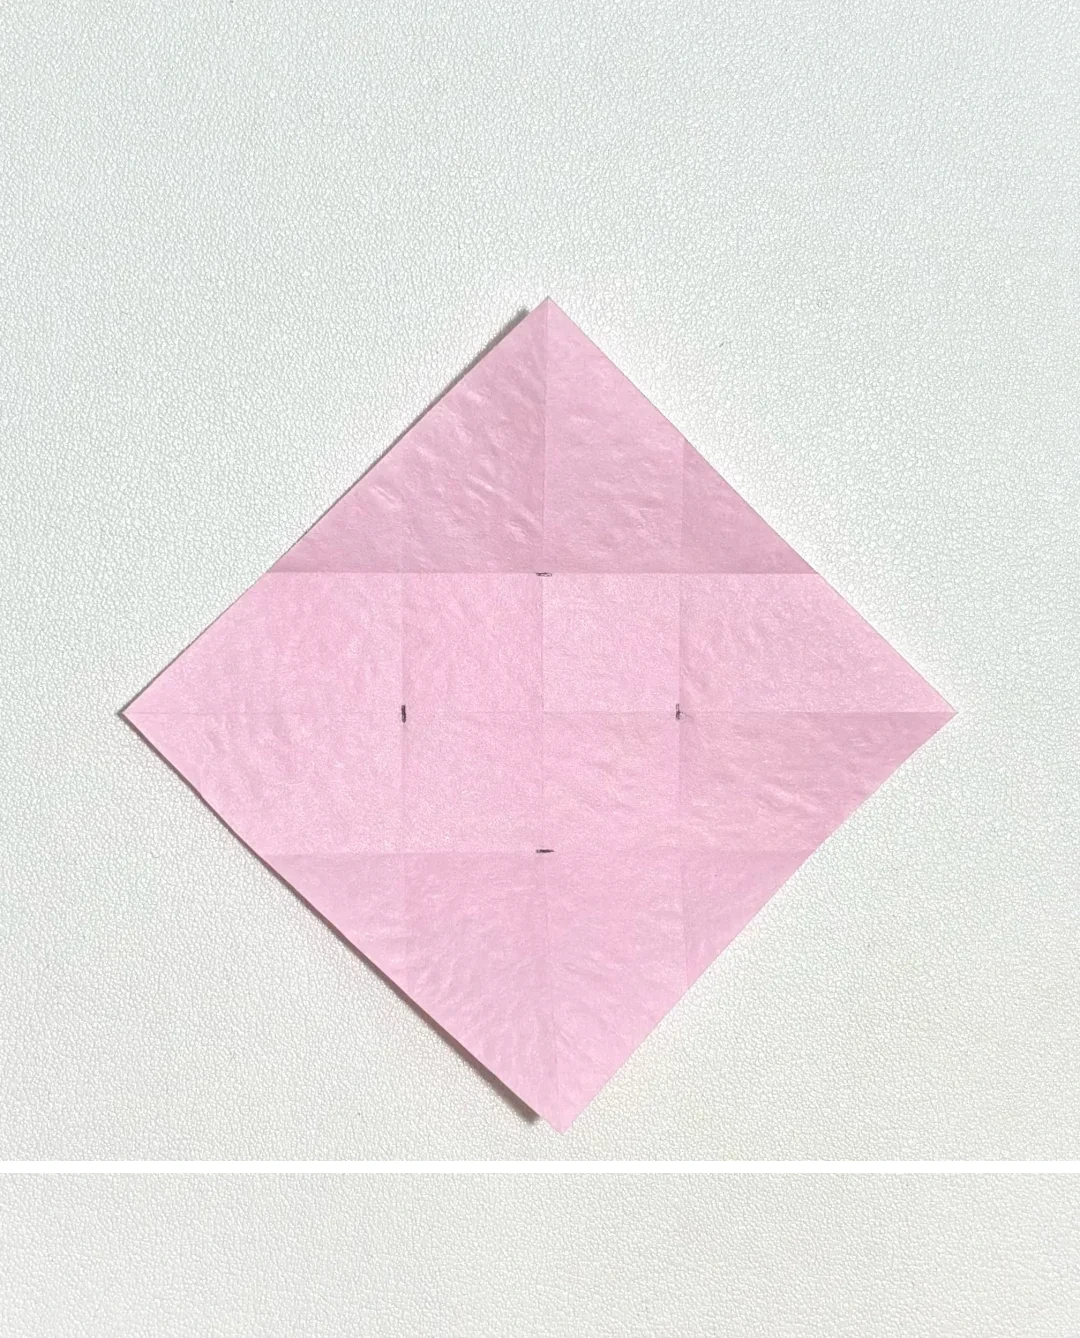
Mark the other direction
 Open image at full size ↗
Rotate the square and divide the other direction into thirds in the same way.
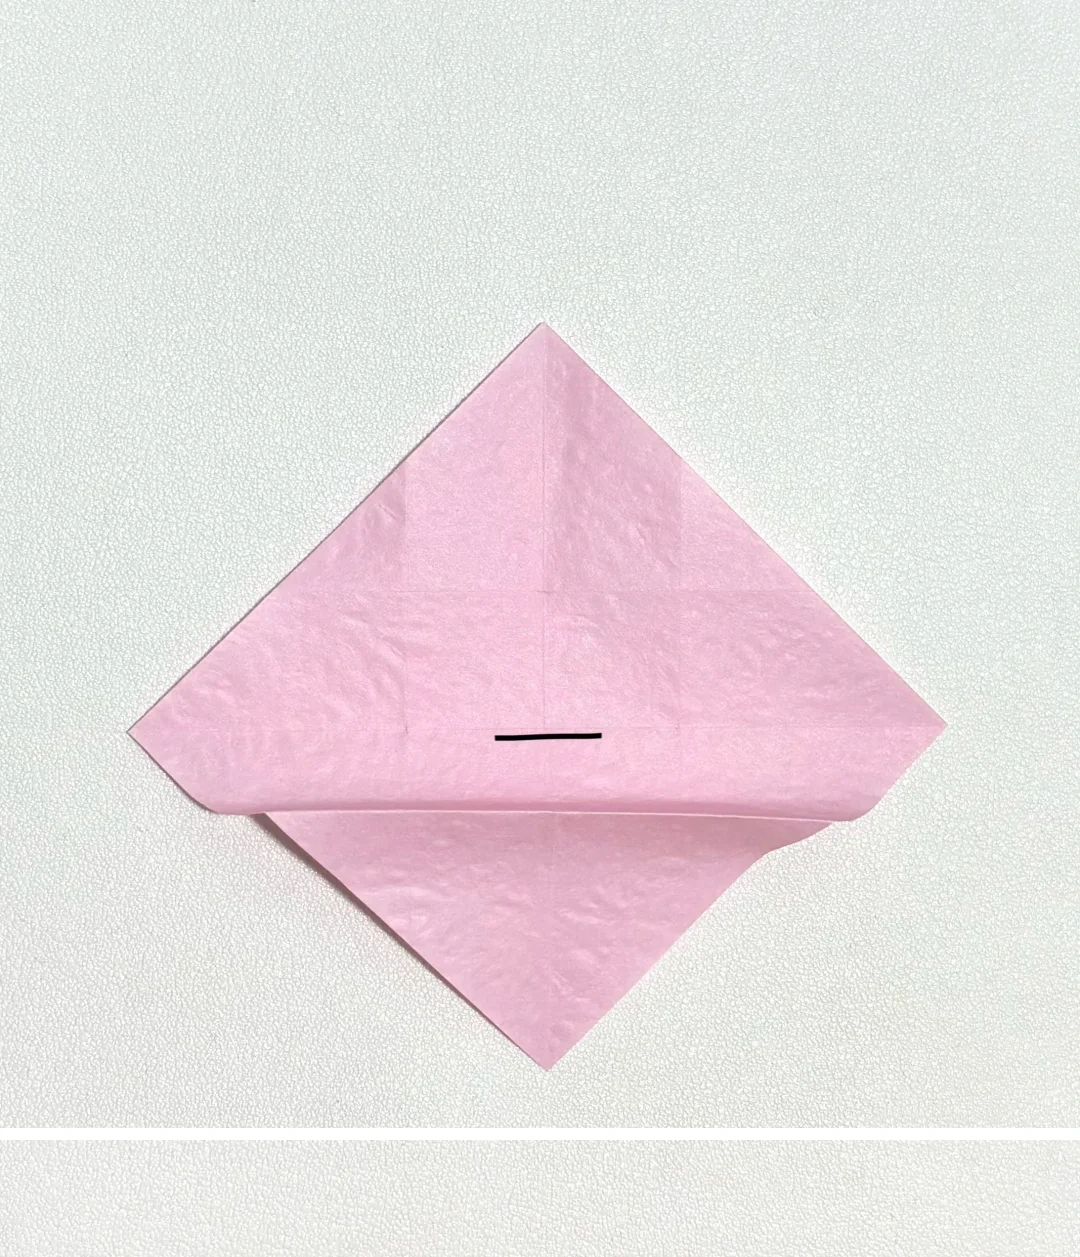
Pleat the lower section
 Open image at full size ↗
Pinch the lower one-third crease and fold it toward a position just below the center line.
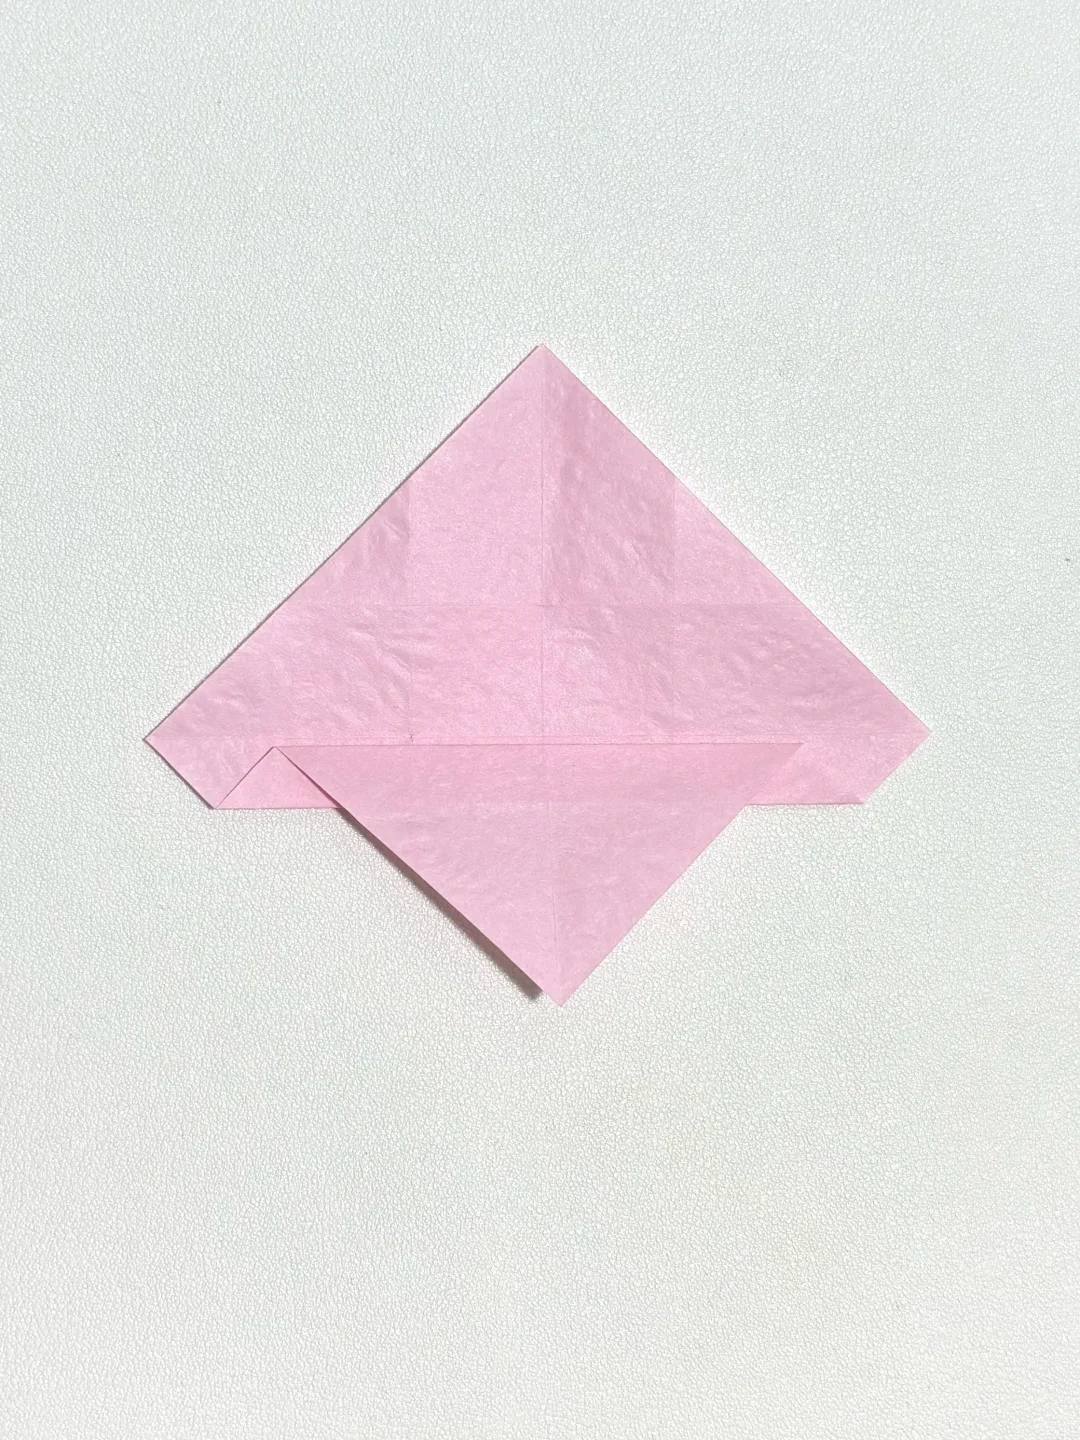
Pleat the opposite section
 Open image at full size ↗
Repeat on the opposite side so the horizontal folds form a narrow band across the middle.
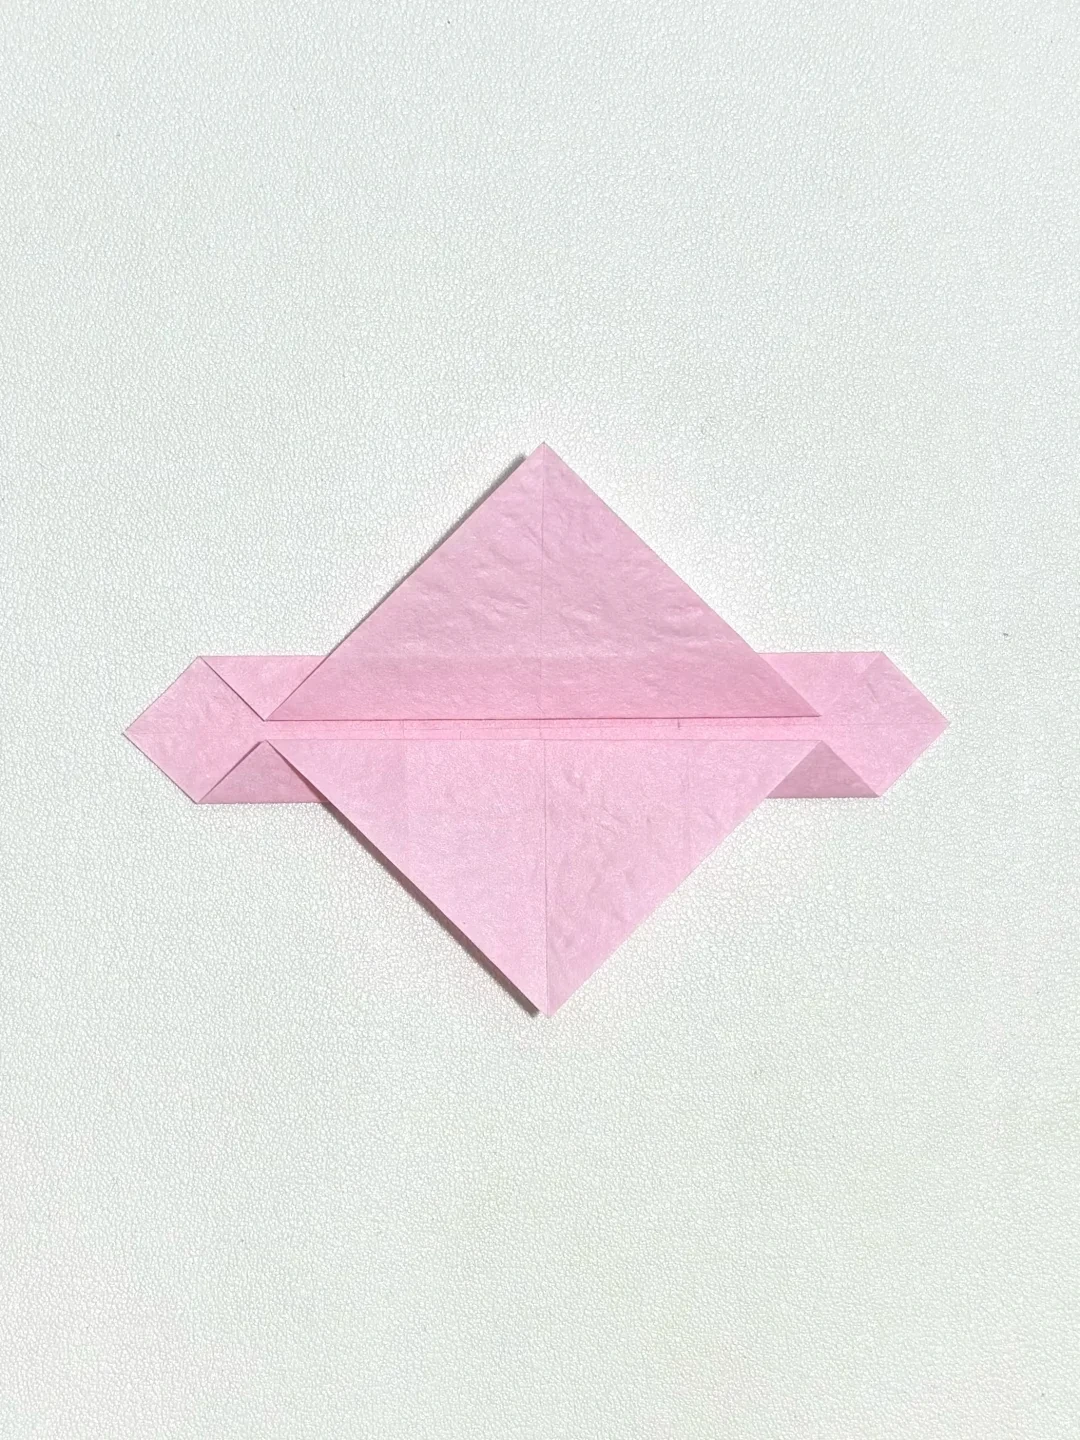
Flatten the paired pleats
 Open image at full size ↗
Press the upper and lower pleats flat, keeping the small triangular ends symmetrical.
Pleat from the side
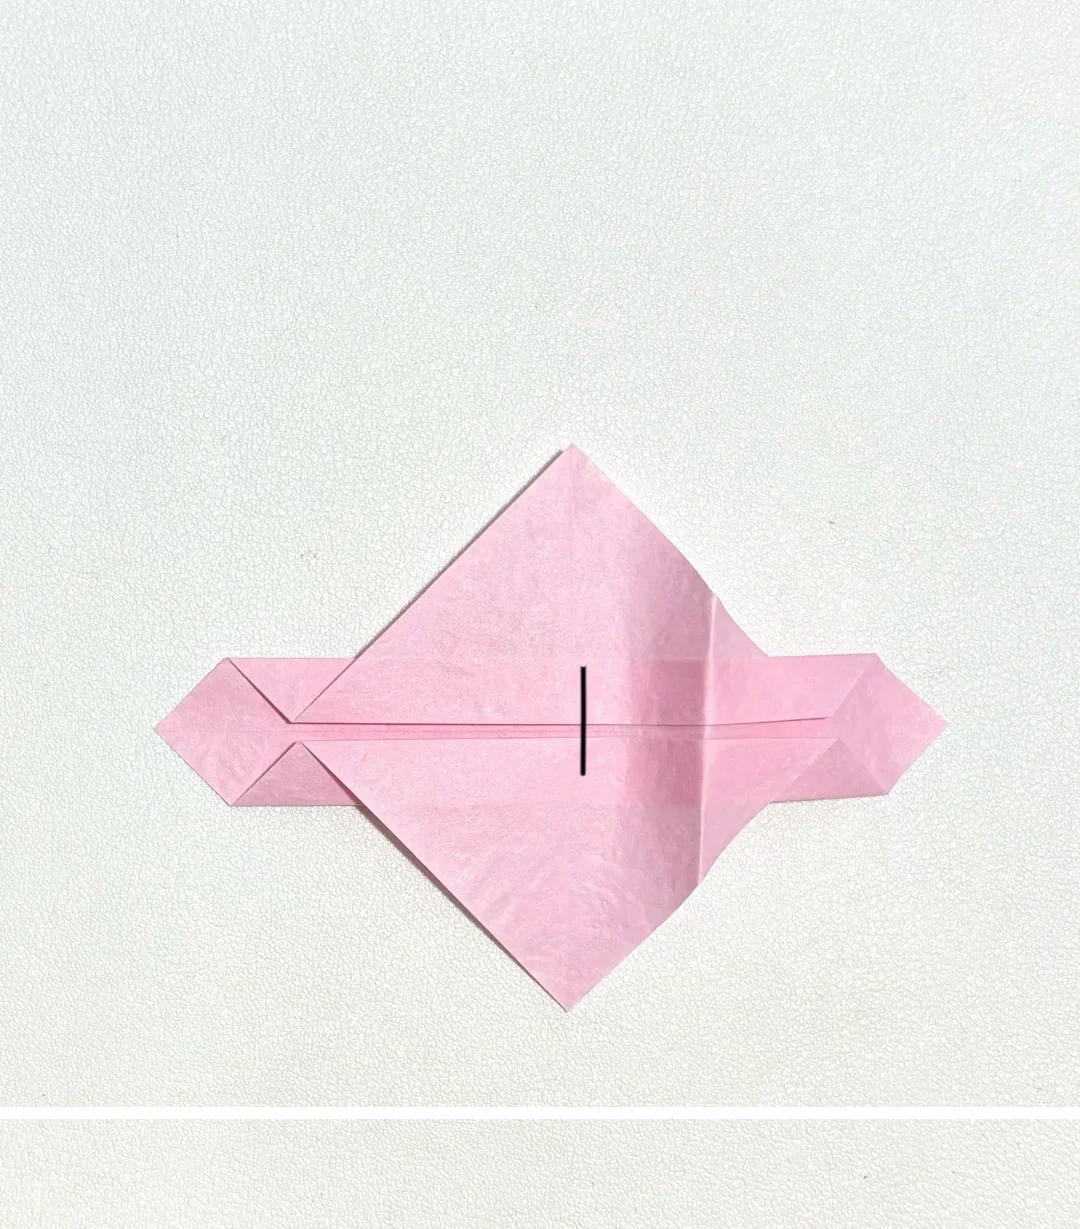 Open image at full size ↗
Pinch the side one-third crease and fold it toward a point just to the right of the center.
Complete the cross
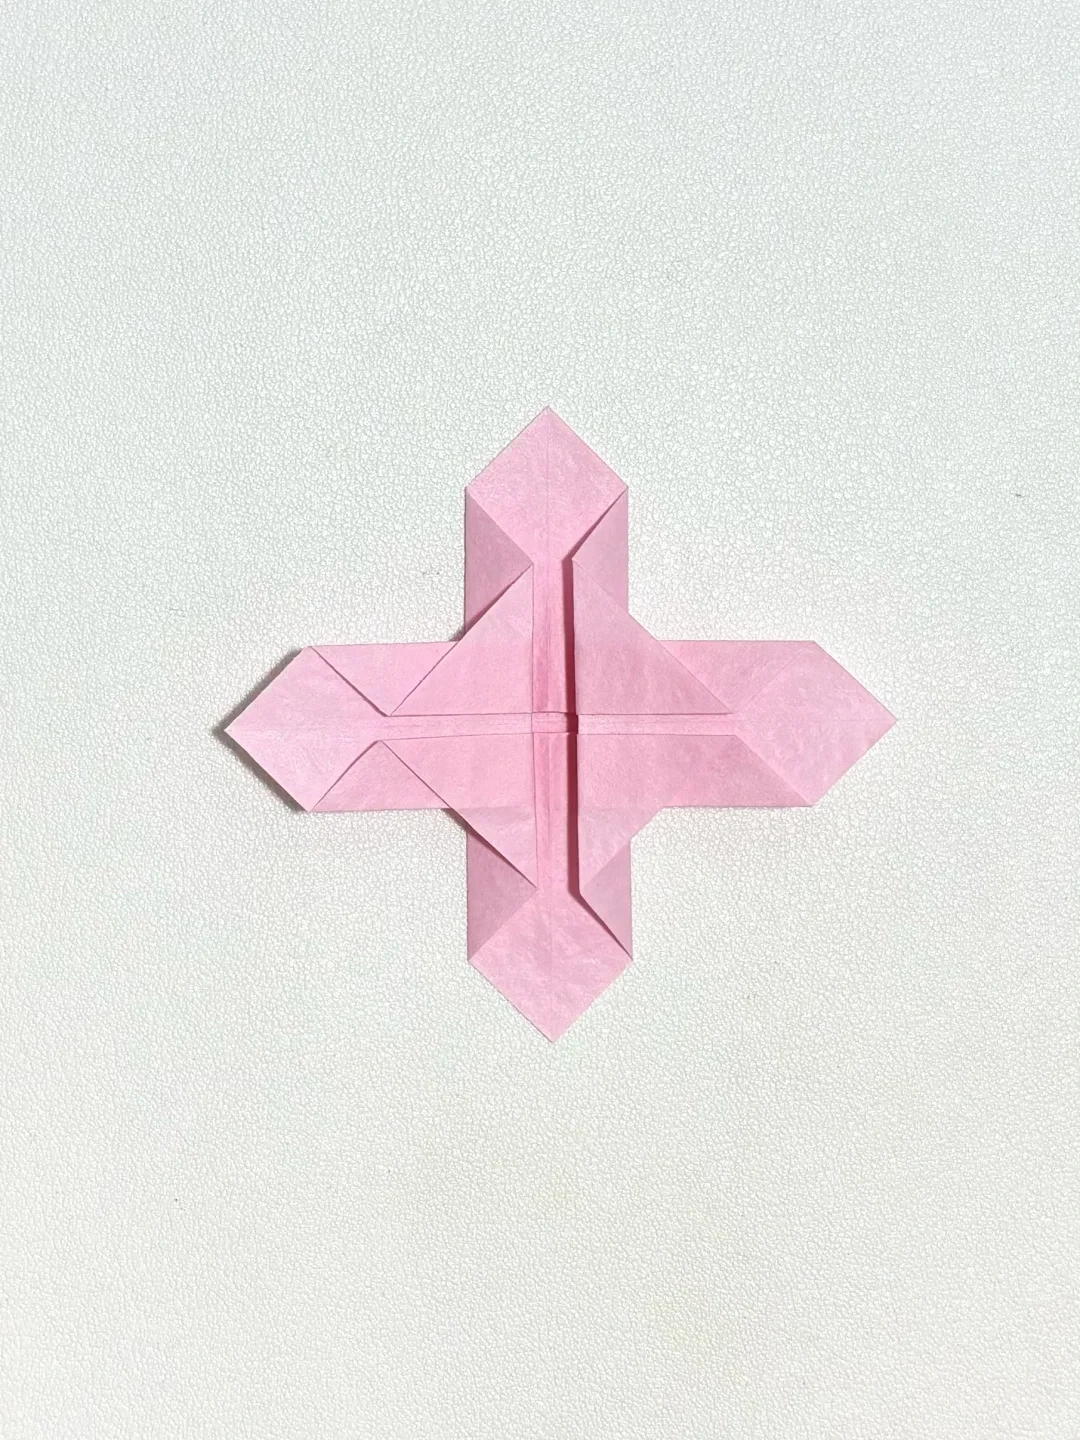 Open image at full size ↗
Repeat from the opposite side to create the four-armed folded cross.
Shape a petal
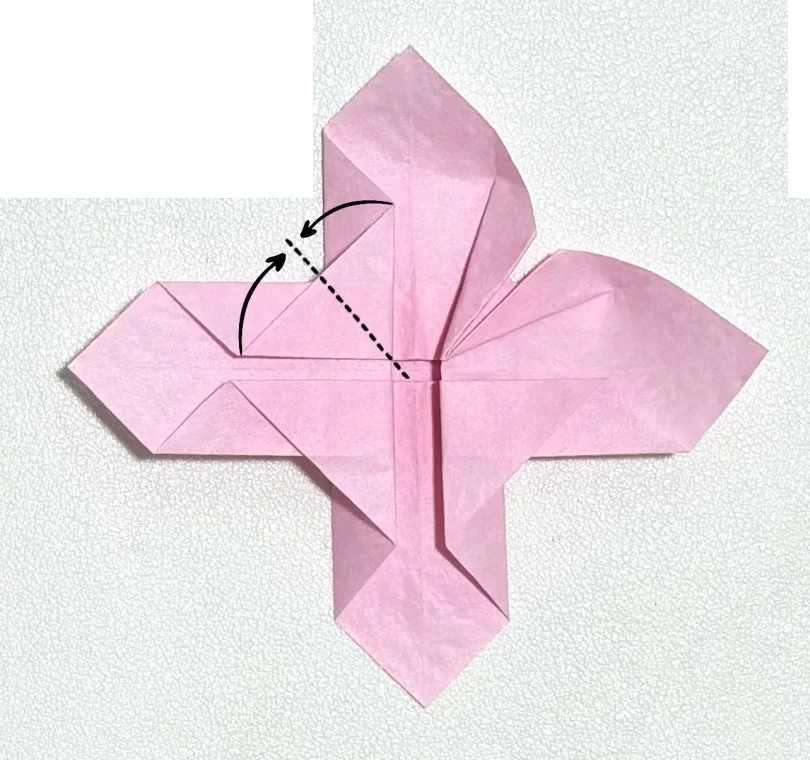 Open image at full size ↗
Open one arm and fold its two sides toward the middle along the marked guides. Shape the neighboring arms in the same way.
Round four petals
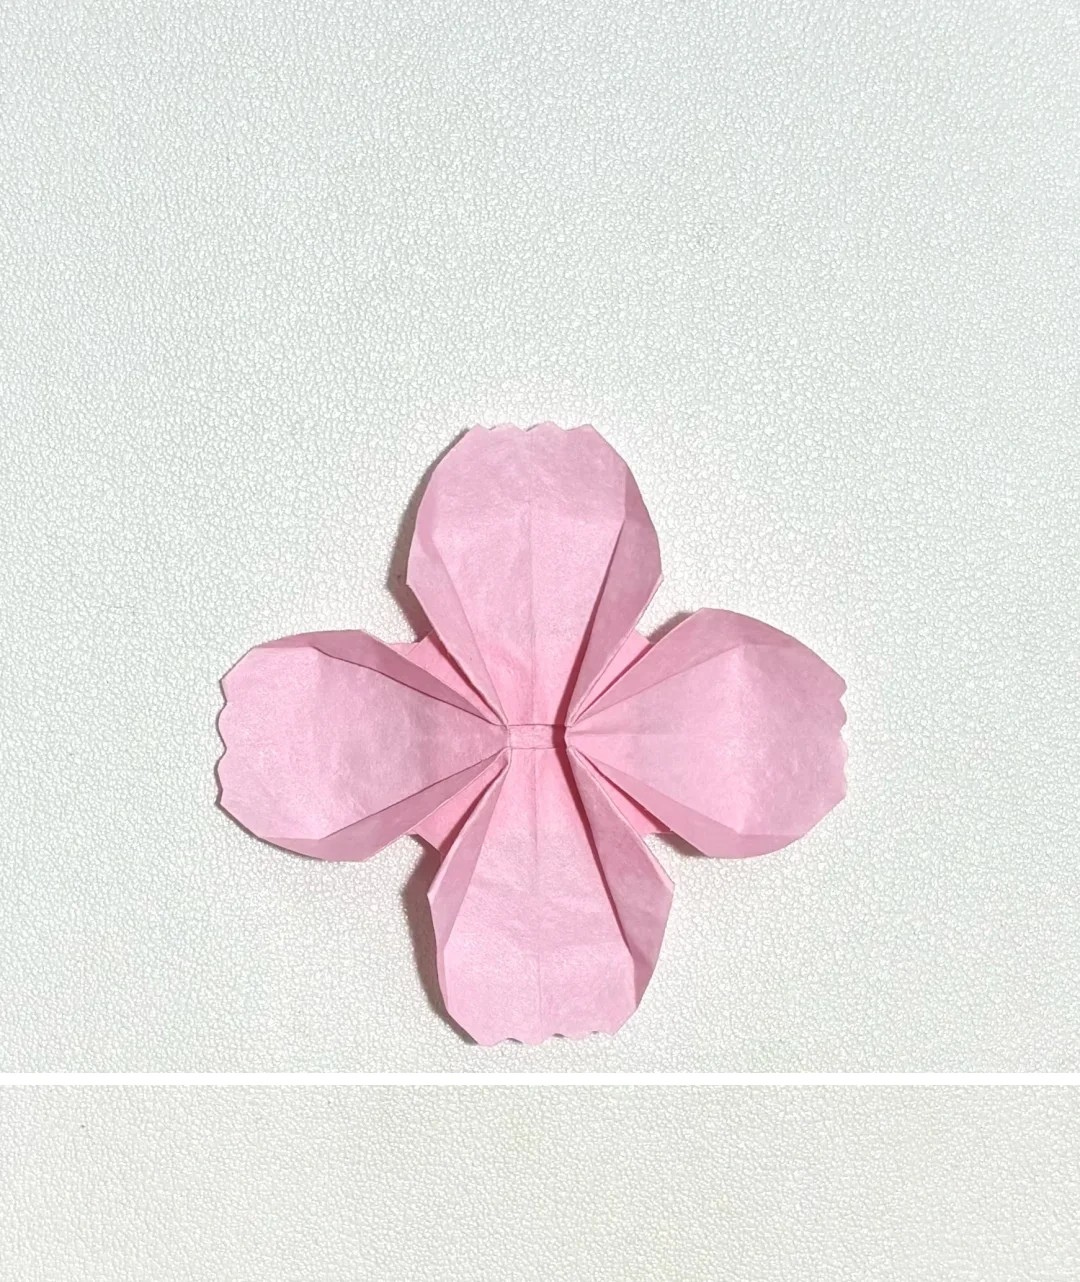 Open image at full size ↗
Repeat the shaping on all four arms. Trim the petal edges into a gentle wavy outline.
Make eight petal units
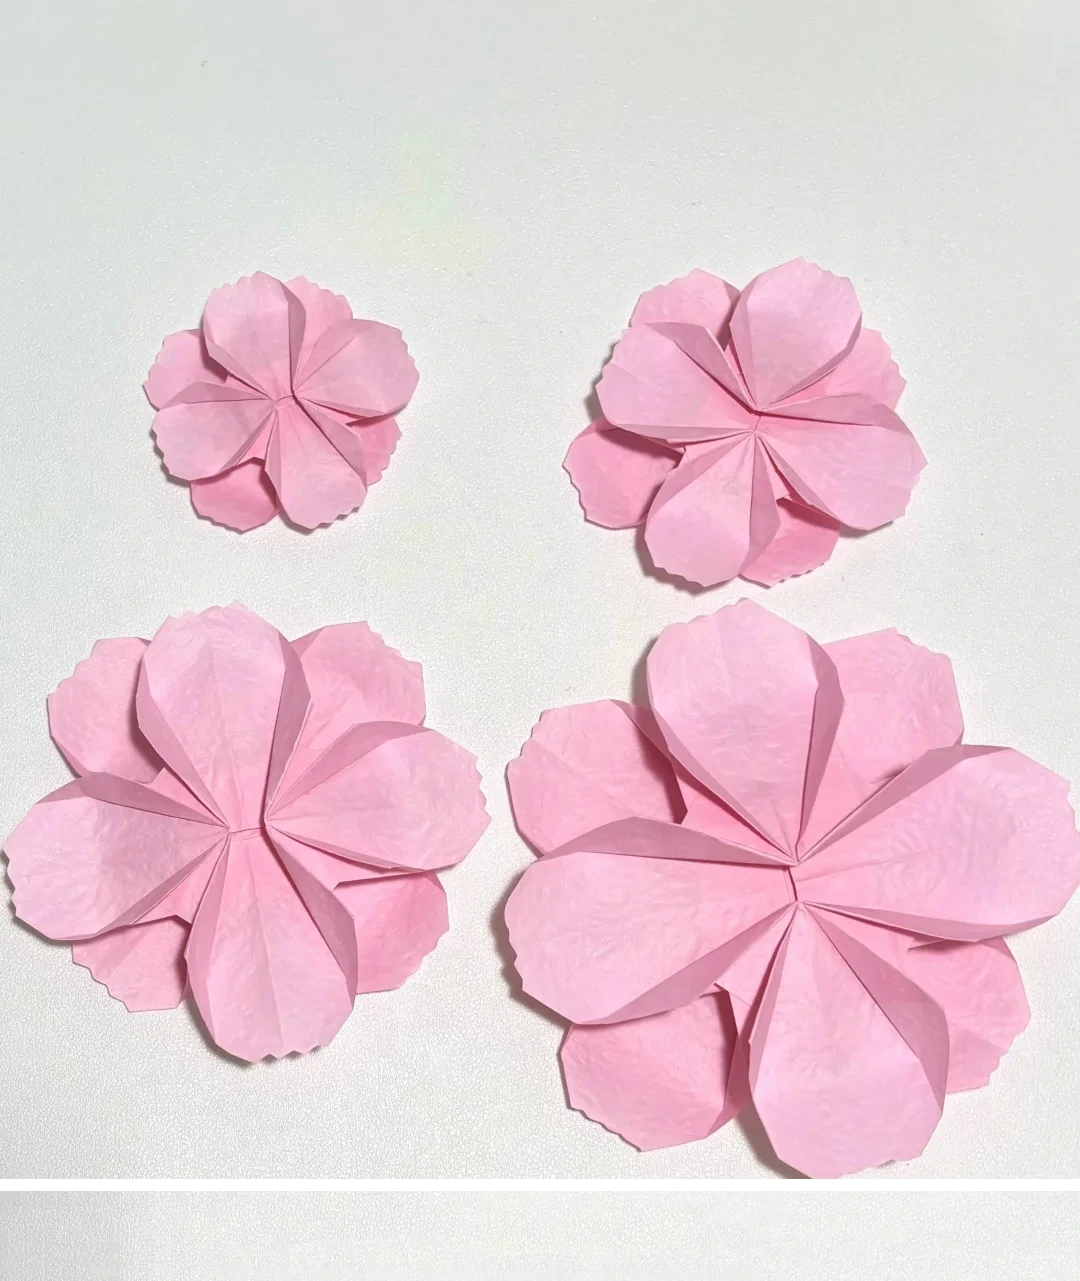 Open image at full size ↗
Fold two units in each of the four square sizes. Place matching pairs together with their petals offset.
Stack the layers
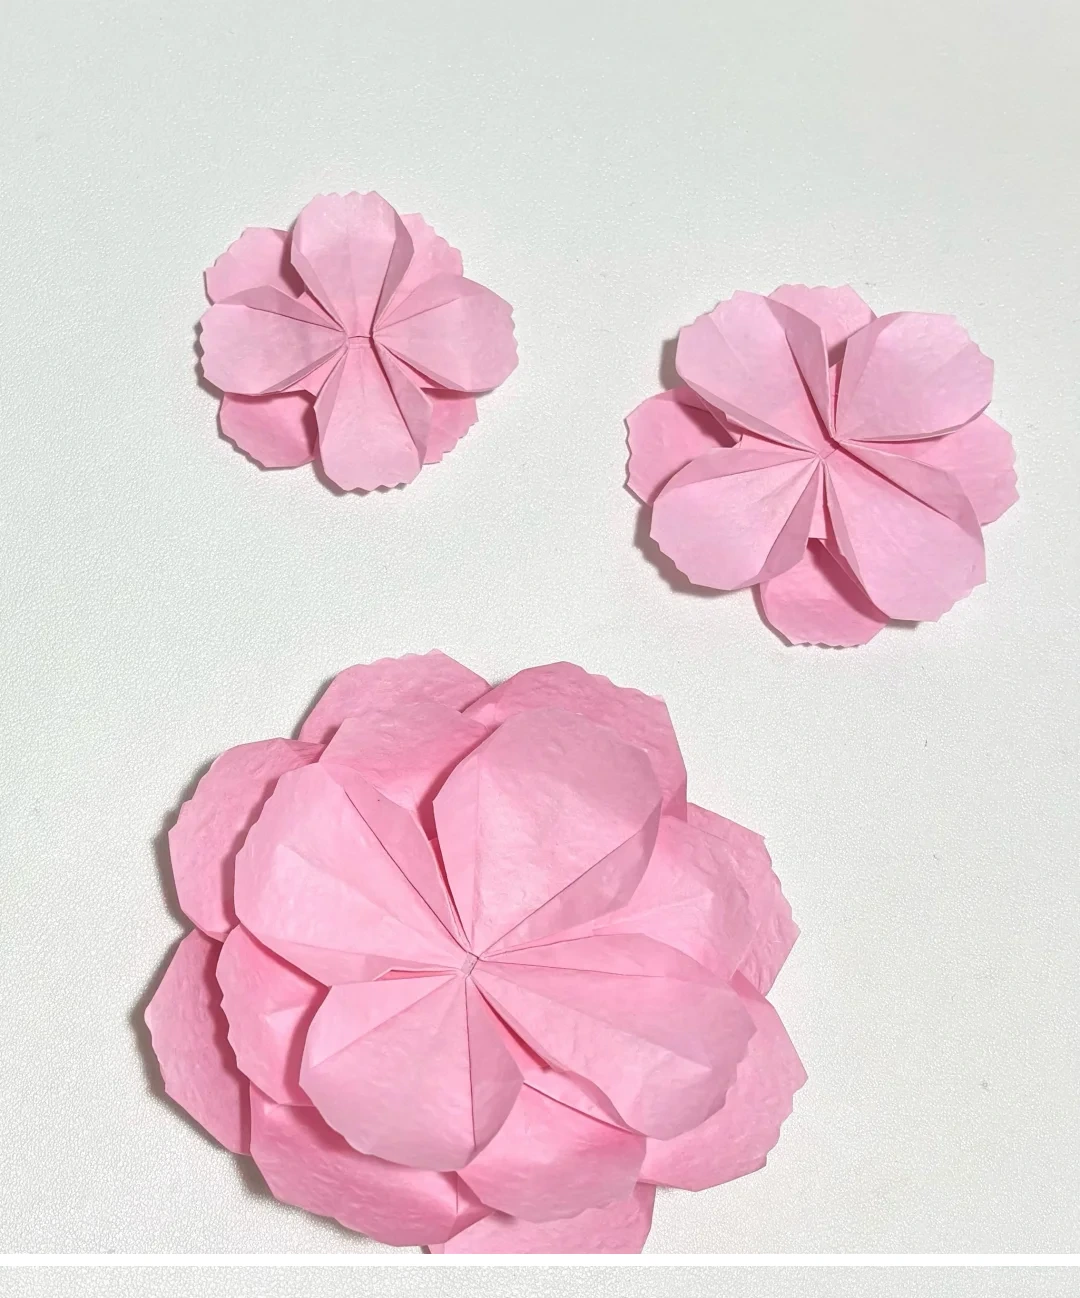 Open image at full size ↗
Glue the paired units in order from largest to smallest, rotating each layer slightly so the petals fill the gaps.
Shape the flower bowl
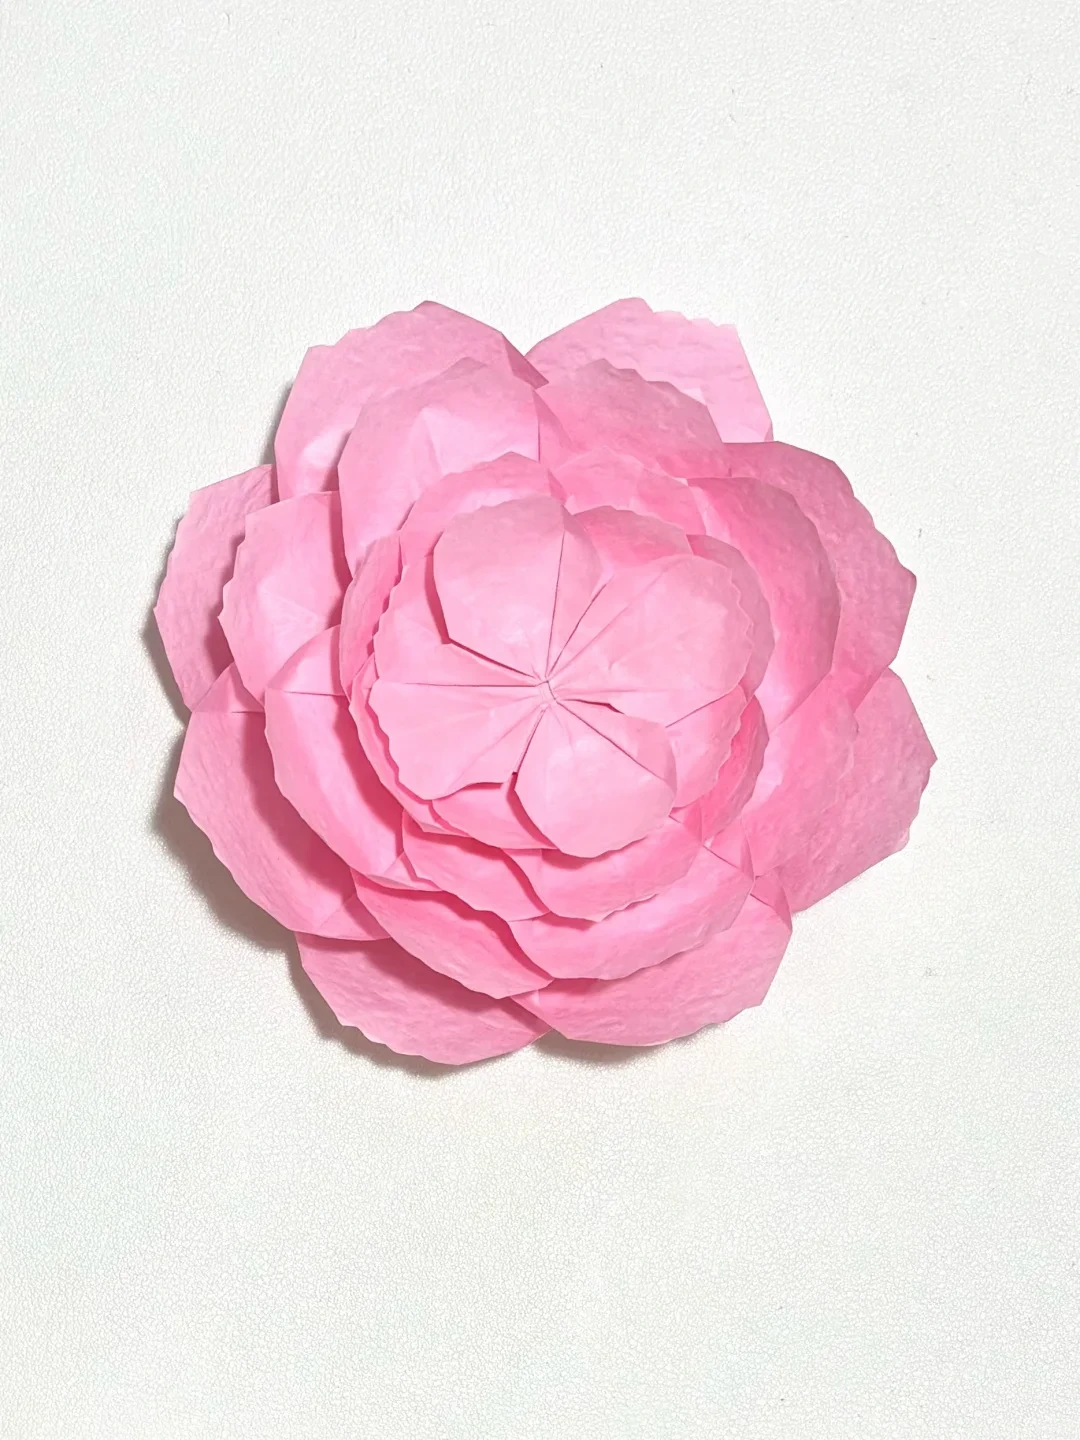 Open image at full size ↗
Lift and adjust the layered petals to form a rounded peony with space at the center.
Prepare the center strips
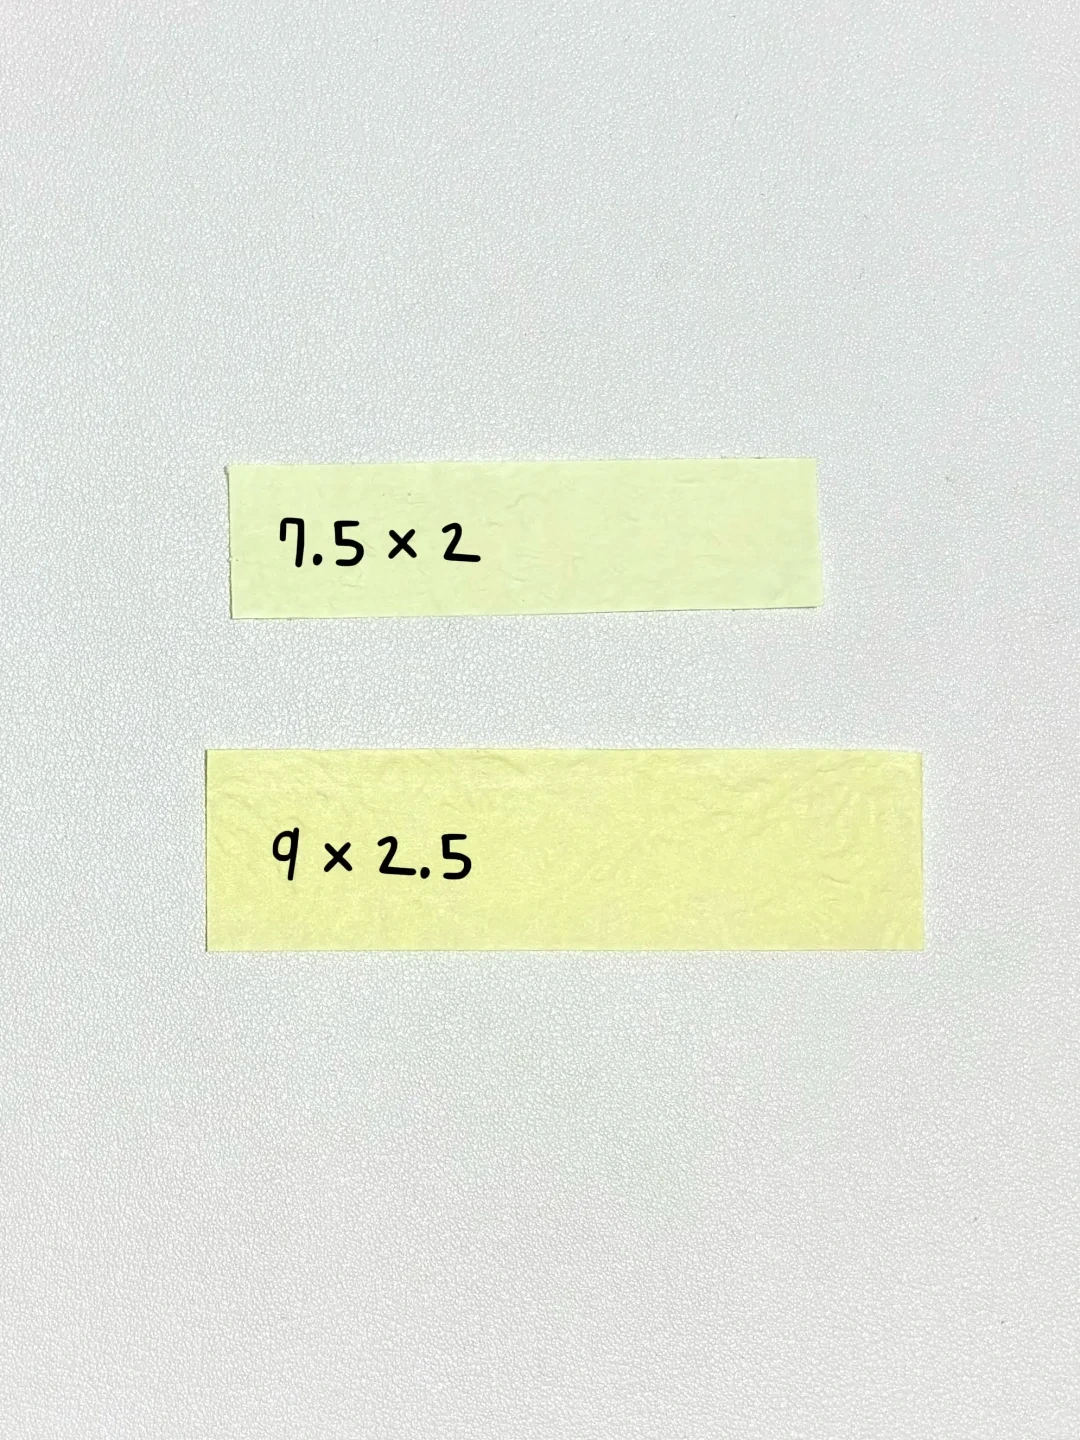 Open image at full size ↗
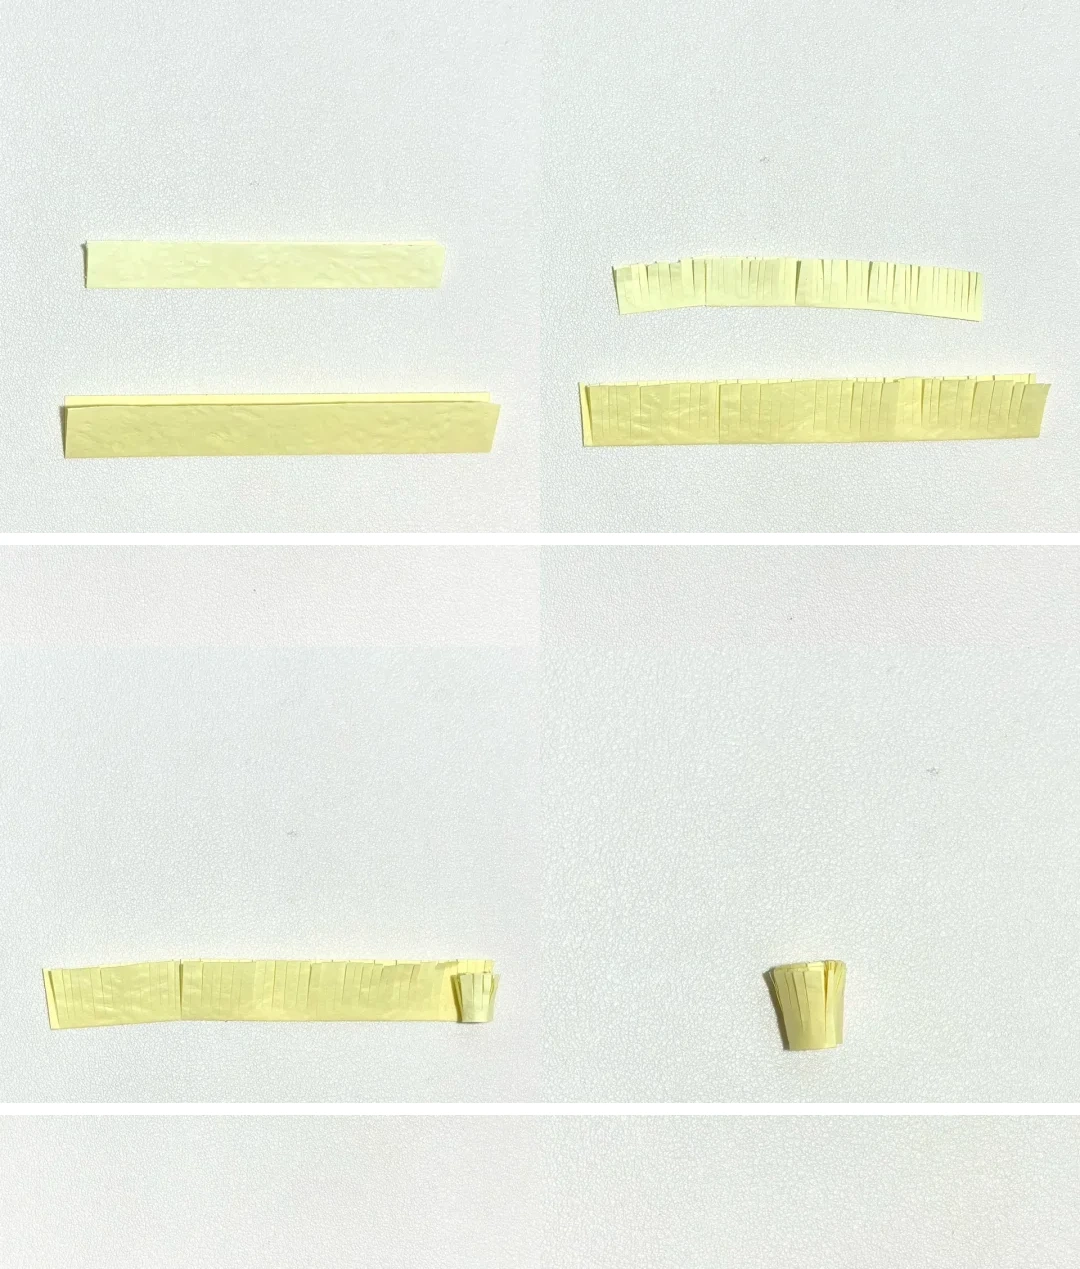
Cut two yellow rectangles: 7.5 × 2 cm and 9 × 2.5 cm.
Make a fringe center
 Open image at full size ↗
Fold each strip lengthwise. Make closely spaced fringe cuts while leaving a connected band. Roll the smaller strip first, then wrap the larger strip around it and glue the end.
Finish the peony
 Open image at full size ↗
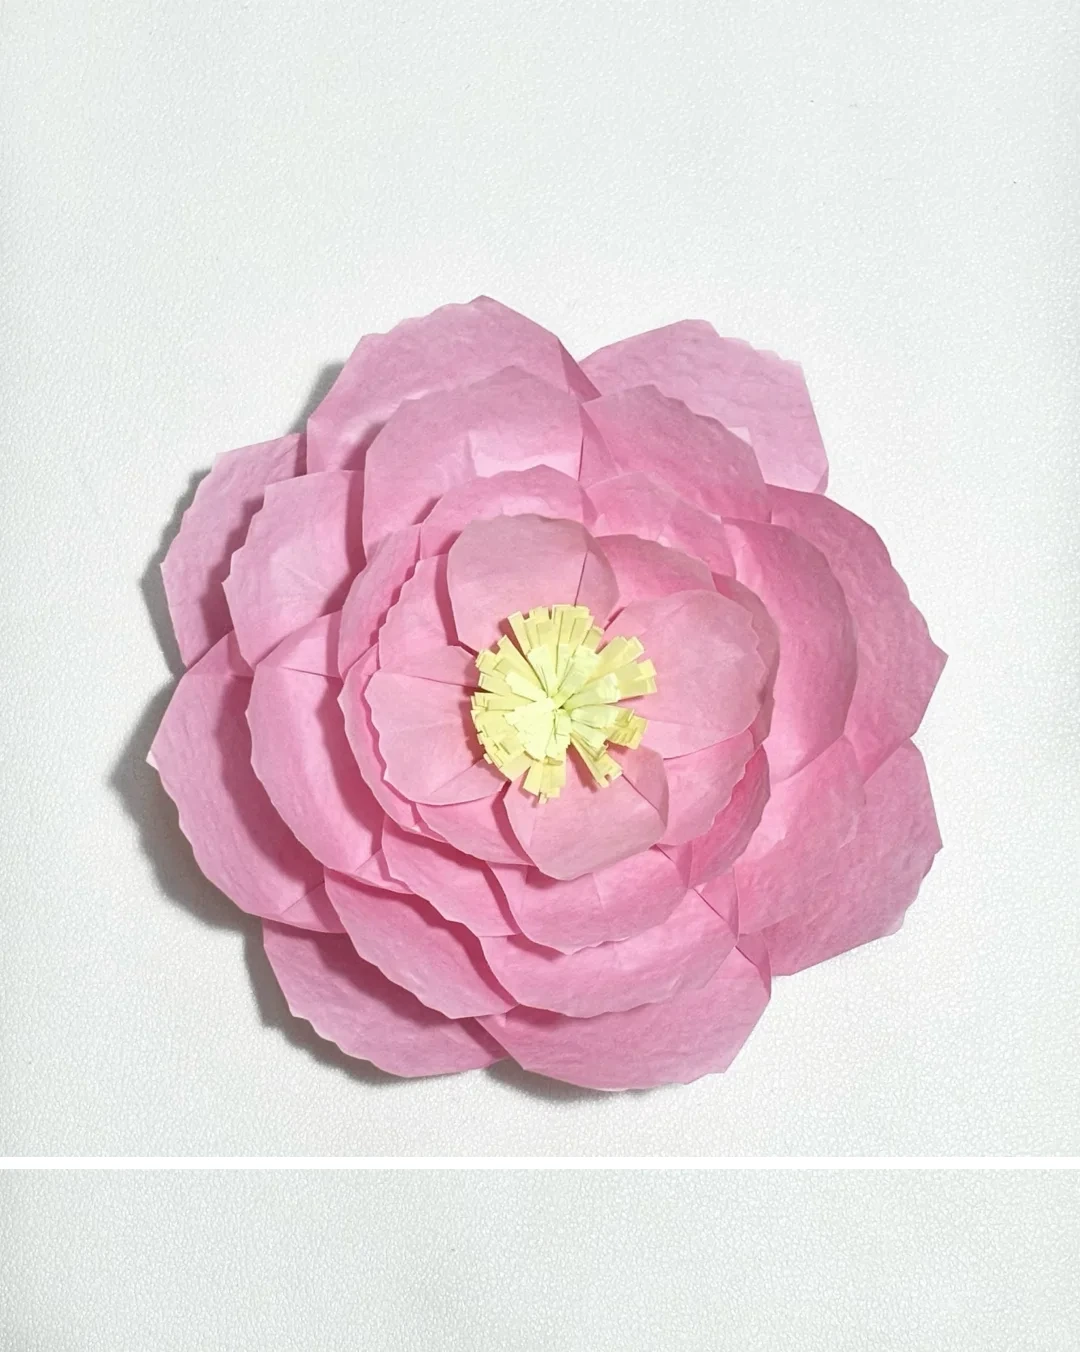
Glue the rolled fringe into the center of the layered flower. Spread the fringe and gently lift the surrounding petals.
Follow the diagrams alongside the step-by-step English instructions.
Choose your next project →