
Decorations · Step-by-step guide
Heart-Tipped Paper Crown
Make a crown from interlocking base units, five tall points and five small inflated hearts.
What you’ll need
- Fifteen black paper squares
- Five smaller red paper squares
- Glue
Modular paper folding · Interlocking units, inflated hearts & glue
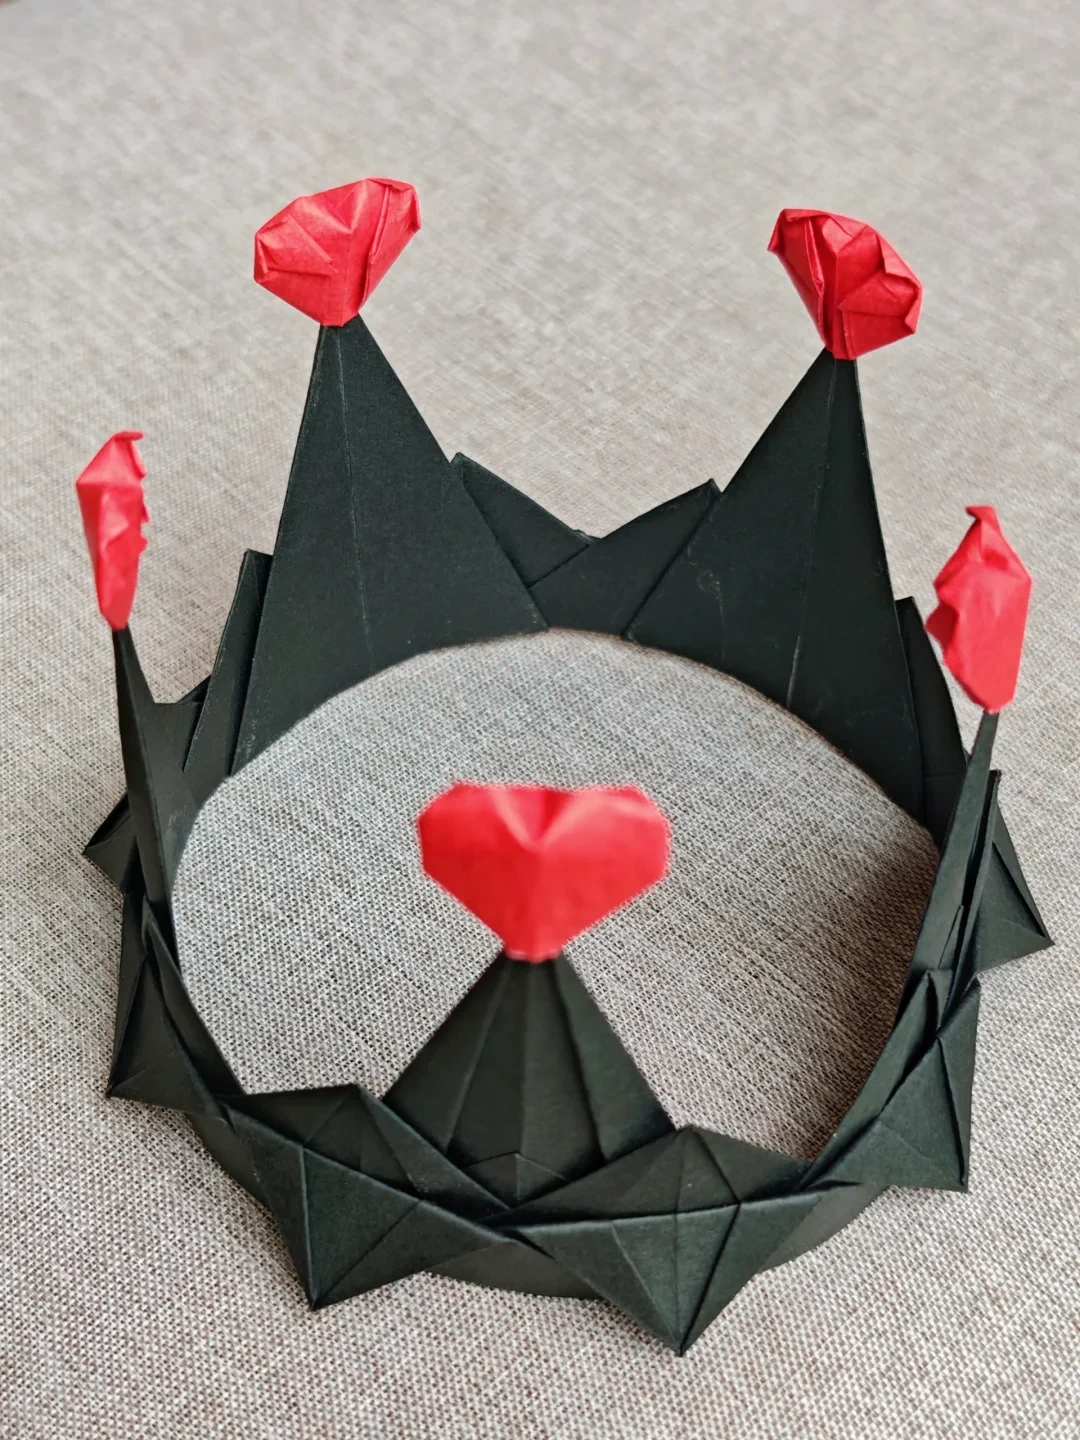
Make it, step by step.
10 steps · Original diagrams with English instructions
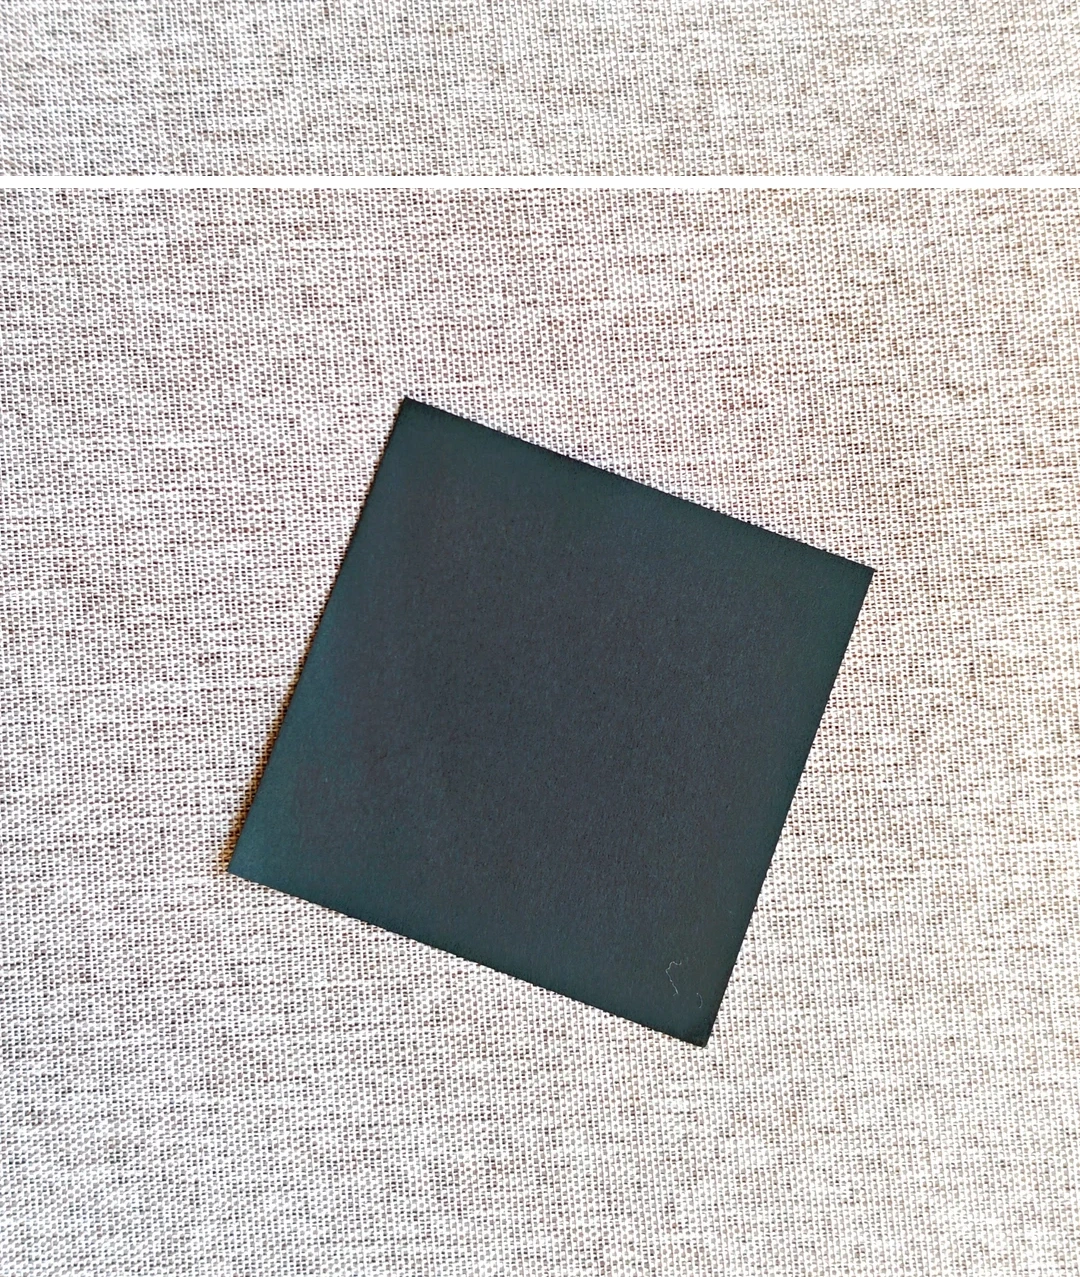
Prepare the paper
 Open image at full size ↗
Set aside ten black squares for the base, five for the tall points and five red squares for the hearts.
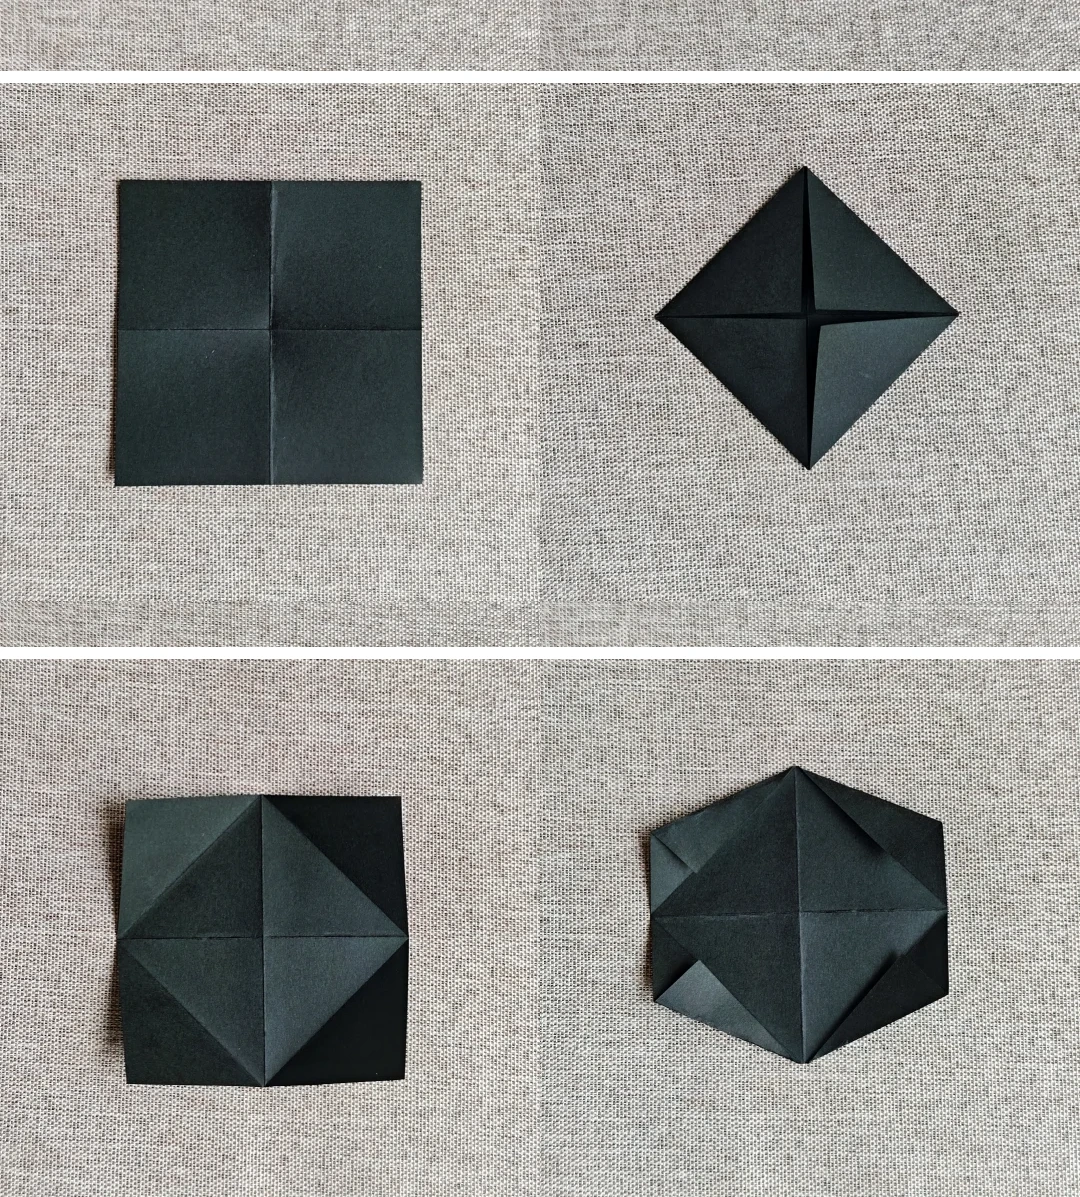
Fold a base unit
 Open image at full size ↗
Crease the square across both midlines, fold all corners to the center, reopen and refold along the smaller square shown.
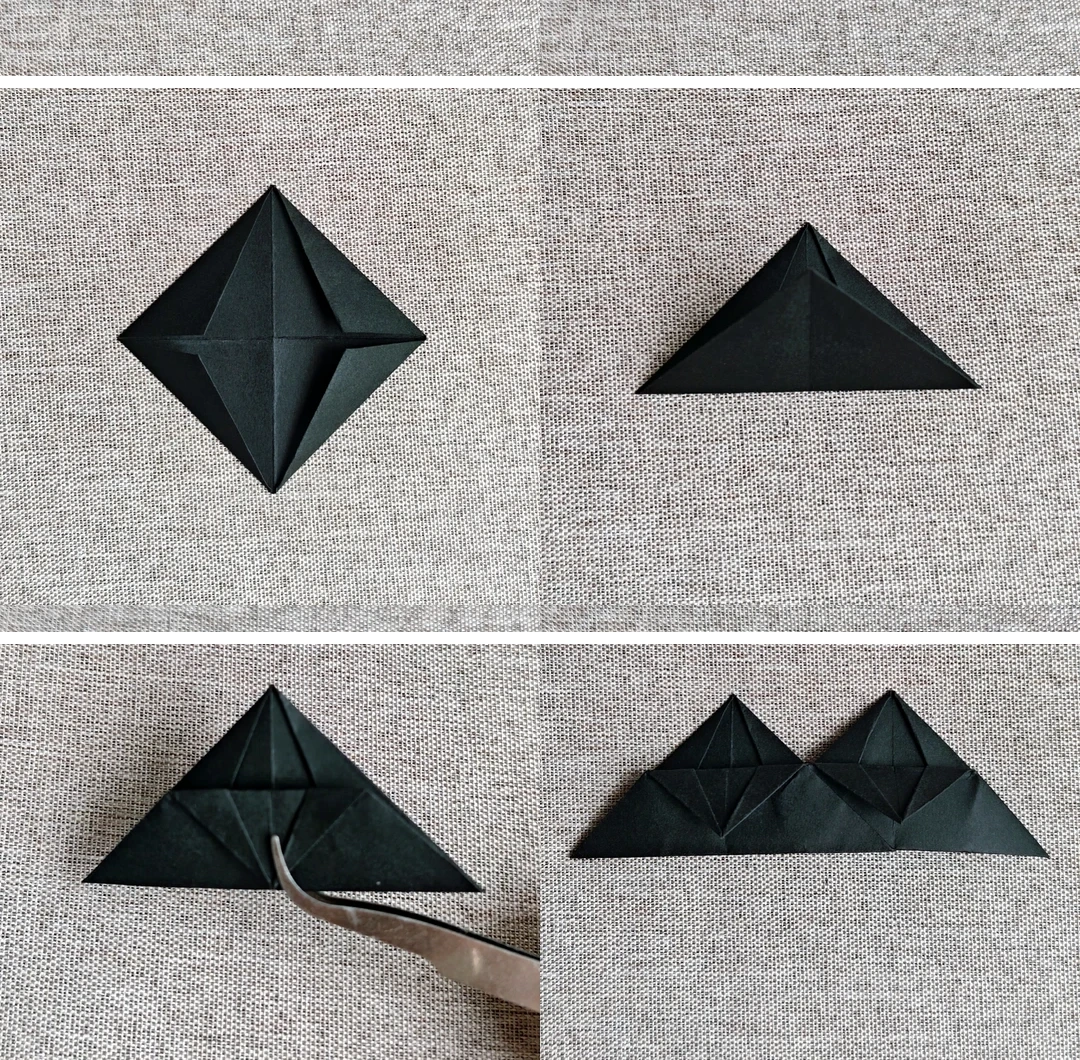
Link the base units
 Open image at full size ↗
Fold inward once more, fold upward, then fold the front section down. Make ten units and glue their interlocking overlaps.
Start a tall point
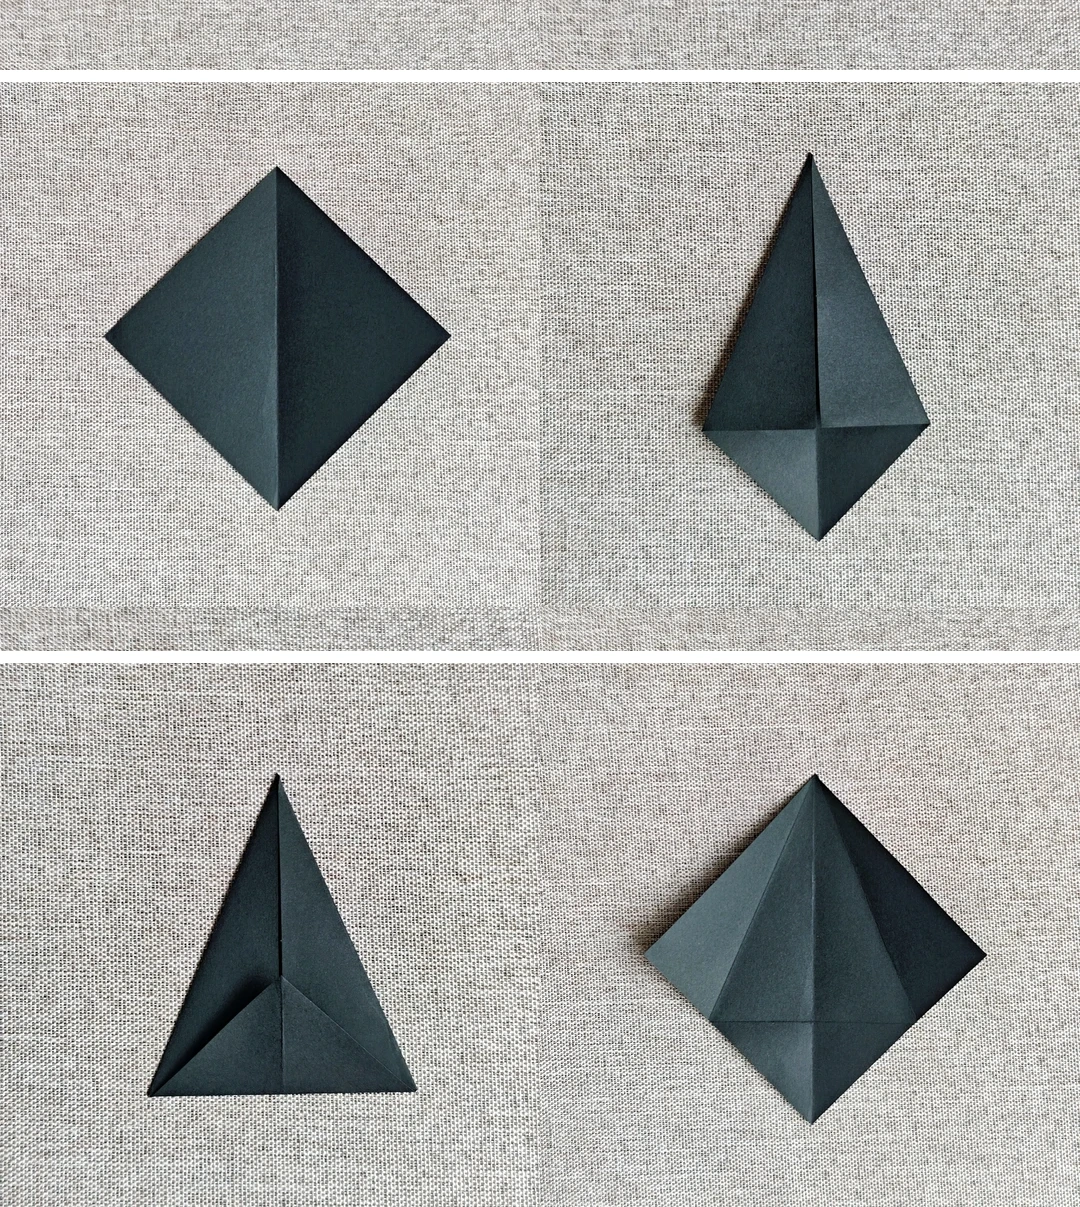 Open image at full size ↗
Crease a diagonal, fold both upper sides to the center and lift the lower triangle. Reopen that lower fold.
Finish the tall point
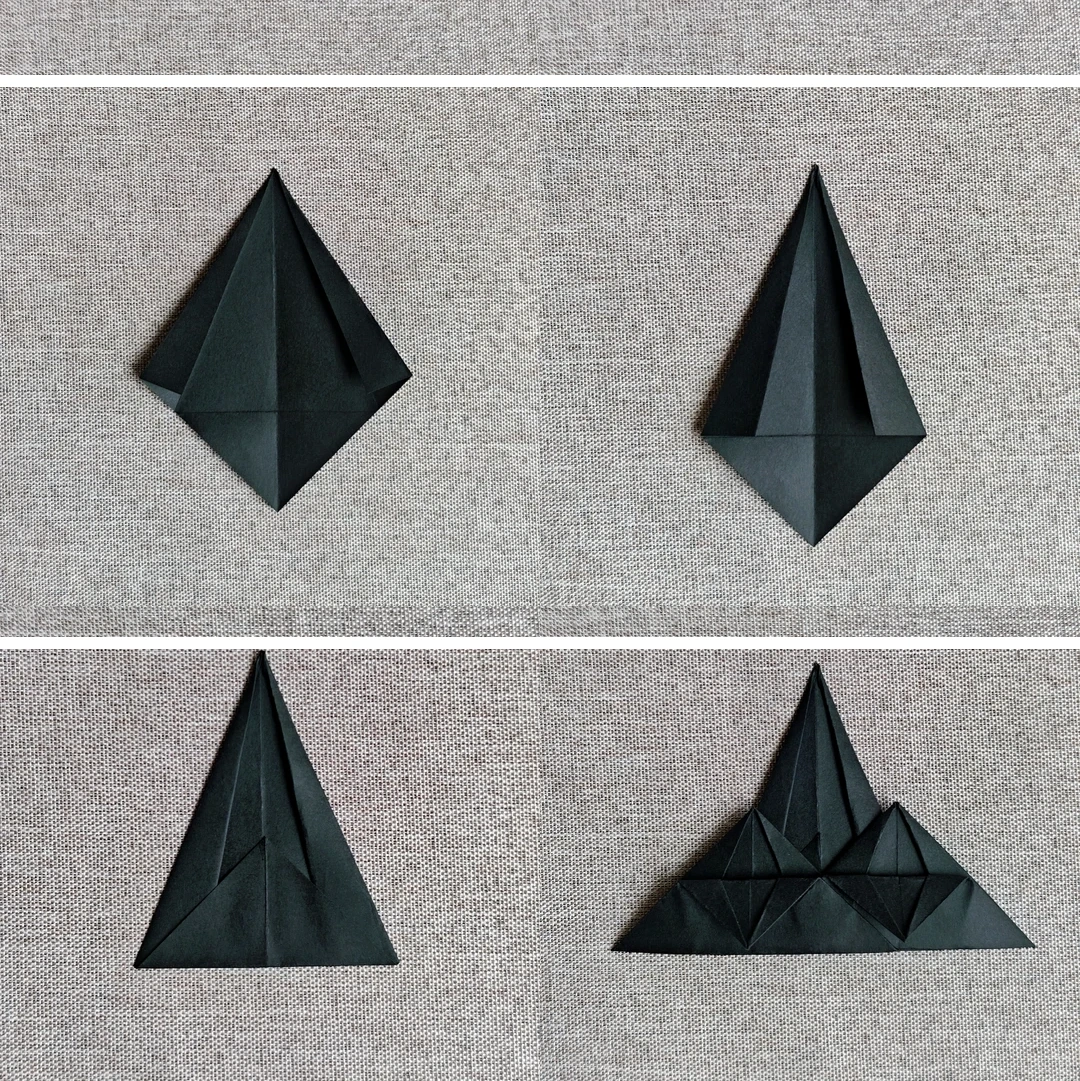 Open image at full size ↗
Refold the sides, lift the lower section and fold it inward once more. Make five and glue them into the base overlaps.
Close the crown
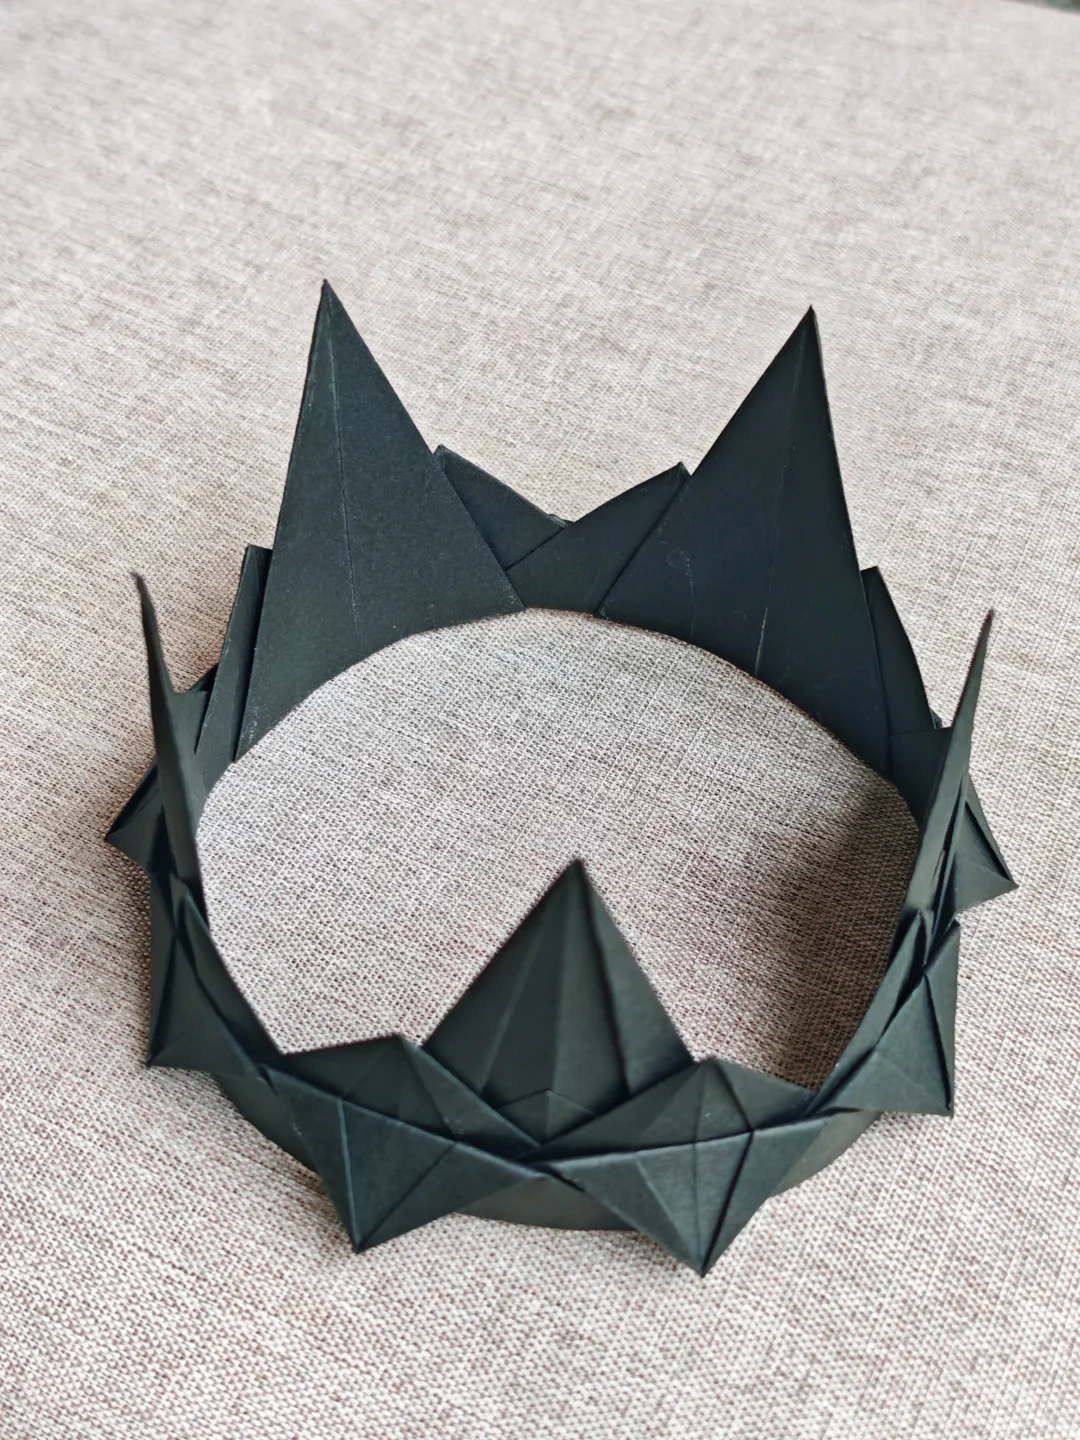 Open image at full size ↗
Join the ends of the band into a ring, spacing the five tall points evenly.
Start a heart
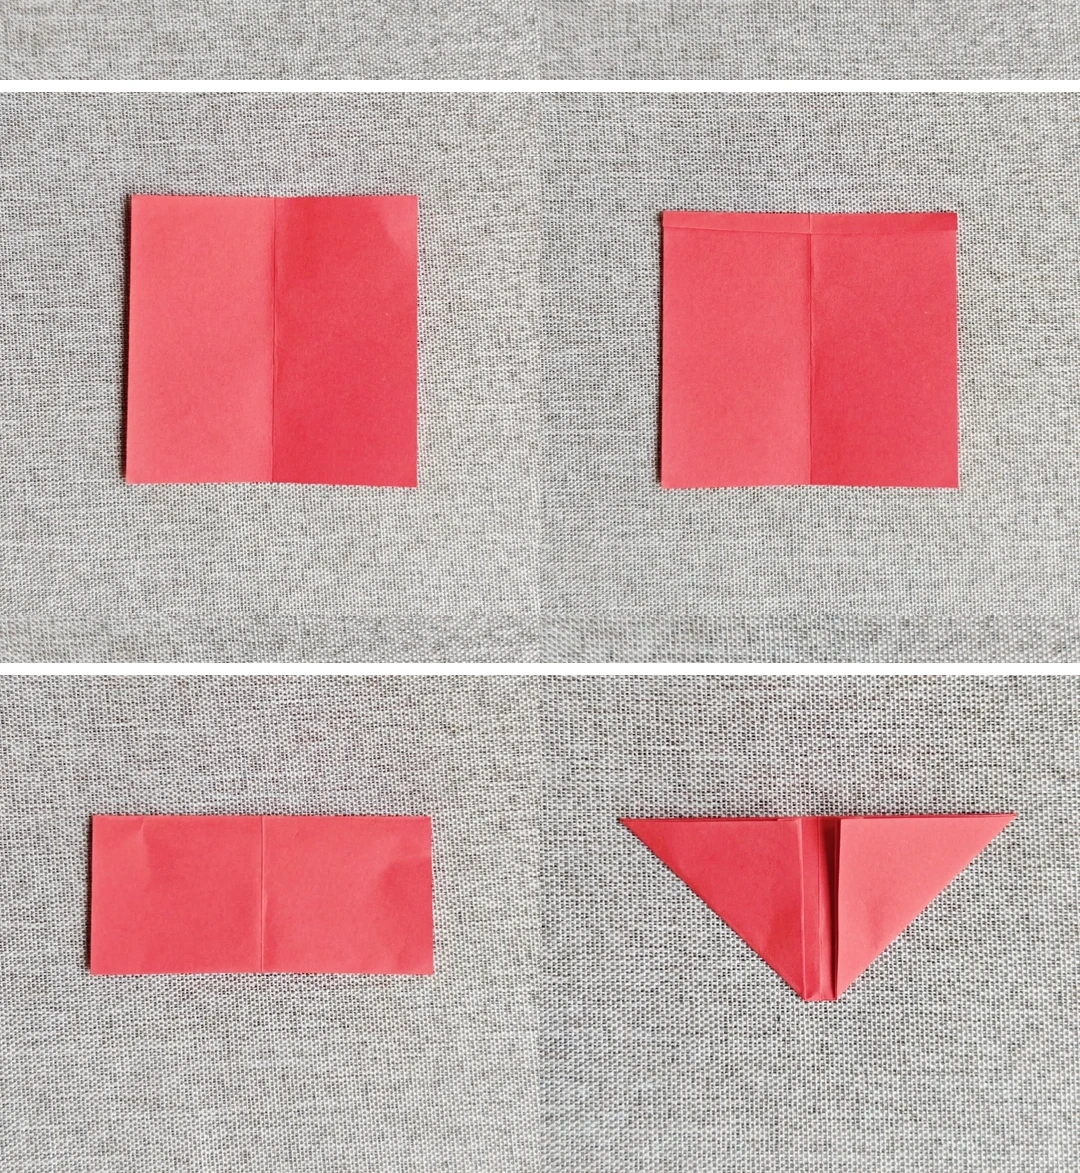 Open image at full size ↗
Crease a red square vertically, fold its top edge down slightly, then fold it in half with the opening downward. Fold the sides as pictured.
Shape the heart pocket
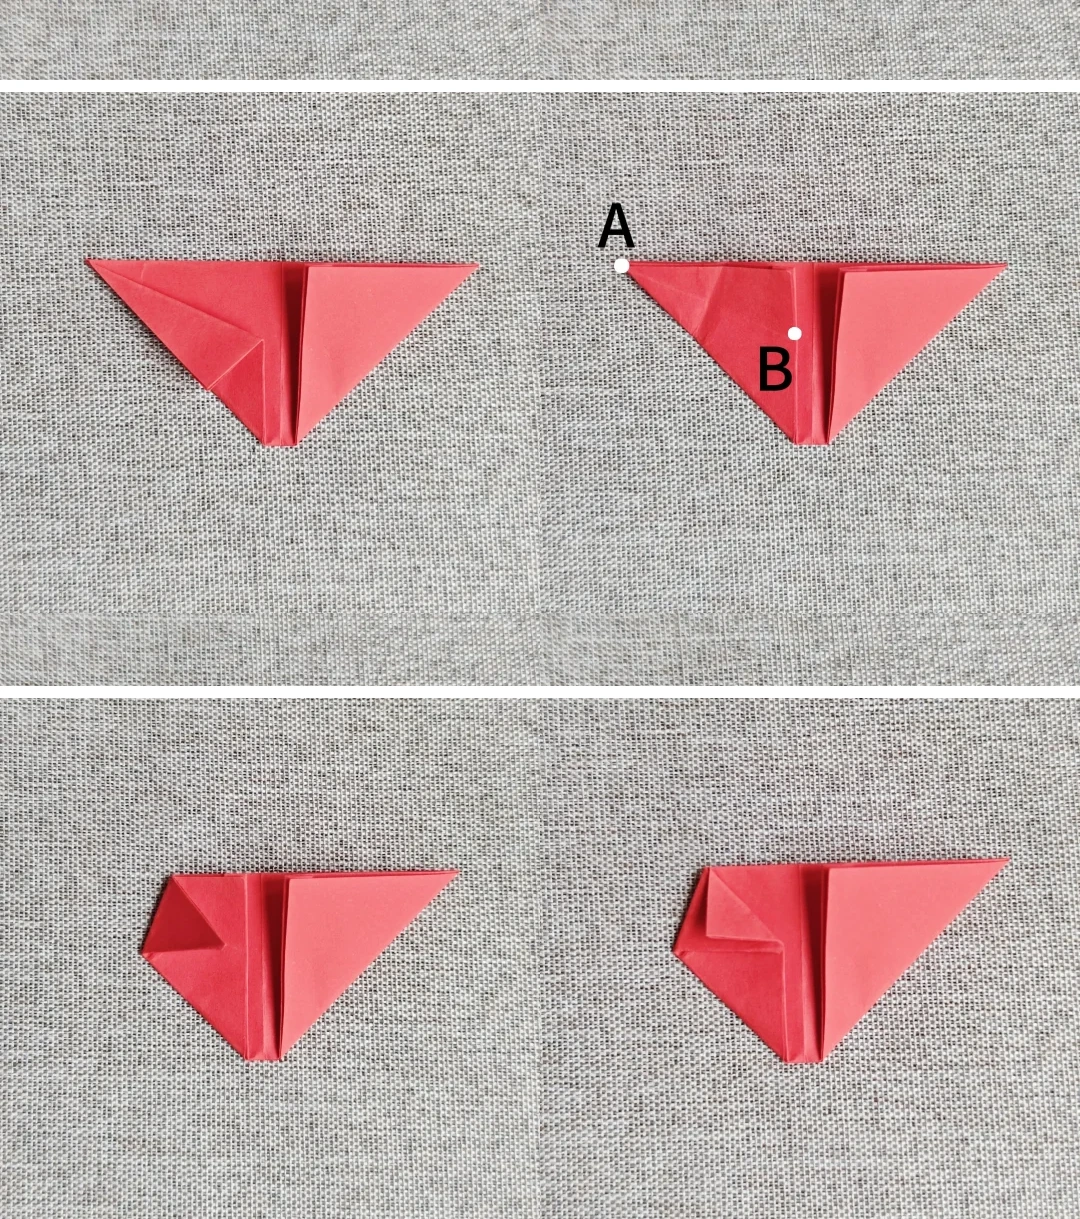 Open image at full size ↗
Bring point A to point B and crease. Fold the small section again along the pictured edge.
Inflate the heart
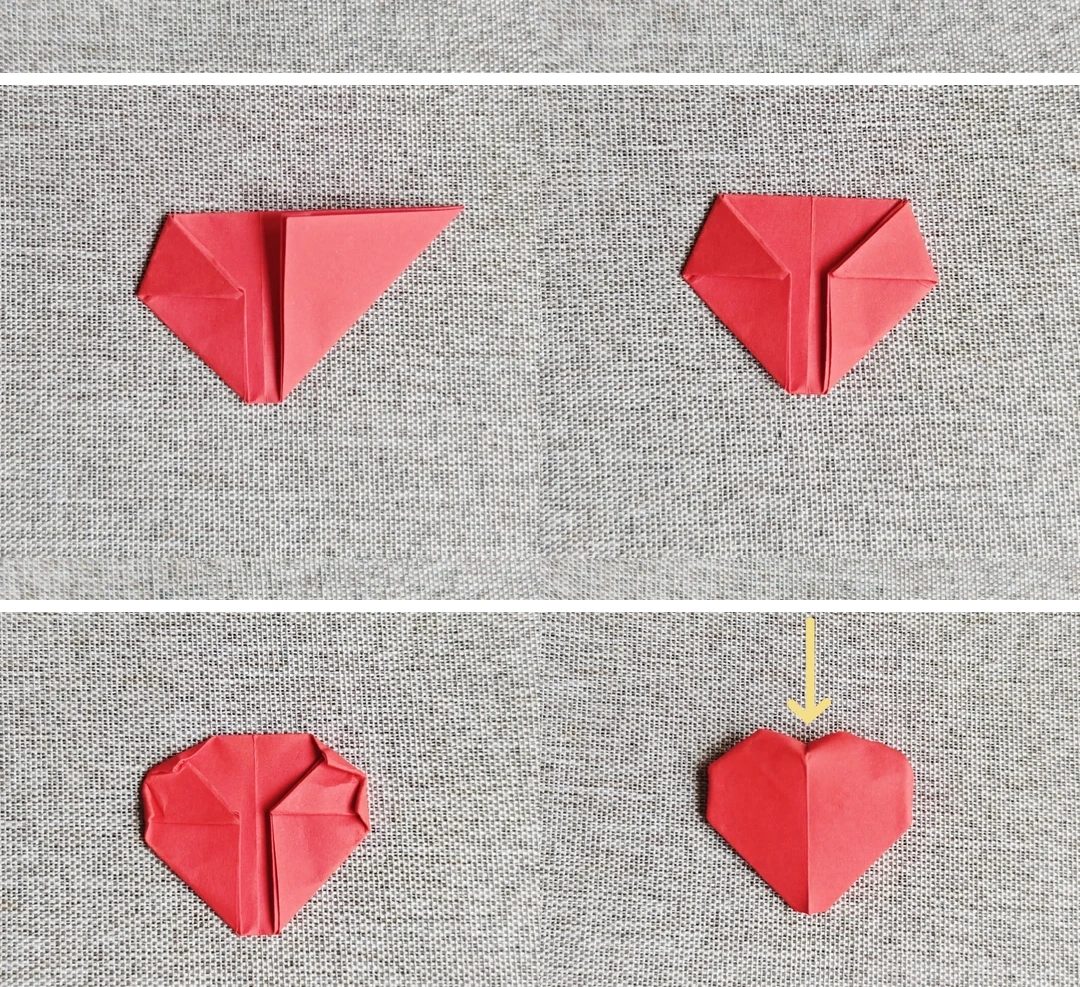 Open image at full size ↗
Tuck the flap into its pocket and repeat on the other side. Fold the four corners inward, gently inflate through the bottom opening and press the top center down. Make five hearts.
Decorate the crown
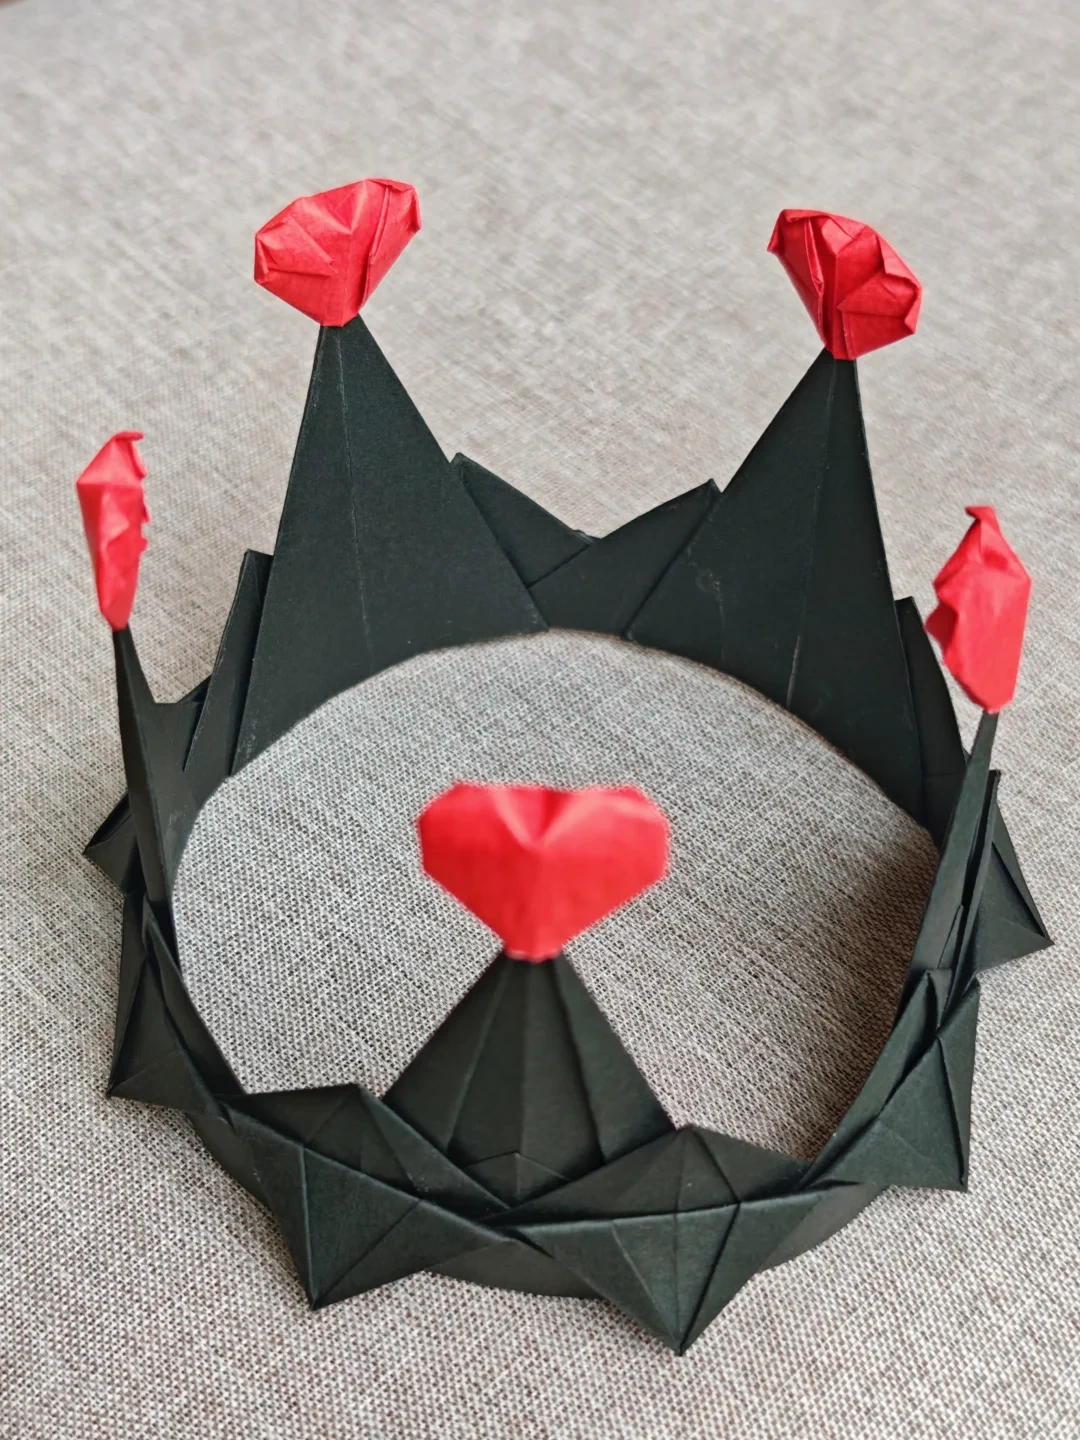 Open image at full size ↗
Attach one heart to each tall point and let the glue dry.
Follow the diagrams alongside the step-by-step English instructions.
Choose your next project →