
Decorations · Step-by-step guide
Heart-Sealed Paper Envelope
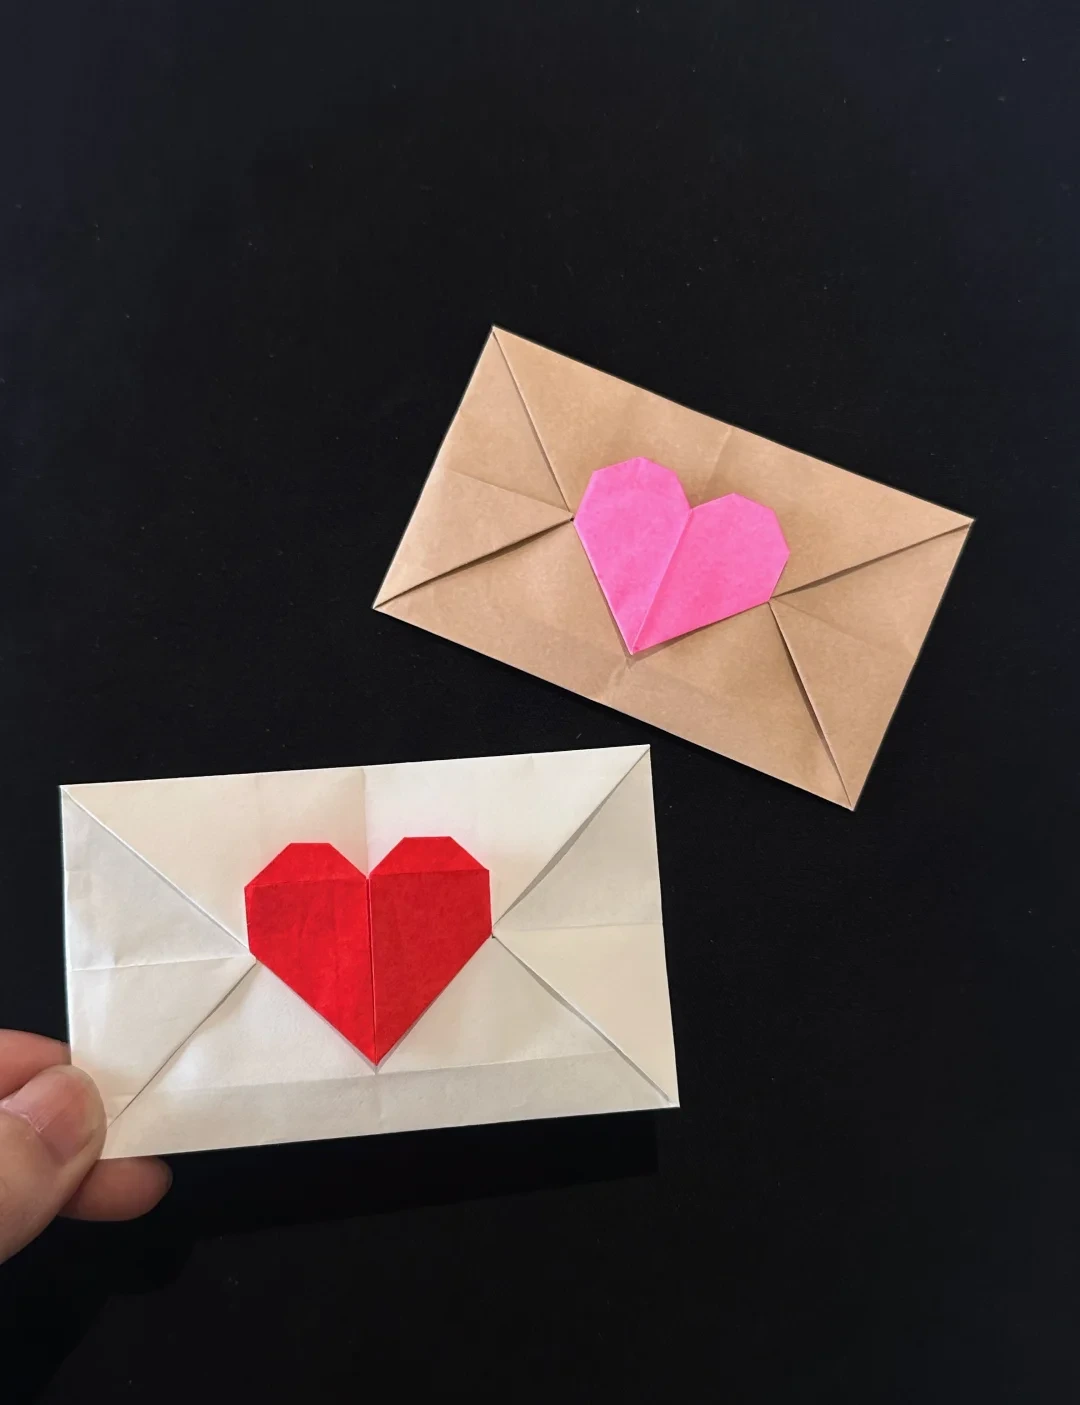
Make a small folded envelope and decorate its flap with a separate paper heart.
What you’ll need
- One 15 × 15 cm square for the envelope
- One 7.5 × 7.5 cm square, colored on one side, for the heart
- Craft glue, optional
Paper craft · Folding and assembly
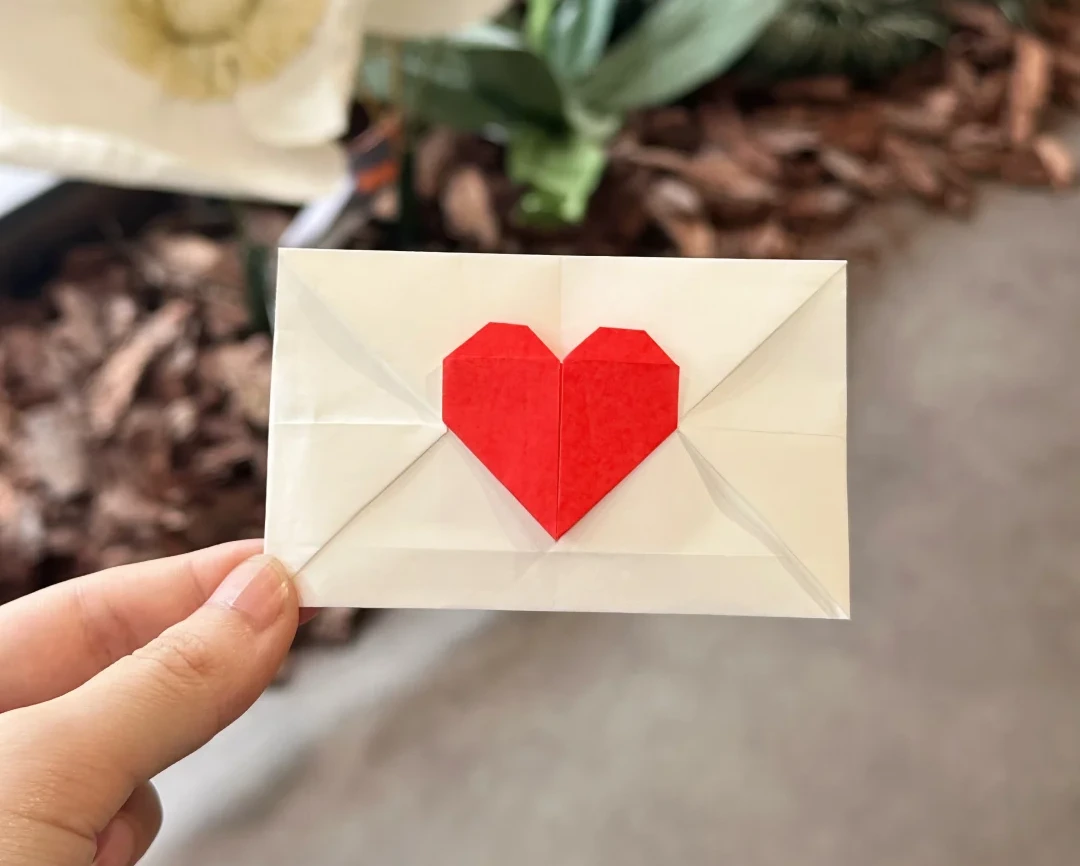
Make it, step by step.
8 steps · Original diagrams with English instructions
Read each picture from left to right, then top to bottom.
Finished model
 Open image at full size ↗
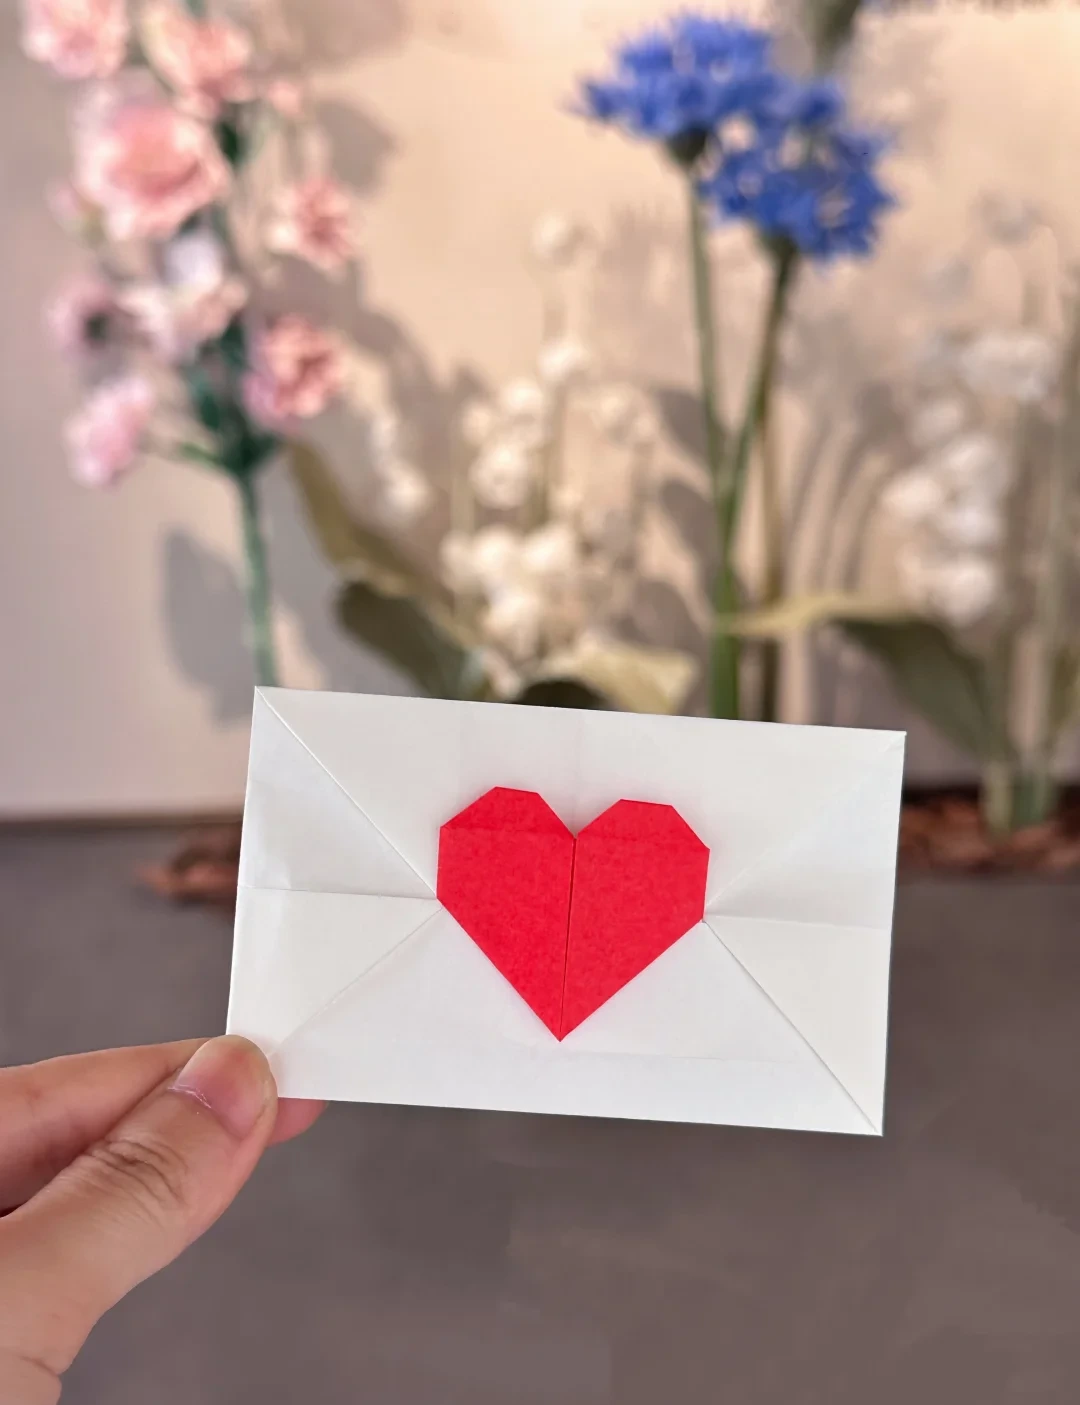
The completed model, shown from another angle to help check its shape and proportions.
Finished model
 Open image at full size ↗
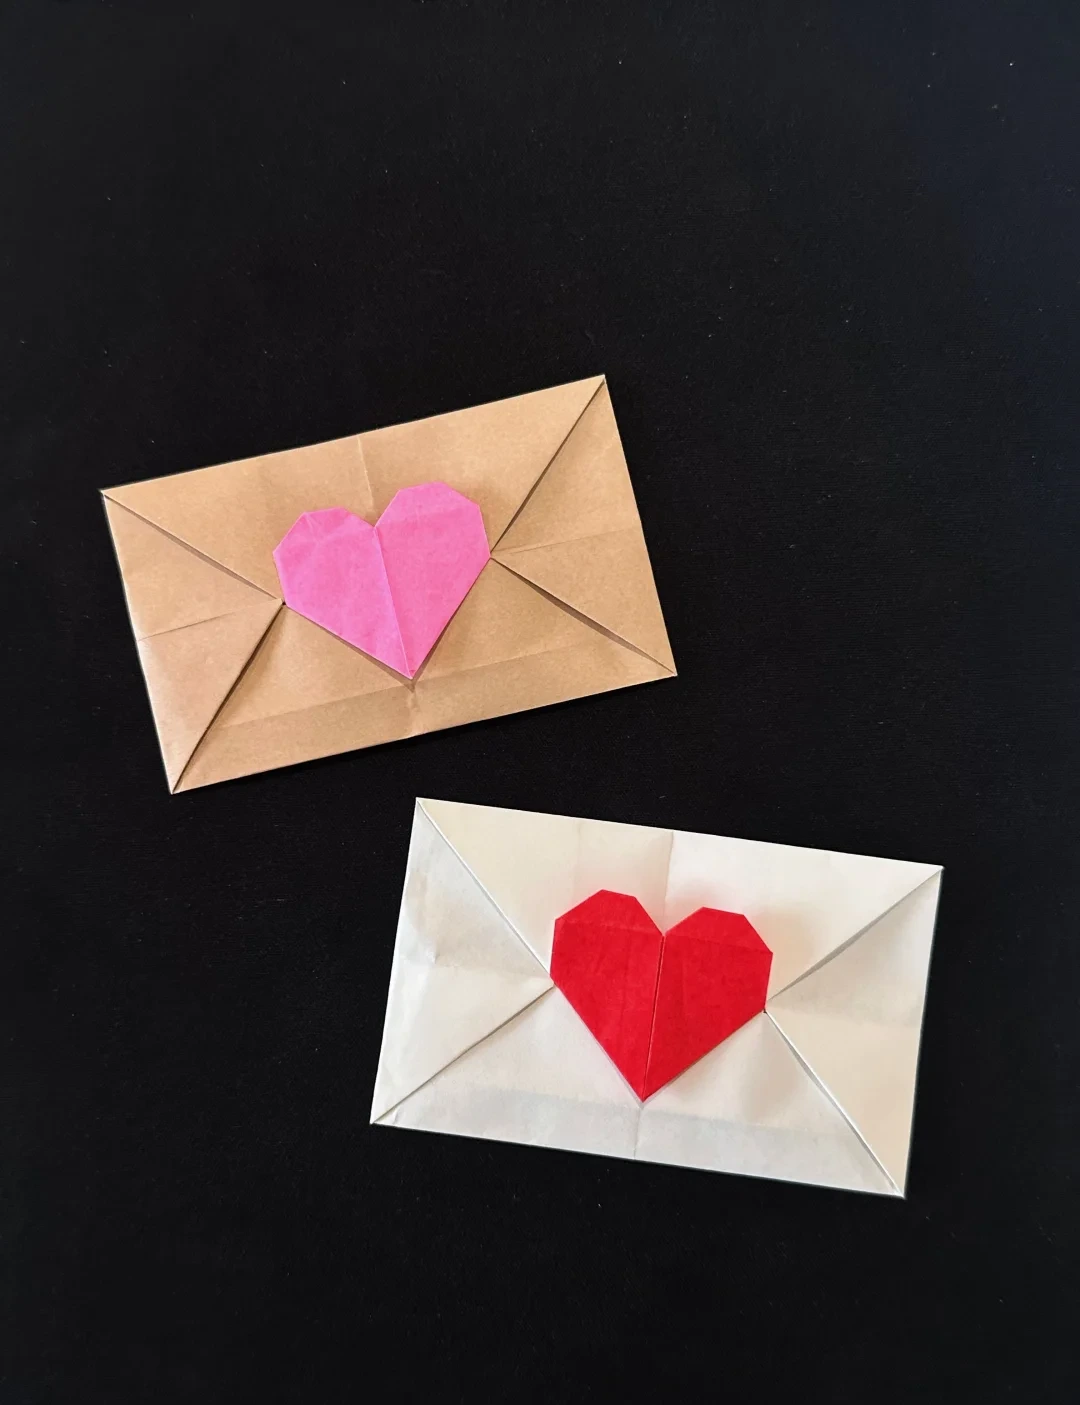
The completed model, shown from another angle to help check its shape and proportions.
Mark the envelope
 Open image at full size ↗
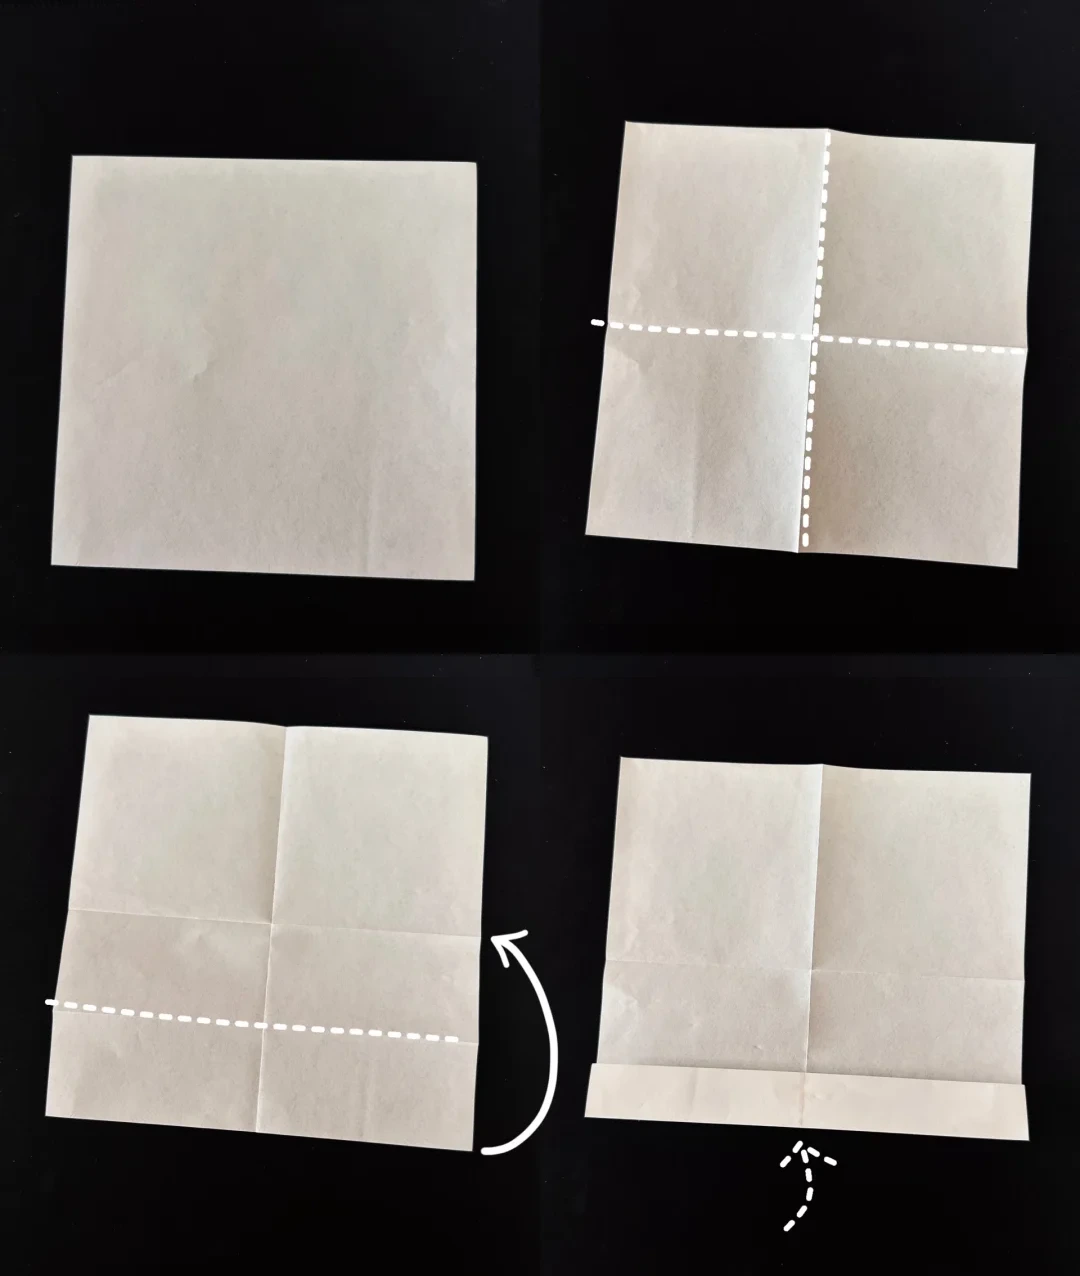
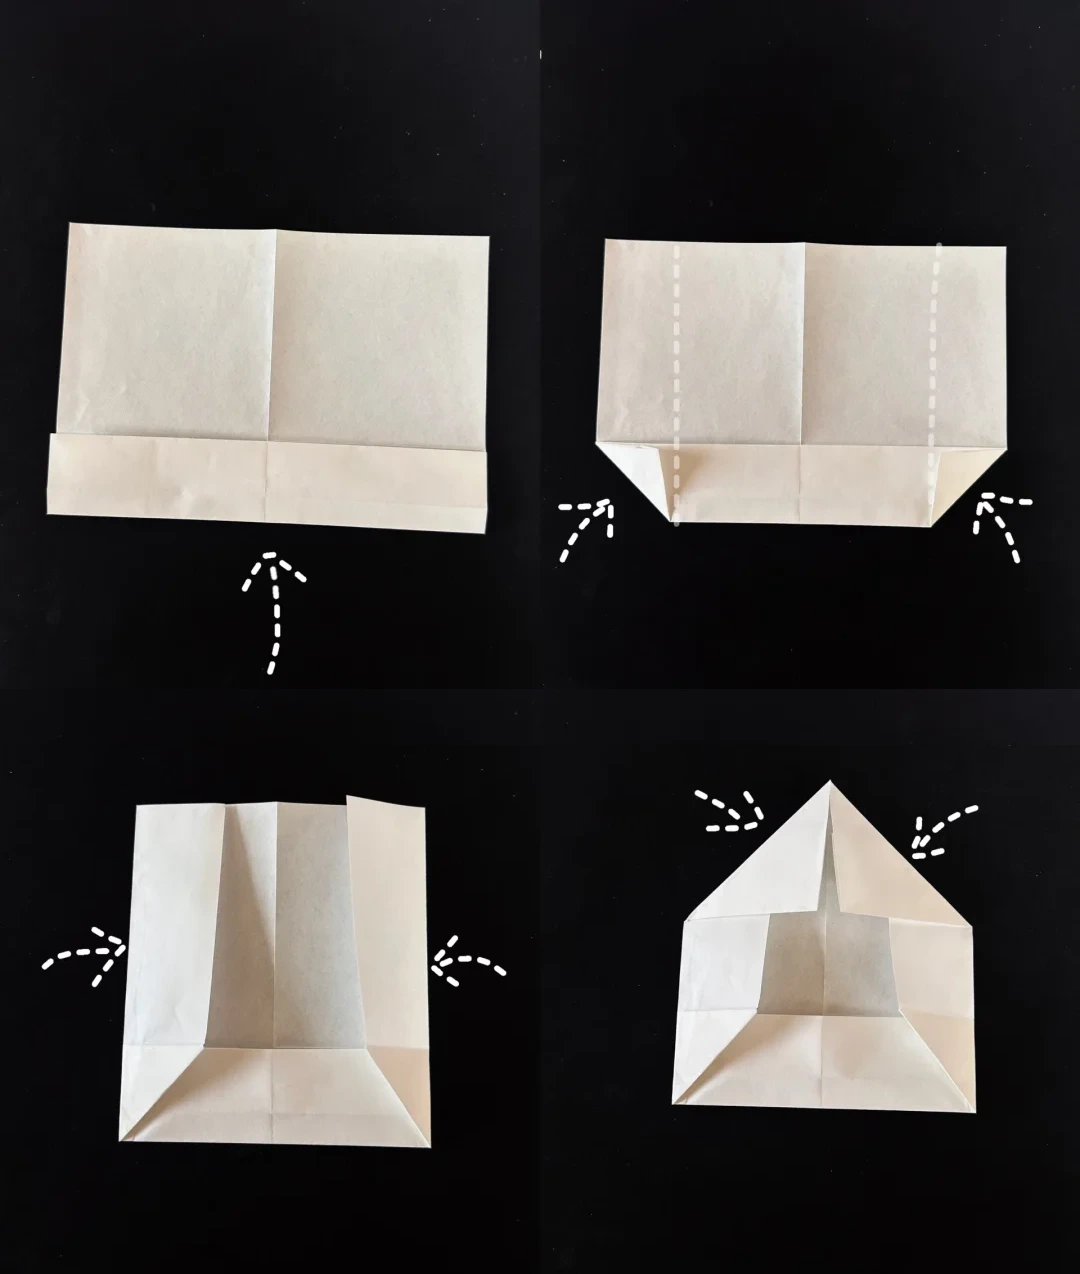
Fold the large square in half in both directions and reopen it. Fold the bottom edge upward along the lower guide, then fold it upward once more as pictured.
Fold the envelope sides
 Open image at full size ↗
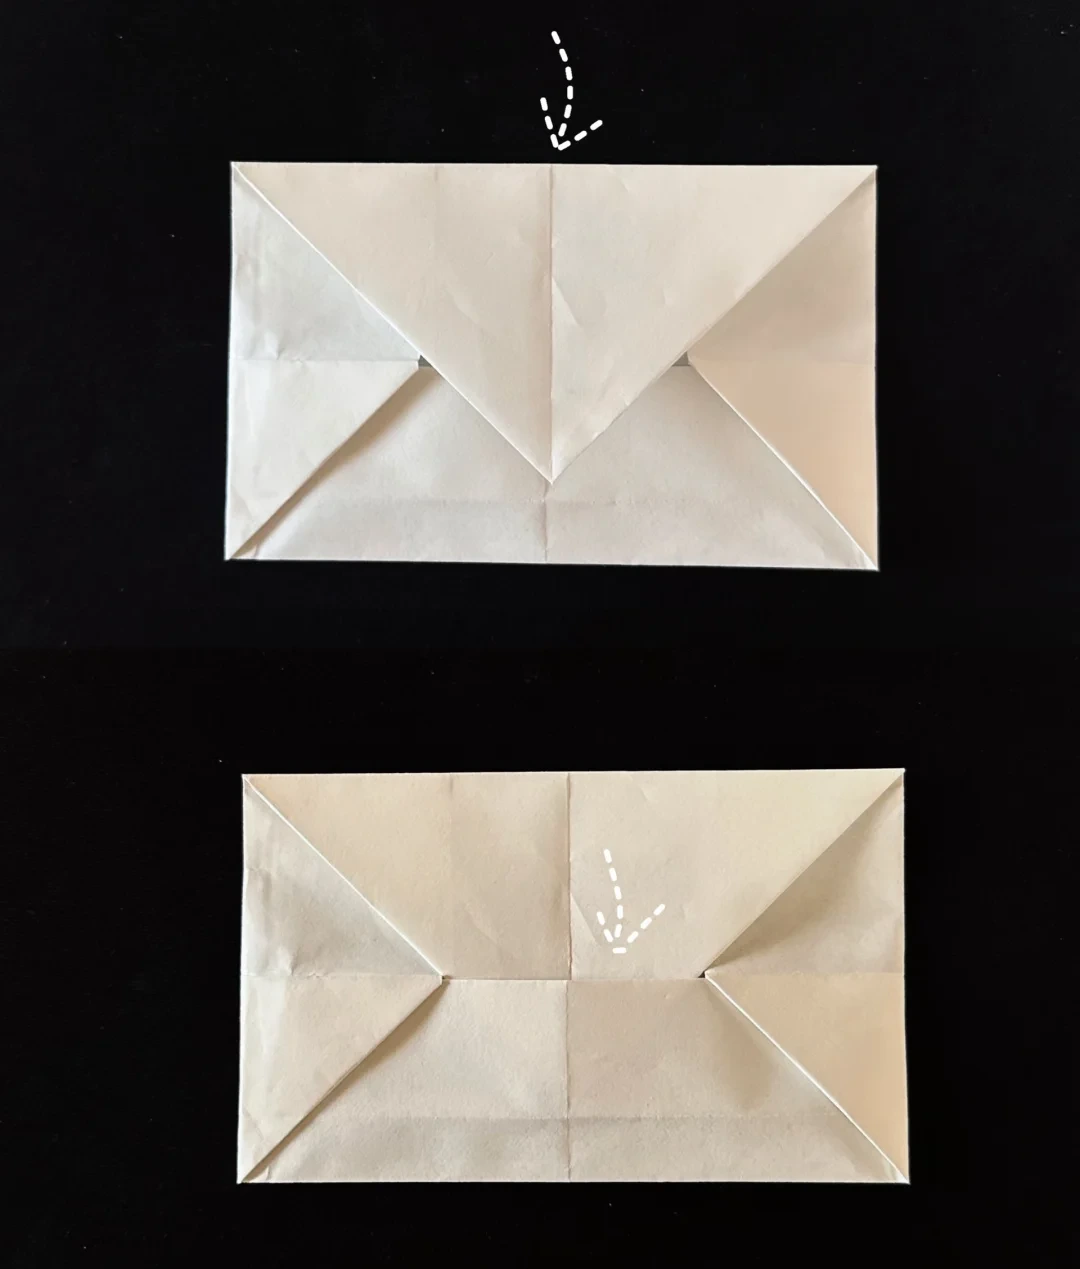
Fold the lower strip upward again. Fold its two corners inward, then bring the side edges to the center. Fold the upper corners toward the middle.
Close the flap
 Open image at full size ↗
Fold the upper triangular flap downward. Tuck its point into the pocket formed by the lower layers.
Start the heart
 Open image at full size ↗
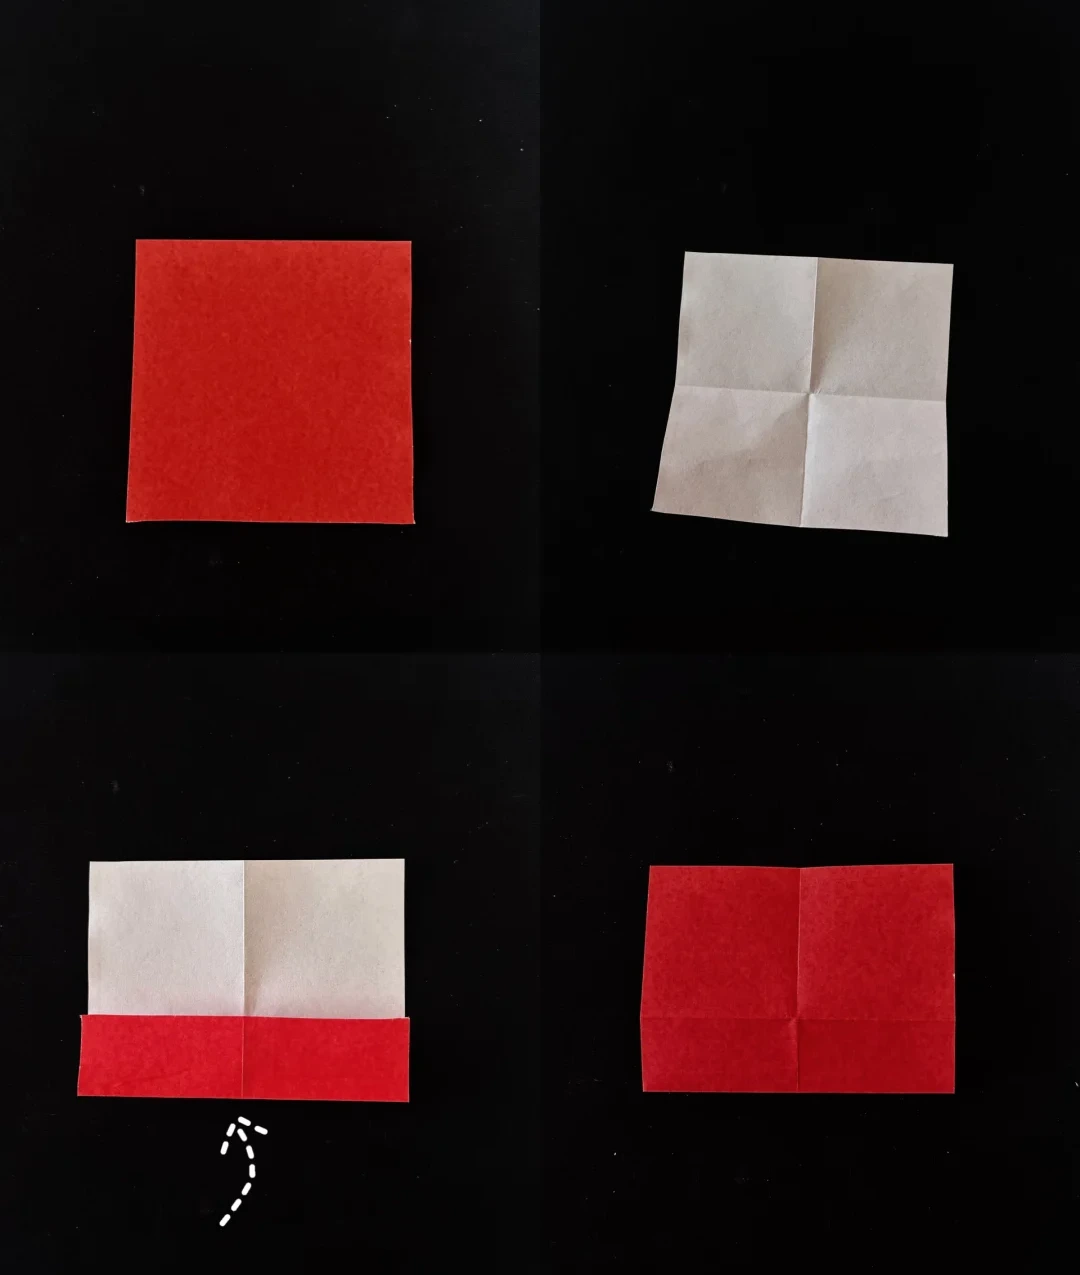
Crease the small square in half in both directions. With the pale side up, fold the lower edge to the center line, then turn the paper over.
Make the heart point
 Open image at full size ↗
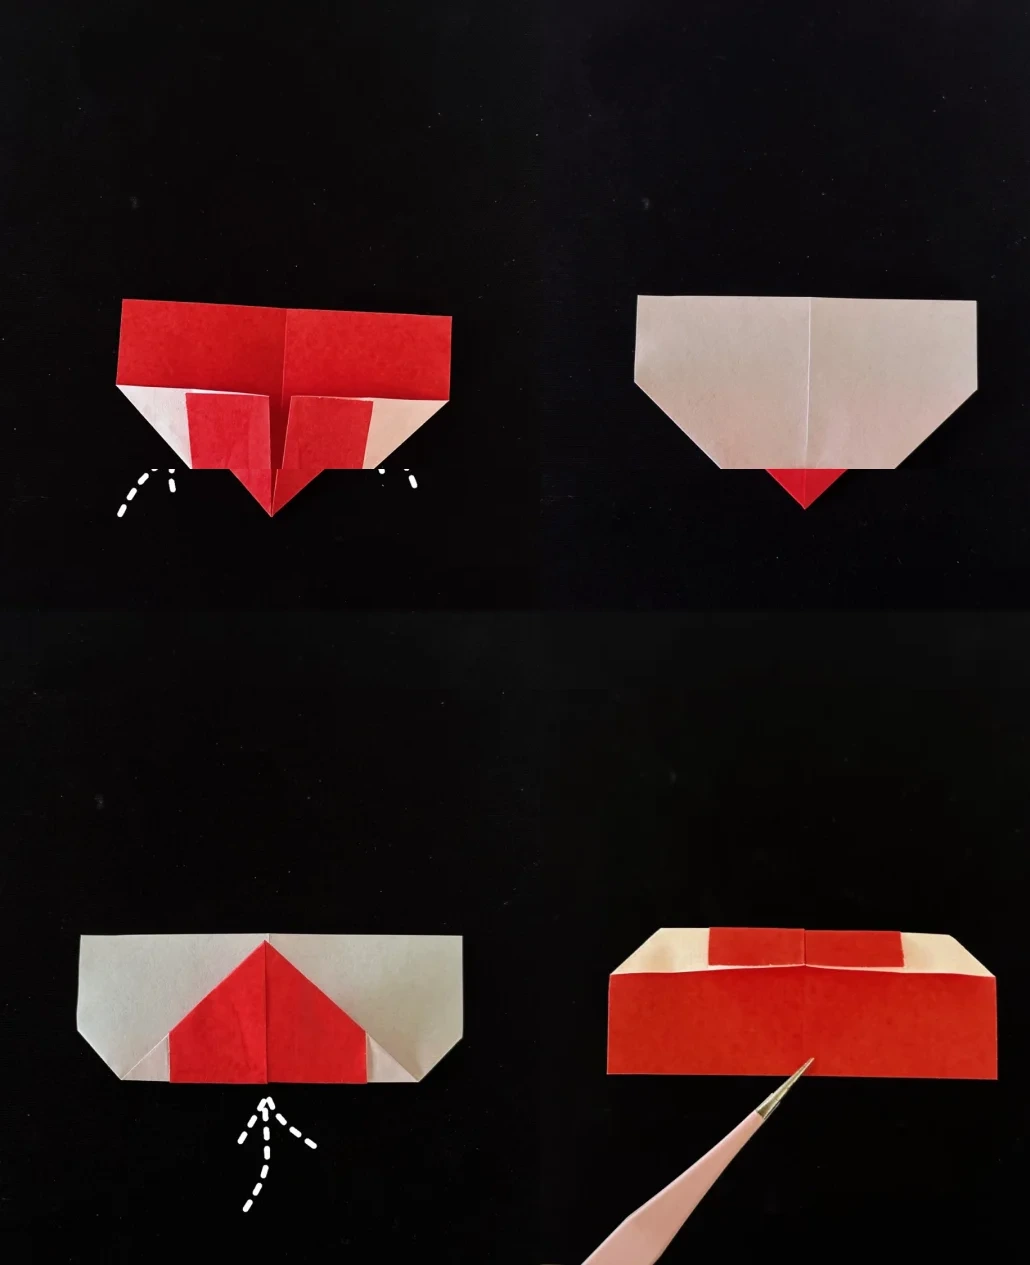
Fold the two lower sides toward the center to form a point. Turn the paper over and fold upward as shown, then turn it over again.
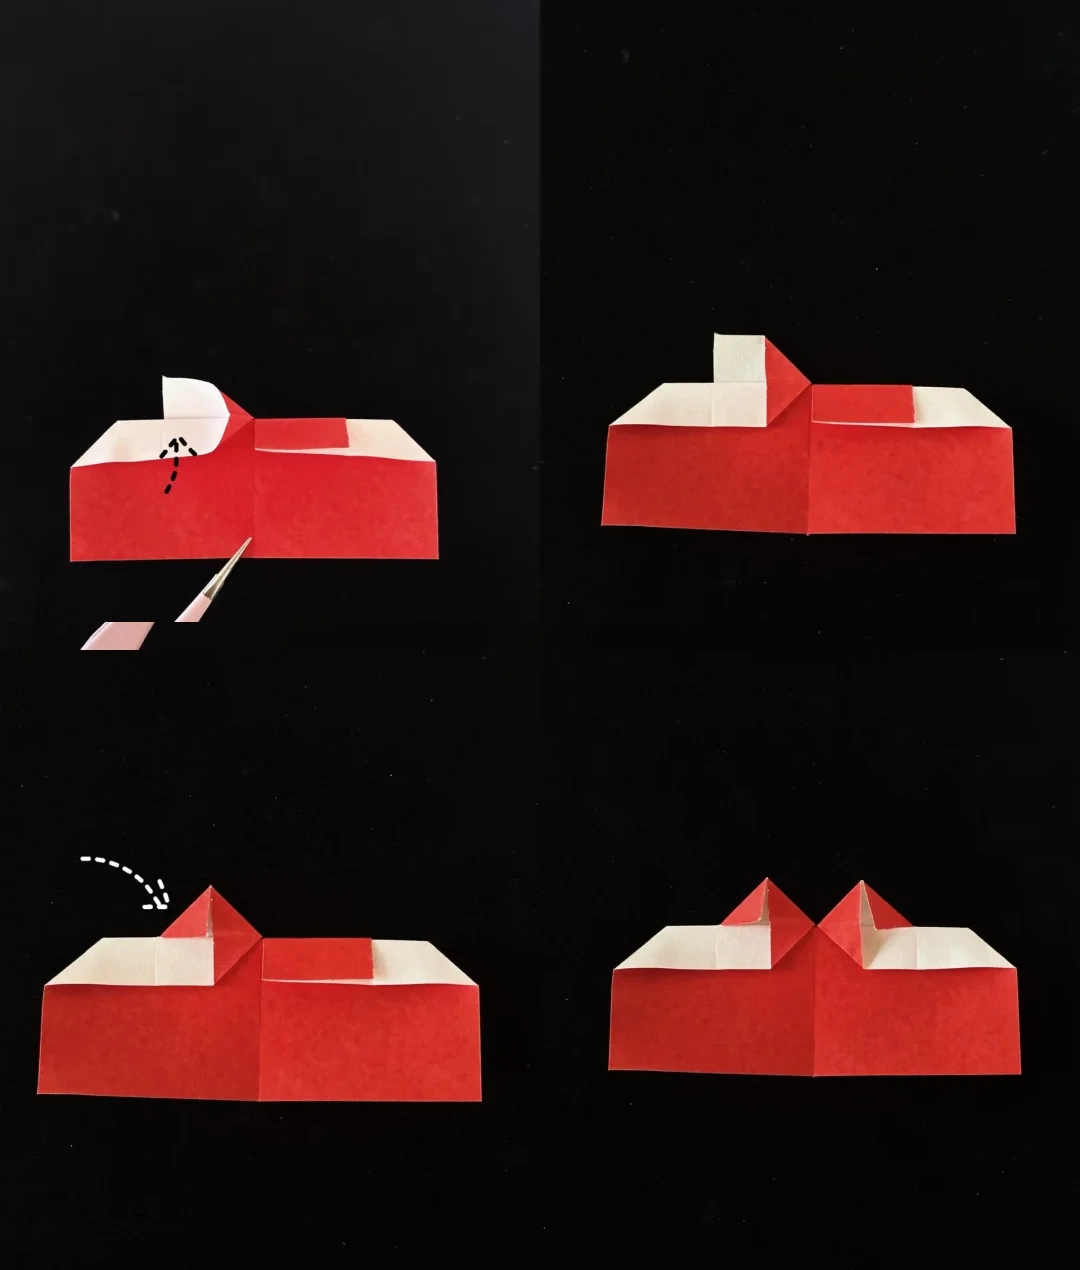
Open the top pockets
 Open image at full size ↗
Lift the left pocket and squash it flat. Fold its corner to the right along the guide. Repeat symmetrically on the other side.
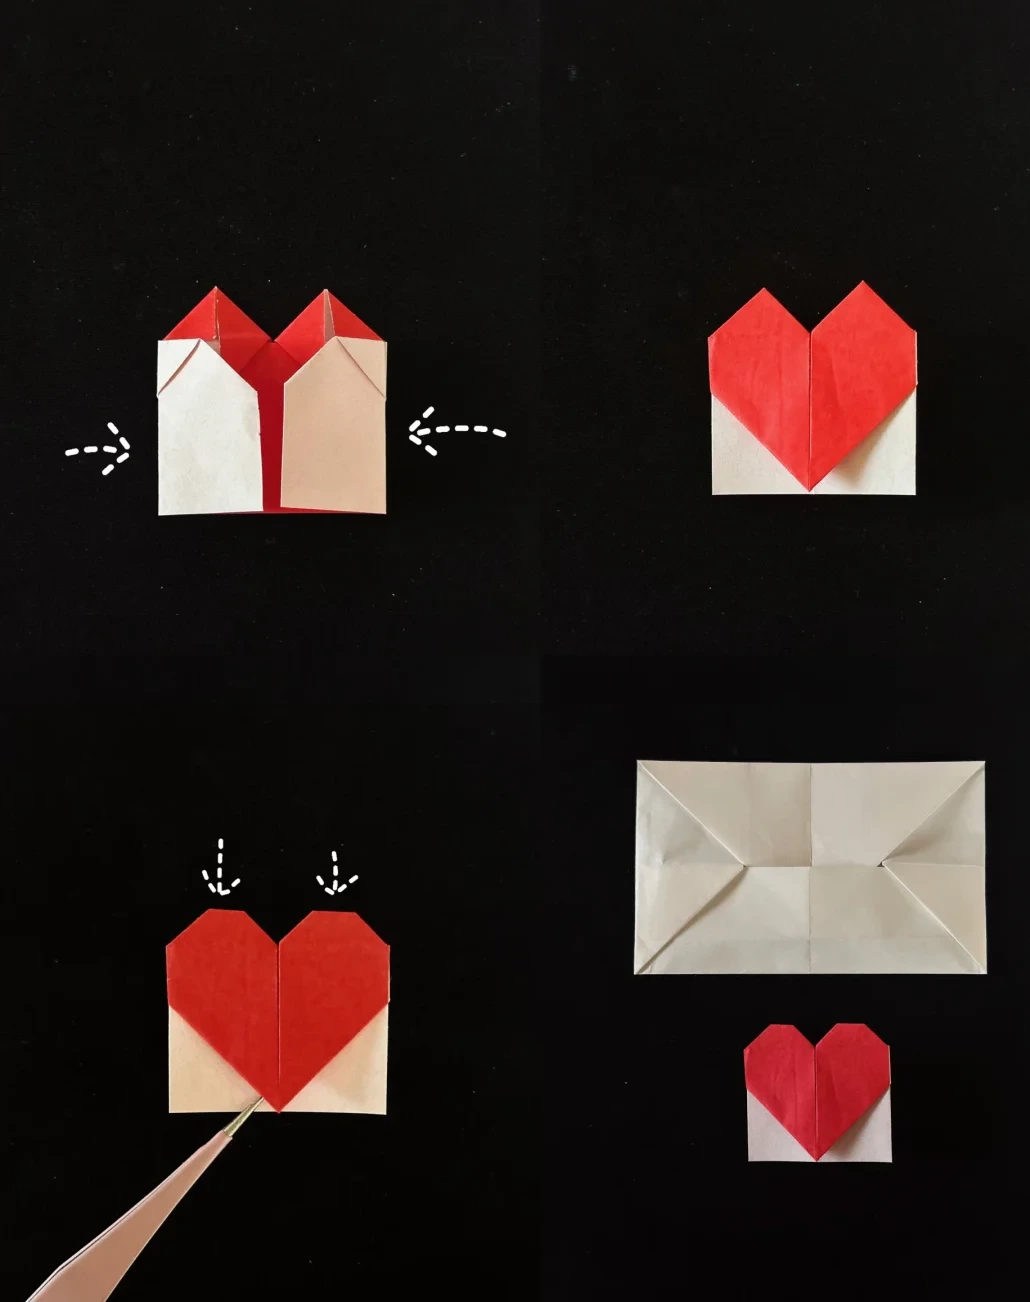
Round the heart
 Open image at full size ↗
Fold both outer sides toward the center. Turn the model over and fold the small top corners behind to round the two lobes.
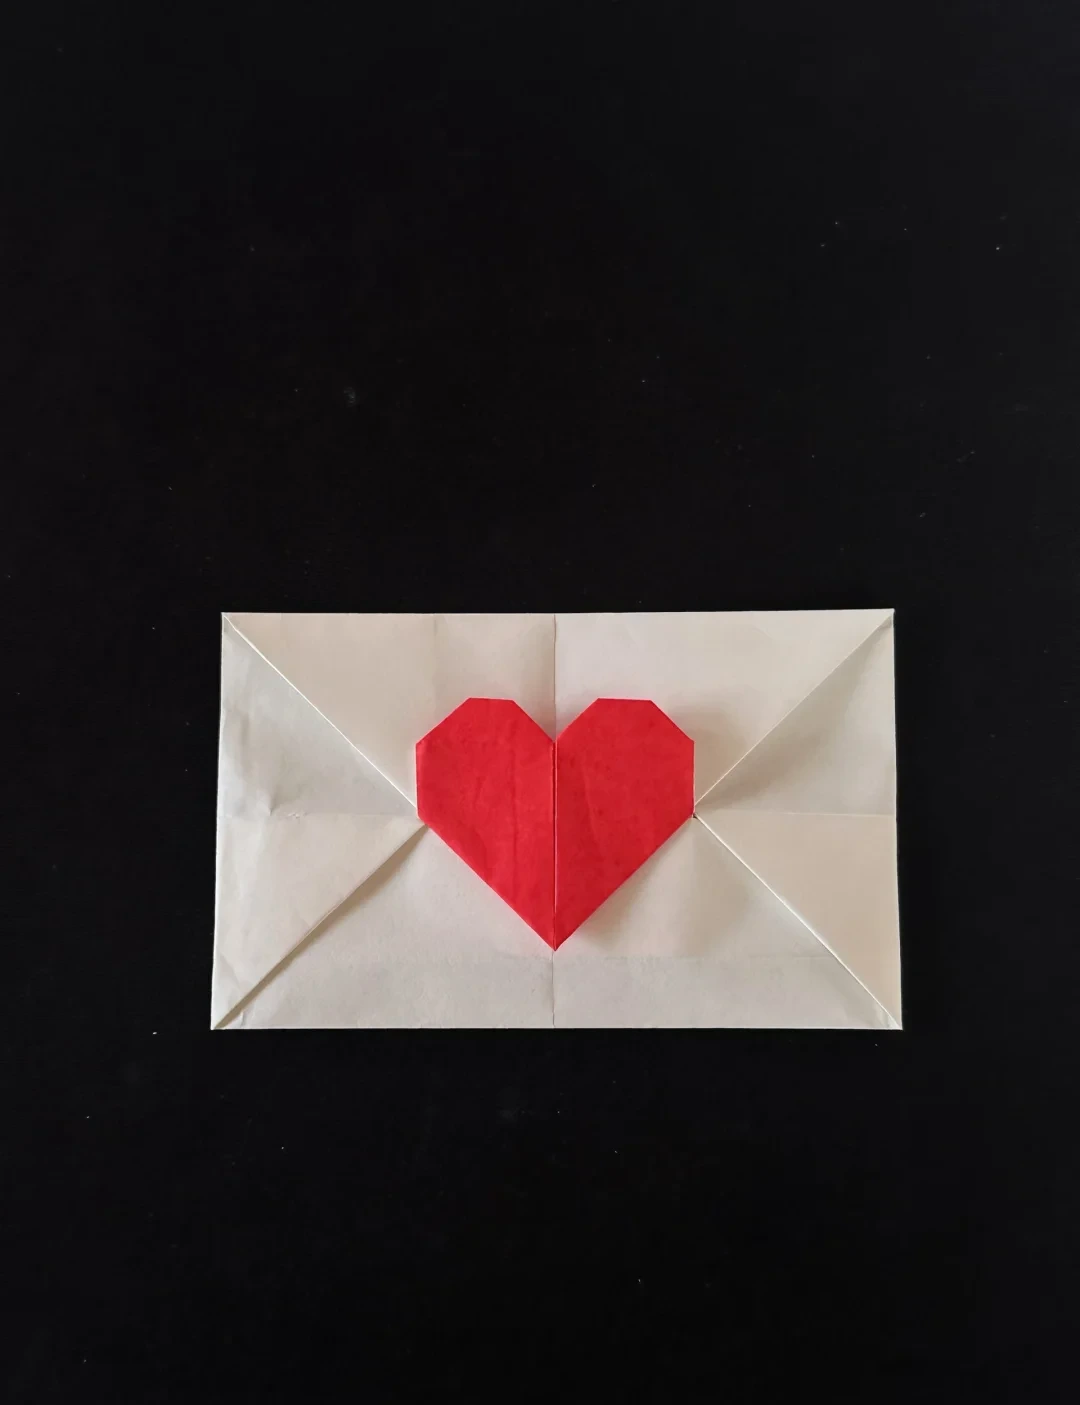
Decorate the envelope
 Open image at full size ↗
Place the finished heart on the envelope flap. Use a little glue to hold it in place if desired.
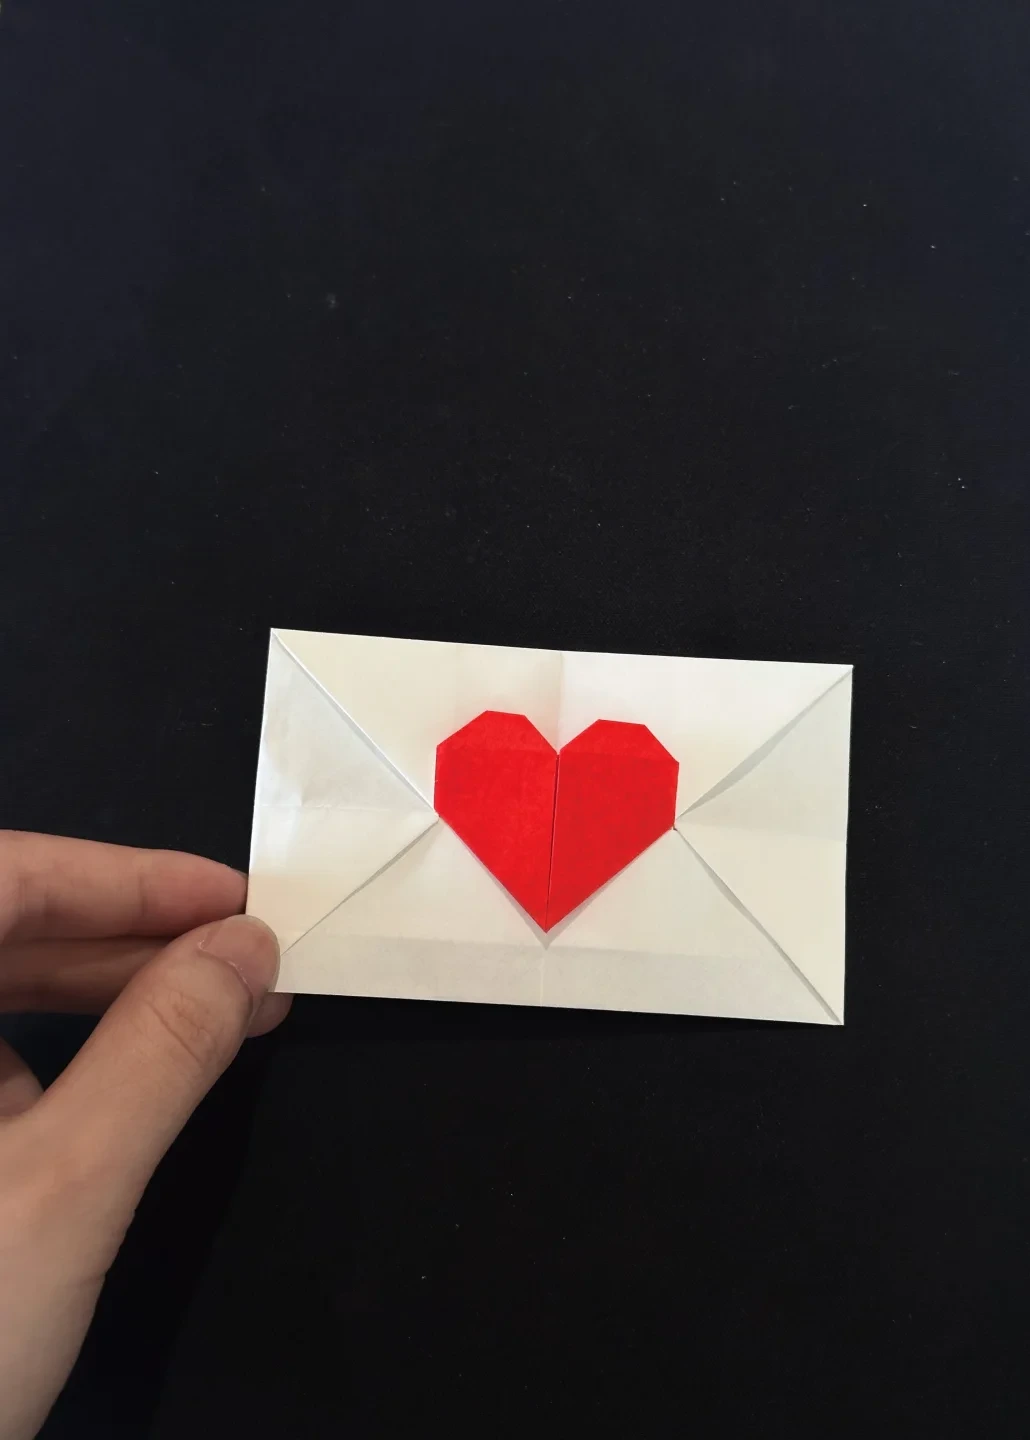
Finished model
 Open image at full size ↗
The completed model, shown from another angle to help check its shape and proportions.
Finished model
 Open image at full size ↗
The completed model, shown from another angle to help check its shape and proportions.
Follow the diagrams alongside the step-by-step English instructions.
Choose your next project →