
Decorations · Step-by-step guide
Gift Bow with Split Tails
Make a paper bow with a small square knot, rounded loops, and two pointed tails. Use it to decorate a separate card, envelope, or gift bag.
What you’ll need
- One paper square
- Scissors
Paper craft · Square-base folds, cutting & tucking
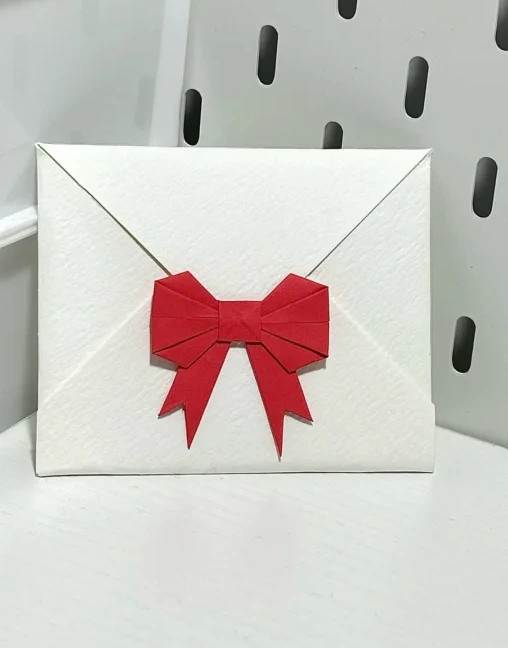
Make it, step by step.
17 steps · Original diagrams with English instructions
Precrease the square
 Open image at full size ↗
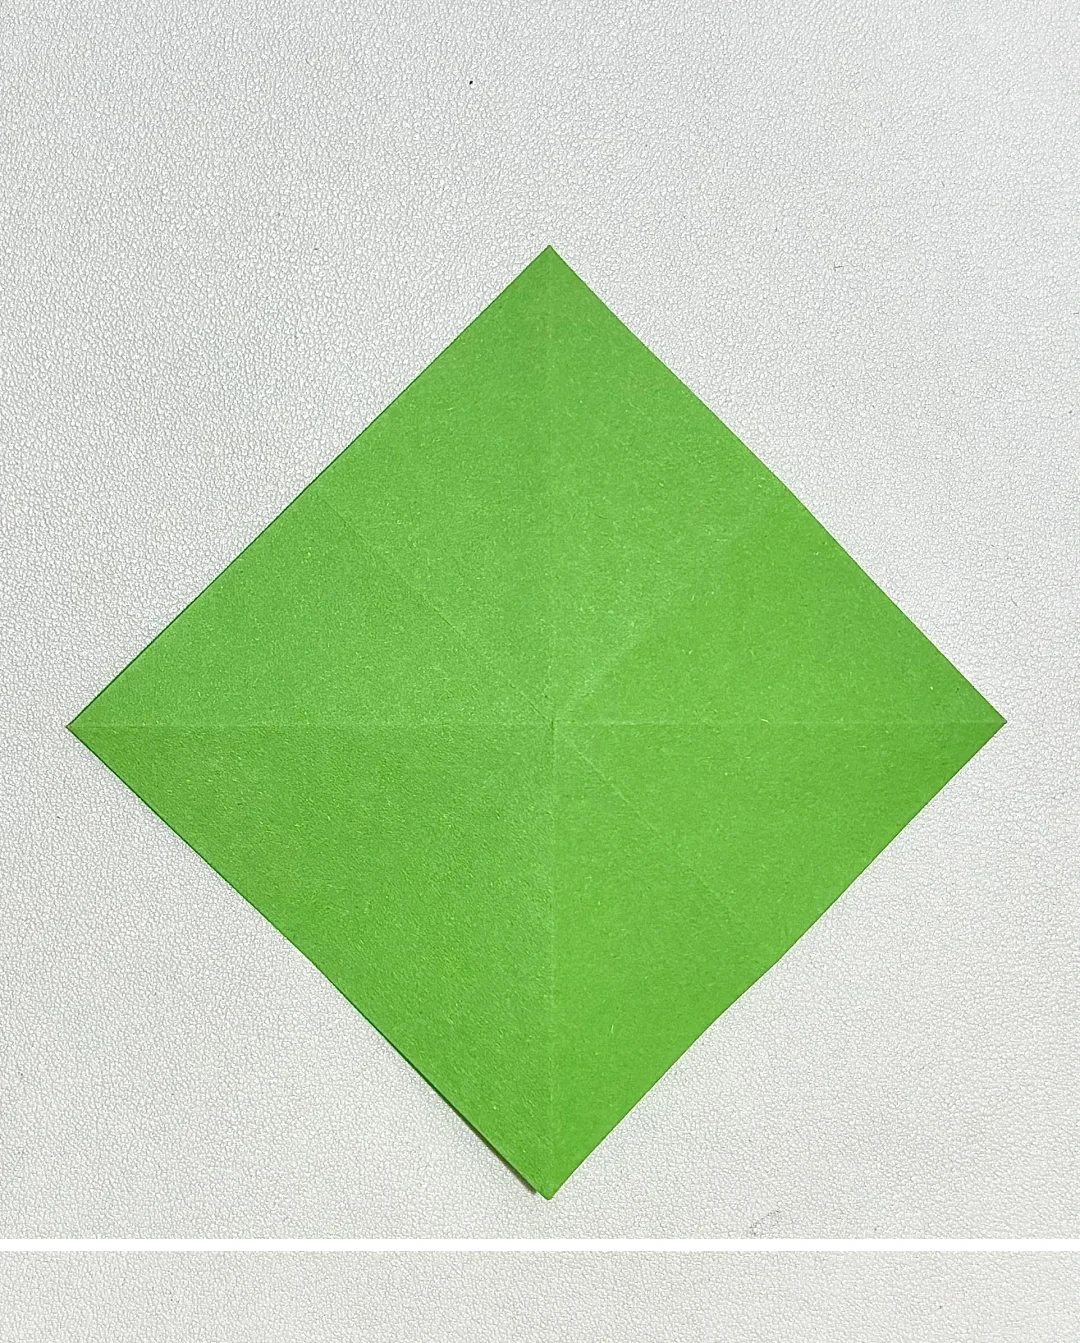
Fold both straight center lines and both diagonals, then open the paper.
Collapse a square base
 Open image at full size ↗
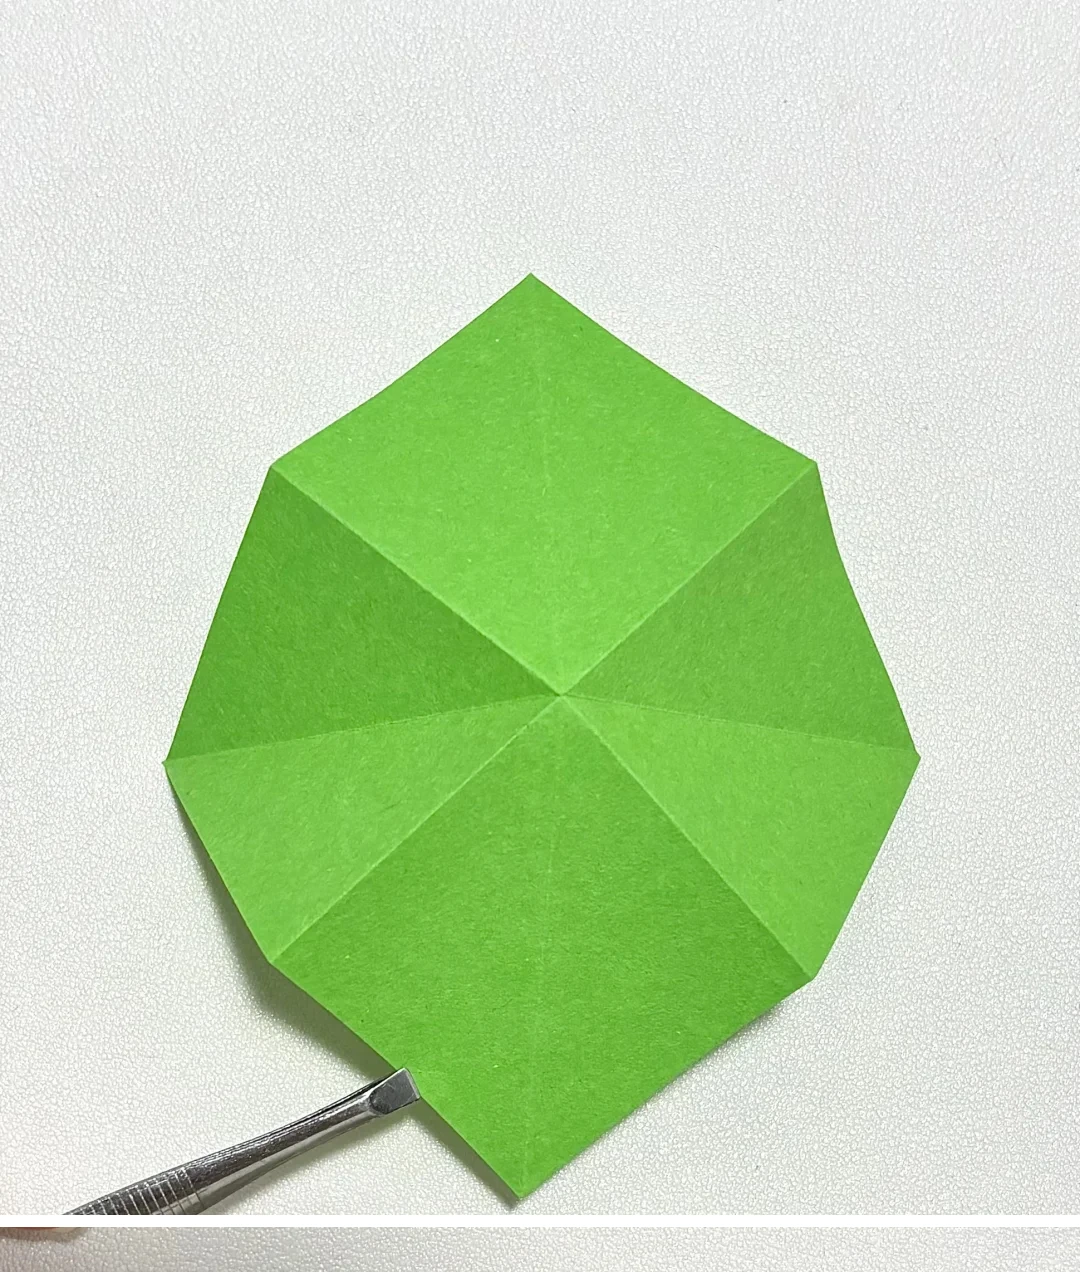
Bring the straight creases inward and flatten the sheet into a layered square.
Orient the base
 Open image at full size ↗
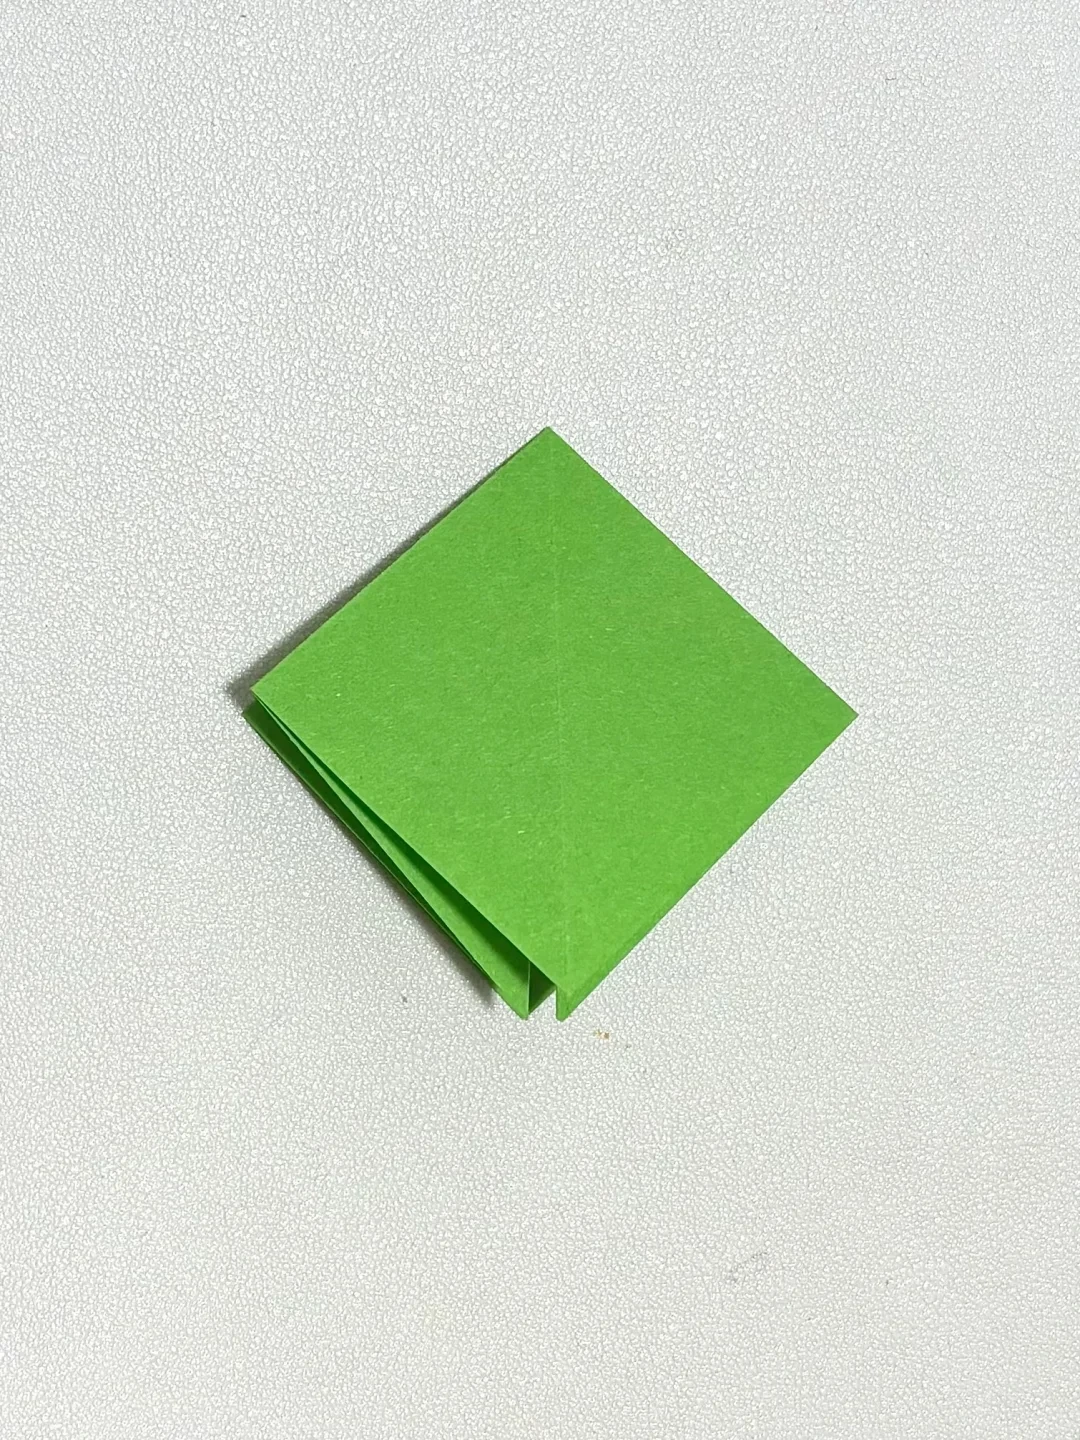
Keep the closed corner at the top and align the open edges below it.
Mark the knot
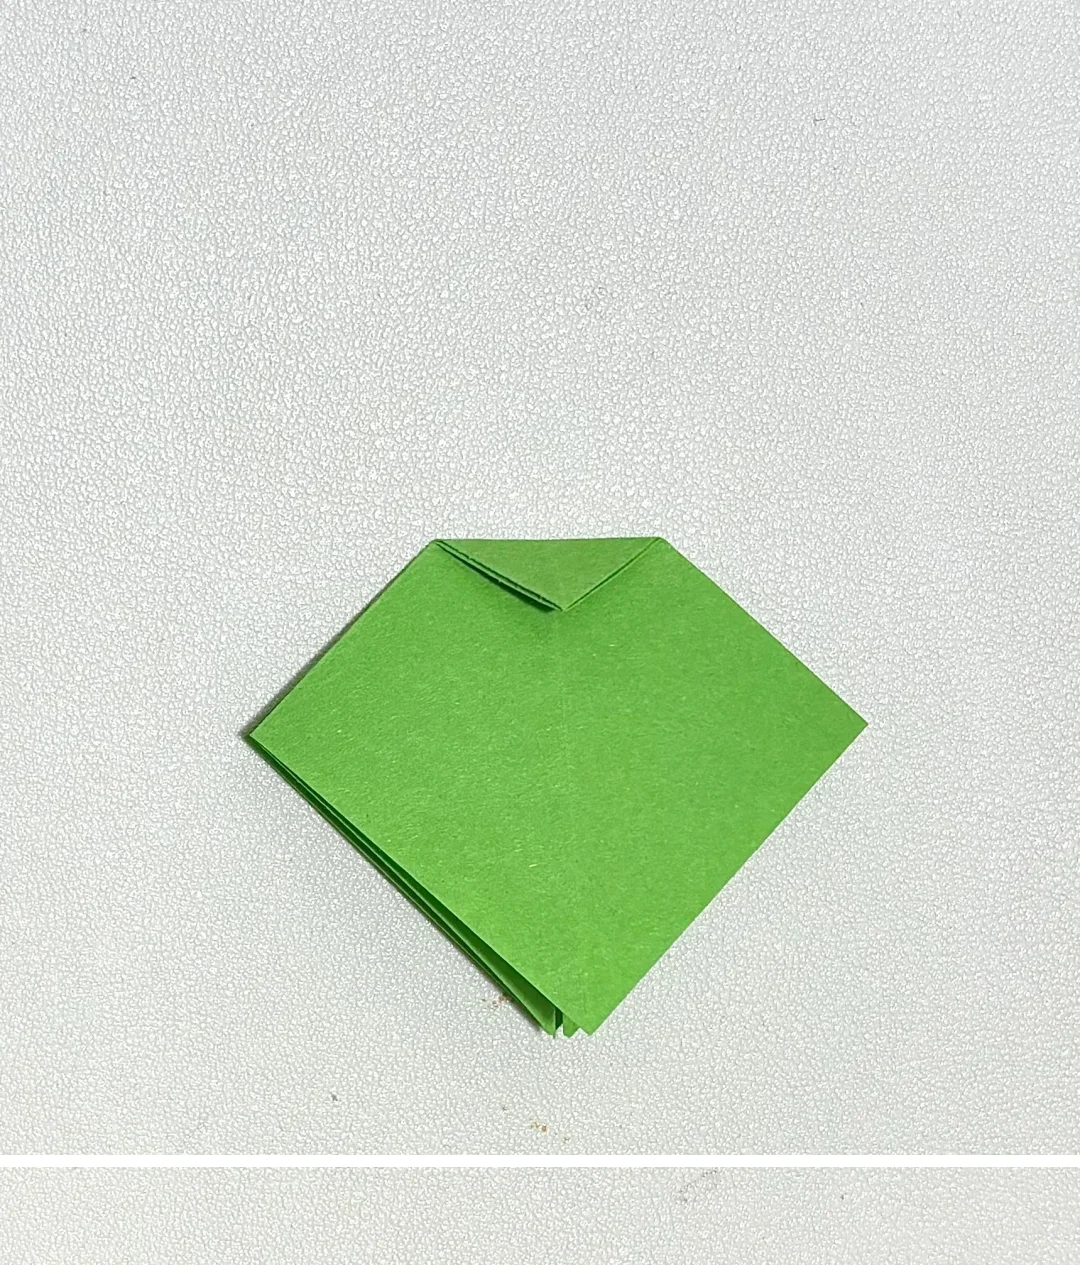 Open image at full size ↗
Fold the closed top corner downward to make a small triangular crease, then unfold it.
Raise the central square
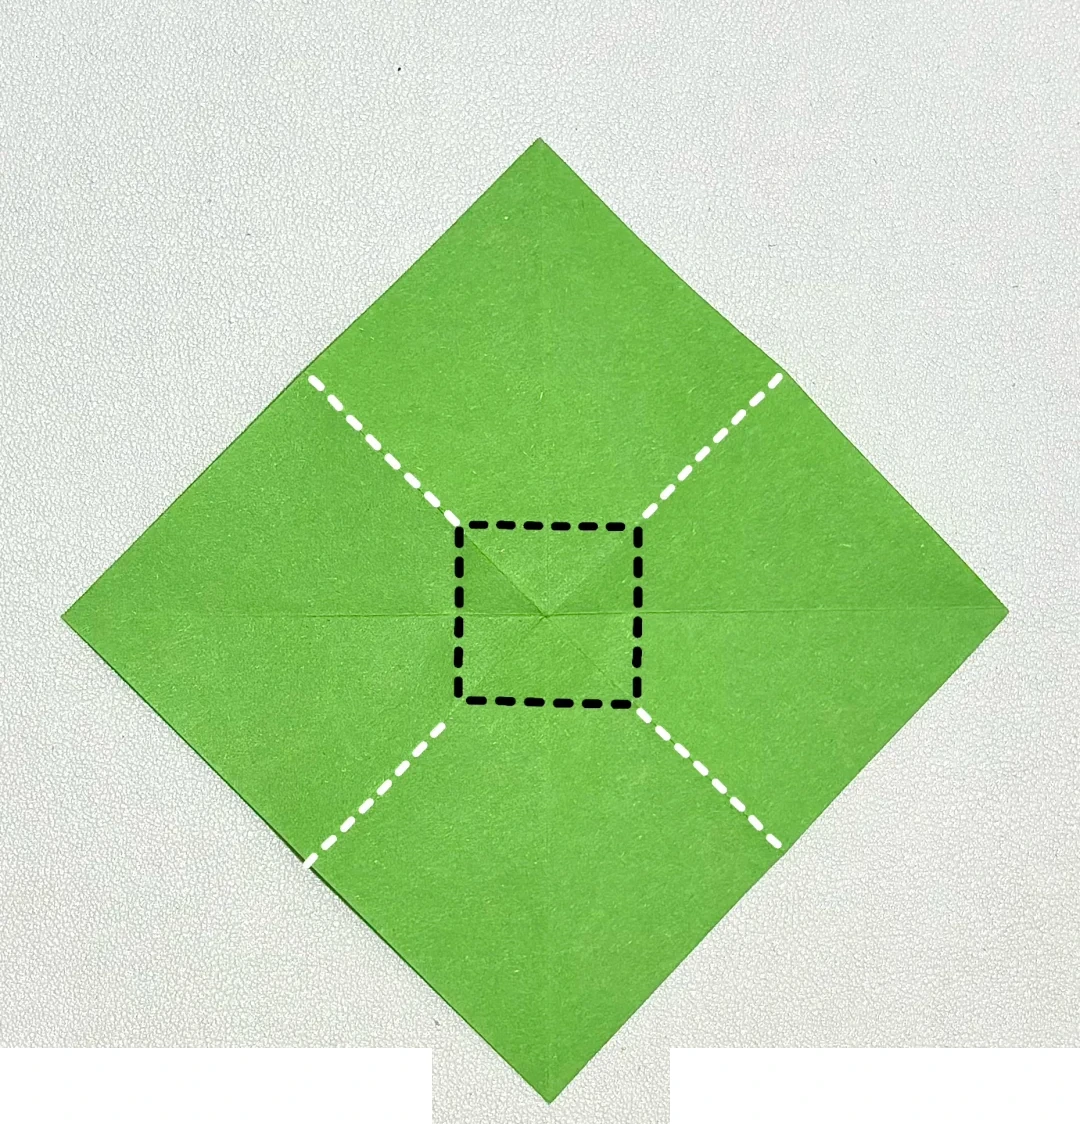 Open image at full size ↗
Open the sheet fully. Pinch the four sides along the marked creases to raise the small square in the center.
Sink the center
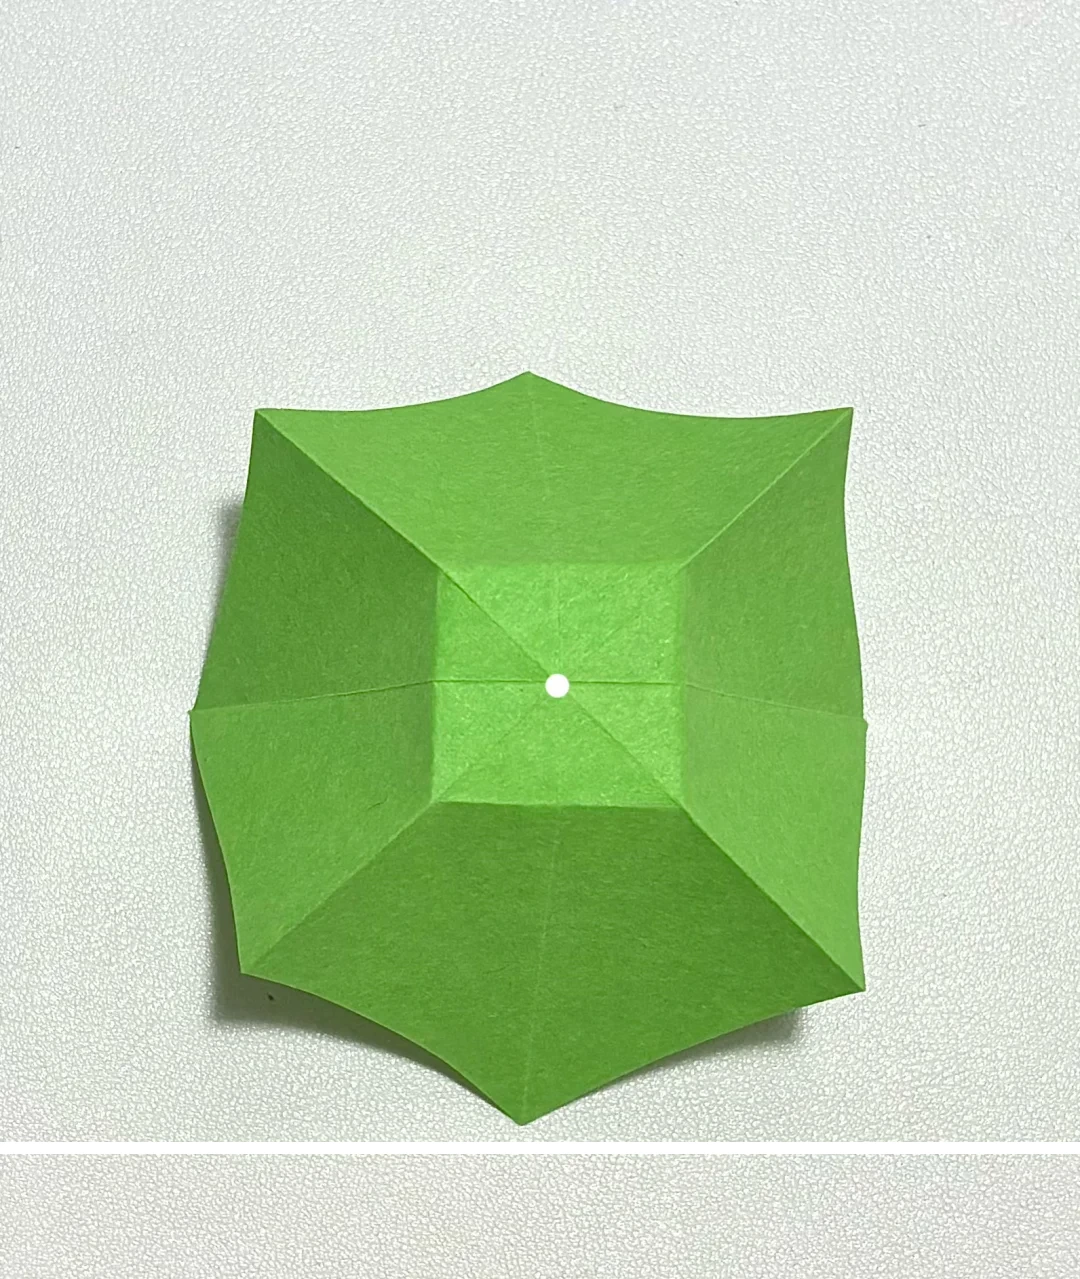 Open image at full size ↗
Press the small center square downward while bringing the two sides inward.
Collapse around the knot
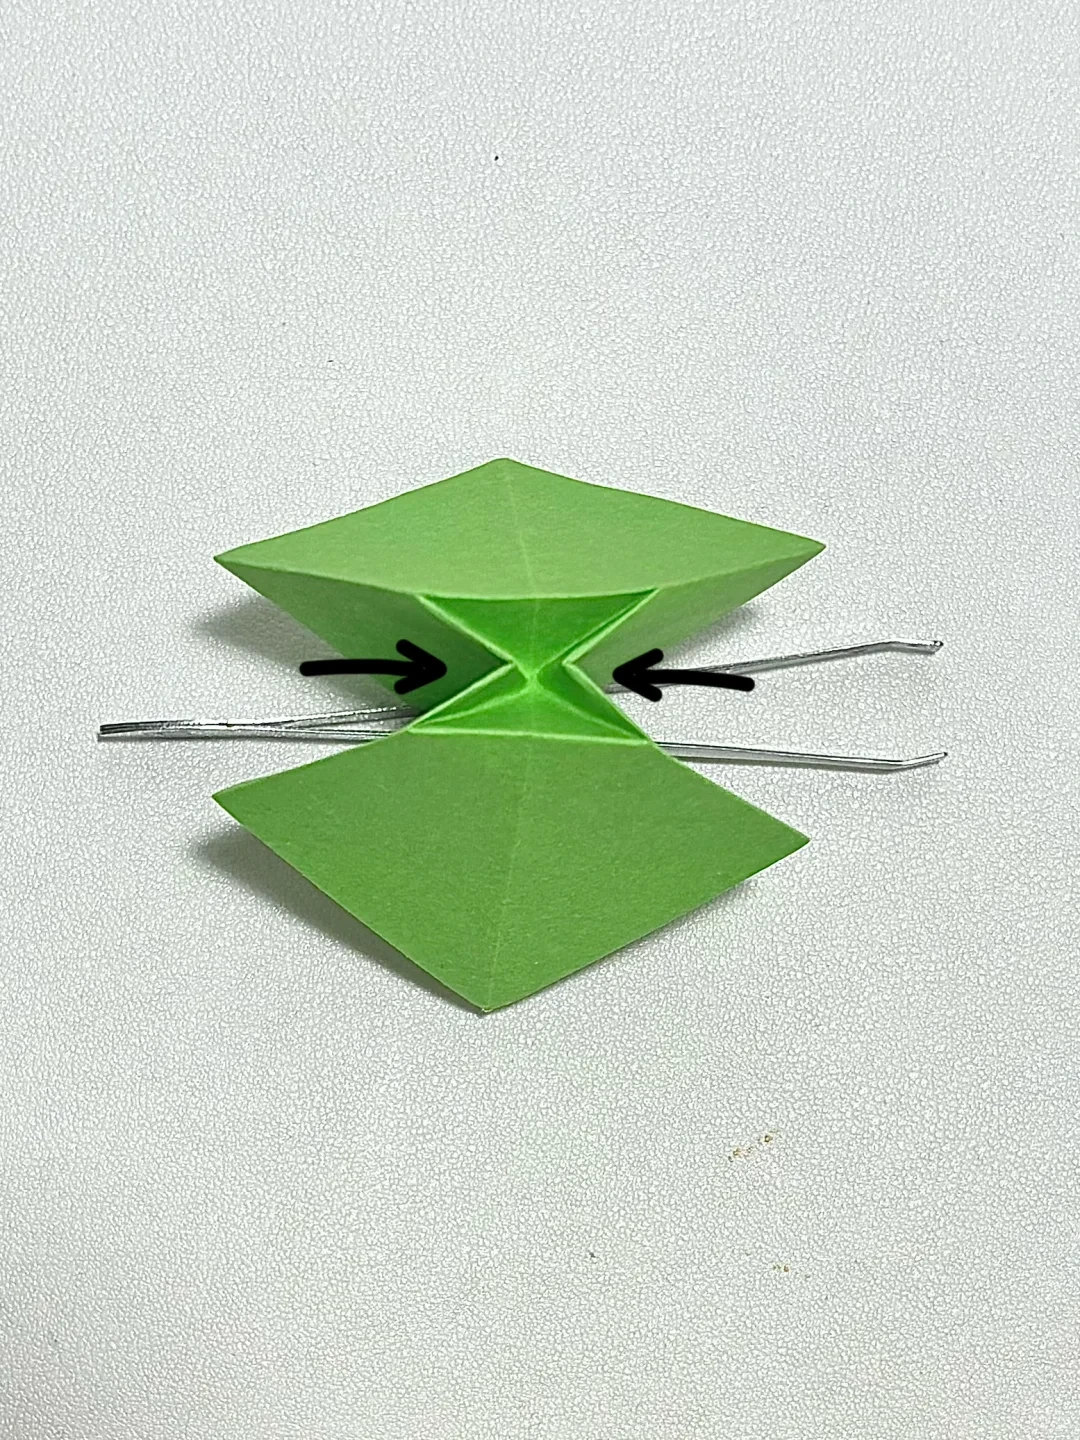 Open image at full size ↗
Guide the side layers together until the center square sits neatly between them.
Check the front
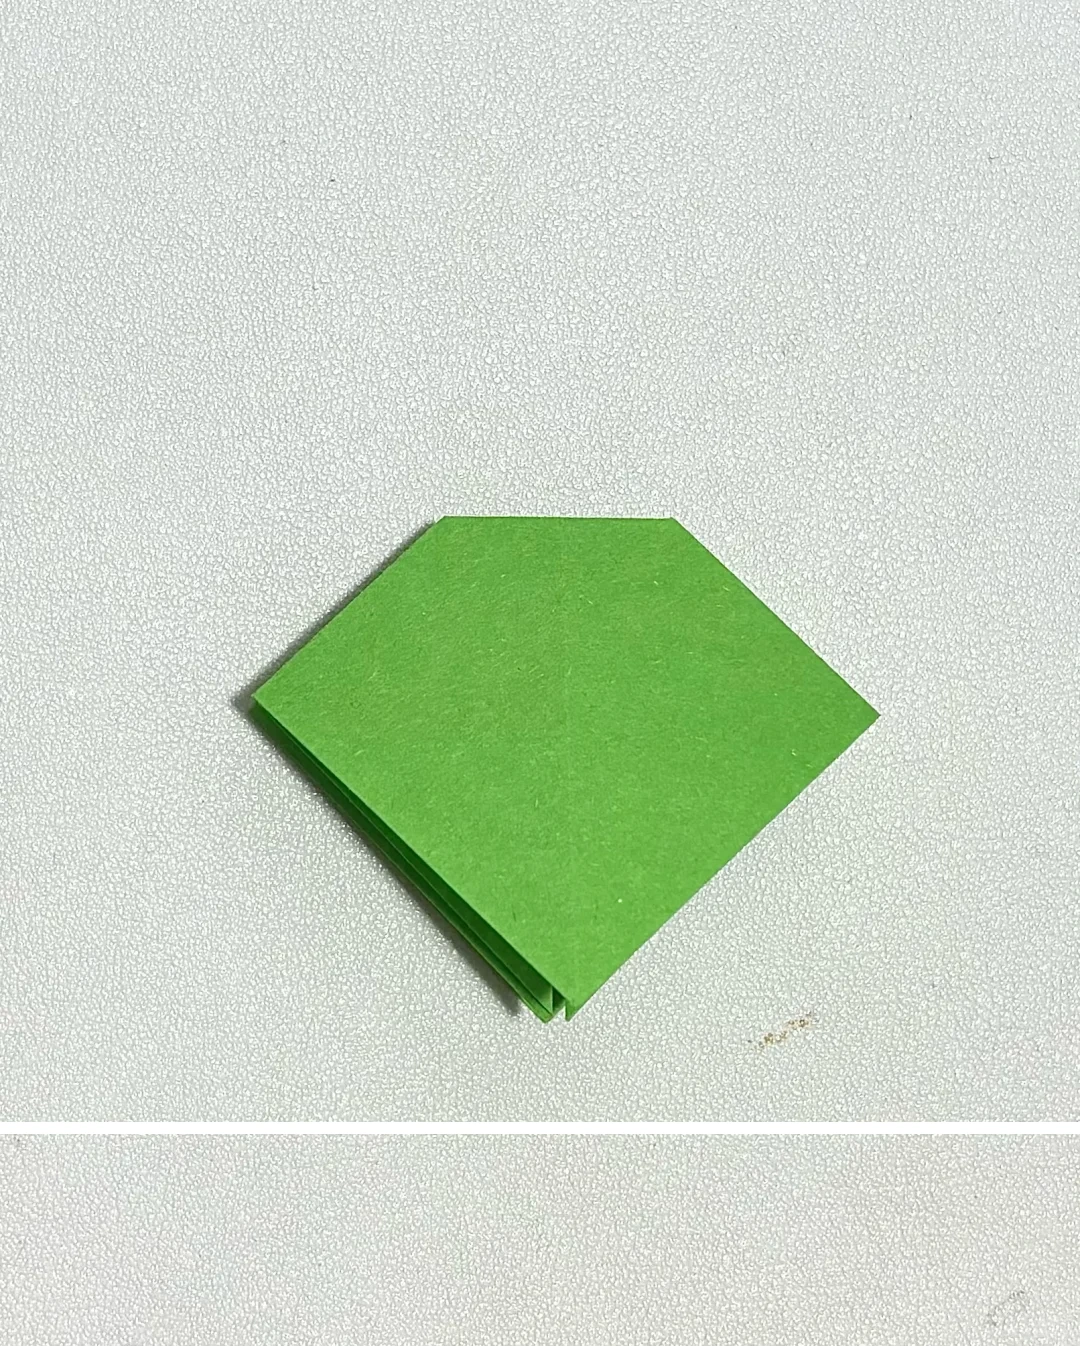 Open image at full size ↗
Flatten the packet into the five-sided shape shown.
Fold the first edges
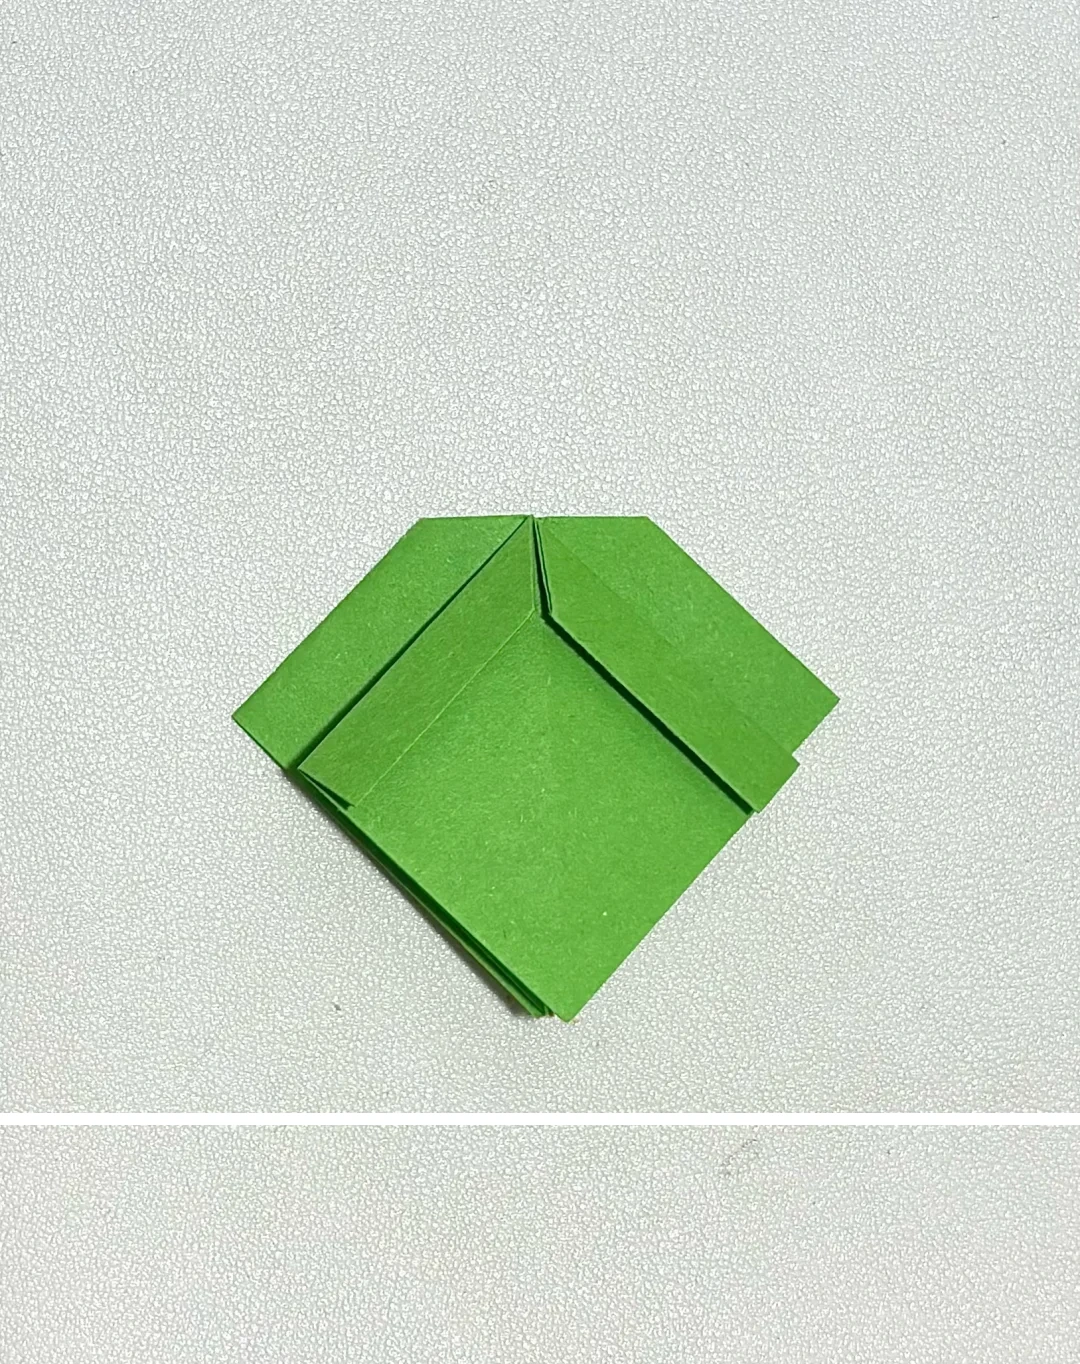 Open image at full size ↗
Fold both upper edges toward the center to create narrow triangular flaps.
Repeat on the back
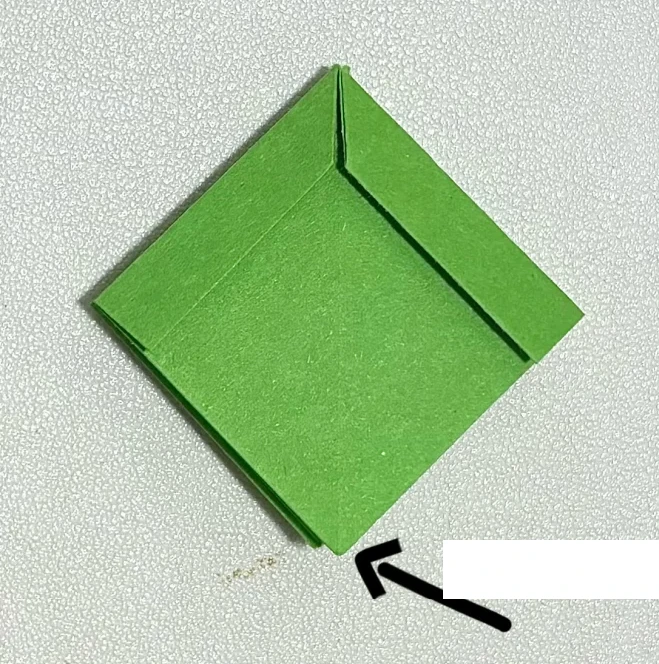 Open image at full size ↗
Turn the upper flap over as indicated. Repeat the same edge folds on the other face.
Open the packet
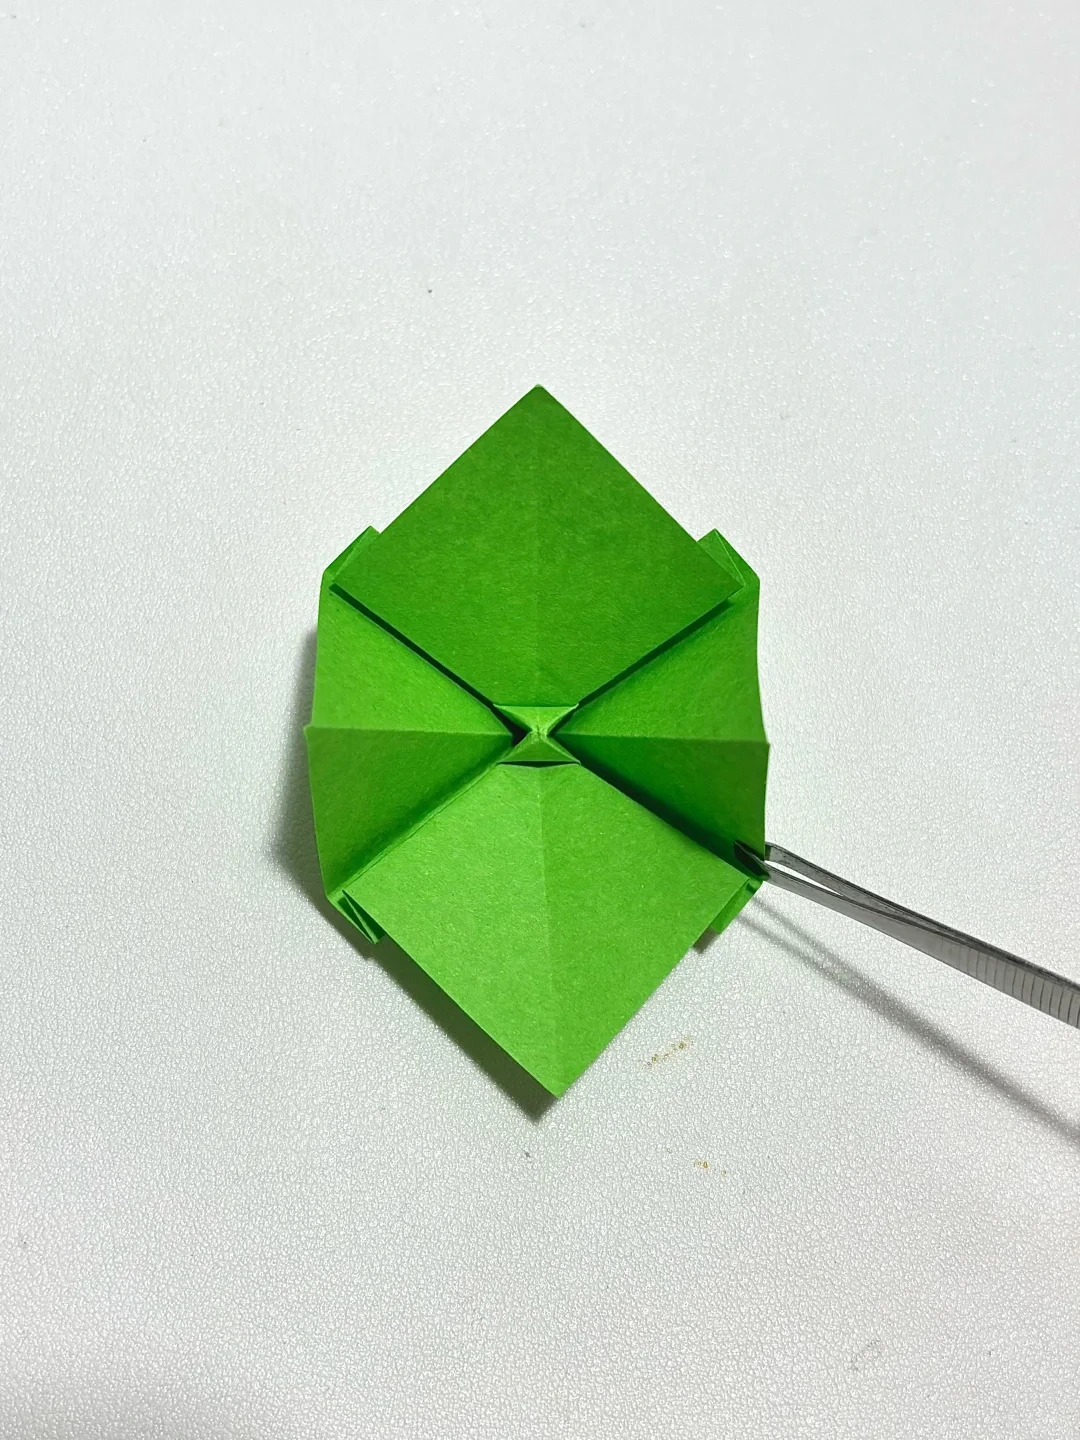 Open image at full size ↗
Separate the layers carefully while keeping the small square knot folded.
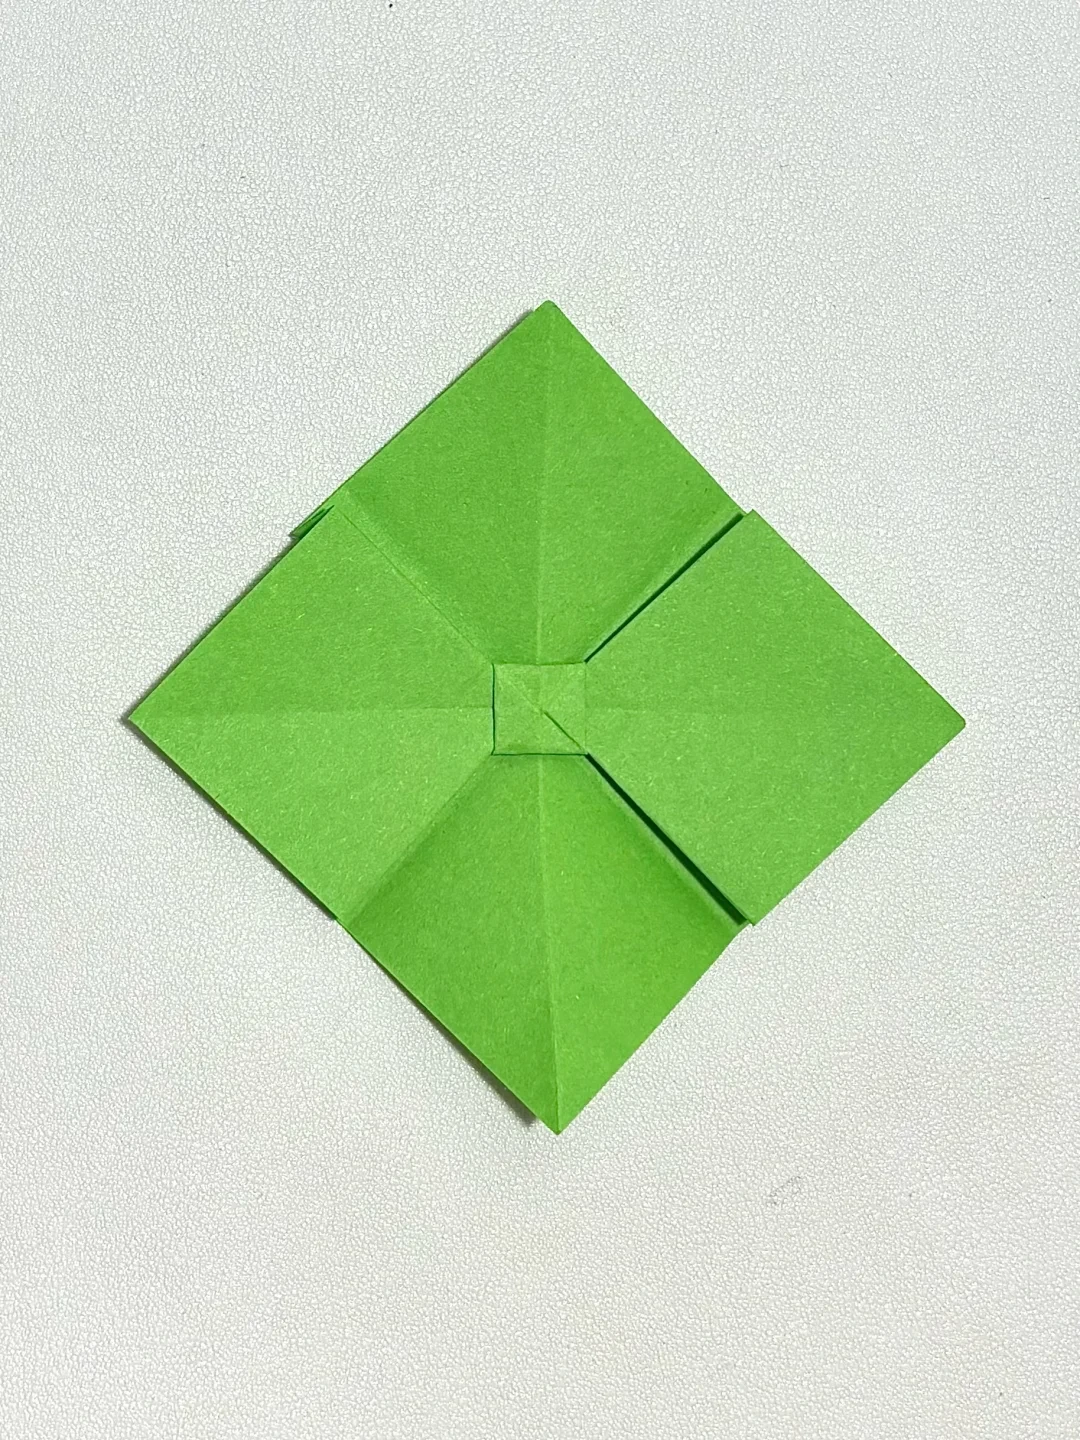
Flatten the bow base
 Open image at full size ↗
Open the sheet into a diamond with a small square in the center and four raised edge folds.
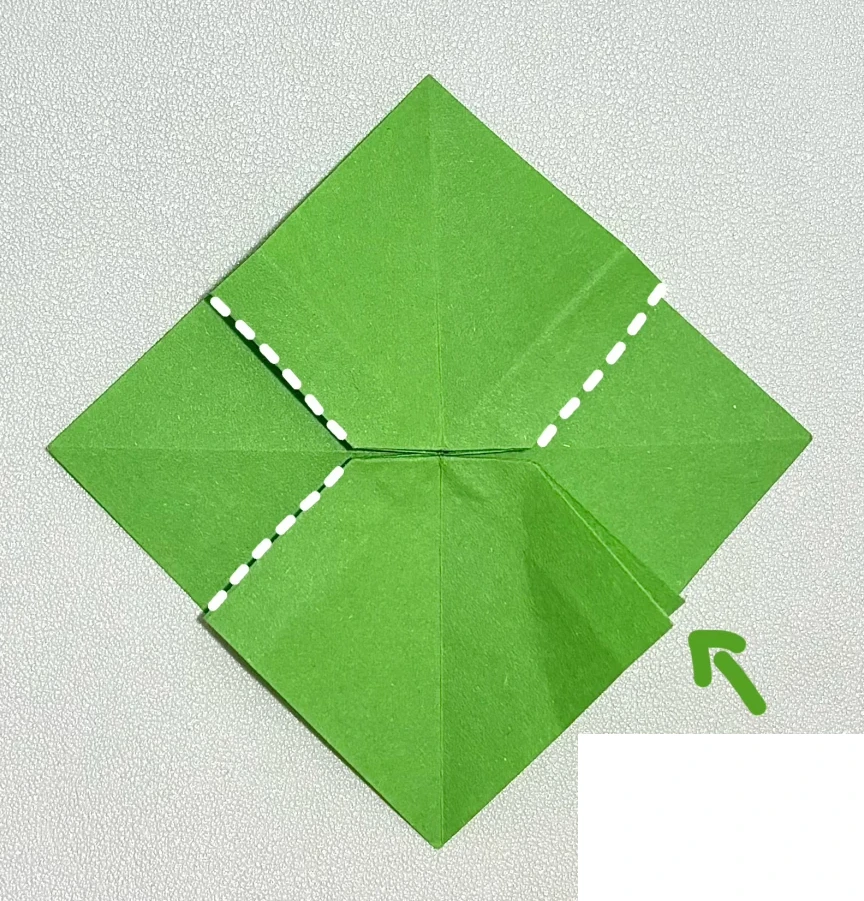
Cut the four folds
 Open image at full size ↗
Turn the sheet over and cut only along the four marked diagonal creases. Stop at the ends of the marked lines so the center remains connected.
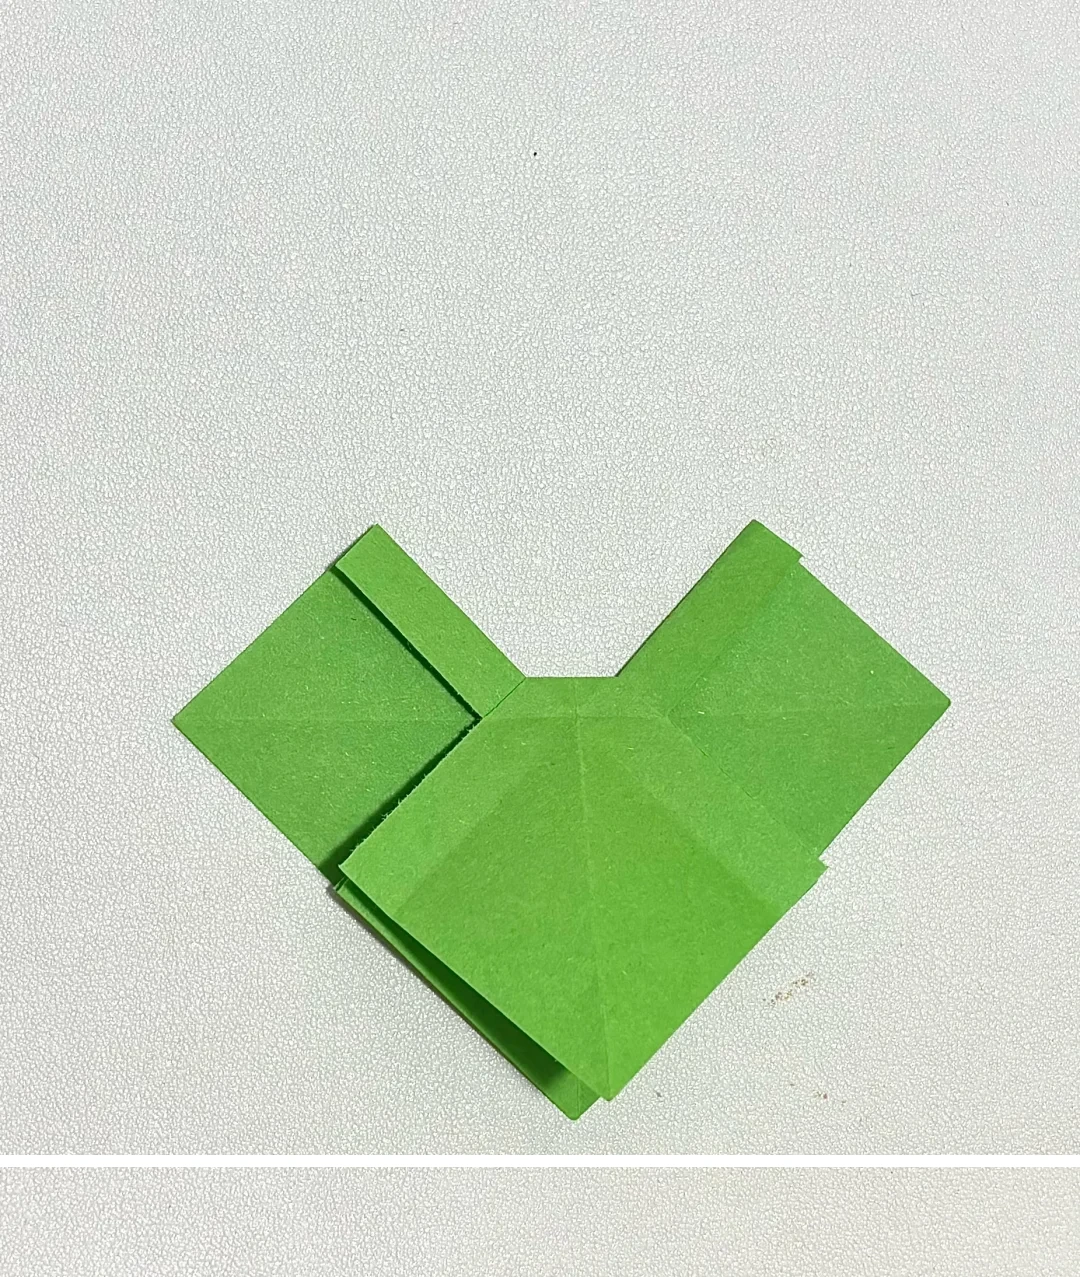
Move the upper flap down
 Open image at full size ↗
After cutting, turn the upper loose flap downward.
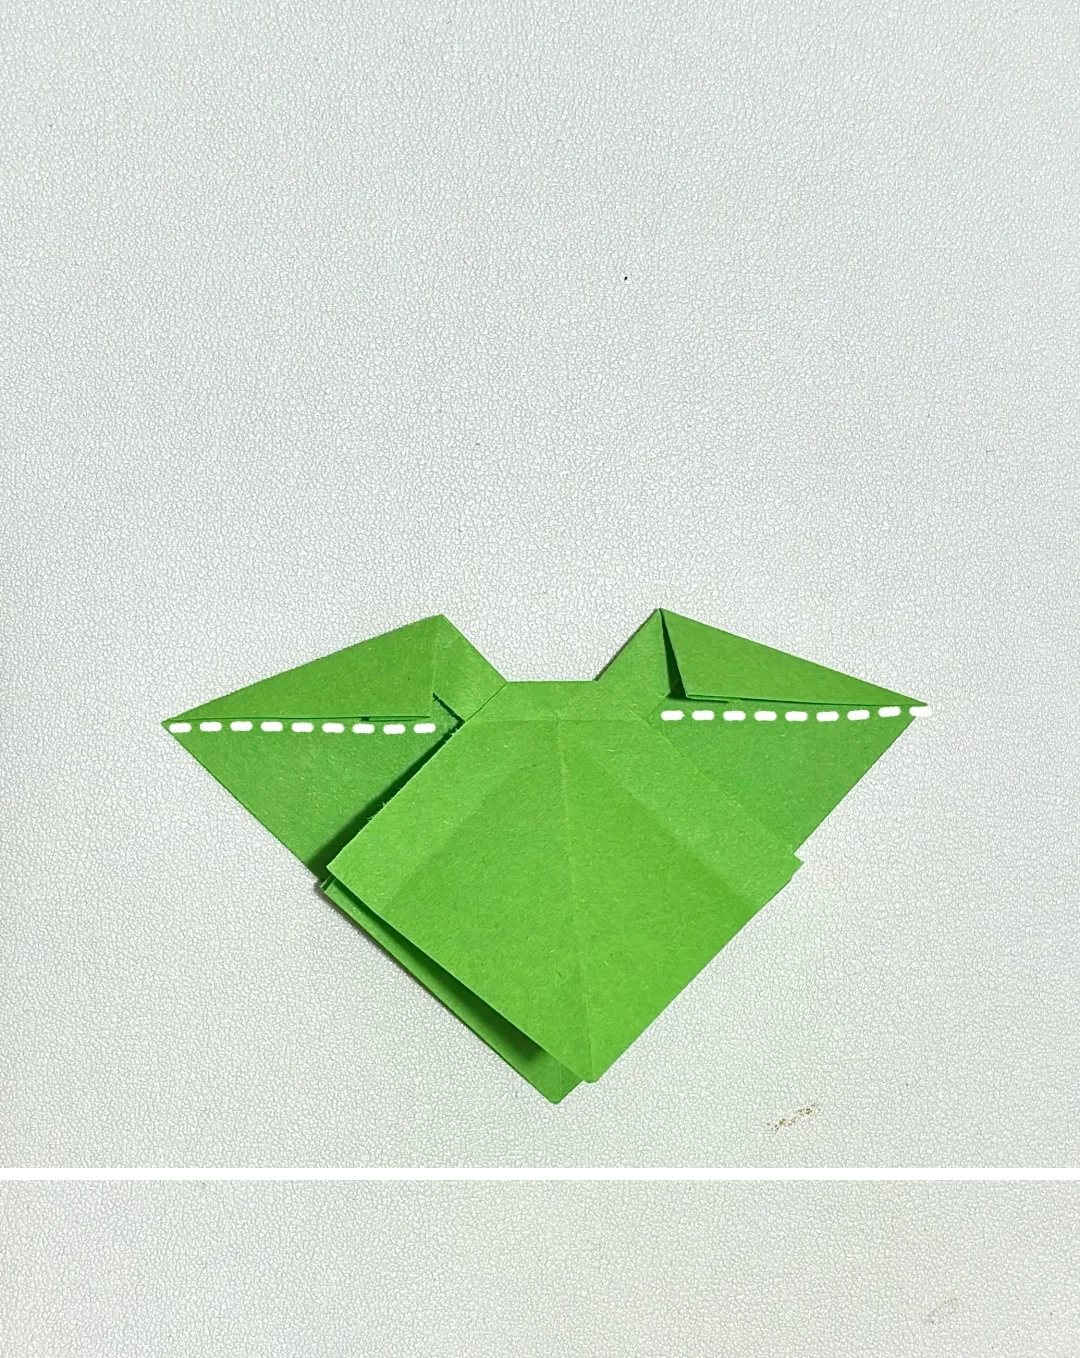
Narrow the loops
 Open image at full size ↗
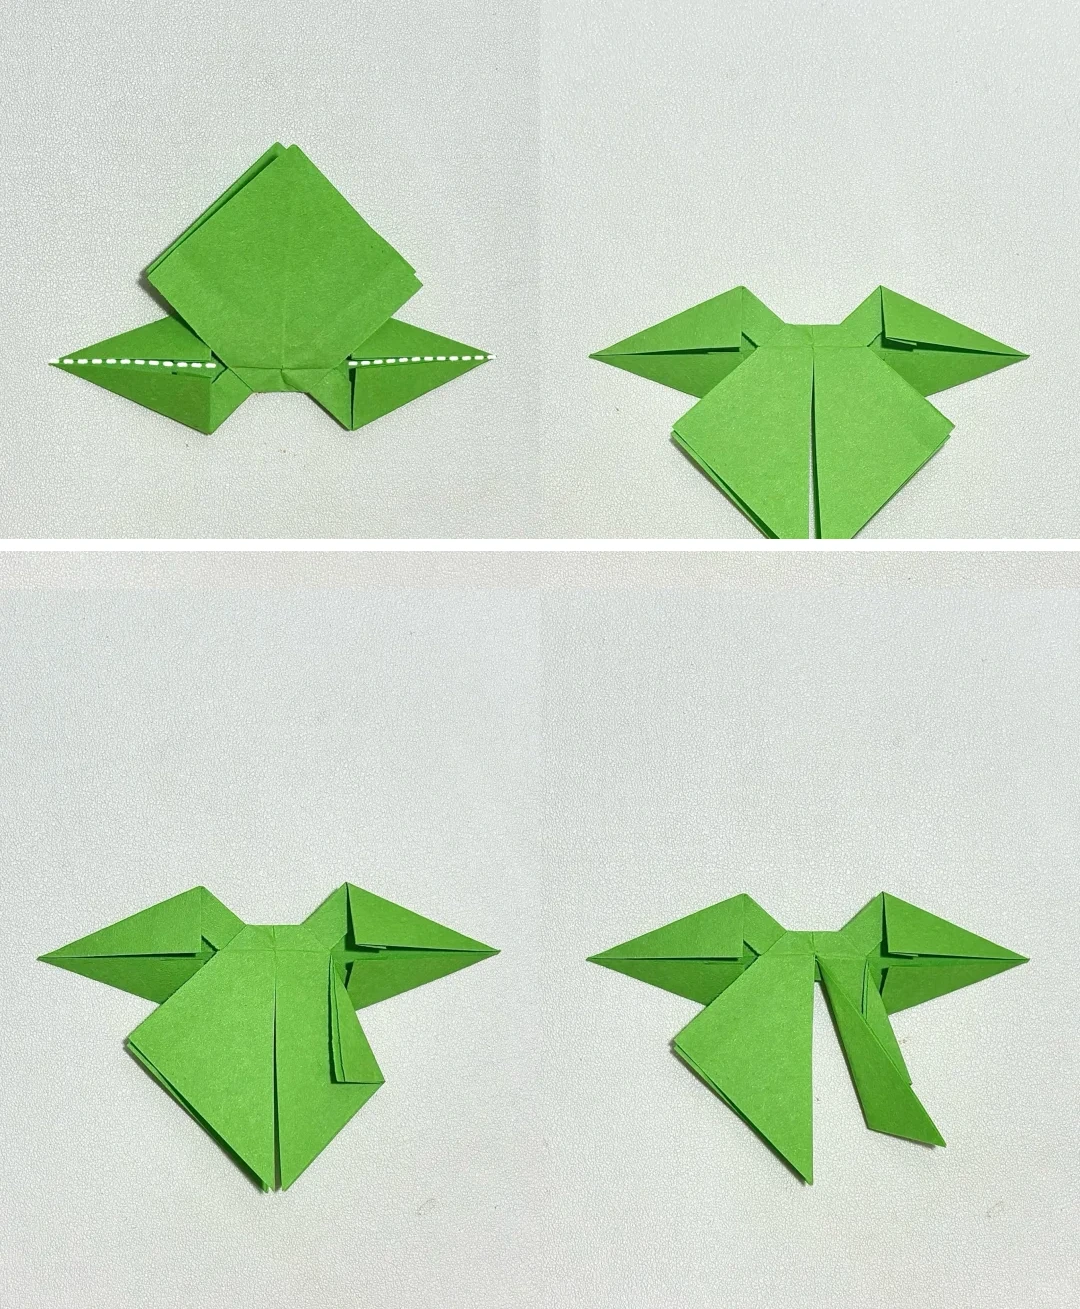
Fold the side edges inward along the dotted horizontal guides.
Split the tails
 Open image at full size ↗
Lift the flap again, fold the lower part along its guide, and cut the central lower section to separate the tails. Fold the flap down again.
Finish the bow
 Open image at full size ↗
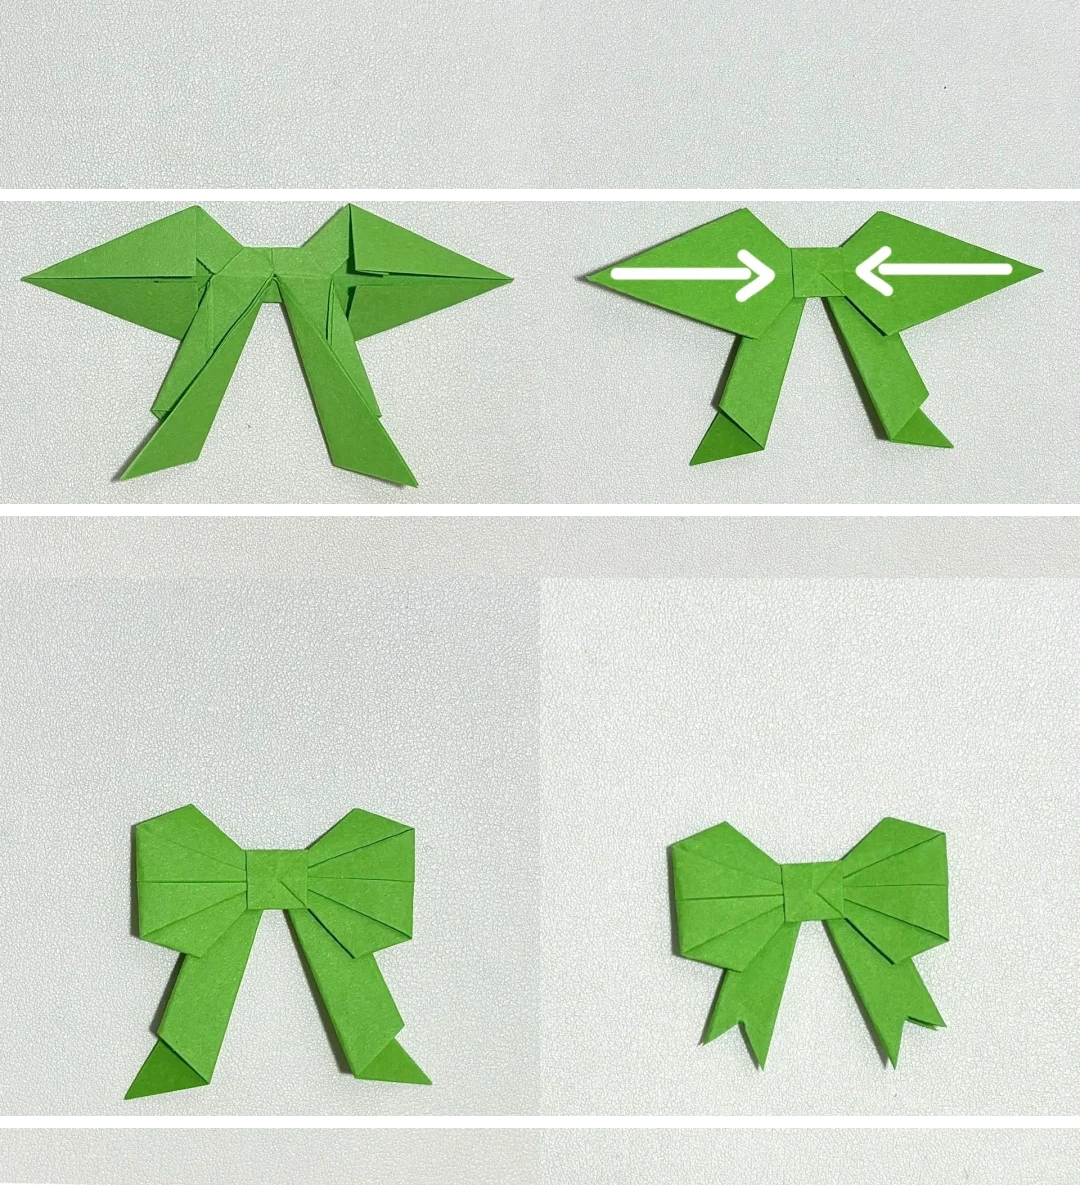
Tuck the two outer pointed ends into the center knot to form the loops. Turn over and optionally cut small V-shaped notches in the tail ends.
Follow the diagrams alongside the step-by-step English instructions.
Choose your next project →