
Animals · Step-by-step guide
Paper Capybara
Shape a calm little capybara with a long body, tiny feet and folded ears.
What you’ll need
- One 15 × 15 cm paper square
- A fine marker
- A folding tool, optional
Origami · Folding and shaping
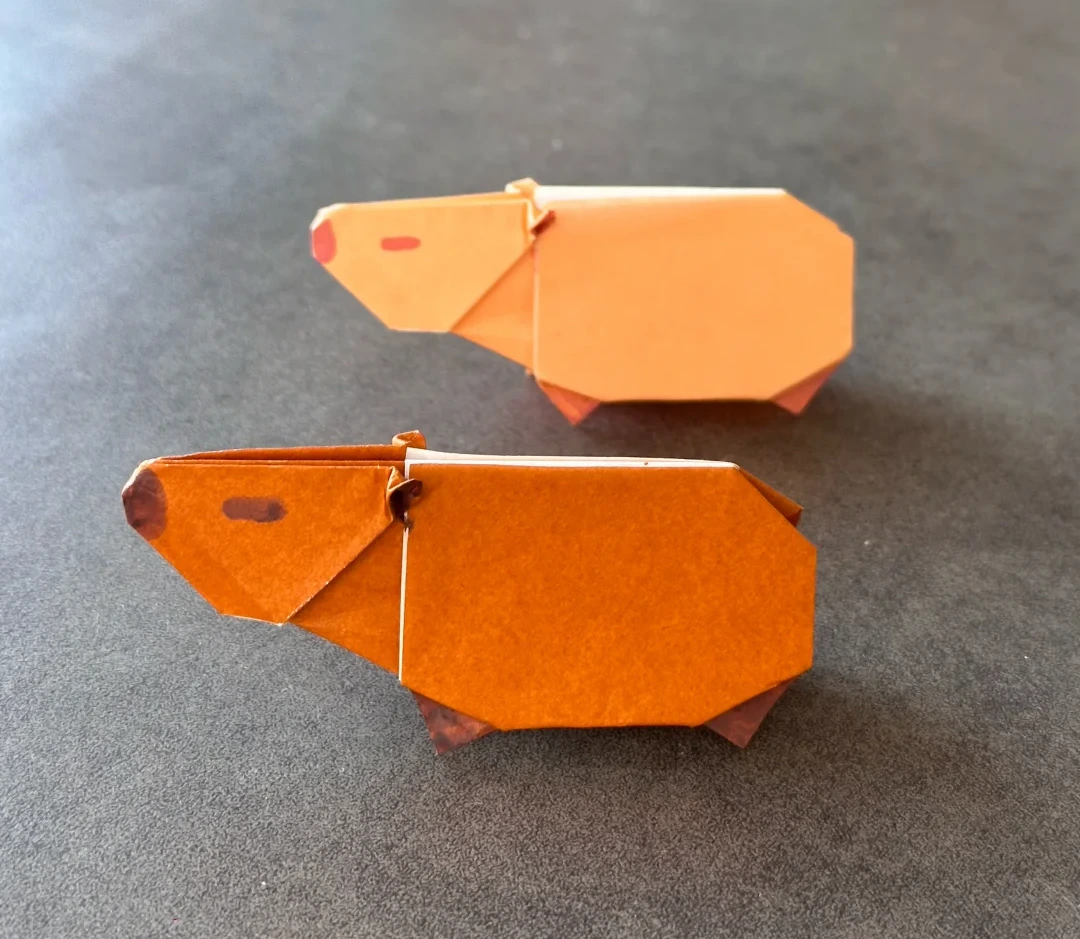
Make it, step by step.
16 steps · Original diagrams with English instructions
Read each picture from left to right, then top to bottom.
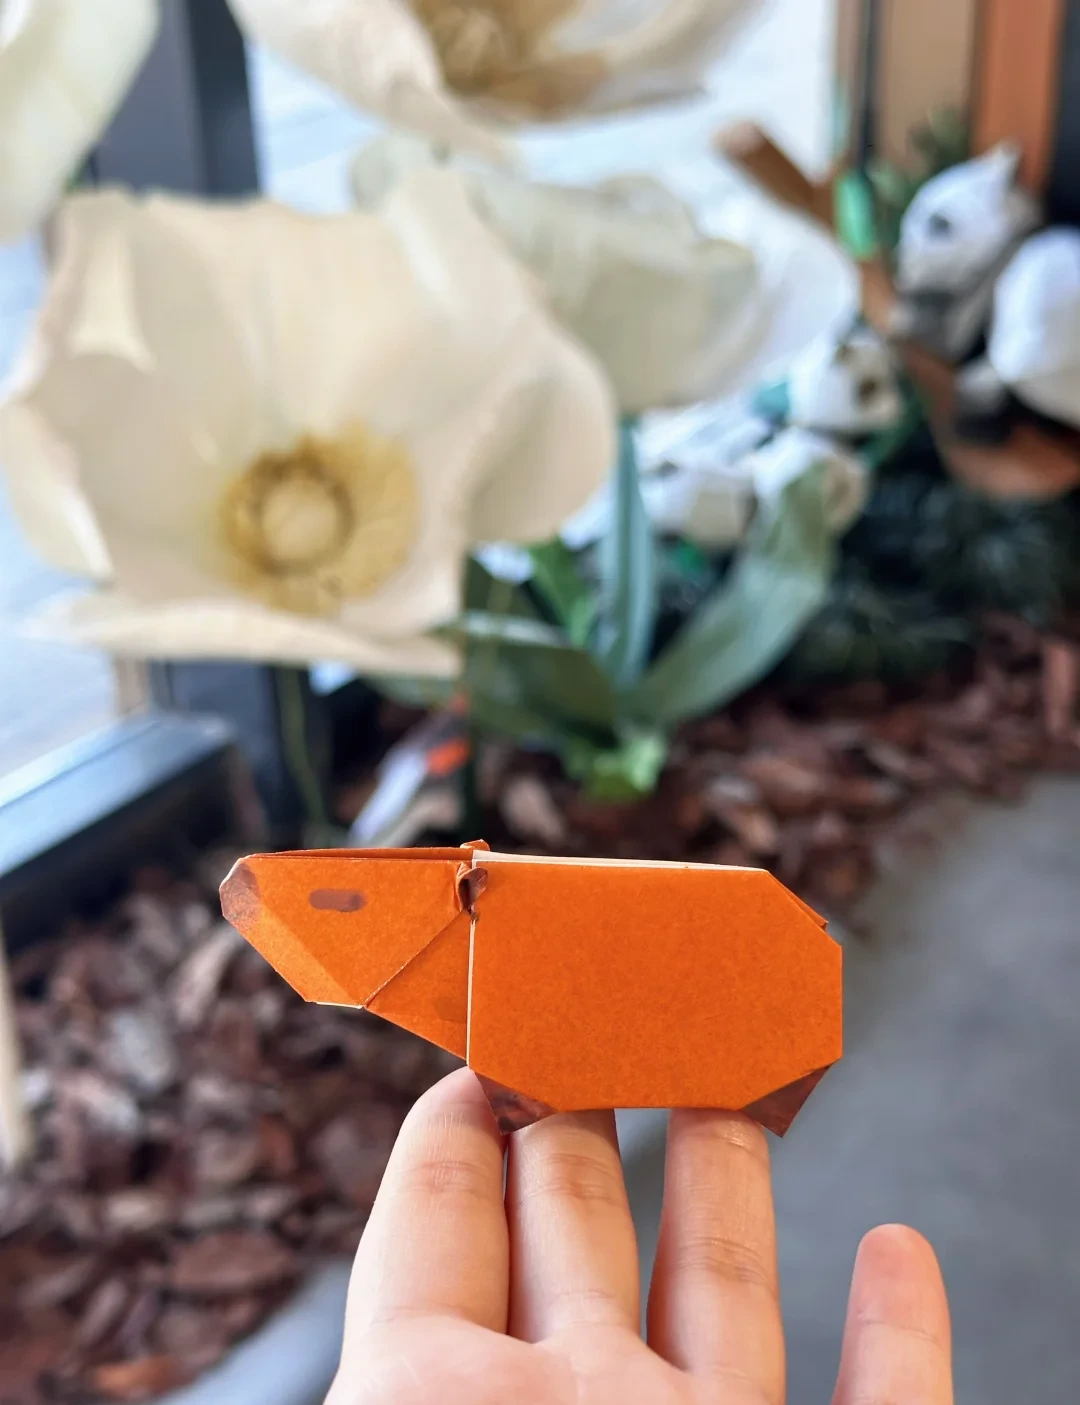
Finished model
 Open image at full size ↗
Use this finished example to compare the shape and proportions of your model.
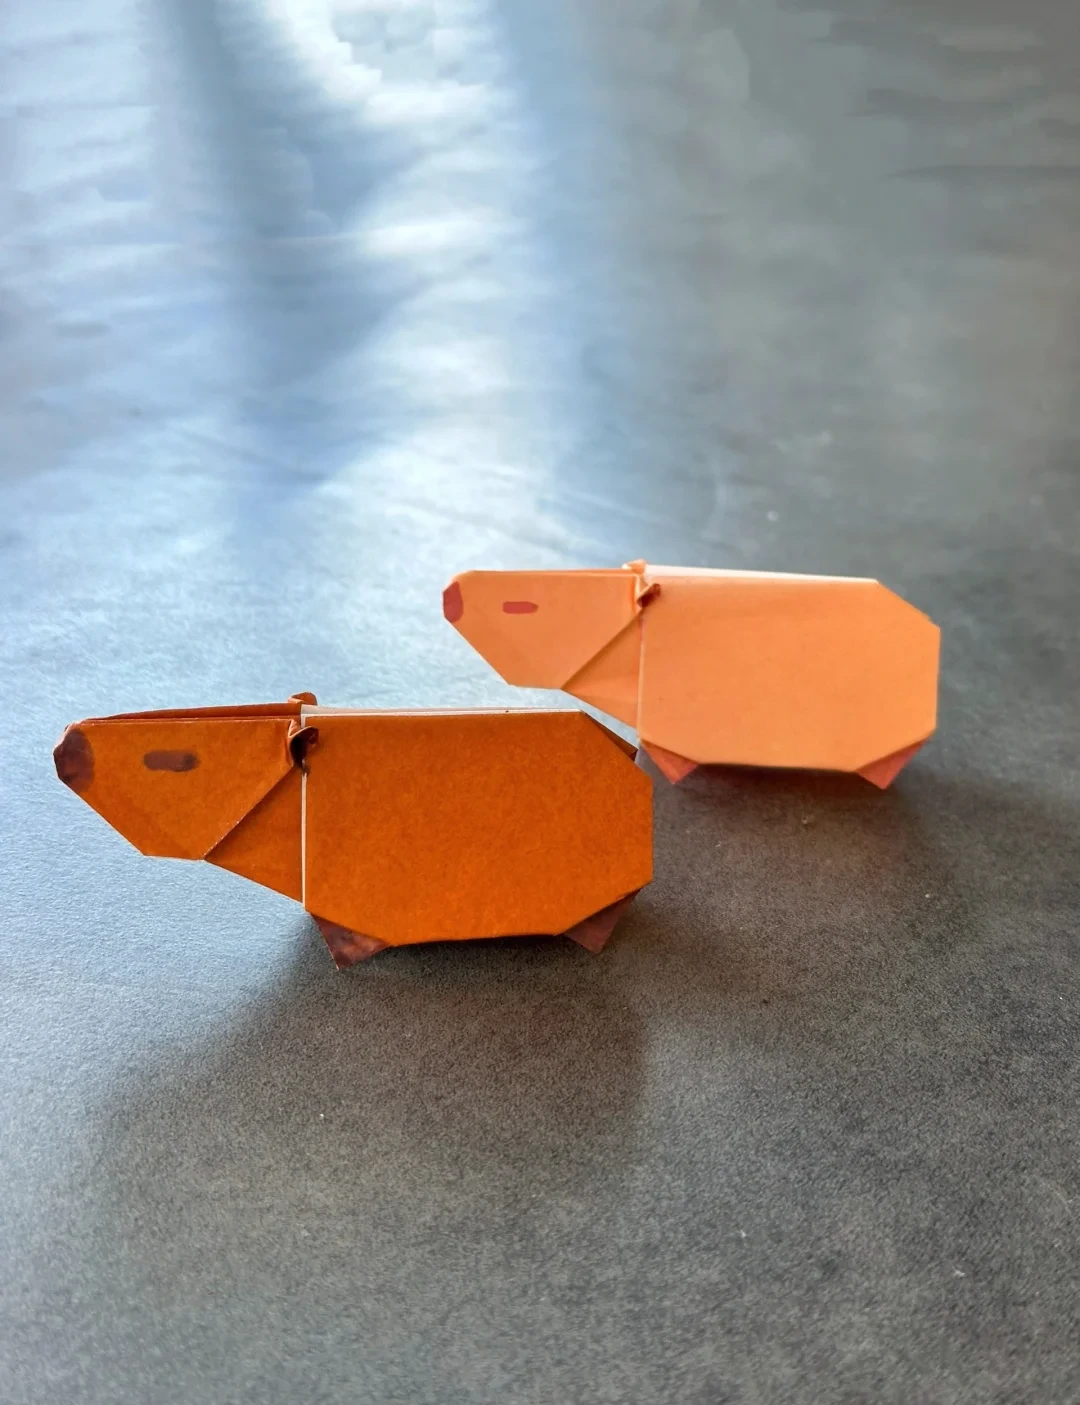
Finished model
 Open image at full size ↗
Use this finished example to compare the shape and proportions of your model.
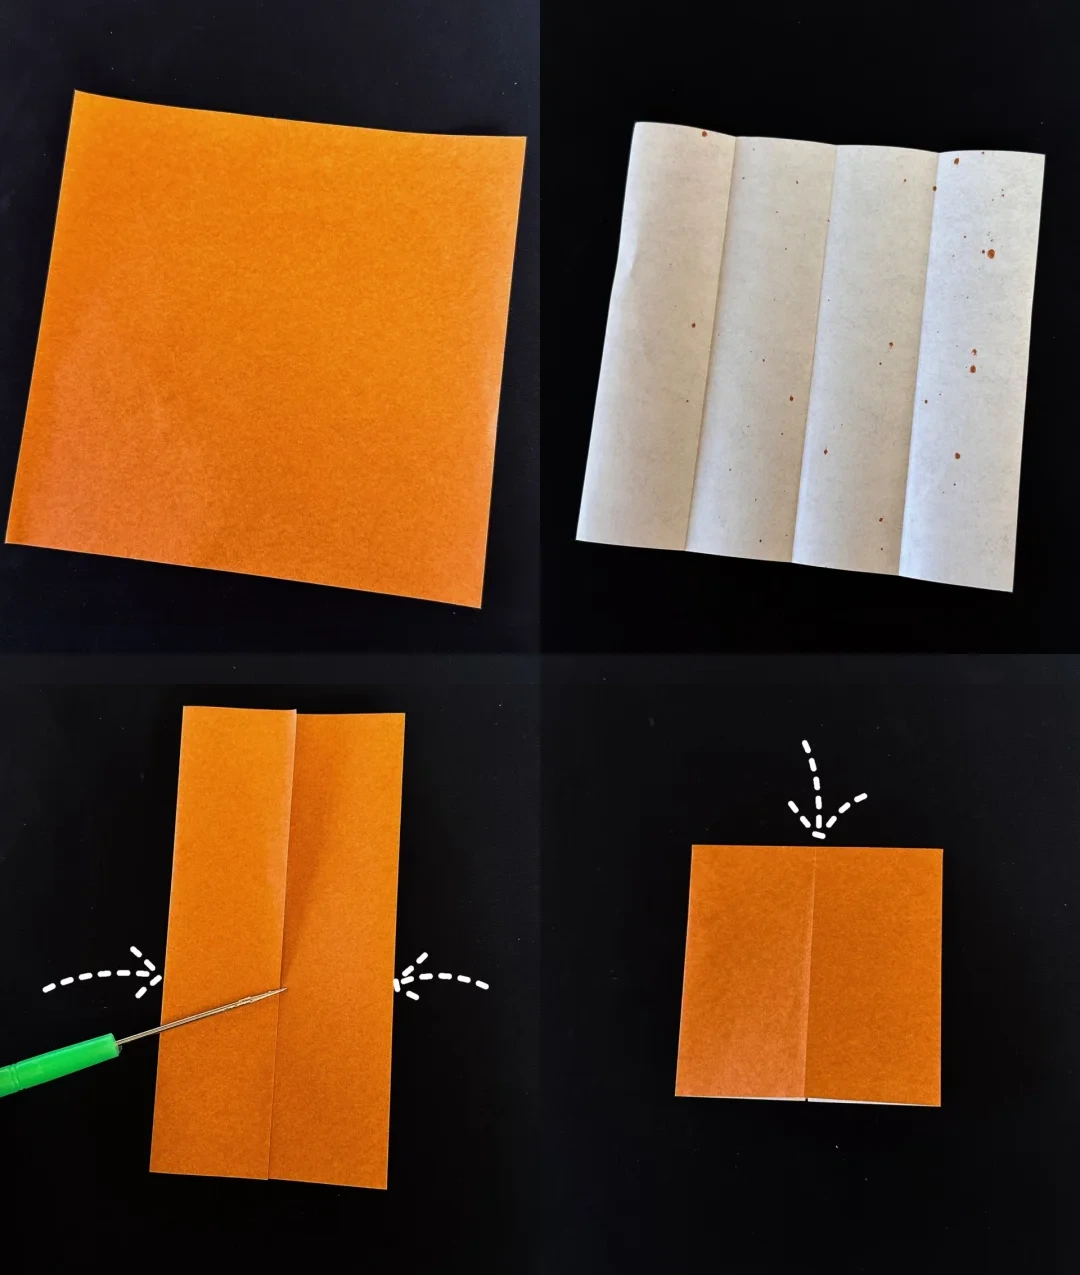
Make the base folds
 Open image at full size ↗
Crease the square into four equal vertical strips. Fold the left and right edges to the center.
Fold the rectangle in half downward, then unfold this last fold.
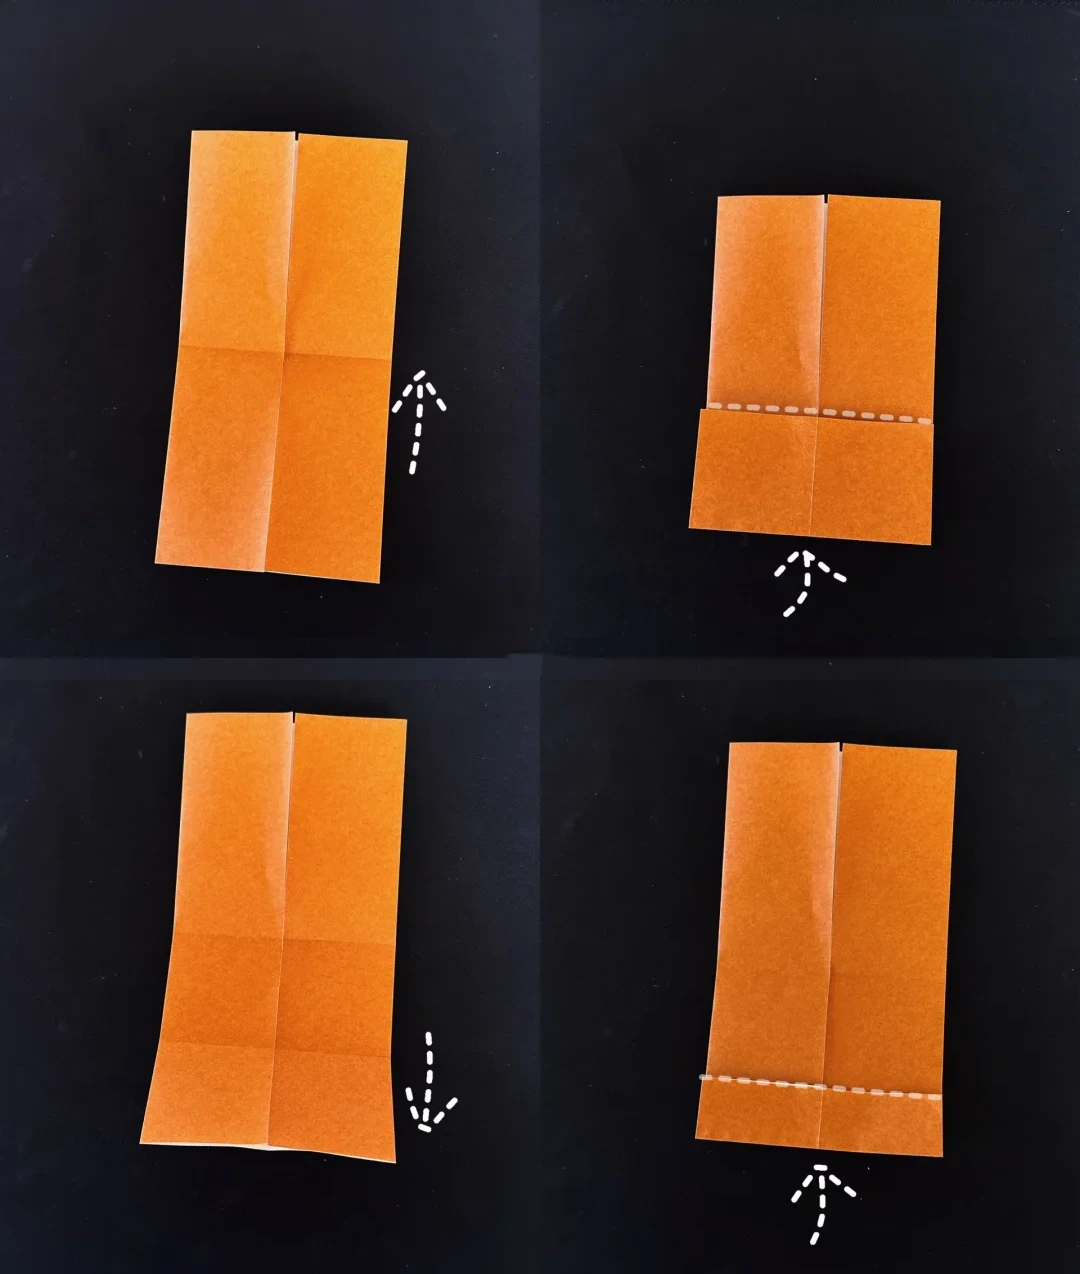
Mark the lower guide folds
 Open image at full size ↗
Open the lower half. Fold the bottom edge upward to the middle crease, then unfold.
Bring the bottom edge to the new lower crease to make a narrower fold.
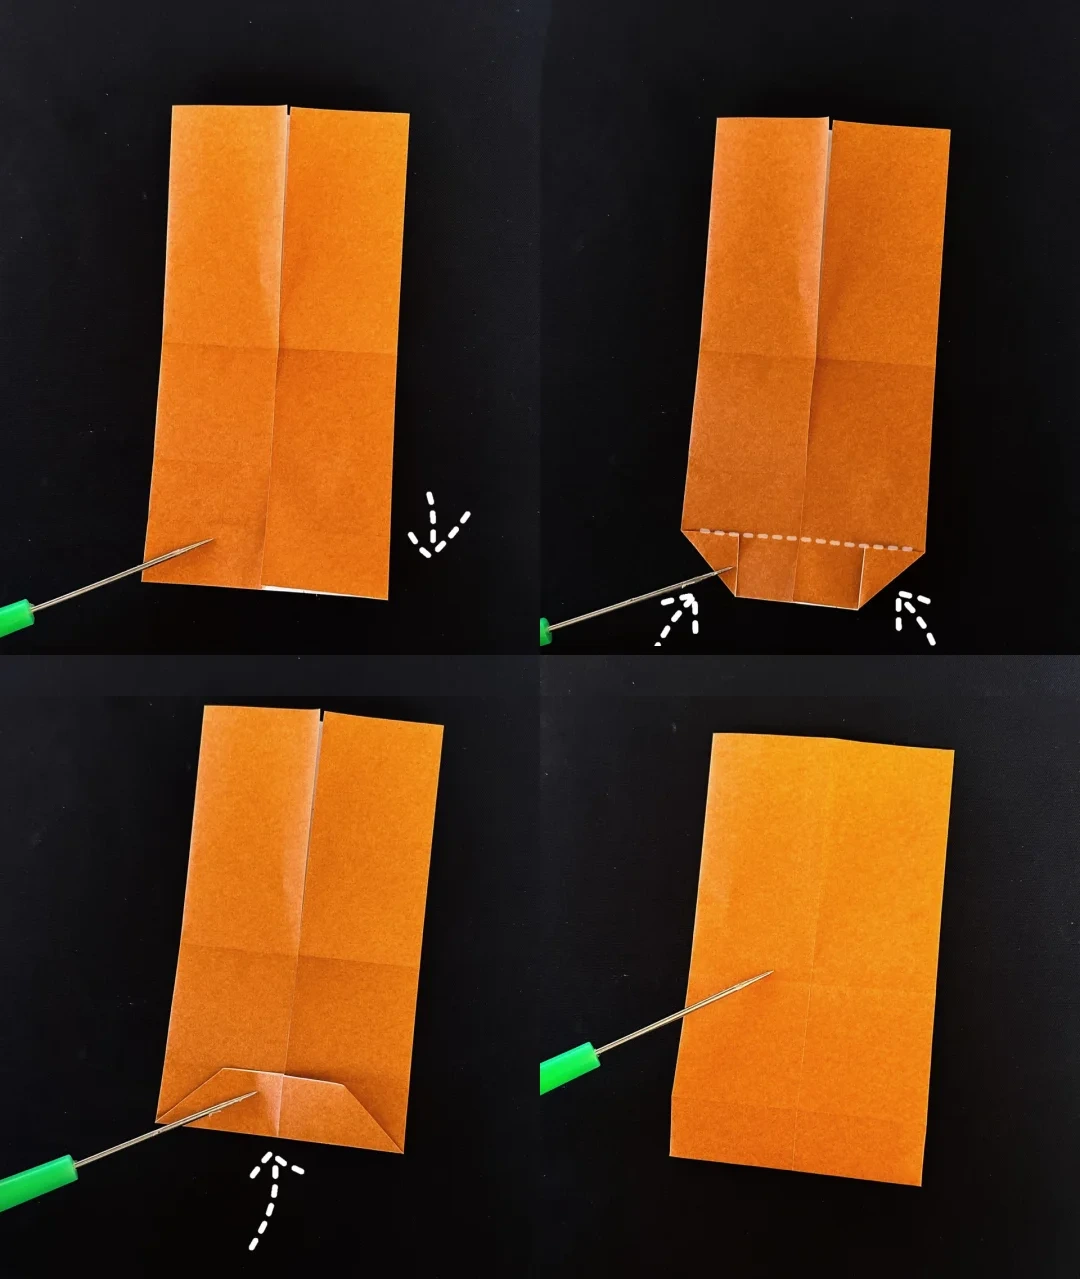
Shape the lower corners
 Open image at full size ↗
Open the narrow fold. Bring the two bottom corners toward the marked crease, then fold the lower section upward along the guide.
Turn the model over.
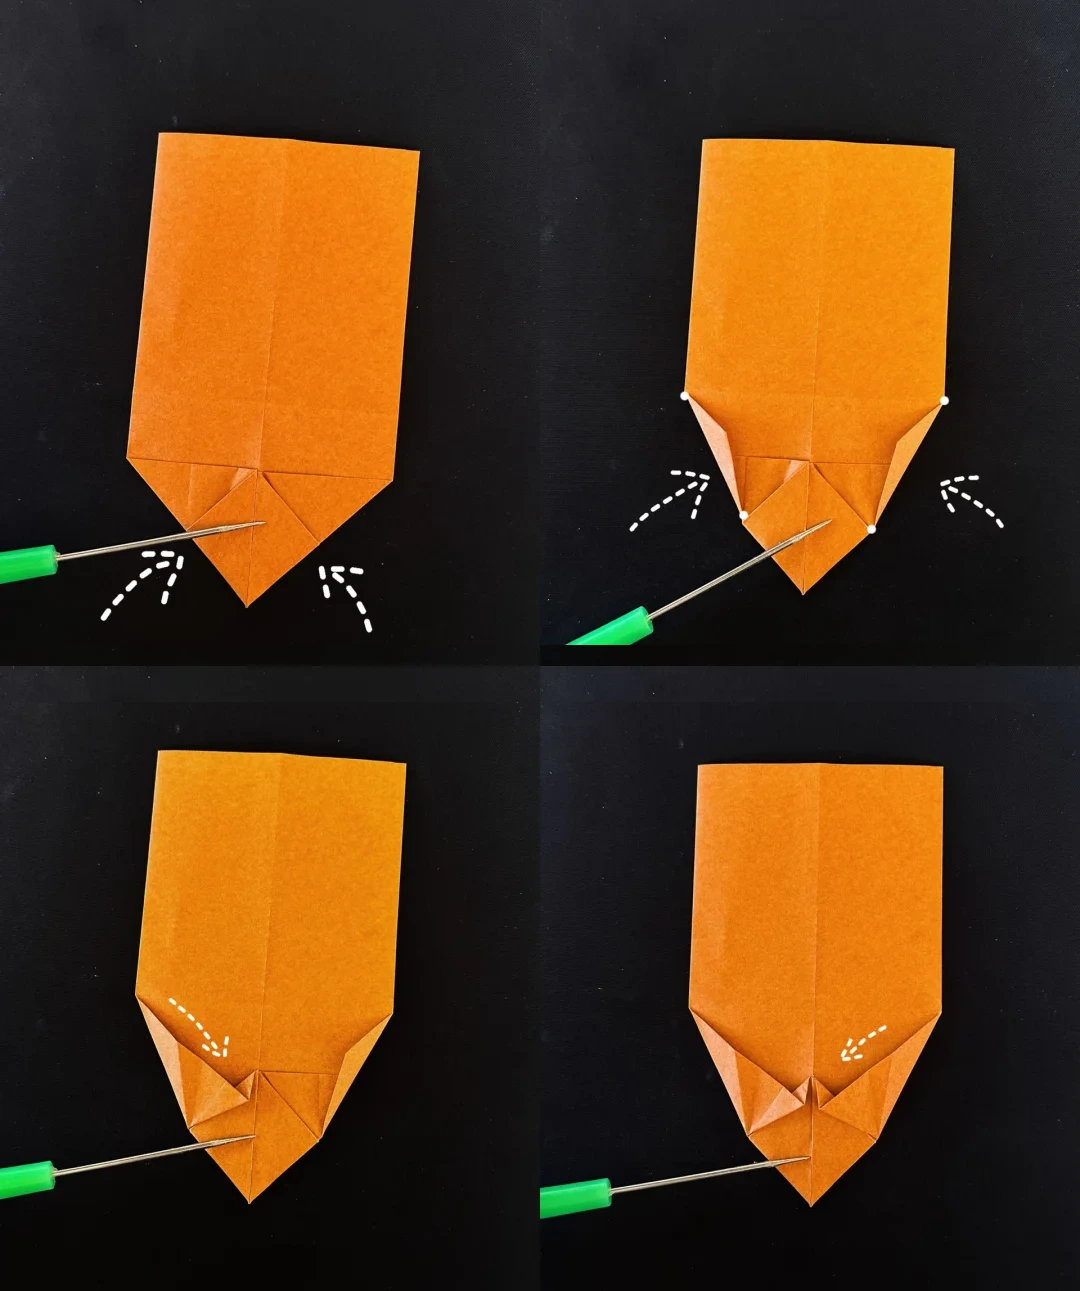
Open the small pockets
 Open image at full size ↗
Fold the two lower edges inward toward the center. Open and squash the small triangular pockets.
Bring each side inward along the line between the marked points, repeating on both sides.
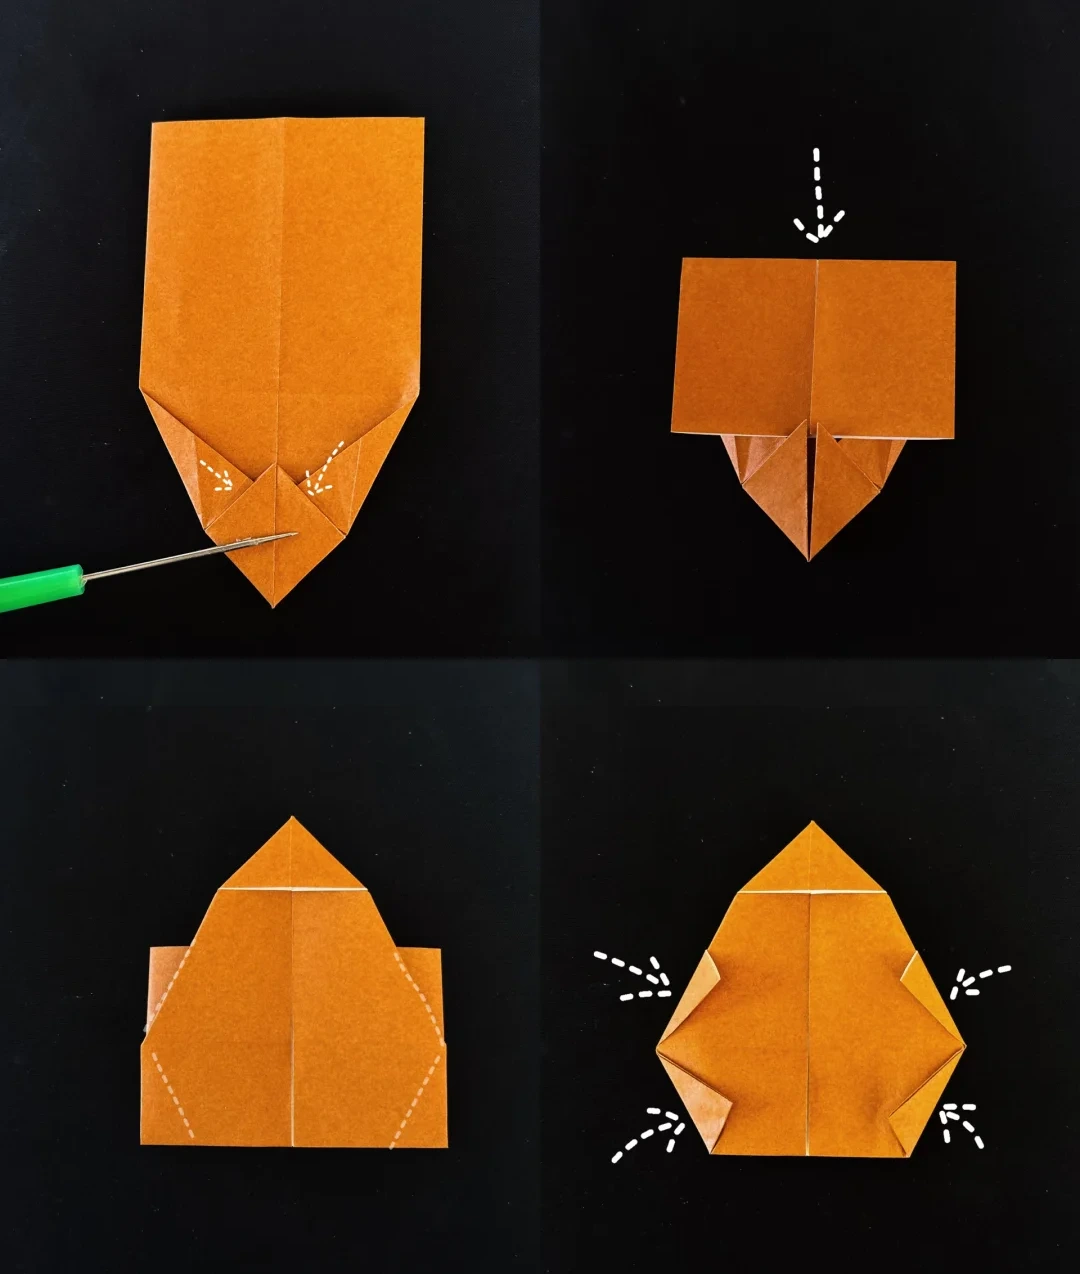
Tuck and fold the body
 Open image at full size ↗
Tuck the small excess flaps between the layers. Fold the upper section downward along the guide.
Turn the paper over and fold all four indicated corners inward.
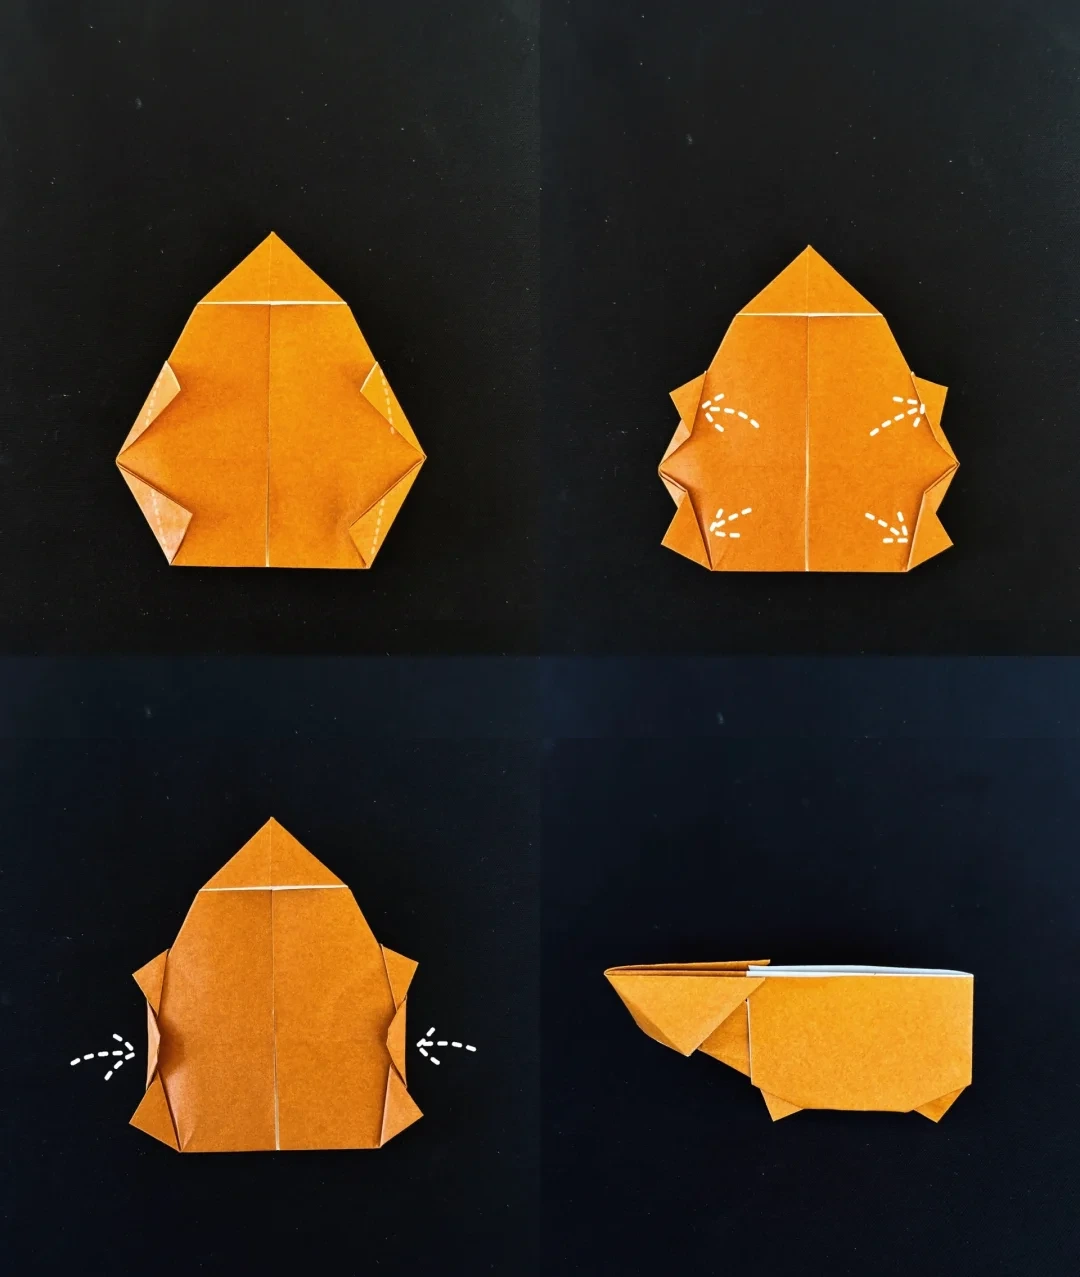
Form the feet
 Open image at full size ↗
Fold the small corner sections outward along the dotted guides to create the feet.
Bring the side sections toward the middle and fold the entire model in half.
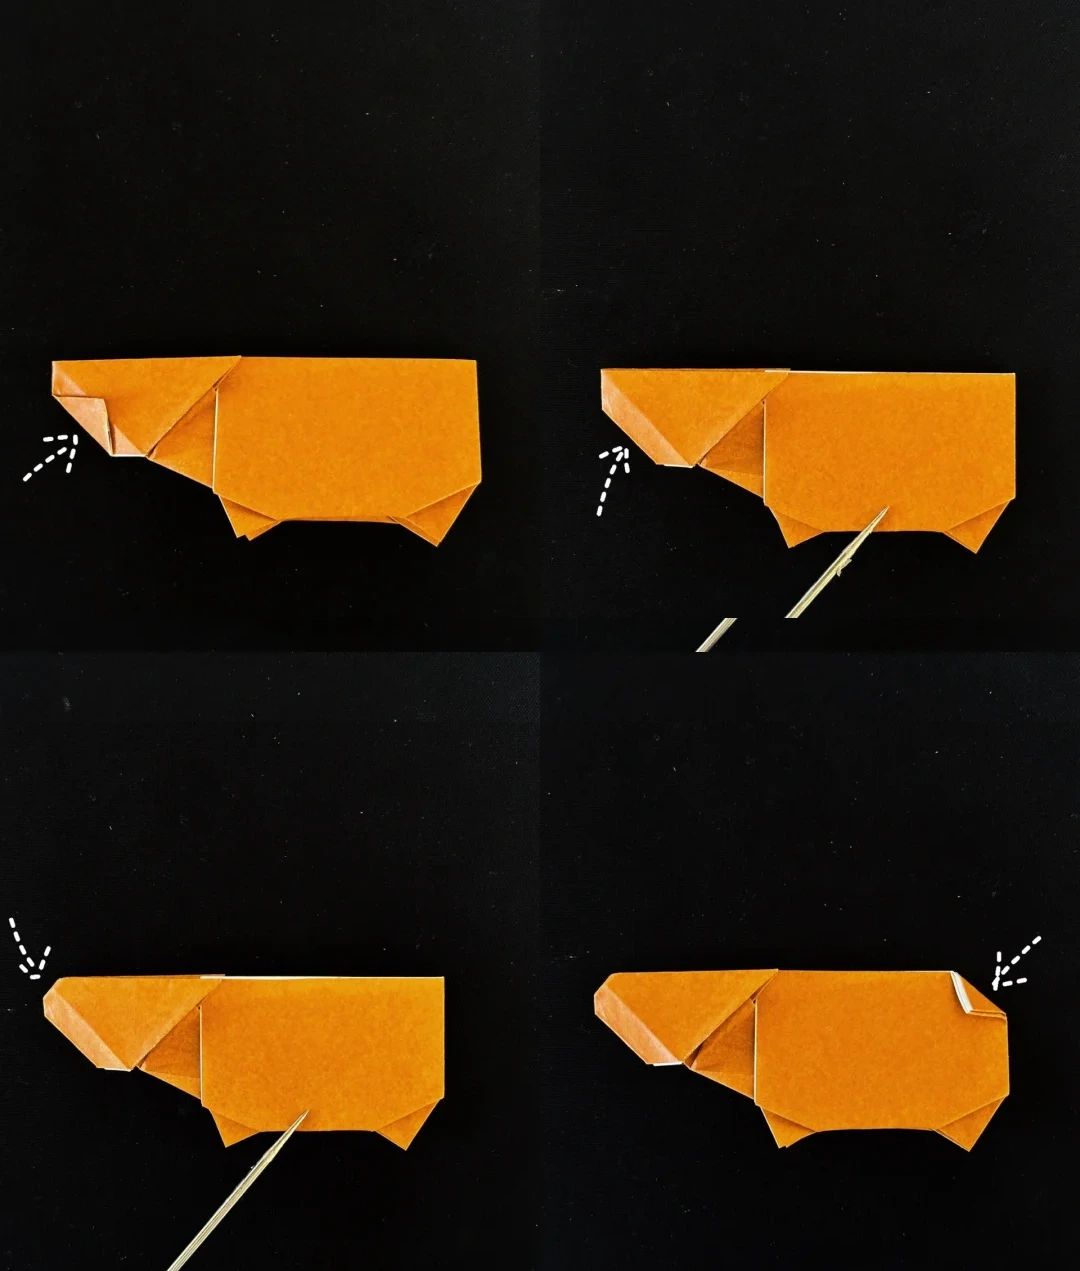
Round the outline
 Open image at full size ↗
Fold a little of the snout inward, unfold, and reverse that fold between the layers.
Make small inward folds at the indicated corners to soften the front and rear outline.
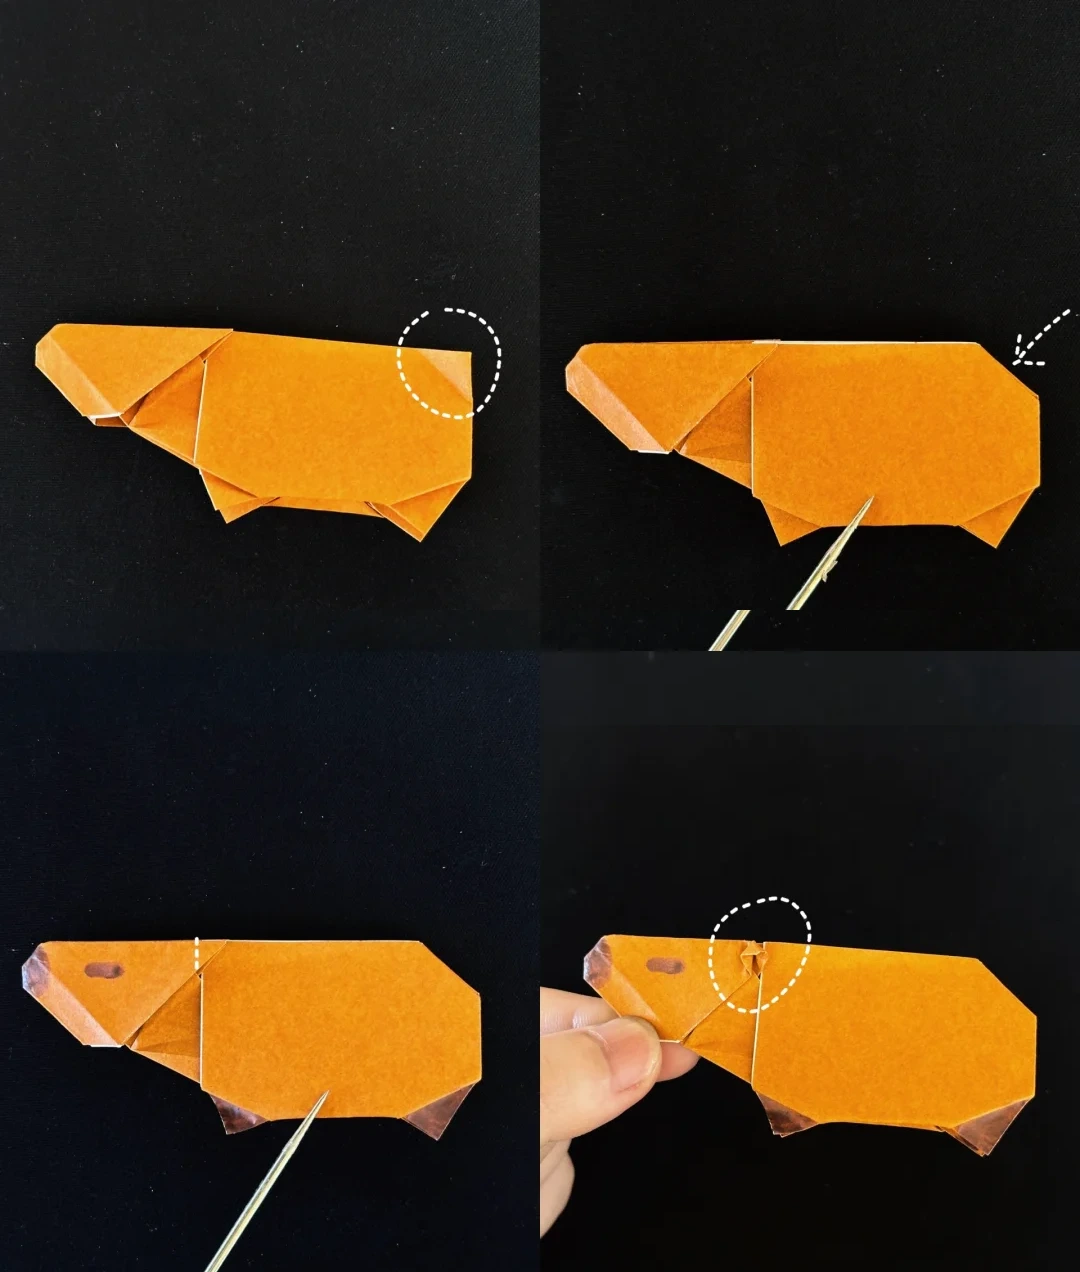
Finish the ears and face
 Open image at full size ↗
Open the rear corner folds and tuck them inside along their creases.
Near the head, fold the indicated layer to the left and open the small flap to form the ear. Add a short eye mark and a nose.
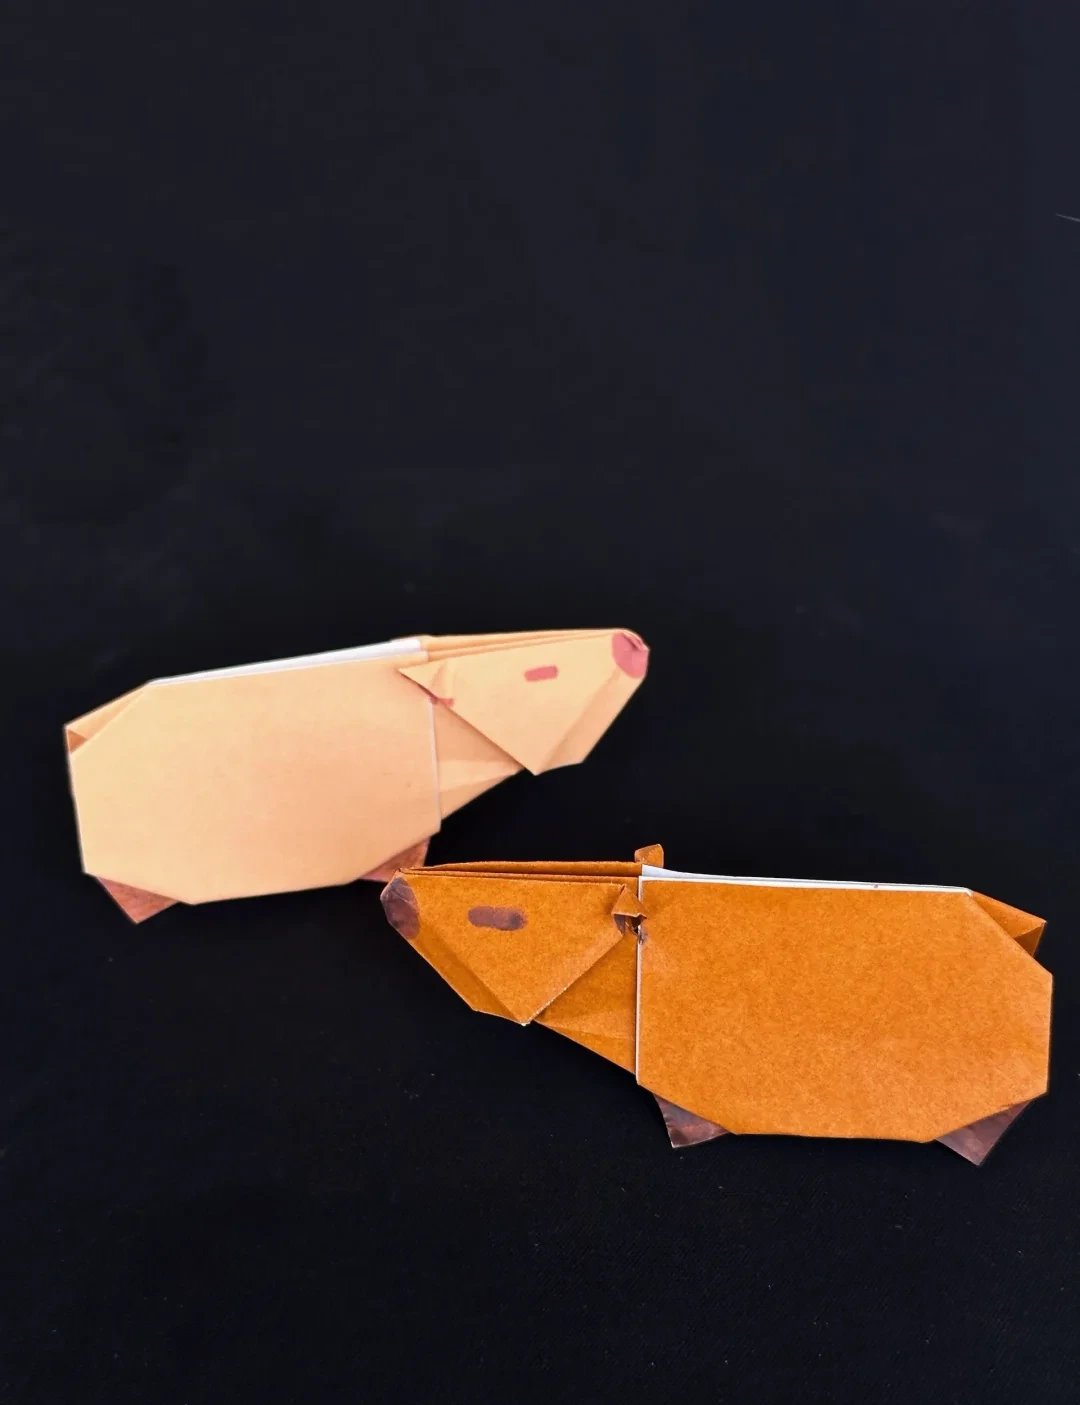
Finished model
 Open image at full size ↗
Use this finished example to compare the shape and proportions of your model.
Finished model
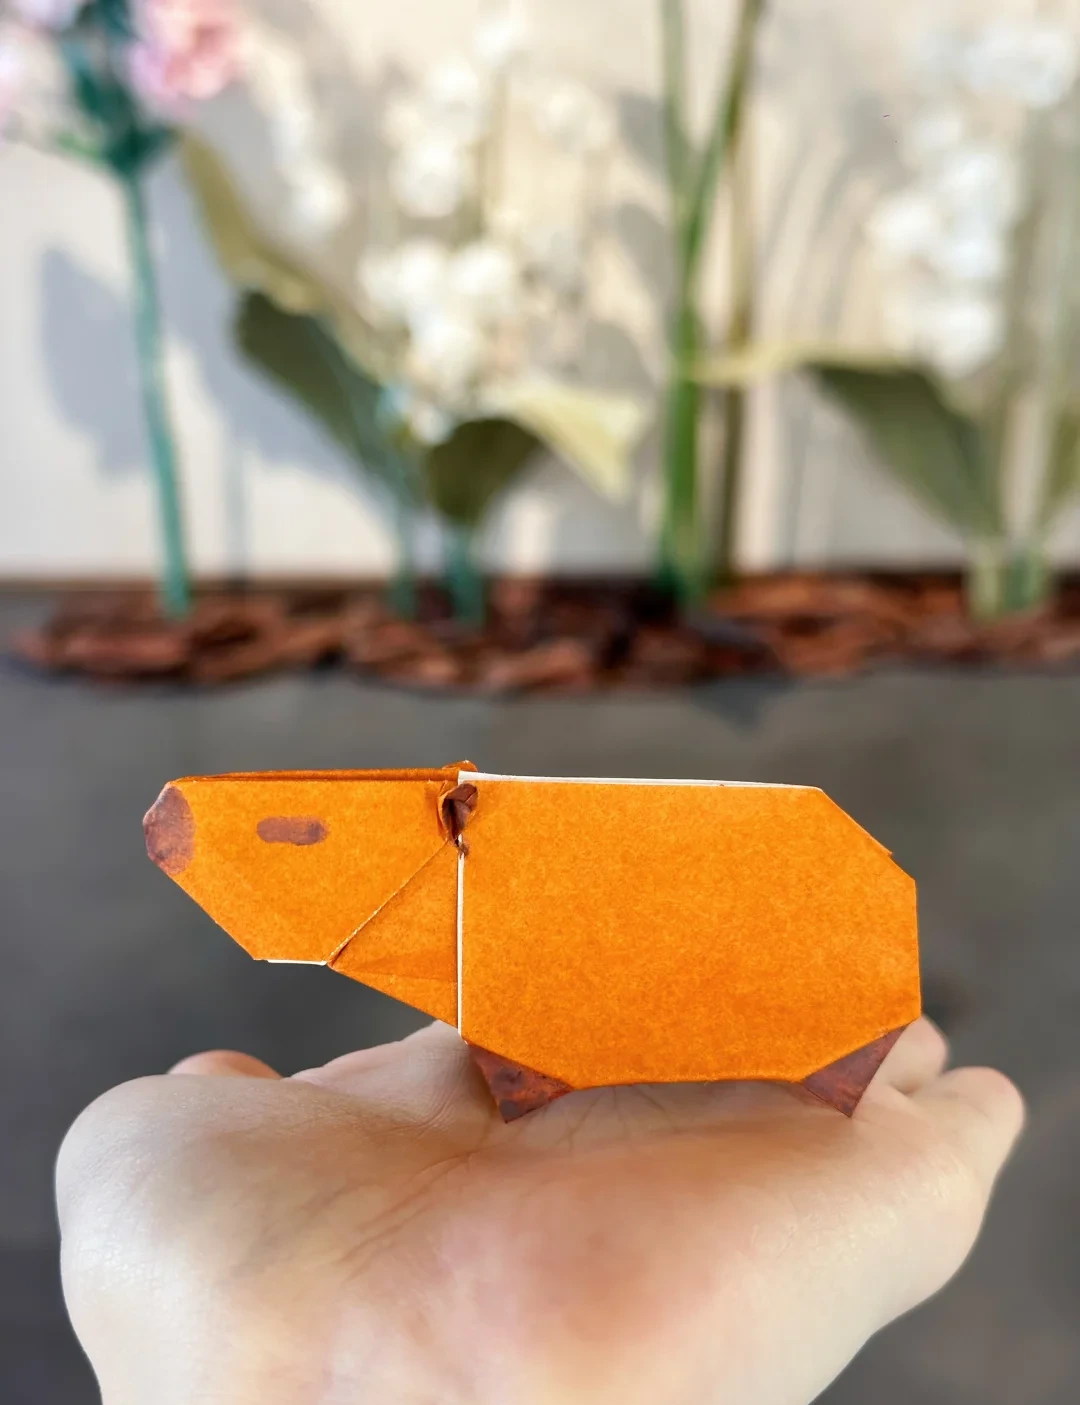 Open image at full size ↗
Use this finished example to compare the shape and proportions of your model.
Follow the diagrams alongside the step-by-step English instructions.
Choose your next project →