
Decorations · Step-by-step guide
Paper LOVE Letter Set
Fold an L, a heart, a V and an E from four small squares for a colorful message.
What you’ll need
- Four 7.5 × 7.5 cm paper squares
- Scissors
Paper craft · Folding and assembly

Make it, step by step.
16 steps · Original diagrams with English instructions
Read each picture from left to right, then top to bottom. The V is shown as a finished shape; its intermediate bend is not pictured. The extra small heart in the display is optional.
Finished model
 Open image at full size ↗
Use this finished example to compare the shape and proportions of your model.
Choose four squares
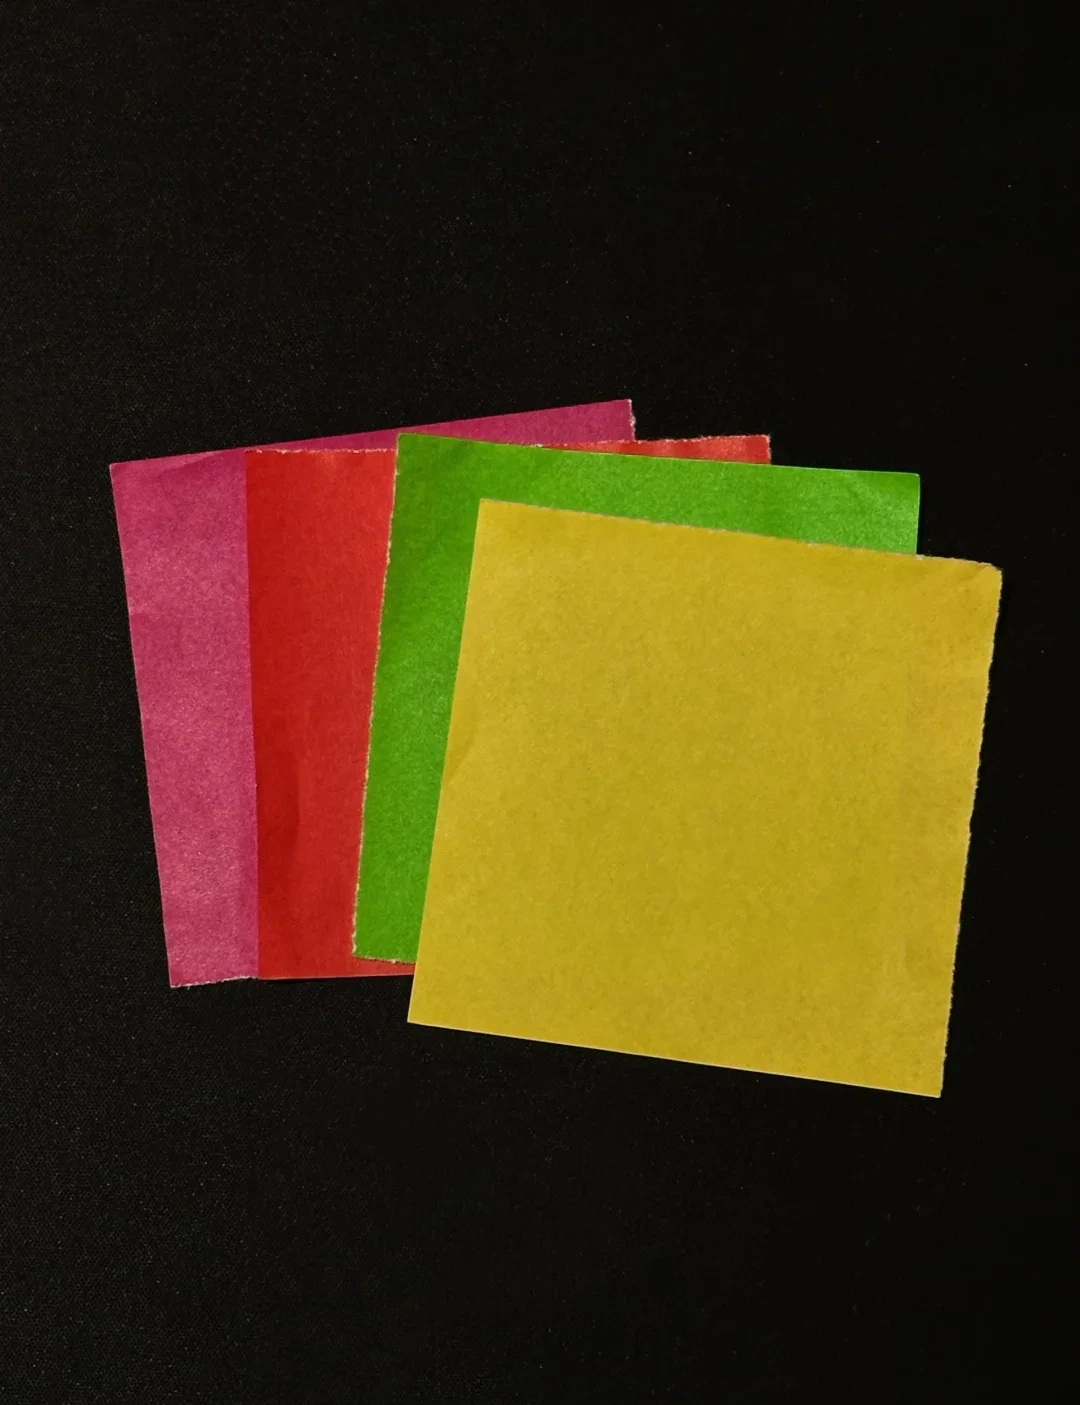 Open image at full size ↗
Use a separate square for each letter or heart.
Fold the L strip
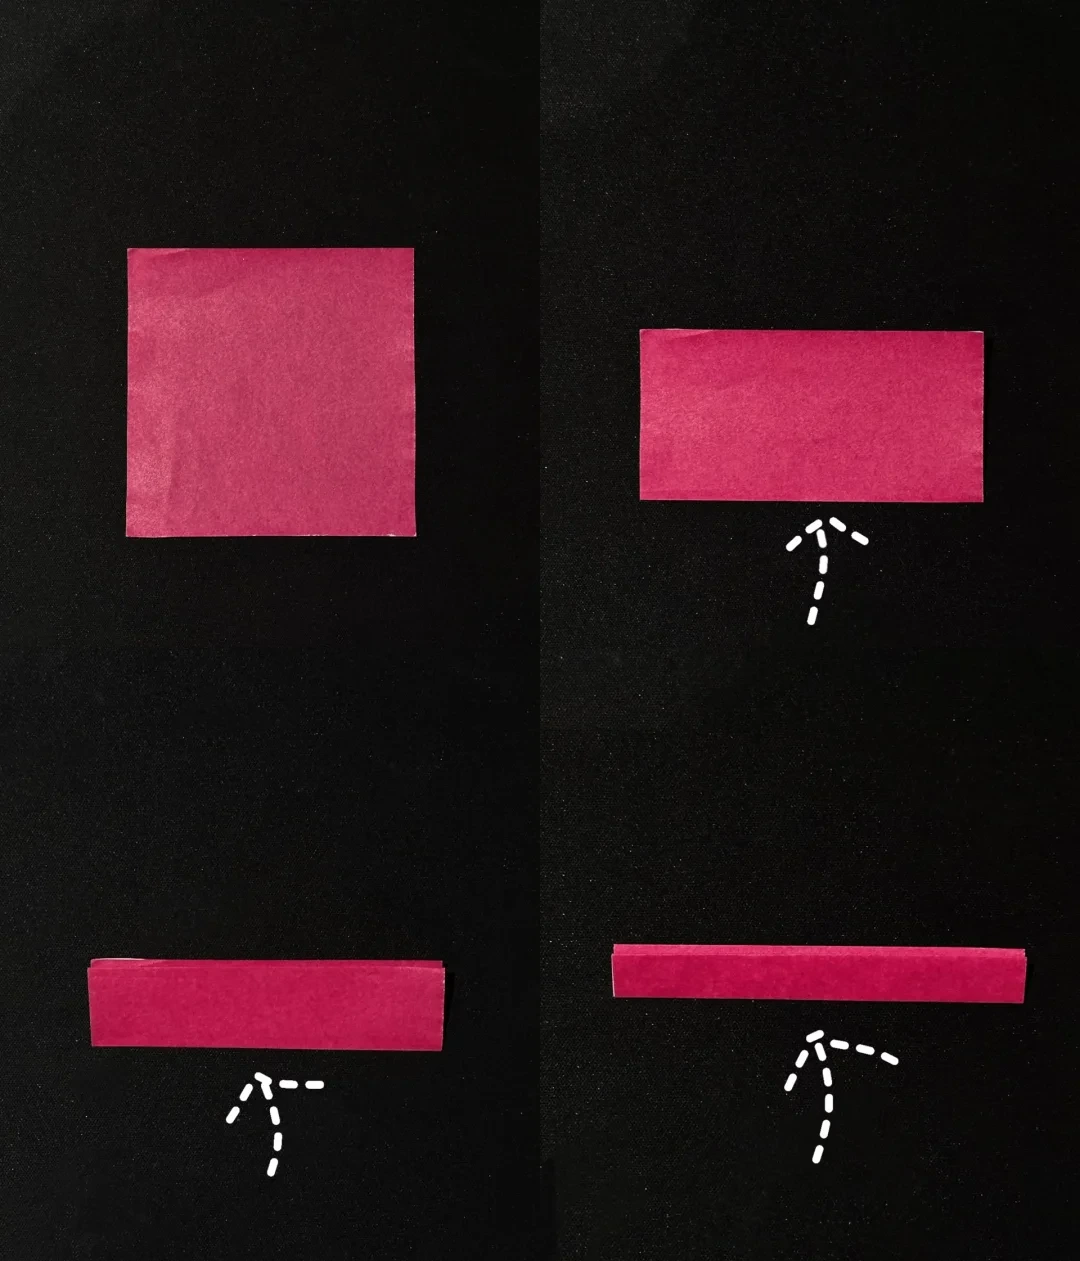 Open image at full size ↗
Fold the first square in half three times in the same direction to make a narrow strip.
Shape the L
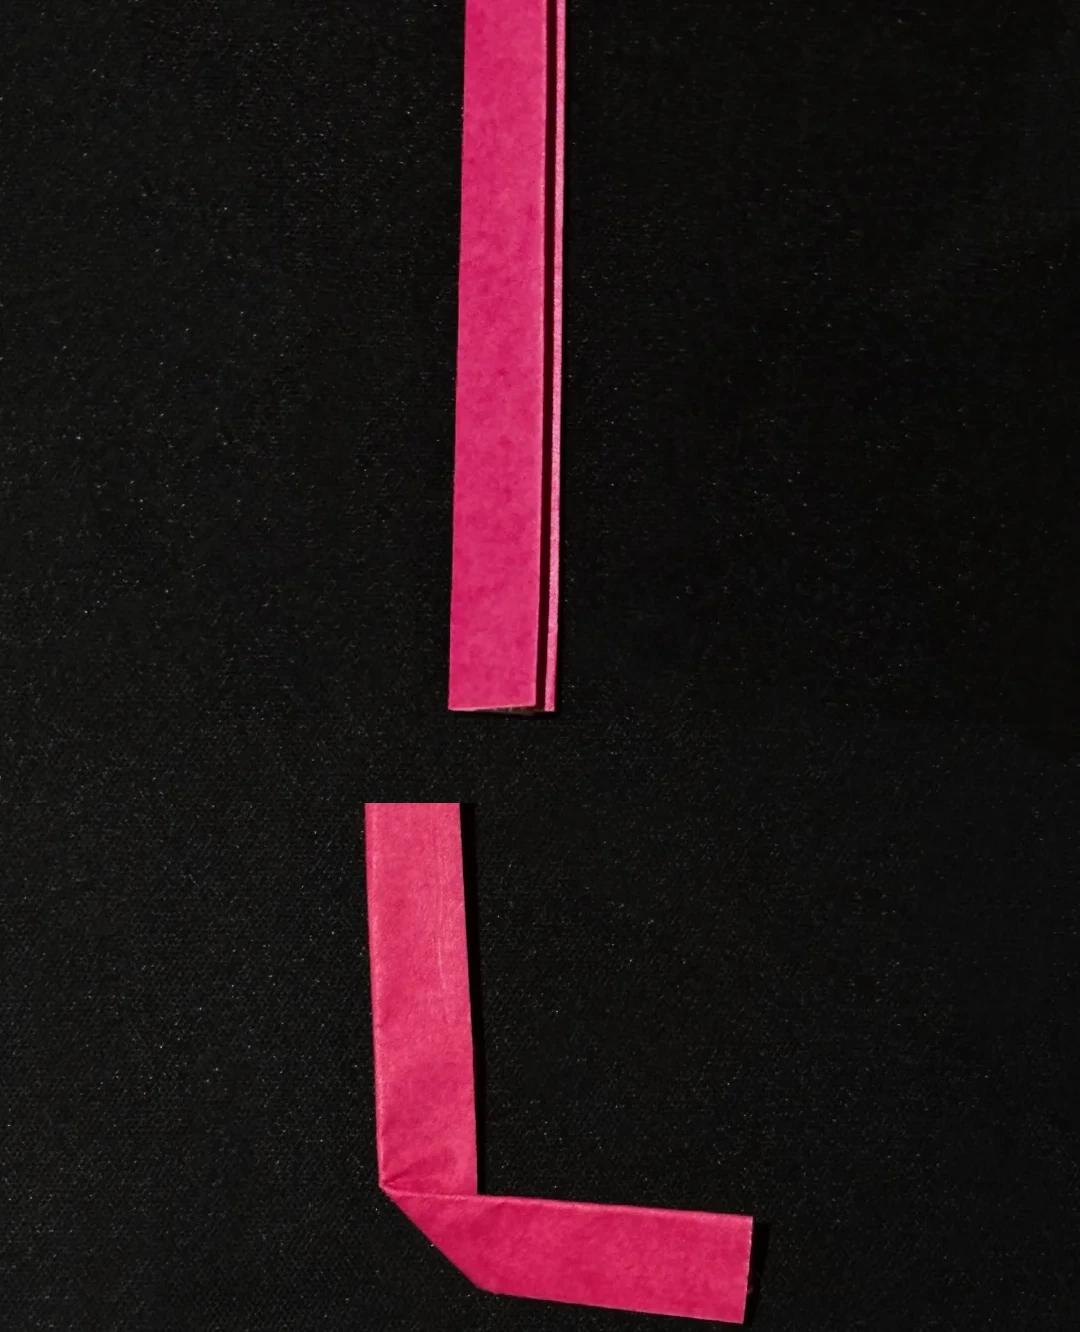 Open image at full size ↗
Place the strip vertically. Fold the lower portion to the right at an angle to form the foot of the L.
Prepare the heart
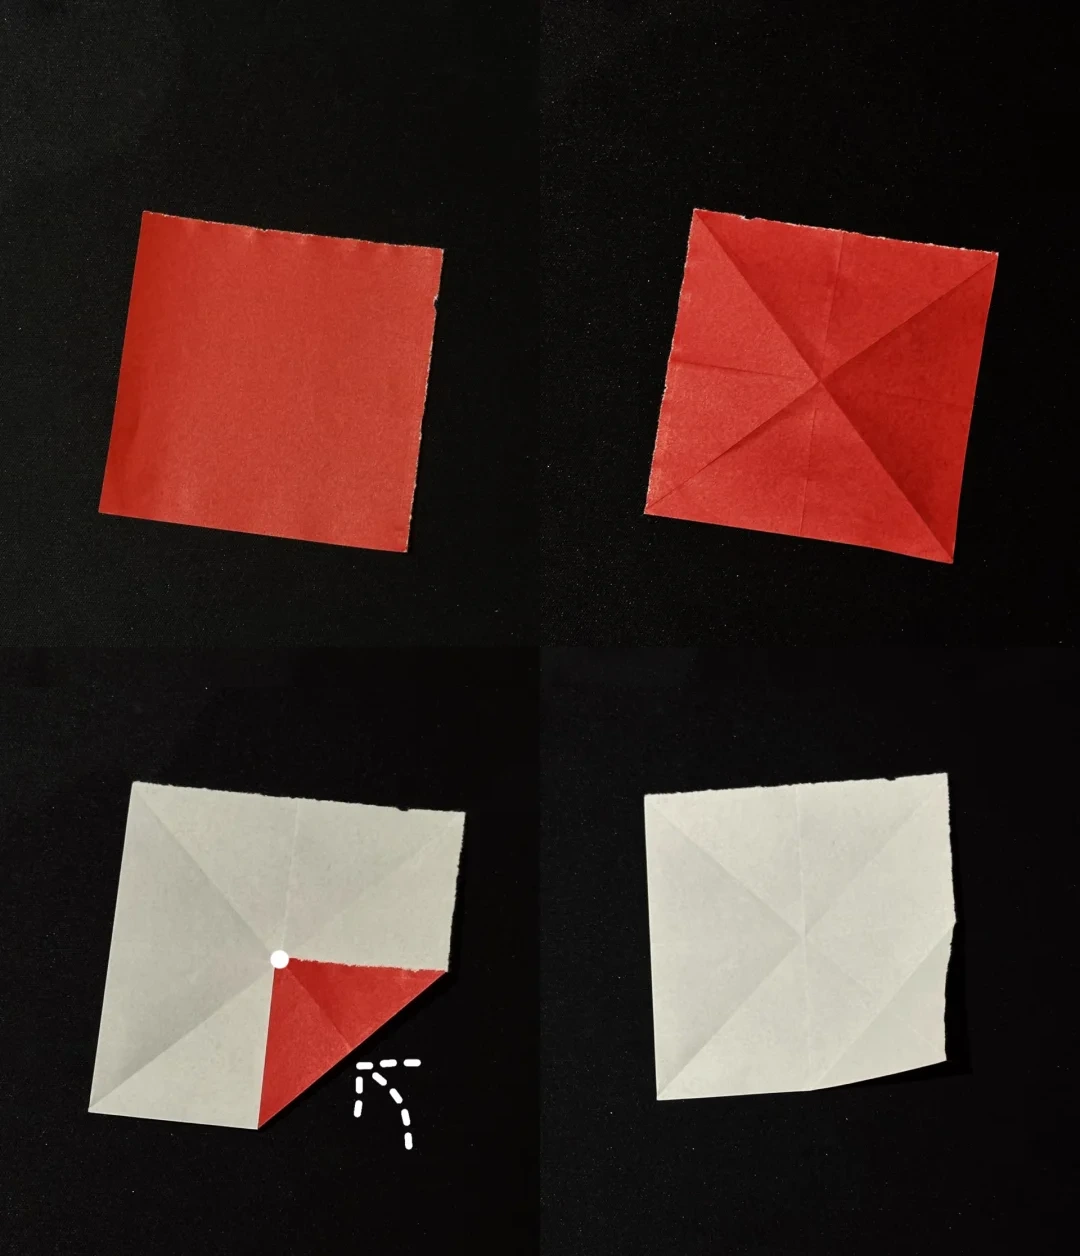 Open image at full size ↗
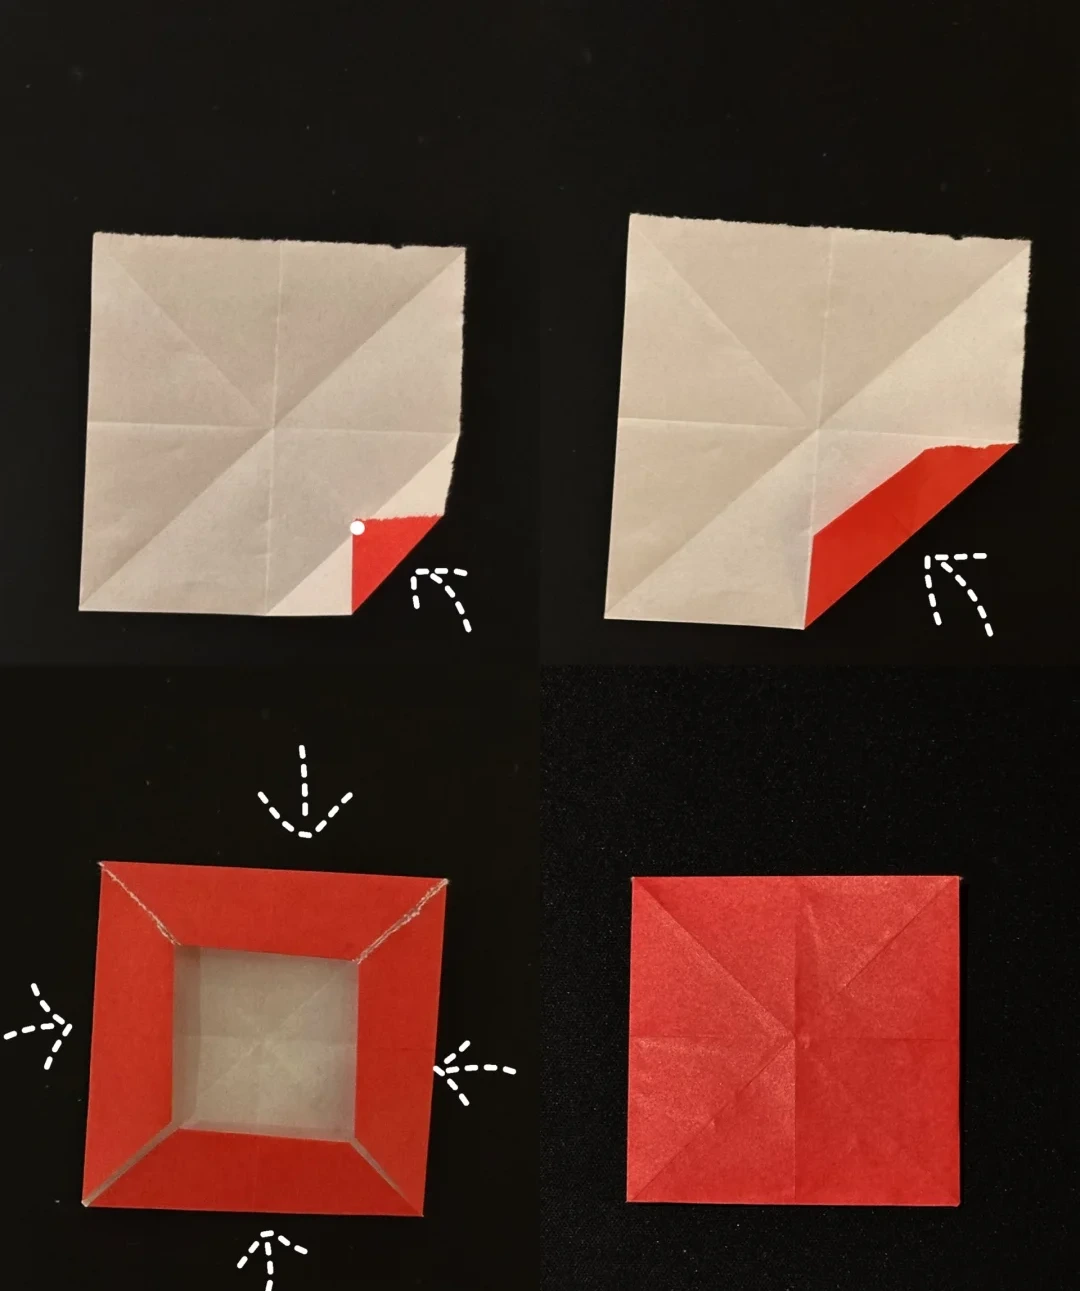
With the second square, crease both diagonals and both midlines. Fold all four corners to the center, then unfold.
Make the heart border
 Open image at full size ↗
Fold each corner to its nearby crease. Repeat at all four corners.
Fold the edges inward along the existing creases, then turn the paper over.
Collapse the heart
 Open image at full size ↗
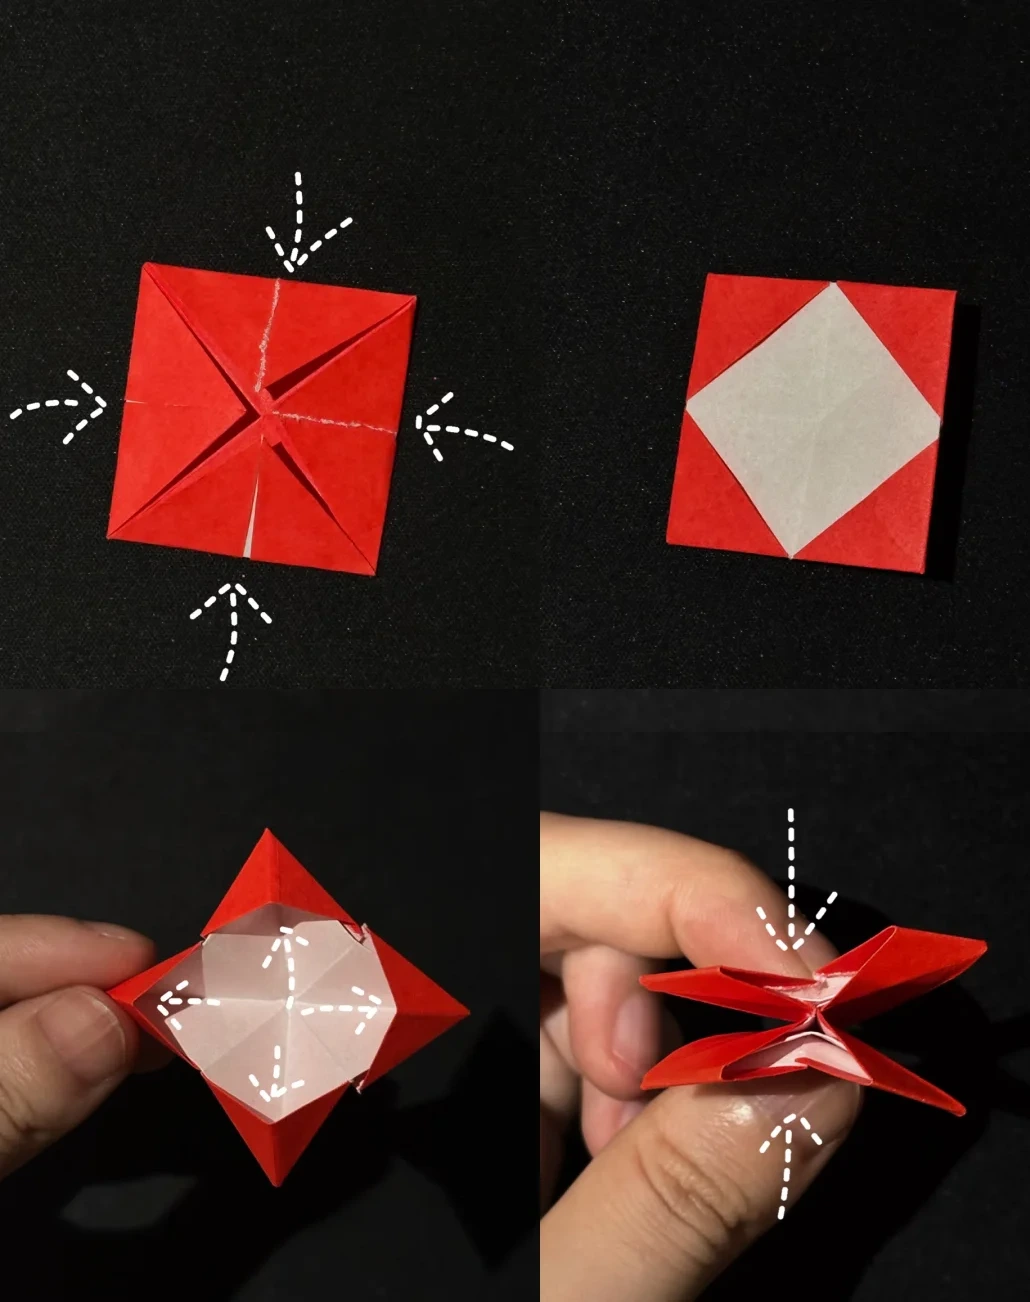
Bring all four corners to the center again and turn the paper over.
Open the four sides of the small central square. Bring its opposing layers together and squash along the creases as shown.
Orient the heart
 Open image at full size ↗
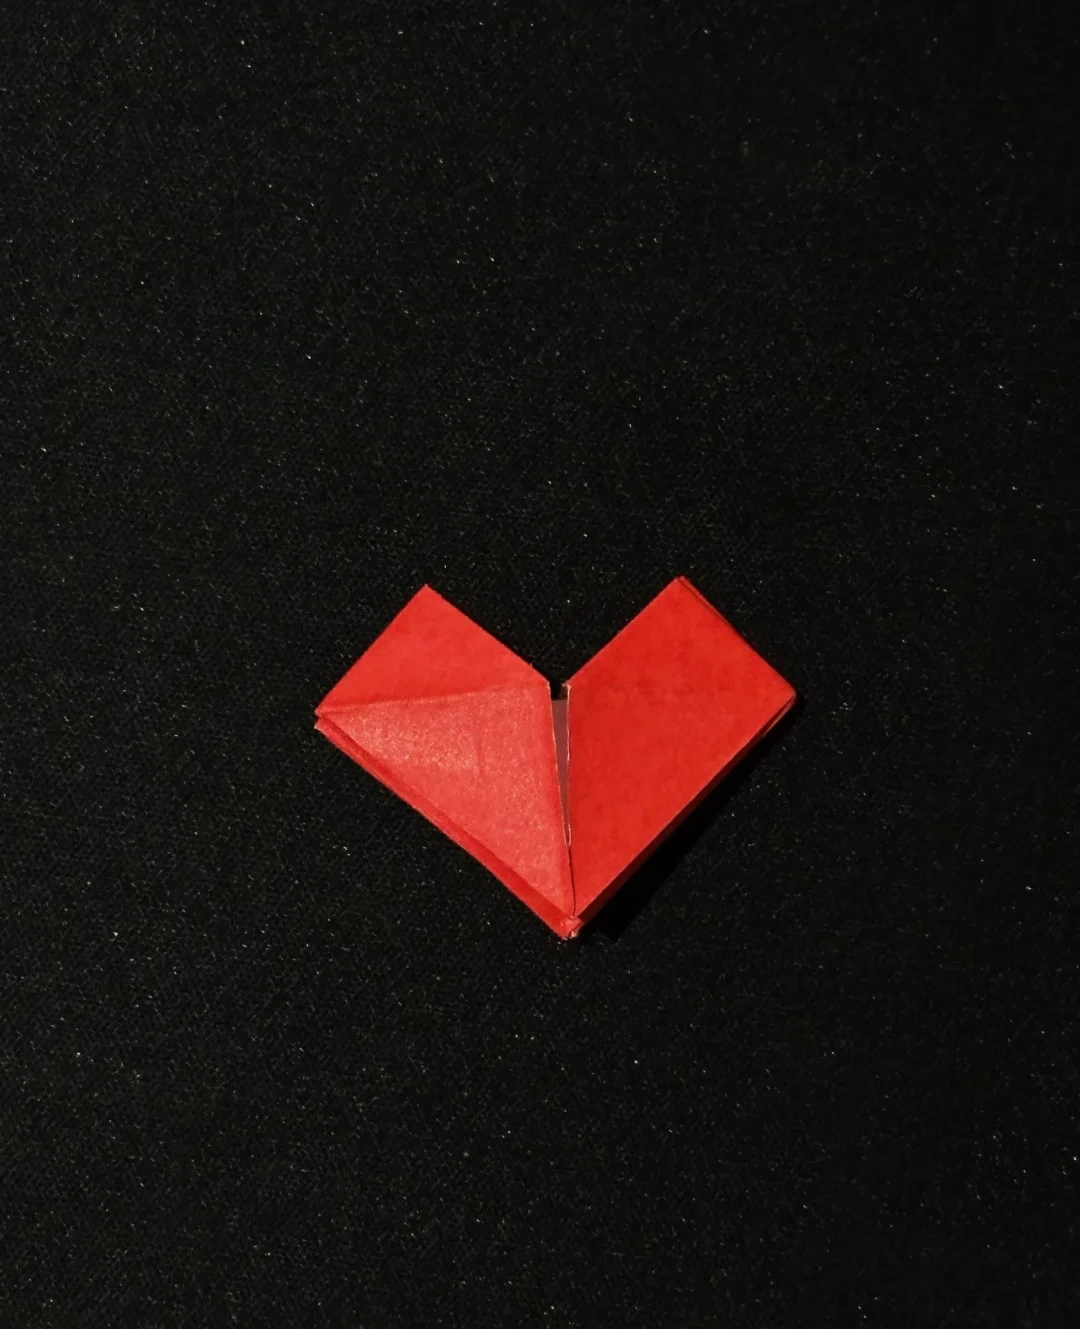
Turn the collapsed model to its front and open the two upper lobes to reveal the heart.
Fold the V strip
 Open image at full size ↗
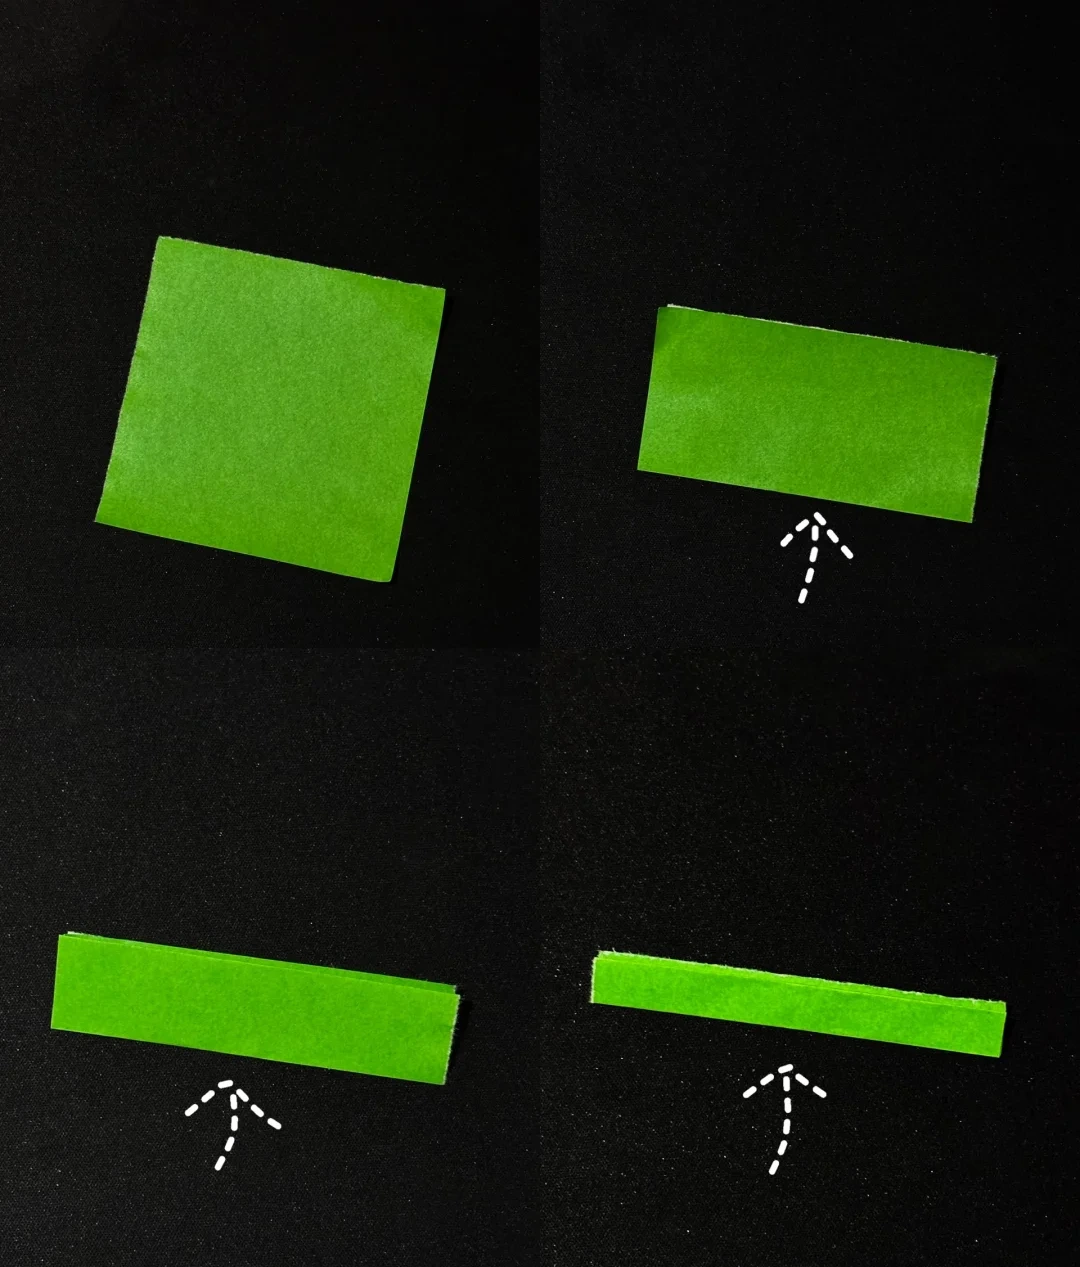
Fold the third square in half three times to make another narrow strip.
Shape the V
 Open image at full size ↗
Bend the strip near its middle so the two ends point upward and outward, matching the V in the picture.
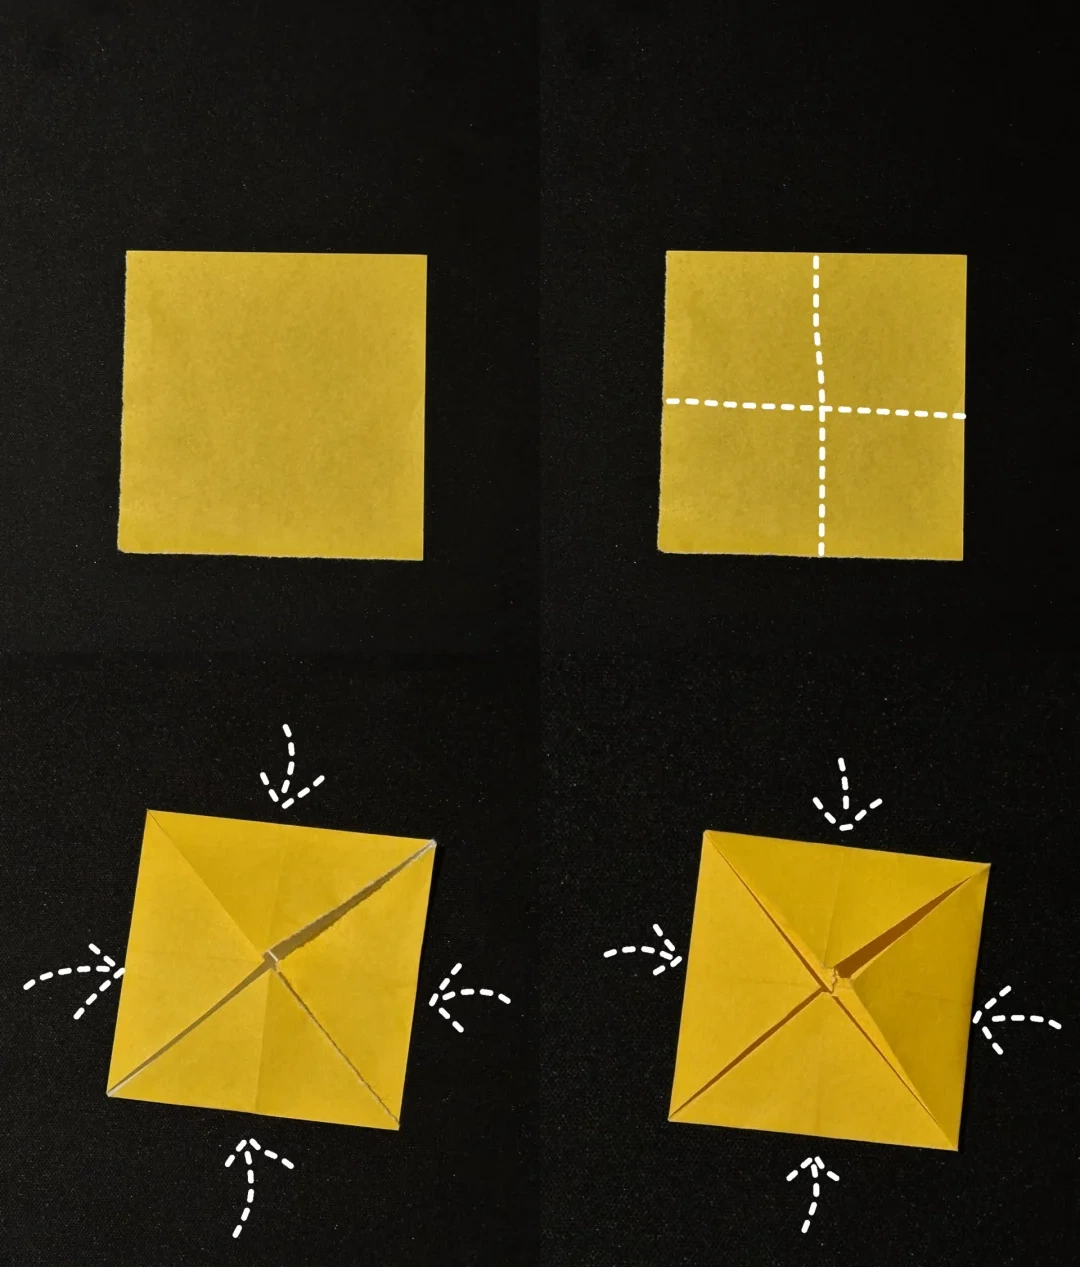
Prepare the E
 Open image at full size ↗
Crease the final square horizontally and vertically. Bring all four corners to the center.
Fold all four corners to the center once more.
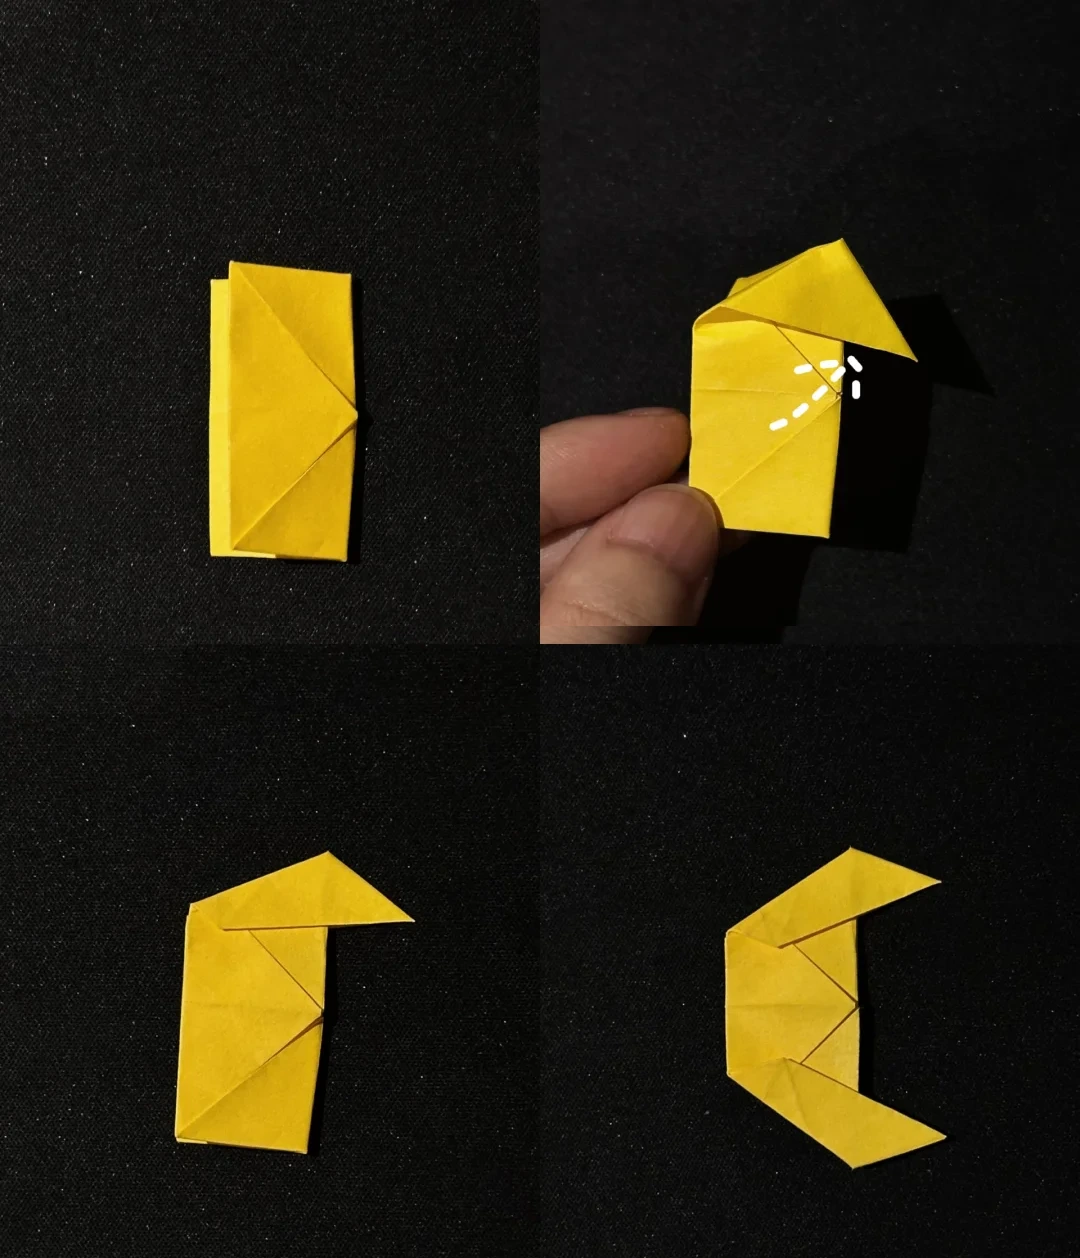
Open the arms of the E
 Open image at full size ↗
Fold the layered square in half. Pull the upper inner flap outward and flatten it.
Pull out the next layer to lengthen the upper arm. Repeat at the lower end.
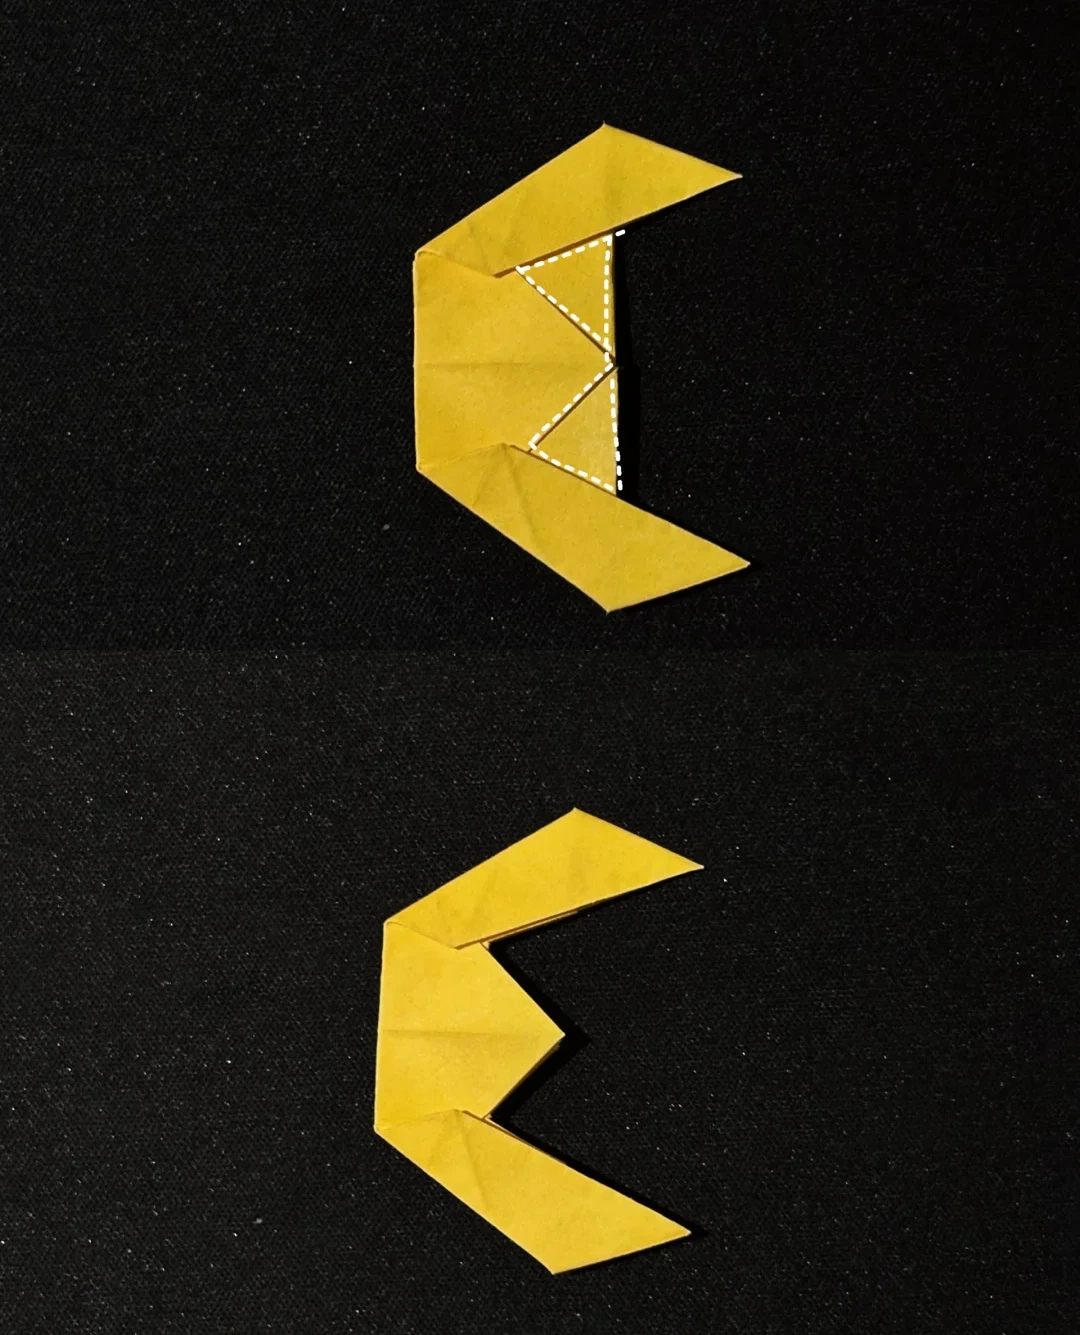
Cut the middle arm
 Open image at full size ↗
Cut away the two small triangular sections marked by the dotted guides, leaving the central point attached to the left spine.
Arrange the message
 Open image at full size ↗
Place the L, heart, V and E in order. Adjust their spacing to display the word.
Finished model
 Open image at full size ↗
Use this finished example to compare the shape and proportions of your model.
Follow the diagrams alongside the step-by-step English instructions.
Choose your next project →