
Flowers & nature · Step-by-step guide
Flat Paper Apple
Fold a rounded apple silhouette and finish it with a small contrasting stem.
What you’ll need
- One paper square
- A small brown paper strip for the stem
- Craft glue
Paper craft · Folding and assembly
Make it, step by step.
7 steps · Original diagrams with English instructions
Read each picture from left to right, then top to bottom. No exact paper sizes are specified.
Prepare the lower folds
 Open image at full size ↗
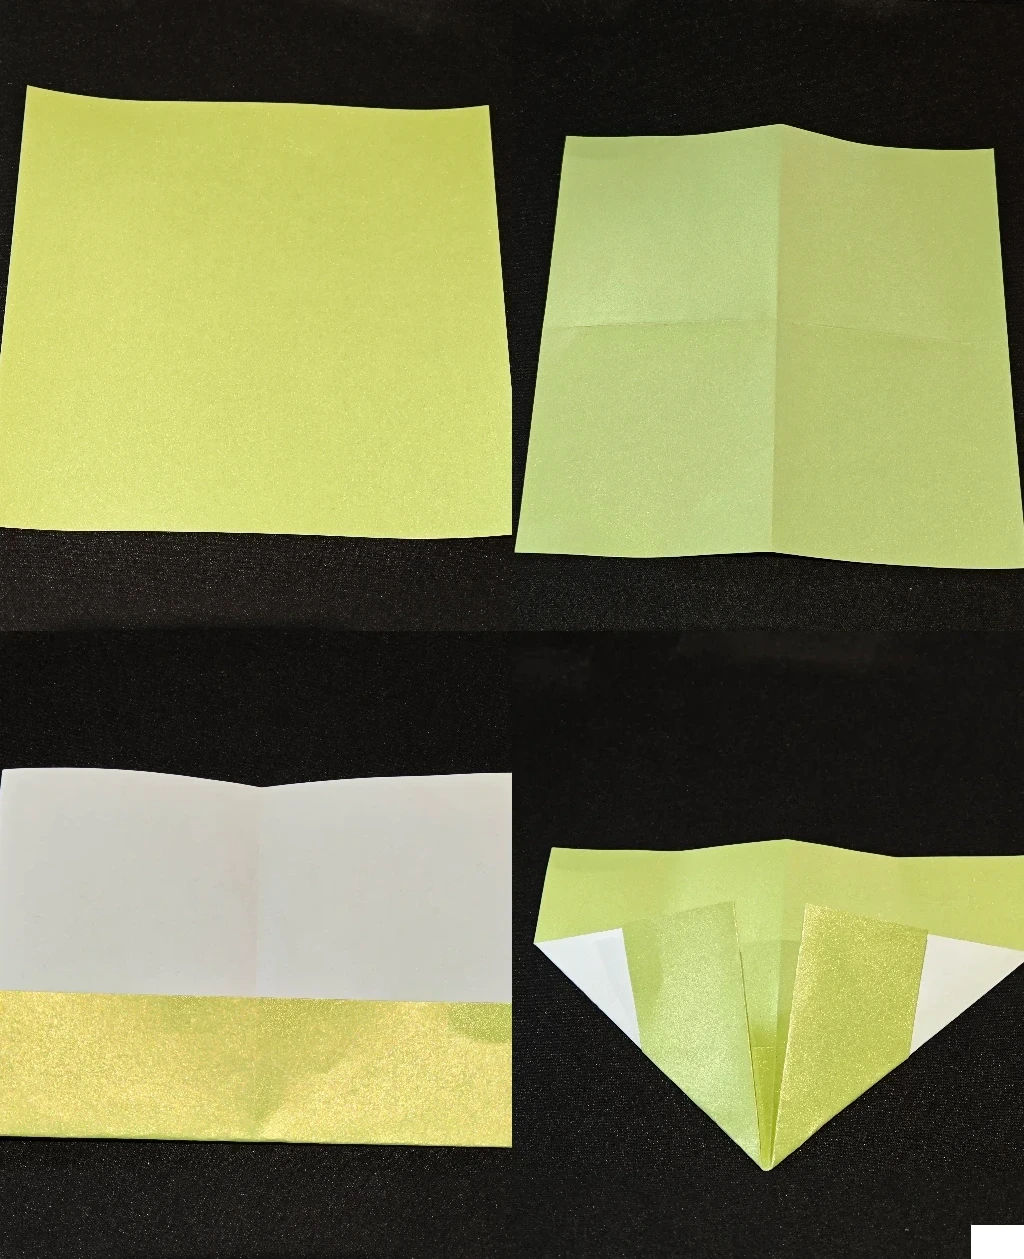
Crease both diagonals and both midlines. Turn the square over and fold the bottom edge upward to the middle.
Turn it over again and bring the two lower side edges toward the middle.
Fold the upper section
 Open image at full size ↗
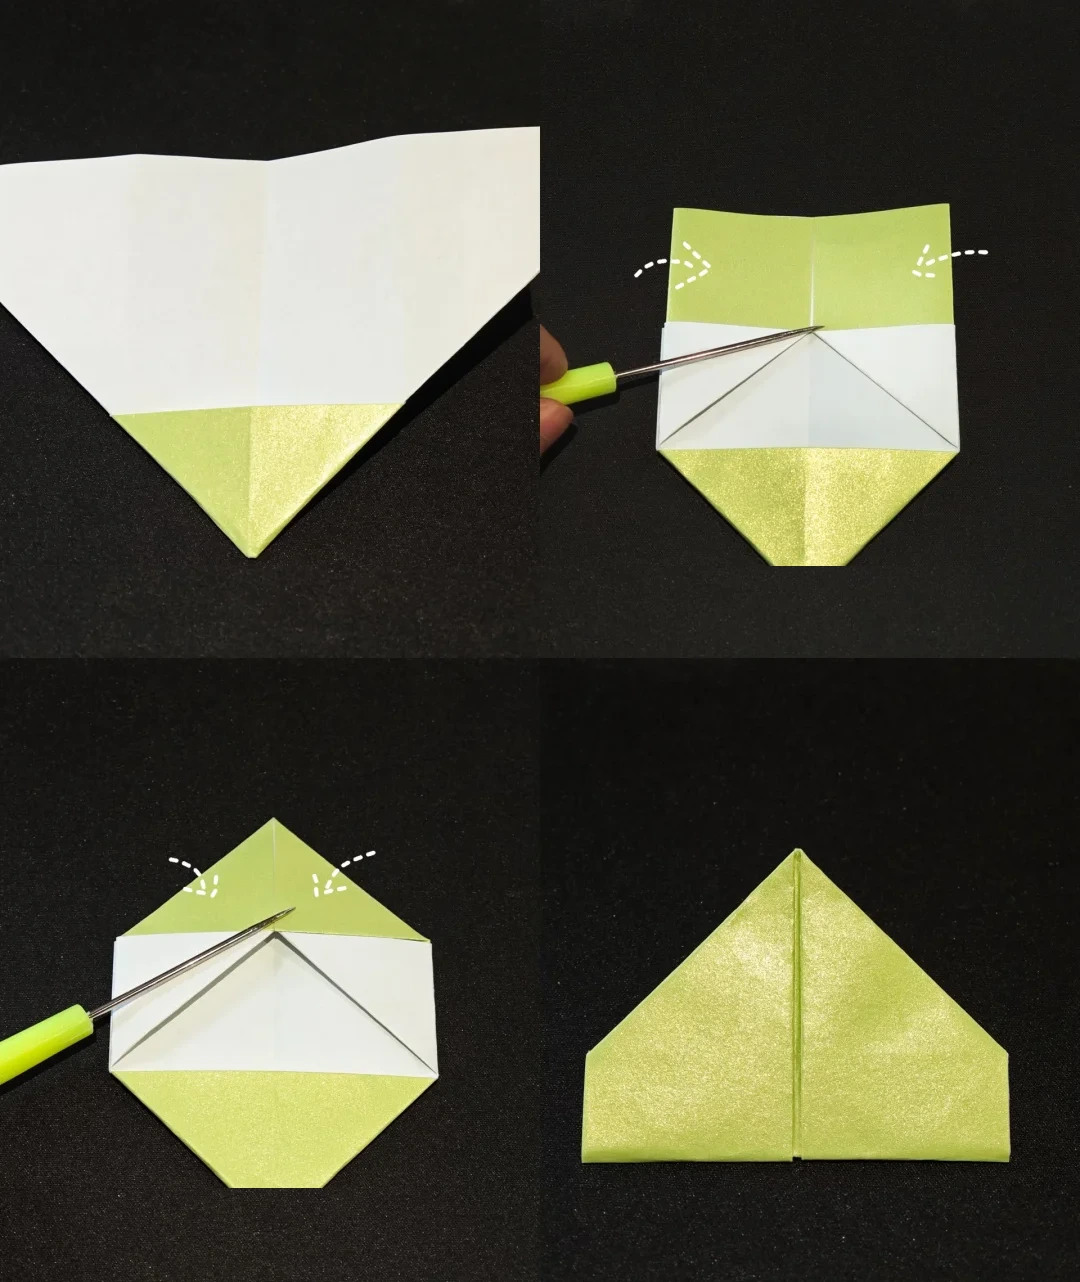
Turn the model over. Bring the upper side sections inward, then fold the two upper corners toward the center. Turn the model over again.
Round the apple shoulders
 Open image at full size ↗
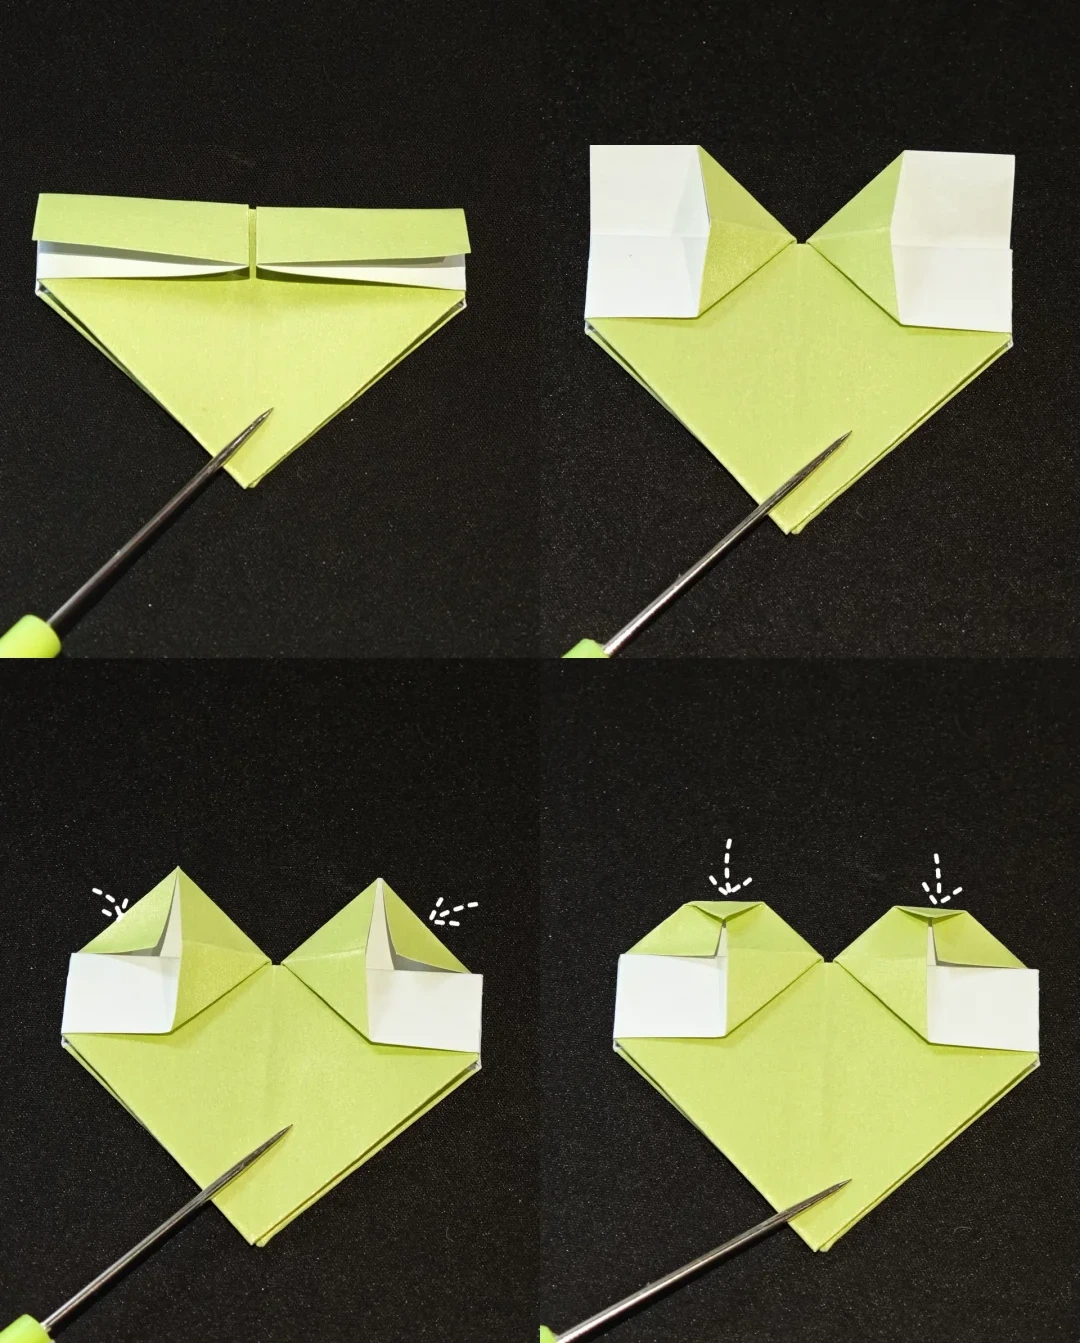
Turn to the opposite face and open the two upper pockets. Squash them flat.
Fold the outer corners inward, then fold the two upper tips down.
Add the stem
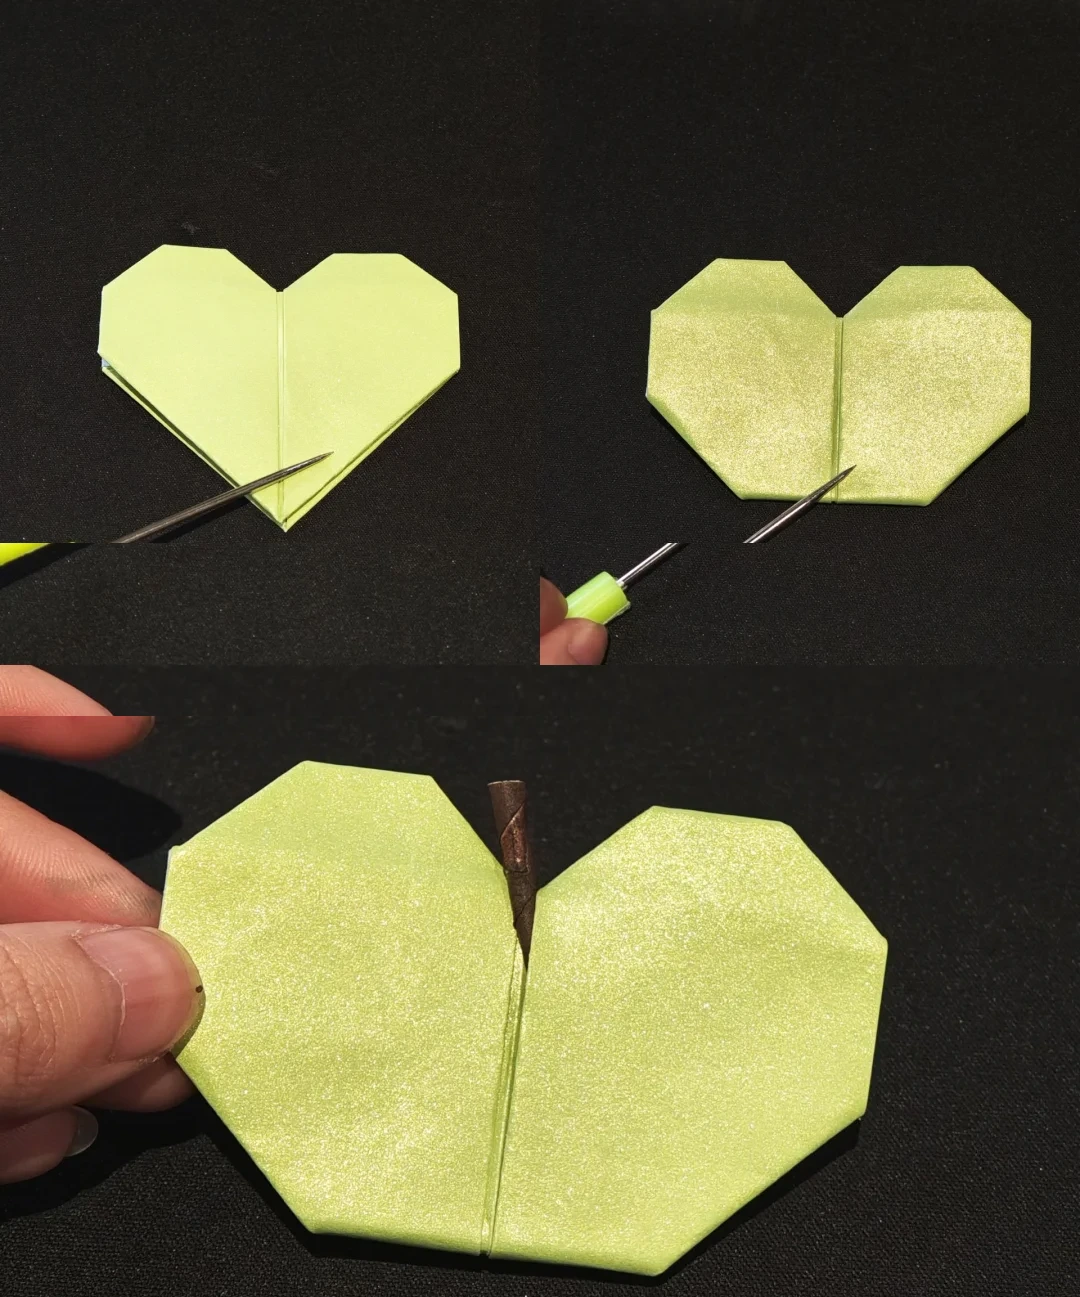 Open image at full size ↗
Turn the apple face up. Fold a little of its lower point behind to make a flat base.
Attach the small brown strip behind the notch at the top.
Finished model
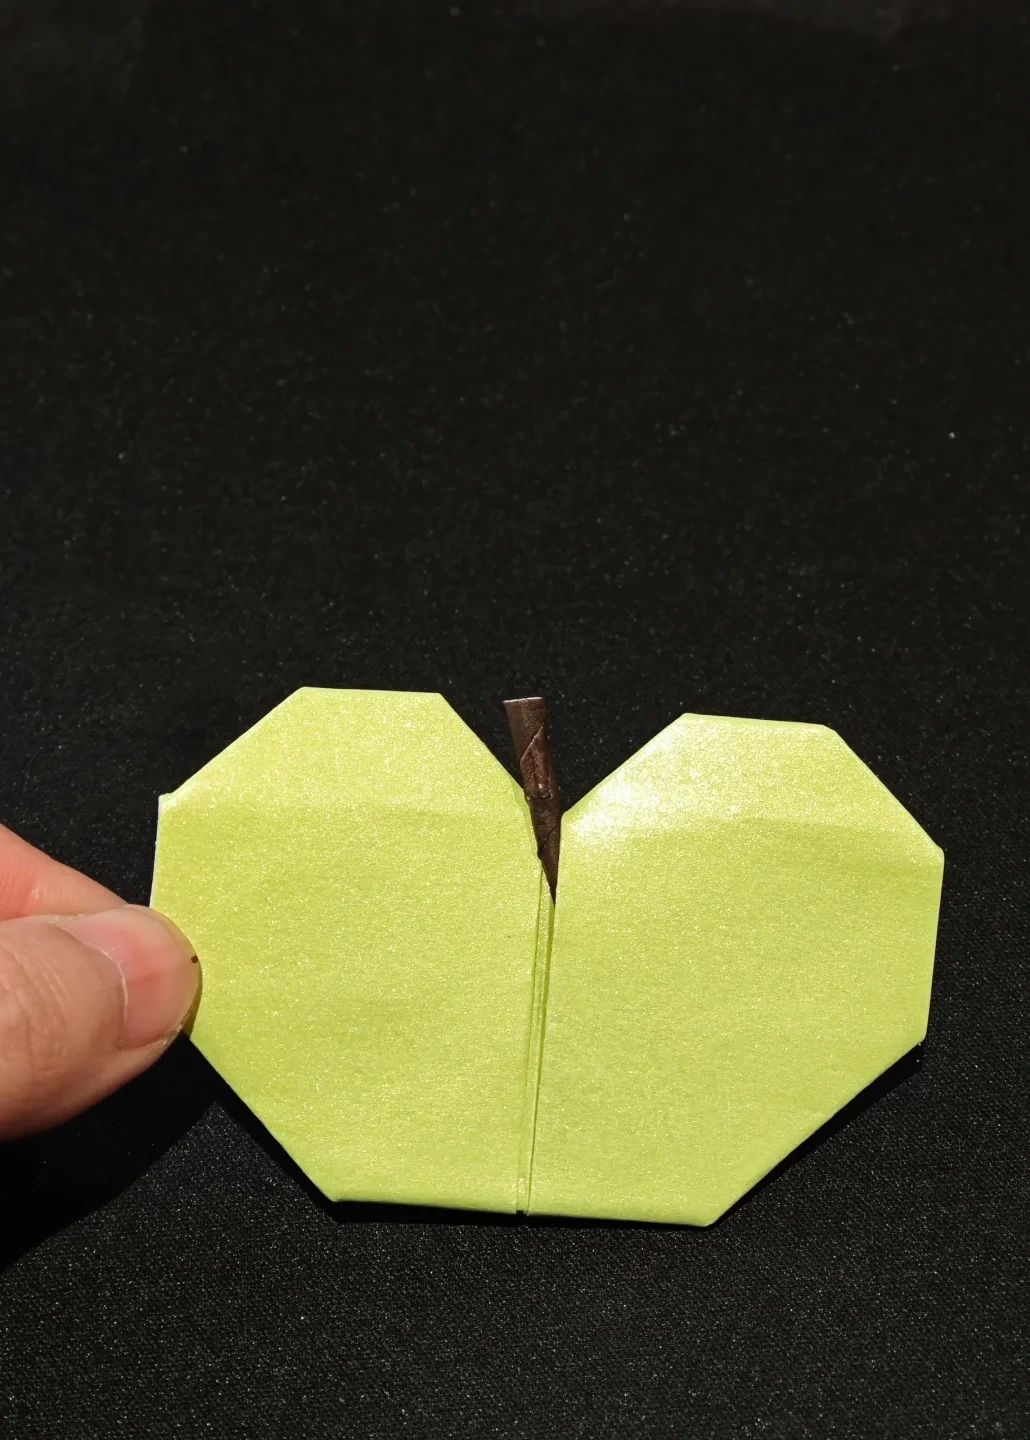 Open image at full size ↗
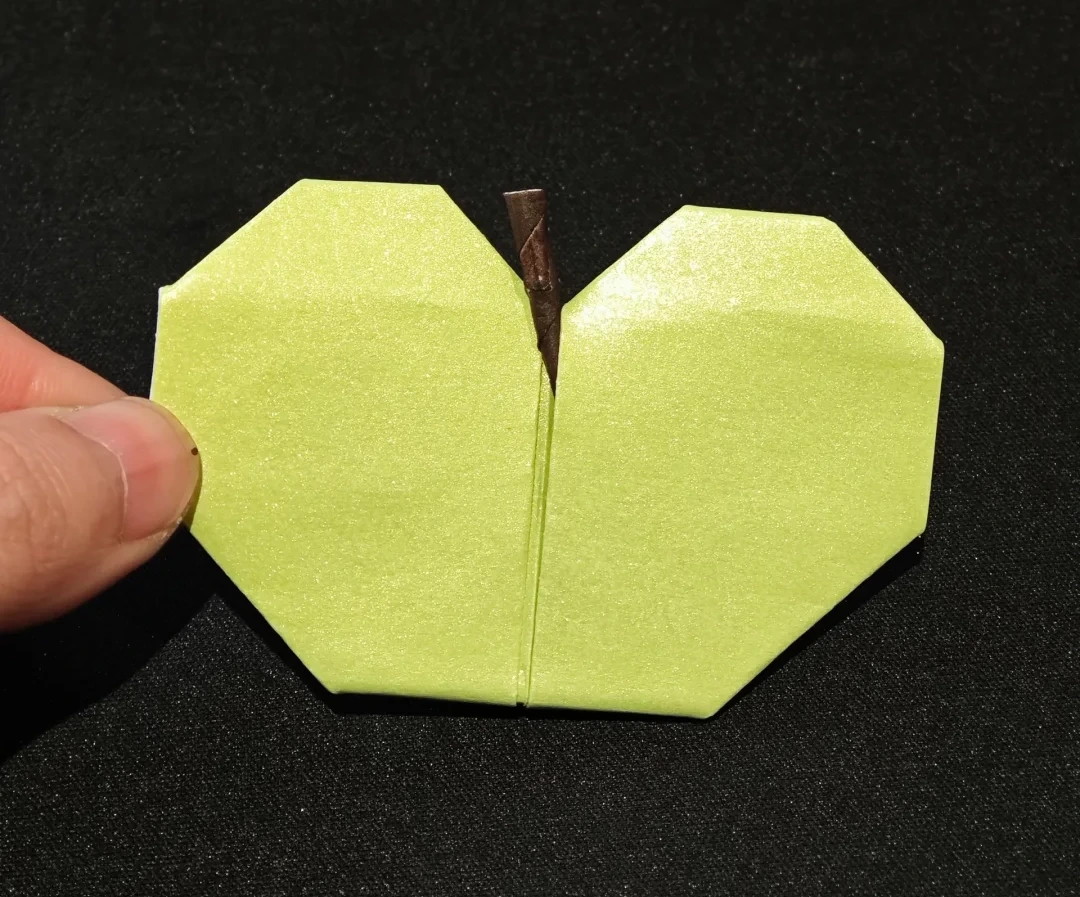
Use this finished example to compare the shape and proportions of your model.
Finished model
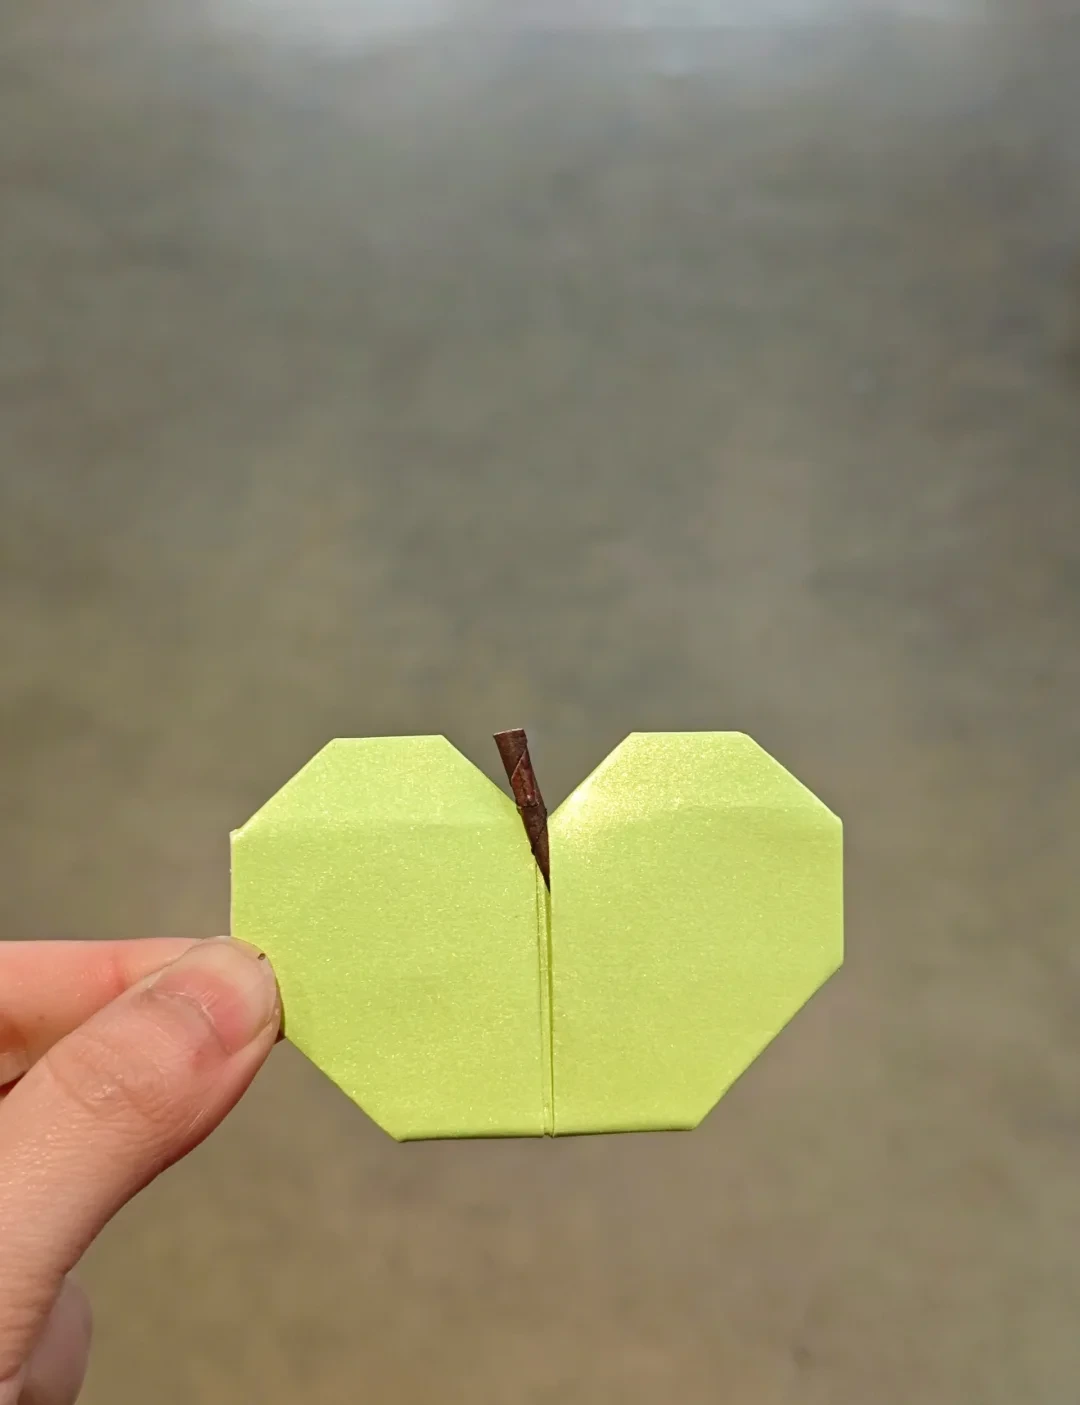 Open image at full size ↗
Use this finished example to compare the shape and proportions of your model.
Follow the diagrams alongside the step-by-step English instructions.
Choose your next project →