
Decorations · Step-by-step guide
Five-Point Paper Star
Fold and cut a square into a five-point star with a raised, sculpted center.
What you’ll need
- Square colored paper
- Scissors
Folding and cutting paper

Make it, step by step.
20 steps · Original diagrams with English instructions
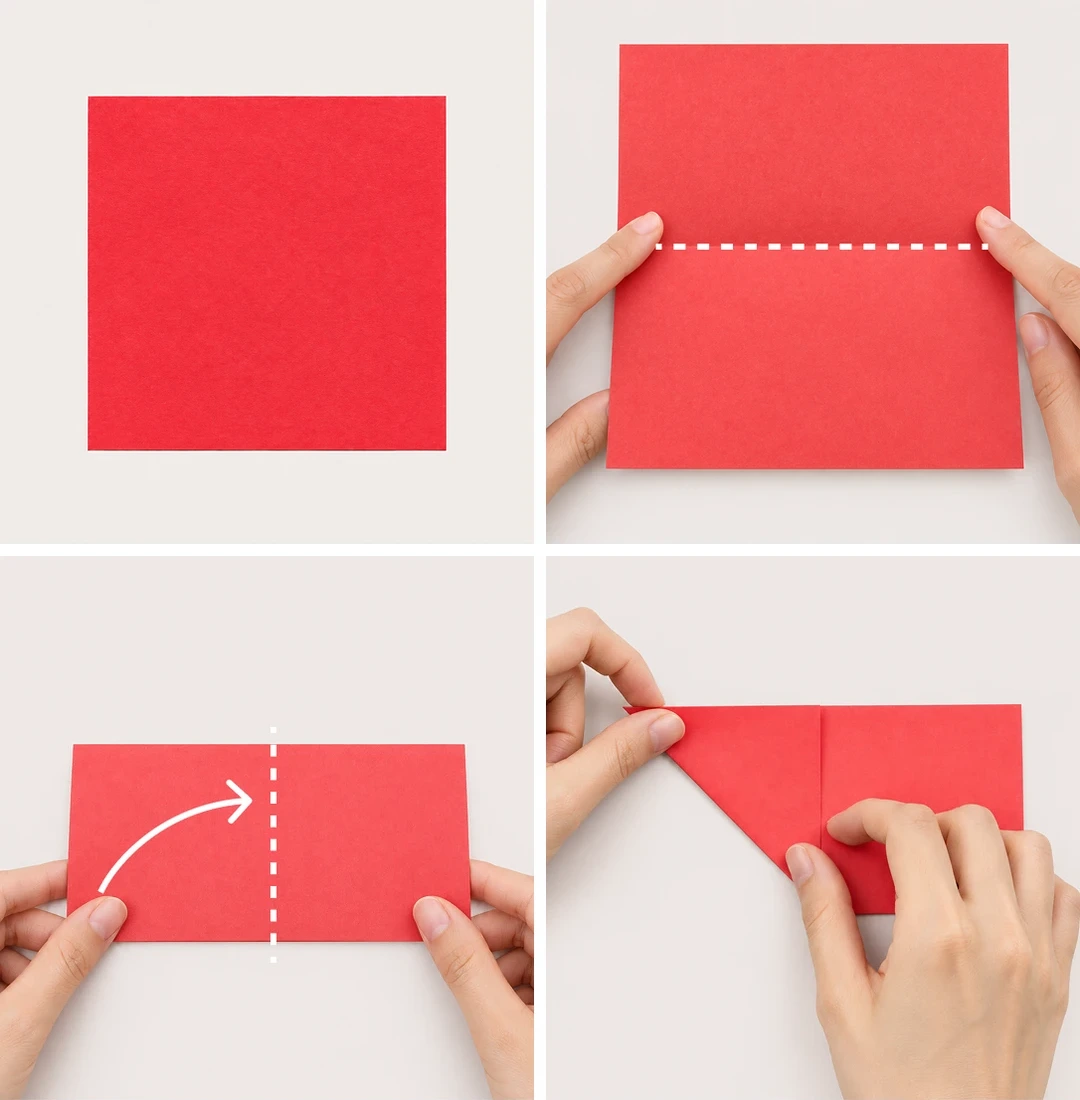
Steps 1–4
 Open image at full size ↗
Prepare a square sheet.
Fold upward in half to mark the centerline.
Fold the left side upward along the indicated line.
Press the crease into the shape shown.
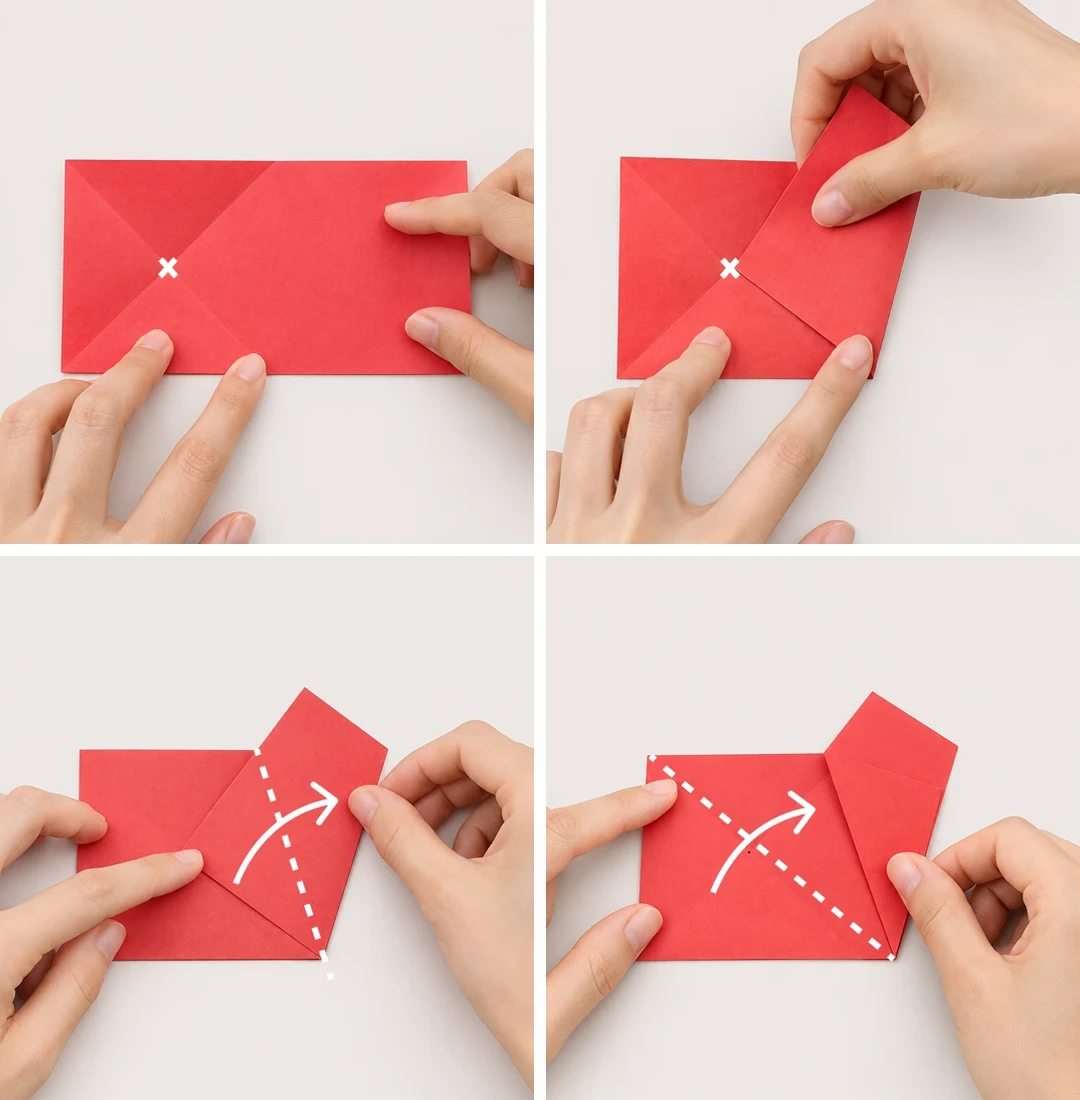
Steps 5–8
 Open image at full size ↗
Fold downward again to locate the center point.
Bring the lower-right corner to that center point.
Fold the flap to the right along the dotted line.
Fold the remaining left section rightward along the dotted line.
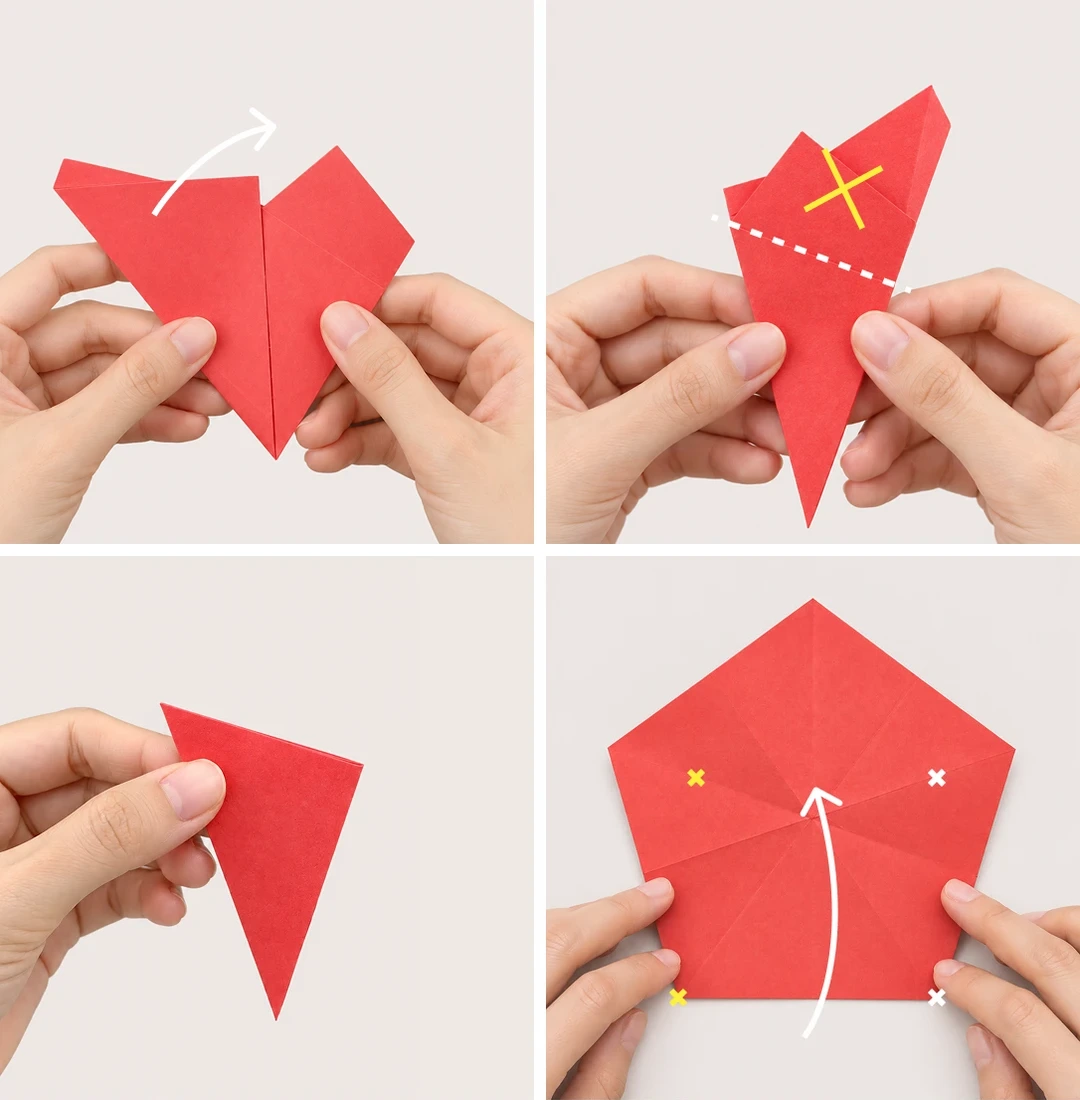
Steps 9–12
 Open image at full size ↗
Fold the left side behind the model.
Cut along the dotted line to remove the crossed-out portion.
Check the cut shape.
Open it and fold upward, matching the indicated points.
Steps 13–16
 Open image at full size ↗
Repeat the same fold on the other four sides.
Open the paper to reveal the crease pattern.
Bring the creases together toward the center.
Press the folds around in the same direction.
Steps 17–20
 Open image at full size ↗
Turn over and fold toward the center.
Fold and press each section in turn.
Tuck the last section into the first triangular pocket.
Your three-dimensional five-point star is complete.
Follow the diagrams alongside the step-by-step English instructions.
Choose your next project →