
Flowers & nature · Step-by-step guide
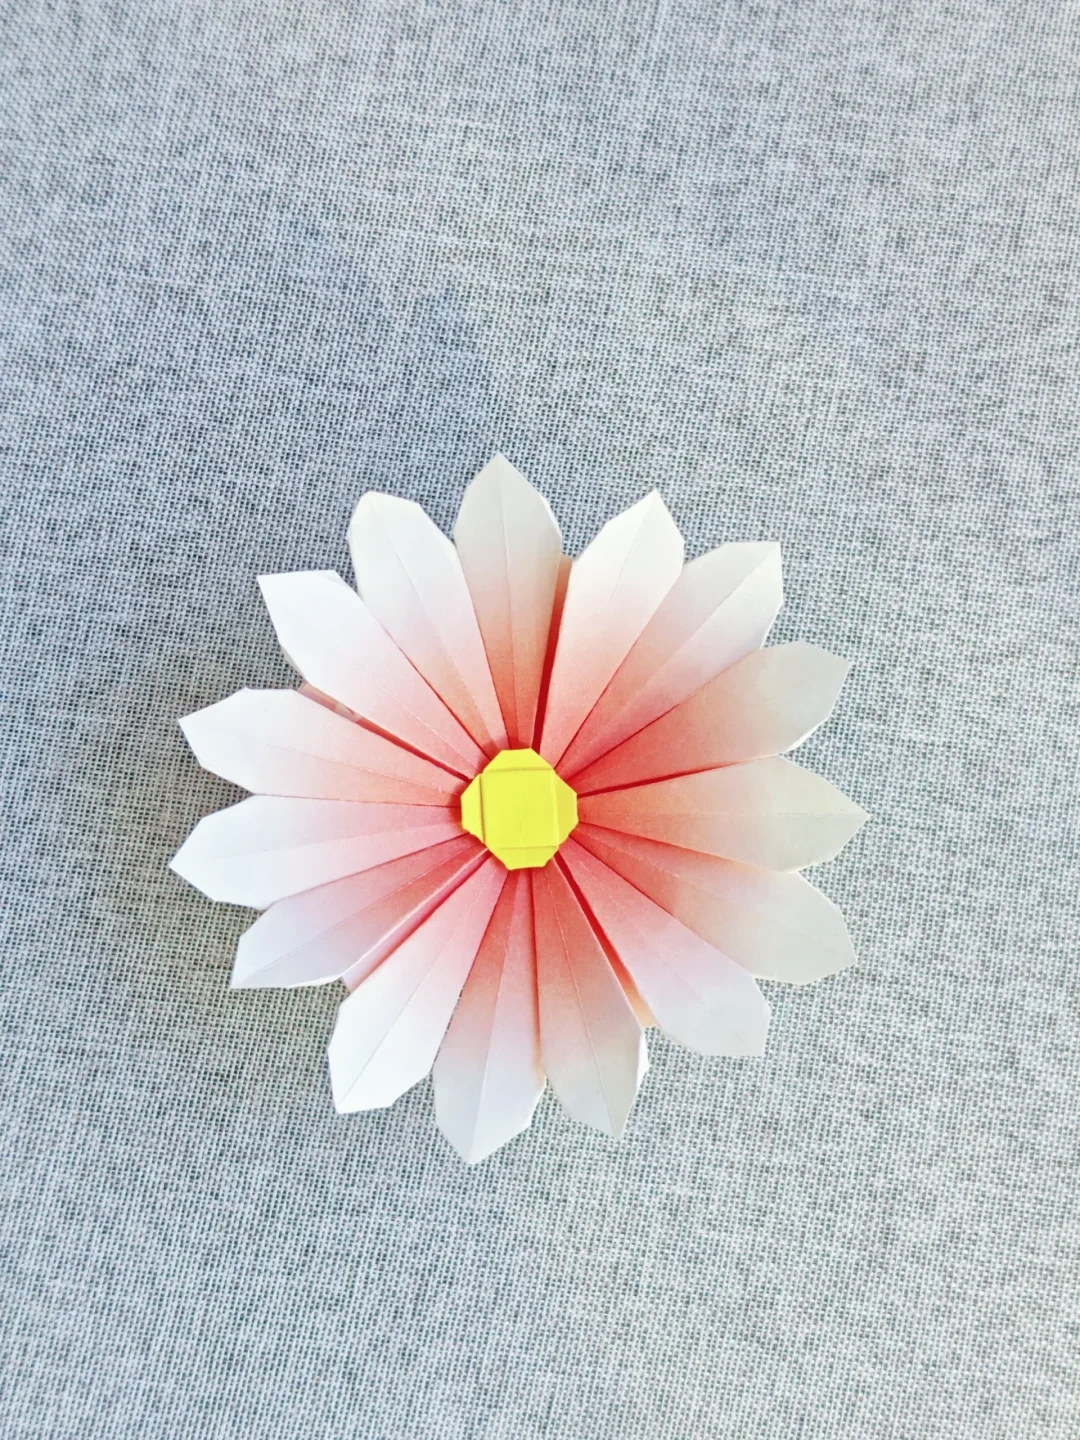
Fifteen-Petal Paper Daisy
Join five three-petal units and add a folded yellow center to make a full daisy.
What you’ll need
- Five equal squares for the petals
- One smaller yellow square
- Glue or double-sided tape
Modular paper folding · Petal groups & folded center
Make it, step by step.
11 steps · Original diagrams with English instructions
Prepare the petal papers
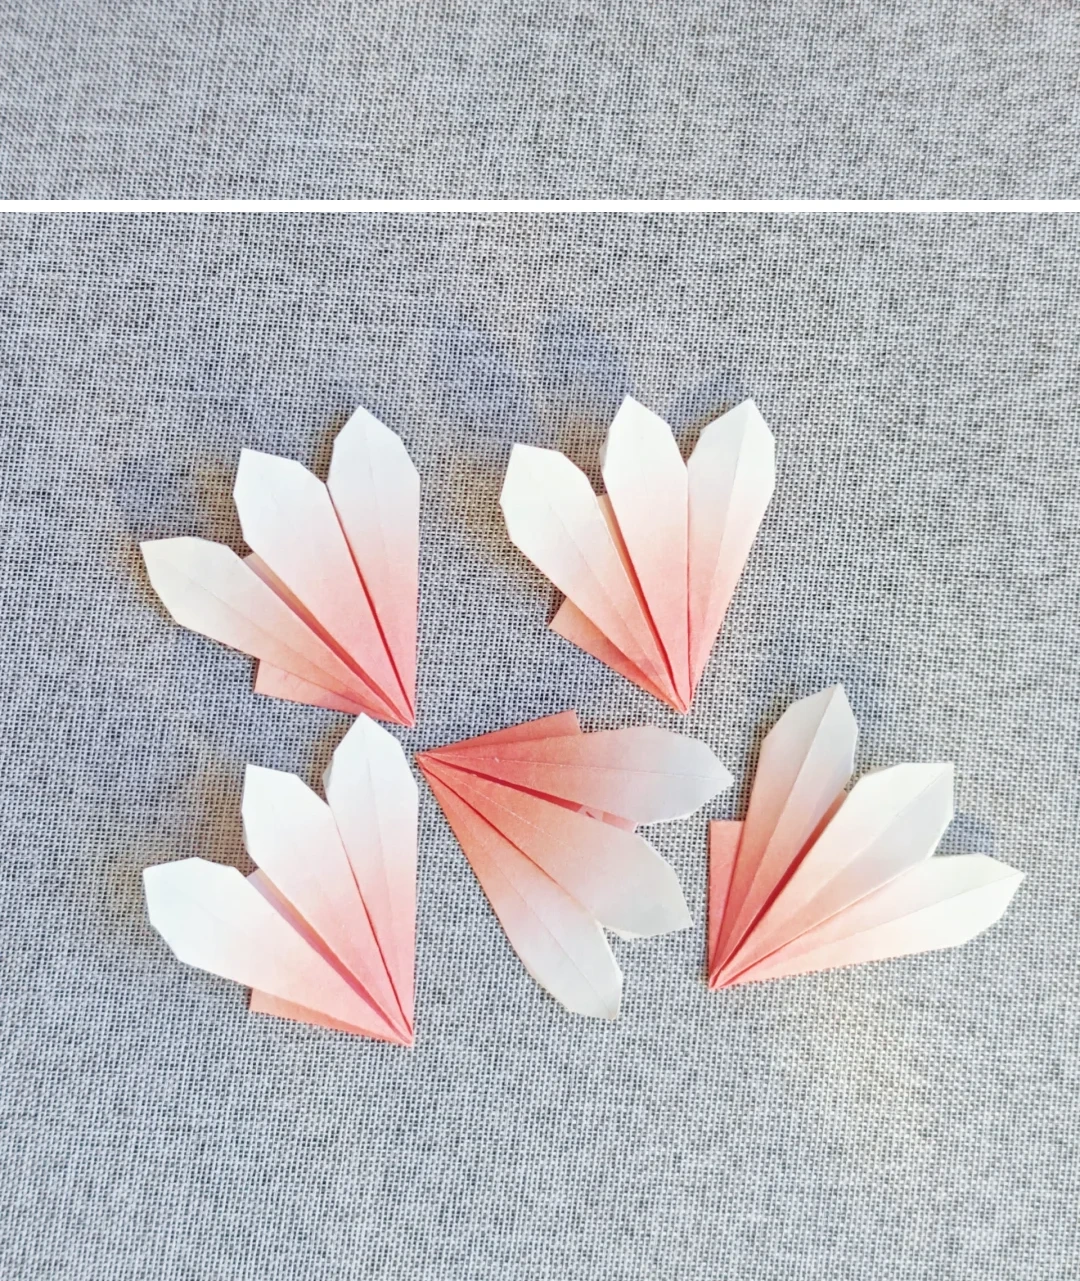 Open image at full size ↗
Use five equal squares and a smaller yellow square for the center.
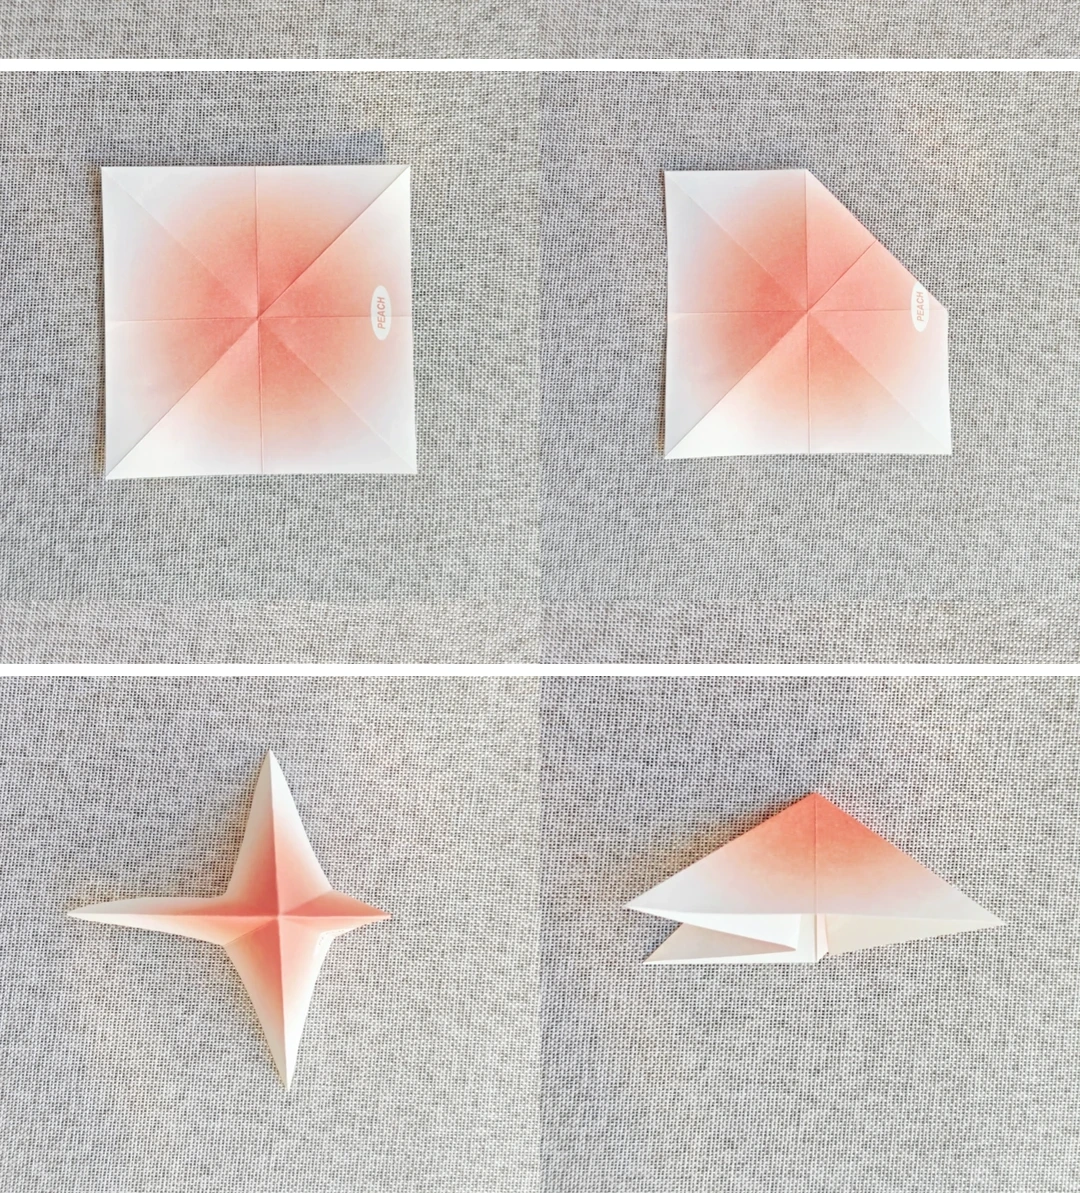
Collapse the petal base
 Open image at full size ↗
Crease both diagonals and midlines. Fold one corner back, collapse the square and flatten it as pictured.
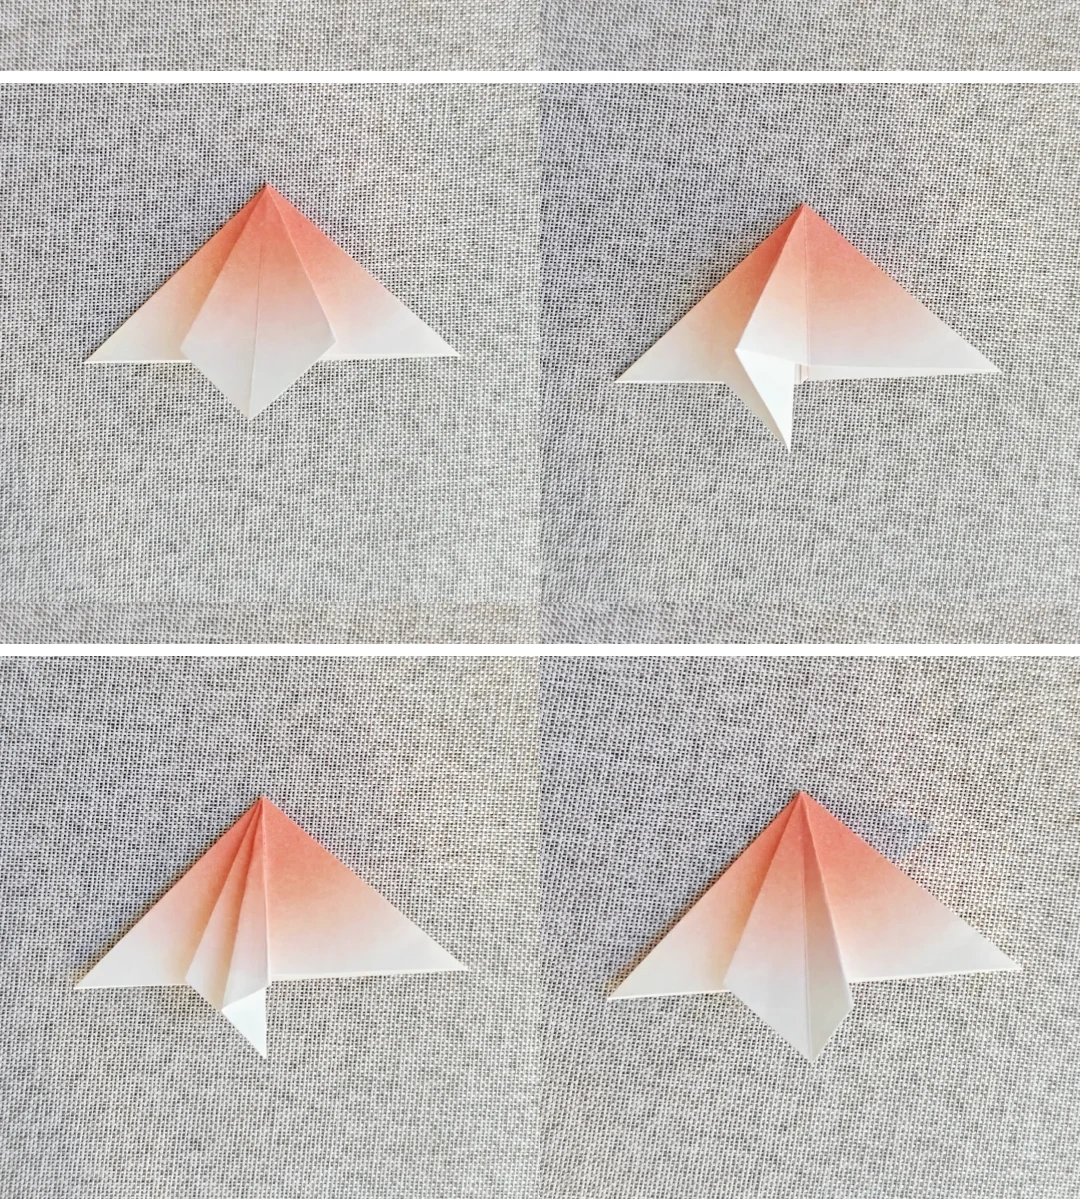
Open the middle flap
 Open image at full size ↗
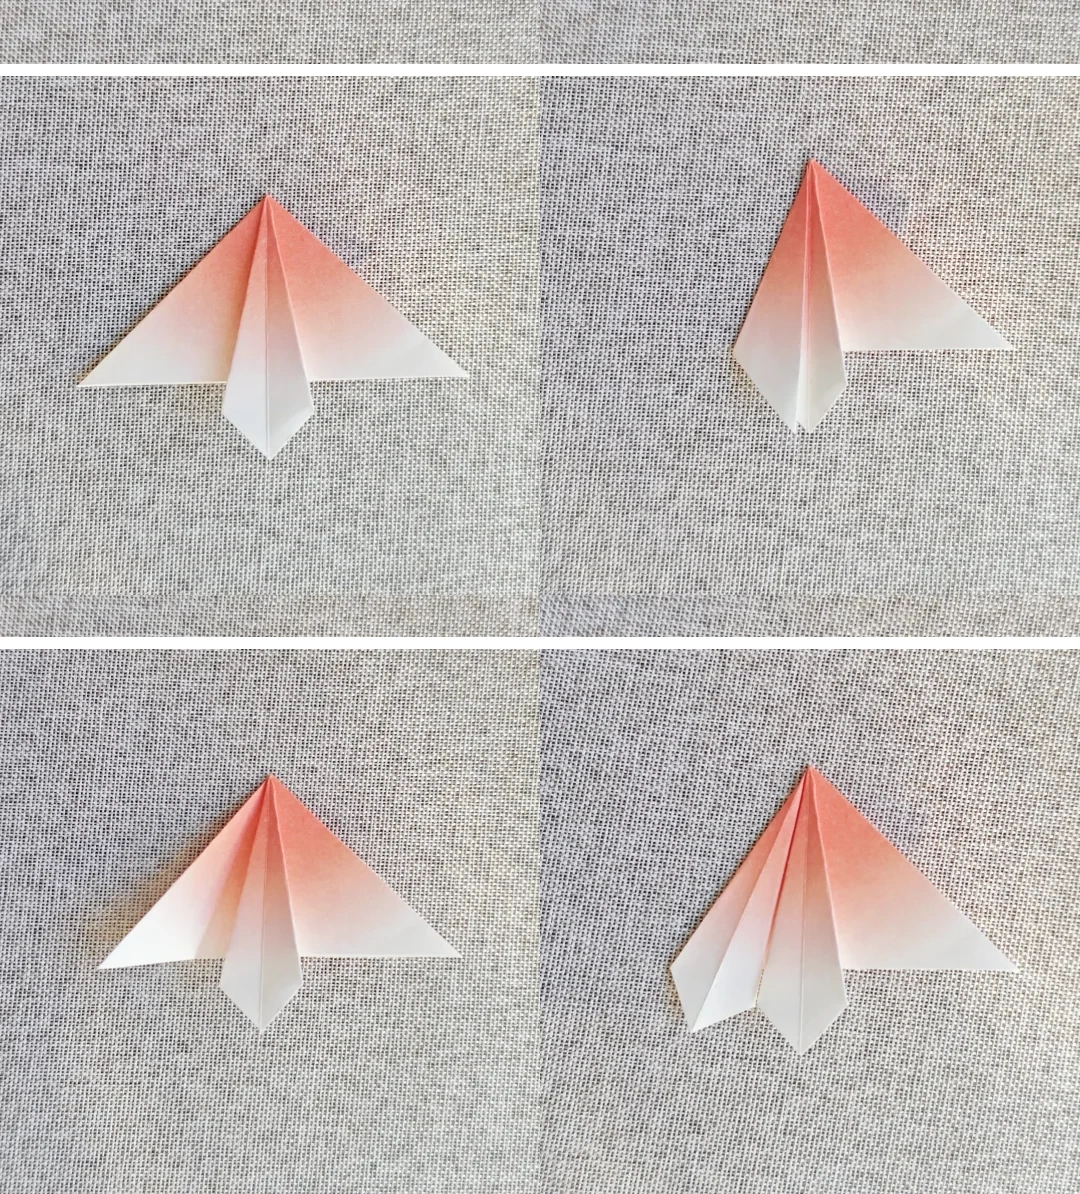
Open the central edge, fold the exposed face inward, turn one flap across and return it.
Repeat on the other side
 Open image at full size ↗
Repeat the same folds on the opposite side, then open the pockets gently.
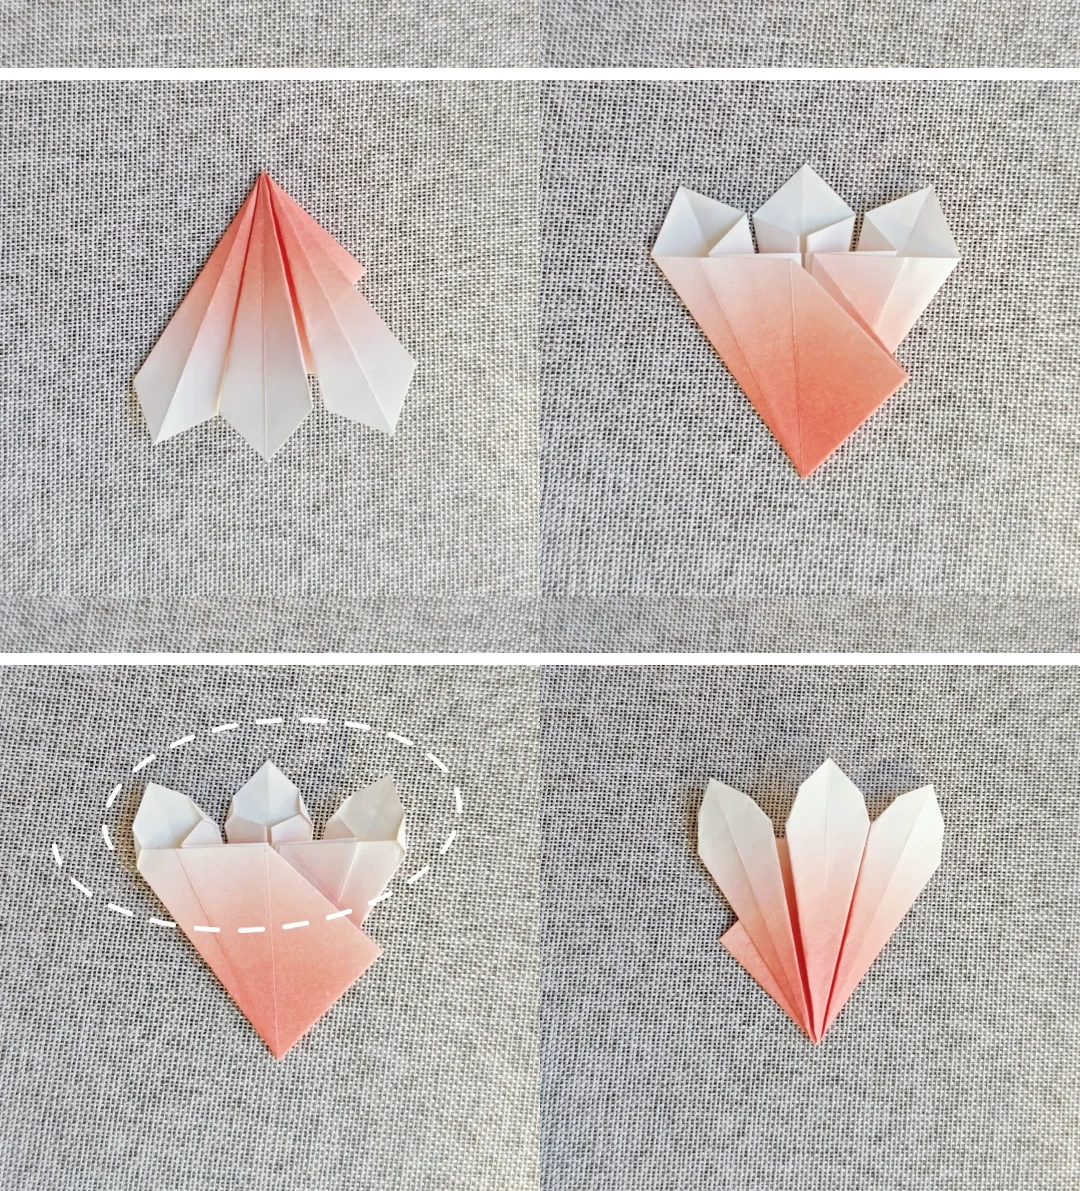
Round the petal tips
 Open image at full size ↗
Repeat the pocket folds, turn over and fold the small corners inward. Turn back to reveal three rounded petals.
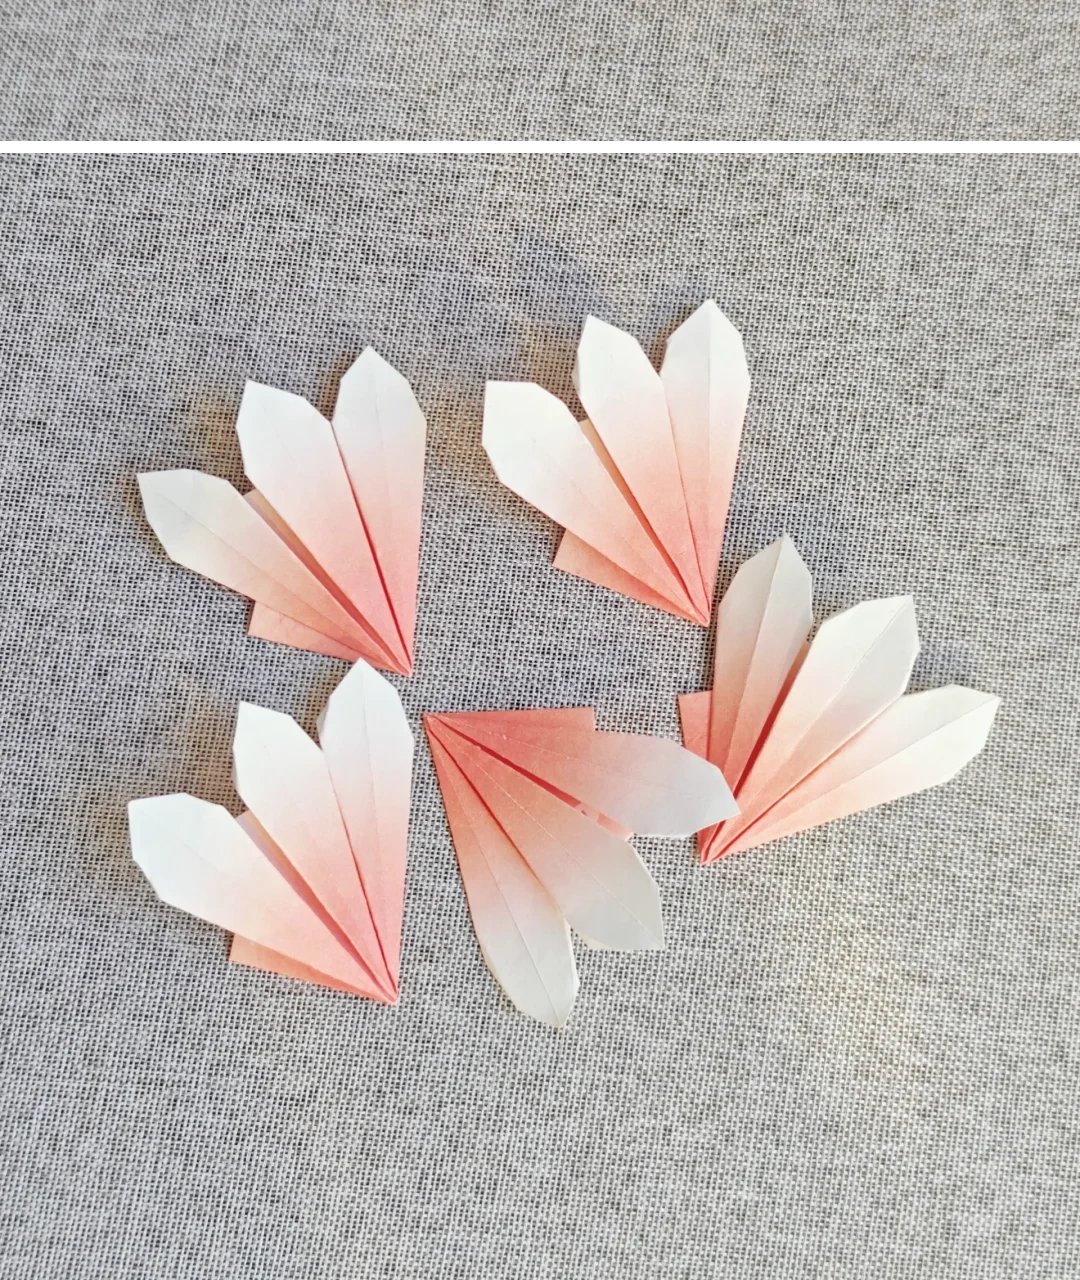
Make five units
 Open image at full size ↗
Repeat until you have five matching three-petal units.
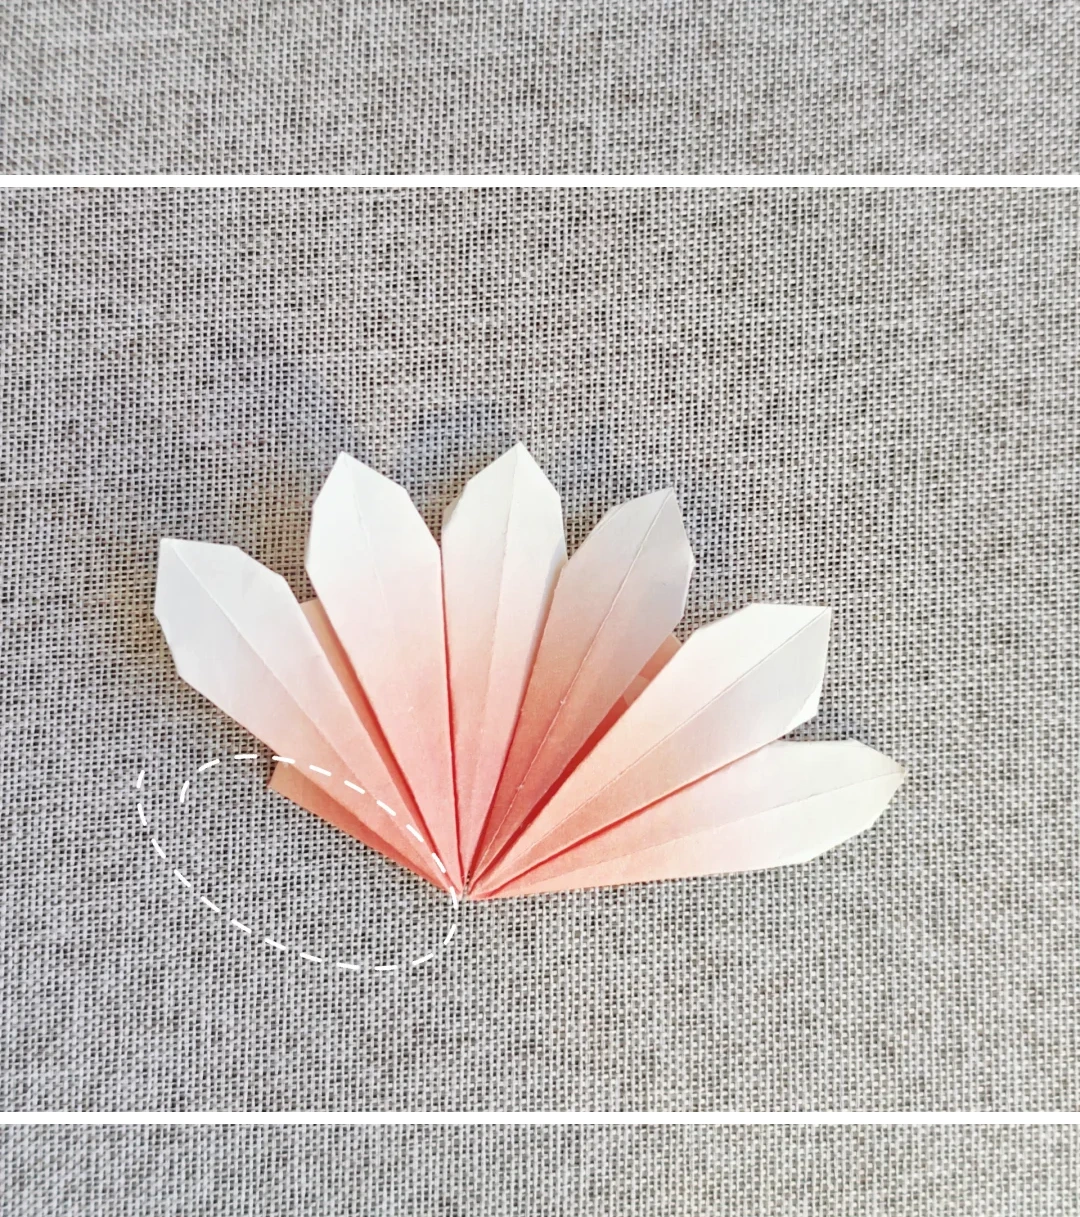
Join neighboring units
 Open image at full size ↗
Apply glue to the circled lower faces and overlap adjacent units.
Close the daisy
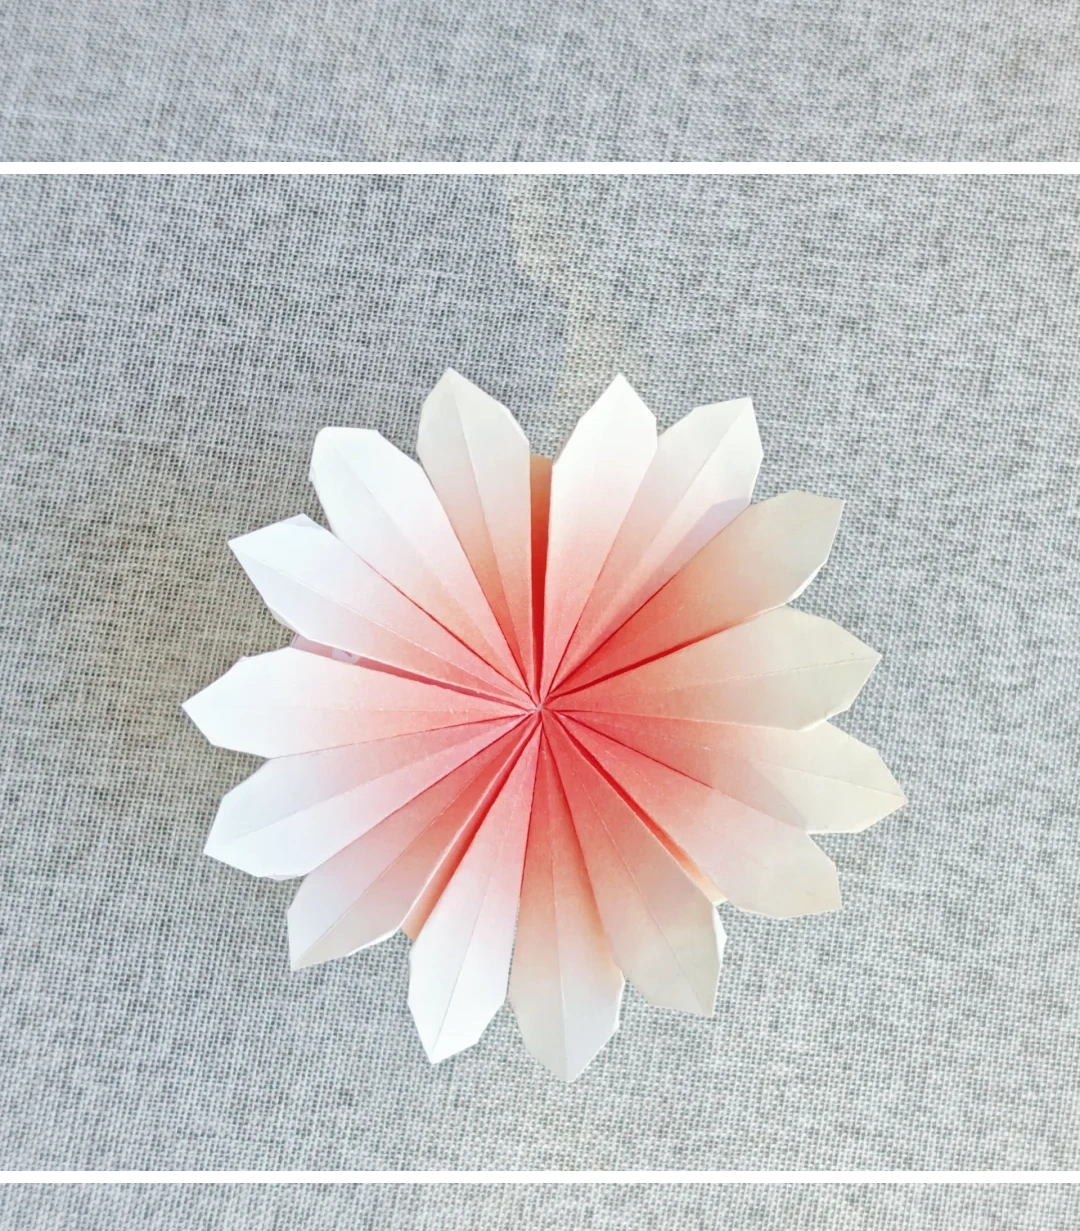 Open image at full size ↗
Join the units into a circle. Keep the gentle curve in the flower rather than forcing it completely flat.
Fold the center blank
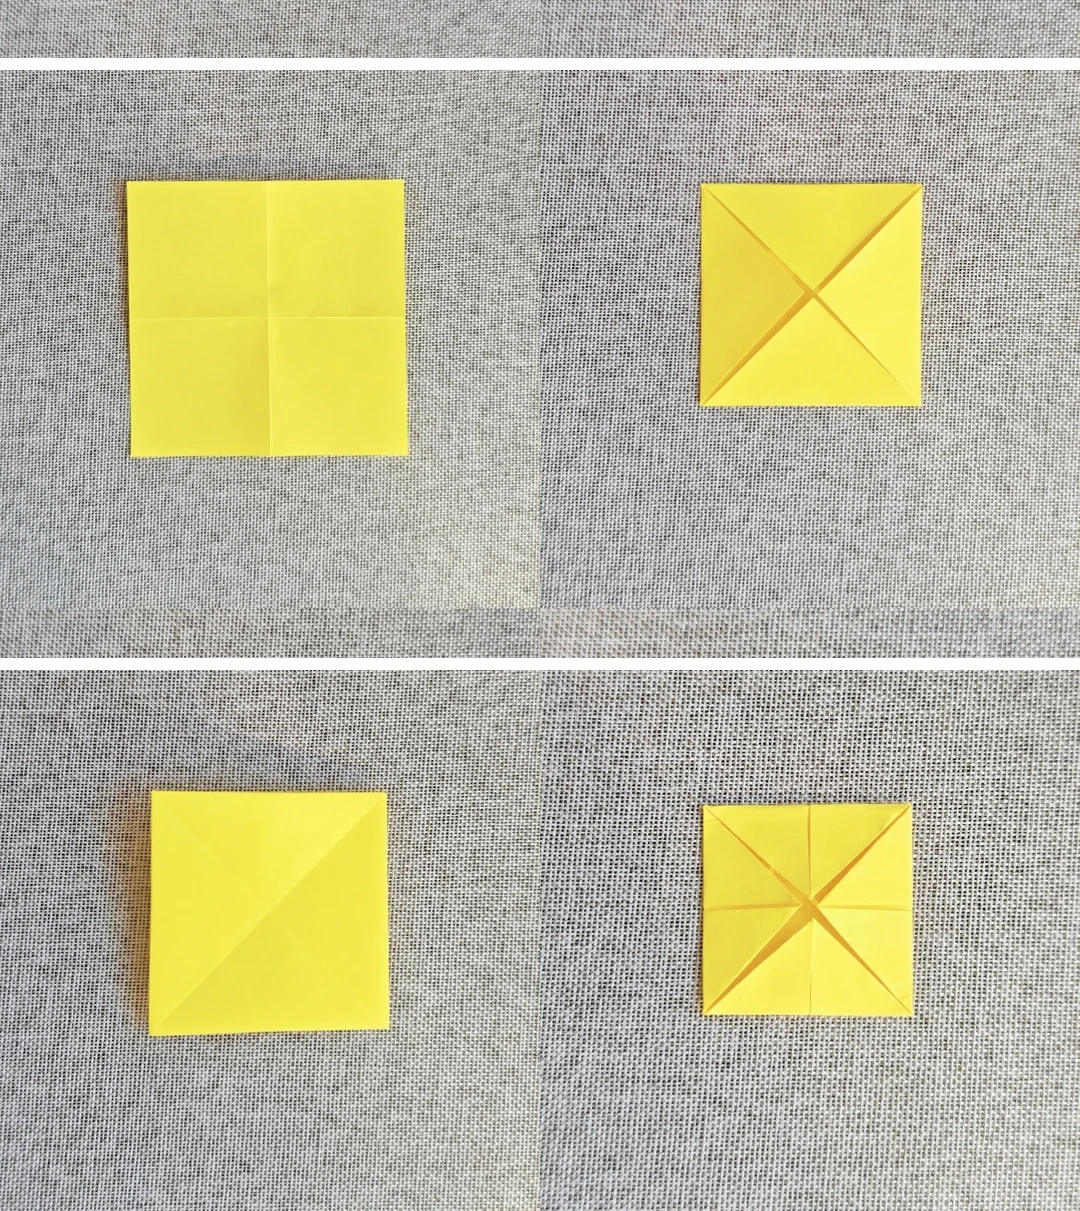 Open image at full size ↗
Crease the yellow square across both midlines. Fold all corners to the middle, turn over and repeat.
Round the center
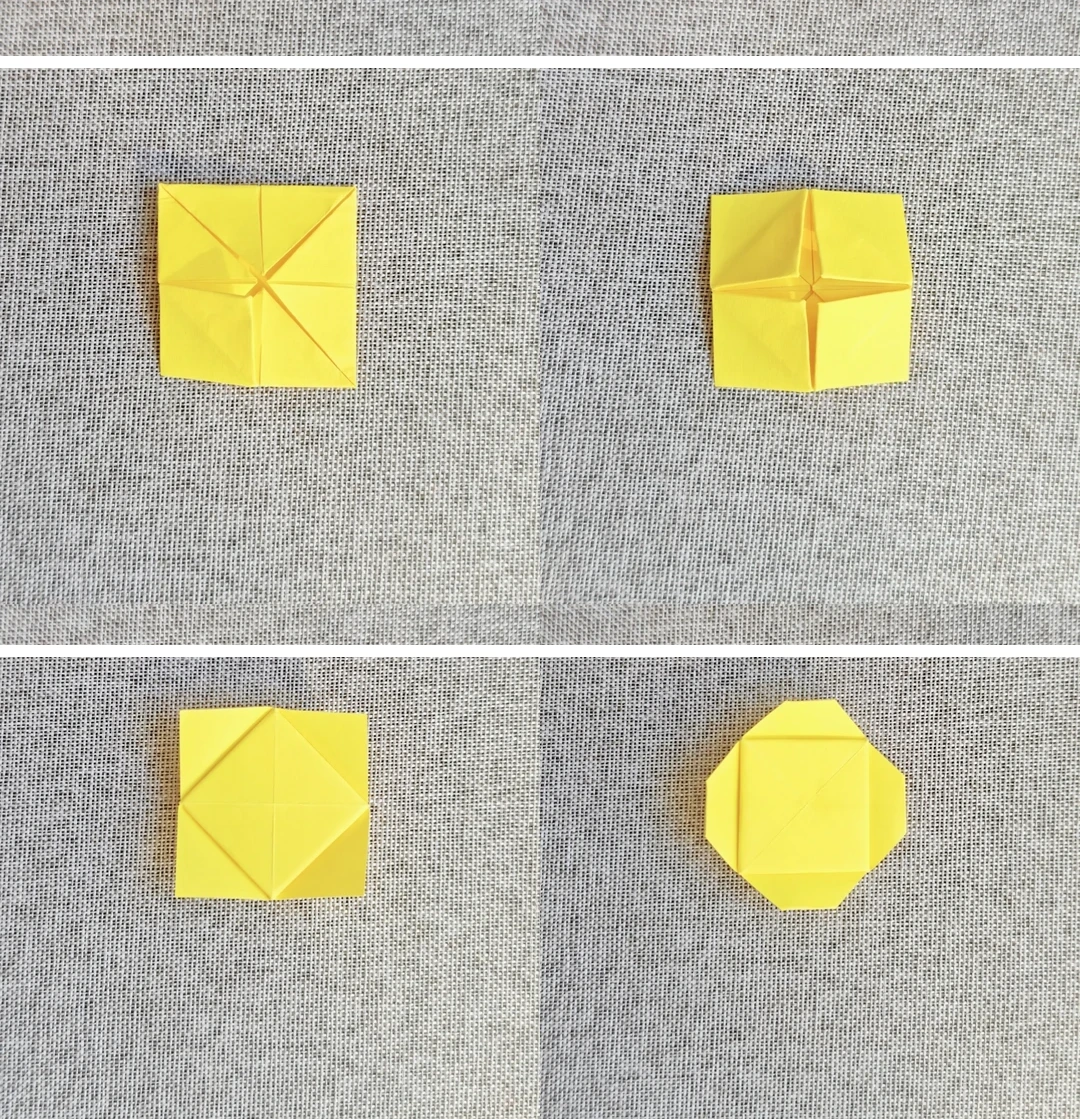 Open image at full size ↗
Fold the corners inward once more, turn over, then fold the small outer corners behind to form an octagon.
Attach the center
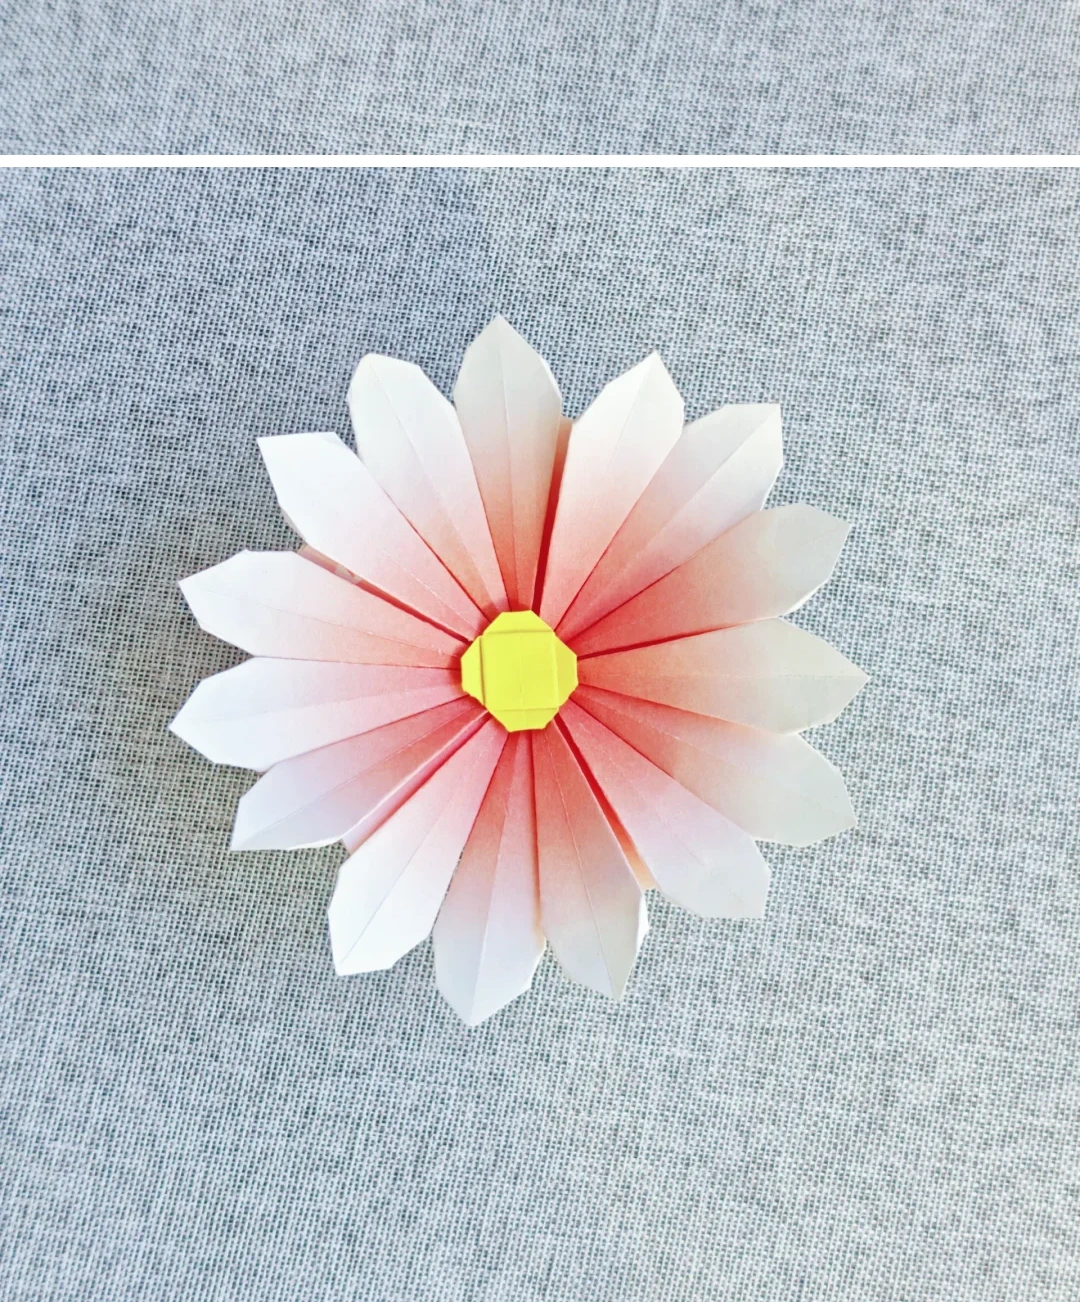 Open image at full size ↗
Glue the yellow center over the meeting point of the petals.
Follow the diagrams alongside the step-by-step English instructions.
Choose your next project →