
Decorations · Step-by-step guide
Faceted Six-Point Snowflake
Turn a paper hexagon into a snowflake with six raised, pointed petals. Read the panels left to right, then top to bottom.
What you’ll need
- One square of paper
- Scissors
Paper folding · Hexagon cutting, radial creases & squash folds
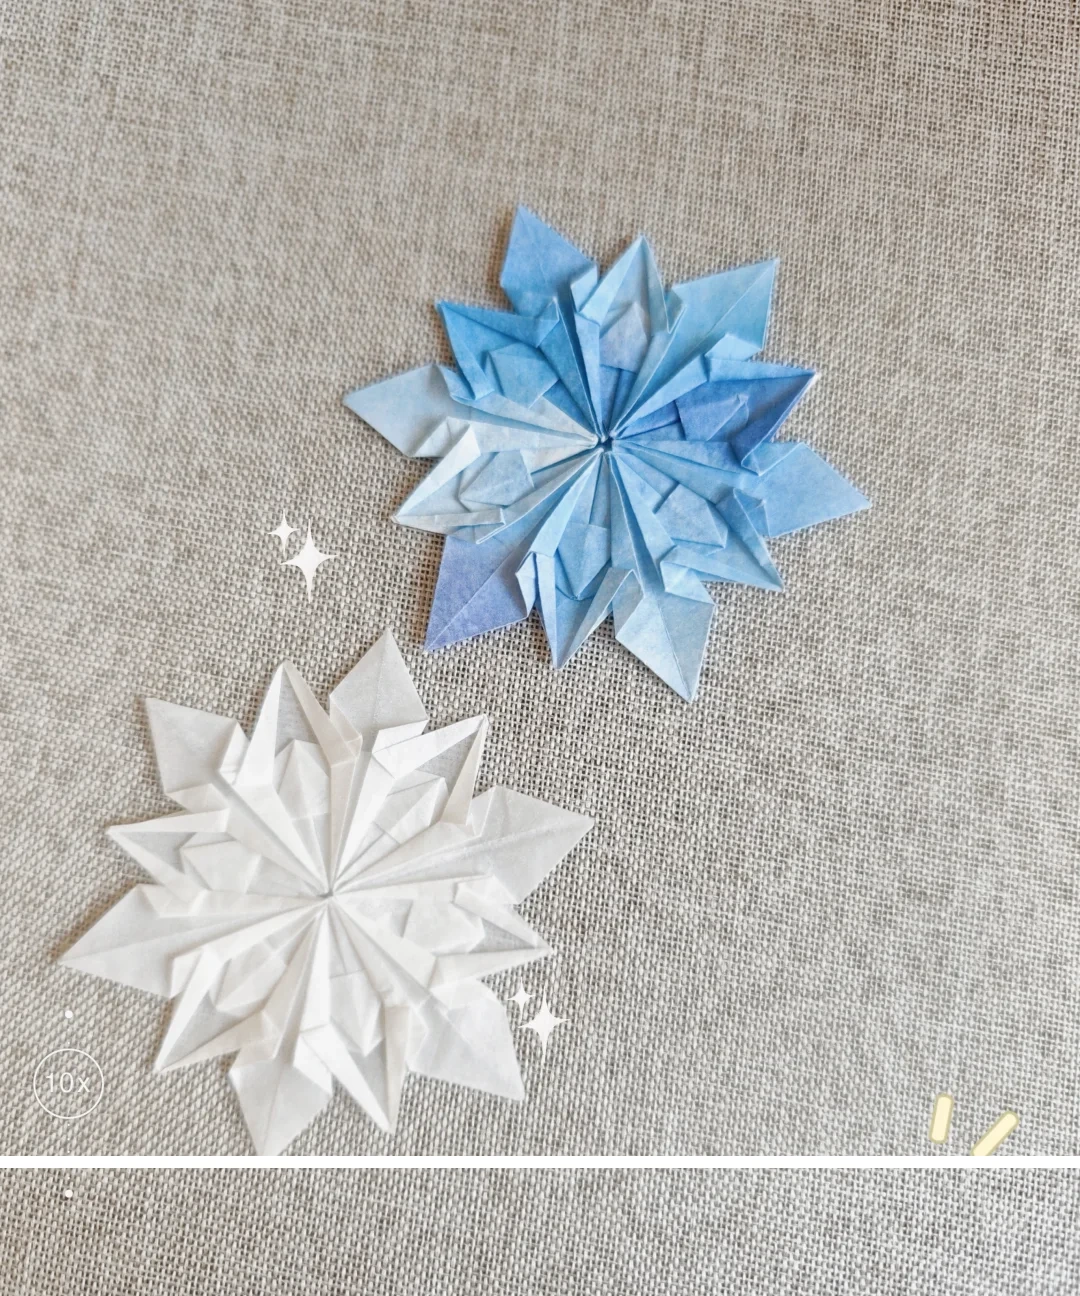
Make it, step by step.
11 steps · Original diagrams with English instructions
Start the creases
 Open image at full size ↗
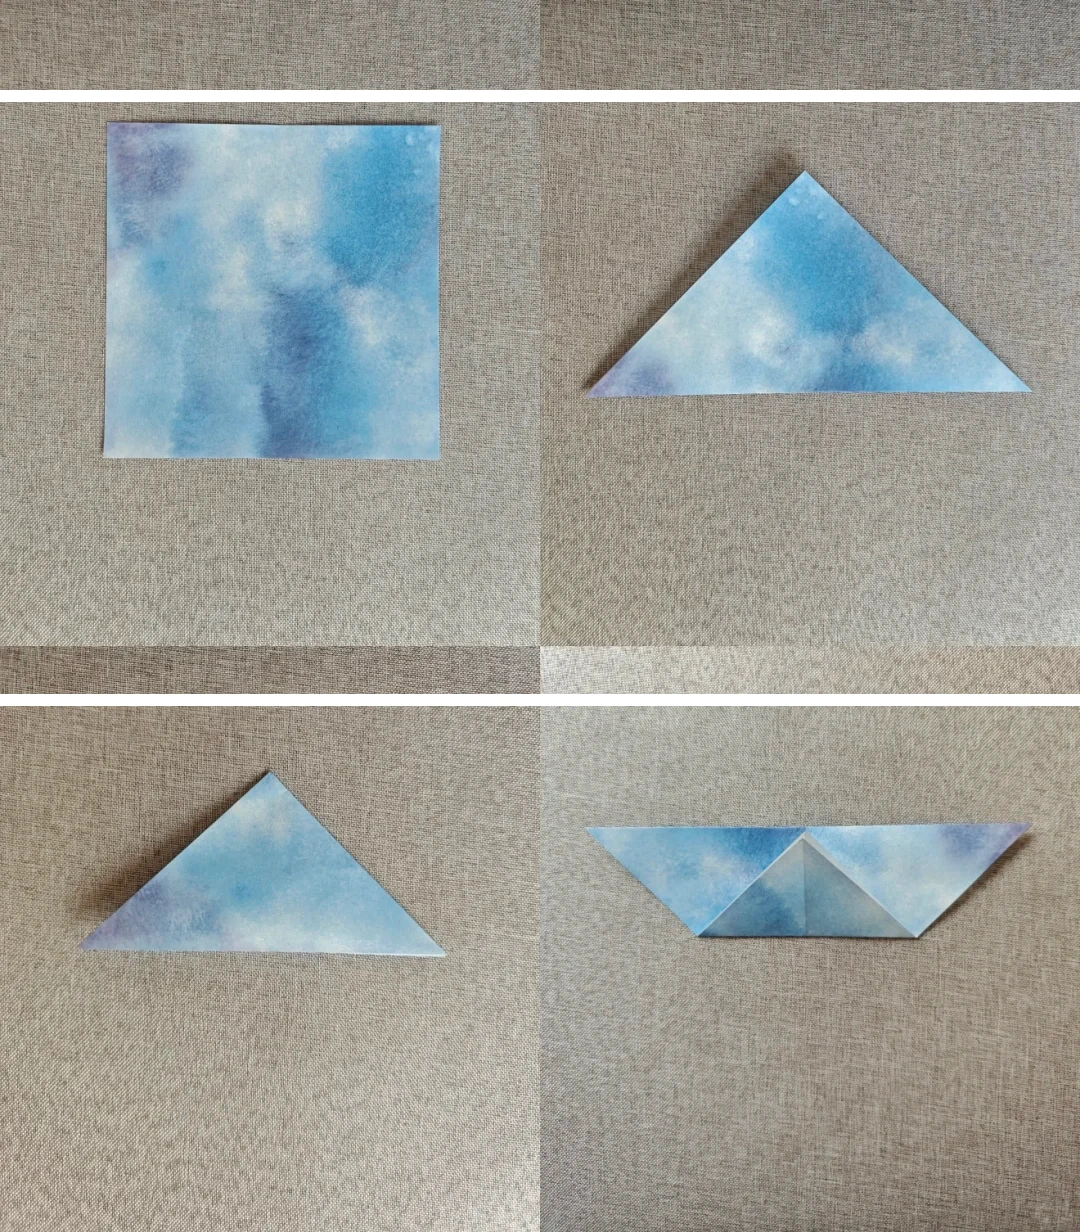
Fold the square diagonally, fold the triangle in half, then reopen the second fold. Bring the top point down to the midpoint of the long edge.
Cut a hexagon
 Open image at full size ↗
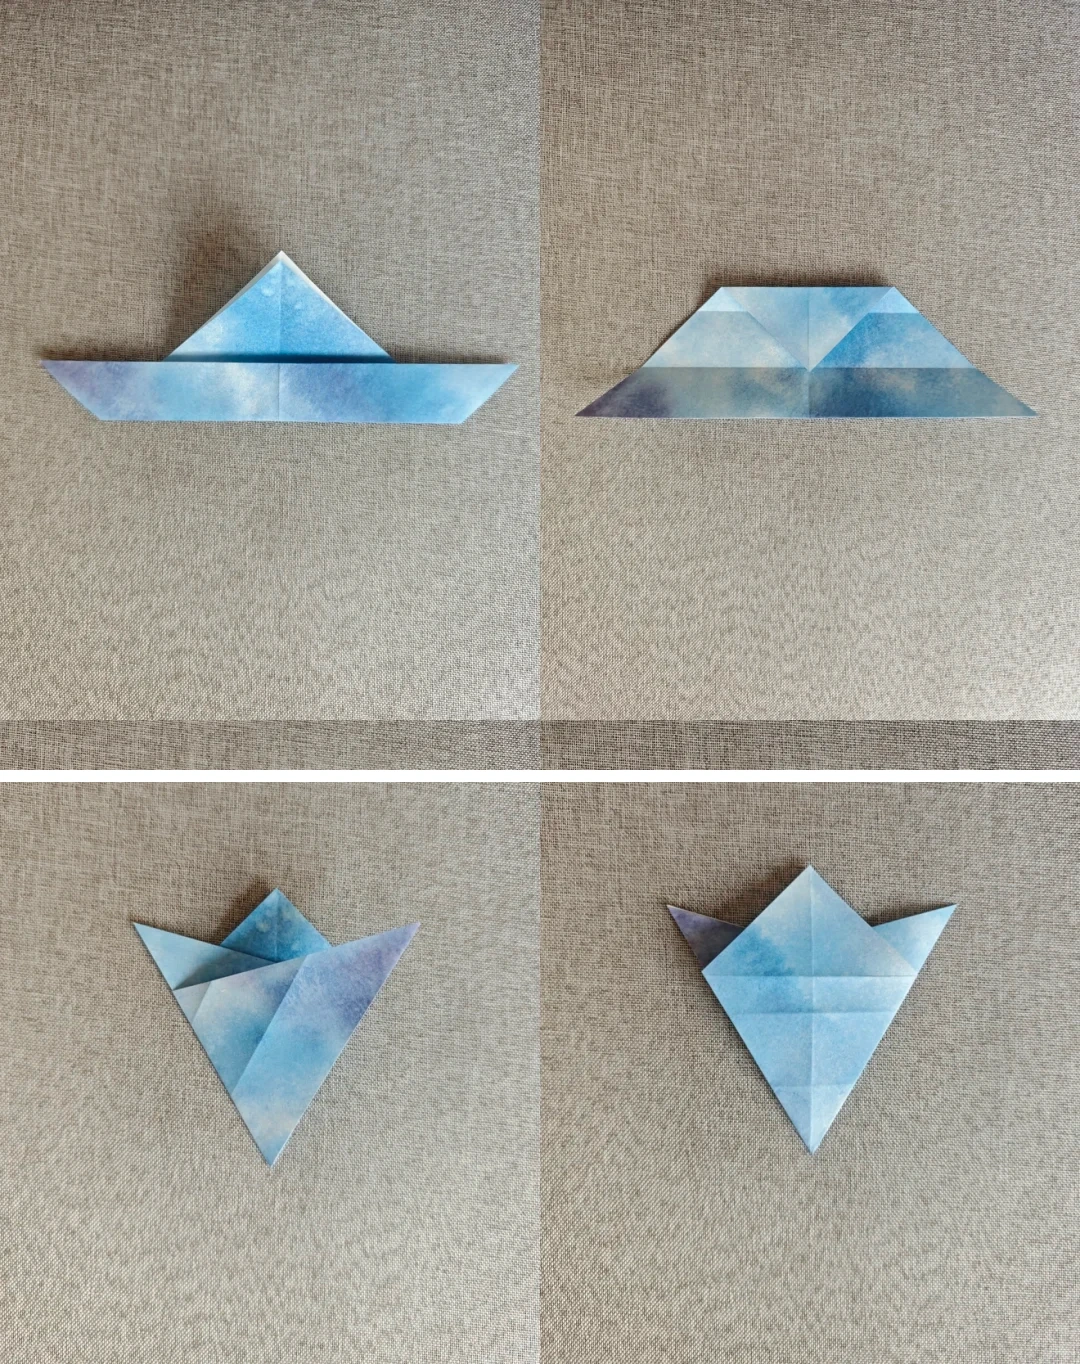
Make the horizontal guide folds shown, then fold the triangle into thirds and bring the layers together. Locate the horizontal cutting line.
Crease all six sides
 Open image at full size ↗
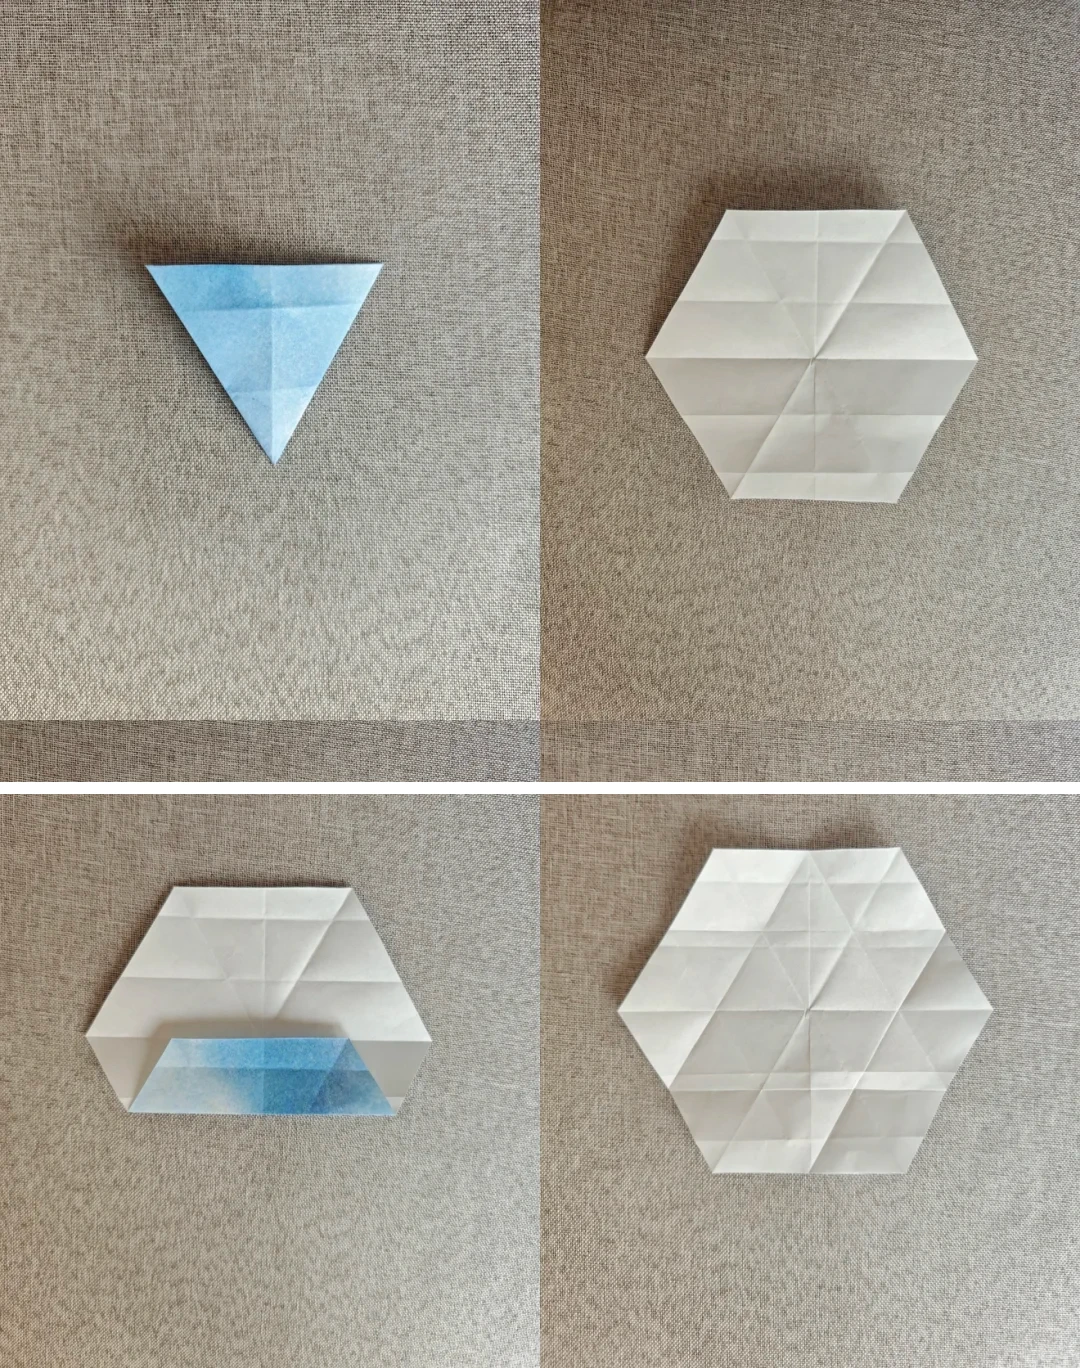
Cut along the indicated line and open the lower piece into a hexagon. Fold one edge inward as pictured and unfold. Repeat around all six sides.
Collapse the center
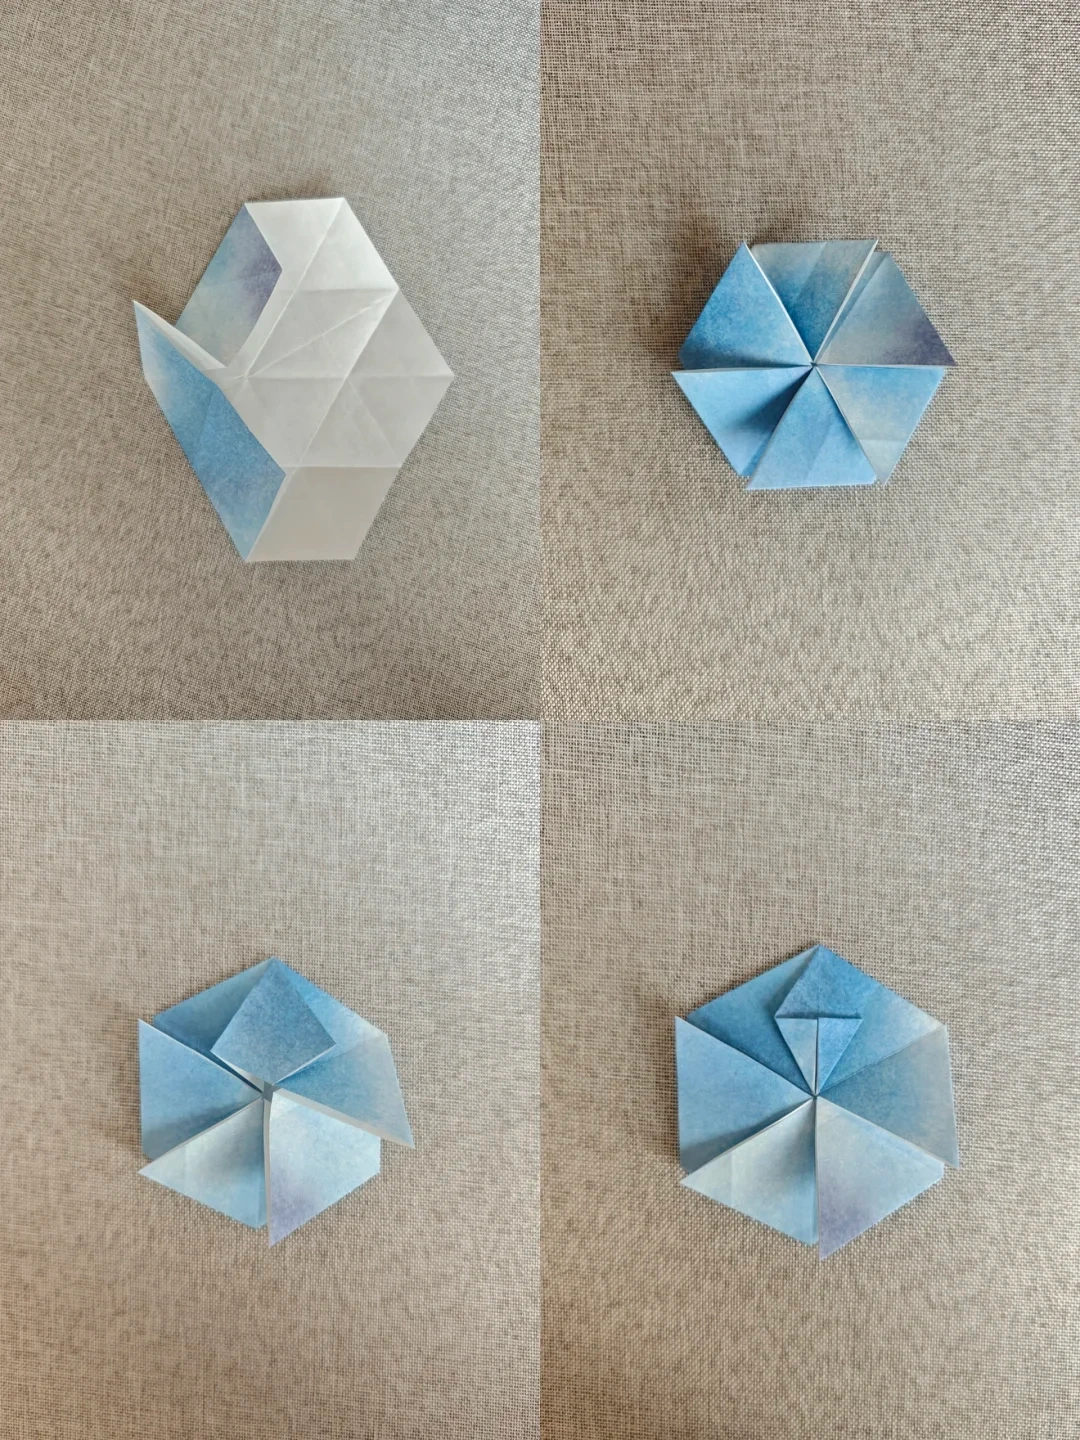 Open image at full size ↗
Pinch the radial creases together, press the center down and arrange the six folded sectors around it.
Turn and crease
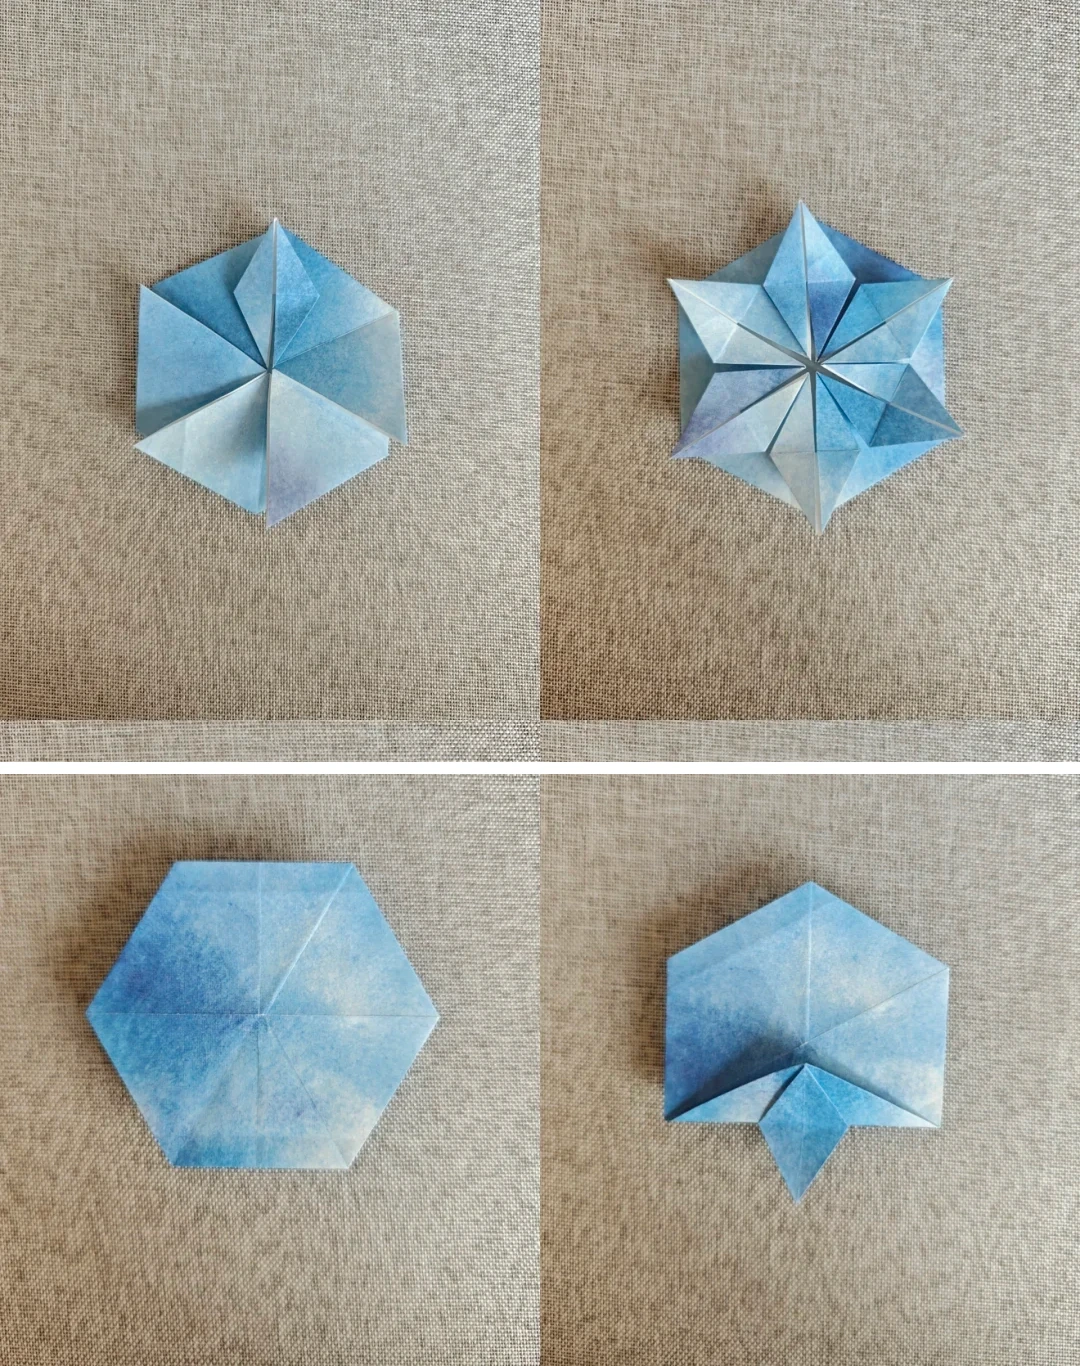 Open image at full size ↗
Finish arranging the six folded sectors, then turn the model over. Fold the lower edge upward and repeat around the hexagon.
Open the points
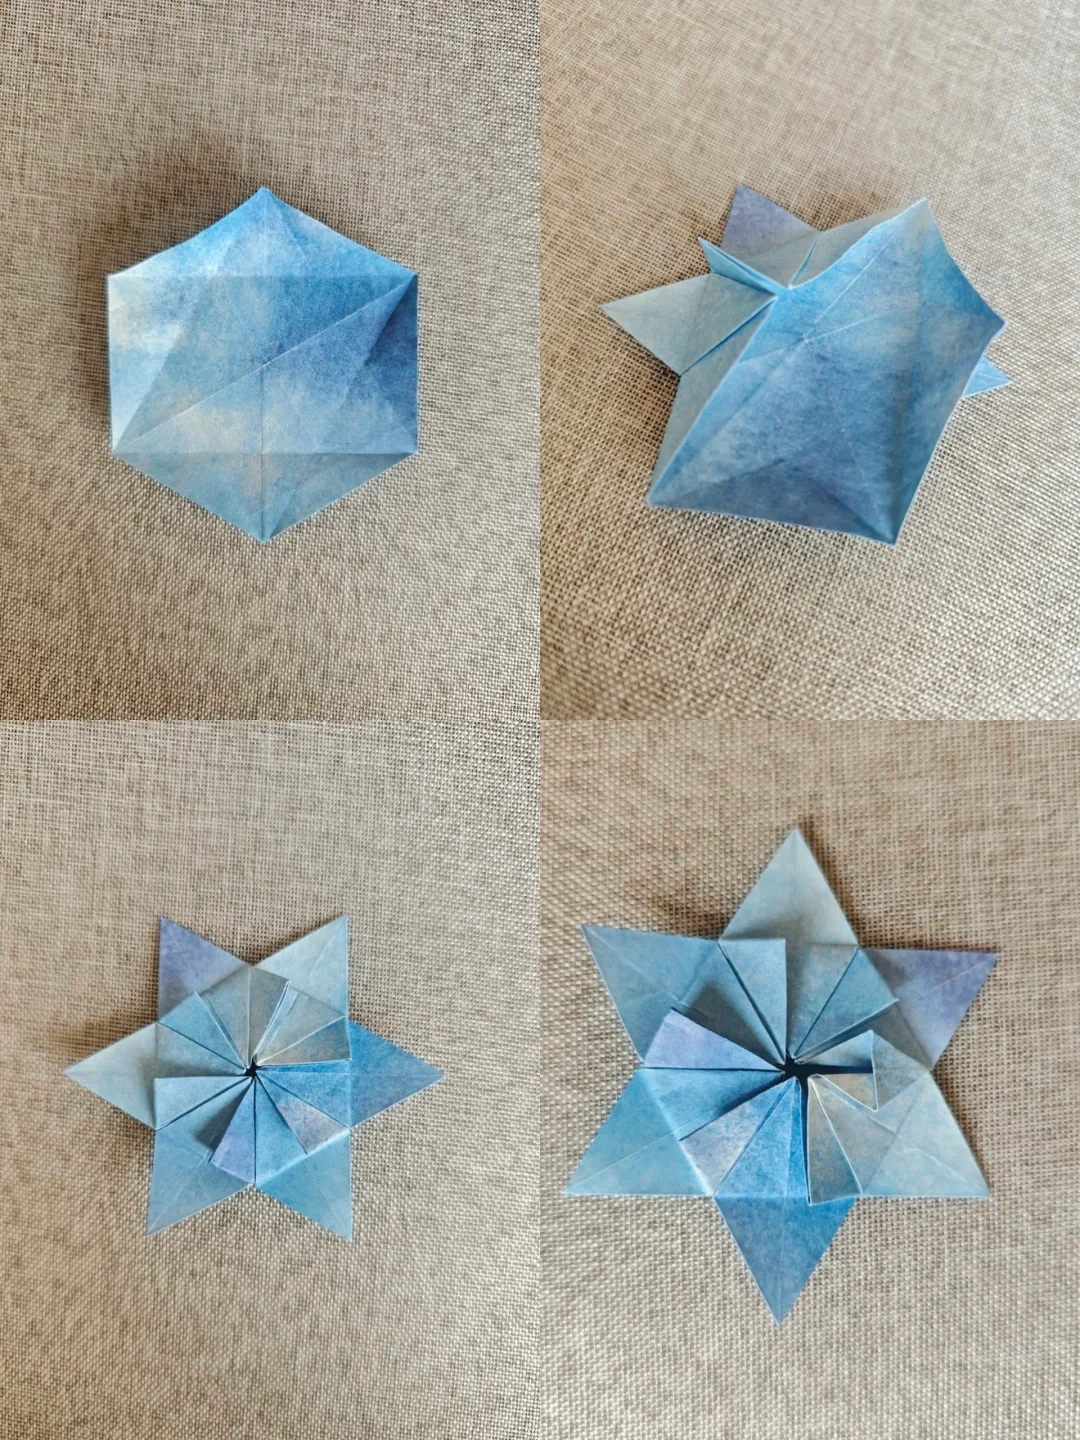 Open image at full size ↗
Open one folded pocket and flatten it into a point. Continue around the center, matching the successive panels.
Refine the reverse
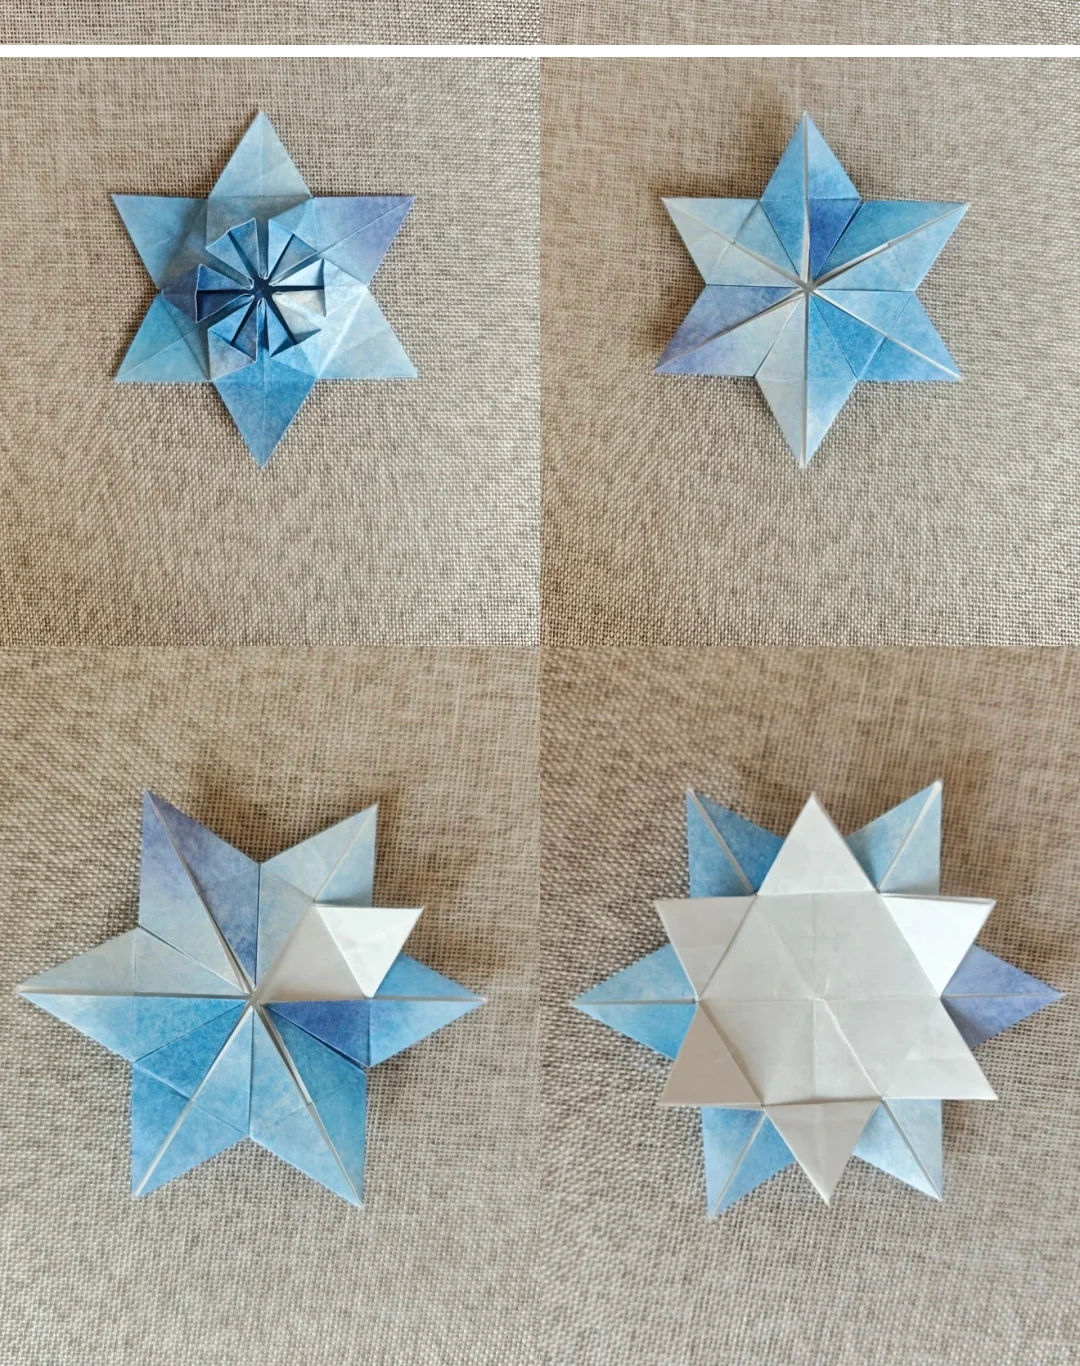 Open image at full size ↗
Turn the model over and fold the indicated corners inward, repeating around all six sectors.
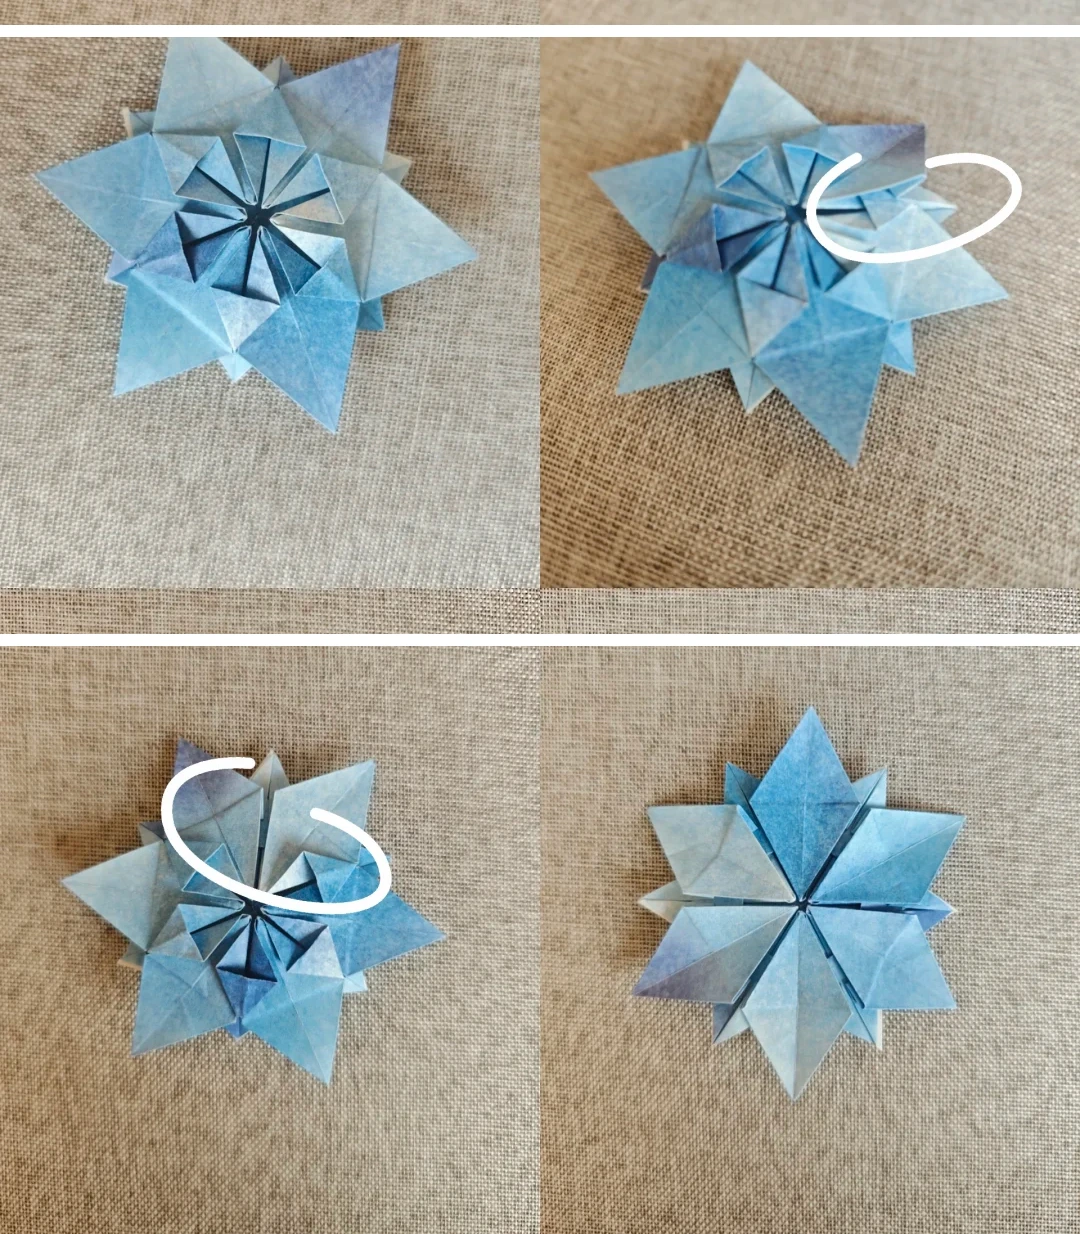
Tuck the small corners
 Open image at full size ↗
Turn over again. Fold both sides of a point inward and lift the neighboring layer to tuck the small triangle beneath it.
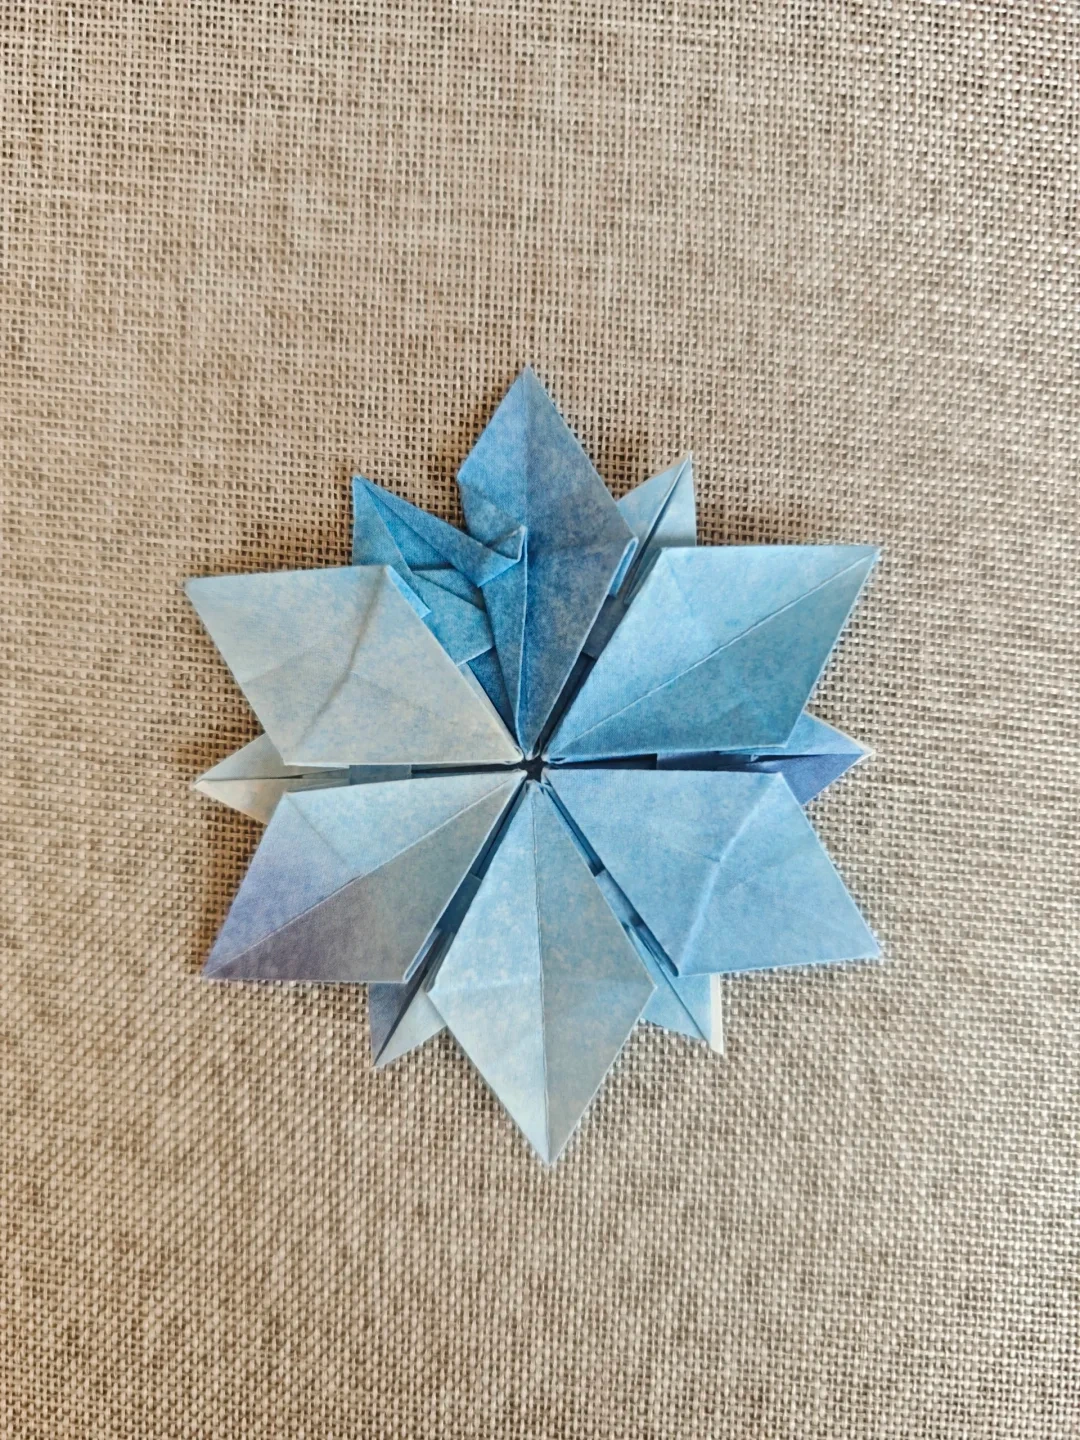
Repeat around the model
 Open image at full size ↗
Repeat these edge folds and tucks on all six points, keeping the center flat.
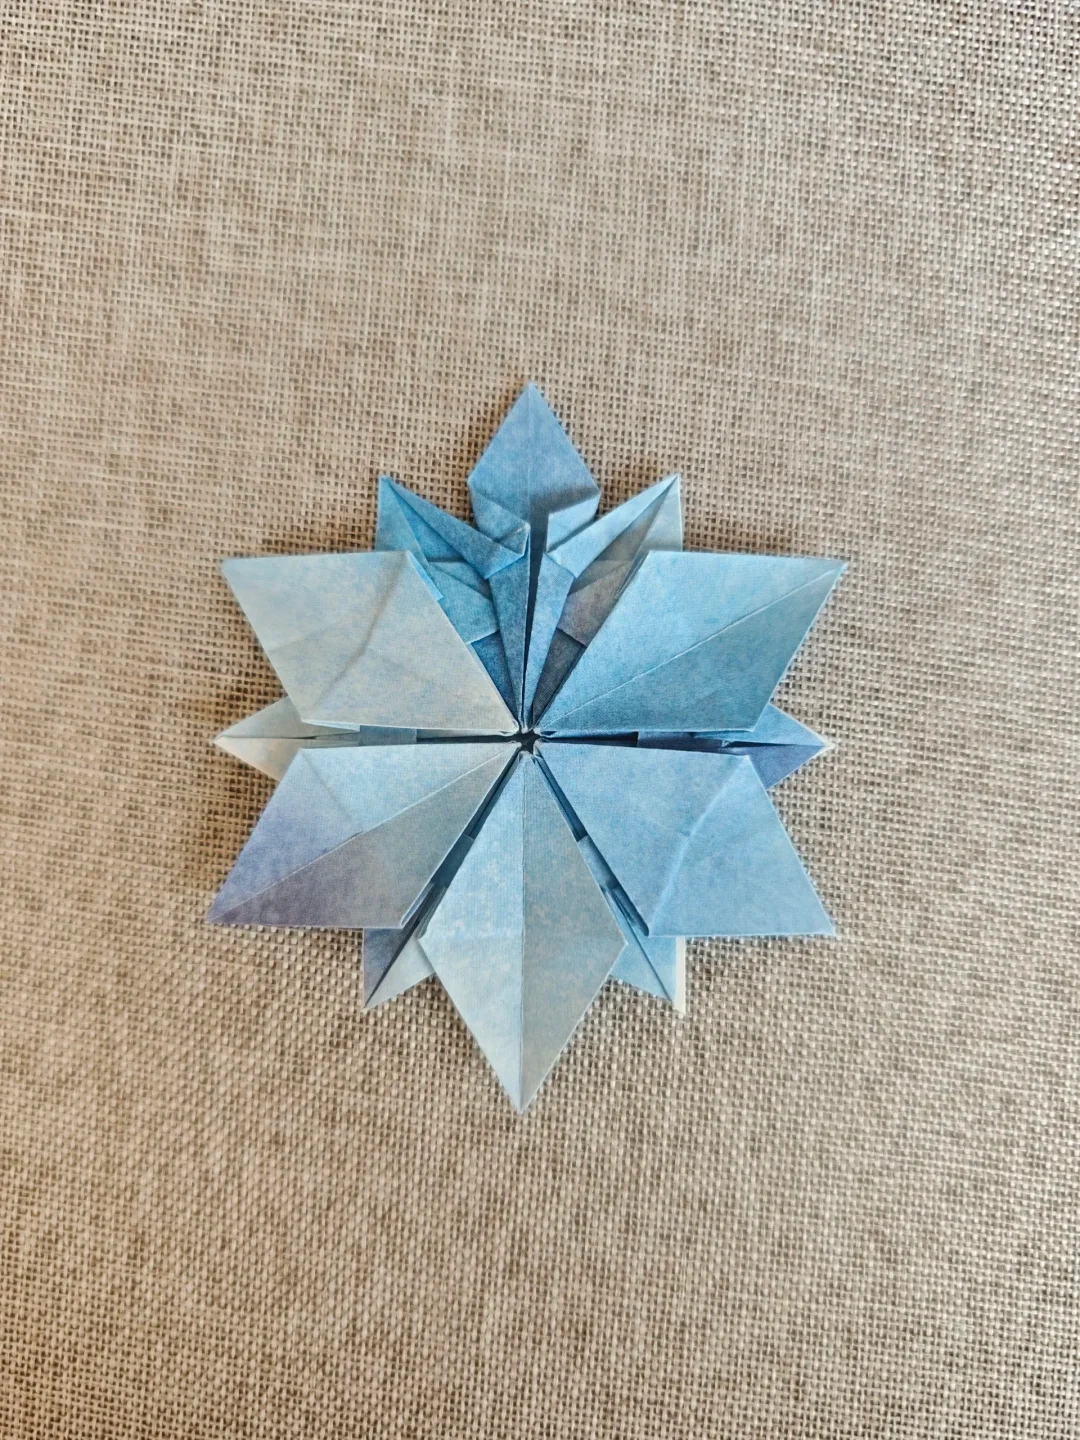
Lift the facets
 Open image at full size ↗
Gently open the folded layers of each point so the petal faces rise above the center.
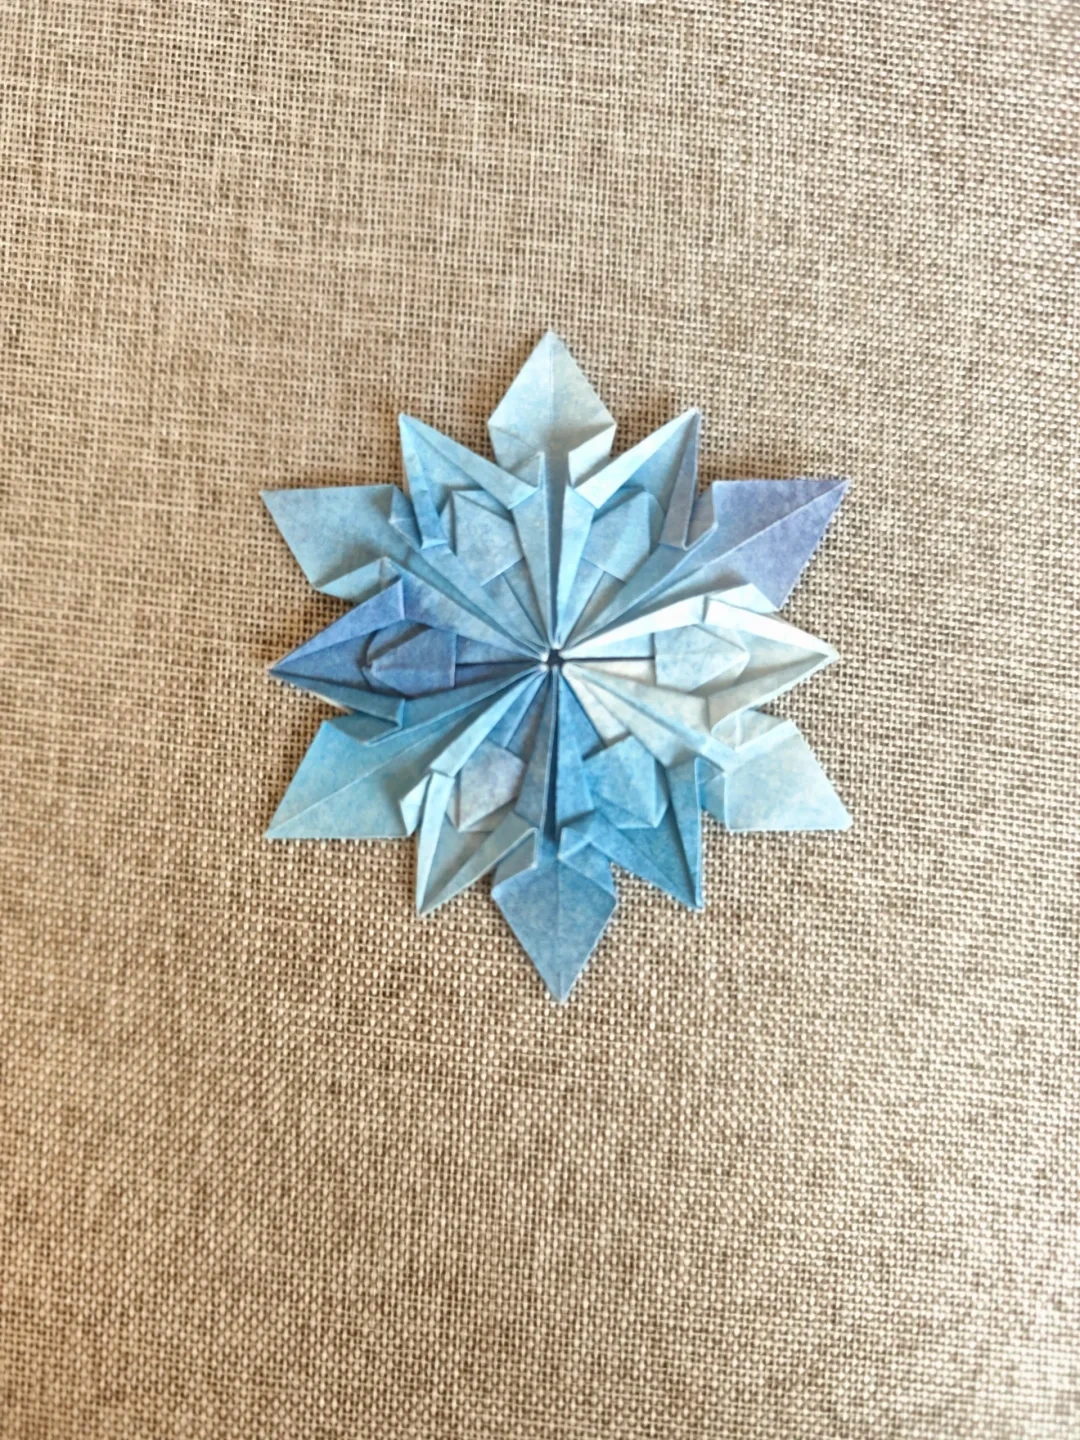
Finish the snowflake
 Open image at full size ↗
Even out the six points and press their bases to hold the raised shape.
Follow the diagrams alongside the step-by-step English instructions.
Choose your next project →