
Flowers & nature · Step-by-step guide
Eight-Point Paper Rosette
Fold a single square into an eight-point flower with a spiral center. Build up the creases, shape the points, then fold the petals around the middle.
What you’ll need
- One 15 × 15 cm square of paper
Origami · Creasing, squash folds & inward folds
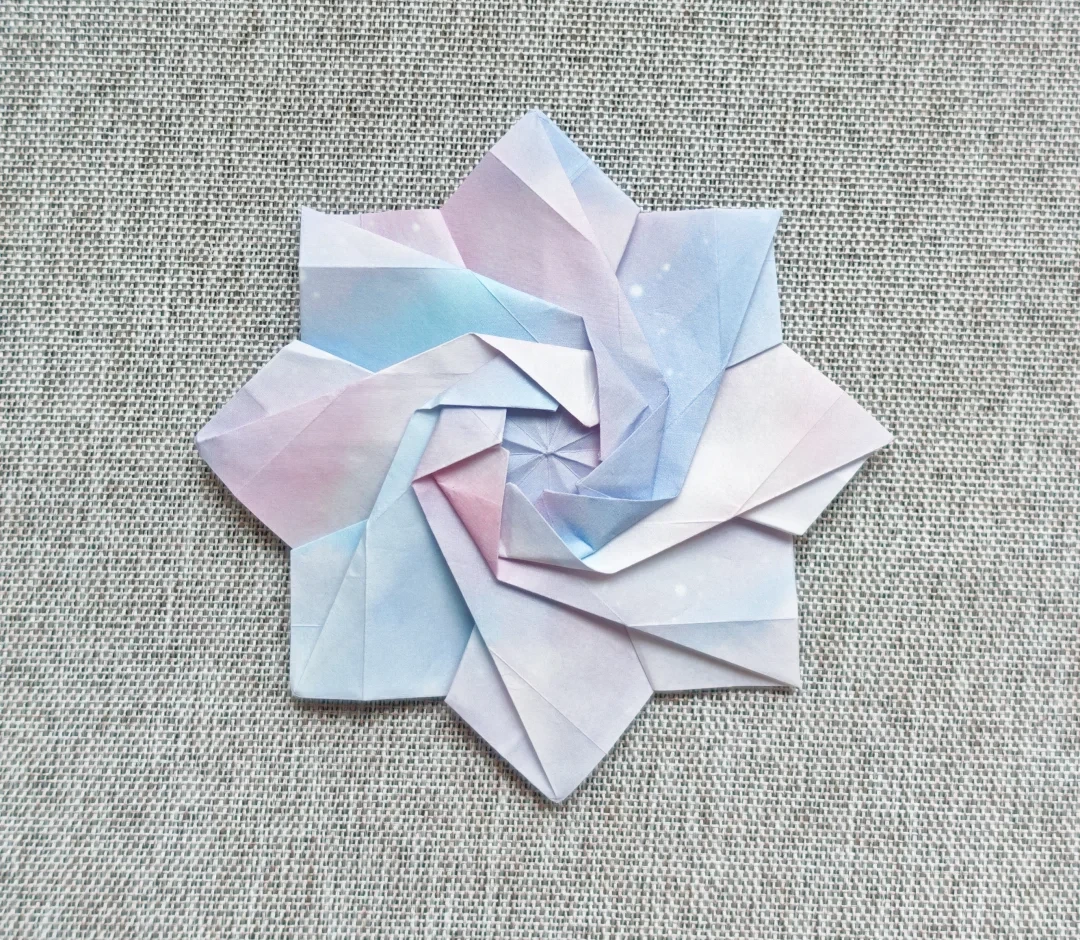
Make it, step by step.
32 steps · Original diagrams with English instructions
Prepare the paper
 Open image at full size ↗
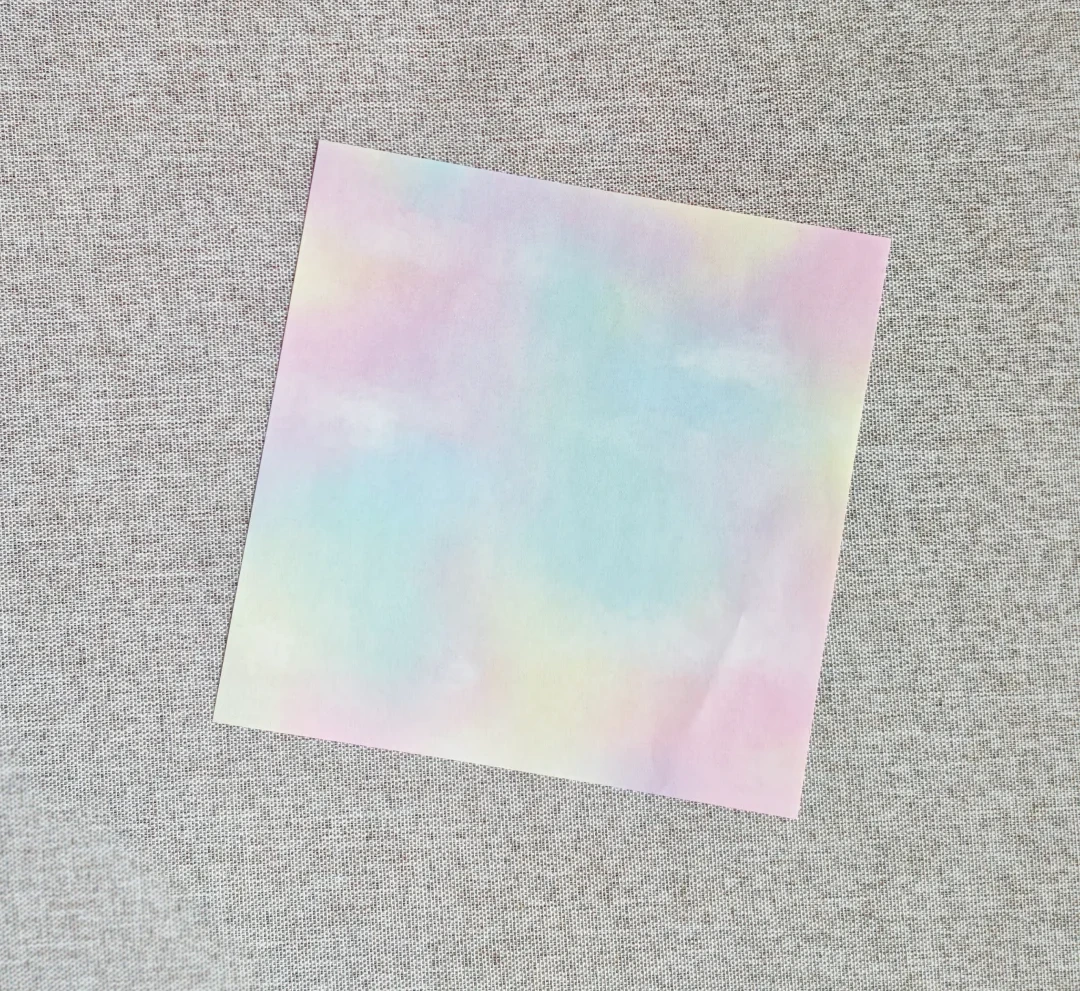
Start with one 15 × 15 cm square of paper.
Crease and collapse
 Open image at full size ↗
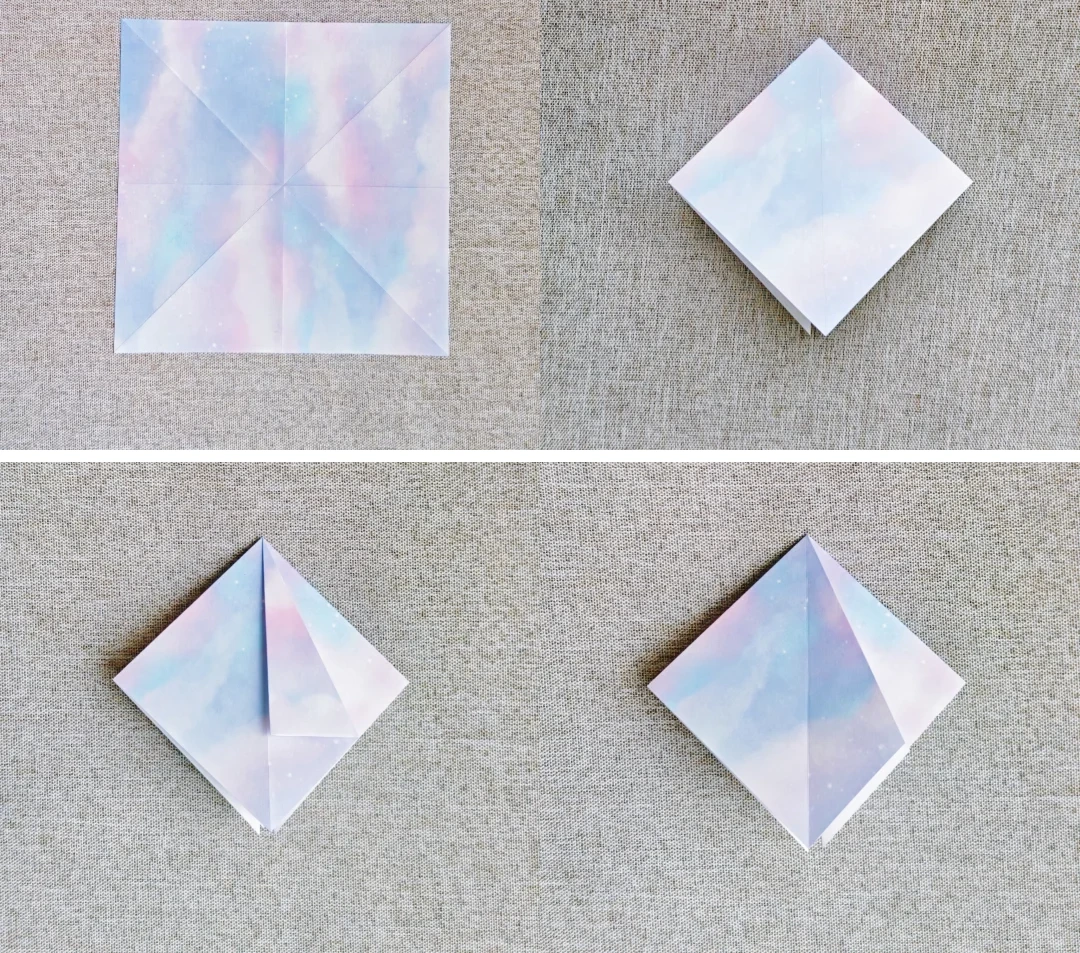
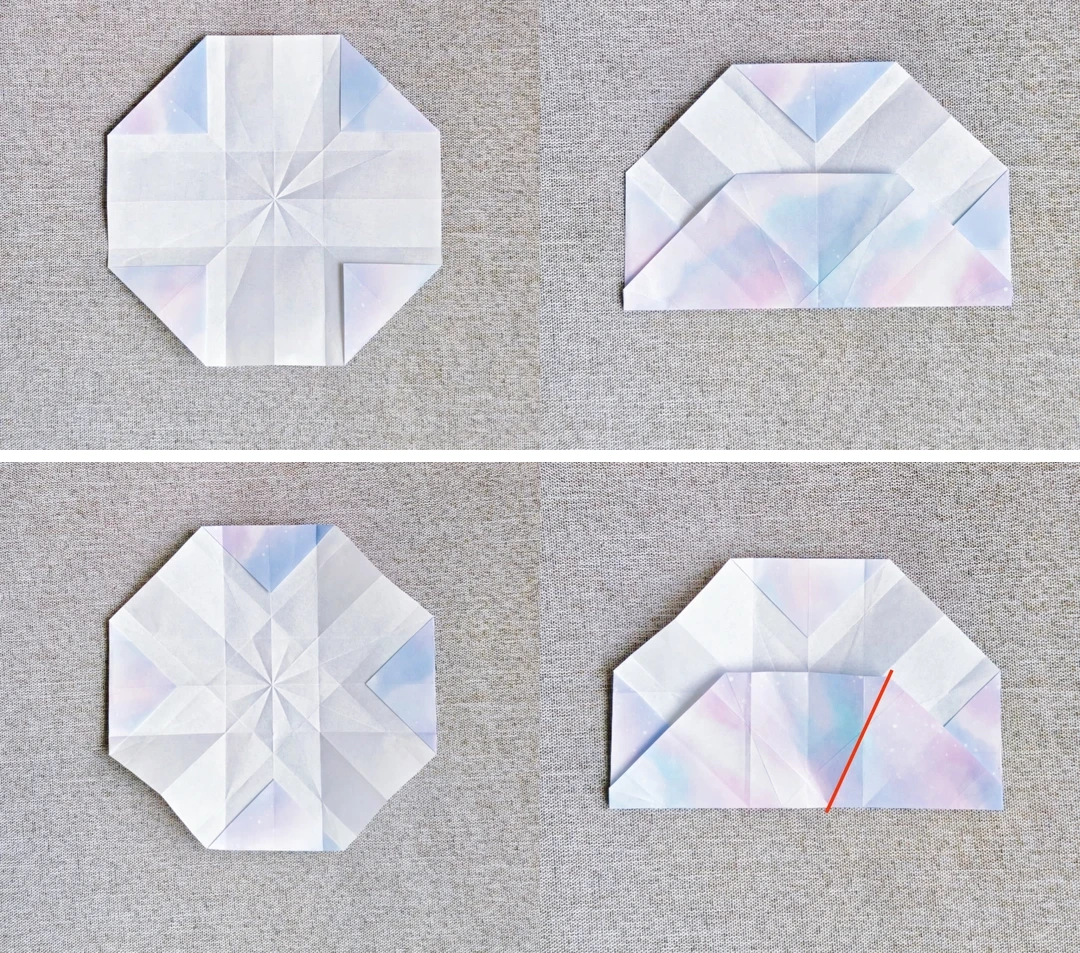
Fold and unfold the square in half horizontally, vertically and along both diagonals.
Collapse the creases into a flat square base, with a point facing down as shown.
Lift and open one triangular flap, as shown in the lower-left panel.
Open the flap and fold inward along the crease, flattening it into the narrower shape shown.
Shape an octagon
 Open image at full size ↗
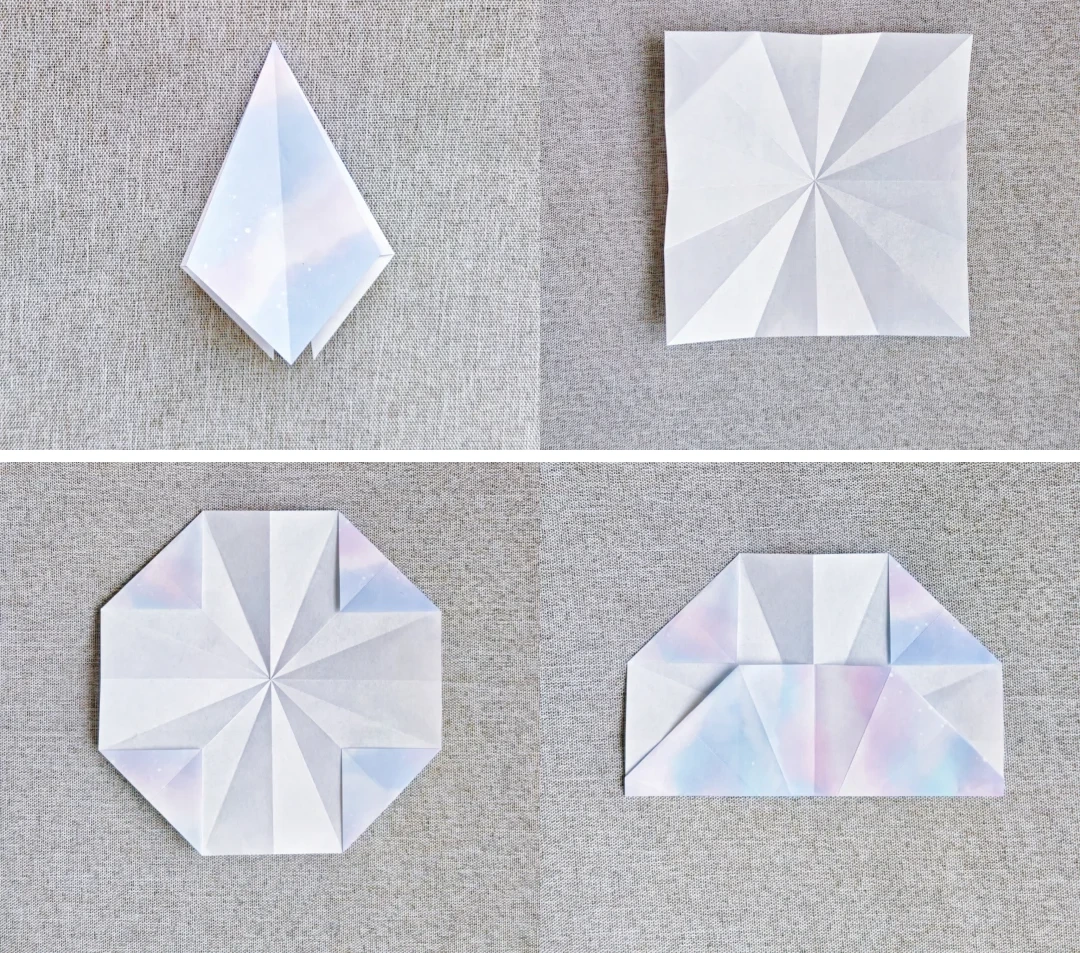
Repeat the same fold on the remaining flaps.
Unfold the paper completely to reveal the creases radiating from the center.
Fold all four corners inward as shown to make an octagonal outline.
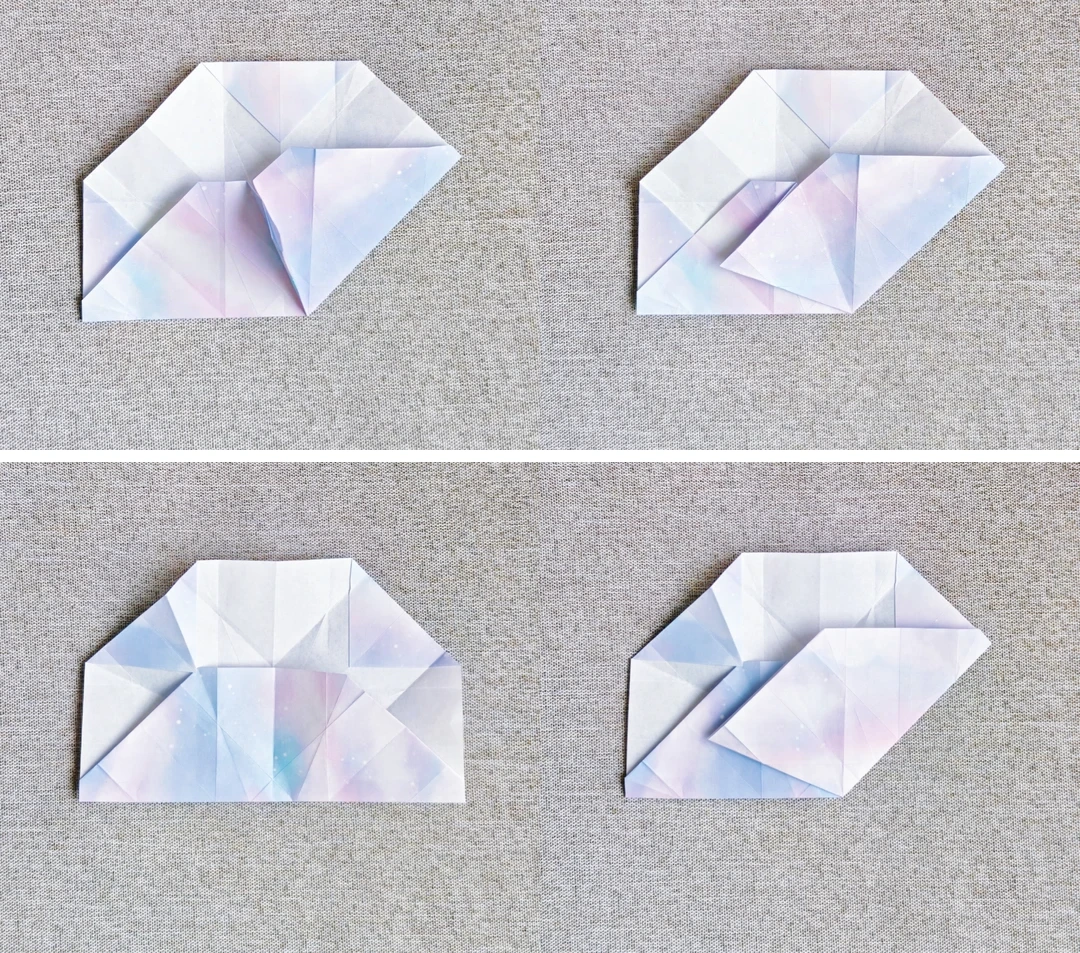
Fold the lower part upward to match the lower-right panel. Crease, then unfold.
Add the radial creases
 Open image at full size ↗
Repeat the previous fold on the other three sides, unfolding each time.
Make the next upward fold as shown in the upper-right panel. Crease, then unfold.
Repeat this fold on the other three sides, unfolding each time.
Fold the lower part up again as shown, then pinch the paper up along the red line.
Reinforce the folds
 Open image at full size ↗
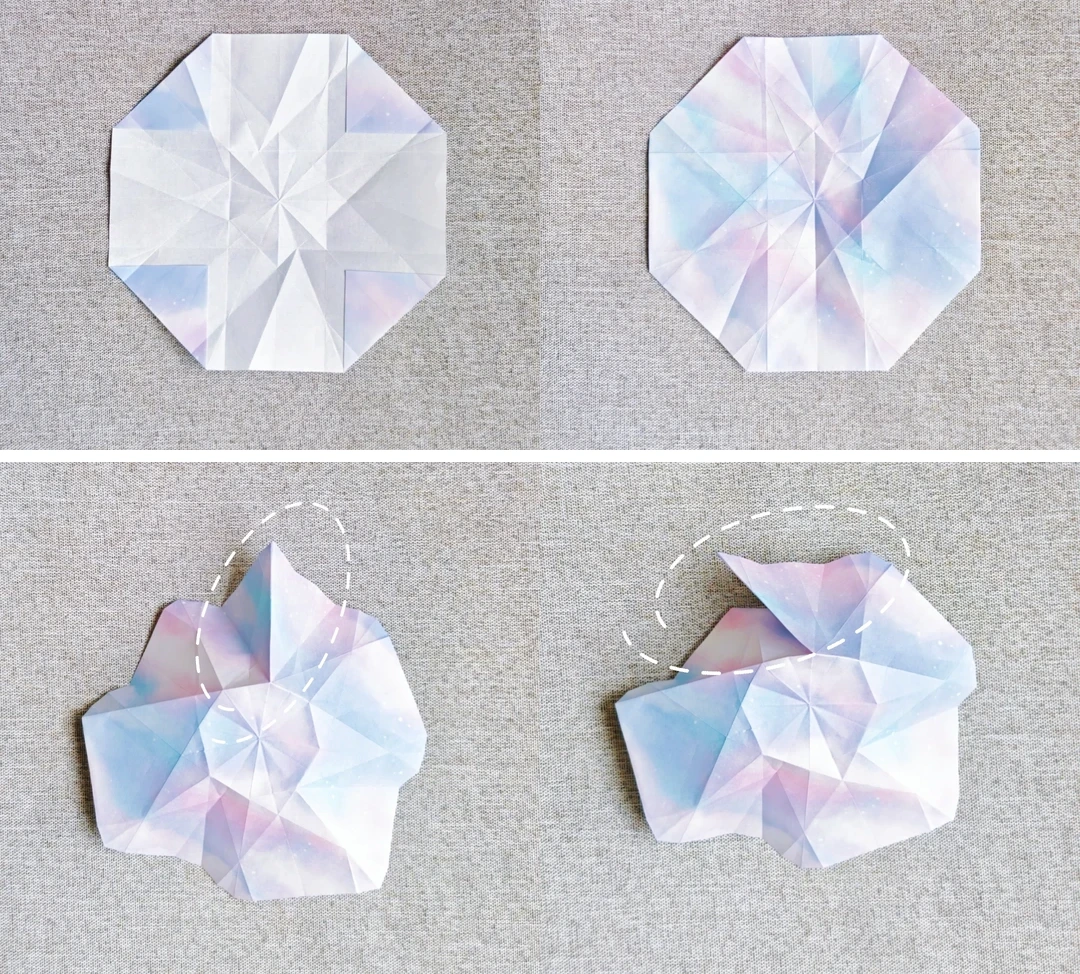
Lift the pinched section along the crease, matching the raised flap in the upper-left panel.
Bring the raised layers together and fold them down to the left. Crease, then unfold.
Fold the lower section upward again, keeping the diagonal creases in the arrangement shown.
Repeat the first two actions in this group to sharpen the creases, then unfold.
Form the eight points
 Open image at full size ↗
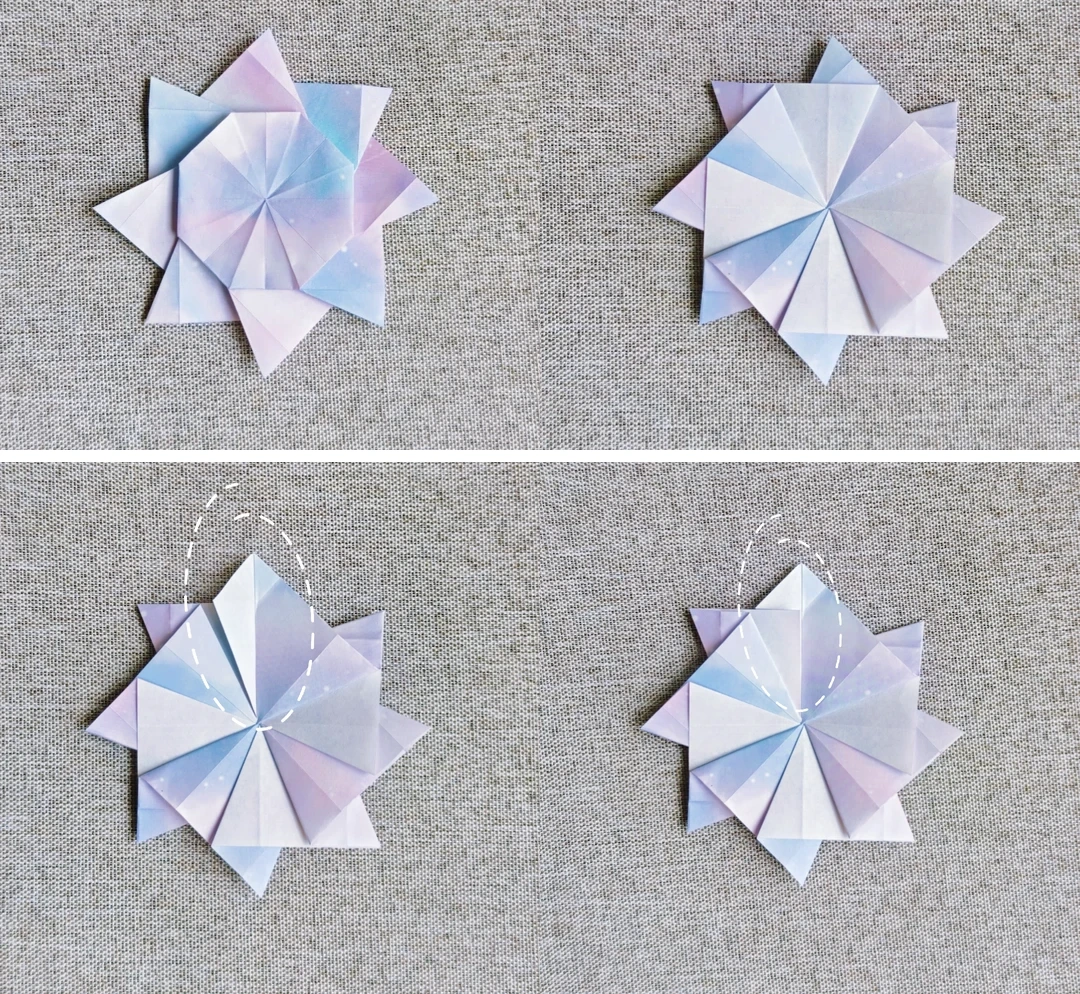
Repeat the crease-making sequence on the other three sides. Unfold to the octagonal crease pattern shown.
Turn the paper over.
Pinch up one ridge along the existing creases, as highlighted by the dashed oval.
Fold the raised section to the left. Work around the paper and repeat for all eight corners.
Shape the petal folds
 Open image at full size ↗
Keep turning the model as you work around it, pressing down along the creases until it forms the eight-point shape shown.
Turn the model over.
Fold the highlighted flap to the right.
Open the flap you just folded and tuck the fold inward, following the lower-right panel.
Finish the inward folds
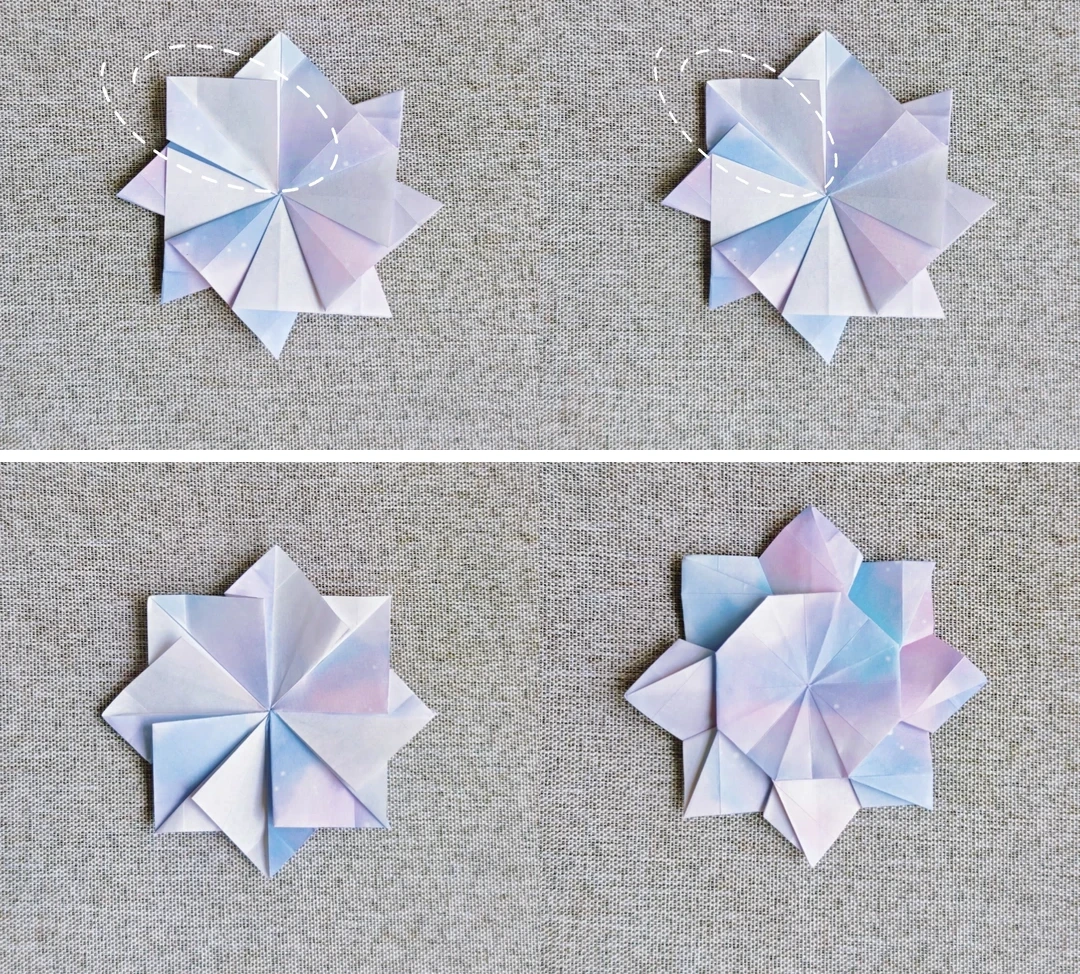 Open image at full size ↗
Fold the left-side flap to the left, as highlighted.
Open that fold and fold it inward.
Repeat the same sequence around the remaining edges.
Turn the model over again.
Start the spiral
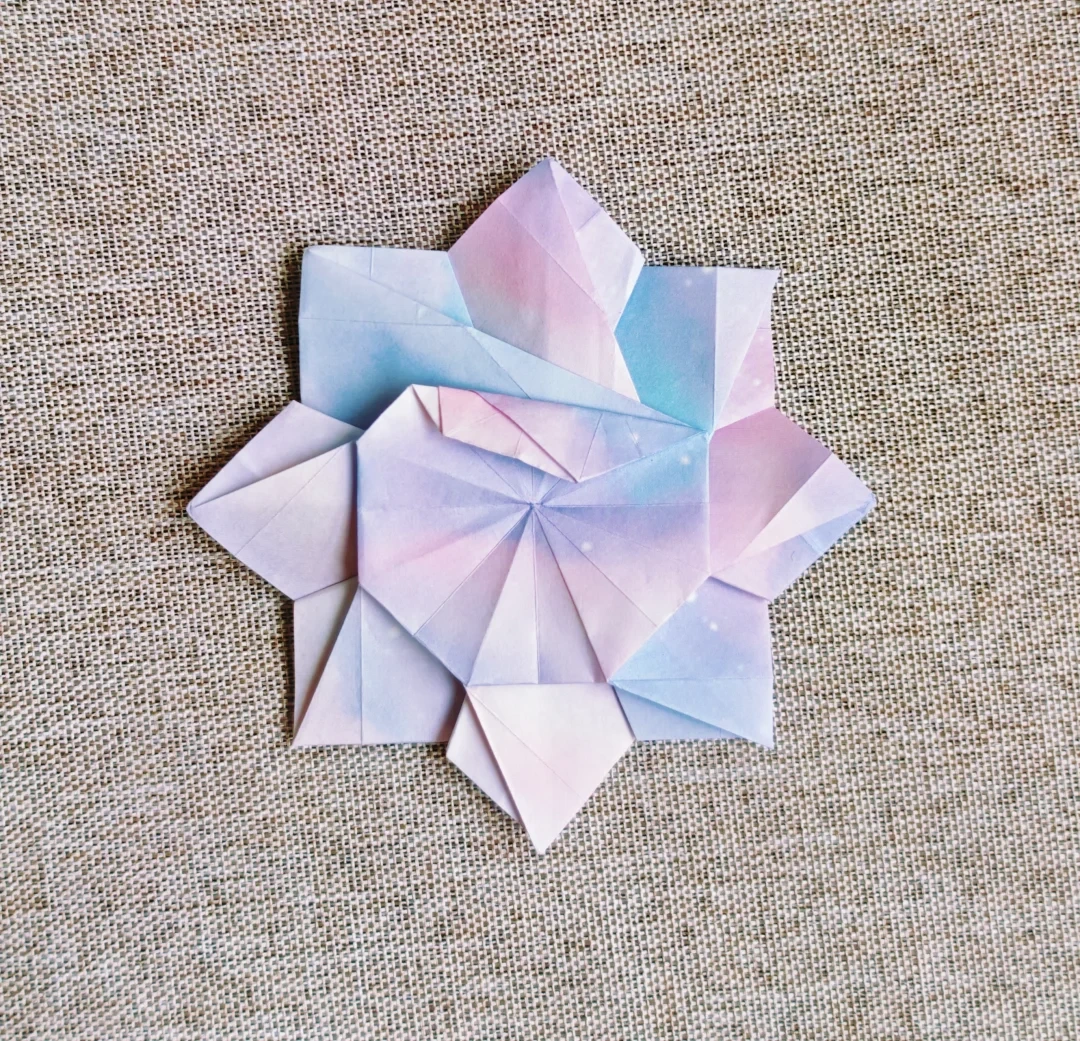 Open image at full size ↗
Fold the inner edge of one petal toward the center, matching the folded band at the top of the picture.
Continue around the flower
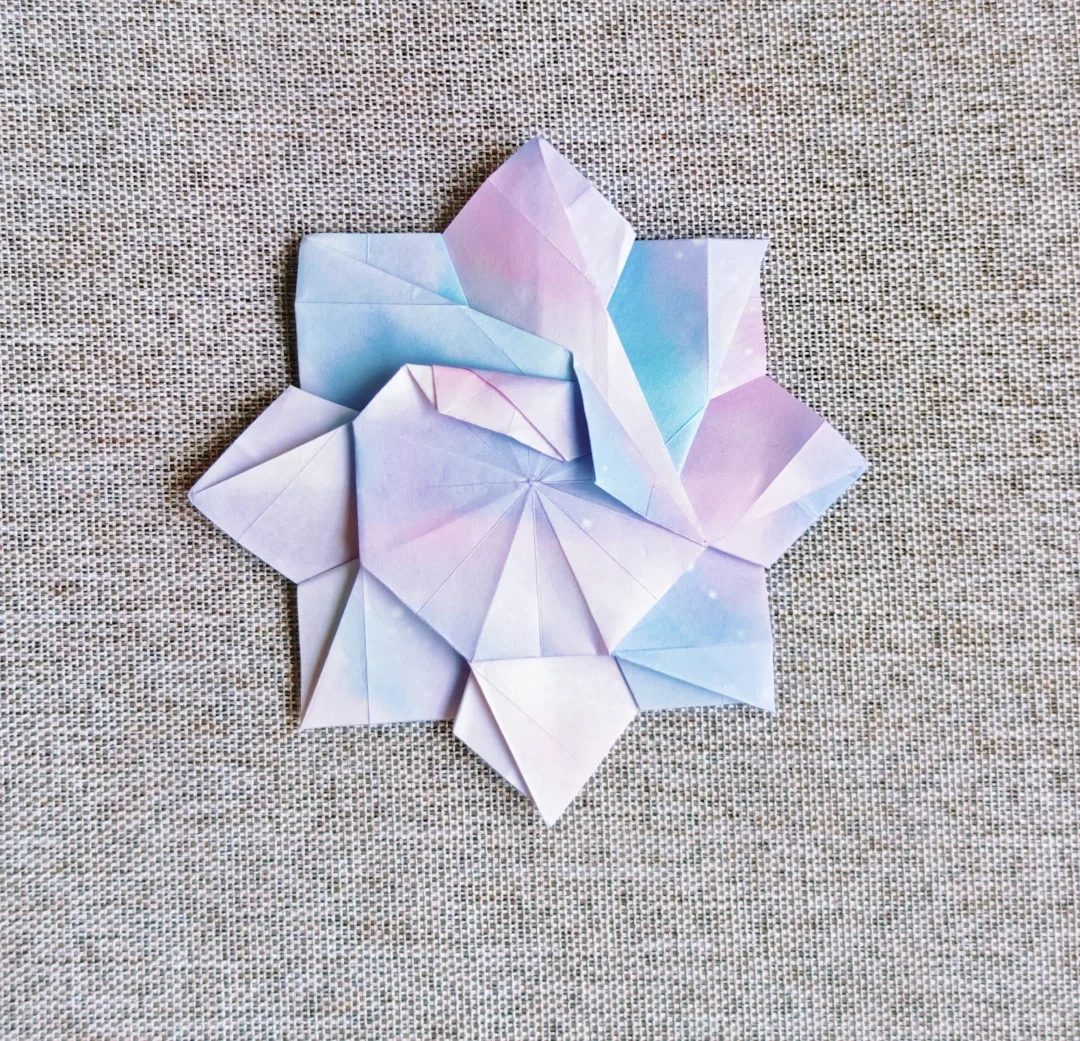 Open image at full size ↗
Repeat on the next petal in the same direction. Continue around the flower so the folded edges form a spiral.
The finished rosette
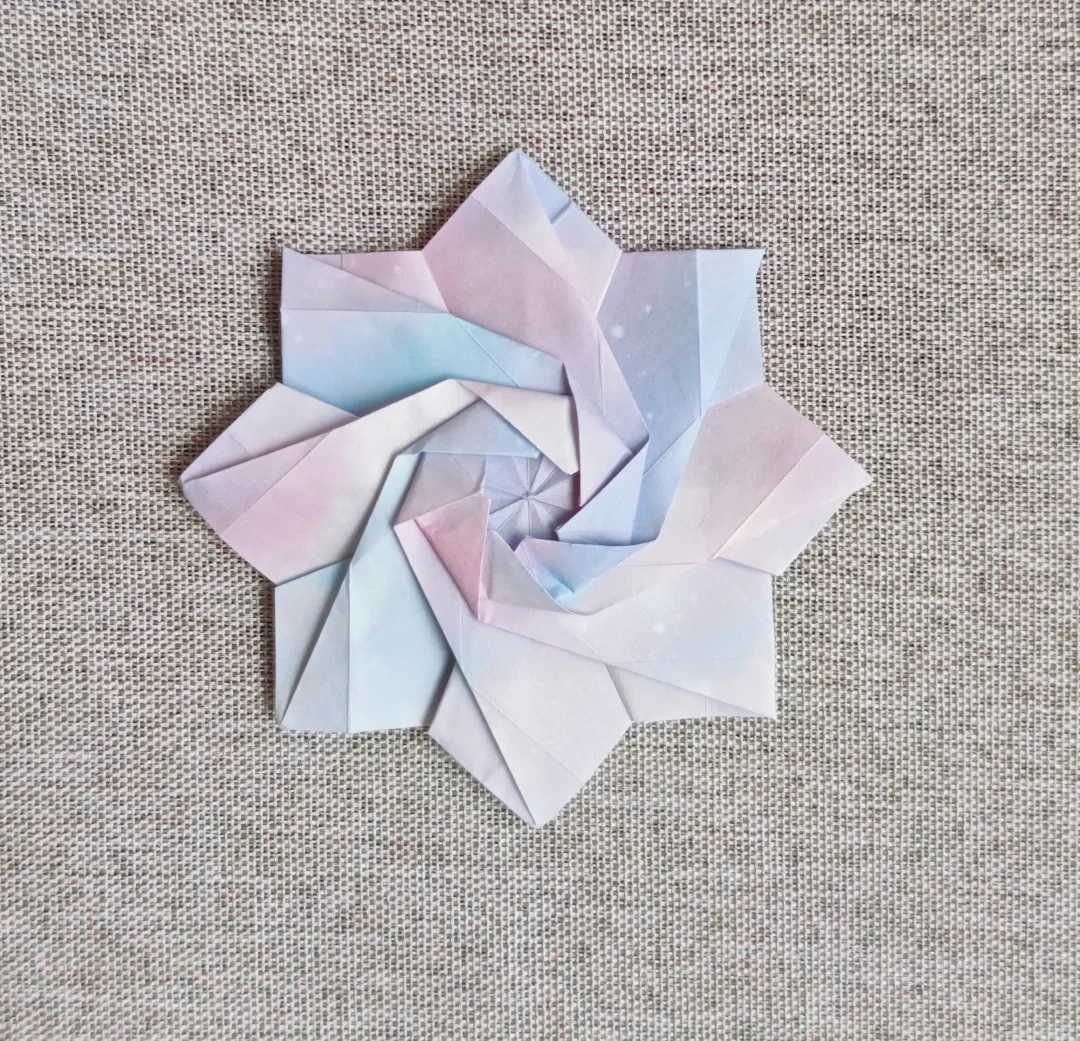 Open image at full size ↗
Complete the remaining petal folds and gently flatten the model to finish the rosette.
Follow the diagrams alongside the step-by-step English instructions.
Choose your next project →