
Flowers & nature · Step-by-step guide
Four-Leaf Paper Clover
Fold and shape four heart-like leaves into a flat green clover.
What you’ll need
- One 15 × 15 cm green paper square
- Scissors
- A separate narrow green stem, optional
- Craft glue, optional for a stem
Paper craft · Folding and assembly

Make it, step by step.
12 steps · Original diagrams with English instructions
Read each picture from left to right, then top to bottom. The folding sequence makes the four-leaf shape. The optional stem shown in the finished photos is a separate piece; its construction is not illustrated.
Finished model
 Open image at full size ↗
Use this finished example to compare the shape and proportions of your model.
Finished model
 Open image at full size ↗
Use this finished example to compare the shape and proportions of your model.
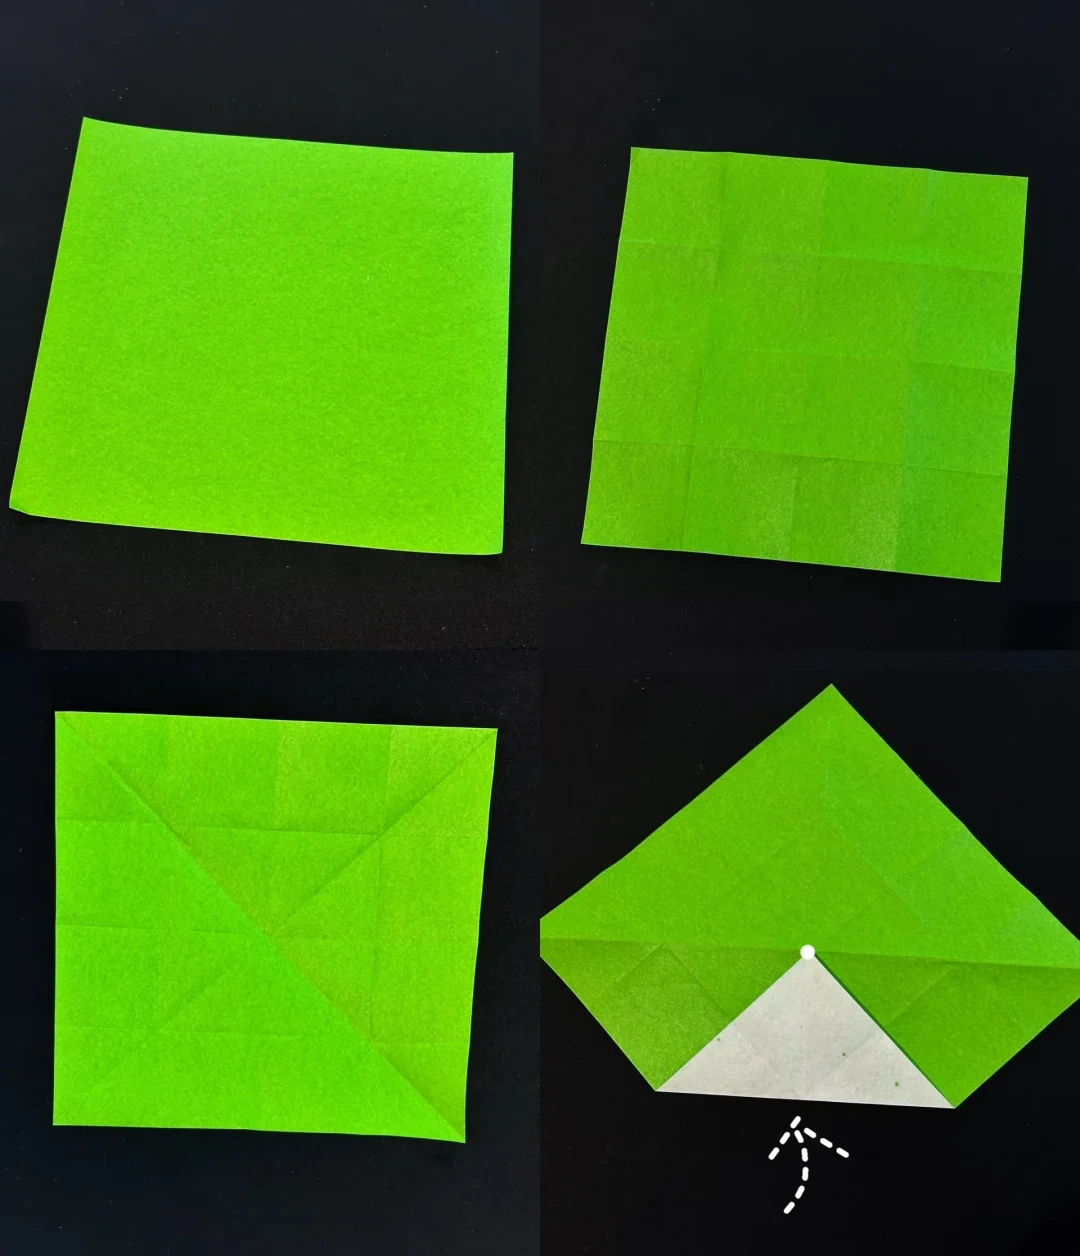
Mark the center folds
 Open image at full size ↗
Crease the square in half horizontally and vertically, then crease both diagonals.
Bring one corner to the center point and crease it.
Add a second crease
 Open image at full size ↗
Fold the same corner upward again to the marked point, then unfold to reveal the two guide creases.
Repeat around all four corners. Begin folding inward along these creases.
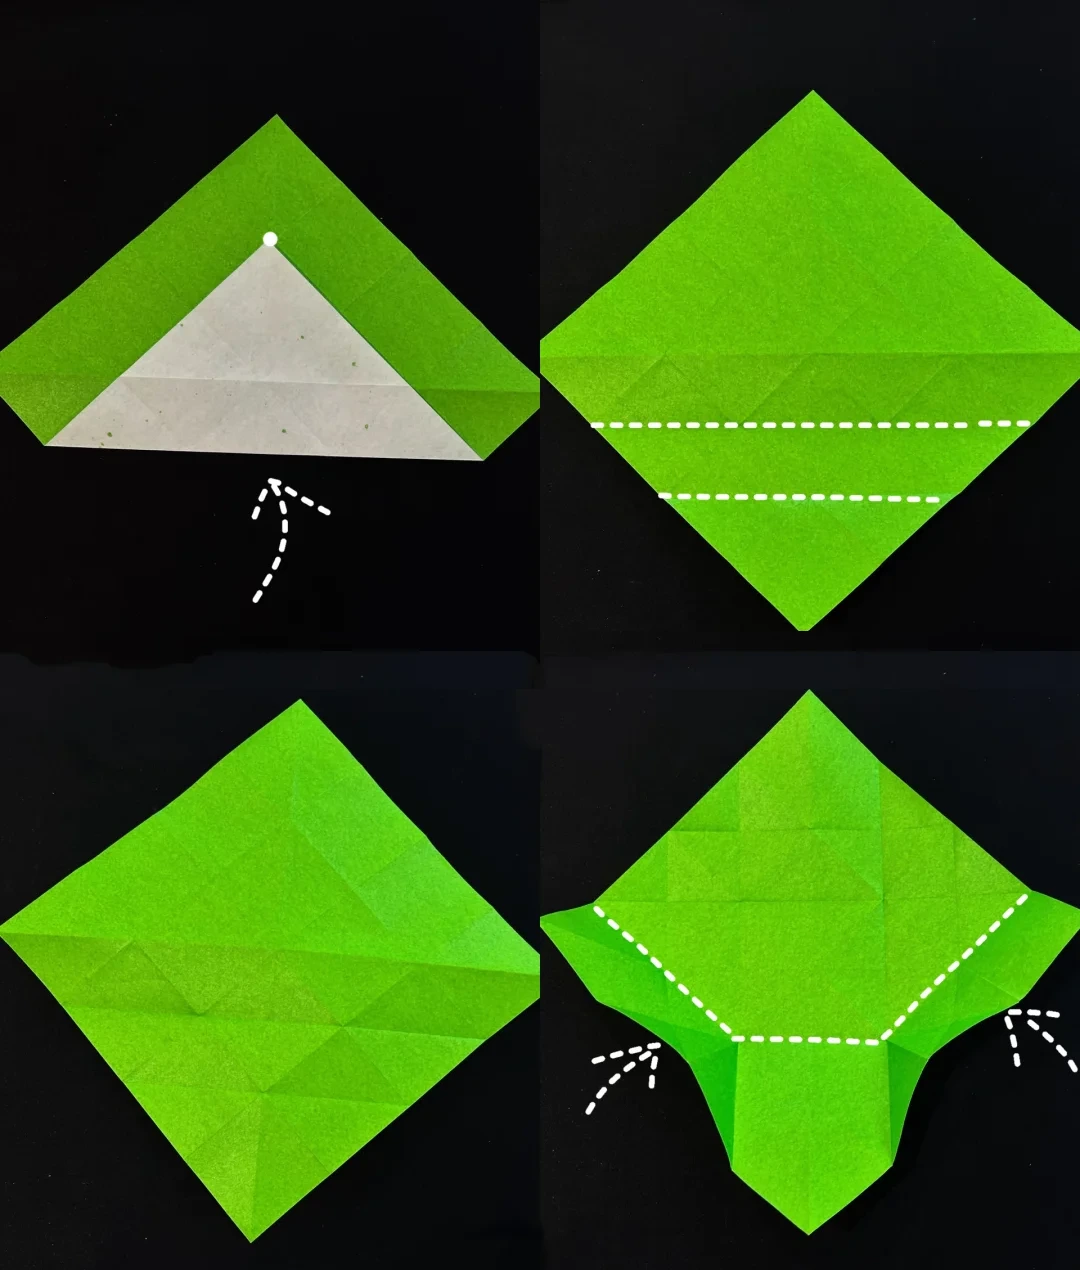
Collapse the corner section
 Open image at full size ↗
Push the two side sections inward along the existing creases. Fold the indicated layer upward.
Open the small square pocket and squash it downward to flatten the section.
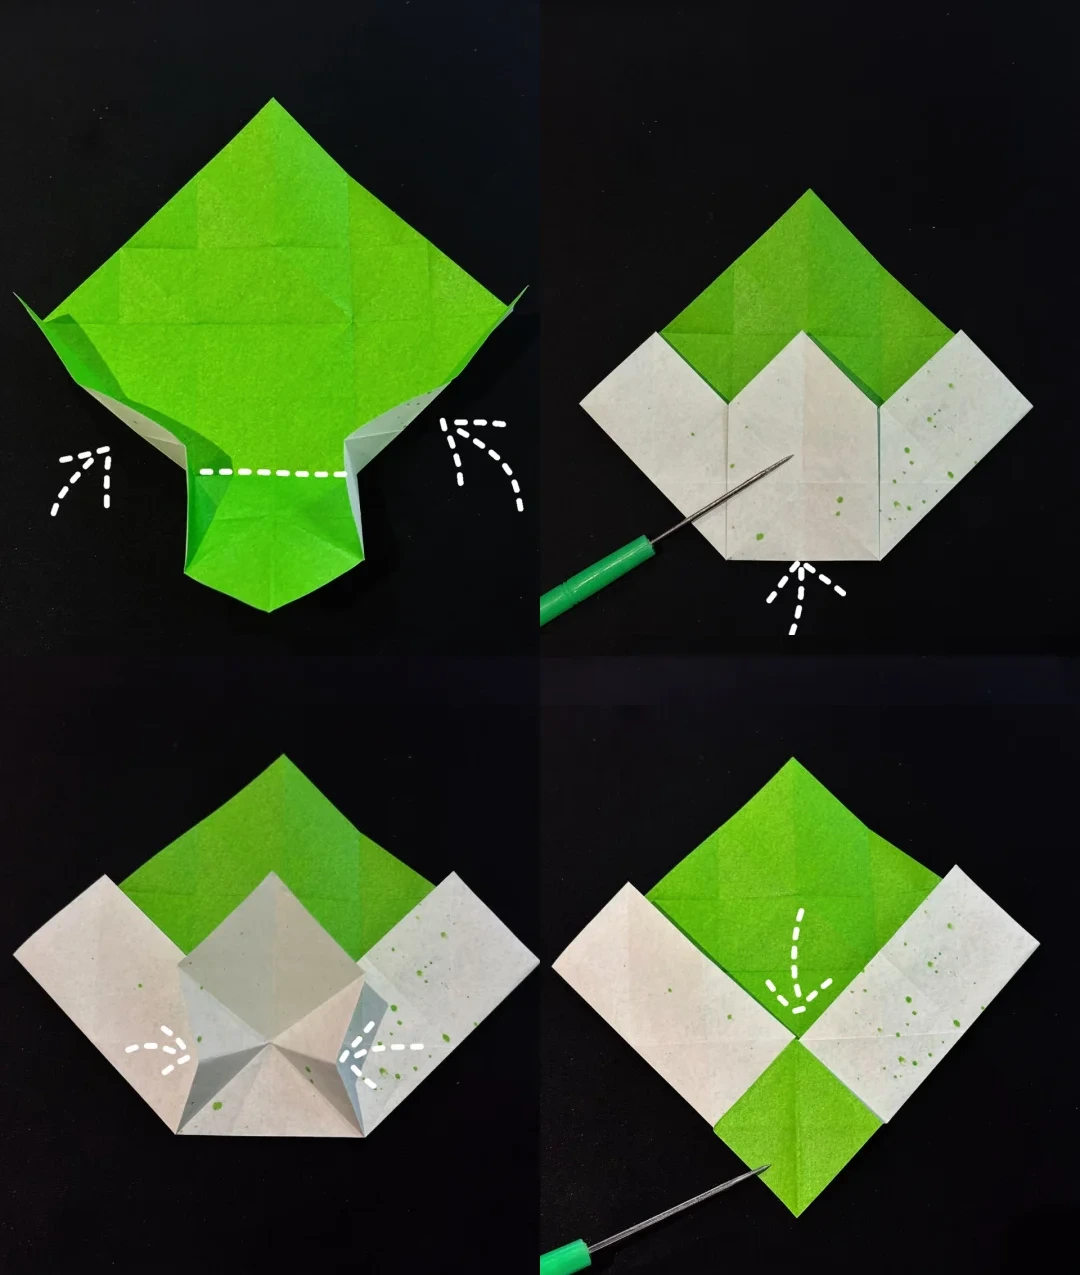
Repeat on four sides
 Open image at full size ↗
Repeat the same collapse around all four sides to make four square sections.
Raise one pair of flaps, fold the sides outward along the guides, then return them to their original position. Repeat around the model.
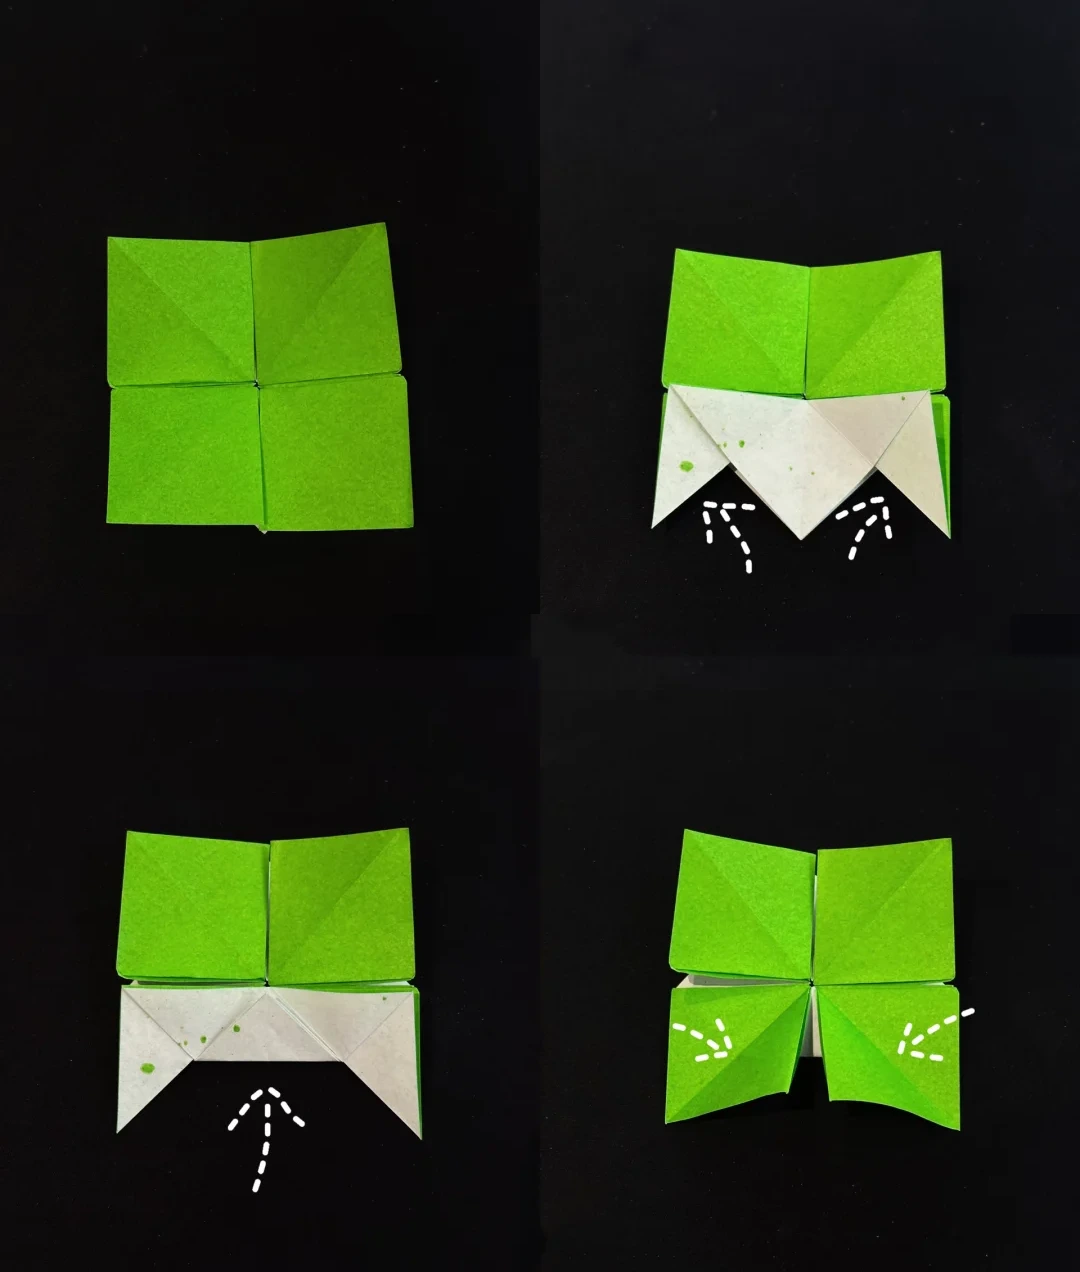
Round the outer edges
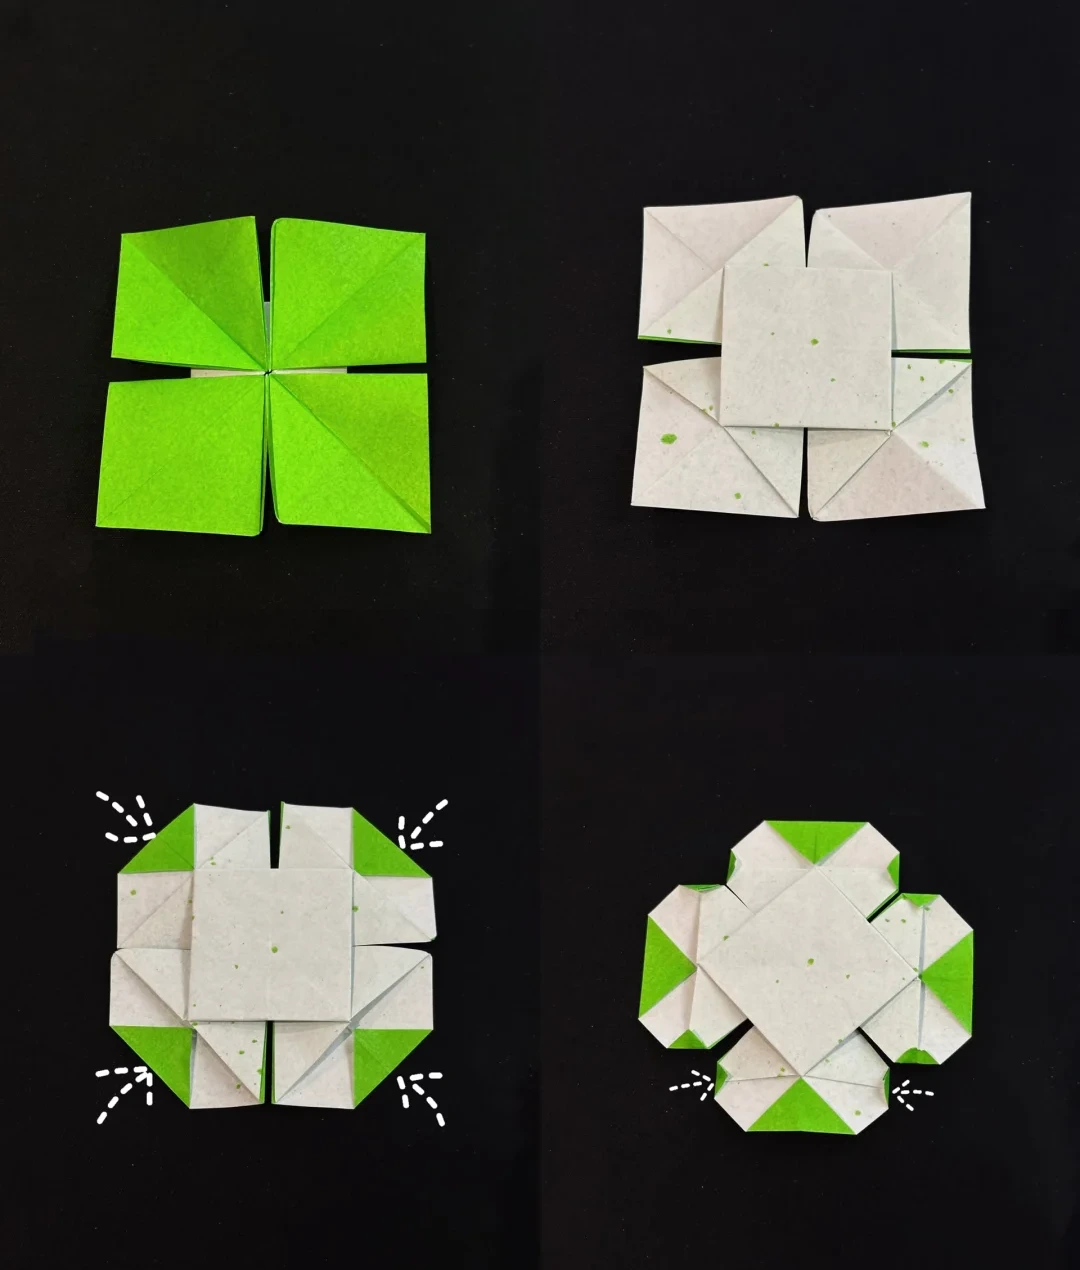 Open image at full size ↗
Make the small indicated folds on all four sections and turn the clover over.
Fold the outer corners of each leaf inward a little to soften its shape.
Separate the leaf tips
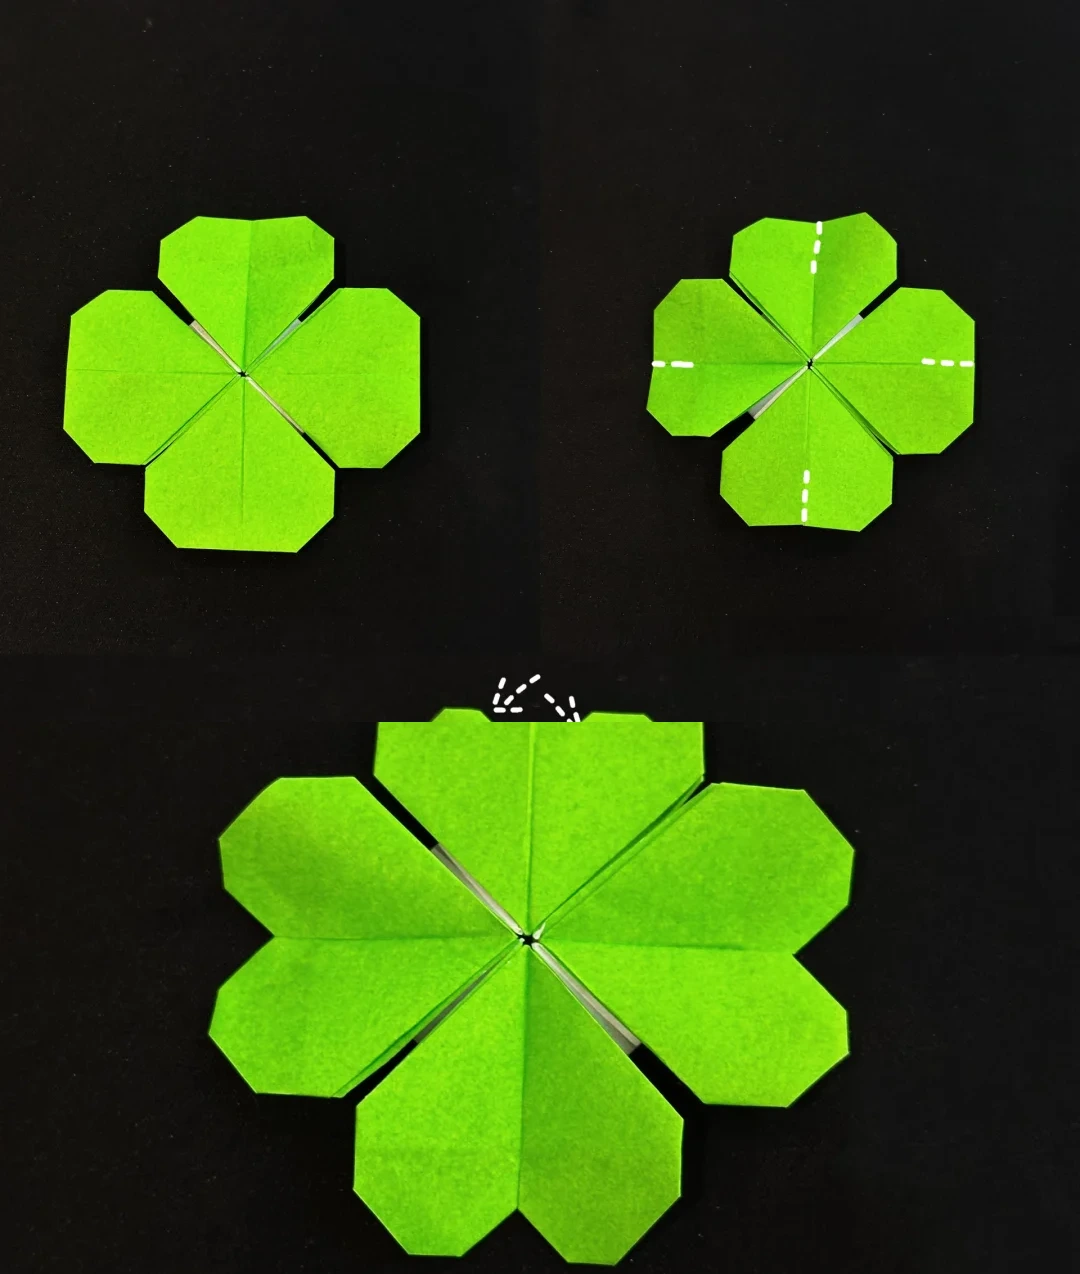 Open image at full size ↗
Turn the clover face up. Cut along the short dotted lines, stopping at their marked ends.
Fold the two edges beside each cut behind to form the notch in each heart-shaped leaf.
Finished model
 Open image at full size ↗
Use this finished example to compare the shape and proportions of your model.
Finished model
 Open image at full size ↗
Use this finished example to compare the shape and proportions of your model.
Finished model
 Open image at full size ↗
Use this finished example to compare the shape and proportions of your model.
Finished model
 Open image at full size ↗
Use this finished example to compare the shape and proportions of your model.
Follow the diagrams alongside the step-by-step English instructions.
Choose your next project →