
Flowers & nature · Step-by-step guide
Cupped Five-Petal Hibiscus
Fold five full petals from one pentagon and open them into a hibiscus blossom.
What you’ll need
- One paper square
- Scissors
- A small yellow paper center
- Craft glue
Paper craft · Folding and assembly
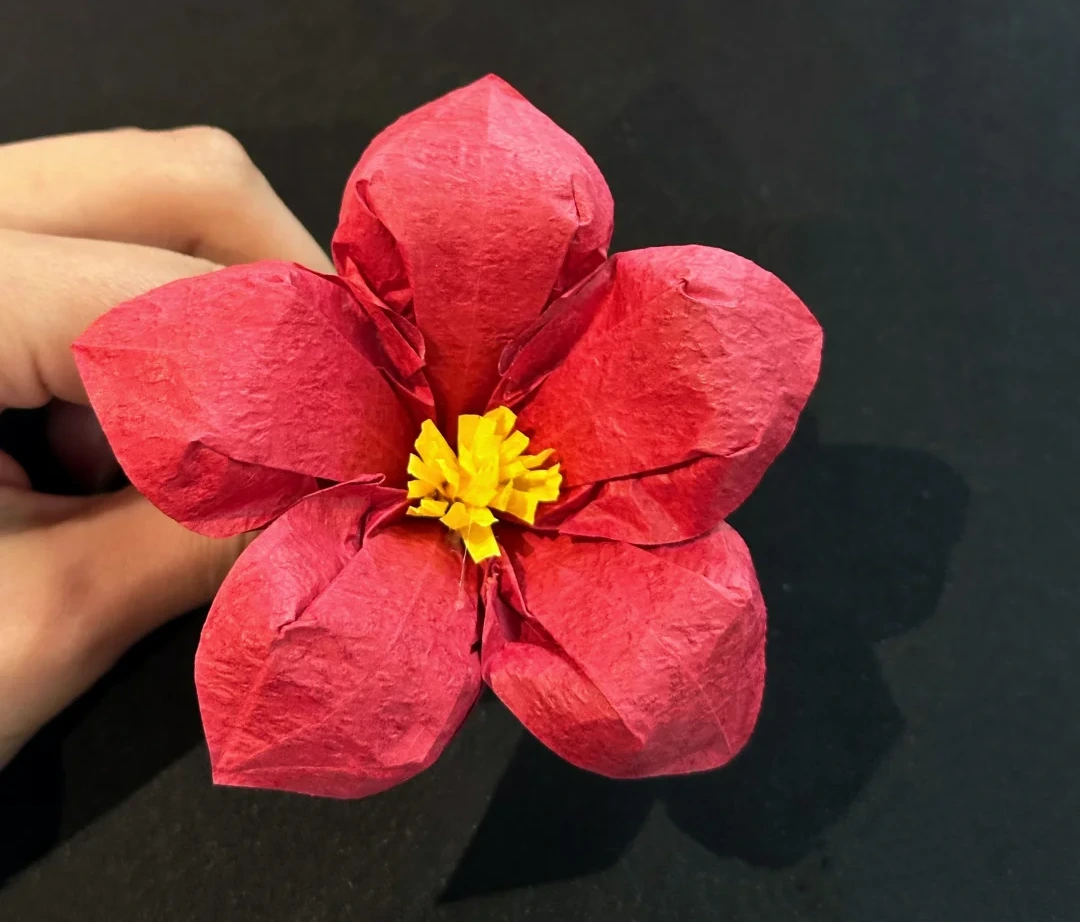
Make it, step by step.
9 steps · Original diagrams with English instructions
Read each picture from left to right, then top to bottom. The starting square size and the construction of the yellow center are not shown.
Mark the pentagon guide
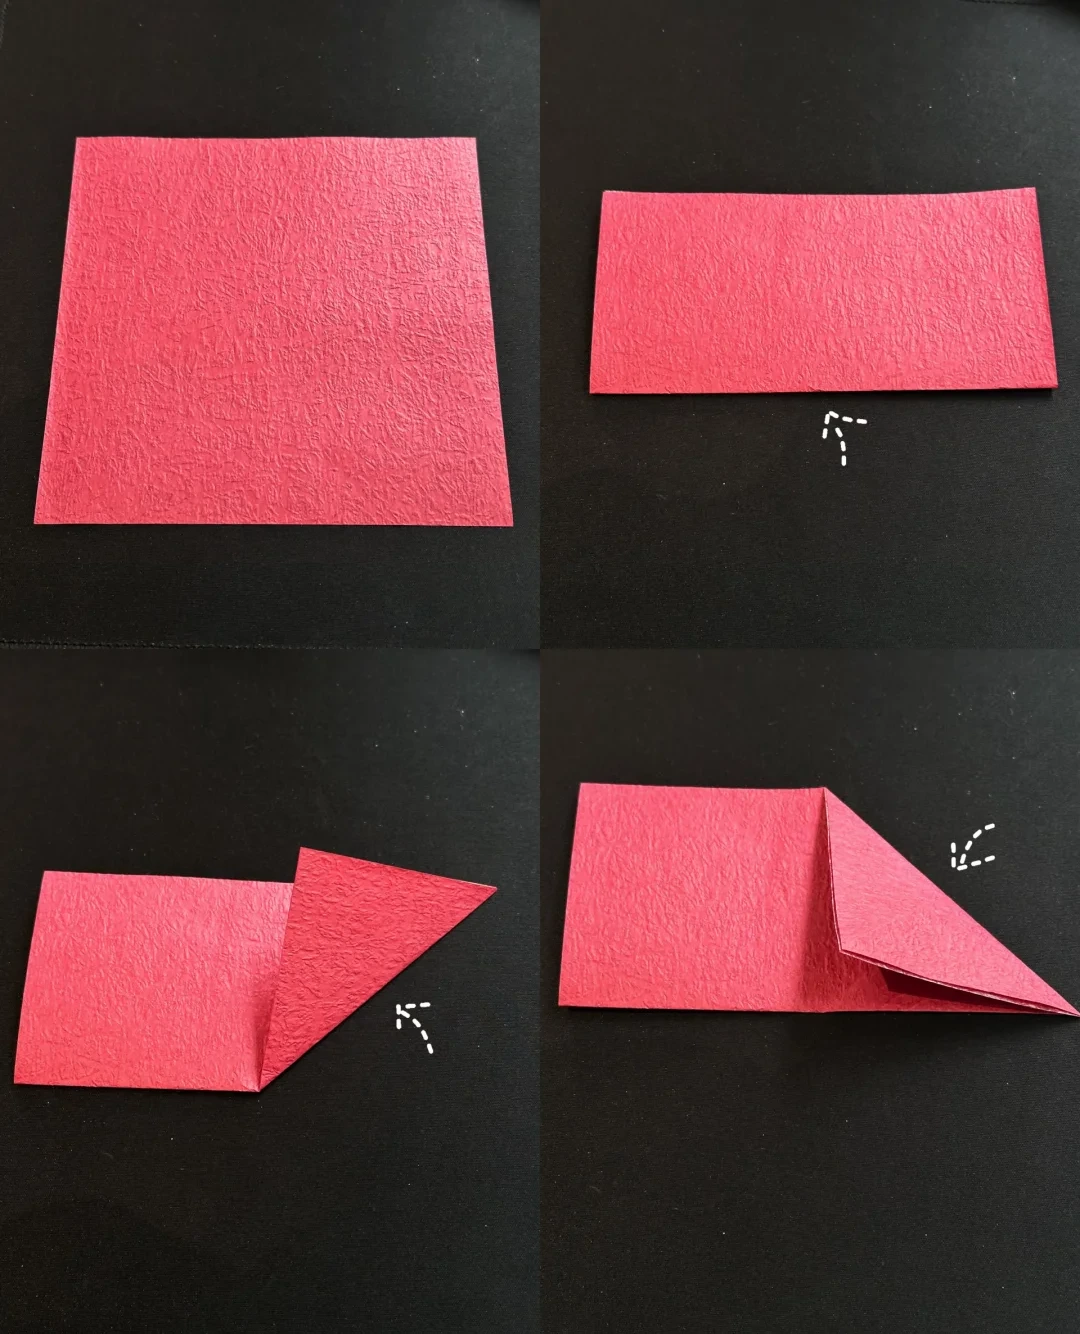 Open image at full size ↗
Fold the square upward in half. Fold the right end diagonally in both directions and unfold.
Fold the cutting wedge
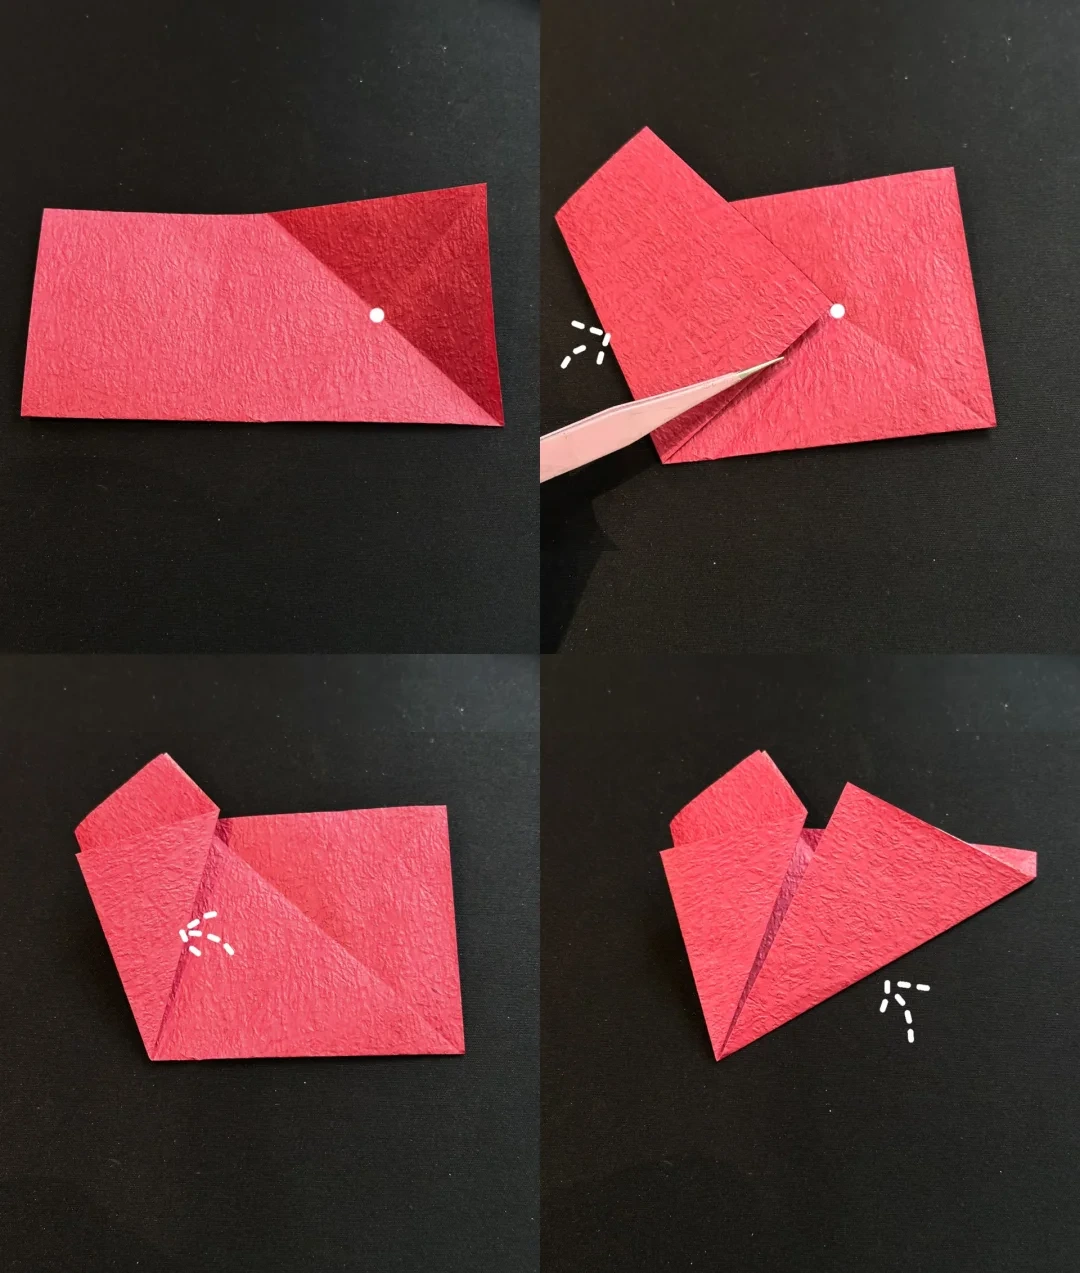 Open image at full size ↗
Bring the opposite corner to the marked intersection. Fold the flap back to the left, then fold the right section across along the guide.
Cut a pentagon
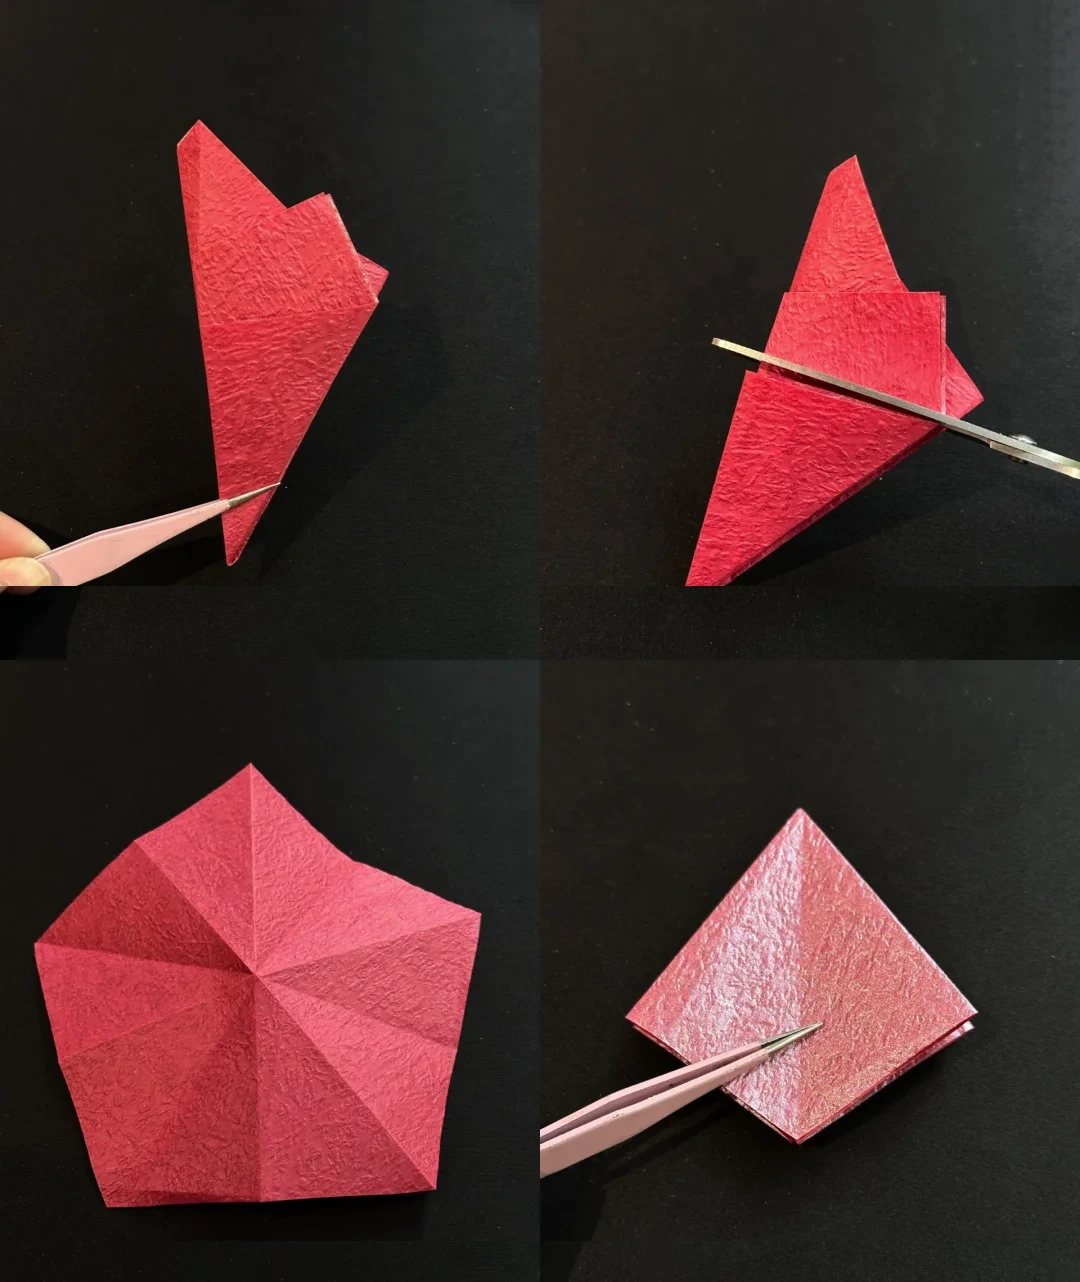 Open image at full size ↗
Fold the wedge in half and cut away the excess. Open the pentagon and gather its radial creases into a layered diamond.
Make a petal fold
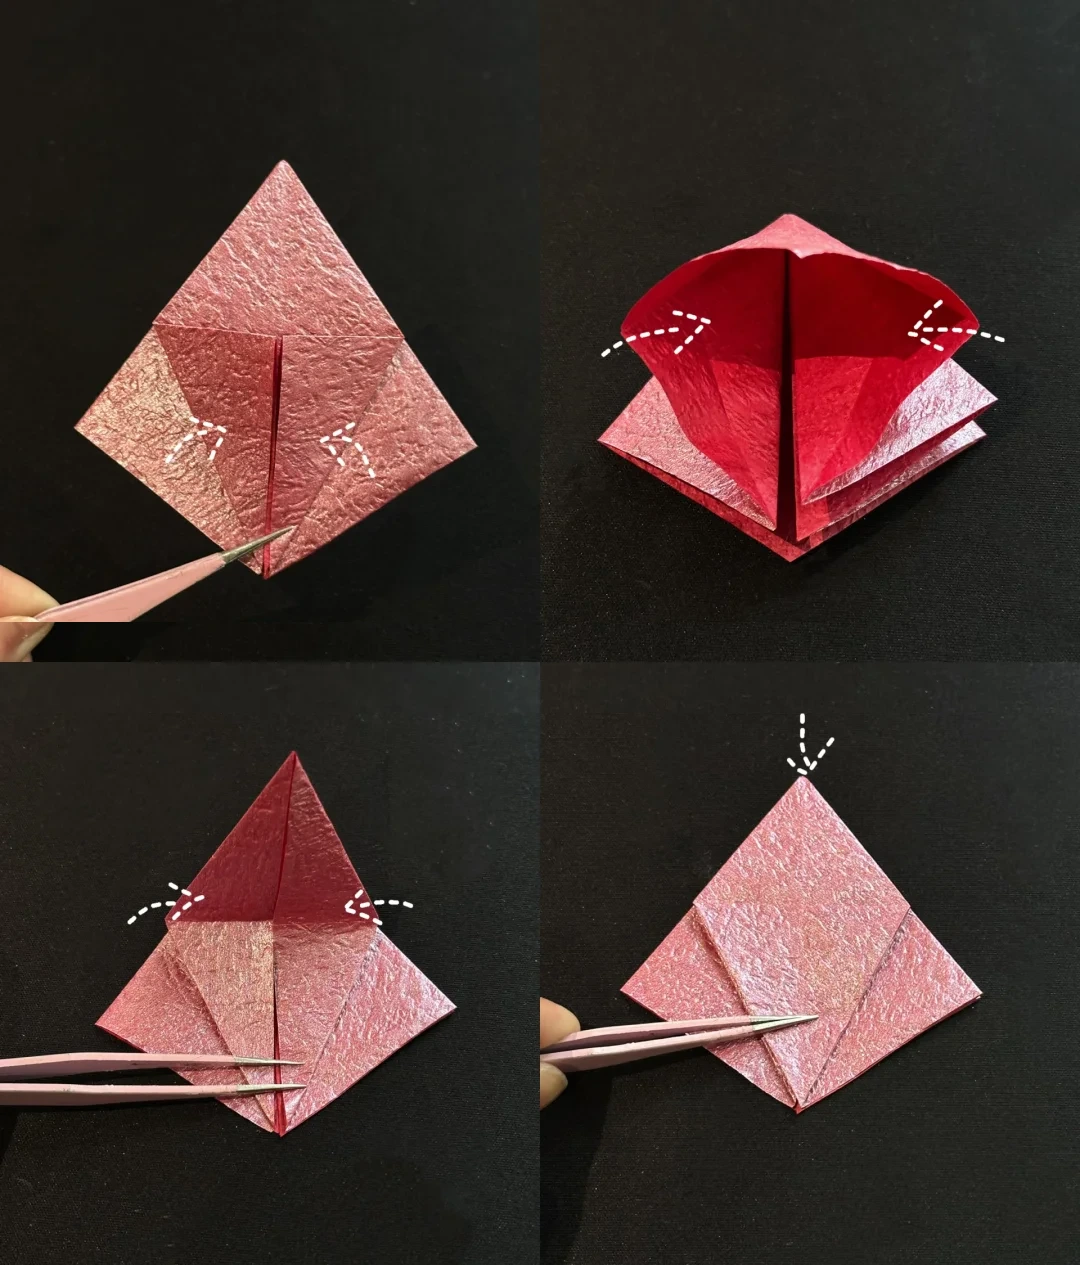 Open image at full size ↗
Fold the side edges to the middle and unfold. Open the front pocket, bring its sides inward, then lower and flatten the flap.
Repeat around the base
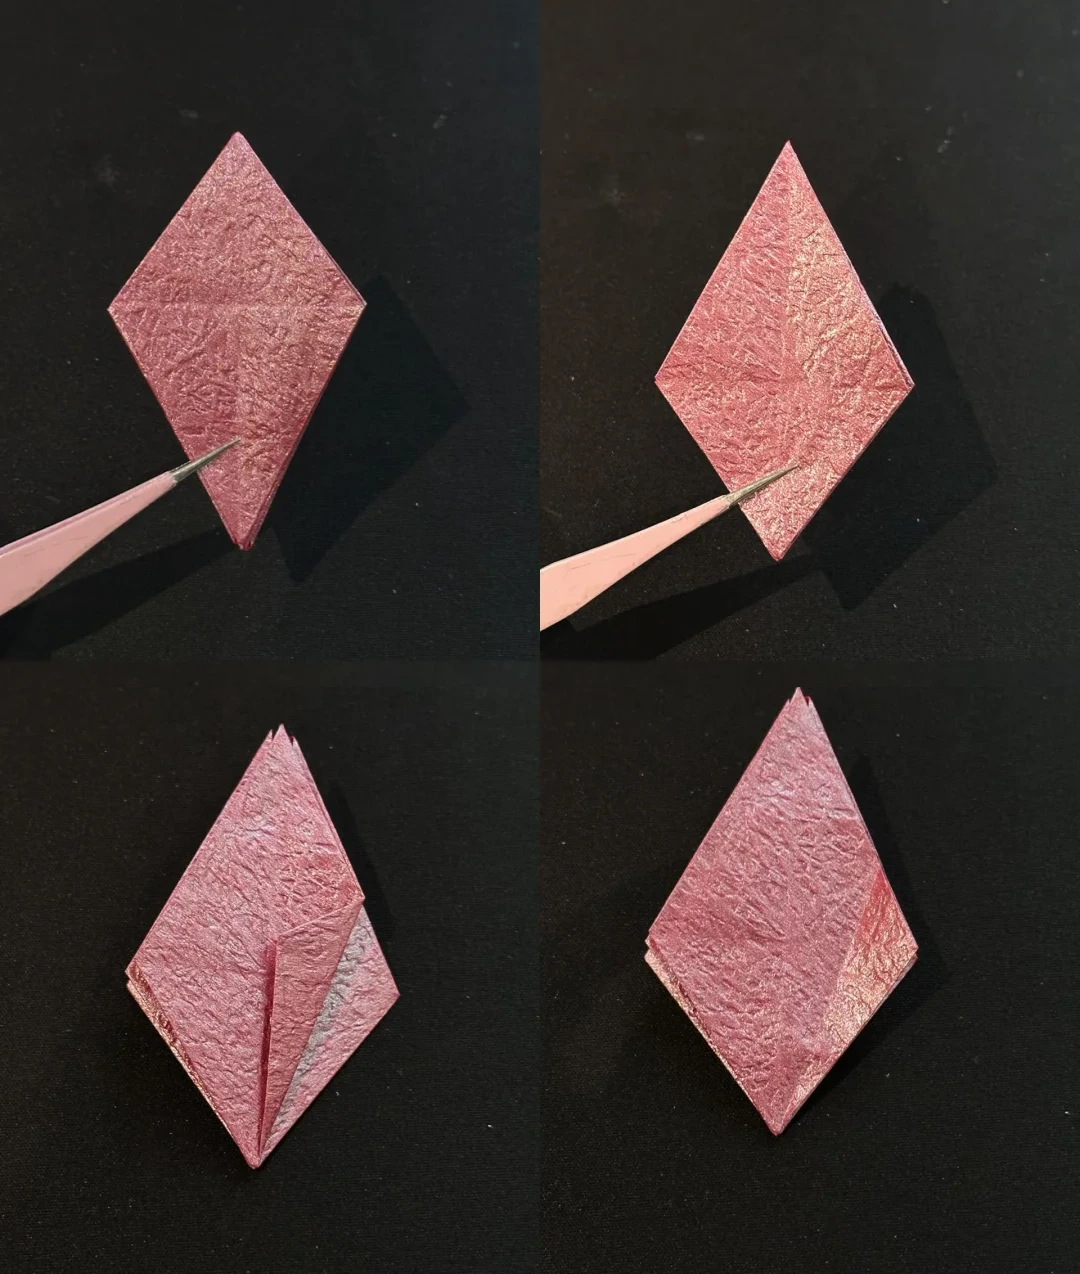 Open image at full size ↗
Repeat the pocket fold on every section. With the open end upward, bring the side edges toward the middle and unfold.
Pull out the inner triangle
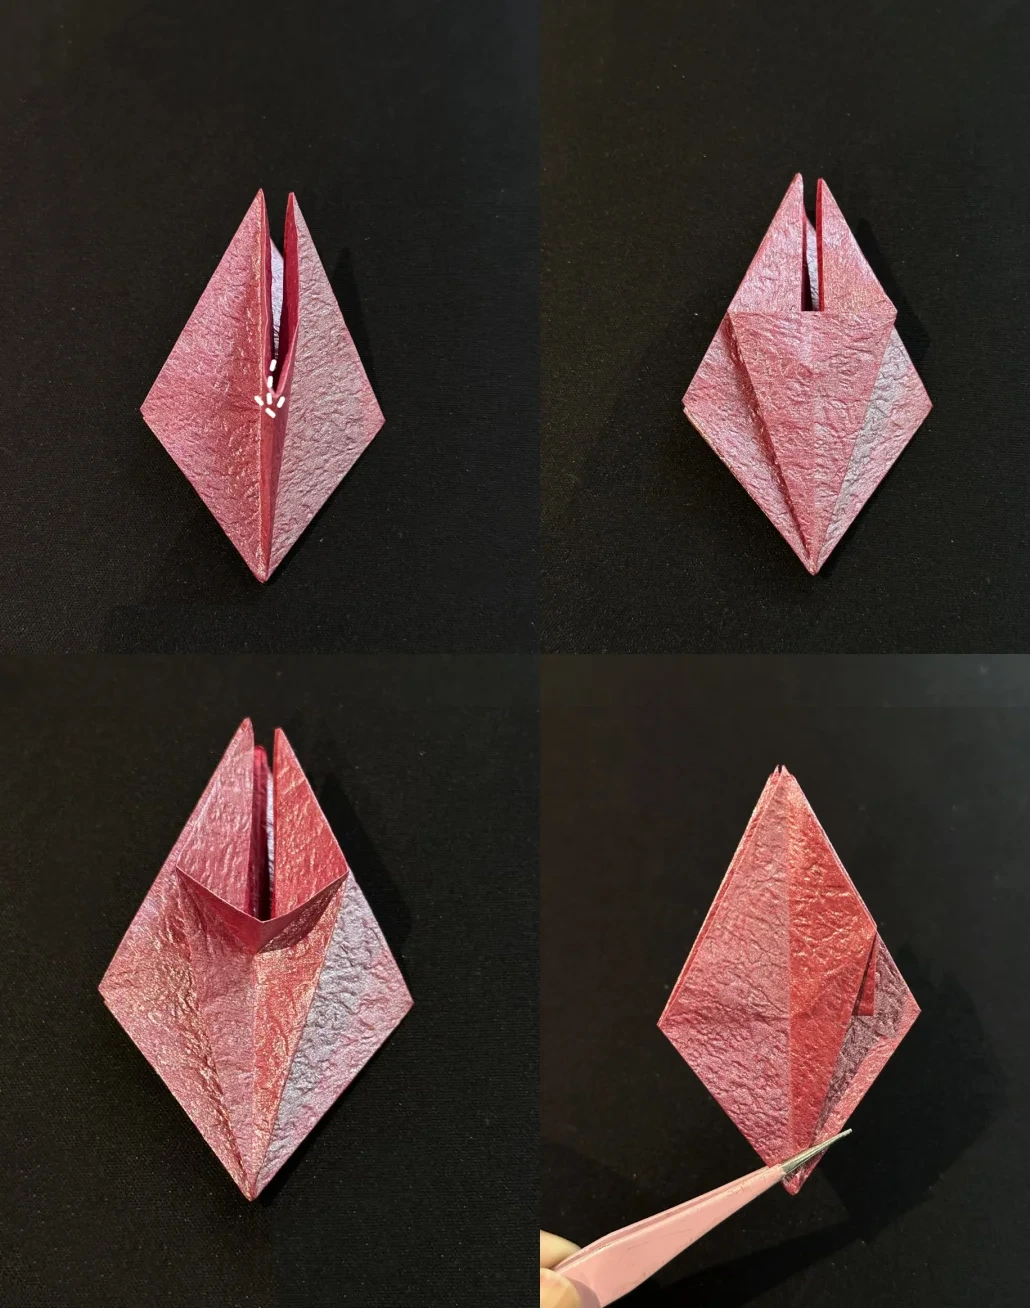 Open image at full size ↗
Stand one layer upright. Gently pull out its inner triangular flap, squash it flat and lay it to one side.
Narrow the base
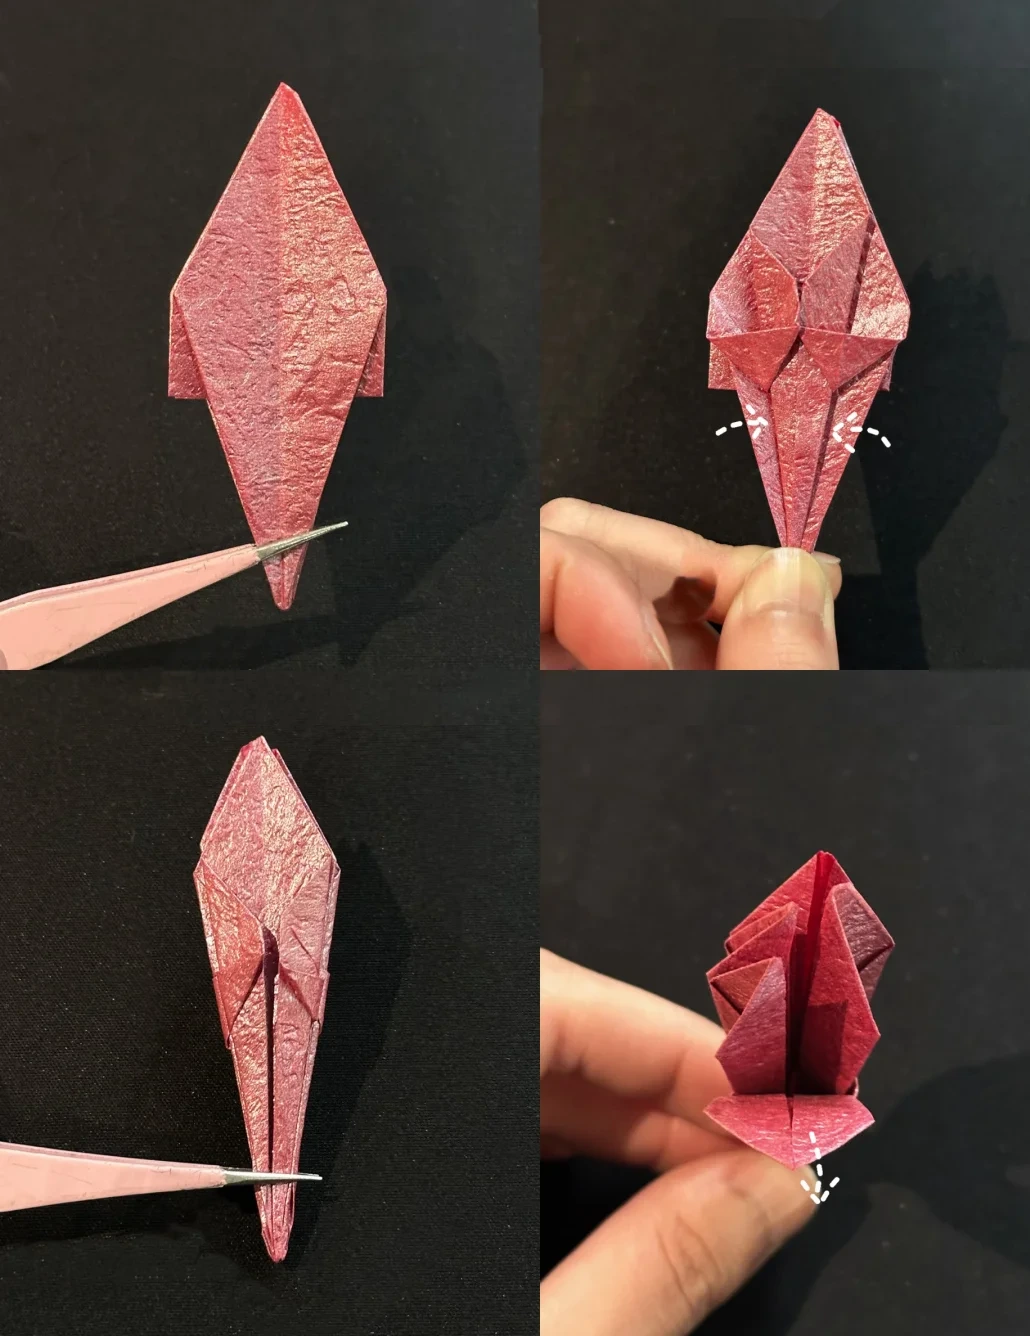 Open image at full size ↗
Repeat around every section. Fold both long side edges toward the middle on each face, then start spreading the petals.
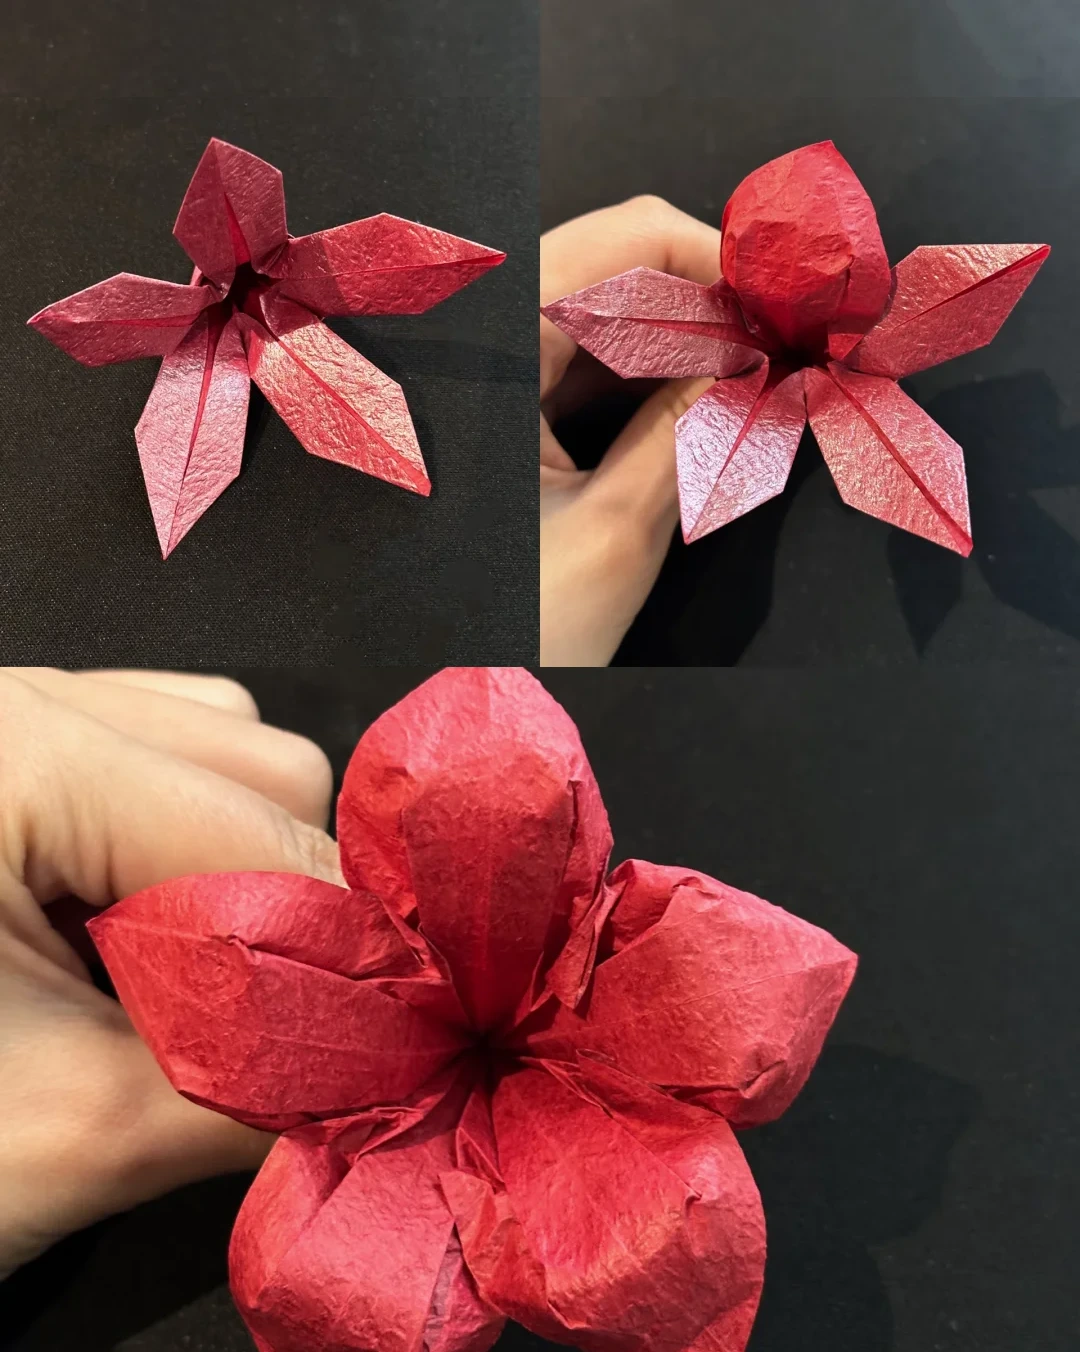
Cup each petal
 Open image at full size ↗
Open each petal gradually with your fingertips, rounding the middle and widening the upper edge.
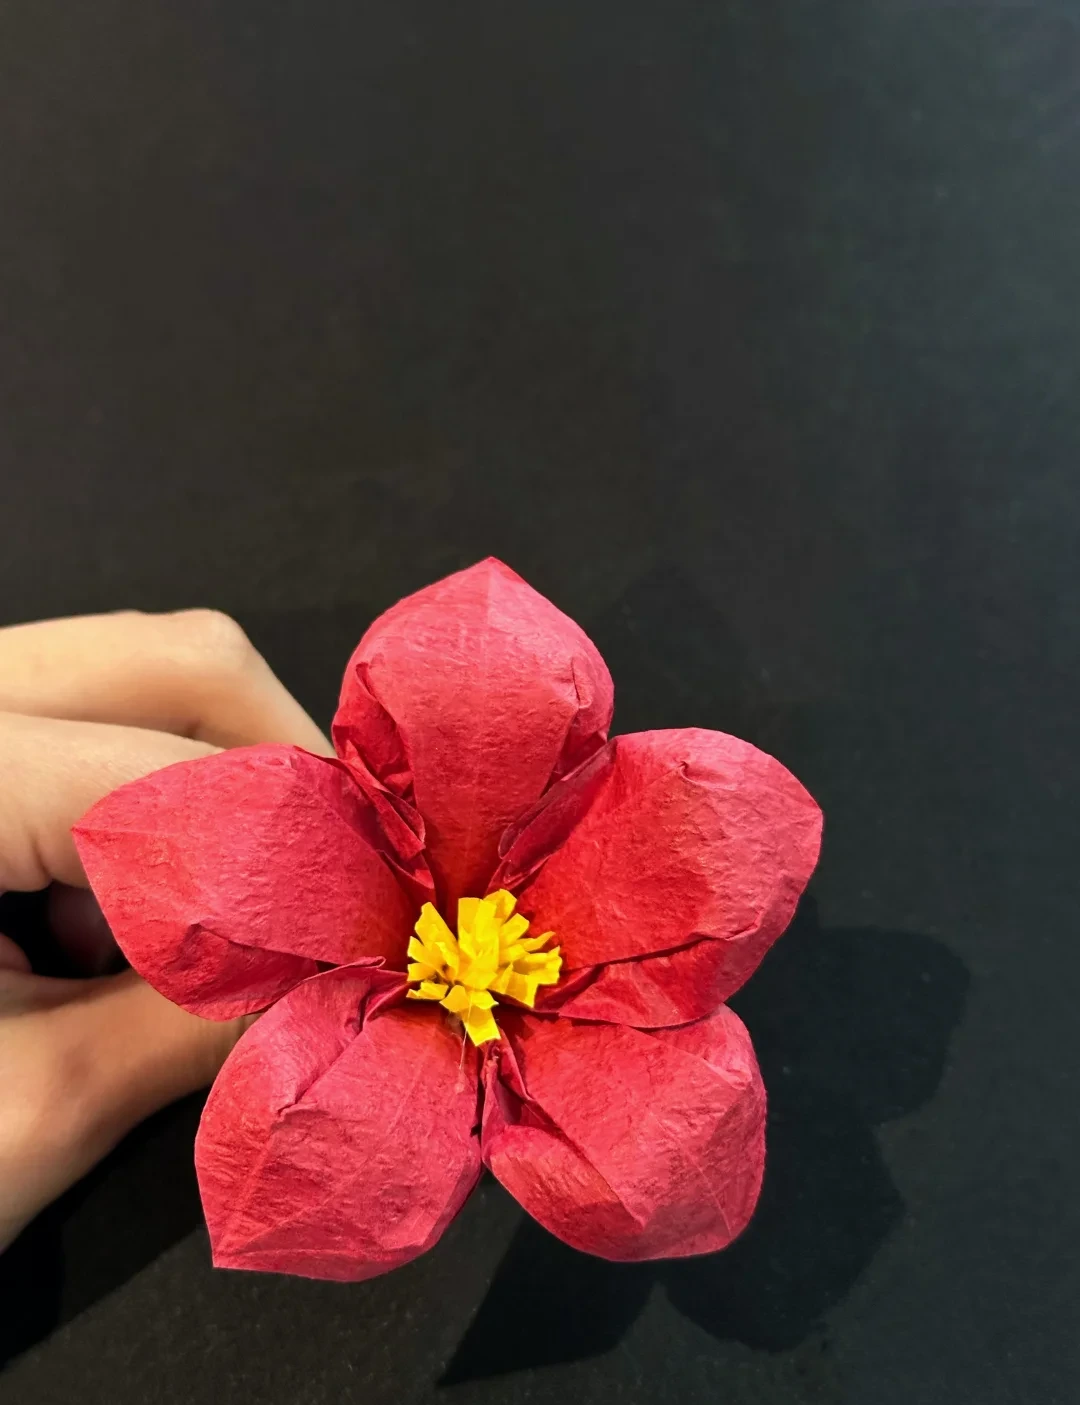
Add a flower center
 Open image at full size ↗
Attach a small yellow paper center in the middle of the blossom.
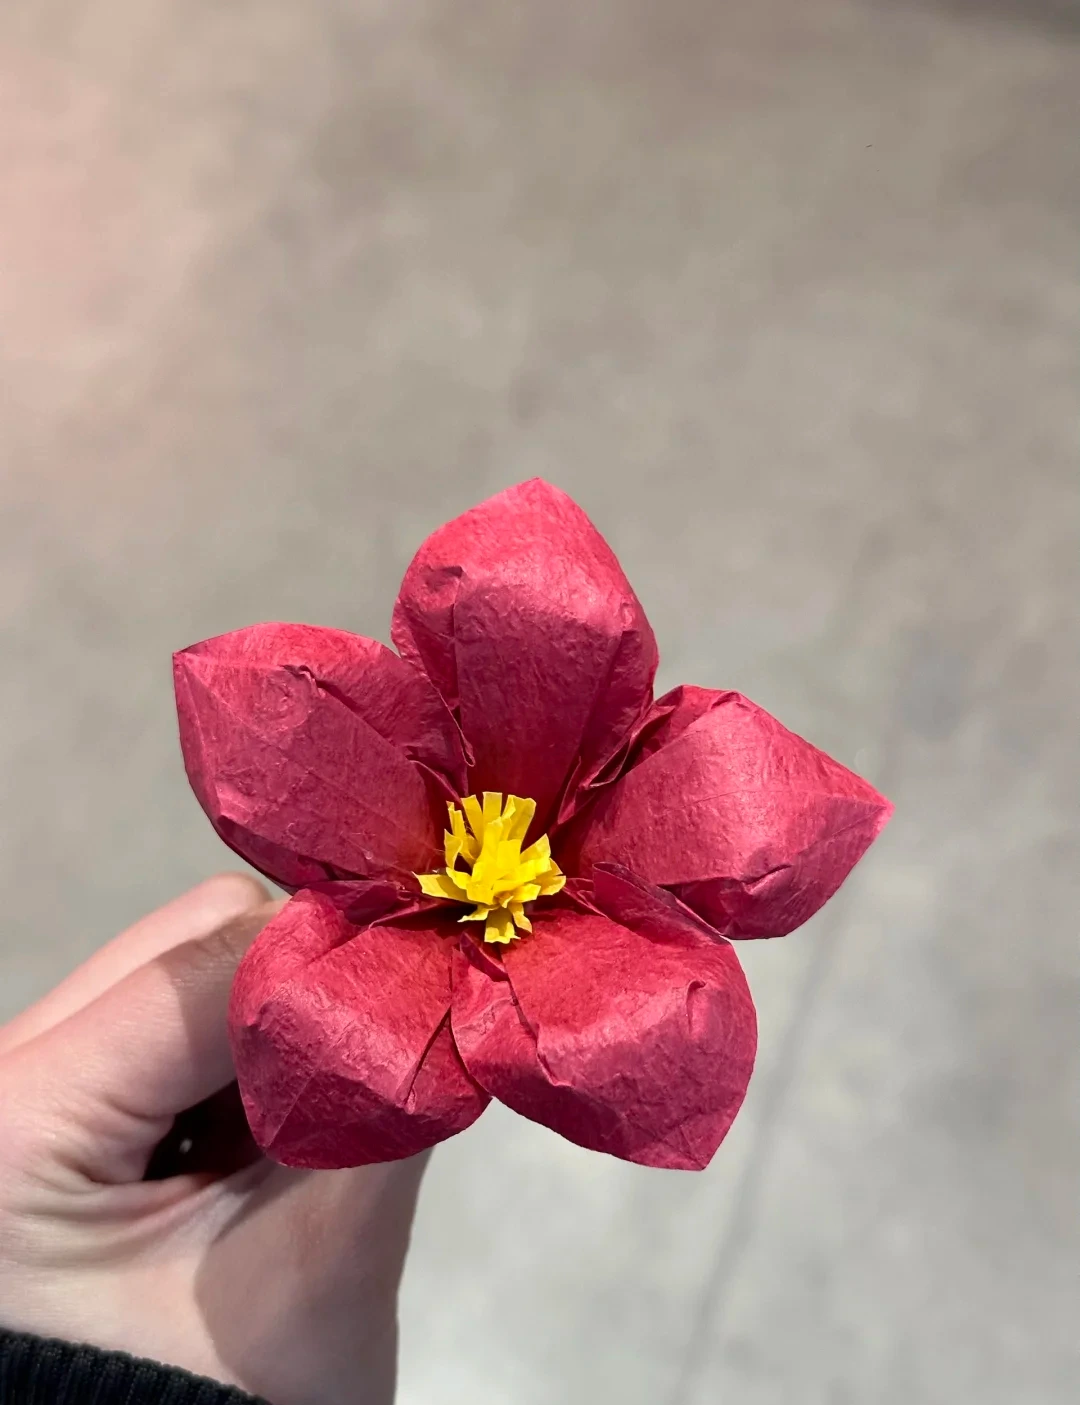
Finished model
 Open image at full size ↗
Use this finished example to compare the shape and proportions of your model.
Follow the diagrams alongside the step-by-step English instructions.
Choose your next project →