
Animals · Step-by-step guide
Cupped-Ear Paper Rabbit
Fold a little sitting rabbit with open ears that reveal the paper’s contrasting color.
What you’ll need
- One 15 × 15 cm paper square, different colors on each side
- A fine marker
- A folding tool, optional
Origami · Folding and shaping
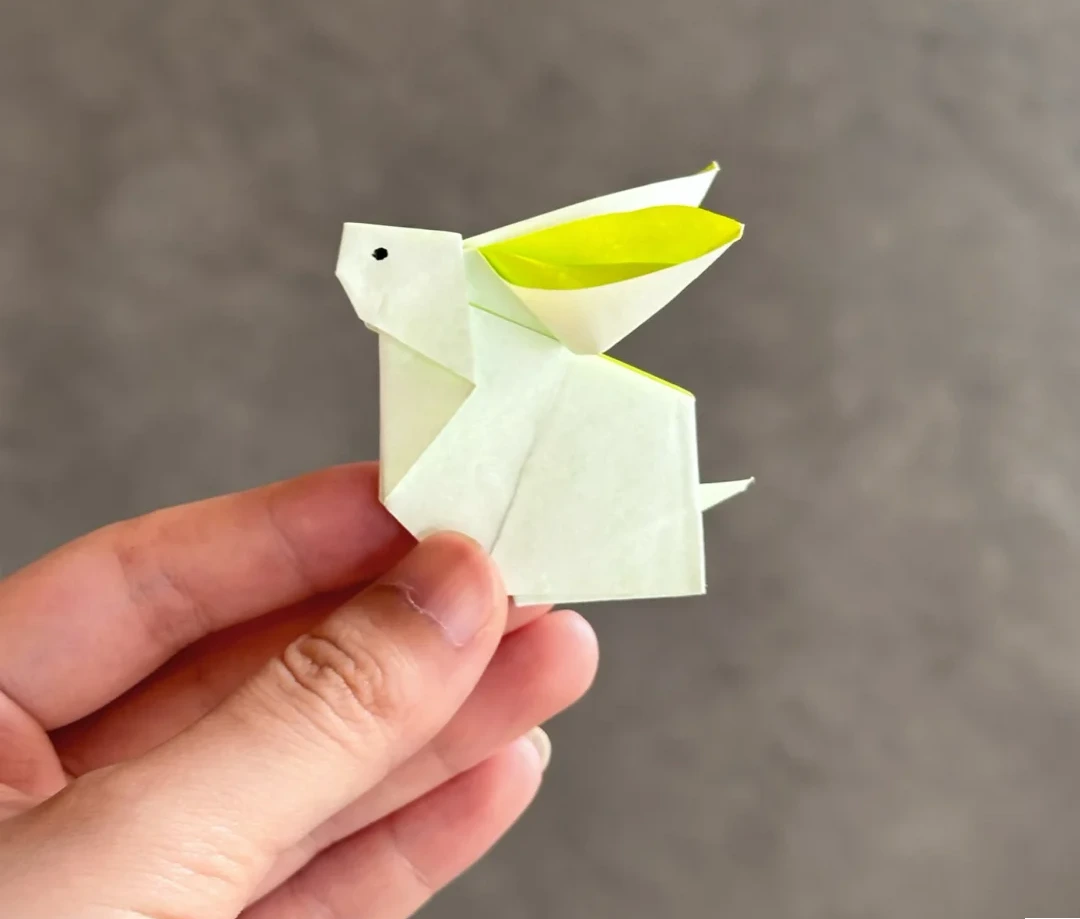
Make it, step by step.
15 steps · Original diagrams with English instructions
Read each picture from left to right, then top to bottom.
Finished model
 Open image at full size ↗
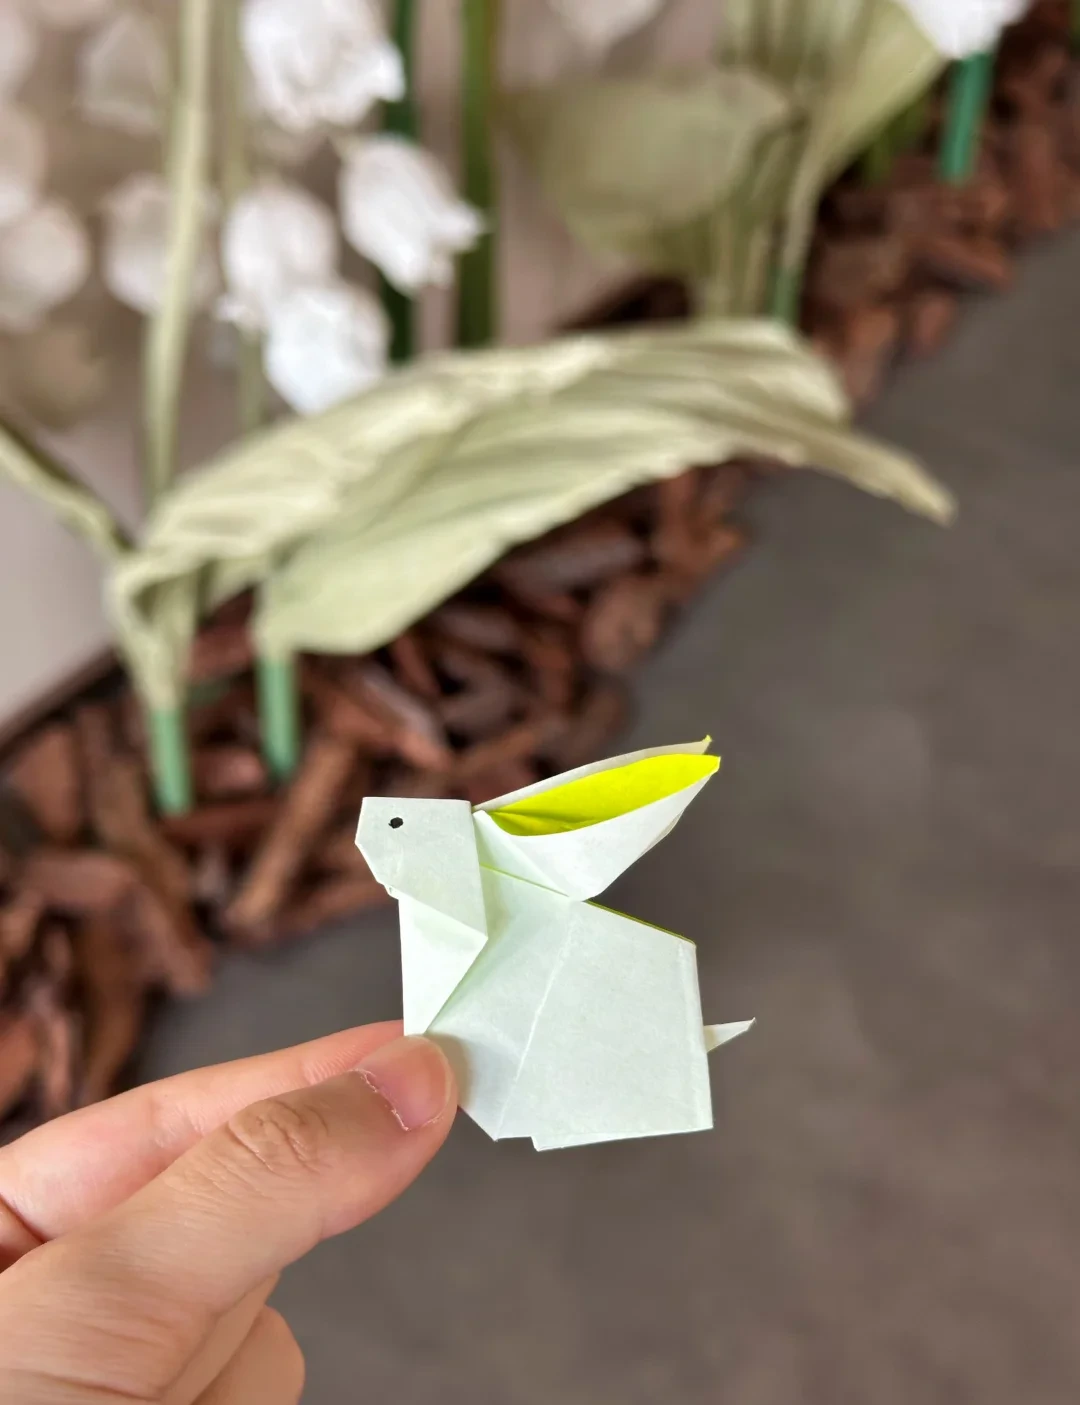
Use this finished example to compare the shape and proportions of your model.
Finished model
 Open image at full size ↗
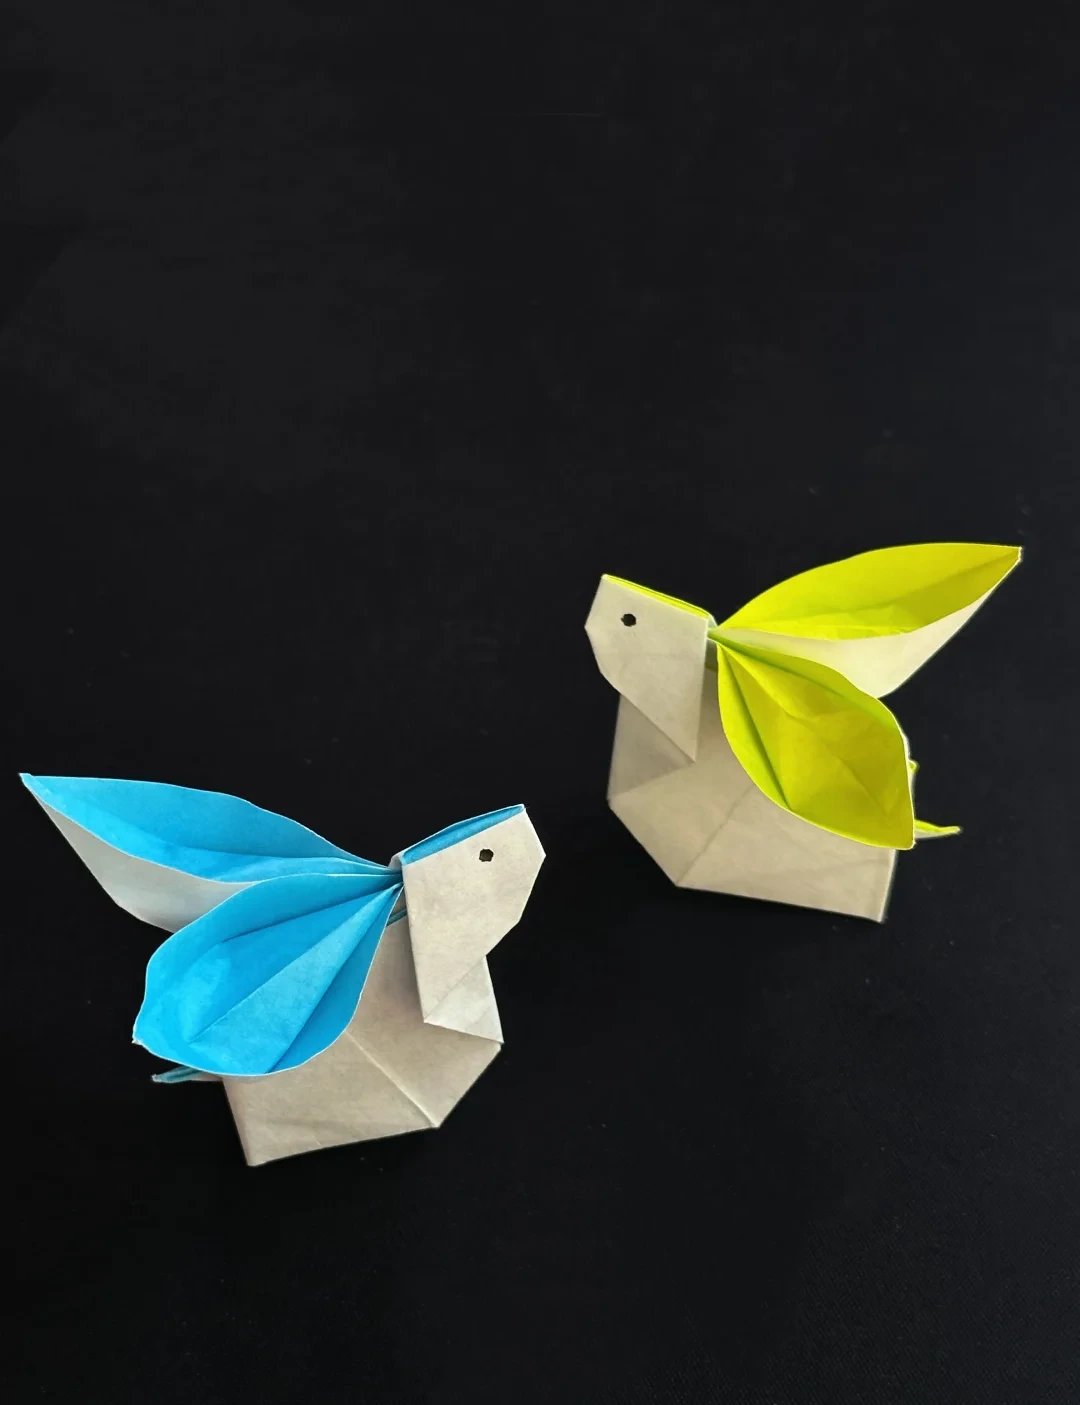
Use this finished example to compare the shape and proportions of your model.
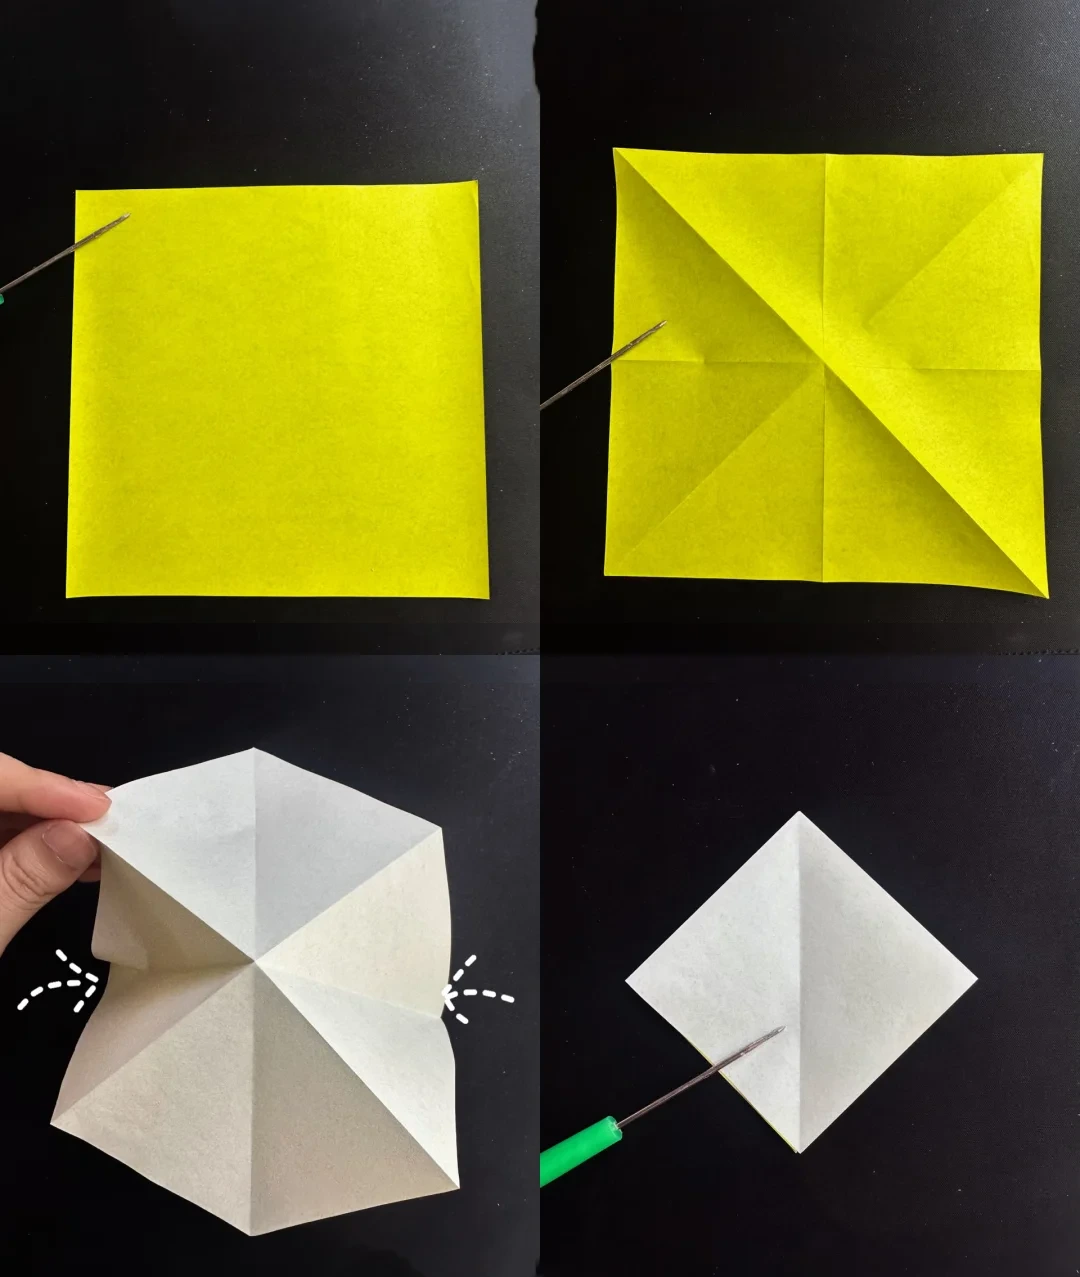
Make a square base
 Open image at full size ↗
Crease both diagonals and both midlines. Push the two sides inward along the creases and flatten into a layered square.
Open the bird base
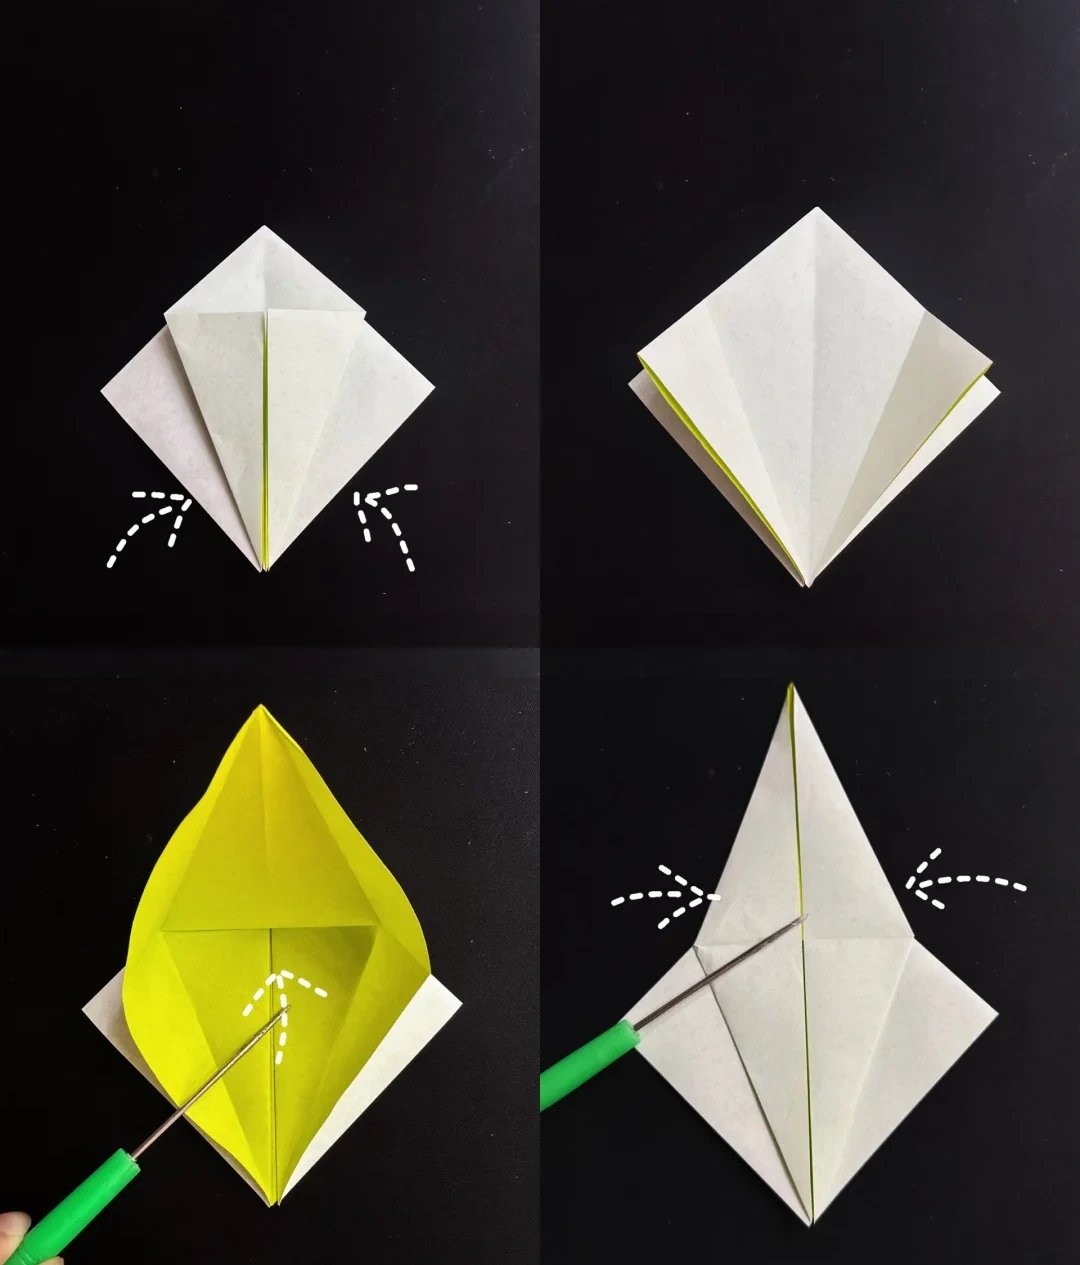 Open image at full size ↗
Fold the lower front edges to the center, then unfold. Lift the lower front point upward.
Bring the sides inward along the creases and flatten the raised flap.
Arrange the long points
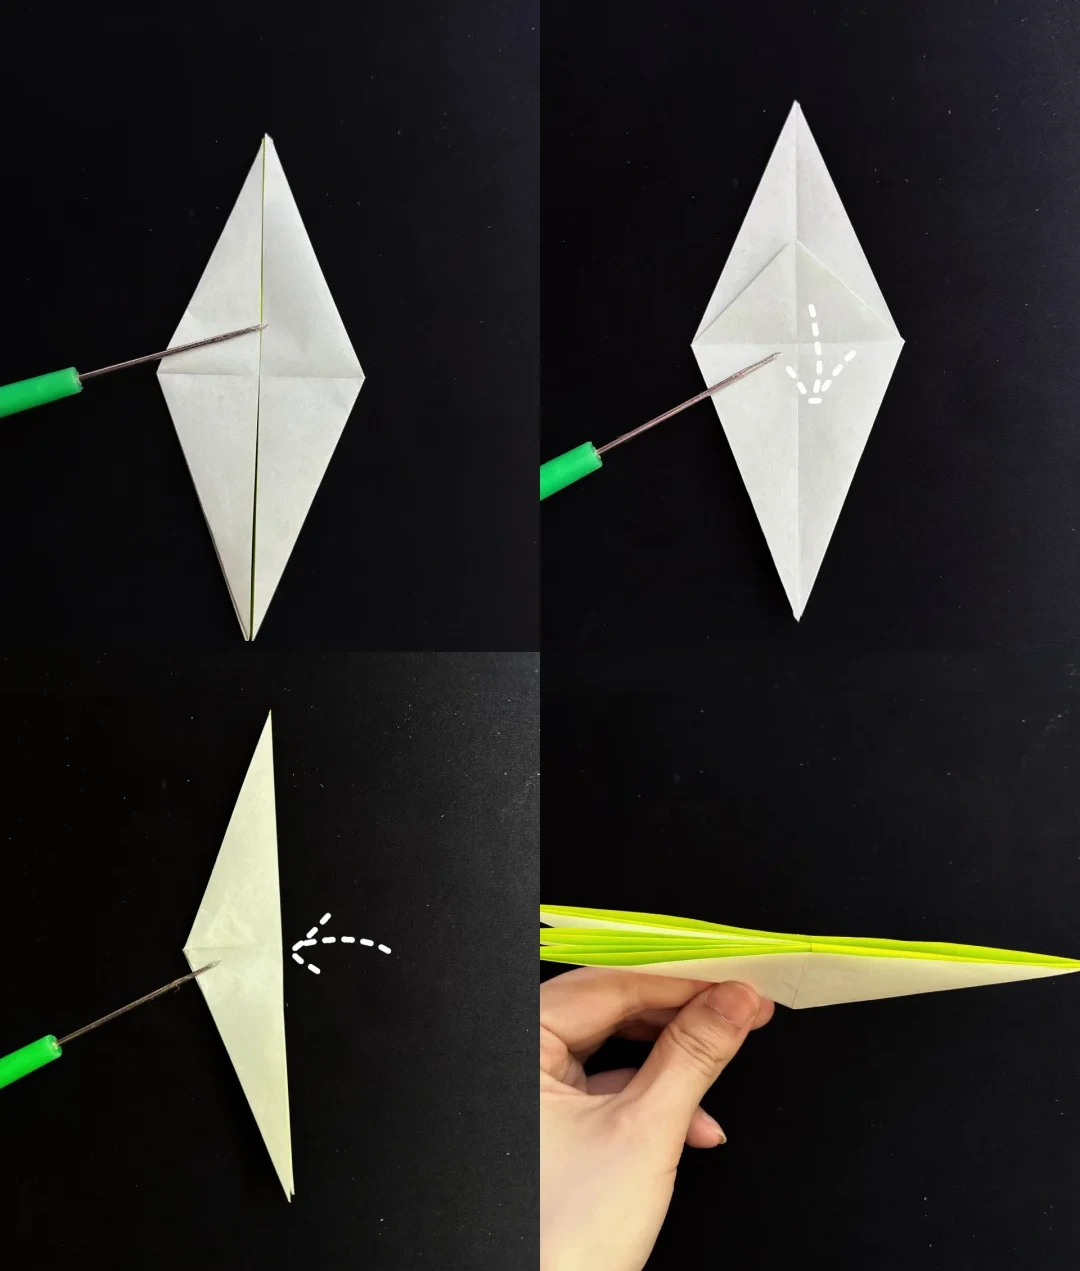 Open image at full size ↗
Repeat the same petal fold on the back. Lower the indicated flap.
Fold the model to the left along its center and check the layered edge from above.
Raise the ear sections
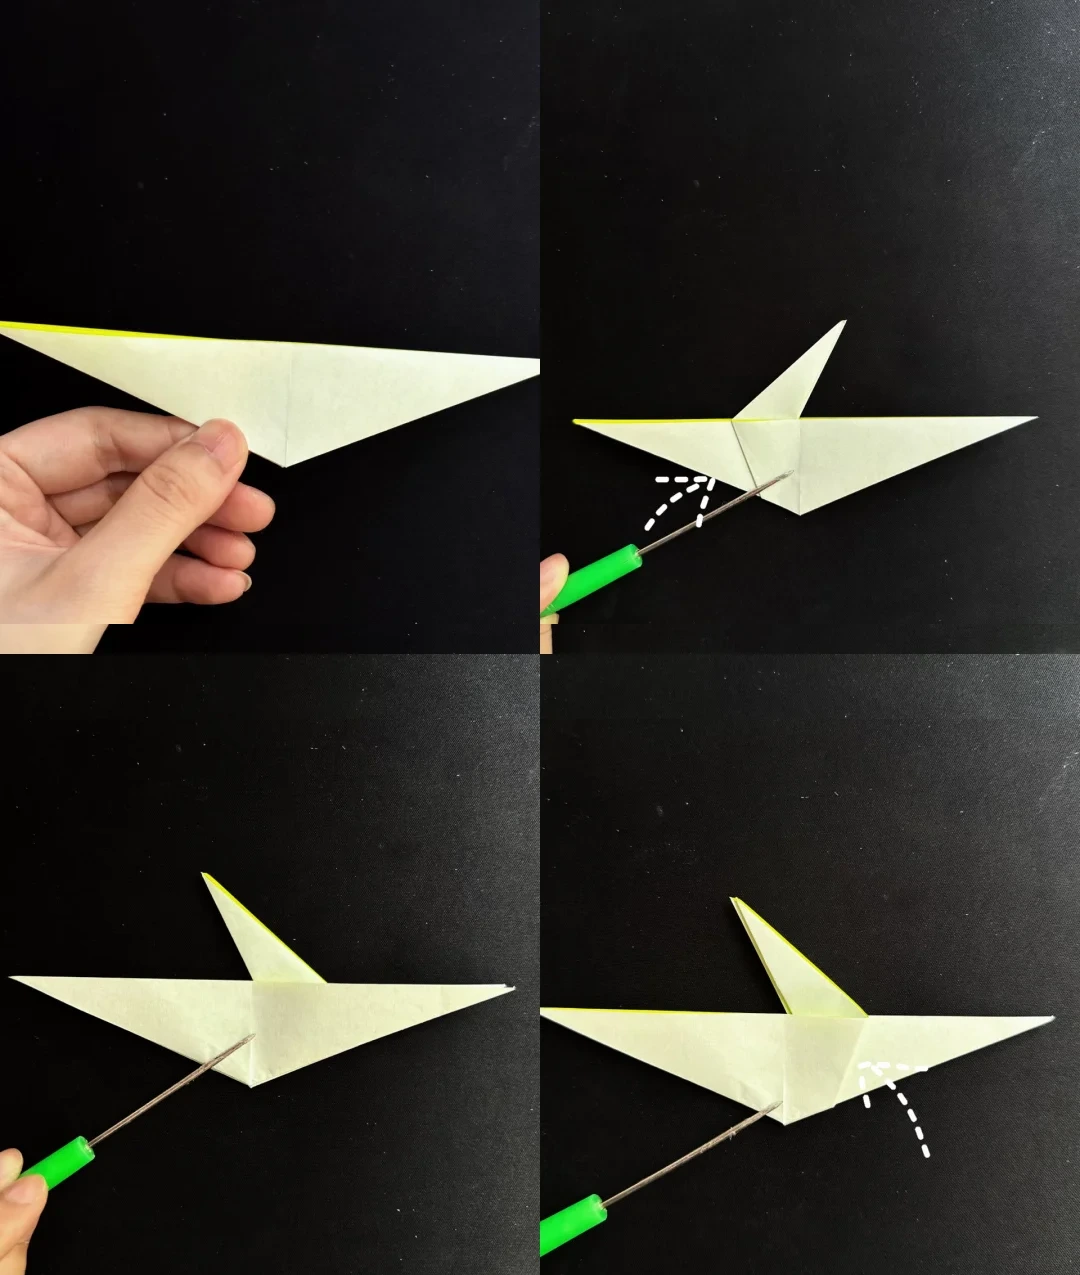 Open image at full size ↗
With the long model held horizontally, fold the indicated point behind along its guide.
Turn the model over and repeat the fold on the other side.
Precrease the head
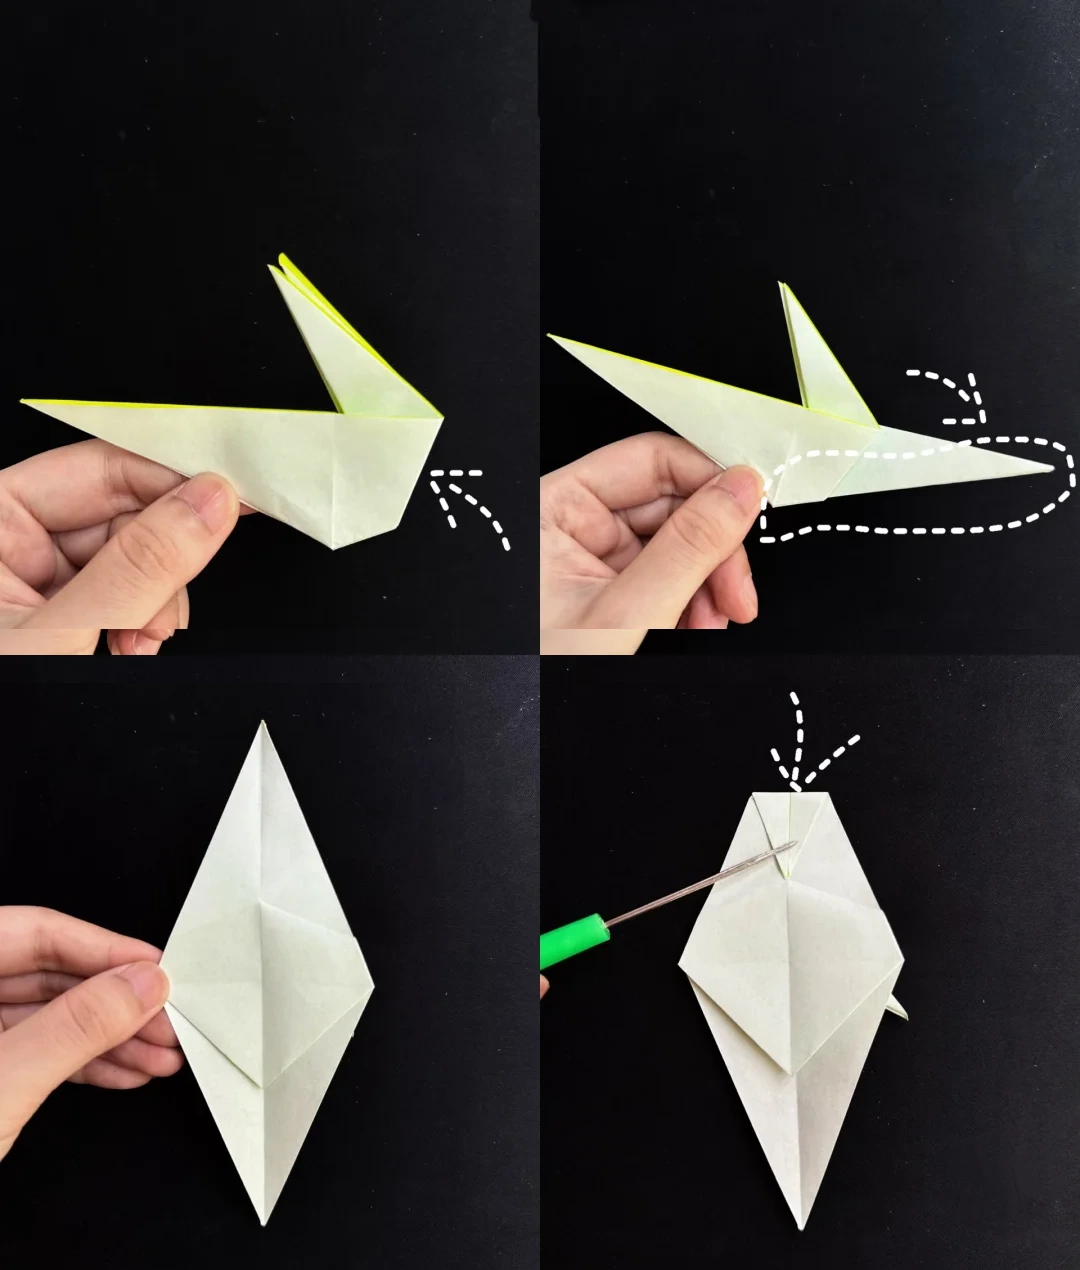 Open image at full size ↗
Fold the middle layer in the same way. Open the indicated section, then return it to its original shape.
Open the model to the upright face shown and fold the small top point downward.
Shape the small head
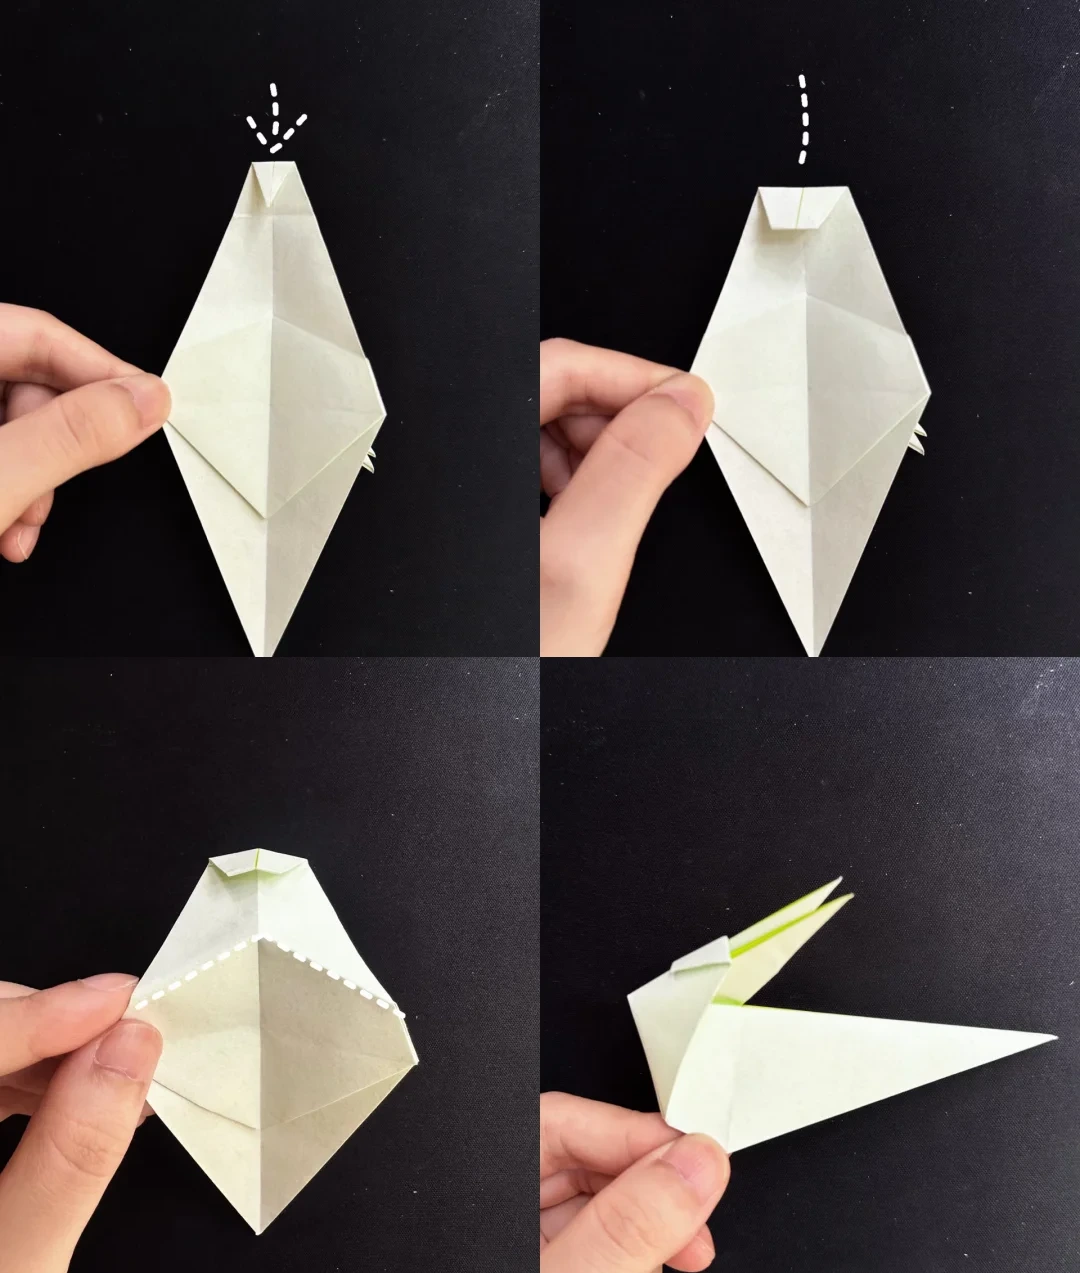 Open image at full size ↗
Fold the top point down again to the new crease.
Open the layers and raise the indicated creases to form the small head section. Flatten into the side view shown.
Set the head and body angles
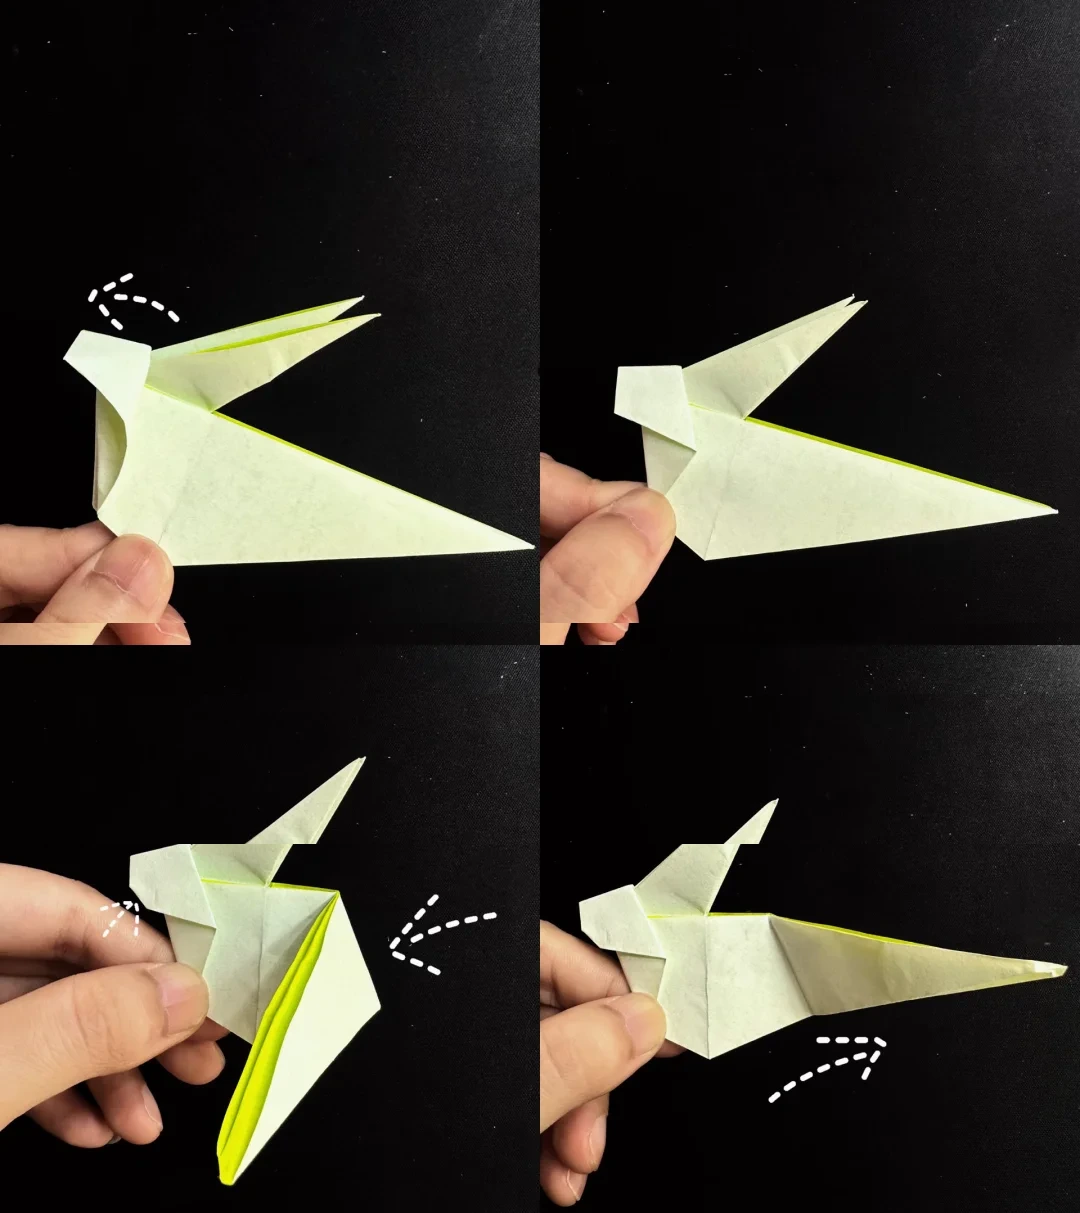 Open image at full size ↗
Pull the head section outward to the left and tuck a small corner inside. Flatten gently.
Fold the large body section to the left along the guide, then open it back to the right to mark the crease.
Finish the tail and ears
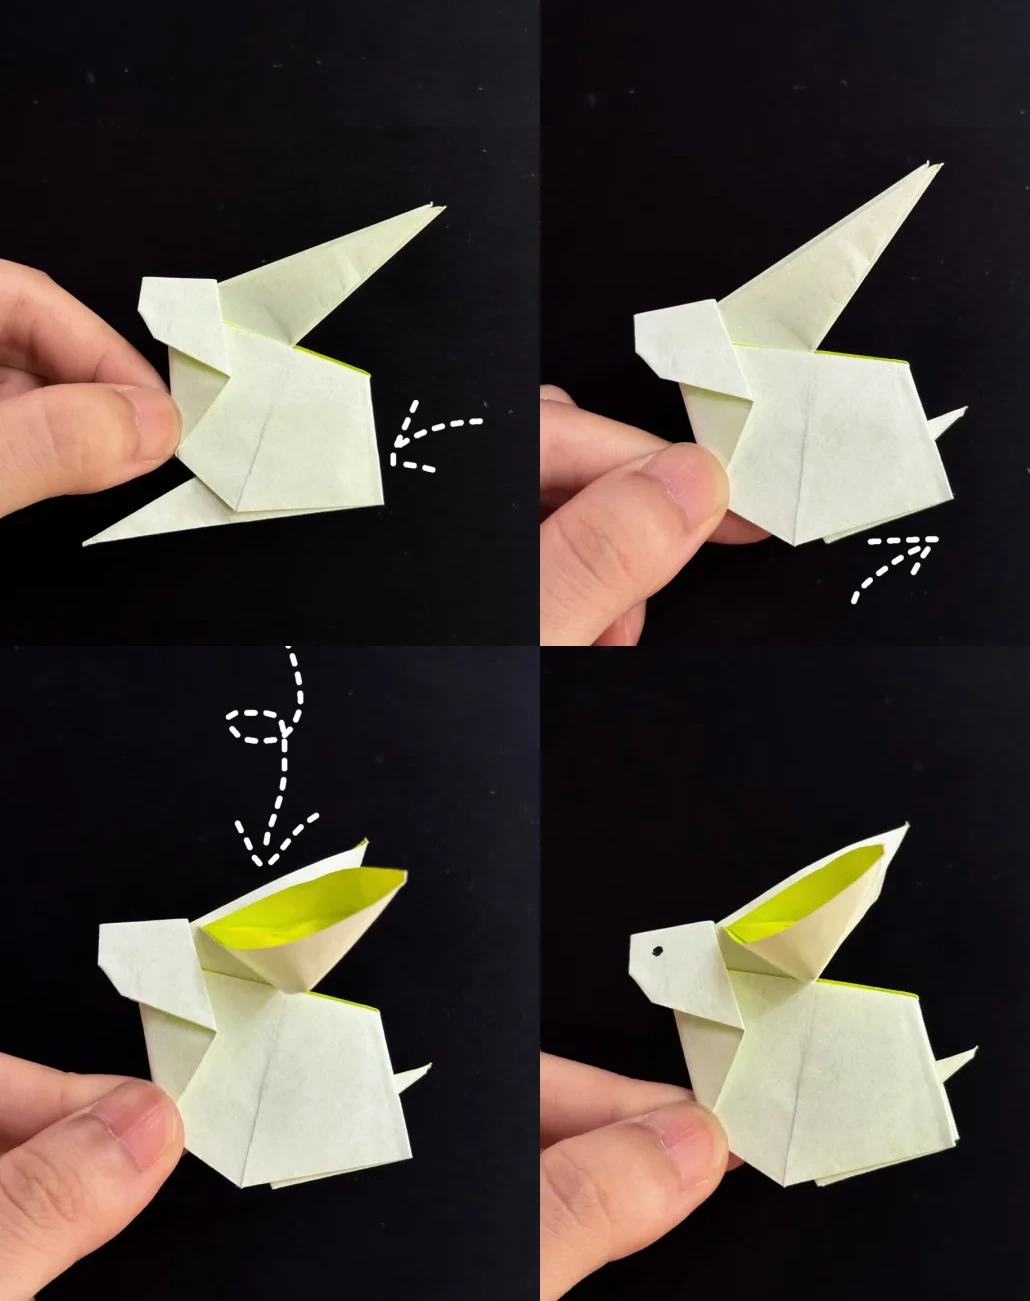 Open image at full size ↗
Reverse the body fold inward along its crease. Fold a small tip back outward to make the tail.
Open the long ear pockets gently, shape them into cups, and add a small eye with a marker.
Finished model
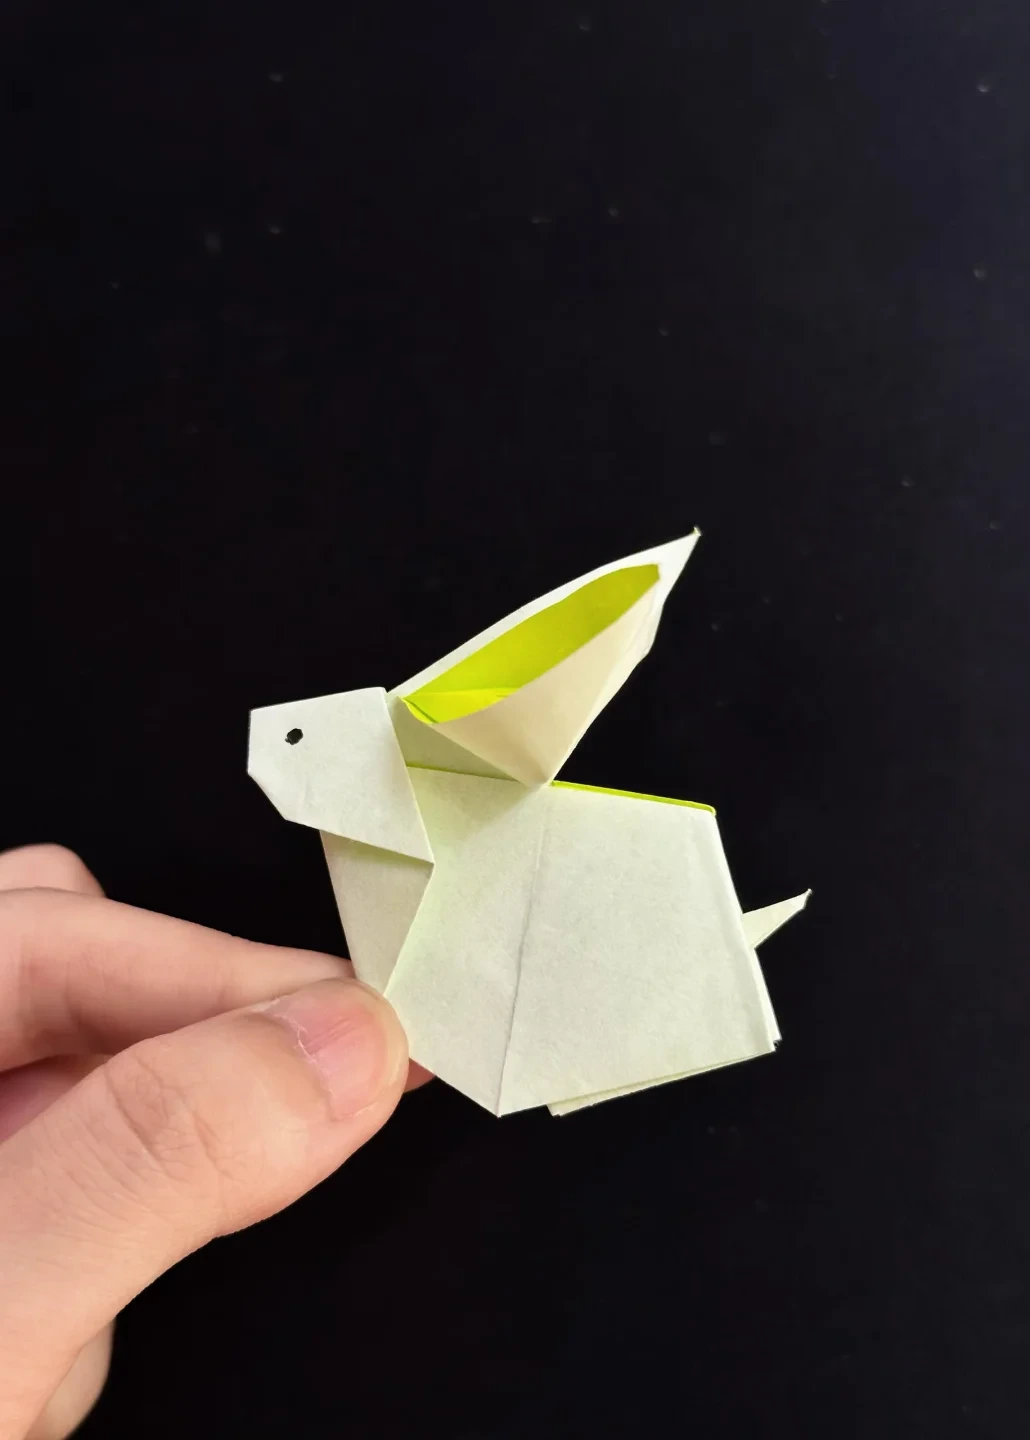 Open image at full size ↗
Use this finished example to compare the shape and proportions of your model.
Finished model
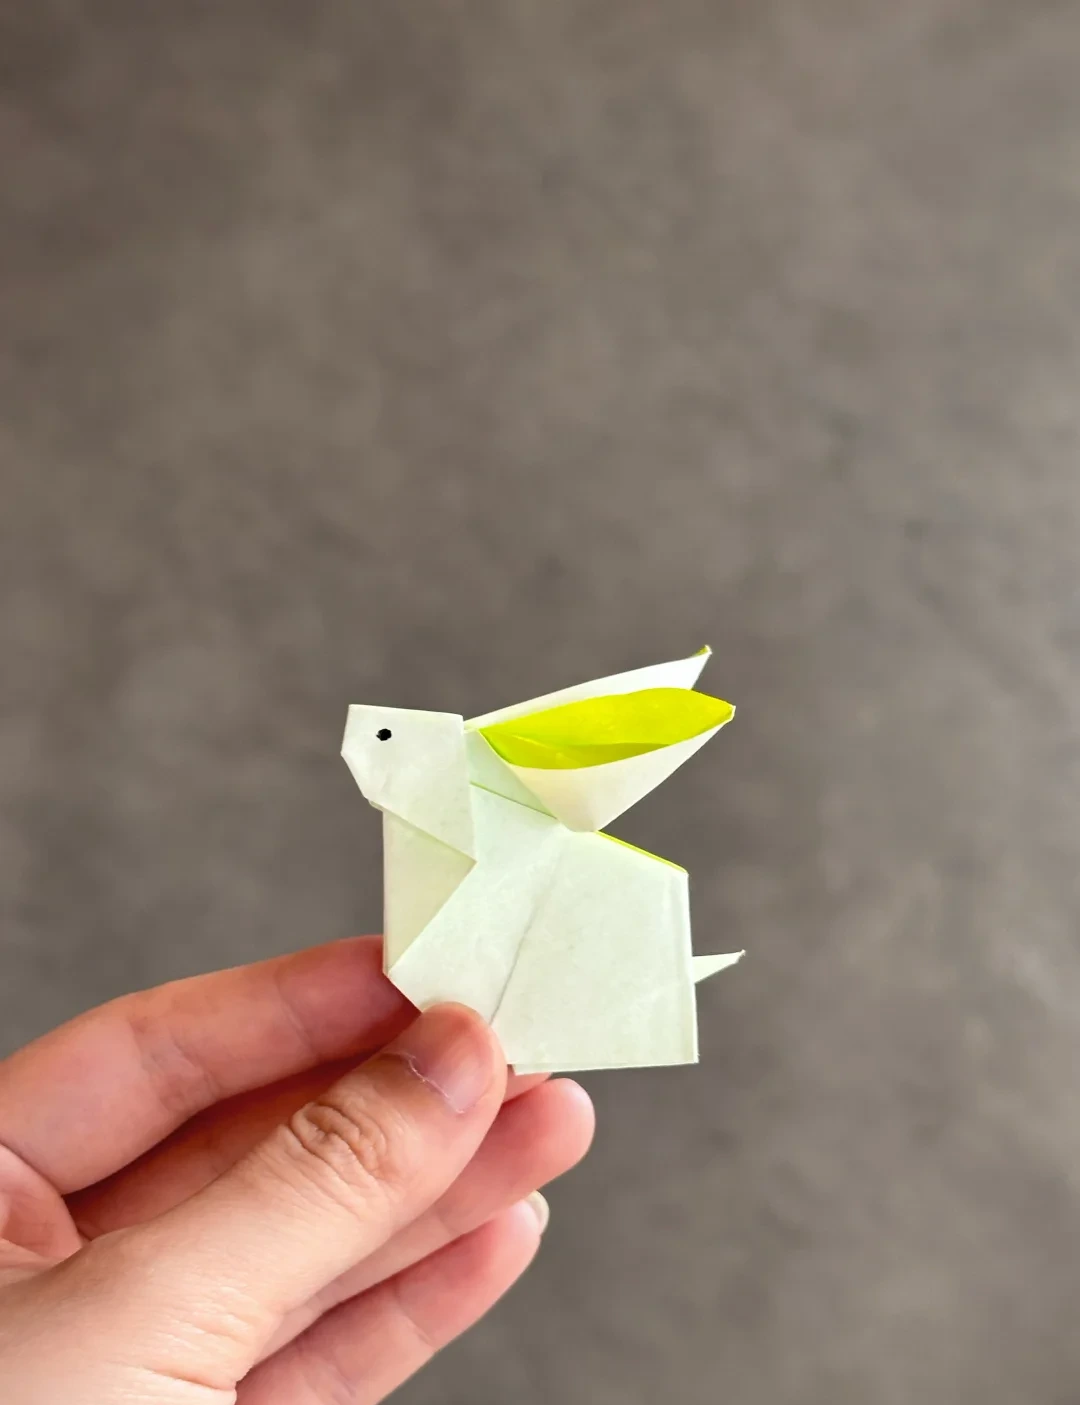 Open image at full size ↗
Use this finished example to compare the shape and proportions of your model.
Finished model
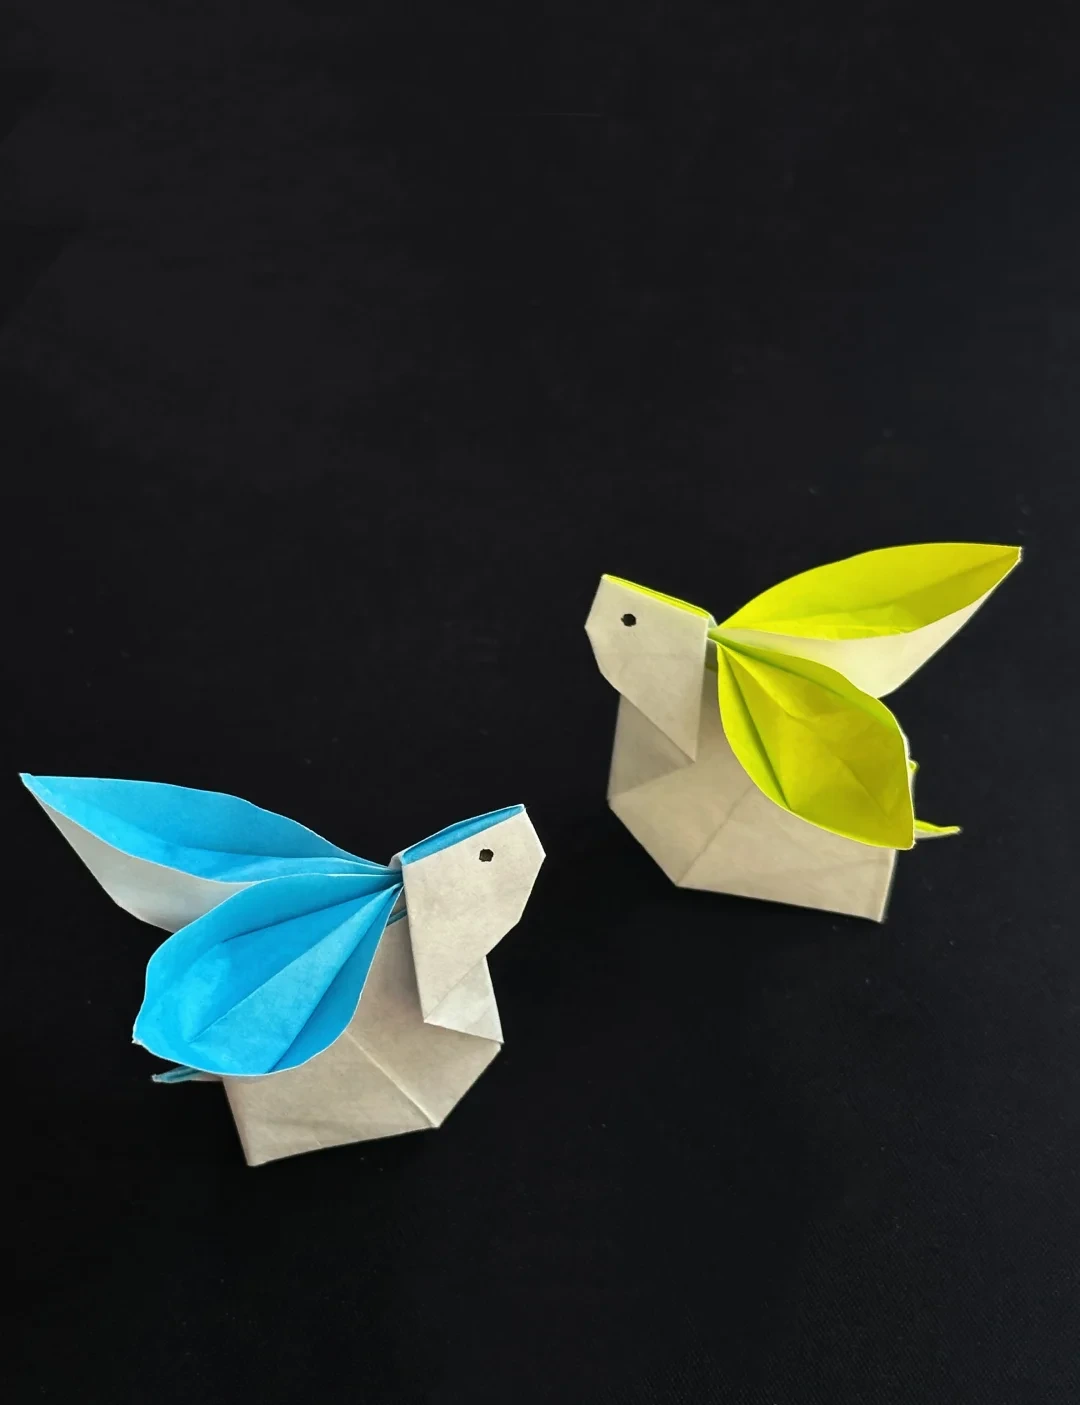 Open image at full size ↗
Use this finished example to compare the shape and proportions of your model.
Follow the diagrams alongside the step-by-step English instructions.
Choose your next project →