
Animals · Step-by-step guide
Classic Pointed-Wing Crane
Fold a traditional crane with a slender neck, pointed tail and broad wings.
What you’ll need
- One paper square
Origami · Folding and shaping
Make it, step by step.
8 steps · Original diagrams with English instructions
Read each picture from left to right, then top to bottom. The starting square size is not specified.
Make a square base
 Open image at full size ↗
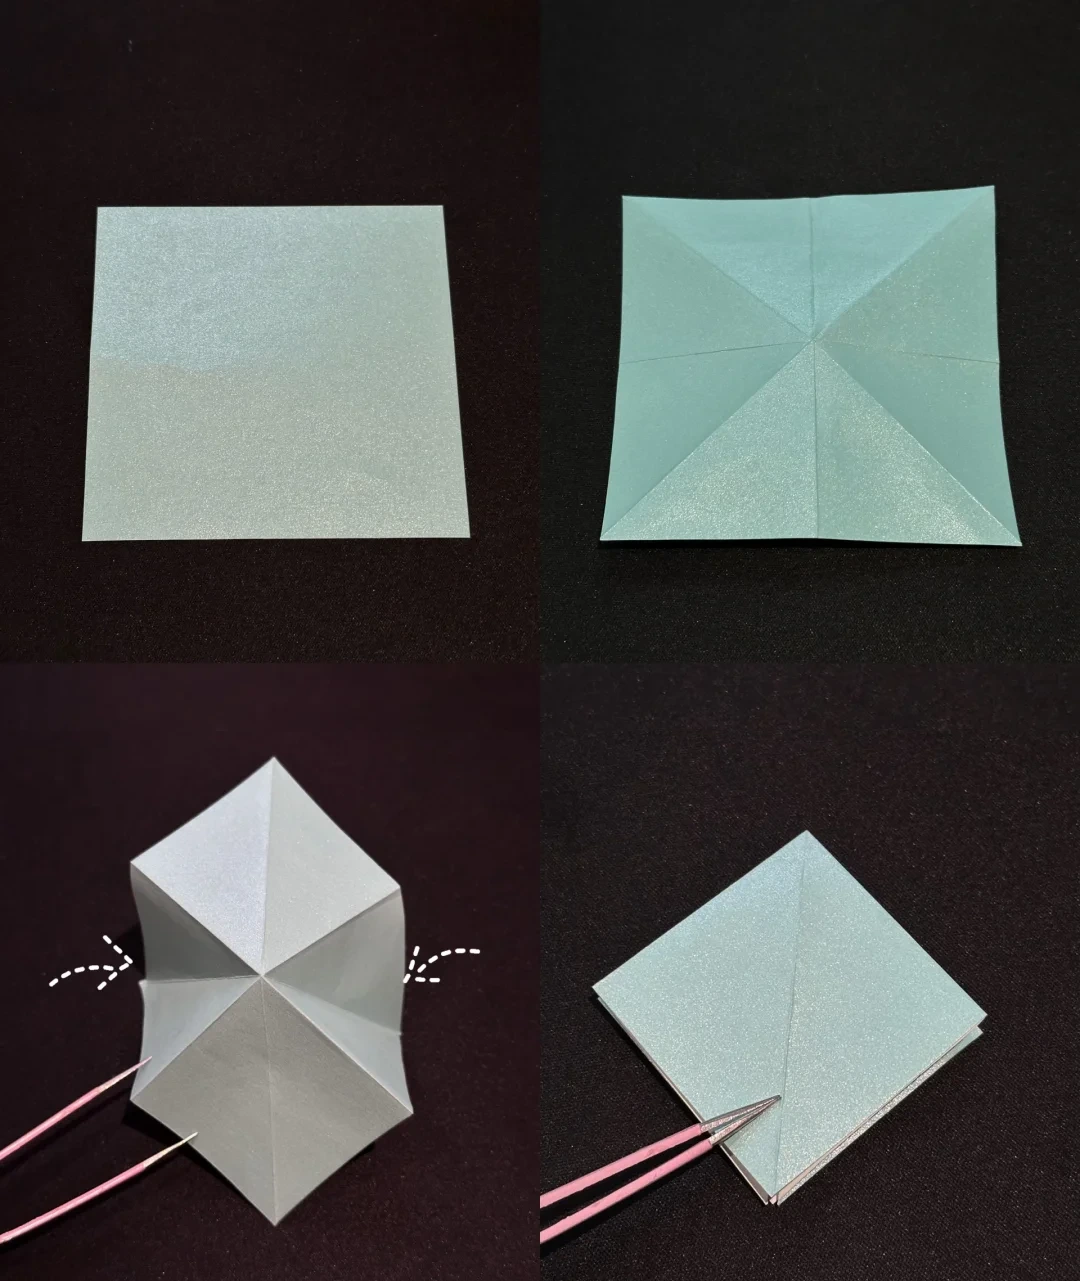
Crease both diagonals and both midlines. Push the sides inward and flatten into a layered square.
Make the first petal fold
 Open image at full size ↗
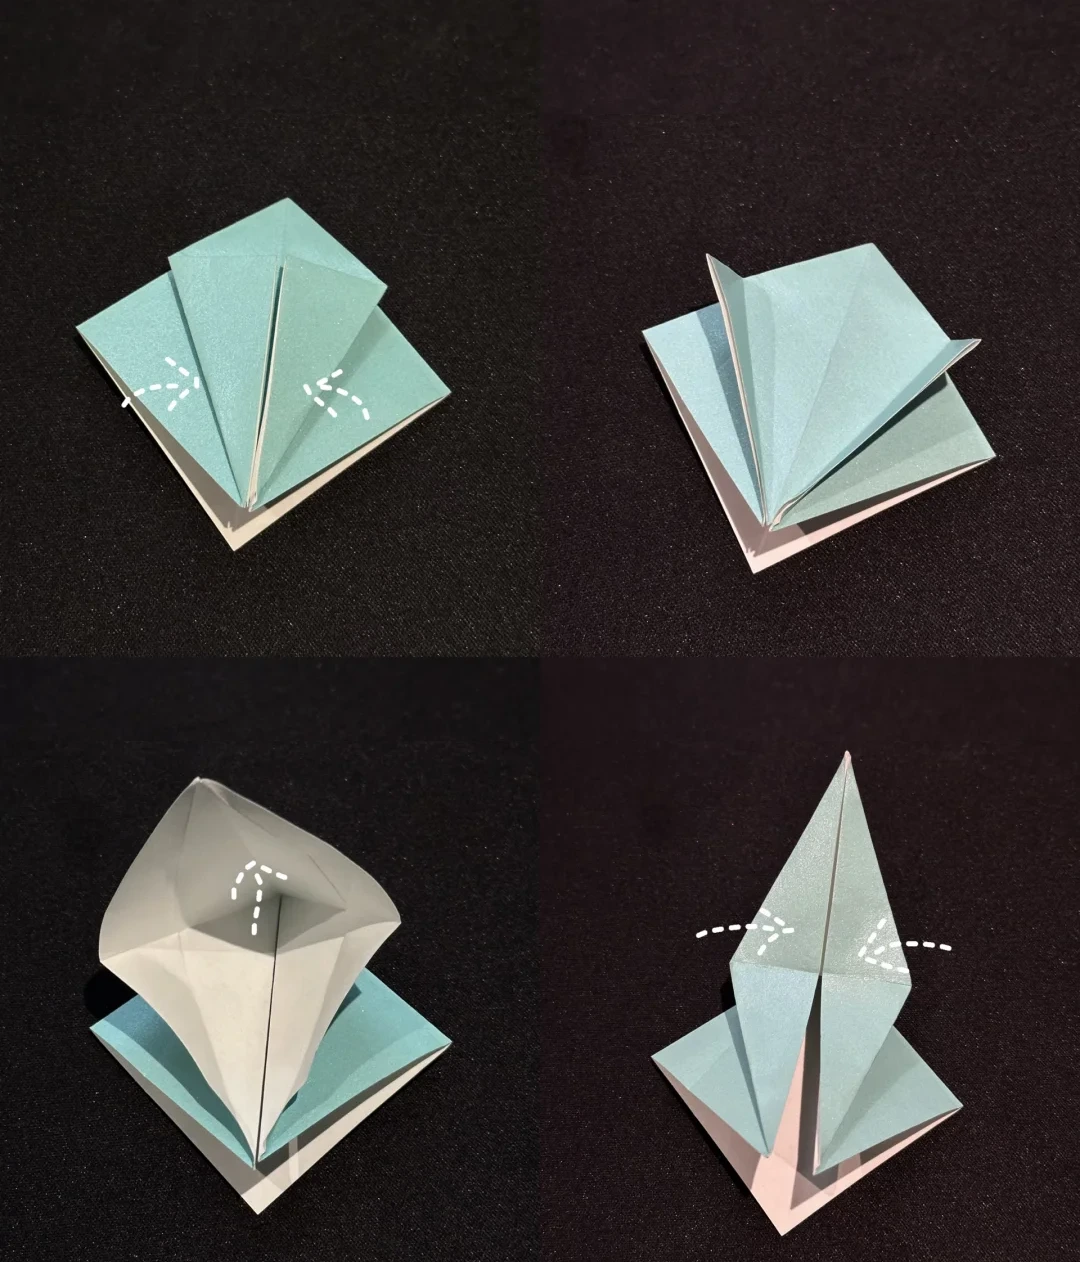
Fold the two lower front edges to the center and unfold. Lift the lower front point upward.
Bring the sides inward along their creases and flatten into a long diamond.
Narrow the bird base
 Open image at full size ↗
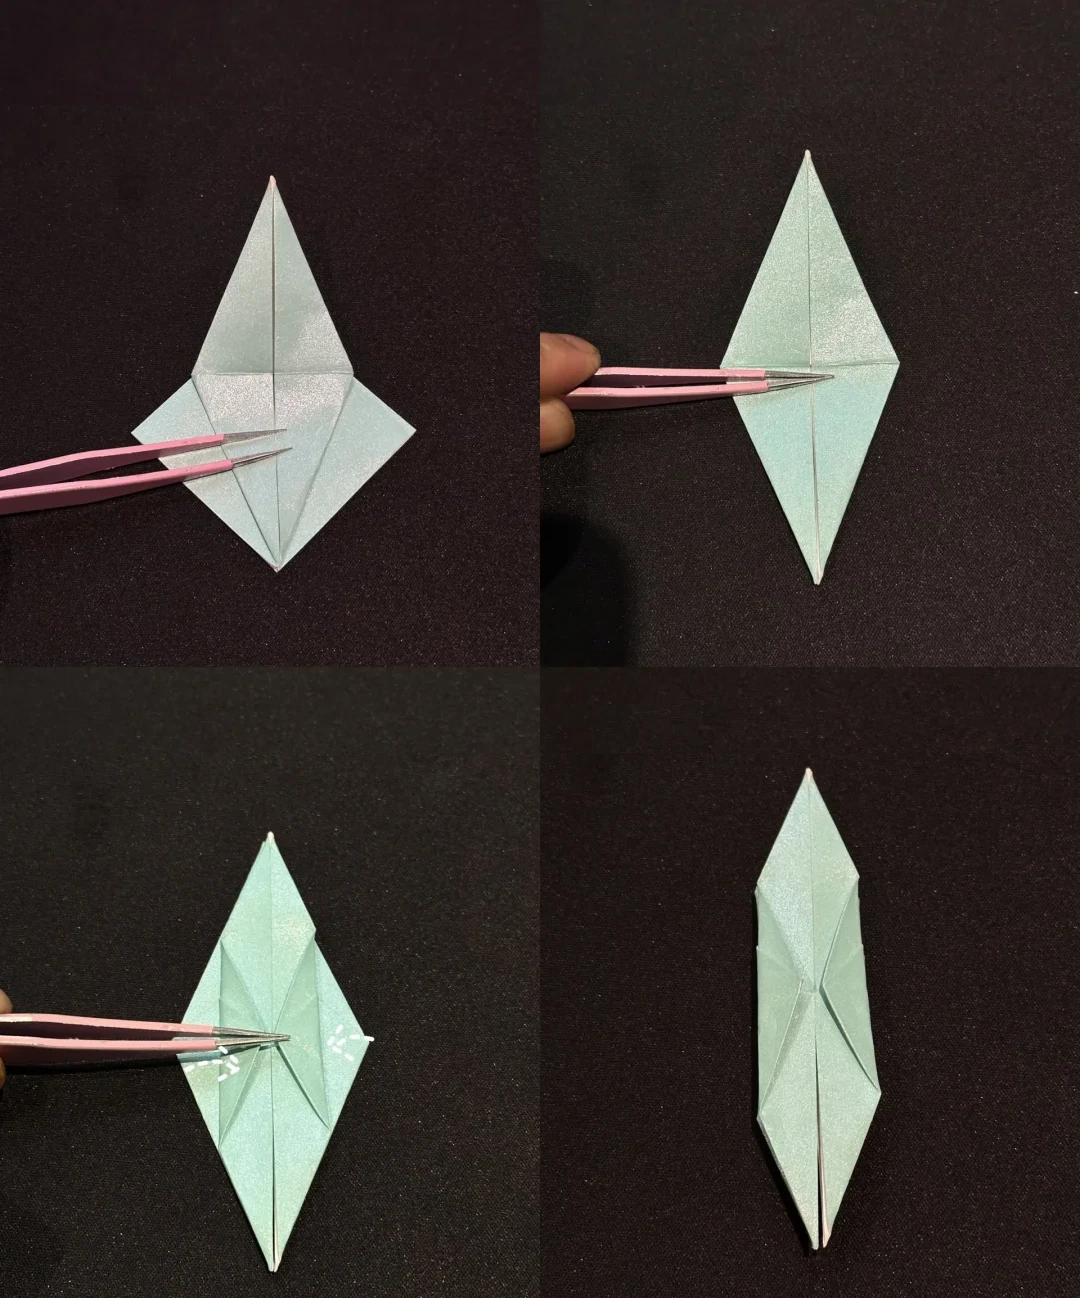
Repeat the petal fold on the back. Fold the lower side edges toward the center on both faces.
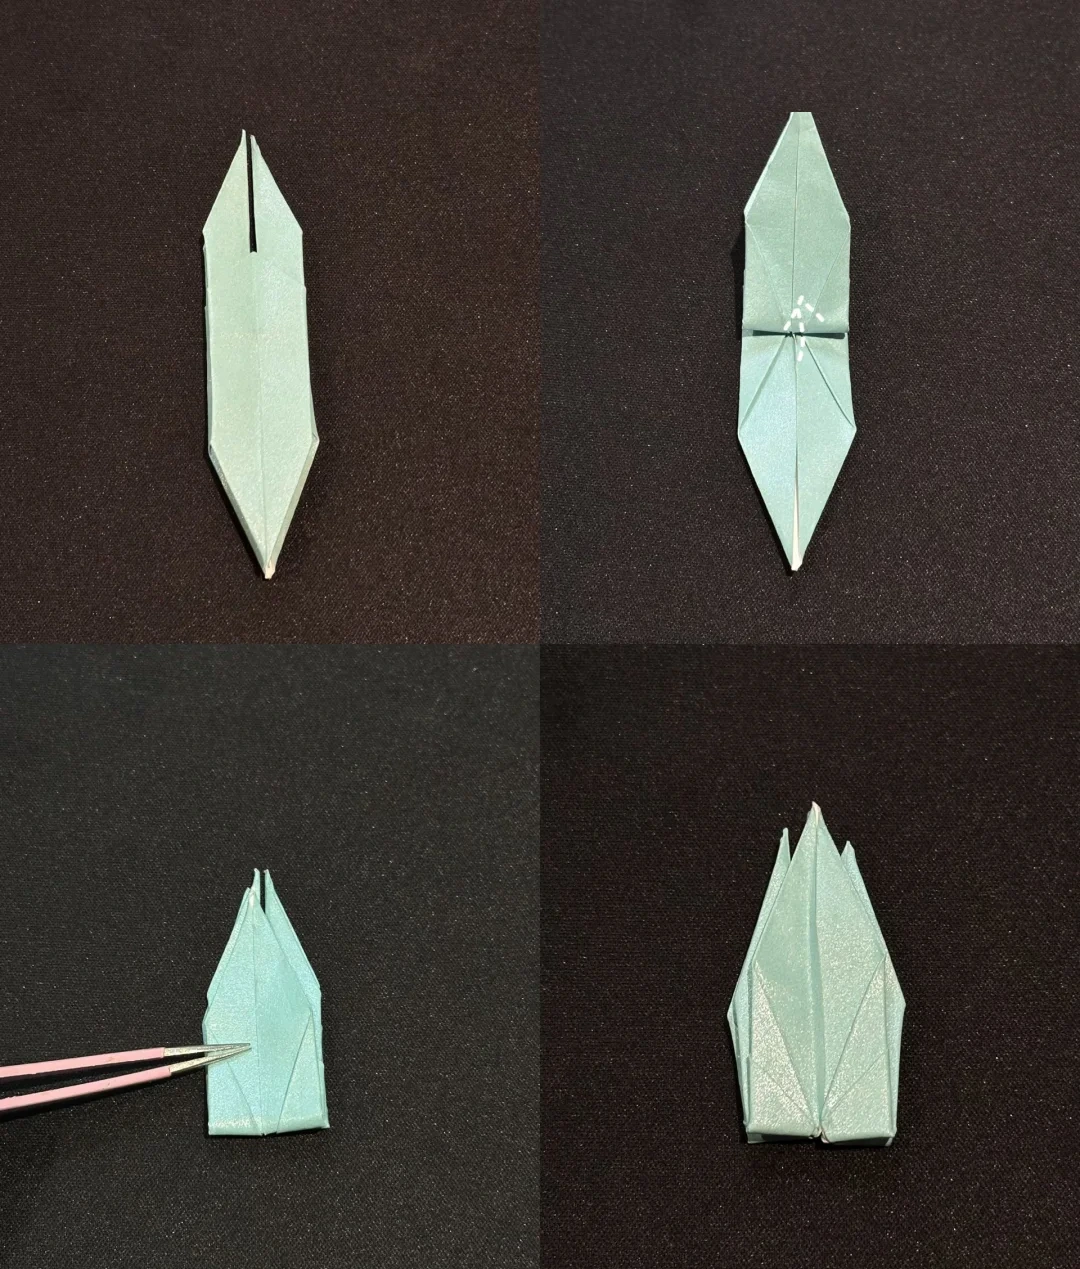
Raise neck and tail
 Open image at full size ↗
Turn the front and back layers sideways like pages. Fold the lower point upward on each face.
Turn the layers sideways again to enclose the raised points between the wings.
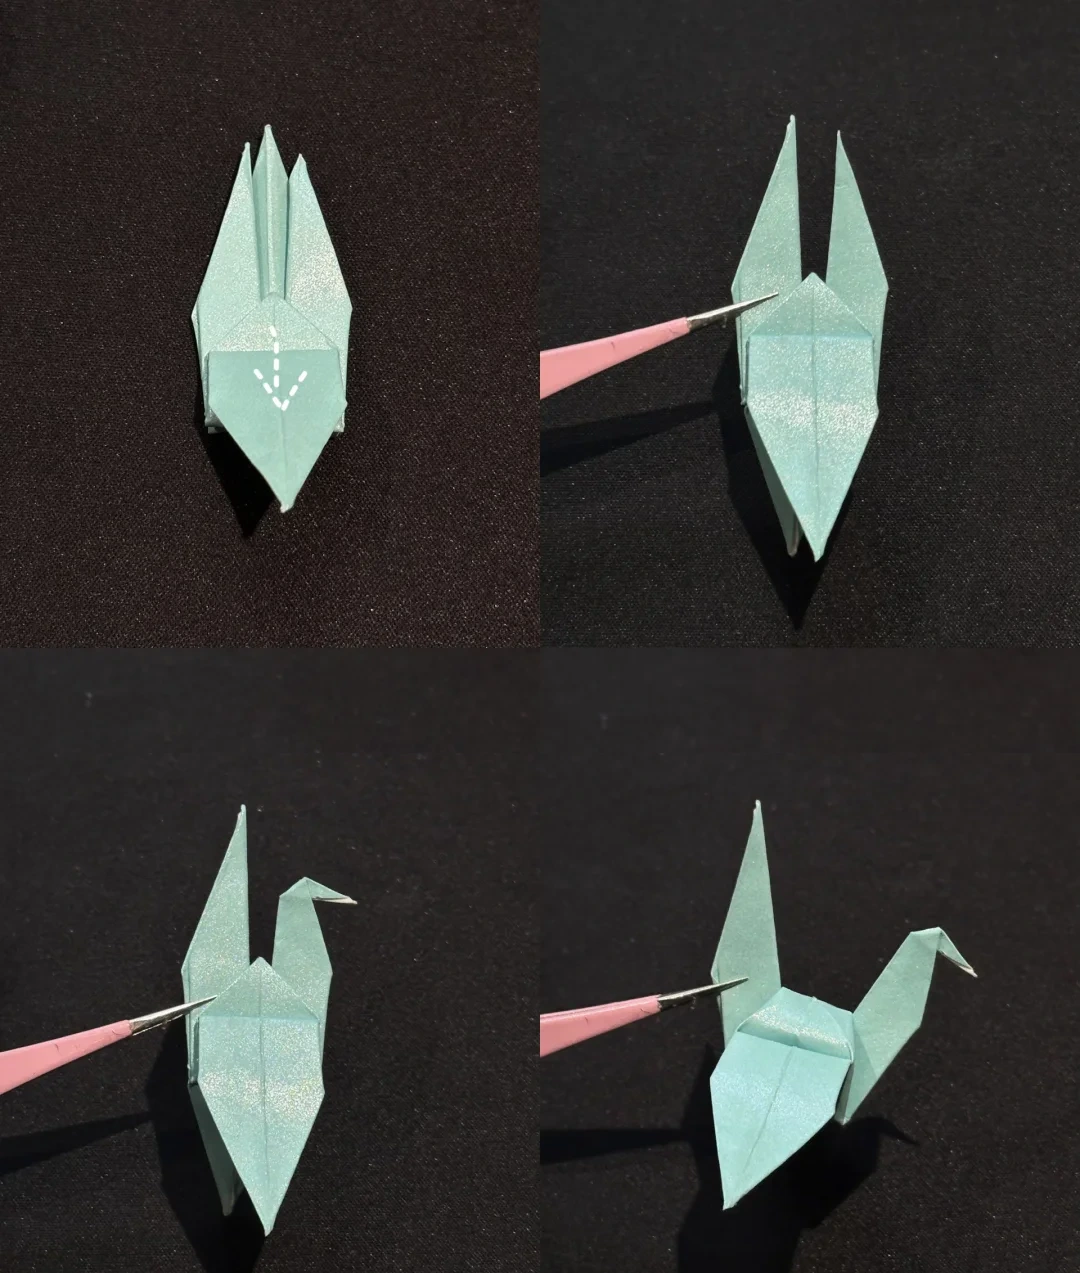
Open the crane
 Open image at full size ↗
Fold the broad wing downward and repeat on the other side. Reverse the tip of one narrow point to make the head.
Spread the wings gently and adjust the neck and tail.
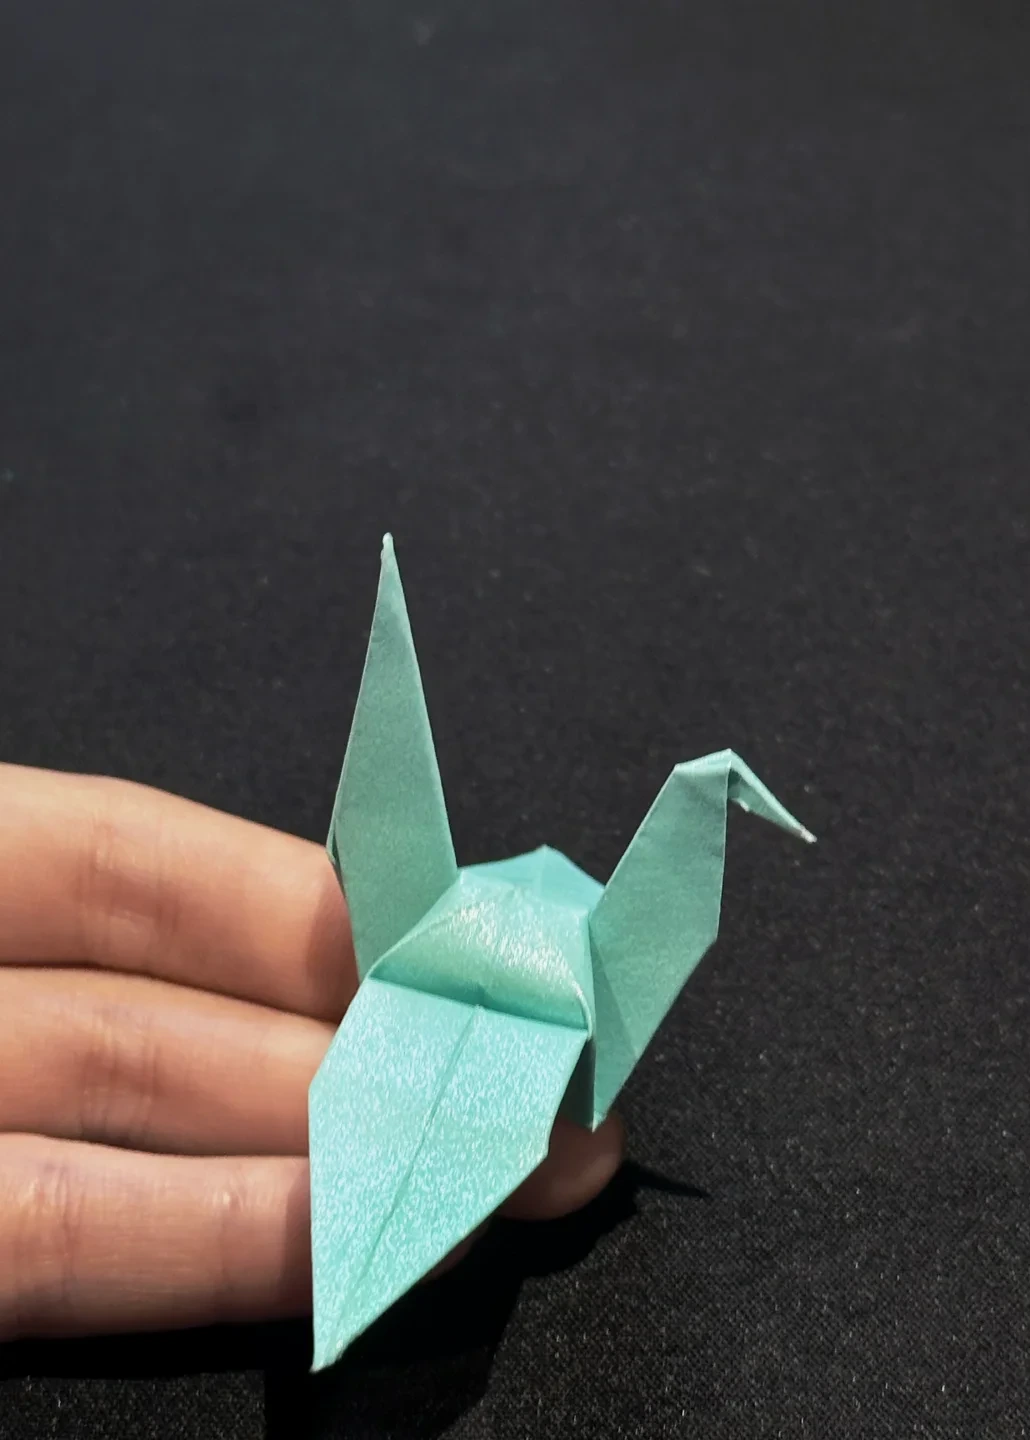
Finished model
 Open image at full size ↗
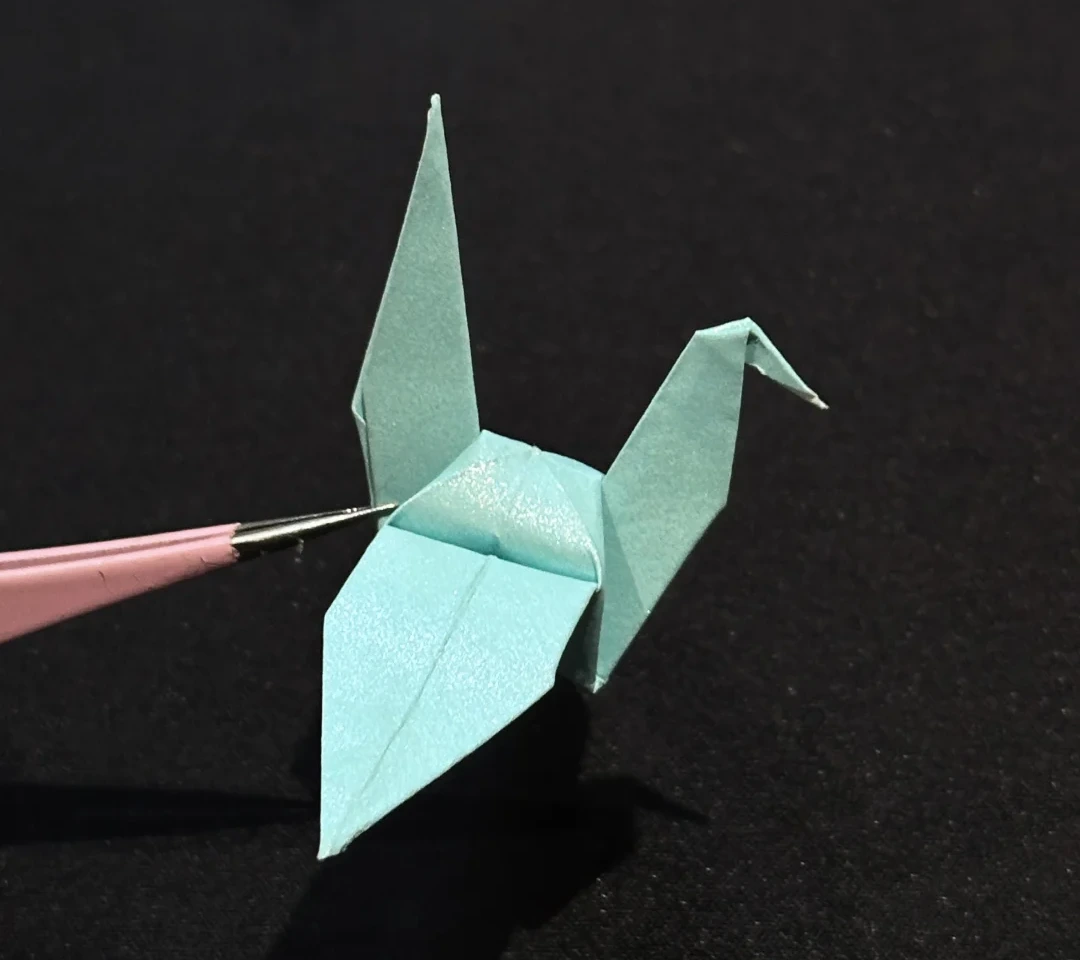
Use this finished example to compare the shape and proportions of your model.
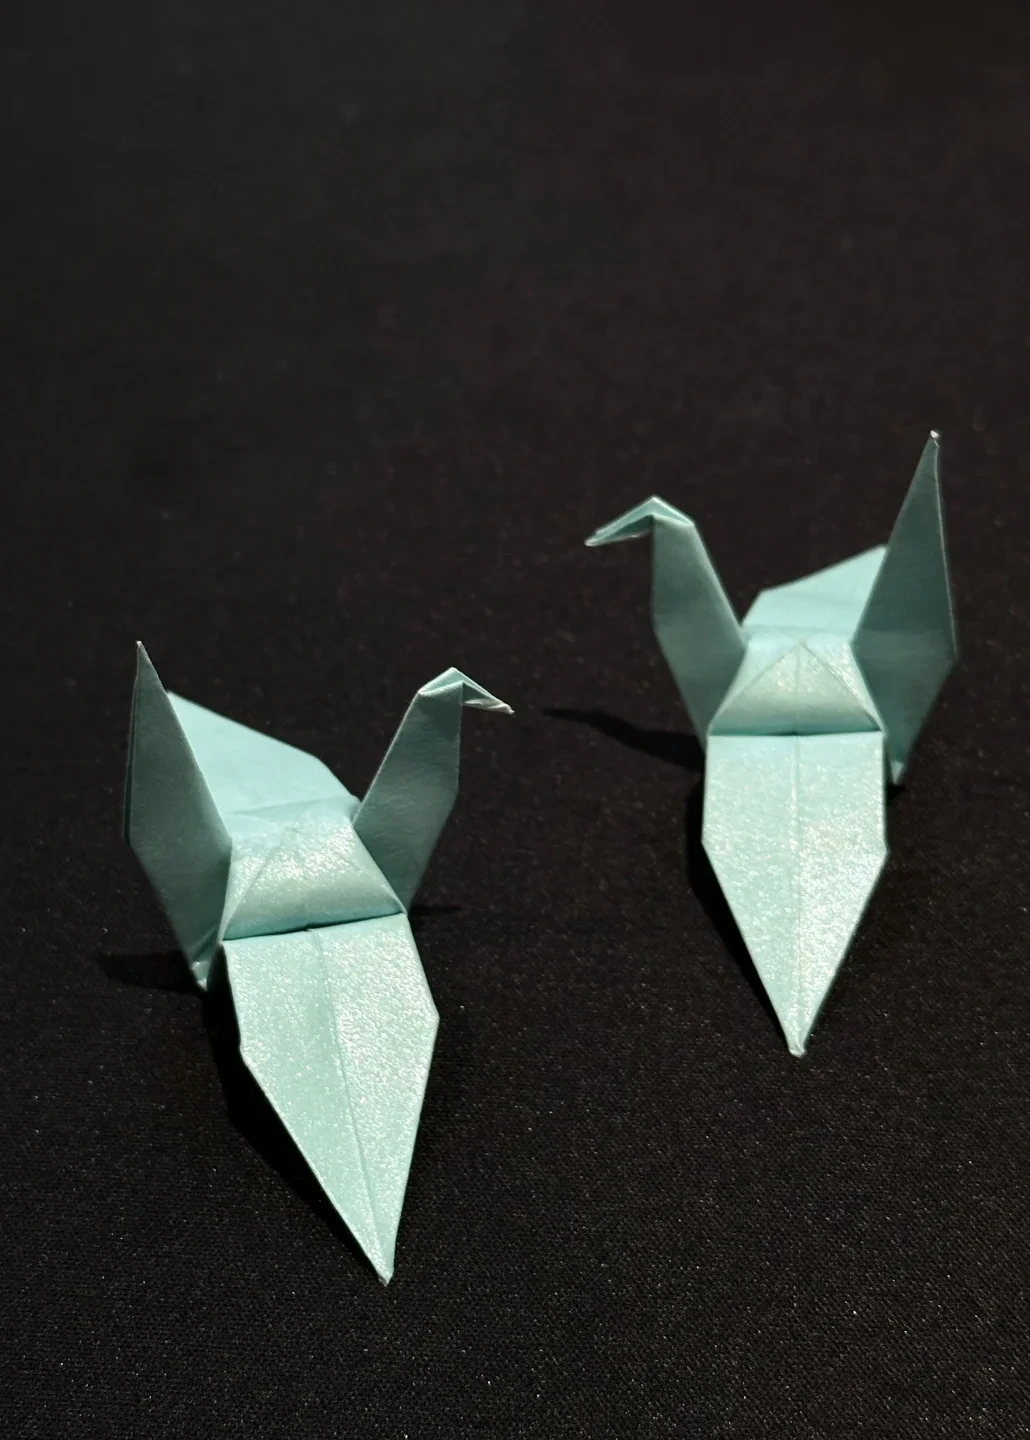
Finished model
 Open image at full size ↗
Use this finished example to compare the shape and proportions of your model.
Follow the diagrams alongside the step-by-step English instructions.
Choose your next project →